ASTON MARTIN DB AR1 Q 2003 Owners Guide
DB AR1 Q 2003
ASTON MARTIN
ASTON MARTIN
https://www.carmanualsonline.info/img/52/56975/w960_56975-0.png
ASTON MARTIN DB AR1 Q 2003 Owners Guide
Trending: recommended oil, instrument panel, warning light, language, fog light, differential, brakes
Page 51 of 279
B - Controls
1-B-15
Windscreen Washer Control
The windscreen washers are switched on by pressing the button on the end
of the right column stalk. The washers and wipers operate whilst the button
is pressed. On releasing the button, the washers stop immediately but the
wipers continue for a few strokes to clear any residual washer fluid from the
screen.
If the washer button is used during normal wiper operation, the washers
operate whilst the button is pressed and the wipers operate continually
irrespective of the washer operation.
Steering Wheel
Horn Push
The horn is sounded by pressing either of the
horn buttons above the steering wheel pad.
An alternative three spoke sports wheel is
fitted to cars with the Touchtronic transmission
option.
Two buttons marked '+' and
'-' are fitted to
the steering wheel horizontal spokes. These
buttons are used for gearchanging when in
Touchtronic mode.
Page 52 of 279
B - Controls
1-B-16
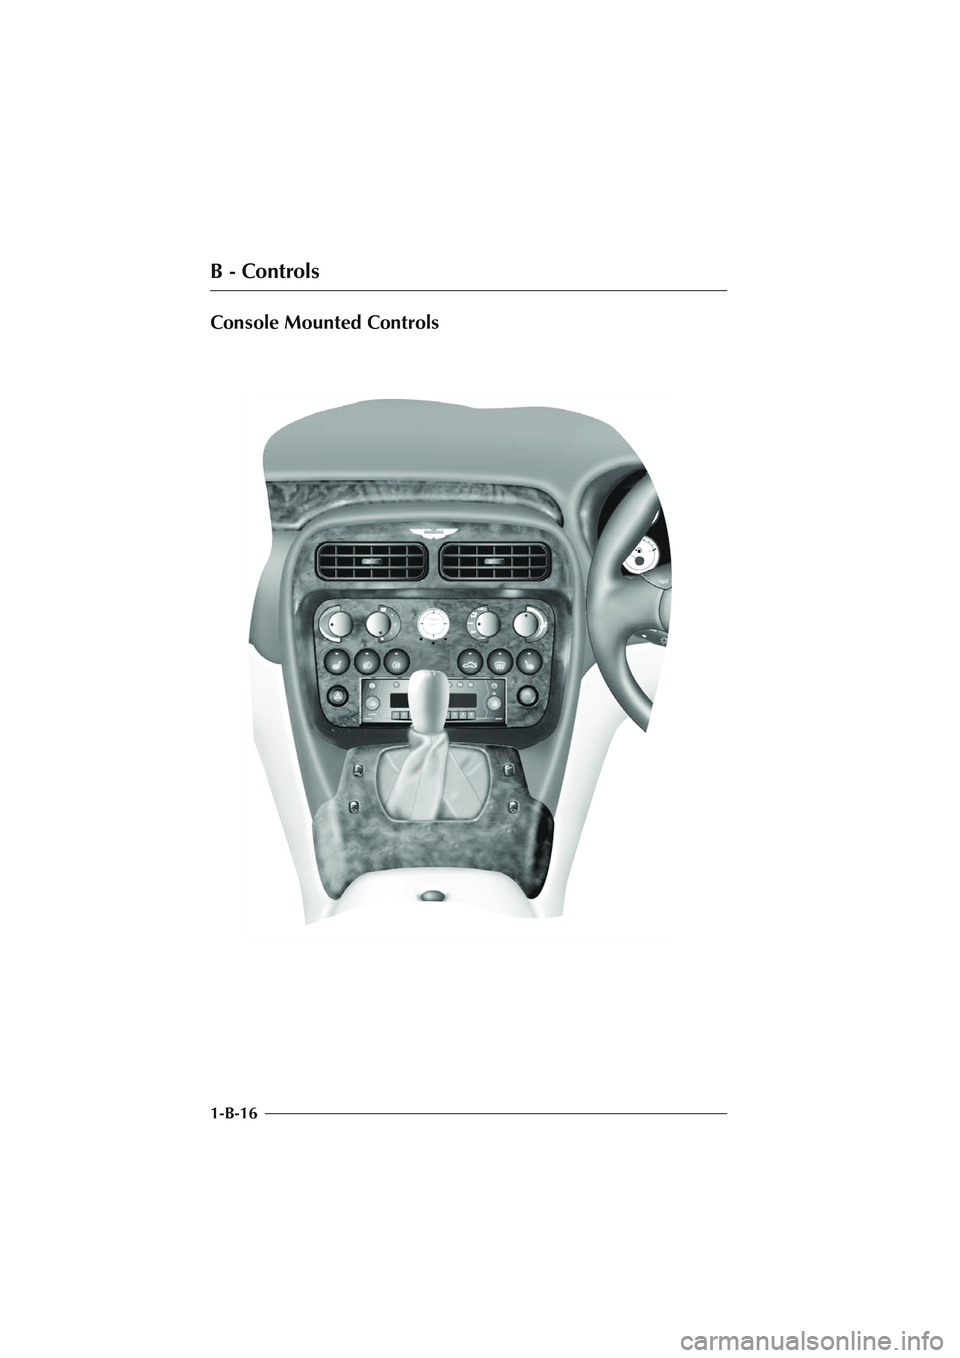
Console Mounted Controls
Page 53 of 279
B - Controls
1-B-17 The centre console contains the following controls:
• Clock and PATS Status Light
• Heating, Ventilation and Air-Conditioning Controls
• Fog Lamp, Screen Heater and Seat Heater Switches
• Radio Cassette Player (Control for the CD autochanger)
• Hazard Light Switch
• Starter Button
• Traction Control Switch
• Window Lift Switches
• Boot Release Switch
• Cigar Lighter and Ashtray
The Heating, Ventilation and Air-Conditioning Systems are fully described
in the Air-Conditioning section of this Owner's Guide.
Clock
The clock in the centre of the air conditioning control panel is set using the
buttons on the clock panel.
The left button is used to retard the time and the
right button to advance the time.
The small light between the time set buttons is the
PATS Status Light which is described in the Security
section of this Owner's Guide.
ASTON MARTIN
Page 54 of 279
B - Controls
1-B-18
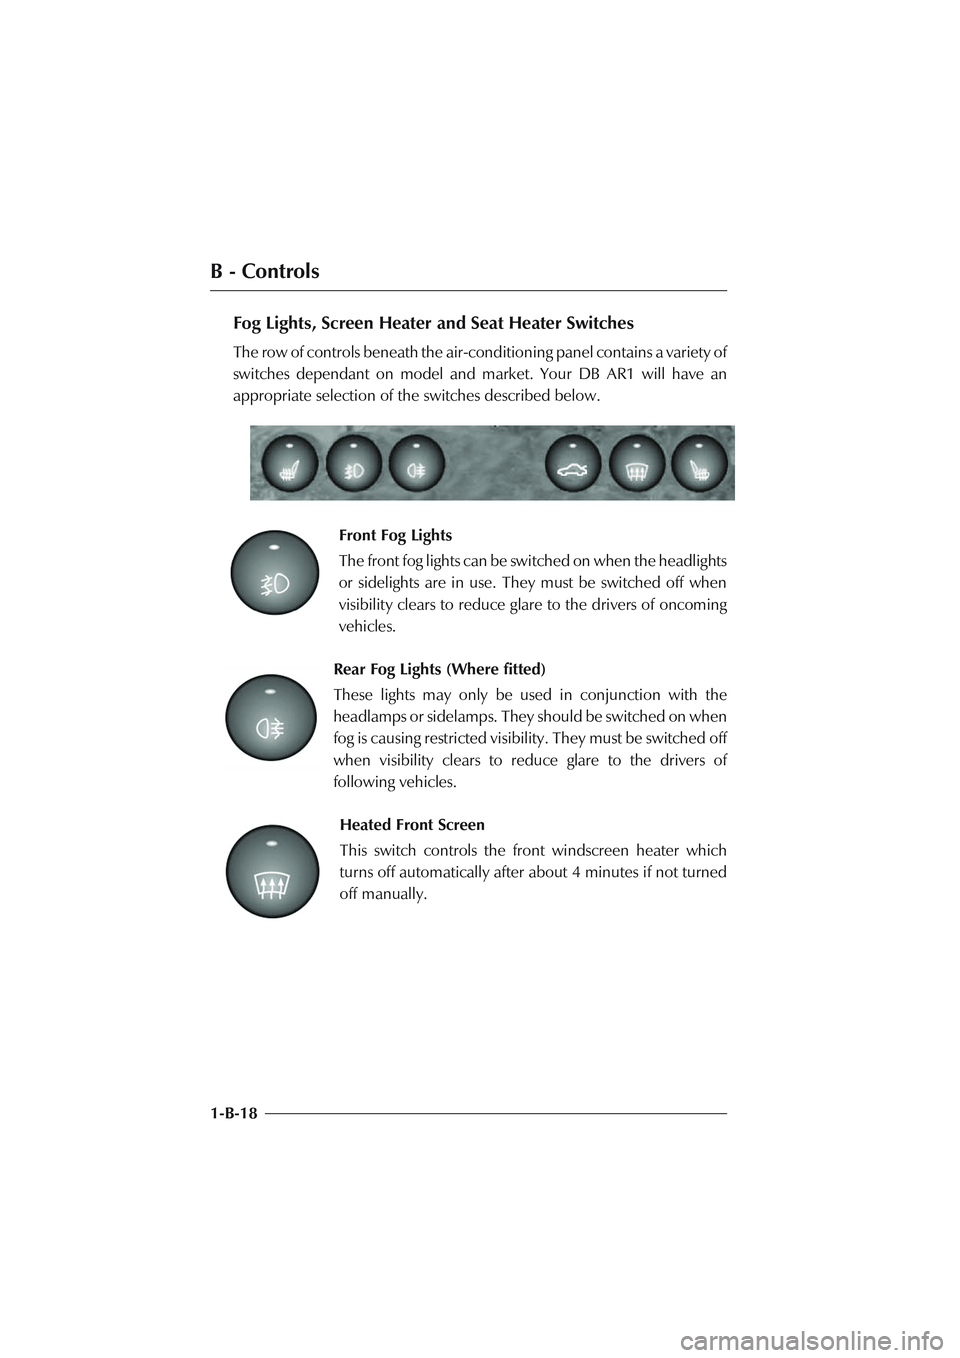
Fog Lights, Screen Heater and Seat Heater Switches
The row of controls beneath the air-conditioning panel contains a variety of
switches dependant on model and market. Your DB AR1 will have an
appropriate selection of the switches described below.
Front Fog Lights
The front fog lights can be switched on when the headlights
or sidelights are in use. They must be switched off when
visibility clears to reduce glare to the drivers of oncoming
vehicles.
Rear Fog Lights (Where fitted)
These lights may only be used in conjunction with the
headlamps or sidelamps. They should be switched on when
fog is causing restricted visibility. They must be switched off
when visibility clears to reduce glare to the drivers of
following vehicles.
Heated Front Screen
This switch controls the front windscreen heater which
turns off automatically after about 4 minutes if not turned
off manually.
Page 55 of 279
B - Controls
1-B-19 Seat Heater Switches
Press to switch on the heater. Press the button a second
time to switch off the heater. The heater is thermostatically
controlled and maintains a constant seat temperature until
either the heater is switched off or the ignition is switched
off.
Boot Release Switch
Press to open the boot at any time when the alarm system
is switched off and the ignition is switched on.
Radio/Cassette/CD Player
The radio/cassette player is located beneath the console switch panel. The
CD changer is fitted in the boot (trunk). Manufacturers operating instructions
for the in-car entertainment system are included with this Owner's Guide.
Hazard Warning Lights
The hazard warning light switch is located beside the
radio cassette player. When pressed, the external indicator
lights and side repeater lights will flash in unison.
Press the switch again to turn off the hazard lights.
Caution: Observe local laws on the use of hazard lights
Page 56 of 279
B - Controls
1-B-20
Starter Button
This button is located on the drivers side of the radio
cassette player. It is used to start the engine after turning
on the ignition. See the detailed instructions in the
'Driving' section.
The button will illuminate when the ignition is switched
on. The button lamp will extinguish when the engine
starts.
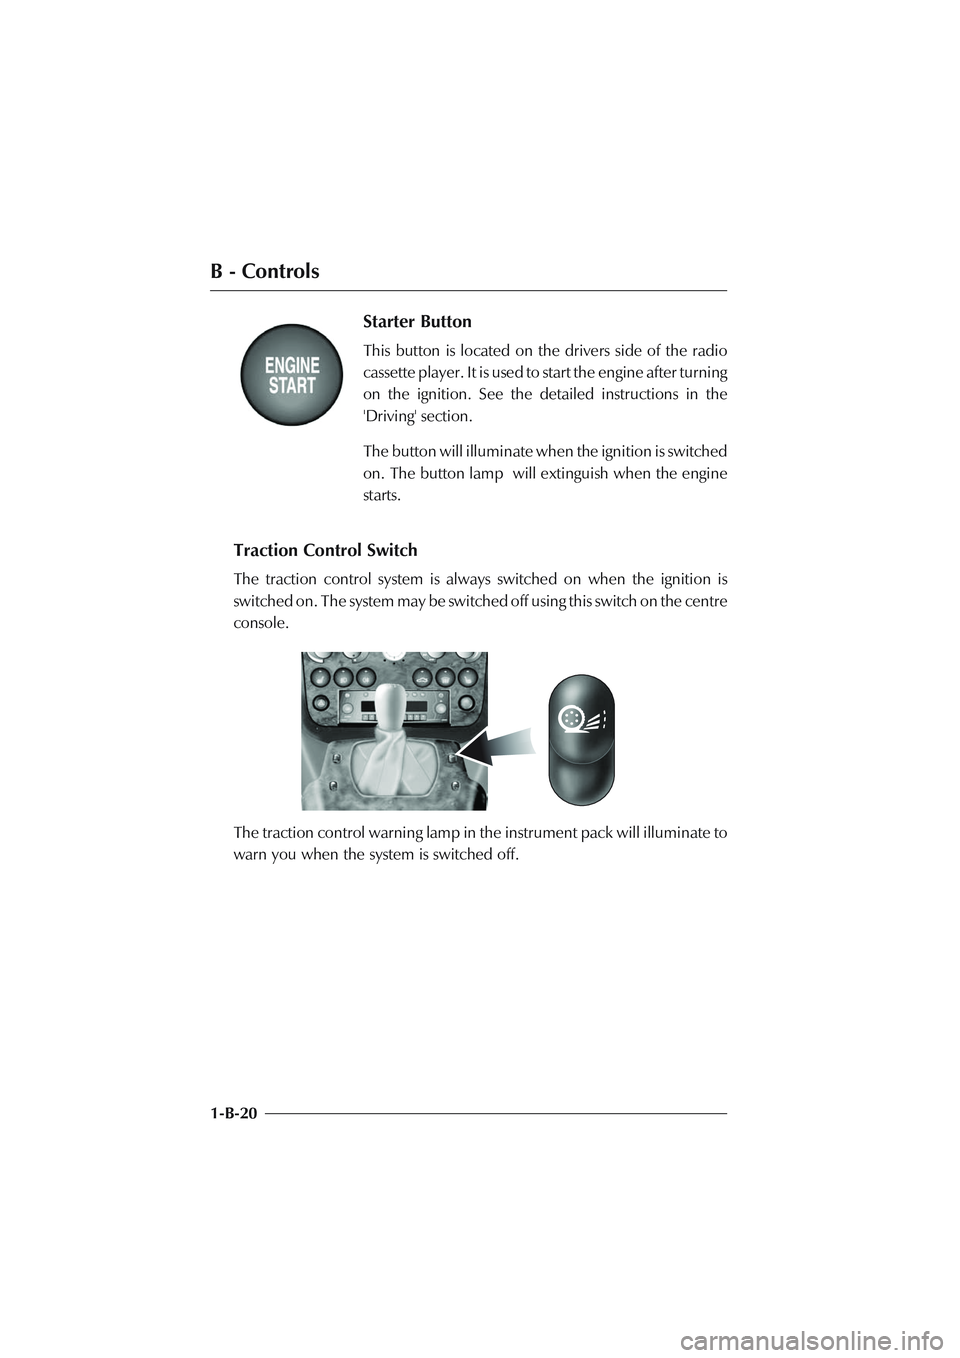
Traction Control Switch
The traction control system is always switched on when the ignition is
switched on. The system may be switched off using this switch on the centre
console.
The traction control warning lamp in the instrument pack will illuminate to
warn you when the system is switched off.
Page 57 of 279
B - Controls
1-B-21
Electric Window Switches
On either side of the gear selector lever are two identical
rocker switches to control the movement of the electric
windows.
With the ignition on and the doors closed, press and hold
the down (hollow) arrow to lower the window.
Press and hold the up (solid) arrow to raise the window.
Note: The electric window will only operate if the door is
closed.
Electric Window 'One Touch Down' Feature
Briefly press and release the down (hollow) arrow to lower the window fully.
Pressing the button again will stop downward window movement.
WARNINGS: Clear all obstructions before raising the window. When leaving the
vehicle, remove the ignition keys. Misuse of window switches, especially by
children, can cause injury.
Note: If battery power to the electric windows has been interrupted for any
reason, they will fail to operate correctly until reset using the procedure described
in 'Owner Maintenance'.
Page 58 of 279
B - Controls
1-B-22
Cigar Lighter and Ashtray
The cigar lighter is located to the left of the ashtray and may be used when
the ignition switch is in positions I or II. It is heated by pushing down until
it clicks. The lighter will pop up when ready for use.
WARNING: The cigar lighter is heated to "Red Heat" when in use. Take care to
avoid burns and do not allow children to play with the lighter.
The ashtray may be removed for cleaning by sliding back the lid and pulling
the tray upwards. After cleaning it should be replaced and pushed down
until the locating springs click into position.
Page 59 of 279
B - Controls
1-B-23
Bonnet (Hood) and Boot (Trunk)
Bonnet (Hood) Release
The bonnet release lever is situated
on the outside of the left hand front
footwell. Pull the lever to release the
bonnet latches. The bonnet will be
released and will rise until captured
by the bonnet safety catch.
Bonnet (Hood) Safety Catch
The bonnet safety catch is located under the
bonnet rear edge on the drivers side of the car
(left side on left hand drive, right side on right
hand drive).
Push down slightly on the bonnet rear edge
whilst pushing forward on the bonnet safety
catch to release it. Lift the bonnet until fully
open. The bonnet is held open by two gas
struts.
Page 60 of 279
B - Controls
1-B-24
Closing the Bonnet (Hood)
To close the bonnet, hold near the centre of the rear edge and lower until
approximately 18 inches (450 mm) from the latch mechanisms and then
release it. After closing the bonnet, ensure that both left and right hand
latches have fully engaged by pulling up at either side of the bonnet rear
edge.
WARNING: Before closing the bonnet, ensure that no one is obstructing the
closing area and that hands and clothing are clear. Remove tools, cleaning cloths,
etc. from the engine compartment.
Boot (Trunk) Release
There are four methods for opening the boot.
1. The boot lid may be released at any time using the right hand button on
the key fob.
ASTON MARTIN
Trending: fuse chart, park assist, change time, gas type, rear view mirror, oil temperature, hood release


