Timing ASTON MARTIN V8 VANTAGE 2010 Owner's Manual
[x] Cancel search | Manufacturer: ASTON MARTIN, Model Year: 2010, Model line: V8 VANTAGE, Model: ASTON MARTIN V8 VANTAGE 2010Pages: 947, PDF Size: 43.21 MB
Page 327 of 947
Valve Train (03.09)
Engine (03.00)
Issue 5, January 2010 Workshop Manual 3-9-1
Engine (03.00)
Valve Train (03.09)
Specifications
Maintenance
Left Side Timing Chain Arm Assembly -
Remove and Install
Remove
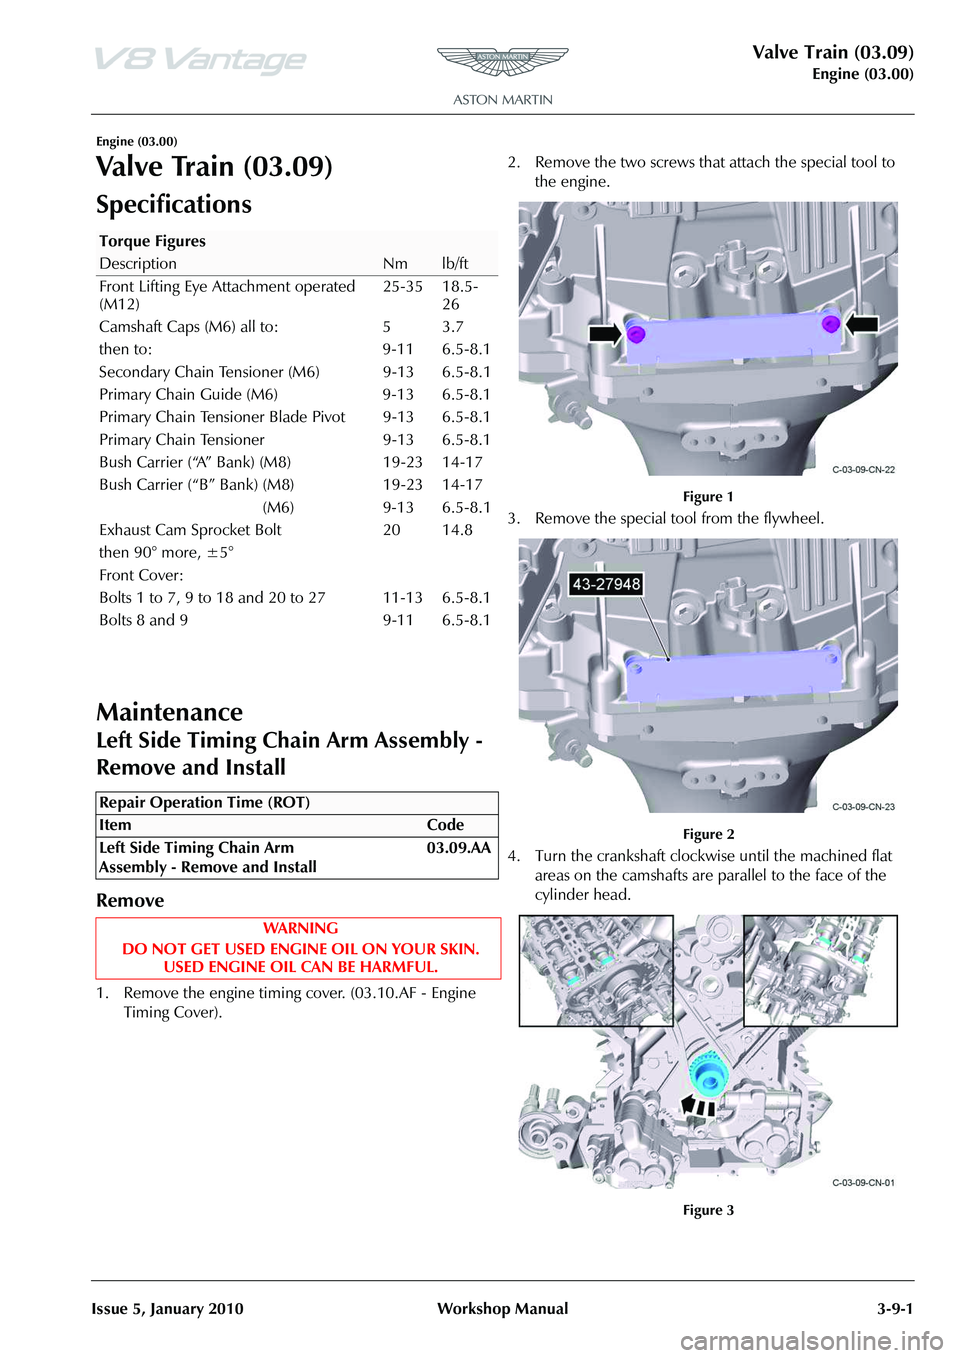
1. Remove the engine timing cover. (03.10.AF - Engine Timing Cover). 2. Remove the two screws that attach the special tool to
the engine.
Figure 1
3. Remove the special tool from the flywheel.
Figure 2
4. Turn the crankshaft clockwise until the machined flat areas on the camshafts are parallel to the face of the
cylinder head.
Figure 3
Torque Figures
DescriptionNmlb/ft
Front Lifting Eye Attachment operated
(M12) 25-35 18.5-
26
Camshaft Caps (M6) all to: 5 3.7
then to: 9-11 6.5-8.1
Secondary Chain Tensioner (M6) 9-13 6.5-8.1
Primary Chain Guide (M6) 9-13 6.5-8.1
Primary Chain Tensioner Blade Pivot 9-13 6.5-8.1
Primary Chain Tensioner 9-13 6.5-8.1
Bush Carrier (“A” Bank) (M8) 19-23 14-17
Bush Carrier (“B” Bank) (M8) 19-23 14-17
(M6) 9-13 6.5-8.1
Exhaust Cam Sprocket Bolt
then 90° more, ±5° 20 14.8
Front Cover:
Bolts 1 to 7, 9 to 18 and 20 to 27
Bolts 8 and 9 11-13
9-116.5-8.1
6.5-8.1
Repair Operation Time (ROT)
Page 329 of 947
Valve Train (03.09)
Engine (03.00)
Issue 5, January 2010 Workshop Manual 3-9-3
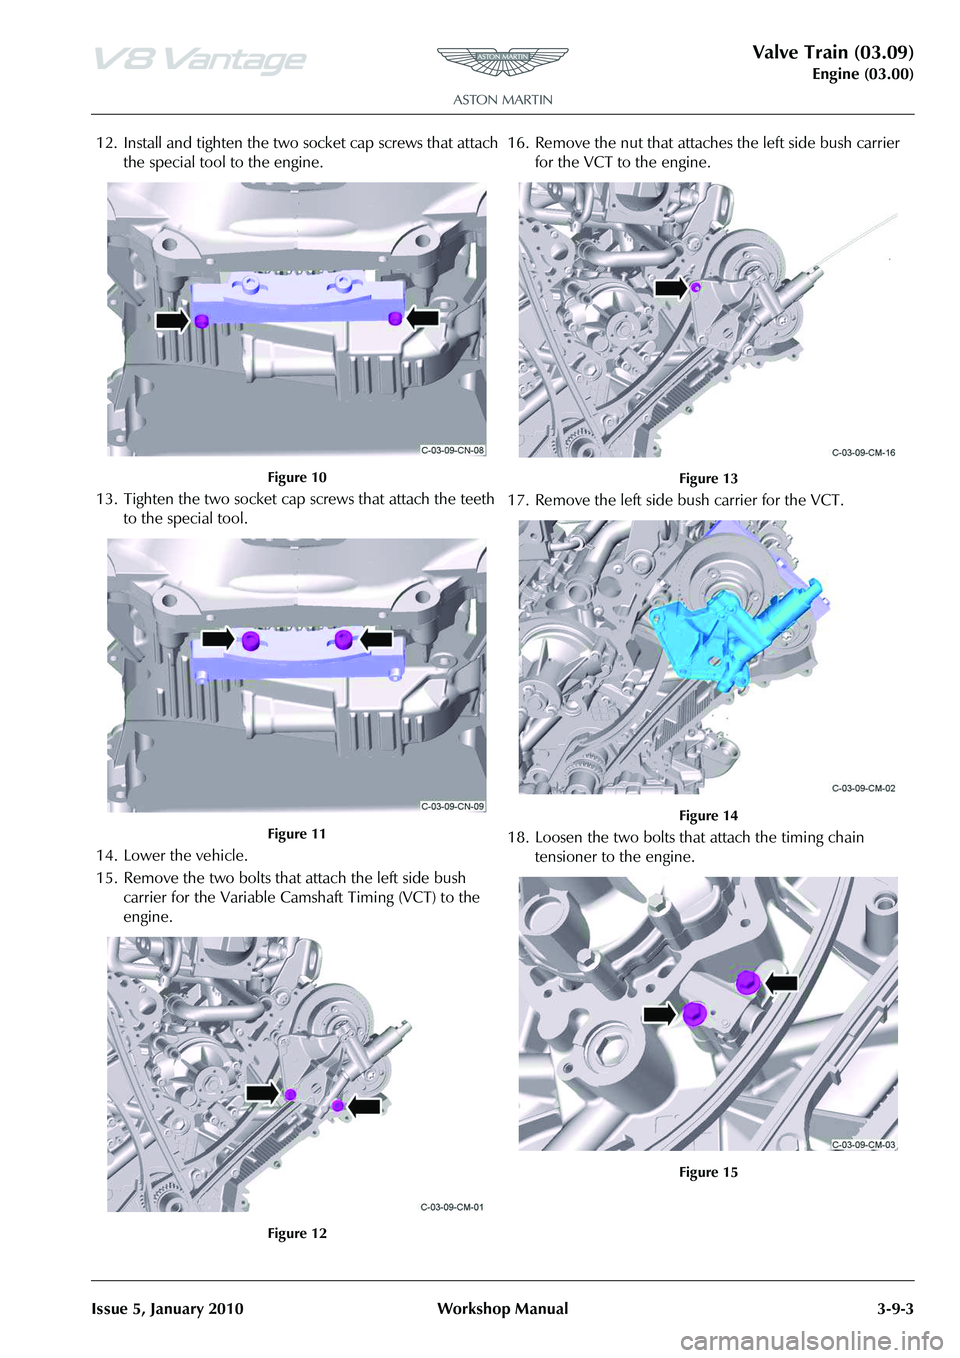
12. Install and tighten the two socket cap screws that attach the special tool to the engine.
Figure 10
13. Tighten the two socket cap screws that attach the teeth to the special tool.
Figure 11
14. Lower the vehicle.
15. Remove the two bolts that attach the left side bush carrier for the Variable Camshaft Timing (VCT) to the
engine.
Figure 12
16. Remove the nut that attaches the left side bush carrier for the VCT to the engine.
Figure 13
17. Remove the left side bush carrier for the VCT.
Figure 14
18. Loosen the two bolts that attach the timing chain tensioner to the engine.
Figure 15
Page 330 of 947

Valve Train (03.09)
Engine (03.00)3-9-4 Workshop Manual Issue 5, January 2010
19. Release the ratchet lock on the timing chain tensioner and push the piston into the tensioner housing.
Figure 16
20. Install an applicable pin into the timing chain tensioner.
Figure 17
21. Remove the two bolts that attach the timing chain tensioner to the engine.
Figure 18
22. Remove the timing chain tensioner.
Figure 19
23. Remove the special bolt that attaches the tensioner arm to the engine.
Figure 20
24. Remove the tensioner arm.
Figure 21
Page 331 of 947

Valve Train (03.09)
Engine (03.00)
Issue 5, January 2010 Workshop Manual 3-9-5
25. Loosen the two Torx bolts that attach the camshaft sprockets to the camshafts.
Figure 22
Install
1. Install the tensioner arm (refer to Figure 21).
2. Install the special bolt that attaches the tensioner arm to the engine and torque the bolt to 11 Nm (refer to
Figure 20).
3. Install the timing chain tens ioner (refer to Figure 19).
4. Install the two bolts that attach the timing chain tensioner to the engine and torque the bolts to 11 Nm
(refer to Figure 18).
5. Install the special tool on the exhaust camshaft sprocket.
Figure 23
6. Use the special tool to turn the exhaust sprocket counterclockwise until there is tension in the chain.
Figure 24
7. Release the pin from the ti ming chain tensioner and let
the tension piston gradually apply tension to the timing
chain.
Figure 25
Note: You must use the special tool to hold the timing chain
in the correct position during the subsequent two steps of
the procedure.
Note: Make sure that the tensio ner is fully operated but do
not use too much force.
Page 333 of 947

Valve Train (03.09)
Engine (03.00)
Issue 5, January 2010 Workshop Manual 3-9-7
16. Remove the special tool from the flywheel.
Figure 31
17. Lower the vehicle.
18. Remove the three screws that attach the special tool to the cylinder head.
Figure 32
19. Remove the special tool from the left side camshaft.
Figure 33
20. Remove the three screws that attach the special tool to the cylinder head.
Figure 34
21. Remove the special tool from the right side camshaft.
Figure 35
22. Turn the crankshaft two full revolutions clockwise.
23. Use the applicable equipment to lift the vehicle and make it safe.
Caution:
During the step that follows, if you feel any increase in
resistance, do not force the crankshaft. If you do you
can damage the engine. If you cannot turn the
crankshaft, you must do the engine timing procedure again.
Page 334 of 947

Valve Train (03.09)
Engine (03.00)3-9-8 Workshop Manual Issue 5, January 2010
24. Install the special tool onto the flywheel.
Figure 36
25. Install and tighten the two screws that attach the special tool to the engine.
Figure 37
26. Install the engine timing cover (refer to procedure 03.10.AF - Engine Timing Cover).
Right Side Timing Chain Arm Assembly -
Remove and Install
Remove
1. Remove the engine timing cover. (03.10.AF - Engine Timing Cover). 2. Remove the two screws that attach the special tool to
the engine.
Figure 1
3. Remove the special tool from the flywheel.
Figure 2
4. Turn the crankshaft clockwise until the machined flat
areas on the camshafts are parallel to the face of the
cylinder head.
Figure 3
5. Install the special tool on the right side camshaft.
Repair Operation Time (ROT)
Note: If necessary, use special tool 303-530-04 with this
step.
Page 336 of 947

Valve Train (03.09)
Engine (03.00)3-9-10 Workshop Manual Issue 5, January 2010
12. Install and tighten the two socket cap screws that attach the special tool to the engine.
Figure 10
13. Tighten the two socket cap screws that attach the teeth to the special tool.
Figure 11
14. Lower the vehicle.
15. Remove the three screws that attach the right side bush carrier for the Variable Camshaft Timing (VCT) to the
engine.
Figure 12
16. Remove the right side bush carrier for the VCT.
Figure 13
17. Loosen the two screws that attach the timing chain tensioner to the engine.
Figure 14
18. Release the ratchet lock on the timing chain tensioner and push the piston into the tensioner housing.
Figure 15
Page 337 of 947

Valve Train (03.09)
Engine (03.00)
Issue 5, January 2010 Workshop Manual 3-9-11
19. Install an applicable pin into the timing chain tensioner.
Figure 16
20. Remove the two bolts that attach the timing chain tensioner to the engine.
Figure 17
21. Remove the timing chain tensioner.
Figure 18
22. Remove the bolt that attaches the tensioner arm to the engine.
Figure 19
23. Remove the tensioner arm.
Figure 20
24. Loosen the two Torx bolts that attach the camshaft sprockets to the camshafts.
Figure 21
Install
1. Install the tensioner arm (refer to Figure 20).
Page 338 of 947

Valve Train (03.09)
Engine (03.00)3-9-12 Workshop Manual Issue 5, January 2010
2. Install and torque the special bolt that attaches the tensioner arm to the engine to 11 Nm (refer to
Figure 19).
3. Install the timing chain tens ioner (refer to Figure 18).
4. Install and torque the two bolts that attach the timing chain tensioner to the engine to 11 Nm (refer to
Figure 17).
5. Install the special tool on the exhaust camshaft sprocket.
Figure 22
6. Use the special tool to turn the exhaust sprocket counterclockwise until the chain is tight.
Figure 23
7. Release the pin from the ti ming chain tensioner and let
the tension piston gradually tension the timing chain.
Figure 24
8. Torque the two Torx bolts that attach the camshaft
sprockets to the camshafts to 20 Nm.
Figure 25
9. Torque the two Torx bolts that attach the camshaft sprockets to the camshafts 90 degrees more (refer to
Figure 25).
Note: You must use the special
tool to hold the timing chain
in the correct position during the subsequent two steps of
the procedure.
Note: Make sure that the tensio ner is fully operated but do
not use too much force.
Note: Make sure that you torque the bolt that attaches the
sprocket to the exhaust camsha ft first in the step that
follows.
Note: Make sure that you torque the bolt that attaches the
sprocket to the exhaust camsha ft first in the step that
follows.
Page 340 of 947

Valve Train (03.09)
Engine (03.00)3-9-14 Workshop Manual Issue 5, January 2010
19. Remove the three screws that attach the special tool to the right cylinder head.
20. Remove the special tool from the right cylinder head.
21. Turn the crankshaft two full revolutions clockwise.
22. Use the applicable equipment to lift the vehicle and make it safe.
23. Install the special tool onto the flywheel.
24. Install and tighten the two screws that attach the special tool to the engine.
25. Install the engine timing cover (refer to procedure 03.10.AF - Engine Timing Cover).
RH/LH Secondary Tensioner Assembly -
Remove and Install
Remove
1. Remove the left and right primary timing chains (refer to Workshop Manual procedure 03.09.AM/03.09.AN/
03.09.CM/03.09.CN Chain - Timing Primary - LH/RH -
Renew).
2. Remove the two M12 Torx bolts that attach the inlet and exhaust camshaft sprockets to the camshafts (refer
to Figure 1).
Figure 1
3. Collect the spacer from the bolt on the exhaust camshaft.
4. Remove the two M6 bolts that attach the secondary timing chain tensioner to the cylinder head (refer to
Figure 2).
Figure 2
Caution: During the step that follows, if you feel any
increase in resistance, do not force the crankshaft. If
you do you can damage the en gine. If you cannot turn
the crankshaft, you must do the engine timing
procedure again.
Repair Operation Time (ROT)
Secondary Tensioner Assembly-
Renew LH-RHD
03.09.CR
Secondary Tensioner Assembly-
Renew RH-RHD
03.09.CS
WAR NI NG
DO NOT GET USED ENGINE OIL ON YOUR SKIN. USED ENGINE OIL CAN BE HARMFUL.
Repair Operation Time (ROT)
ItemCode
A0309252
A0309256