seat ASTON MARTIN V8 VANTAGE 2010 Workshop Manual
[x] Cancel search | Manufacturer: ASTON MARTIN, Model Year: 2010, Model line: V8 VANTAGE, Model: ASTON MARTIN V8 VANTAGE 2010Pages: 947, PDF Size: 43.21 MB
Page 3 of 947
Contents
Issue 5, January 2010 Workshop Manual 0-0-3
V8 Vantage Workshop Manual
Contents
IntroductionWelcome .............................................................. 0-0-6
Safety Precautions ................................................. 0-0-7
Lifting and Jacking ................................................. 0-0-9
Vehicle Recovery ................................................ 0-0-10
Vehicle Identification Number ............................ 0-0-11
Body System (01.00) Body Structure (01.01) .......................................... 1-1-4
Front End System (01.02) ...................................... 1-2-1
Body Closures (01.03) ........................................... 1-3-1
Interior Trim (01.05) ............................................. 1-4-1
Exterior Trim (01.08) ............................................. 1-8-1
Mirrors (01.09) ...................................................... 1-9-1
Seating (01.10).................................................... 1-10-1
Glass, Frame and Mechanism (01.11) .................. 1-11-1
Instrument Panel (IP) (01.12) . .............................. 1-12-1
Handles and Lock Mechanisms (01.14) ............... 1-14-1
Wipers and Washer System (01.16)..................... 1-16-1
Convertible Roof and Roof Opening
Subsystem (01.17)................ ...............................1-17-1
Bumpers (01.19) ................................................. 1-19-1
Restraining Devices (01.20) .... ............................. 1-20-1
Frame and Mounting (02.00) Subframes (02.03) ................................................. 2-1-2
Engine System (03.00) Engine Assembly....................................................3-0-3
Engine Structure (03.01)........................................ 3-1-1
Lubrication System (03.02).................................... 3-2-1
Cooling System (03.03) ......................................... 3-3-1
Fuel Charging System (03.04) ................................ 3-4-1
Accessory Drive System (03.05)............................. 3-5-1
Engine Cranking System (03. 06) ............................ 3-6-1
Valve Train (03.09) ............................................... 3-9-1
Engine Sealing (03.10)......................................... 3-10-1
Power Conversion (03.11)................................... 3-11-1
Evaporative Emissions (03.13) ............................. 3-11-1
Engine Management System (0 3.14).................... 3-14-1
Throttle Control (03.16) ...... ................................ 3-16-1
Foot Operated Control (03.18)............................ 3-18-1
Suspension (04.00) Road Wheel Alignment (04.00) ............................. 4-0-2
Front Suspension (04.01)....................................... 4-1-1
Rear Suspension (04.02)........................................ 4-2-1
Shock Absorber System (04.03) ............................. 4-3-1
Road Wheels and Tyres (04.04) ............................ 4-4-1
Driveline (05.00) Driveshaft (05.01) ................................................. 5-1-2
Halfshafts (05.05) .................................................. 5-2-1 Brake System (06.00)
Front Disc Brake (06.03) ....................................... 6-3-2
Rear Disc Brakes (06.04) ....................................... 6-4-1
Hand Brake (06.05) .............................................. 6-5-1
Brake Actuation System (06.06 ) ............................ 6-6-1
Power Brake System (06.07) ................................. 6-7-1
Anti-lock Braking System (06.09)........................... 6-9-1
Transmission (07.00) Transmission Cooling (07.02) ................................ 7-0-2
Manual Transmission (07.03) ................................ 7-3-1
Automatic Control System (07.05)......................... 7-5-1
Manual Control System (07.06) ............................. 7-6-1
Automatic Shifting Subsytem (07.11) .................. 7-11-1
Clutch (08.00) Clutch Controls (08.02) ......................................... 8-1-2
Exhaust (09.00) Exhaust Overview ................................................. 9-1-2
Silencer Assembly (09.01) ..................................... 9-1-3
Pipes and Supports (09.03) ................................... 9-2-1
Exhaust Protection (09.04) .................................... 9-3-1
Fuel (10.00) Fuel Tank and Lines (10.01) ................................ 10-1-2
Steering (11.00) Steering Gear (11.01) .......................................... 11-1-2
Power Steering (11.02)........................................ 11-2-1
Steering Column (11.04) ..................................... 11-4-1
Steering Column Switches (1 1.05) ....................... 11-5-1
Steering Wheel (11.06) ....................................... 11-6-1
Climate Control (12.00) Body Ventilation system (12.01) .......................... 12-1-2
Heater System (12.02) ........................................ 12-2-1
Air Conditioning (A/C) System (12.03) ................. 12-3-1
Information, Gauge and Warning (13.00) Instrument Cluster (13.01) .................................. 13-1-2
Power Supply (14.00) Battery System (14.01) ........................................ 14-1-2
Alternator and Regulator System (14.02) ............. 14-2-1
Vehicle Entertainment (15.00) Audio System (15.01)................................ ..........15-1-2
Antenna (15.02).................................................. 15-2-1
Vacuum Distribution (16.00) Body Vacuum System (16.01) ............................. 16-1-2
Lighting (17.00) Front Lights (17.01) ............................................. 17-1-2
Interior Lighting (17.02) ...................................... 17-2-1
Rear Lights (17.03) .............................................. 17-3-1
Lighting Mechanisms (17.04). .............................. 17-4-1
Page 6 of 947
Welcome
0-0-6 Workshop Manual Issue 5, January 2010
Welcome
This Workshop Manual is part of a suite of technical manuals
provided for V8 Vantage. Other technical manuals include:
• Parts manual
• OBDII Diagnostic manual
• Man hour schedules
Chapters
Each chapter in this workshop manual is associated with a 4
digit number, i.e. Transmission (07.00). Each chapter is then
further broken into sections, i.e. Automatic Transmission
(07.01).
Chapter Navigation
Example 1:
Older workshop manuals would have Steering and
Suspension together in one chapter. The structure now used
places Steering and Suspension into their own chapters.
When required references are made out to other chapters.
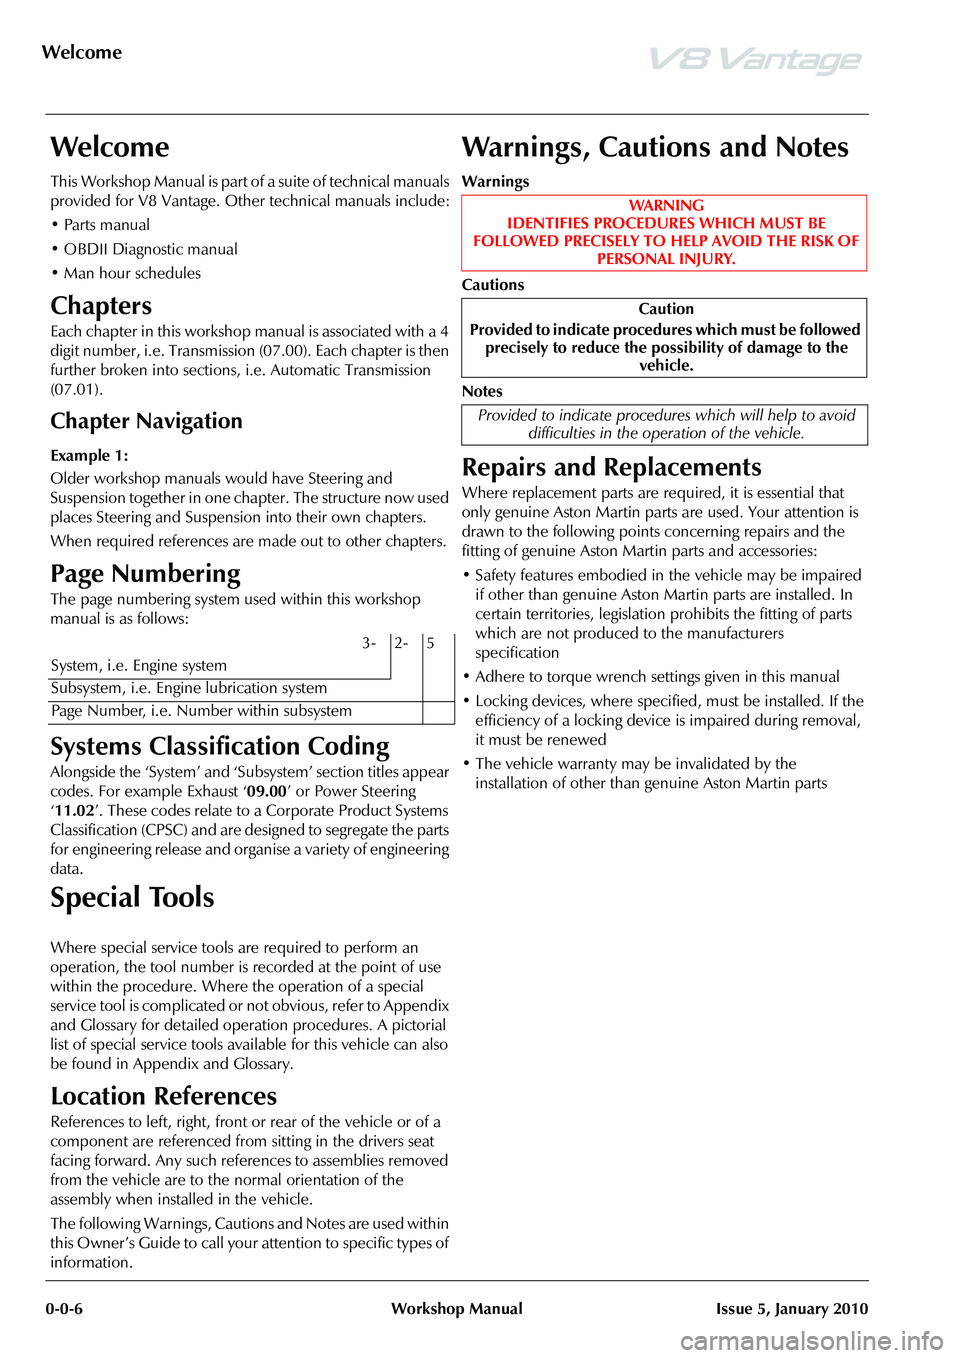
Page Numbering
The page numbering system used within this workshop
manual is as follows:
Systems Classification Coding
Alongside the ‘System’ and ‘Sub system’ section titles appear
codes. For example Exhaust ‘ 09.00’ or Power Steering
‘ 11.02 ’. These codes relate to a Corporate Product Systems
Classification (CPSC) and are designed to segregate the parts
for engineering release and organise a variety of engineering
data.
Special Tools
Where special service tools are required to perform an
operation, the tool number is recorded at the point of use
within the procedure. Where the operation of a special
service tool is complicated or not obvious, refer to Appendix
and Glossary for detailed operation procedures. A pictorial
list of special service tools available for this vehicle can also
be found in Appendix and Glossary.
Location References
References to left, right, front or rear of the vehicle or of a
component are referenced from sitting in the drivers seat
facing forward. Any such refe rences to assemblies removed
from the vehicle are to the normal orientation of the
assembly when installed in the vehicle.
The following Warnings, Cautions and Notes are used within
this Owner’s Guide to call your attention to specific types of
information.
Warnings, Cautions and Notes
Warnings
Cautions
Notes
Repairs and Replacements
Where replacement parts are required, it is essential that
only genuine Aston Martin parts are used. Your attention is
drawn to the following points concerning repairs and the
fitting of genuine Aston Martin parts and accessories:
• Safety features embodied in the vehicle may be impaired if other than genuine Aston Martin parts are installed. In
certain territories, legislation prohibits the fitting of parts
which are not produced to the manufacturers
specification
• Adhere to torque wrench settings given in this manual
• Locking devices, where specified, must be installed. If the efficiency of a locking device is impaired during removal,
it must be renewed
• The vehicle warranty may be invalidated by the installation of other than genuine Aston Martin parts
3- 2- 5
System, i.e. Engine system
Subsystem, i.e. Engine lubrication system
Page Number, i.e. Number within subsystem
WAR NI NG
IDENTIFIES PROCEDURES WHICH MUST BE
FOLLOWED PRECISELY TO HELP AVOID THE RISK OF PERSONAL INJURY.
Caution
Provided to indicate procedur es which must be followed
precisely to reduce the possibility of damage to the vehicle.
Provided to indicate procedur es which will help to avoid
difficulties in the oper ation of the vehicle.
Page 13 of 947
Issue 5, January 2010 Workshop Manual 1-1-1
Body System (01.00)
Contents
Body Structure (01.01)........................................... 1-1-4Overview ................................................................ 1-4
Specifications.......................................................... 1-4
Maintenance ........................................................... 1-5Right Side Front Crush Bar for the Body
Reinforcement - Remove and Install ....................... 1-5
Left Side Front Crush Bar for the Body
Reinforcement - Remove and Install ....................... 1-5
Front Crush Brace - Remove and Install .................. 1-5
Front End (01.02) ................................................... 1-2-1 Front Wings ............................................................ 2-1Specifications ......................................................... 2-1
Maintenance ........................................................... 2-1 Radiator Closing Panel - Remove and Install ........... 2-1
Centre Undertray - Remove and Install
(Roadster Only) ..................................................... 2-1
Front Undertray-Remove and Install ....................... 2-2
Rear Undertray - Renew (Coupe only).................... 2-2
Rear Undertray - Renew (Roadster only) ................ 2-2
Install ..................................................................... 2-2.............................................................................. 2-2
Undertray, Vehicle Set - Renew ............................. 2-2
RH/LH Front Wheel Arch Liner - Renew ................ 2-2
RH/LH Rear Wheel Arch Liner - Renew ................. 2-3
RH Front Wing Panel Assembly - Renew ................ 2-4
LH Front Wing Panel Assembly - Renew ................ 2-6
Body Closures (01.03) ........................................... 1-3-1 Specifications.......................................................... 3-1Doors .................................................................... 3-1
Tailgate .................................................................. 3-1
Bonnet................................................................... 3-2
Maintenance ........................................................... 3-2 LH/RH Door Assembly-Renew ............................... 3-2
RH/LH Door Assembly-Remove/Refit ..................... 3-6
Front Door Hinge (One Side) - Renew ................... 3-6
Front Door Check Arm Assembly - Renew ............. 3-7
Boot Lid Assembly - Renew (Roadster Only) ........... 3-7
Boot Lid Hinge Assembly (Pair) - Renew
(Roadster Only) .................................................... 3-10
Boot Gas Strut (Pair) - Renew (Roadster Only) ...... 3-11
Boot Lid Striker Assembly - Renew
(Roadster Only) .................................................... 3-11
Exterior Boot Lid Switch Release - Renew
(Roadster Only) .................................................... 3-12
Tailgate Assembly - Renew ................................... 3-12
Tailgate Hinge Assembly (Pair) - Renew ................ 3-13
Hood Assembly - Renew ...................................... 3-14
Hood Hinge Assembly (Vehicle Set) - Renew ....... 3-14
Interior Trim (01.05).............................................. 1-4-1 Maintenance ........................................................... 4-1Rear Centre Console - Renew ................................ 4-1
Headlining - Renew (Roadster Only) ...................... 4-1
Header Panel As sembly - Renew
(Excluding Roadster)............................................... 4-6 Header Panel Assembly - Renew (Roadster Only)... 4-7
Front Header Console Assembly - Renew............... 4-7
RH/LH Upper Rear Pillar Panel Assembly
- Renew ................................................................. 4-8
RH Sun Visor - Renew ........................................... 4-8
LH Sun Visor - Renew ............................................ 4-8
Door Trimboard Assembly - Renew ....................... 4-9
Door Trimboard Assembly
- Remove for Access/Refit ...................................... 4-9
Lower Quarter Trim Panel Assembly - Renew
(Roadster Only)...................................................... 4-9
Side Carpet Kit (RHD) - Renew ............................ 4-11
Side Carpet Kit (LHD) - Renew ............................ 4-12
Top Rear Console Fini
sher Panel Assembly
- Renew (Roadster Only) ...................................... 4-14
RH/LH Bodyside Rear Trim Panel Assembly
- Renew (Roadster Only) ...................................... 4-14
Tonneau to Body Weatherstrip Assembly
- Renew (Roadster Only) ...................................... 4-15
Door Trim Weather Strip Assembly - Renew
(Roadster Only).................................................... 4-16
Exterior Trim (01.08) ............................................. 1-5-1 Maintenance ........................................................... 5-1RH/LH Applique Sill - Renew ................................. 5-1
RH Wing Side Strake - Renew................................ 5-2
LH Wing Side Strake - Renew ................................ 5-2
Channel Assembly Divider Bar - Renew ................. 5-2
Windshield Header Finisher - Renew
(Roadster Only)...................................................... 5-3
Mirrors (01.09) ...................................................... 1-6-1 Specifications ......................................................... 6-1
Maintenance ........................................................... 6-1RH Door Mirror Assembly - Renew ........................ 6-1
LH Door Mirror Assembly - Renew ........................ 6-1
Seating (01.10)....................................................... 1-7-1 Description ............................................................. 7-1Heated Seats ......................................................... 7-1
Specifications ........................................................ 7-1
Maintenance ........................................................... 7-1 RH/LH Front Seat - Remove and Install .................. 7-1
Front Seat Squab Cover Assembly
(Each, Pre-08MY) - Remove and Install .................. 7-1
Front Seat Squab Cover Assembly
(Each, from 08MY) - Remove and Install................. 7-3
Front Seat Cushion Cover Assembly (Each)
- Renew ................................................................. 7-3
6-Way Height Adjuster (Inc. Motors) - Renew ........ 7-4
Squab Motor Kit - Renew....................................... 7-6
Lumbar Support Kit - Renew .................................. 7-7
Side Airbag - Renew .............................................. 7-8
Front Seat Buckle Assembly - Renew...................... 7-9
Valance Heater and Lumbar Switch Assembly
- Renew ................................................................. 7-9
Seat Harness Kit - Renew ..................................... 7-10
Page 14 of 947
1-1-2 Workshop Manual Issue 5, January 2010
RH/LH Seat Switchpack Assembly - Renew...........7-13
Lumbar Pump for the Front Seat (From 08MY)
- Remove and Install.............................................7-13
Lumbar Valve for the Front Seat (From 08MY)
- Remove and Install.............................................7-14
Lumbar Bladder for the Front Seat (From 08MY)
- Remove and Install.............................................7-14
Glass, Frame and Mechanism (01.11) .................. 1-8-1 Description .............................................................8-1 Frameless doors......................................................8-1
Specifications .........................................................8-1
Maintenance ...........................................................8-1 Glass Regulator - Renew .........................................8-1
RH/LH Door Glass - Renew ....................................8-2
Door Glass - Adjust/Reset .......................................8-3
Front Windshield - Renew ......................................8-3
Rear Windshield - Renew .......................................8-4
Quarter Window Glass - Renew .............................8-6
Passenger Window Lift Switch - Renew ..................8-6
Driver Window Lift Switch - Renew........................8-7
Instrument Panel (IP) (01.12)................................ 1-9-1 Specifications ..........................................................9-1
Maintenance ...........................................................9-1 Instrument Panel - Renew ......................................9-1
Airbag Panel and Door Assembly - Renew ..............9-6
Glovebox Assembly - Renew ..................................9-6
Instrument Centre Panel Asse mbly - Renew............9-7
Knee Protector - Renew .........................................9-7
Instrument Panel As sembly - Renew .......................9-7
Cluster Bezel Panel - Renew .................................9-10
Driver Panel Assembly - Renew ............................9-10
Instrument Panel Bezel A ssembly (With Sat. Nav.)
- Renew ...............................................................9-11
Instrument Panel Bezel Assembly
(Without Sat. Nav.) - Renew .................................9-11
Rear Console Panel Assembly - Renew .................9-12
Armrest Pad Assembly - Renew ............................9-13
Console Panel Assembly - Renew .........................9-13
RH/LH Rear Console Pa nel Assembly - Renew
(Roadster Only) ....................................................9-13
Centre Console Panel - Remove and Install
(Coupe Only) .......................................................9-15
Centre Console Panel - Remove and Install
(Roadster Only) ....................................................9-19
RH/LH Lower Quarter Panel Assembly - Renew
(Roadster Only) ....................................................9-29
Handles and Lock Mechanisms (01.14) .............. 1-10-1 Description ...........................................................10-1 Vehicle Key/Remote Transmitter...........................10-1
Central Locking System ........................................10-1
Remote Transmitter ..............................................10-1
Fuel Filler Assembly ..............................................10-1
Boot Emergency Release ....... ...............................10-1
Specifications ........................................................10-2
Maintenance .........................................................10-2 Ignition Cylinder Lock - Re new.............................10-2
RH/LH Front Door Latch As sembly - Renew .........10-2
Bonnet Latch Assembly - Renew...........................10-3
Hood Release Cable Assembly - Renew (Roadster Only) .................................................... 10-3
Bonnet Secondary Latch Asse
mbly - Renew ......... 10-4
Tailgate Latch and Cable Assembly - Renew ......... 10-4
Fuel Filler Actuator Assembly - Renew
(Roadster Only) .................................................... 10-4
Fuel Filler Release Cable - Renew (Roadster Only) 10-5
Fuel Flap Release Switch - Renew ........................ 10-6
RH/LH Tonneau Latch Motor - Renew
(Roadster Only) .................................................... 10-7
RH/LH Tonneau Latch - Renew (Roadster Only) ... 10-7
RH/LH Tonneau Cover Striker Assembly
- Renew (Roadster Only) ...................................... 10-8
Tailgate Latch Assembly-Renew (Roadster Only) ... 10-8
Wipers and Washer System (01.16) ....................1-11-1 Headlamp Washing .............................................. 11-1
Specifications ........................................................ 11-2
Maintenance ......................................................... 11-2 Windscreen Wiper Motor As sembly - Renew ....... 11-2
Wiper Linkage Assembly - Renew ........................ 11-2
Windshield Wash Tube - Renew .......................... 11-2
Windscreen Reservoir and Motor Assembly
- Remove and Install ............................................ 11-3
Low Level Water Sensor - Remove and Install ...... 11-4
Headlamp Wash Motor and Pump Assembly
- Renew ............................................................... 11-5
Headlamp Wash Tube Assembly - Renew ............ 11-5
Washer Fluid Reservoir - Renew........................... 11-6
Convertible Roof and Roof Opening Subsystem
(01.17)..................................................................1-12-1 System Description .............................................. 12-1
Maintenance ......................................................... 12-2 Hood Assembly-Renew ........................................ 12-2
Canopy Cover - Renew ........................................ 12-5
Header Latch Motor - Renew ............................... 12-9
Hydraulic Main Actuator Cy linder - Renew .......... 12-9
Hydraulic Tensrod Cylinder - Renew .................. 12-10
Hydraulic Tonneau Cylinder - Renew................. 12-11
Convertible Top ECU - Renew ........................... 12-13
Hydraulic Pump - Renew ................................... 12-13
Hydraulic Lock Valve - Renew............................ 12-16
RH/LH Front Cantrail Seal - Spare Part
- Renew ............................................................. 12-18
RH/LH Front Cantrail Seal Spare Part Kit
- Renew ............................................................. 12-18
RH/LH Middle Cantrail Seal Spare Part
- Renew ............................................................. 12-18
RH/LH Middle Cantrail Seal Spare Part Kit
- Renew ............................................................. 12-19
Rear Seal Spare Part Assembly Kit - Renew ......... 12-20
LH Fully Automatic Latching Kit - Renew............ 12-21
RH Fully Automatic Latching Kit - Renew ........... 12-22
Convertible Roof Hydraulic Pump
- Check Fluid Level ............................................ 12-23
Cantrail Cover Trim - Renew .............................. 12-25
B-Post Trim Cover - Renew ................................ 12-25
Tonneau Cover - Renew .................................... 12-27
LH Front Main Hydraulic Cylinder Pipe
- Renew ............................................................. 12-29
LH Rear Main Hydraulic Cylinder Pipe
Page 15 of 947

Issue 5, January 2010 Workshop Manual 1-1-3
- Renew ............................................................. 12-33
RH Front Main Hydraulic Cylinder Pipe
- Renew ............................................................. 12-37
RH Rear Main Hydraulic Cylinder Pipe
- Renew ............................................................. 12-40
LH Front Hydraulic Cylinder Pipe - Renew........ 12-43
LH Rear Hydraulic Cylinder Pipe - Renew.......... 12-46
RH Front Hydraulic Cylinder Pipe - Renew ........ 12-50
RH Rear Hydraulic Cylinder Pipe - Renew ......... 12-53
RH/LH Rear Hydraulic Tonneau Cylinder Pipe
- Renew ............................................................. 12-56
LH/RH Front Hydraulic Tonneau Cylinder Pipe
- Renew ............................................................. 12-60
Hydraulic Cylinder Valve to Pump Pipe
- Renew ............................................................. 12-63
Wind Deflector - Renew .................................... 12-66
Tonneau Well Liner - Renew . ............................ 12-67
RH/LH Flex Shaft - Renew ................................. 12-69
Bumpers (01.19) .................................................. 1-13-1 Front Bumper ....................................................... 13-1
Rear Bumper......................................................... 13-1
Specifications........................................................ 13-2
Maintenance ......................................................... 13-2Front Bumper Cover - Renew .............................. 13-2
Rear Bumper Cover - Renew................................ 13-3
Restraining Devices (01.20)................................. 1-14-1 Seat Belts .............................................................. 14-1Emergency Locking Retractor (ELR) ...................... 14-2
Airbag System ....................................................... 14-3
Maintenance ......................................................... 14-4 Driver’s Airbag Module - Renew .......................... 14-4
LH Front Seat Belt - Renew .................................. 14-4
RH Front Seat Belt - Renew.................................. 14-5
Passenger Airbag - Renew .................................... 14-6
ARS Side Impact Sensor Assembly - B Pillar
- Renew ............................................................... 14-6
Side Impact Door ARS Sensor Assembly
- Renew ............................................................... 14-6
Front Impact Sensor Assembly - Renew ................ 14-7
Occupant Restraint Control Module Assembly
- Renew ............................................................... 14-7
RH/LH Roll Over Protection System - Renew ....... 14-8
Page 45 of 947

Interior Trim (01.05)
Body System (01.00)
Issue 5, January 2010 Workshop Manual 1-4-3
7. Release rear of canopy cover from tension bow and release velcro securing rear screen to headlining to gain
access to headlining screws (see Figure 6).
8. Position seat back rests in forward position.
9. Remove screws (x5) securing headlining to third cross bar and release headlini ng (see Figure 7). 10. Remove screw securing tension string to front of third
cross bar (see Figure 8).
11. Remove screws (x2) securing tension strings underside of third cross bar (see Figure 9).
Figure 6
Figure 7
Figure 8
Figure 9
Page 48 of 947
Interior Trim (01.05)
Body System (01.00)1-4-6 Workshop Manual Issue 5, January 2010
7. Position B-post trims, pass straps through and secure to hood mechanism using screws.
8. Pass tension springs through B-post trims and secure to hood mechanism using hooks.
9. Position hood to gain access to B-post fixing locations.
10. Install B-post trims to hood mechanism, align using
marks and secure with screws.
11. Position tension strings an d secure to hinges using
screws.
12. Position tension strings underside of third cross bar and secure with screws.
13. Position tension string to front of third cross bar and
secure with screw.
14. Secure headlining to third cross bar and secure with screws (start with the middle screw and work outboard).
15. Position seat back re sts in upright position.
16. Install rear of canopy cover to tension bow and secure headlining velcro to rear screen surround (centre velcro
on top and bottom of screen and continue to corners
pressing outer canopy and headlining together).
17. Ensure headlining velcro is installed centrally to rear screen.
18. Feed heated rear screen connectors through securing loops.
19. Connect heated rear screen Lucars.
20. Insert water pocket to seal, place a drop of super glue at each end of water pockets.
21. Crimp seal to secure water pocket in place.
22. Secure headlining to tension bow using double sided tape.
23. Position rear seal to tens ion bow, fit brackets, springs
and secure with screws. Ensure carrier ends are flush
with tension bow.
24. Fit header trim (see Workshop Manual procedure
01.05.BB Panel Assembly - Header - Renew).
Header Panel Assembly - Renew
(Excluding Roadster)
Removal
1. Remove front header console assembly (see Workshop Manual procedure 01.05.BC Console Assembly - Front
Header - Renew).
2. Remove RH front pillar uppe r trim panel (see Workshop
Manual procedure 01.05.BD Trim - Upper Panel - Front
Pillar - RH - Renew).
3. Remove LH front pillar upper trim panel (see Workshop Manual procedure 01.05.BE Trim - Upper Panel - Front
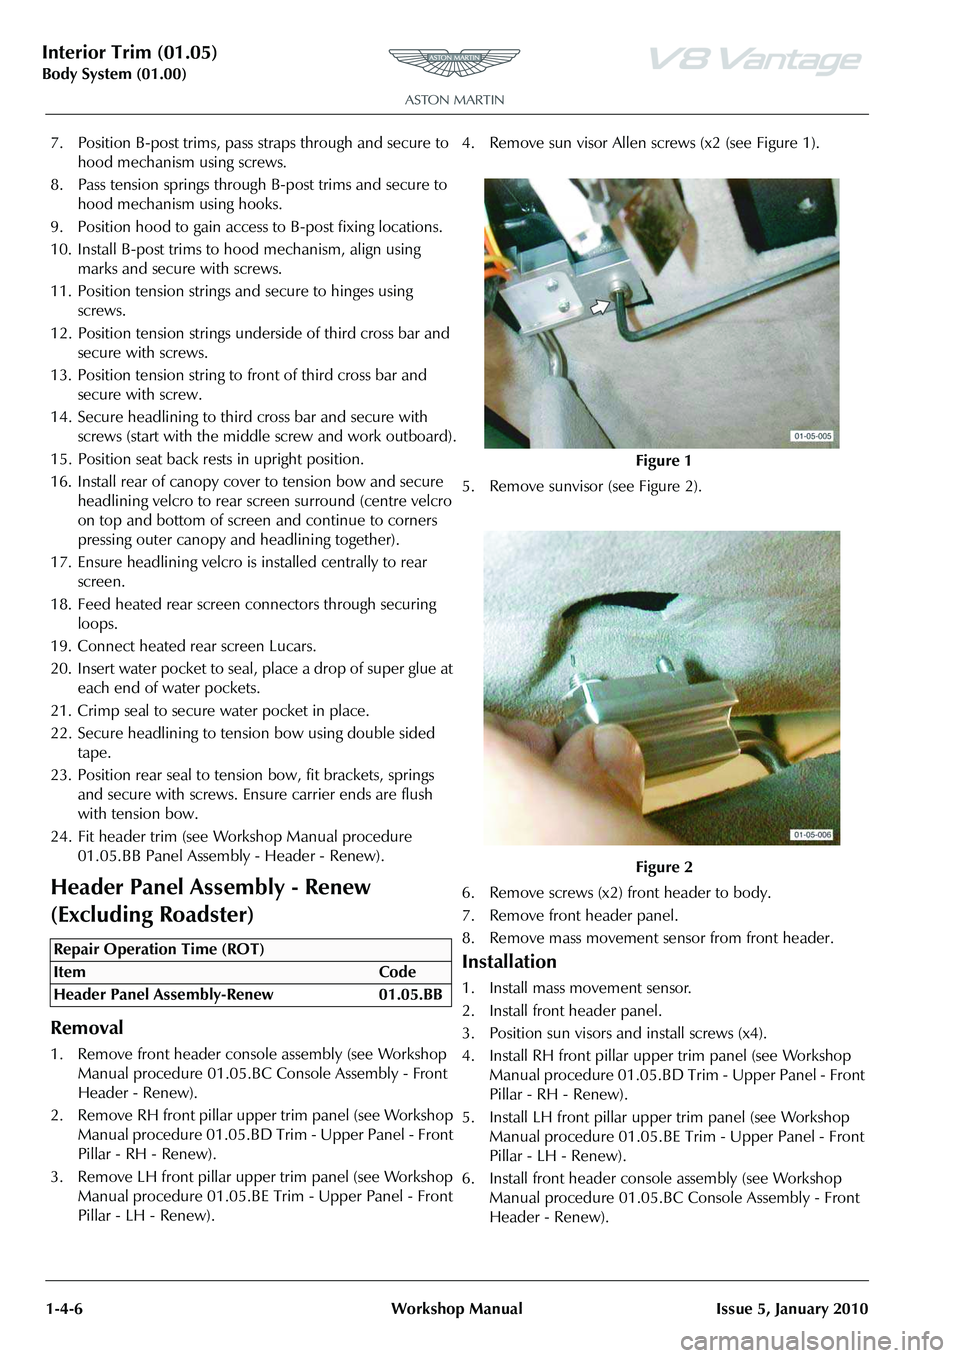
Pillar - LH - Renew). 4. Remove sun visor Allen sc
rews (x2 (see Figure 1).
5. Remove sunvisor (see Figure 2).
6. Remove screws (x2) front header to body.
7. Remove front header panel.
8. Remove mass movement se nsor from front header.
Installation
1. Install mass movement sensor.
2. Install front header panel.
3. Position sun visors and install screws (x4).
4. Install RH front pillar upper trim panel (see Workshop
Manual procedure 01.05.BD Trim - Upper Panel - Front
Pillar - RH - Renew).
5. Install LH front pillar uppe r trim panel (see Workshop
Manual procedure 01.05.BE Trim - Upper Panel - Front
Pillar - LH - Renew).
6. Install front header console assembly (see Workshop Manual procedure 01.05.BC Console Assembly - Front
Header - Renew).
Repair Operation Time (ROT)
Figure 1
Figure 2
Page 53 of 947

Interior Trim (01.05)
Body System (01.00)
Issue 5, January 2010 Workshop Manual 1-4-11
8. Release fir tree clip securing quarter trim to body (see
Figure 5).
9. Release quarter trim from heal board and remove quarter trim (see Figure 6).
10. Remove nut (x2) securing lower panel to quarter panel.
Removal
1. Install nut (x2) securing lower panel to quarter panel.
2. Install quarter trim and secure under heal board.
3. Install fir tree clip securing quarter trim to body.
4. Install nuts (x2) securing panel quarter trim to body side
trim.
5. Install bolt securing body si de trim to quarter panel via
B-post roof aperture.
6. Install screw (x1) securing bottom centre of quarter trim.
7. Install screw (x1) securing quarter trim to body (under
speaker grille) 8. Remove Speaker grille (see Workshop Manual
procedure 01.05.CN/01.05.CP Grille - Speaker Rear
Quarter - RH/LH - Renew).
9. Remove Panel centre (see Workshop Manual procedure
01.05.FS/01.05.FR Panel Assembly - Centre - Rear
Bulkhead - RH/LH - Renew).
10. Install Wind deflector (see Workshop Manual procedure 01.17.DA Wind Deflector - Renew).
Side Carpet Kit (RHD) - Renew
Removal
1. Remove handbrake gaiter (see Workshop Manual procedure 01.05.DK Gaiter - Handbrake - Renew).
2. Remove passenger seat (see Workshop Manual procedure 01.10.AA Seat Assembly - Front - RH -
Remove for Access and Refit
3. Remove drivers seat (see Workshop Manual procedure 01.10.AB Seat Assembly - Front - LH - Remove for
Access and Refit).
4. Remove LH quarter panel assembly (see Workshop Manual procedure 01.05.CM Panel Assembly - Quarter
- LH - Remove for Access and Refit).
5. Remove RH quarter panel assembly (see Workshop Manual procedure 01.05.CL Panel Assembly - Quarter -
RH - Remove for Access and Refit).
6. Pull back RH front centre carpet for access (press stud x1).
7. Remove LH rear centre (pre ss stud x2) and seat runner
carpets for access.
8. Remove RH sill carpet, pull from around, handbrake
lever and A-post trim.
9. Remove LH tunnel carpet, pull from under centre console and footrest.
10. Pull back LH front centre carpet for access.
11. Remove RH rear centre (pre ss stud x2) and seat runner
carpets for access.
12. Remove LH sill carpet, pull from around A-post trim.
13. Remove RH tunnel carpet, pull from under centre console.
Installation
1. Install RH sill carpet around handbrake lever and A-post trim.
2. Install LH tunnel carpet, push under centre console and footrest.
3. Install RH front centre carp et (ensure good fit around
pedals).
4. Install LH rear centre (ensure end tucked into sub woofer) and seat runner carpets.
5. Install LH sill carpet, ensure fit around A-post trim.
6. Install RH tunnel carpet, push under centre console.
Figure 5
Figure 6
Repair Operation Time (ROT)
Page 54 of 947

Interior Trim (01.05)
Body System (01.00)1-4-12 Workshop Manual Issue 5, January 2010
7. Install LH front centre carpet.
8. Install RH rear centre (e nsure end tucked into heel
board) and seat runner carpets.
9. Install LH quarter panel assembly (see Workshop Manual procedure 01.05.CM Panel Assembly - Quarter
- LH - Remove for Access and Refit).
10. Install RH quarter pane l assembly (see Workshop
Manual procedure 01.05.CL Panel Assembly - Quarter -
RH - Remove for Access and Refit).
11. Install passenger seat (see Workshop Manual procedure 01.10.AA Seat Assembly - Front - RH - Remove for
Access and Refit).
12. Install drivers seat (see Workshop Manual procedure 01.10.AB Seat Assembly - Front - LH - Remove for
Access and Refit).
13. Install handbrake gaiter (see Workshop Manual procedure 01.05.DK Gaiter - Handbrake - Renew).
Side Carpet Kit (LHD) - Renew
Removal
1. Remove handbrake gaiter (see Workshop Manual procedure 01.05.DK Gaiter - Handbrake - Renew).
2. Remove passenger seat (see Workshop Manual procedure 01.10.AA Seat Assembly - Front - RH -
Remove for Access and Refit).
3. Remove drivers seat (see Workshop Manual procedure 01.10.AB Seat Assembly - Front - LH - Remove for
Access and Refit).
4. Remove LH quarter panel assembly (see Workshop Manual procedure 01.05.CM Panel Assembly - Quarter
- LH - Remove for Access and Refit).
5. Remove RH quarter panel assembly (see Workshop Manual procedure 01.05.CL Panel Assembly - Quarter -
RH - Remove for Access and Refit).
6. Pull back LH front centre ca rpet for access (press stud
x1) (see Figure 1). 7. Remove LH rear centre (press stud x2) and seat runner
carpets for access (see Figure 2).
8. Remove scuff plate (screws x4).
9. Remove LH sill carpet, pull from around footrest, handbrake lever and A-post trim (see Figure 3).
10. Remove LH tunnel carpet, pull from under centre console.
Repair Operation Time (ROT)
A0105351
Figure 1
Figure 2
Figure 3
A0105352
A0105351
Page 55 of 947

Interior Trim (01.05)
Body System (01.00)
Issue 5, January 2010 Workshop Manual 1-4-13
11. Pull back RH front centre carpet for access (see Figure
4).
12. Remove RH rear centre (pre ss stud x2) and seat runner
carpets for access (see Figure 5).
13. Remove RH sill carpet, pull from around A-post trim
(see Figure 6). 14. Remove RH tunnel carpet, pull from under centre
console (see Figure 7).
Installation
1. Install LH sill carpet around footrest, handbrake lever and A-post trim.
2. Install LH tunnel carpet, push under centre console.
3. Install scuff plate (screws x4).
4. Install LH front centre carpet (ensure good fit around pedals).
5. Install LH rear centre (ensure end tucked into sub woofer) and seat runner carpets.
6. Install RH sill carpet, ensu re fit around A-post trim.
7. Install RH tunnel carpet, push under centre console.
8. Install RH front centre carpet.
9. Install RH rear centre (ensure end tucked into heel board) and seat runner carpets.
10. Install LH quarter pane l assembly (see Workshop
Manual procedure 01.05.CM Panel Assembly - Quarter
- LH - Remove for Access and Refit).
11. Install RH quarter panel assembly (see Workshop
Manual procedure 01.05.CL Panel Assembly - Quarter -
RH - Remove for Access and Refit).
12. Install passenger seat (see Workshop Manual procedure 01.10.AA Seat Assembly - Front - RH - Remove for
Access and Refit).
13. Install drivers seat (see Workshop Manual procedure 01.10.AB Seat Assembly - Front - LH - Remove for
Access and Refit).
14. Install handbrake gaiter (see Workshop Manual procedure 01.05.DK Gaiter - Handbrake - Renew).
Figure 4
Figure 5
Figure 6
A0105355
A0105353
A0105356
Figure 7
A0105357