ECU AUDI A4 1999 B5 / 1.G APB Engine Valve Gear Service Workshop Manual
[x] Cancel search | Manufacturer: AUDI, Model Year: 1999, Model line: A4, Model: AUDI A4 1999 B5 / 1.GPages: 99, PDF Size: 1.78 MB
Page 5 of 99
15-5
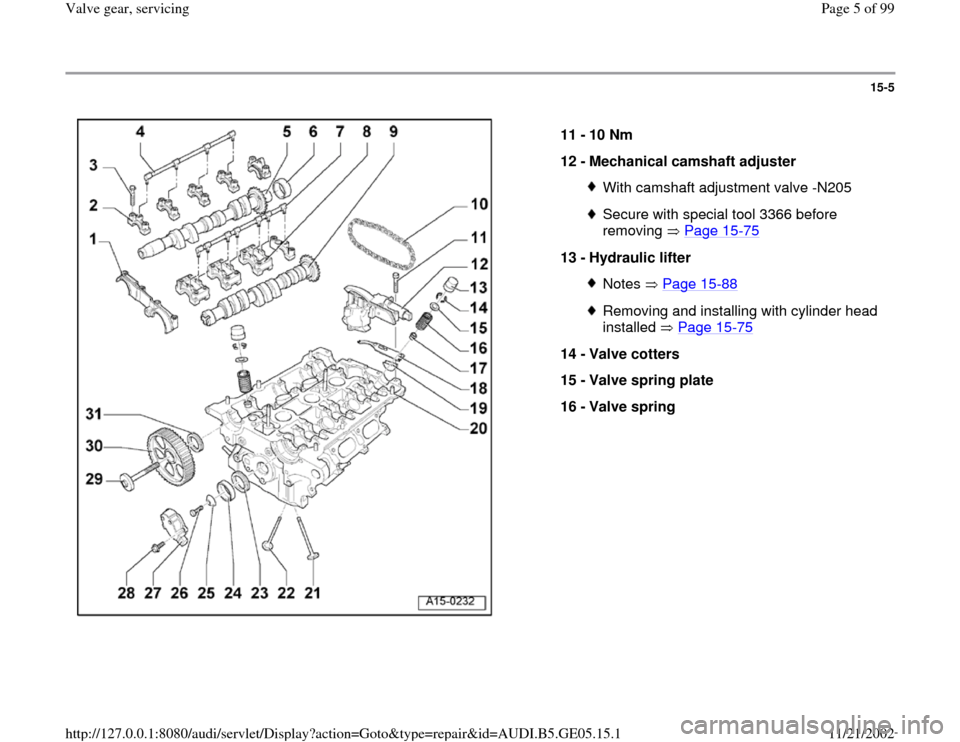
11 -
10 Nm
12 -
Mechanical camshaft adjuster
With camshaft adjustment valve -N205Secure with special tool 3366 before
removing Page 15
-75
13 -
Hydraulic lifter
Notes Page 15
-88
Removing and installing with cylinder head
installed Page 15
-75
14 -
Valve cotters
15 -
Valve spring plate
16 -
Valve spring
Pa
ge 5 of 99 Valve
gear, servicin
g
11/21/2002 htt
p://127.0.0.1:8080/audi/servlet/Dis
play?action=Goto&t
yp
e=re
pair&id=AUDI.B5.GE05.15.1
Page 12 of 99
15-12
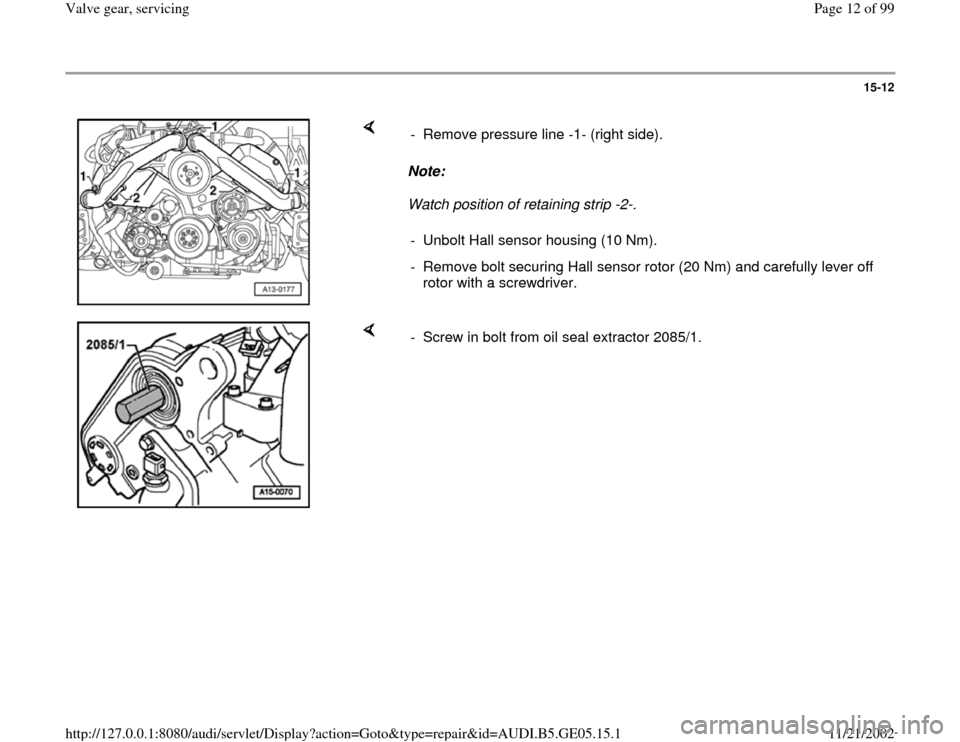
Note:
Watch position of retaining strip -2-. - Remove pressure line -1- (right side).
- Unbolt Hall sensor housing (10 Nm).
- Remove bolt securing Hall sensor rotor (20 Nm) and carefully lever off
rotor with a screwdriver.
- Screw in bolt from oil seal extractor 2085/1.
Pa
ge 12 of 99 Valve
gear, servicin
g
11/21/2002 htt
p://127.0.0.1:8080/audi/servlet/Dis
play?action=Goto&t
yp
e=re
pair&id=AUDI.B5.GE05.15.1
Page 18 of 99
15-18
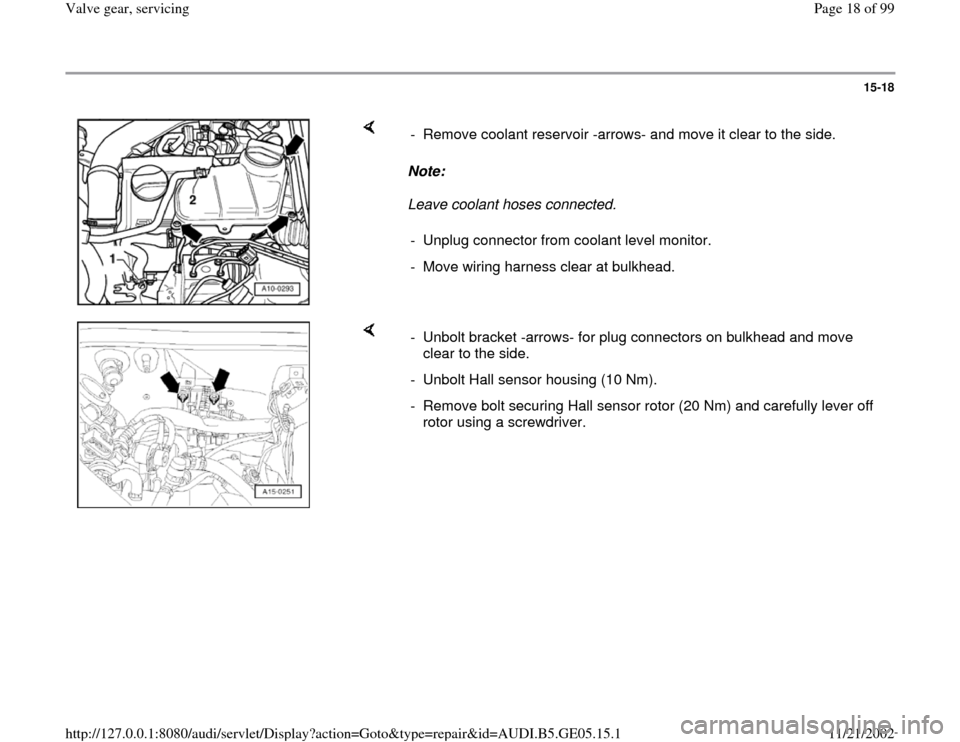
Note:
Leave coolant hoses connected. - Remove coolant reservoir -arrows- and move it clear to the side.
- Unplug connector from coolant level monitor.
- Move wiring harness clear at bulkhead.
- Unbolt bracket -arrows- for plug connectors on bulkhead and move
clear to the side.
- Unbolt Hall sensor housing (10 Nm).
- Remove bolt securing Hall sensor rotor (20 Nm) and carefully lever off
rotor using a screwdriver.
Pa
ge 18 of 99 Valve
gear, servicin
g
11/21/2002 htt
p://127.0.0.1:8080/audi/servlet/Dis
play?action=Goto&t
yp
e=re
pair&id=AUDI.B5.GE05.15.1
Page 19 of 99
15-19
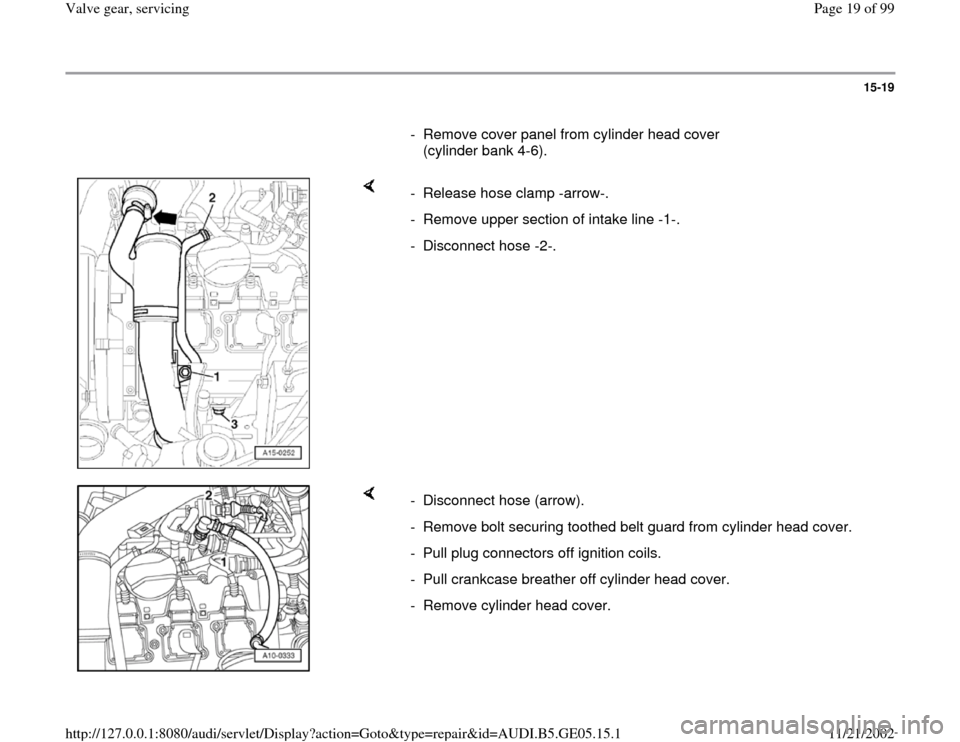
- Remove cover panel from cylinder head cover
(cylinder bank 4-6).
- Release hose clamp -arrow-.
- Remove upper section of intake line -1-.
- Disconnect hose -2-.
- Disconnect hose (arrow).
- Remove bolt securing toothed belt guard from cylinder head cover.
- Pull plug connectors off ignition coils.
- Pull crankcase breather off cylinder head cover.
- Remove cylinder head cover.
Pa
ge 19 of 99 Valve
gear, servicin
g
11/21/2002 htt
p://127.0.0.1:8080/audi/servlet/Dis
play?action=Goto&t
yp
e=re
pair&id=AUDI.B5.GE05.15.1
Page 28 of 99
15-28
- Remove bolt securing toothed belt guard from
cylinder head cover.
- Unplug connectors from ignition coils.
- Pull crankcase breather off cylinder head
cover.
- Remove ignition coils.
- Remove cylinder head cover.
Installing
Install in reverse sequence; note the following
points.
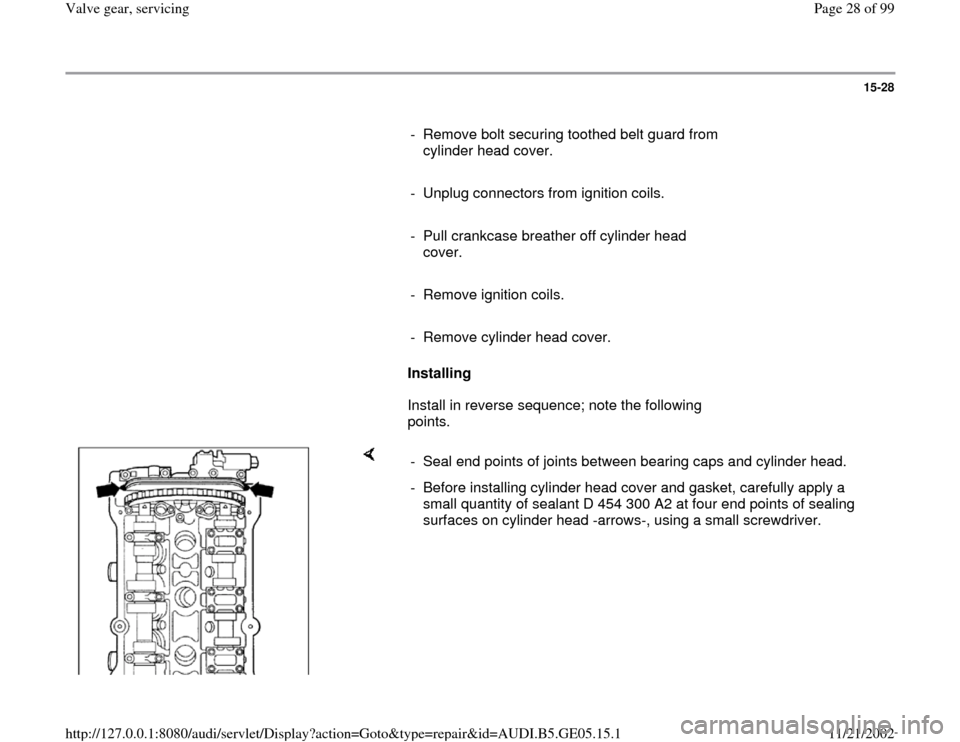
- Seal end points of joints between bearing caps and cylinder head.
- Before installing cylinder head cover and gasket, carefully apply a
small quantity of sealant D 454 300 A2 at four end points of sealing
surfaces on cylinder head -arrows-, using a small screwdriver.
Pa
ge 28 of 99 Valve
gear, servicin
g
11/21/2002 htt
p://127.0.0.1:8080/audi/servlet/Dis
play?action=Goto&t
yp
e=re
pair&id=AUDI.B5.GE05.15.1
Page 29 of 99
15-29
Cylinder head, removing and installing
Removing and installing left cylinder head
Notes:
All hose connections are secured with clips.
Charge air system must be free of leaks.
Replace all seals and gaskets
Removing
- Remove engine Page 10
-1 .
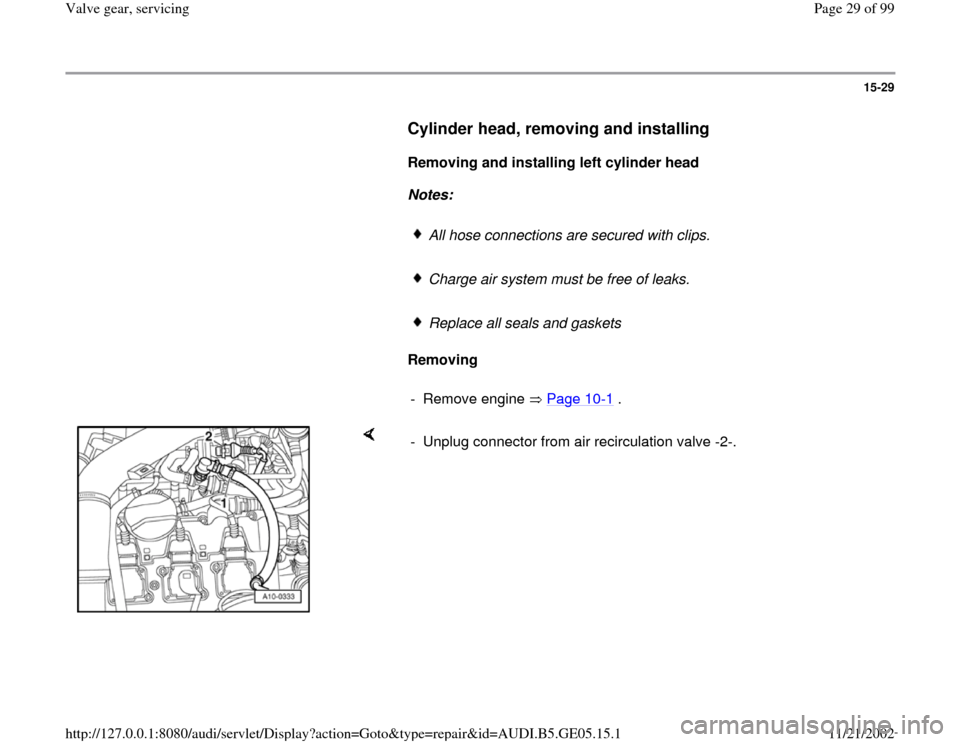
- Unplug connector from air recirculation valve -2-.
Pa
ge 29 of 99 Valve
gear, servicin
g
11/21/2002 htt
p://127.0.0.1:8080/audi/servlet/Dis
play?action=Goto&t
yp
e=re
pair&id=AUDI.B5.GE05.15.1
Page 33 of 99
15-33
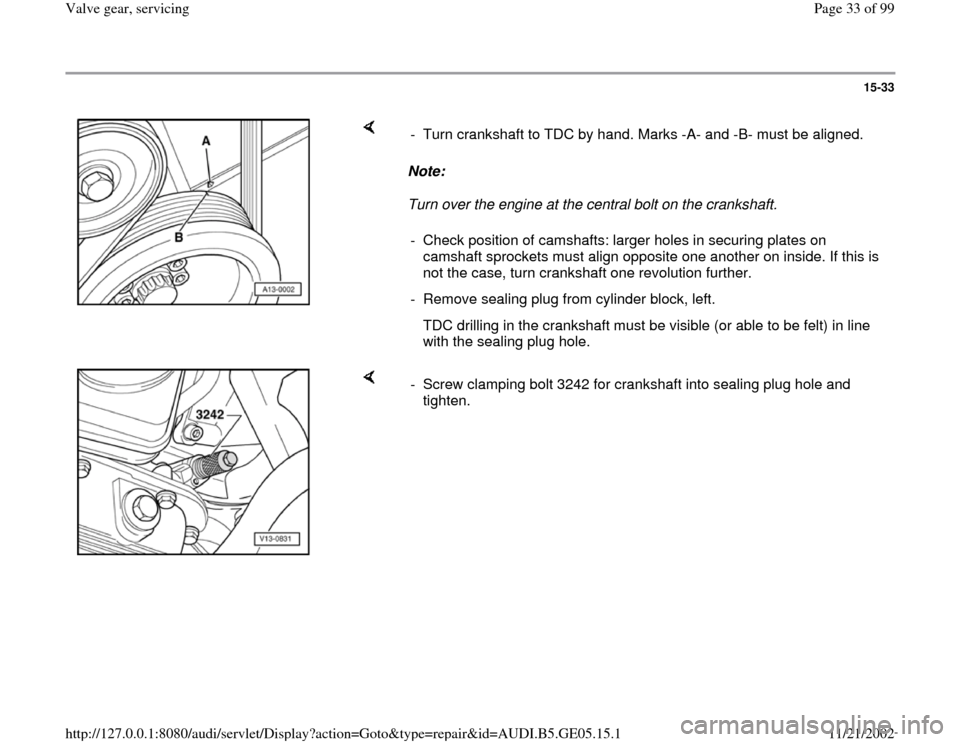
Note:
Turn over the engine at the central bolt on the crankshaft. - Turn crankshaft to TDC by hand. Marks -A- and -B- must be aligned.
- Check position of camshafts: larger holes in securing plates on
camshaft sprockets must align opposite one another on inside. If this is
not the case, turn crankshaft one revolution further.
- Remove sealing plug from cylinder block, left.
TDC drilling in the crankshaft must be visible (or able to be felt) in line
with the sealing plug hole.
- Screw clamping bolt 3242 for crankshaft into sealing plug hole and
tighten.
Pa
ge 33 of 99 Valve
gear, servicin
g
11/21/2002 htt
p://127.0.0.1:8080/audi/servlet/Dis
play?action=Goto&t
yp
e=re
pair&id=AUDI.B5.GE05.15.1
Page 35 of 99
15-35
Notes:
Mark the direction of rotation of the toothed belt
with chalk or felt pen before removing. A used
belt can break if it rotates in the wrong direction
when reinstalled.
The toothed belt tensioning element is oil-
damped and can therefore only be compressed
slowly by applying constant pressure.
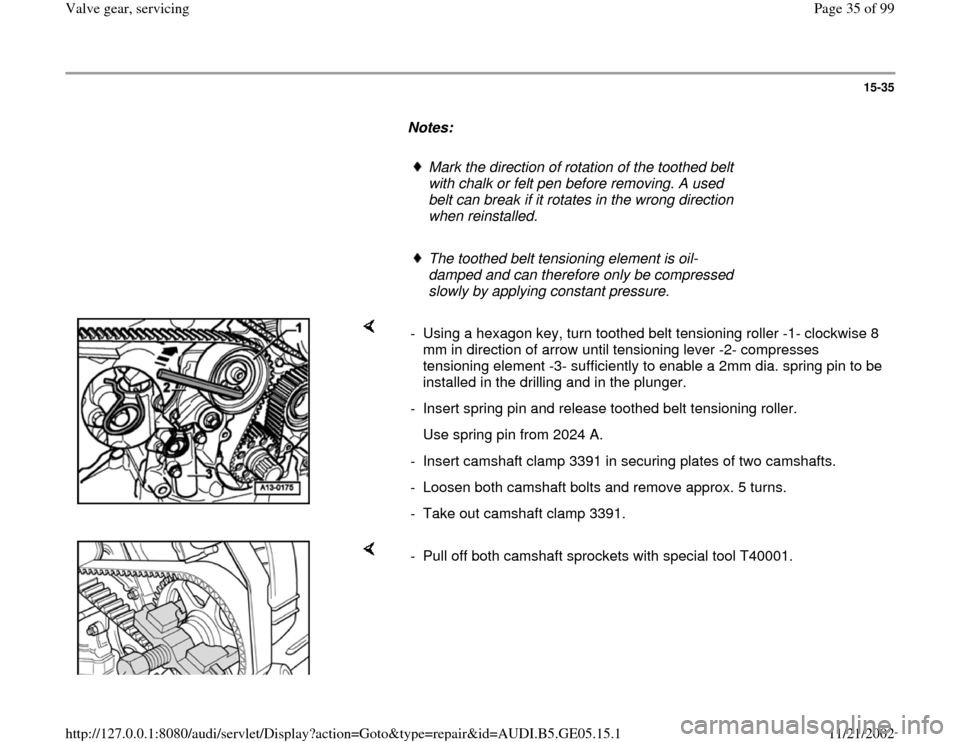
- Using a hexagon key, turn toothed belt tensioning roller -1- clockwise 8
mm in direction of arrow until tensioning lever -2- compresses
tensioning element -3- sufficiently to enable a 2mm dia. spring pin to be
installed in the drilling and in the plunger.
- Insert spring pin and release toothed belt tensioning roller.
Use spring pin from 2024 A.
- Insert camshaft clamp 3391 in securing plates of two camshafts.
- Loosen both camshaft bolts and remove approx. 5 turns.
- Take out camshaft clamp 3391.
- Pull off both camshaft sprockets with special tool T40001.
Pa
ge 35 of 99 Valve
gear, servicin
g
11/21/2002 htt
p://127.0.0.1:8080/audi/servlet/Dis
play?action=Goto&t
yp
e=re
pair&id=AUDI.B5.GE05.15.1
Page 42 of 99
15-42
Removing and installing right cylinder head
Notes:
All hose connections are secured with clips.
Charge air system must be free of leaks.
Replace all seals and gaskets
Removing
- Remove engine Page 10
-1 .
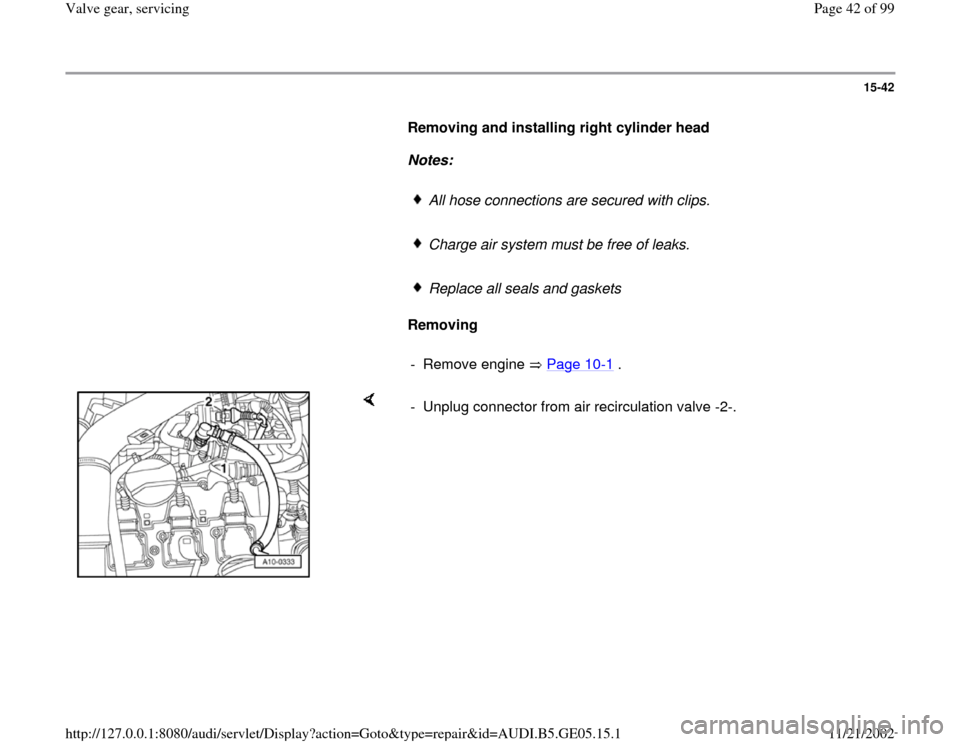
- Unplug connector from air recirculation valve -2-.
Pa
ge 42 of 99 Valve
gear, servicin
g
11/21/2002 htt
p://127.0.0.1:8080/audi/servlet/Dis
play?action=Goto&t
yp
e=re
pair&id=AUDI.B5.GE05.15.1
Page 47 of 99
15-47
Note:
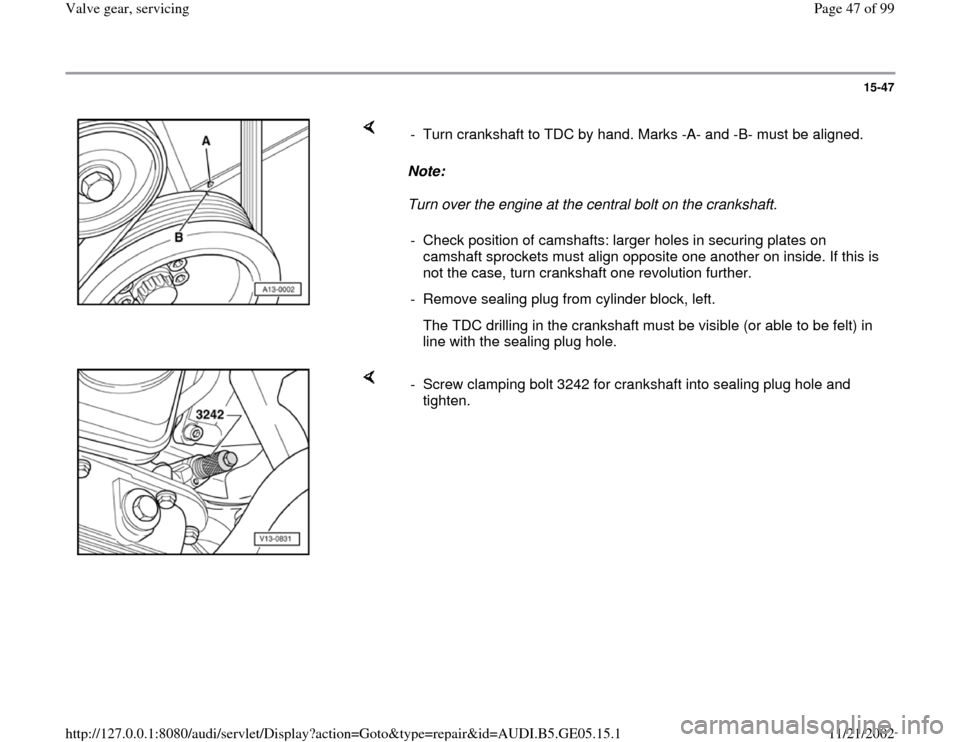
Turn over the engine at the central bolt on the crankshaft. - Turn crankshaft to TDC by hand. Marks -A- and -B- must be aligned.
- Check position of camshafts: larger holes in securing plates on
camshaft sprockets must align opposite one another on inside. If this is
not the case, turn crankshaft one revolution further.
- Remove sealing plug from cylinder block, left.
The TDC drilling in the crankshaft must be visible (or able to be felt) in
line with the sealing plug hole.
- Screw clamping bolt 3242 for crankshaft into sealing plug hole and
tighten.
Pa
ge 47 of 99 Valve
gear, servicin
g
11/21/2002 htt
p://127.0.0.1:8080/audi/servlet/Dis
play?action=Goto&t
yp
e=re
pair&id=AUDI.B5.GE05.15.1