technical data AUDI A5 2008 8T / 1.G Owner's Guide
[x] Cancel search | Manufacturer: AUDI, Model Year: 2008, Model line: A5, Model: AUDI A5 2008 8T / 1.GPages: 313, PDF Size: 12.13 MB
Page 65 of 313
Lights and vision63
Controls
Safety
Driving tips
General maintenance
Self-help
Technical data
Automatic wash and wipe
– Pull the lever to position .
– Release the lever again. The washer will stop and the
wipers will keep running for approximately 4 seconds.
The number of wipe cycles varies according to the length
of time the lever is pulled.
Switching off the wipers
– Move the lever to the "off" position .General notes
The washers and wipers will only work when the ignition is switched
on.
If you stop briefly, e.g. at traffic lights, the wiper speed will automat-
ically be reduced by one level.
The windscreen washer jets are heated when the ignition is
switched on if the outside temperature is low.
Dribble wipe
About 5 seconds after the wash and wipe cycle has finished, the
windscreen wiper system automatically gives the screen one extra
wipe to remove any dribbles of water.
If you want to deactivate the dribble wipe function while driving,
pull the lever to position again within 10 seconds.
The dribble wipe function will be re-activated the next time the igni-
tion is switched off and on.
Rain sensor*
The rain sensor will only function in the intermittent wipe position.
The intermittent wipe function is activated automatically when it
starts to rain.
Before you reach a road speed of 6 km/h you will have to activate the
rain sensor manually by switching it off and back on again.To reduce the sensitivity level of the rain sensor move control
⇒page 62, fig. 64 to the left. To increase the sensitivity level of the
rain sensor move the control to the right.
If you have selected a high sensitivity level for the rain sensor the
windscreen wipers will react sooner to any moisture on the wind-
screen. The wiper intervals in the intermittent wipe setting are also
varied automatically according to the road speed (in addition to the
sensitivity setting).
WARNING
•
Poor visibility can cause accidents. Always ensure that the
wiper blades are in good condition ⇒page 65, “Changing wiper
blades”.
•
The rain sensor is only intended to assist the driver. The driver
is still obliged to manually operate the windscreen wipers as
required depending on visibility.
•
Do not use water-repellent coatings on the windscreen. In bad
visibility conditions such as light rain, low sun or when driving at
night these coatings can cause increased dazzle, which is a
serious safety hazard. Such coatings can also cause the wiper
blades to judder.Caution
•
In icy conditions, always check that the wiper blades are not
frozen to the glass before using the wiper for the first time. If you
switch on the wipers when the wiper blades are frozen to the glass,
this could damage both the wiper blades and the wiper motor.
•
Make sure you switch off the windscreen wiper system (lever in
position "0") before you use an automatic car wash. This will avoid
inadvertent triggering of the wipers and possible damage to the
wiper system.
A5
A0
A5
AA
document_0900452a8179700c.book Seite 63 Donnerstag, 22. März 2007 10:19 10
Page 67 of 313
Lights and vision65
Controls
Safety
Driving tips
General maintenance
Self-help
Technical data when they are in the service position you will also avoid damaging
the paintwork on the bonnet.
•
off - the windscreen wipers will be moved back to their original
position.Caution
Never move the vehicle with the front wiper arms in a raised posi-
tion as they are automatically moved back to their normal park posi-
tion above a speed of 6 km/h. The paintwork on the bonnet may be
damaged as a result.
Note
•
You can also use the service position, for example, if you want to
fix a cover over the windscreen in the winter to keep it clear of ice.
•
The service position is automatically set to off when you operate
the windscreen wiper lever or the road speed exceeds 6 km/h.
Changing wiper blades
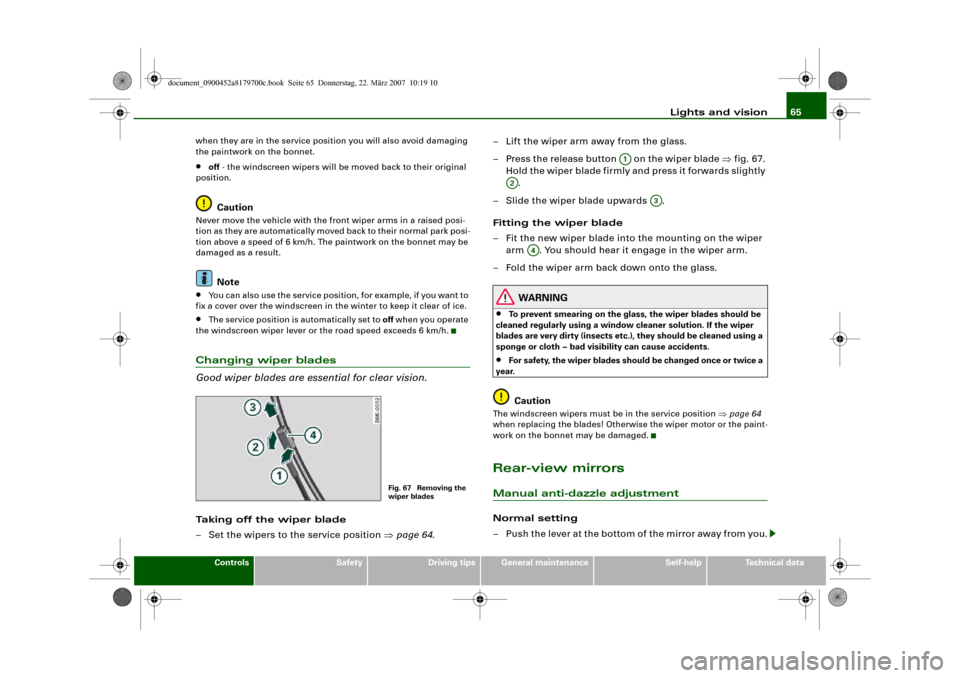
Good wiper blades are essential for clear vision.Taking off the wiper blade
– Set the wipers to the service position ⇒page 64.– Lift the wiper arm away from the glass.
– Press the release button on the wiper blade ⇒fig. 67.
Hold the wiper blade firmly and press it forwards slightly
.
– Slide the wiper blade upwards .
Fitting the wiper blade
– Fit the new wiper blade into the mounting on the wiper
arm . You should hear it engage in the wiper arm.
– Fold the wiper arm back down onto the glass.
WARNING
•
To prevent smearing on the glass, the wiper blades should be
cleaned regularly using a window cleaner solution. If the wiper
blades are very dirty (insects etc.), they should be cleaned using a
sponge or cloth – bad visibility can cause accidents.
•
For safety, the wiper blades should be changed once or twice a
year.Caution
The windscreen wipers must be in the service position ⇒page 64
when replacing the blades! Otherwise the wiper motor or the paint-
work on the bonnet may be damaged.Rear-view mirrorsManual anti-dazzle adjustmentNormal setting
– Push the lever at the bottom of the mirror away from you.
Fig. 67 Removing the
wiper blades
A1
A2
A3
A4
document_0900452a8179700c.book Seite 65 Donnerstag, 22. März 2007 10:19 10
Page 69 of 313
Lights and vision67
Controls
Safety
Driving tips
General maintenance
Self-help
Technical data
Exterior mirrors
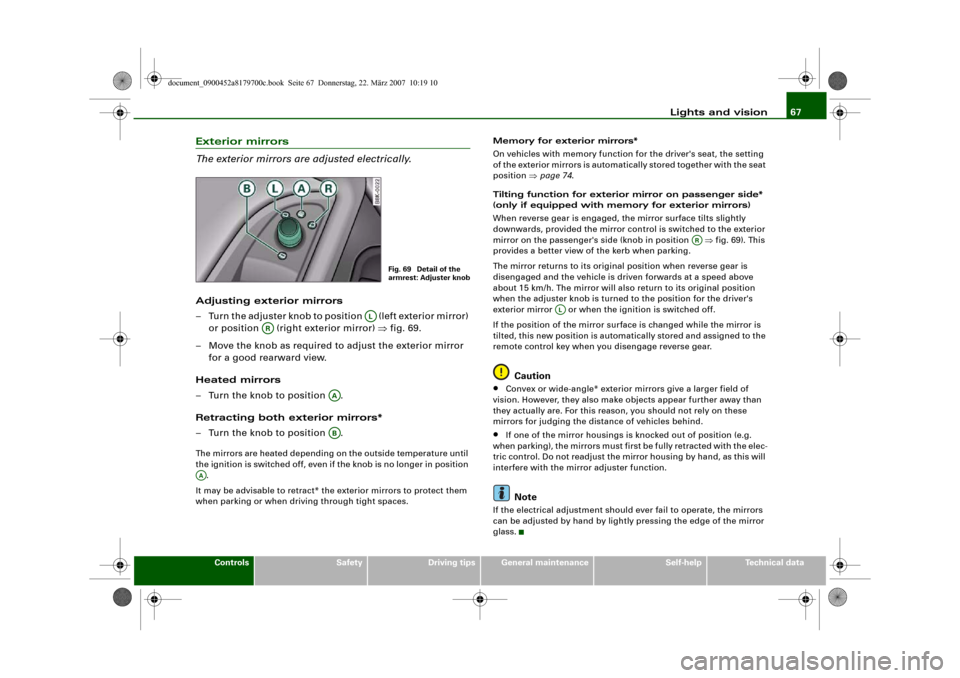
The exterior mirrors are adjusted electrically.Adjusting exterior mirrors
– Turn the adjuster knob to position (left exterior mirror)
or position (right exterior mirror) ⇒fig. 69.
– Move the knob as required to adjust the exterior mirror
for a good rearward view.
Heated mirrors
– Turn the knob to position .
Retracting both exterior mirrors*
– Turn the knob to position .The mirrors are heated depending on the outside temperature until
the ignition is switched off, even if the knob is no longer in position
.
It may be advisable to retract* the exterior mirrors to protect them
when parking or when driving through tight spaces.Memory for exterior mirrors*
On vehicles with memory function for the driver's seat, the setting
of the exterior mirrors is automatically stored together with the seat
position ⇒page 74.
Tilting function for exterior mirror on passenger side*
(only if equipped with memory for exterior mirrors)
When reverse gear is engaged, the mirror surface tilts slightly
downwards, provided the mirror control is switched to the exterior
mirror on the passenger's side (knob in position ⇒fig. 69). This
provides a better view of the kerb when parking.
The mirror returns to its original position when reverse gear is
disengaged and the vehicle is driven forwards at a speed above
about 15 km/h. The mirror will also return to its original position
when the adjuster knob is turned to the position for the driver's
exterior mirror or when the ignition is switched off.
If the position of the mirror surface is changed while the mirror is
tilted, this new position is automatically stored and assigned to the
remote control key when you disengage reverse gear.
Caution
•
Convex or wide-angle* exterior mirrors give a larger field of
vision. However, they also make objects appear further away than
they actually are. For this reason, you should not rely on these
mirrors for judging the distance of vehicles behind.
•
If one of the mirror housings is knocked out of position (e.g.
when parking), the mirrors must first be fully retracted with the elec-
tric control. Do not readjust the mirror housing by hand, as this will
interfere with the mirror adjuster function.Note
If the electrical adjustment should ever fail to operate, the mirrors
can be adjusted by hand by lightly pressing the edge of the mirror
glass.
Fig. 69 Detail of the
armrest: Adjuster knob
AL
AR
AAAB
AA
AR
AL
document_0900452a8179700c.book Seite 67 Donnerstag, 22. März 2007 10:19 10
Page 71 of 313
Lights and vision69
Controls
Safety
Driving tips
General maintenance
Self-help
Technical data
Applies to vehicles: with digital compassSetting the correct compass calibration zone
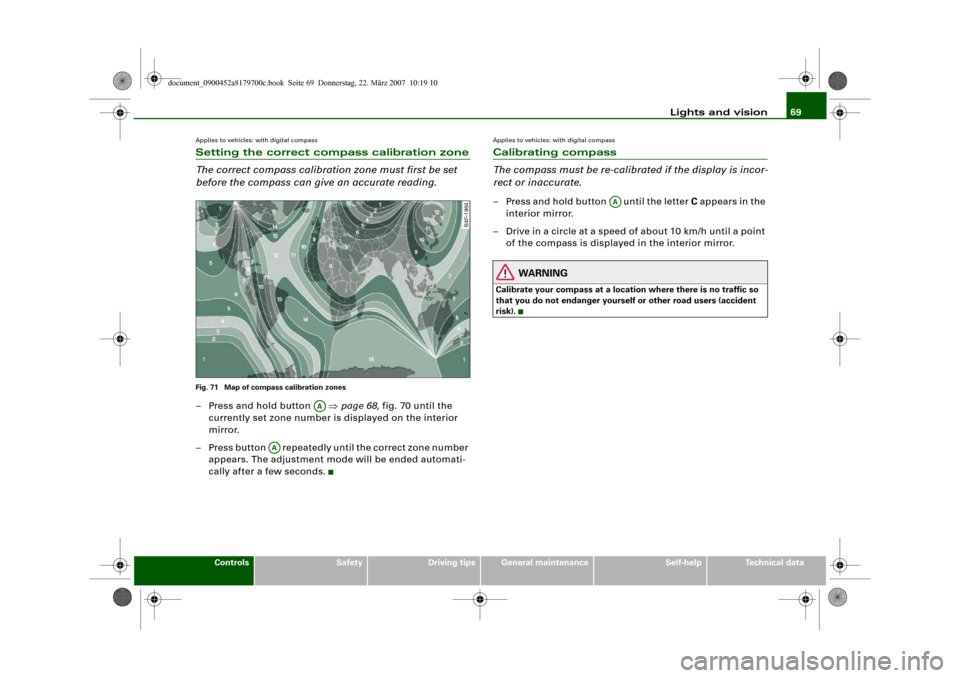
The correct compass calibration zone must first be set
before the compass can give an accurate reading.Fig. 71 Map of compass calibration zones– Press and hold button ⇒page 68, fig. 70 until the
currently set zone number is displayed on the interior
mirror.
– Press button repeatedly until the correct zone number
appears. The adjustment mode will be ended automati-
cally after a few seconds.
Applies to vehicles: with digital compassCalibrating compass
The compass must be re-calibrated if the display is incor-
rect or inaccurate.– Press and hold button until the letter C appears in the
interior mirror.
– Drive in a circle at a speed of about 10 km/h until a point
of the compass is displayed in the interior mirror.
WARNING
Calibrate your compass at a location where there is no traffic so
that you do not endanger yourself or other road users (accident
risk).
AA
AA
AA
document_0900452a8179700c.book Seite 69 Donnerstag, 22. März 2007 10:19 10
Page 73 of 313
Seats and storage71
Controls
Safety
Driving tips
General maintenance
Self-help
Technical data
Adjusting height of lumbar support*
– Press the top or bottom part of the adjuster switch to
move the lumbar support upwards or downwards as
required.
Raising or lowering the seat
– Pull the lever ⇒page 70, fig. 72 up or down repeat-
edly (i.e. pump the lever).
Adjusting backrest angle
– Lean forwards to take your weight off the backrest.
– Turn the adjuster wheel ⇒page 70, fig. 72 to set the
angle of the backrest as required.
WARNING
•
Never adjust the driver's seat when the vehicle is moving - this
could lead to an accident.
•
Be careful when adjusting the seat height. Careless or uncon-
trolled use of the seat adjustment can cause injuries.
•
Do not drive with the backrests of the front seats reclined too
far as otherwise the seat belt and airbag could fail to restrain the
wearer properly in an accident, possibly leading to injury.
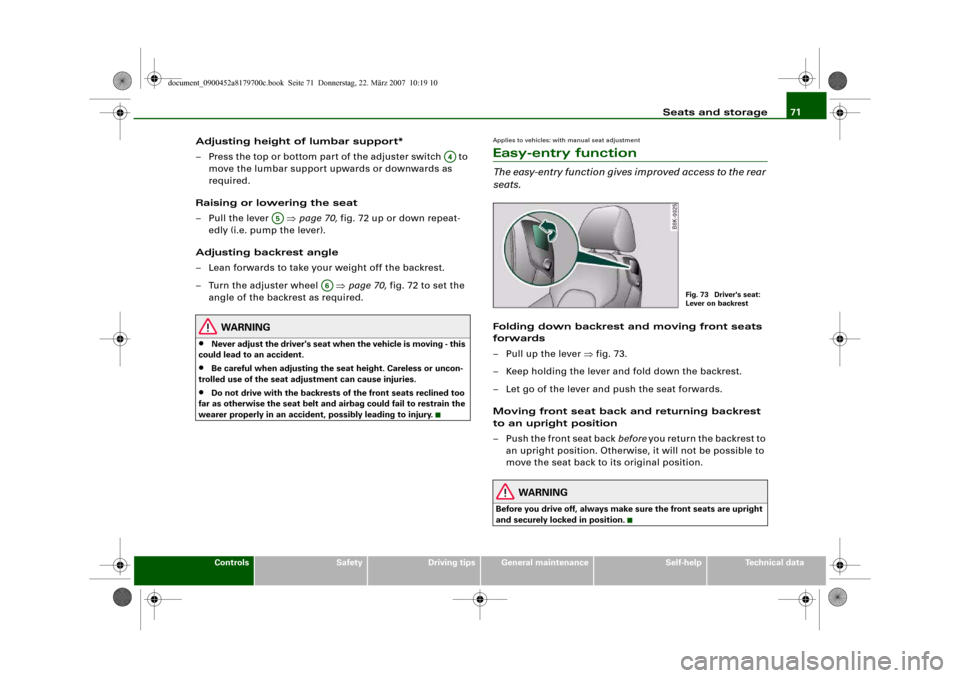
Applies to vehicles: with manual seat adjustmentEasy-entry functionThe easy-entry function gives improved access to the rear
seats.Folding down backrest and moving front seats
forwards
– Pull up the lever ⇒fig. 73.
– Keep holding the lever and fold down the backrest.
– Let go of the lever and push the seat forwards.
Moving front seat back and returning backrest
to an upright position
– Push the front seat back before you return the backrest to
an upright position. Otherwise, it will not be possible to
move the seat back to its original position.
WARNING
Before you drive off, always make sure the front seats are upright
and securely locked in position.
A4
A5
A6
Fig. 73 Driver's seat:
Lever on backrest
document_0900452a8179700c.book Seite 71 Donnerstag, 22. März 2007 10:19 10
Page 75 of 313
Seats and storage73
Controls
Safety
Driving tips
General maintenance
Self-help
Technical data
Adjusting head restraint height
– Press switch up or down.
Extending or shortening the thigh support*
– Lift the control below the seat cushion. The front seat
cushion will spring forward.
– Slide the seat cushion back to the desired position.
WARNING
•
Never adjust the driver's seat when the vehicle is moving - this
could lead to an accident.
•
The electrical seat adjustment also works when the ignition is
off and when the key is not in the ignition. To avoid accidental inju-
ries, never leave children unattended in the vehicle.
•
Be careful when adjusting the seat height. Careless or uncon-
trolled use of the height adjustment can cause injuries.
•
Do not drive with the backrests of the front seats reclined too
far as otherwise the seat belt and airbag could fail to restrain the
wearer properly in an accident, possibly leading to injury.
Applies to vehicles: with electric seat adjustmentEasy-entry functionThe easy-entry function gives improved access to the rear
seats.Tipping the front backrests forward
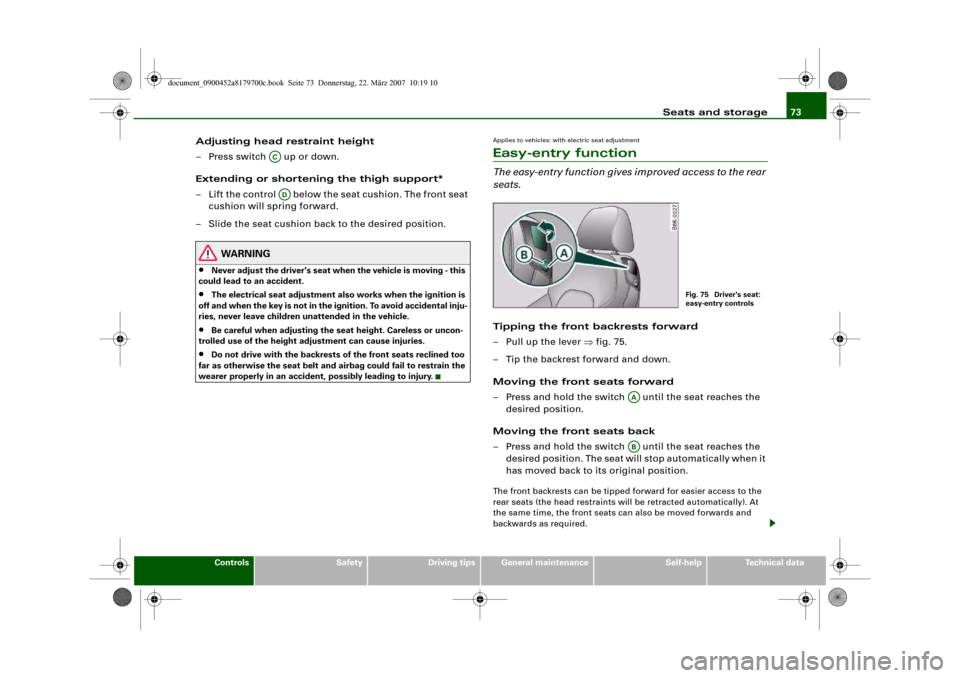
– Pull up the lever ⇒fig. 75.
– Tip the backrest forward and down.
Moving the front seats forward
– Press and hold the switch until the seat reaches the
desired position.
Moving the front seats back
– Press and hold the switch until the seat reaches the
desired position. The seat will stop automatically when it
has moved back to its original position.The front backrests can be tipped forward for easier access to the
rear seats (the head restraints will be retracted automatically). At
the same time, the front seats can also be moved forwards and
backwards as required.
ACAD
Fig. 75 Driver's seat:
easy-entry controls
AAAB
document_0900452a8179700c.book Seite 73 Donnerstag, 22. März 2007 10:19 10
Page 77 of 313
Seats and storage75
Controls
Safety
Driving tips
General maintenance
Self-help
Technical data
Recalling settings
– If the driver's door is open, press the desired recall
button briefly.
– If the driver's door is closed, press and hold down the
desired recall button until the programmed settings are
reached.A tone will sound and the diode in the button ⇒page 74,
fig. 76 will light up to confirm that the settings have been stored.
When you lock the vehicle the current settings are automatically
stored and assigned to the remote control key. However, the
settings assigned to the remote control key will not overwrite the
settings stored on recall buttons 1 and 2. The settings stored on the
recall buttons can be called up at any time. When you unlock the
vehicle, the settings assigned to the remote control key are recalled
automatically.
If your vehicle is also driven by other persons using your remote
control key, it is advisable to store your personal settings on one of
the recall buttons. You can then recall your own settings at any time
simply by pressing the corresponding recall button. When you lock
the vehicle these settings are then stored automatically and
assigned once again to the remote control key.
WARNING
•
For safety reasons, never recall seat settings when the vehicle
is moving - this could lead to an accident.
•
In an emergency the recall function can be stopped at any time
by pressing the switch, or by briefly pressing any of the
recall buttons.
Applies to vehicles: with seat memoryActivating memory for remote control key
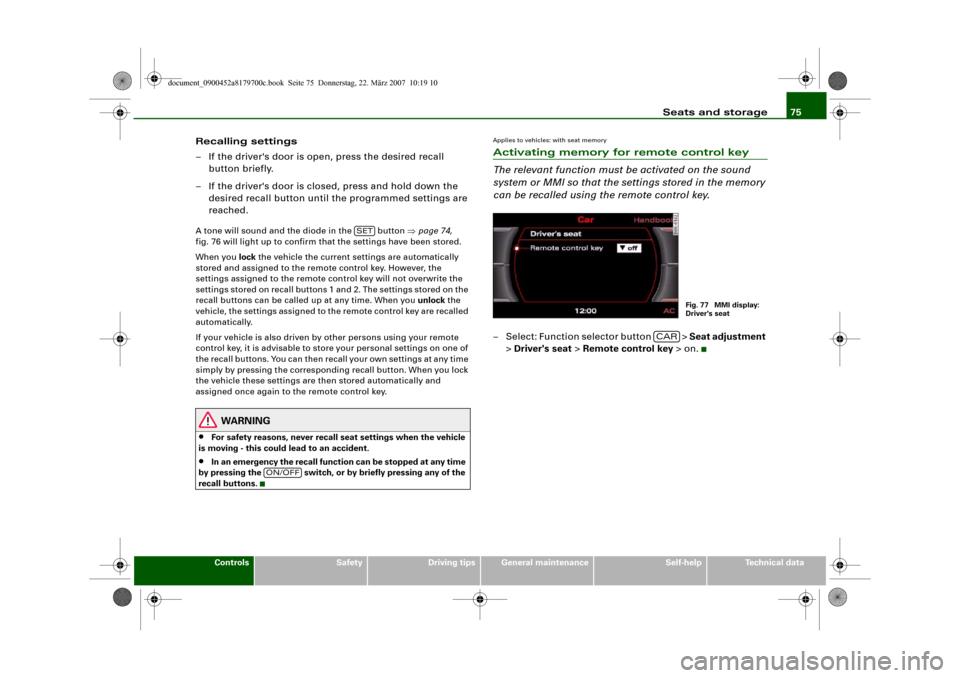
The relevant function must be activated on the sound
system or MMI so that the settings stored in the memory
can be recalled using the remote control key.– Select: Function selector button > Seat adjustment
> Driver's seat > Remote control key > on.
SET
ON/OFF
Fig. 77 MMI display:
Driver's seat
CAR
document_0900452a8179700c.book Seite 75 Donnerstag, 22. März 2007 10:19 10
Page 79 of 313
Seats and storage77
Controls
Safety
Driving tips
General maintenance
Self-help
Technical data
Raising head restraint
– Take hold of the sides of the head restraint with both
hands.
– Push the head restraint upwards as far as it will go.
Lowering head restraint
– Take hold of the sides of the head restraint.
– Press the button ⇒page 76, fig. 80 and push the head
restraint downwards.For best protection, the top of the head restraint should be at least
at eye level, or higher.
When the rear seats are not occupied the head restraints should be
moved to the lowest position so that they do not obstruct the
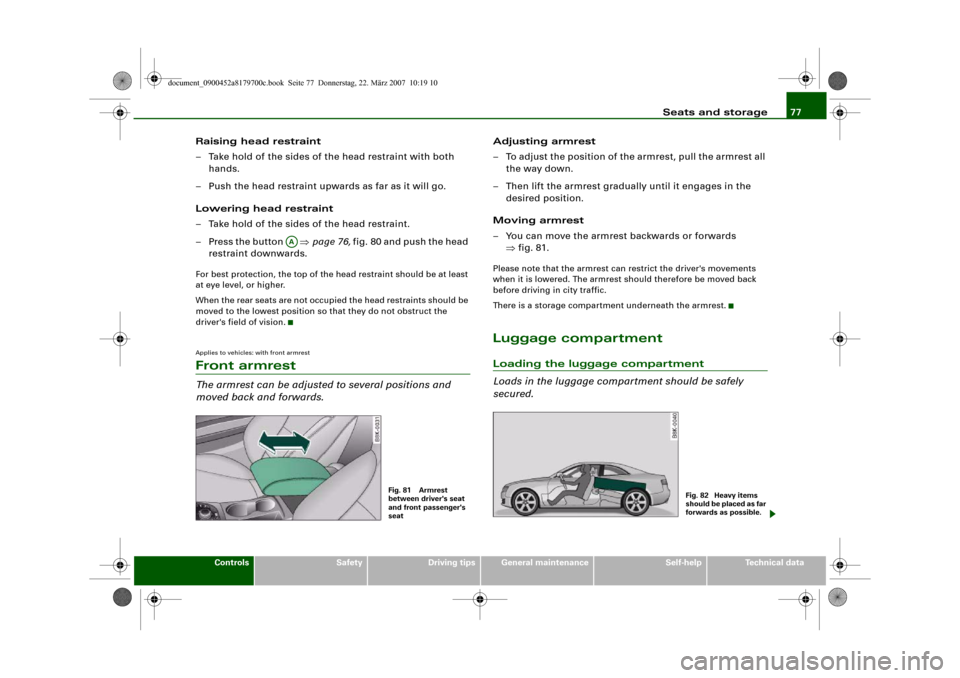
driver's field of vision.Applies to vehicles: with front armrestFront armrestThe armrest can be adjusted to several positions and
moved back and forwards.
Adjusting armrest
– To adjust the position of the armrest, pull the armrest all
the way down.
– Then lift the armrest gradually until it engages in the
desired position.
Moving armrest
– You can move the armrest backwards or forwards
⇒fig. 81.Please note that the armrest can restrict the driver's movements
when it is lowered. The armrest should therefore be moved back
before driving in city traffic.
There is a storage compartment underneath the armrest.Luggage compartmentLoading the luggage compartment
Loads in the luggage compartment should be safely
secured.
AA
Fig. 81 Armrest
between driver's seat
and front passenger's
seat
Fig. 82 Heavy items
s h o u l d b e p l a c e d a s fa r
forwards as possible.
document_0900452a8179700c.book Seite 77 Donnerstag, 22. März 2007 10:19 10
Page 81 of 313
Seats and storage79
Controls
Safety
Driving tips
General maintenance
Self-help
Technical data
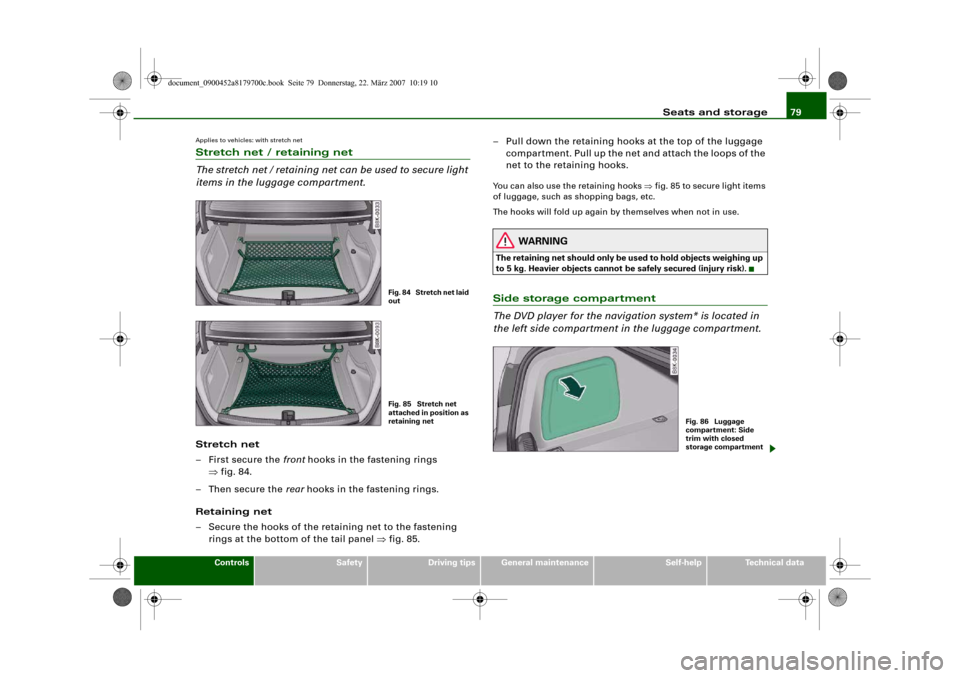
Applies to vehicles: with stretch netStretch net / retaining net
The stretch net / retaining net can be used to secure light
items in the luggage compartment.Stretch net
– First secure the front hooks in the fastening rings
⇒fig. 84.
–Then secure the rear hooks in the fastening rings.
Retaining net
– Secure the hooks of the retaining net to the fastening
rings at the bottom of the tail panel ⇒fig. 85.– Pull down the retaining hooks at the top of the luggage
compartment. Pull up the net and attach the loops of the
net to the retaining hooks.
You can also use the retaining hooks ⇒fig. 85 to secure light items
of luggage, such as shopping bags, etc.
The hooks will fold up again by themselves when not in use.
WARNING
The retaining net should only be used to hold objects weighing up
to 5 kg. Heavier objects cannot be safely secured (injury risk).Side storage compartment
The DVD player for the navigation system* is located in
the left side compartment in the luggage compartment.
Fig. 84 Stretch net laid
outFig. 85 Stretch net
attached in position as
retaining net
Fig. 86 Luggage
compartment: Side
trim with closed
storage compartment
document_0900452a8179700c.book Seite 79 Donnerstag, 22. März 2007 10:19 10
Page 83 of 313
Seats and storage81
Controls
Safety
Driving tips
General maintenance
Self-help
Technical data
Returning backrest to an upright position
– Push the backrest up again until it engages securely
⇒. The red marking on the safety knob ⇒page 80,
fig. 89 should no longer be visible when the backrest is
properly secured.When the backrest is properly engaged in its upright position, it can
be locked and unlocked with the key. This prevents unauthorised
access to the luggage compartment from inside the vehicle.
The luggage compartment can only be extended from the boot
when the backrest has not been locked with the key.
WARNING
The rear backrest must always be securely latched so that objects
stored in the luggage compartment will not fly forward during
sudden braking.
Caution
When returning the backrest to an upright position, make sure that
the seat belts for the rear seats are in their guides so that they
cannot be caught up and damaged in the catches for the backrest.
It is also important to remove any other objects from the rear seats
to avoid damaging the backrest when folding it forwards.
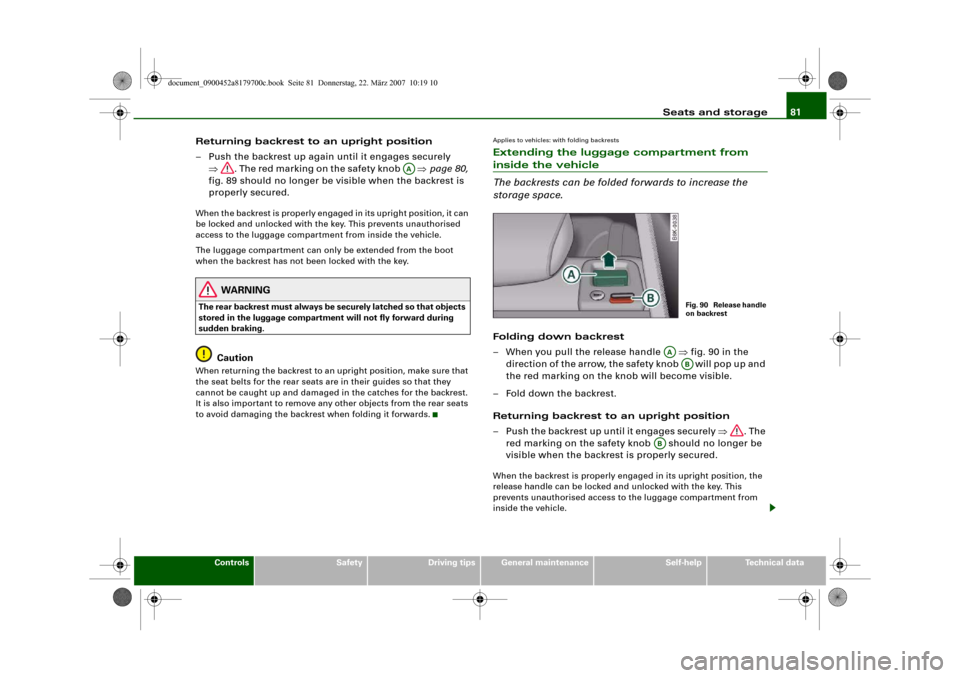
Applies to vehicles: with folding backrestsExtending the luggage compartment from inside the vehicle
The backrests can be folded forwards to increase the
storage space.Folding down backrest
– When you pull the release handle ⇒fig. 90 in the
direction of the arrow, the safety knob will pop up and
the red marking on the knob will become visible.
– Fold down the backrest.
Returning backrest to an upright position
– Push the backrest up until it engages securely ⇒. The
red marking on the safety knob should no longer be
visible when the backrest is properly secured.When the backrest is properly engaged in its upright position, the
release handle can be locked and unlocked with the key. This
prevents unauthorised access to the luggage compartment from
inside the vehicle.
AA
Fig. 90 Release handle
on backrest
AA
AB
AB
document_0900452a8179700c.book Seite 81 Donnerstag, 22. März 2007 10:19 10