key AUDI A5 CABRIOLET 2010 Workshop Manual
[x] Cancel search | Manufacturer: AUDI, Model Year: 2010, Model line: A5 CABRIOLET, Model: AUDI A5 CABRIOLET 2010Pages: 364, PDF Size: 86.51 MB
Page 166 of 364

1111...._ __ P_a _ r_ k_ a_ s_ s_is _ t ____________________________________________________ _
Please note that low objects already signa led by a warning can disap
p ear from the system 's de te ct io n ra nge and will not co nti nu e to be
signaled .
If the distance to an obstacle remains the same, the vo lume of the
dis tance war ning is g radually reduce d after abou t 4 seconds.
Approaching another obstacle wi ll result in the distance warning
so unding at t he normal vo lume aga in.
Malfunctions in the system
If a wa rning tone is aud ible fo r abo ut five seconds when you turn on
the ignition, there is a ma lfunction in the system. Have the prob lem
c o rrected by yo ur autho riz e d Aud i de aler.
Keep the se nsors i n the rear bumper clean and free from ice so t hat
t he a cous tic p ark ass is t sys tem can func tion prope rly.
& WARNING
• Sen sor s have dead space s in whi ch objects cannot be dete cted.
Be especiall y alert for small children and animals , since they are
not alway s detected by the sen sors .
• The Acoustic Par king Sy stem is not a substitute for the dr iver 's
own caution and alertne ss. Ul timate re spon sibility always
rema ins with the drive r dur ing pa rking and similar maneu ve rs .
Always watch where you ar e driving .
• You should alwa ys adjust the volume and frequency of the
c hime s so that you can easily hear the a cou stic distan ce warning
e v en if the radio is playing, the air -cond itioner blower is on High
or there i s a high l evel of outside noi se .
- Check the setting s whenever anyone else ha s driven the
vehi cle b efore you .
0 Note
• Remembe r that low obstacles fo r which a war ning has already
been issued may "dive" below the system's sensing zone if the vehicle
is be ing b acked up closer . In this case, the warn ing so und sh utting off does
not ind
icate that you have cleared the obstacle. Instead, impact
is imm inen t.
• Objects such as tra iler hitches, chains, narrow posts or fences
c overed by a th in laye r of pa int may no t always be detected by the
system . They can still damage your vehicle without warning .
[ i ] Tips
Keep the sensors in the rear bumper clean and free of snow and ice so
that the acoustic parking assist system can function properly .•
Ap plies to veh icles : w it h park ing s yst em (rea r)
Adjusting the chimes
T he volume and the pitch (frequency) of the chimes can
be adjusted in the radio or in the fv1fv1I *.
Rear volume adjustment
-Select: [CAR]> Parking system .
-Select Rear volume if you wa nt to cha nge the volume of
the rear s igna l generator .
Rear frequency adjustment
-Sele ct: [CAR)> Parking system.
- Select Rear frequency when you want to change the
frequency of t he rear audible signa l generator.
When ad justing the vo lume and frequency, the new sett ing will
sound for approx. 2 seconds from each aud ible signal generator. The
volume and frequency settings a re automat ica lly stored and assigned
to the master key with remote control. .,,,
Page 173 of 364

Park assist -
----------------
[I) Tips
• The warn ing tones can also be adjusted directly by the visual
display or the picture from the rearview camera. Simply press the
Settings control button.
• Changed settings are activated when parking system is switched
on again.
• Th e settings are automatically stored and assigned to the remote
control key .•
Ap plies to vehicl es: wit h pa rk ing System (re ar) and rea r-v iew ca mera
Acoustic parking system error message
If a warning tone is aud ible for about five seconds when you turn on
the ignition, there is a malfunction in the system. Have the problem
corrected by yo ur authorized Audi dealer .
Keep the sensors in the rear bumper clean and free from ice so that
the acoustic park assist system can function properly. •
Controls and equip
ment Safety first
Vehicle care Technical data
Page 175 of 364

HomeLink® -_______________ __.
Applies to veh icles : w ith Home link® un iversa l remote cont rol
Programming the Homelink ® transmitter
The transmitter is programmed in two phases . For rolling
code transmitters, a third phase is also necessary .
Fig. 175 Overhead
console: Homelink ®
k eypa d
Fig. 176 Radiator
grille
Phase 1: programming the overhead keypad
1. Make sure your vehicle is within operating range of the
remote controlled garage door opener .
2. Set the parking brake=>
& in "General information" on
page 172 .
3. Turn the ignition on . Do not start the engine!
Con tro ls a nd e quip
m en t Vehicle
OP-eration
4. Press and hold the two outside Homelink ® buttons G)and
@ for approximately 20 seconds until indicator light@
=> fig. 175 begins to flash . Then release both buttons. Do
not hold the buttons for longer than
30 seconds .
- This procedure only needs to be performed
once. It erases
the factory-set default codes and does not have to be
repeated to program additional remote controls.
5. Press and hold the Homelink ® button G), @ or@ until
the indicator light @starts flashing
slowly . Release the
button.
- The system will remain in programming mode for 5
minutes. Co to the front of the vehicle and proceed with
phase
2.
Phase 2: at the radiator grille
6. Point the original remote control to the m iddle of the
radiator grille of your vehicle=> fig.
176.
7. Hold the original remote control at a distance between O
S in. (0-13 cm) (use the shortest distance possible) .
8 . Press and hold the activation button on the remote
control.
- May be different in Canada . If so, press and re-press
(cycle) the activation button on your remote control every
two seconds.
9. The emergency flashers will flash
three times (after about
15-60 seconds) when the programming is successful.
Release the button on the remote control.
- To program more devices , repeat steps 4 to 9.
Vehicle care Do-it-yourselt service iTechnical data
Page 176 of 364

IIIIL----.:H....:..: o:....:m..:..:.. e= L:.:.i :....: n :.:.k :....: ® __________________________________________________ _
10. Press and hold the trained Homelink® button and
o bserve the in dicator light©==>
page 173, fig. 175.
- If the indicator light is solid/continuous, programming is
complete and your device should activate when you press
and release the trained Homelink ® button .
- If the indicator light blinks rapidly for 2 seconds and is
then a solid/continuous light , proceed with phase 3 to
program a rolling code device .
Phase 3: rolling code progr amming
- A second person on a ladder who can safely reach the
garage door opener motor is recommended.
11. Locate the "learn" button on the garage door opener
motor (refer to the operating instructions for the opener,
as the location of this button may vary by manufacturer) .
12. Press and release the learn button on the garage door opener motor.
- Note: once the button is pressed, the re are 30 seconds in
which to initiate the next s tep .
13. On the Homelink ® keyJ)ad inside the vehicle, firmly press
and hold the Homelink ® button previously programmed
in phases 1 and 2 for two seconds and release. Repeat this
sequence
twice .
-Some vehicles may require the press/hold/release
sequence up to three times to complete the training
process .
-Homelink ® should now activate your rolling code
equipped device .
If the 5 minute time limit is exceeded, the emergency fl ash ers will
fla sh one time
to ind icate that the process has been terminated. In
this case, repeat steps 4 th rough 9 .
If the emergency flashers do not flash
three times (after about 15-
60 seconds), programming was not s uccessful. In th is case, repeat
steps 4 through 9.
Remote control un its for garage doo r openers in Canada are se t to
stop transmitting radio frequency signals after two seconds. This
time may not be sufficient for the Homelink ® system to learn the
radio frequency signal. Perform all other steps as descr ibed above .•
App lies to veh icles: with H omelink ® un iversa l re mote cont ro l
Operating the Homelink ® transmitter
The Homelink ® transmitter works in the same manner as
the original hand held remote control that came with the
system .
0
•
0
~
Fig . 1 77 Ove rhead
co nso le: H om elin k®
k ey pad
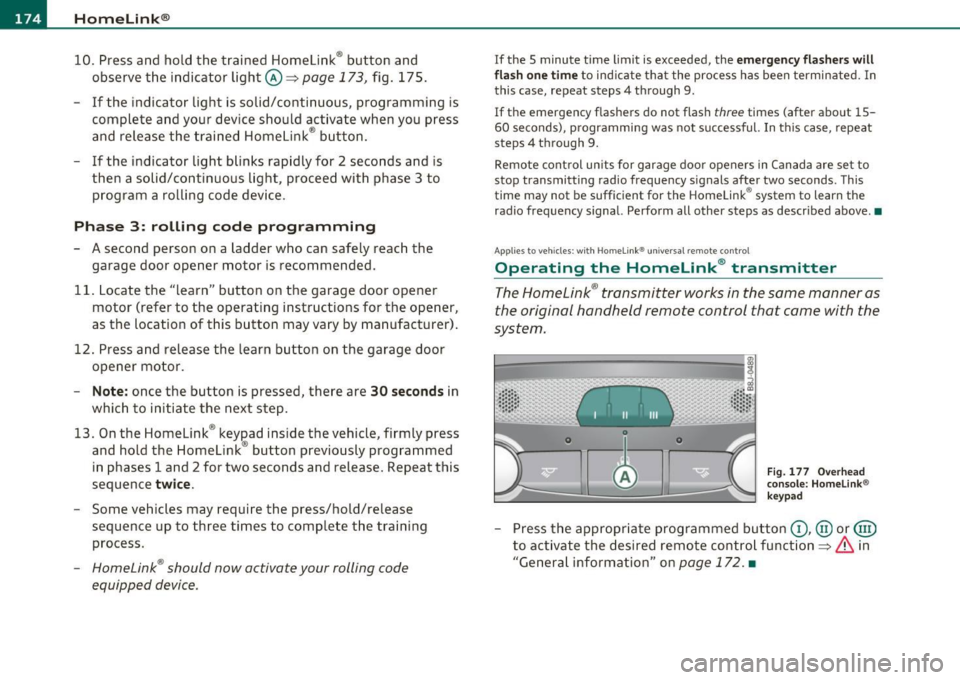
- Press the app ropriate programmed bu tton G) , @ or@
to activate the desired remo te cont rol function ==>
& in
"General information" on
page 172. •
Page 177 of 364

HomeLink® -
----------------
Applies to vehicles : w ith Home link® un iversa l remote cont rol
Reprogramming a single button
A HomeLink ® button con be reprogrammed individually
without affecting the other button allocations .
Programming the overhead keypad
Press the appropriate Homelink® button until the indi
cator light begins flashing slowly.
At the radiator grille
1. Point the original remote control to the middle of the
radiator grille of your vehicle~
page 173, fig. 176.
2. Hold the original r emote control at a distance between O
S in . (0 -13 cm) (use the shortest distance poss ible) .
3 . Press and hold the activation button on the remote
control.
4. The emergency flashers will flash three times (after about
15-60 seconds) when the programming is successful.
Now release the button on the remote control.
- If the device utilizes a rolling code, please follow phase 3
of ~
page 173 , "Programming the Homelink® trans
mitter" for rolling code programming.
This procedure will cause the existing programming on the
Homelink ® button to be erased! •
Controls and equip
ment Safety first
App
lies to vehicles : w ith Home link® un iversa l remote cont rol
Erasing the programming of the
Homelink ® transmitter
When you erase the programming, the programming on
all three of the transmitter channels with be lost!
- Perform steps 1 to 4 as described on ::::;, page 173, "Phase
1: programming the overhead keypad" .
When completed, the Homelink® system will be in the programming
mode and is then ready to learn the codes for remote controlled
devices.
[I] Tips
• Programm ed buttons canno t be e ras ed ind iv idually.
• For security reasons you are adv ised to erase the programming of
the Horne Link ® system befo re you sell your vehicle. •
Vehicle care Technical data
Page 196 of 364

___ s_a_ f_ e_ t_y _ b_e _l_t _s ___________________________________________ _
& WARNING (continued)
• Never let any person ride with their feet on the instrument
panel or sticking out the window or on the seat .
• Never remove a safety belt while the vehicle is moving . Doing
so will increase your risk of being injured or killed .
• Never wear belt s twisted.
• Never wear belts over rig id or breakable objects in or on your
clothing, such as eye glasses, pen s, keys, etc ., a s these may cause
injury.
• Never allow safety belt s to become damaged by being caught
in door or seat hardware .
• Do not wear the shoulder part of the belt under your arm or
otherwise out of position.
• Several layers of h eavy clothing may interfere with correct
positioning of belts and reduce the overall effectiveness of the
sy stem.
• Always keep belt buckles free of anything that may prevent the
bu ckle from latching securely.
• Never u se comfort clips or devices that create slack in the
shoulder belt. However, special clips may be required for the
proper use of some child restraint systems.
• Torn or frayed safety belts can tear , and damaged belt hard
ware can break in an accident. Inspect belts regularly . If webbing,
bindings, buckles , or retractors are damaged, hav e belts replaced
by an authorized Audi dealer or qualified workshop.
• Safety be lts that have been worn and loaded in an accident
must be repla ced with the correct replacement safety belt by an
authorized Audi dealer. Replacement may be necessary even if
damage cannot be clearly seen. Anchorages that were loaded
must also be inspected.
• Never remove, modify , disas semble, or try to repair the safety
belts yourself .
& WARNING (co ntinued )
• Always keep the belts clean. Dirty belts may not work properly
and can impair the function of the inertia reel ::::>
page 272,
"Safety belts". •
Safety belts
Belt positioner
Th e driver and fr ont passenger se ats are e qui pp ed with
b elt pos itione rs.
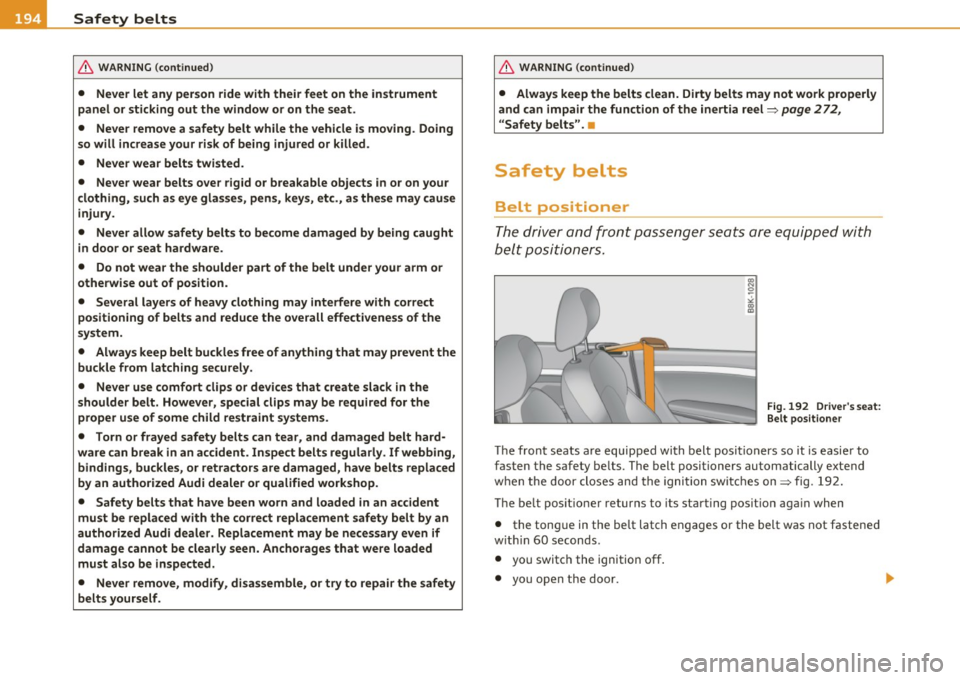
Fig. 192 Driver 's seat:
Be lt positioner
Th e fron t seats a re equipped with belt posi tioners so it is easie r to
fasten the safety be lts. The belt posit ioners automatically extend
w hen the door closes and the igni tion swi tch es on=> fig. 192.
T he be lt pos it io ner returns to its starting posit ion aga in when
• the tong ue in the be lt latch engages or the belt was not fastene d
w it hi n 60 s eco nds .
• you switc h the ignition off .
• you open the door.
Page 198 of 364

.. Safety belts PJWI _______________ _
& WARNING (continued)
• Always lock the convertible locking retractor when you are
securing a child safety seat in the vehicle=>
page 234. •
Safety belt position
Correct belt position is the key to getting maximum
protection from safety belts.
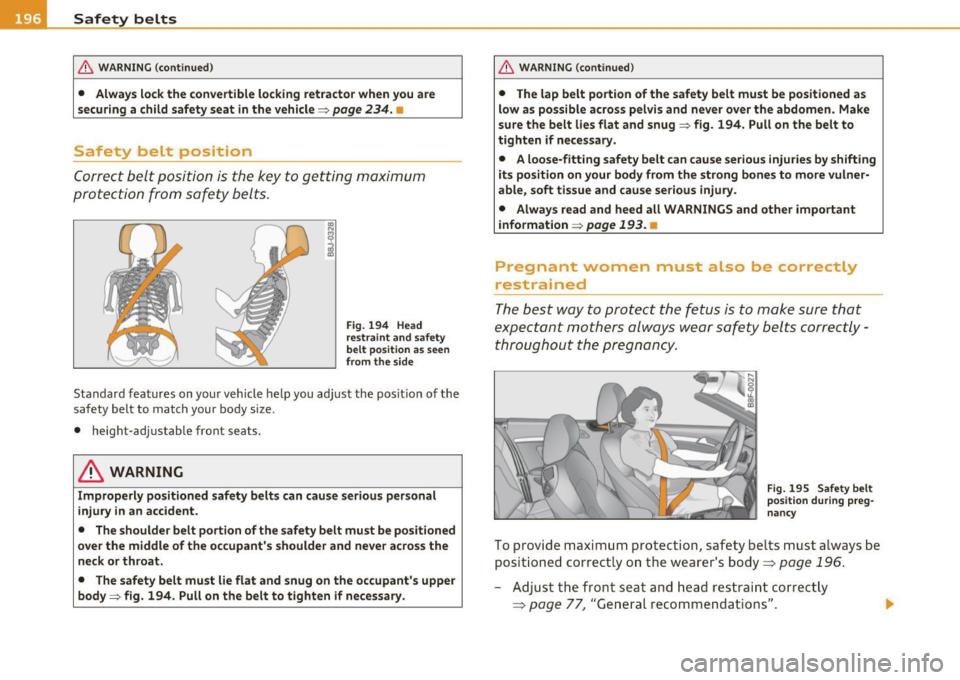
Fig. 194 Head
restraint and safety
belt position as seen
from the side
Standard features on your vehicle help you adjust the position of the
safety belt to match your body size.
• height-adjustable front seats.
& WARNING
Improperly positioned safety belts can cause serious personal
injury in an accident.
• The shoulder belt portion of the safety belt must be positioned
over the middle of the occupant's shoulder and never across the
neck or throat.
• The safety belt must lie flat and snug on the occupant's upper
body=> fig. 194. Pull on the belt to tighten if necessary.
& WARNING (continued)
• The lap belt portion of the safety belt must be positioned as
low as possible across pelvis and never over the abdomen. Make
sure the belt lies flat and snug => fig. 194. Pull on the belt to
tighten if necessary.
• A loose-fitting safety belt can cause serious injuries by shifting
its position on your body from the strong bones to more vulner
able, soft tissue and cause serious injury.
• Always read and heed all WARNINGS and other important
information =>
page 193. •
Pregnant women must also be correctly
restrained
The best way to protect the fetus is to make sure that
expectant mothers always wear safety belts correctly -
throughout the pregnancy.
Fig. 195 Safety belt
position during preg
nancy
To provide maximum protection, safety belts must always be
positioned correctly on the wearer's body=>
page 196.
-Adjust the front seat and head restraint correctly
=>
page 77, "General recommendations".
Page 250 of 364

Intelligent technology
'-------------------------------------------------
vi dual components. It regulates consumption, so that more electrical
energy is not being used than is being generated and ensures an
optimal state of charge for the battery .
[I] Tips
• But even energy management cannot negate the limits of physics.
Consider that the power and life of a battery are limited.
• If starting ability is threatened, you are informed by a warning
~ page 249, "Driver notification in the instrument cluster display" .•
What you should know
The highest priority is given to maintaining starting capa
bility.
Th e battery is severe ly taxed in short-distance driving, in city traffic
and during the cold time of year. Abundant electrical energy is
required, but only a little is generated.
It is also critical if the engine
is not running and electrical components are turned on. In this
instance energy is being consumed but none is being generated.
It is in prec ise ly these sit uations that you will notice energy manage
ment actively regulating the distribution of energy.
Vehicle stands for an extended period
If you do not drive your vehicle over a period of several days or weeks,
electrical components are gradually cut back or sw itched off. This
reduces energy consumption and maintains starting capability over a
longer period.
Take into consideration that when you unlock your vehicle, some
convenience functions, such as the remo te key or power seat adjust
ment, may not be available. The convenience functions will be avail
able again when you turn on the ignition and start the engine.
W ith the engine turned off
If you listen to the radio, for example, with the engine turned off or
use other MMI functions, the battery is being discharged .
If starting capability is jeopardized due to energy consumption, the
following warning appears in the MMI display:
Please start engine, otherwise system will switch off in
3 minutes.
Th e warn ing indicates that the system will be turned off automati
cally after 3 m inutes. If you wish to continue using the functions, you
have to start the engine.
With the engine running
Although electrica l energy is generated when the vehicle is being
driven, the battery can become discharged. This happens most ly
when little energy is being generated and a great deal consumed and
the battery's state of charge is not optimal.
T o br ing the ene rgy balance back into equilibrium, consumers which
require especially large amounts of energy are temporarily cut back
or switched off. Heating systems in particular require a great deal of
energy .
If you notice, for example, that the heated seats* or the
heated rear window are not heating, they have been temporarily cut
back or switched off. These systems will be ava ilable again as soon as
the energy ba lance has been restored.
You will also notice that engine idle speed has been increased
slightly. This is normal and not a cause for concern. By increasing
eng ine id le speed the additional energy required is generated and the
battery is charged. •
Page 275 of 364

Cleaning and protection Ill
---------------=---------=----
& WARNING
Be aware: The engine compartment of any motor vehicle is a
potentially hazardous area.
• Before working in the engine compartment, be sure to read the
information =:>
page 272.
• Before reaching into the front plenum panel, always remove
the ignition key. Otherwise, the windshield wiper system could unintentionally be switched on, possibly causing personal injury
from the moving wiper linkage.
• Never reach into the area around or touch the radiator fan. The
auxiliary fan is temperature controlled and can switch on suddenly
- even when the ignition is off.
• Do not wash, wax or dry the engine with the engine running.
Moving or hot parts could injure you.
• Do not clean the underside of the chassis, fenders, wheel
covers, or other hard to reach parts without protecting your hands
and arms. You may cut yourself on sharp-edged metal parts.
• Always read and heed all WARNINGS and other information
=:>
page 260. •
Safety first Vehicle care Technical data
Page 282 of 364

-Checking and filling
-------=------=---------------------------------------------------
Closing the engine hood
-Pull the hood down until the pressure from the struts is
reduced.
- Let the hood
drop down and latch in place . Do not try to
push it shut;
it may fail to engage=> &.
& WARNING
A hood that is not completely latched could fly up and block your
view while driving.
• When you close the engine hood, check it to make sure the
safety catch has properly engaged. The hood should be flush with
the surrounding vehicle body parts.
• If you notice while driving that the hood is not secured prop
erly, stop at once and close it. •
Working in the engine compartment
Be especially careful whenever you work in the engine
compartment.
Whenever you must perform any work in the engine compartment,
for example checking and filling different fluids, there is a risk of
injury, burns and accidents. To prevent personal injury always
observe the following WARNINGS. The engine compartment of any
vehicle is a hazardous area
=> & .
& WARNING
To help avoid injury, before you check anything under the hood :
• Turn off the engine.
• Remove the ignition key.
• Apply the parking brake.
& WARNING (continued)
• Move selector lever of automatic transmission to "P" (Park).
• Always let the engine cool down. Hot components will burn
skin on contact.
• To reduce the risk of being burned, never open the hood if you
see or hear steam or coolant escaping from the engine compart
ment. Wait until no steam or coolant can be seen or heard before
carefully opening the hood.
• Keep children away from the engine compartment.
• Never spill fluids on hot engine components. They can cause a
fire.
• Never touch the radiator fan. The auxiliary electric fan is
temperature controlled and can switch on suddenly.
• Never open the coolant reservoir cap when the engine is still
warm. The coolant system is pressurized and hot coolant could
spray out.
• Protect your face, hands and arm from steam or hot engine
coolant by placing a thick rag over the cap when you open the
coolant reservoir.
• If work on the fuel system or the electrical system is necessary:
-Always disconnect the battery.
- Never smoke or work near heaters or open flames. Fluids in
the engine compartment could start a fire.
- Keep an approved fire extinguisher immediately available.
• To avoid electrical shock and personal injury while the engine is
running or being started, never touch: -Ignition cables
- Other components of the high voltage electronic ignition system.
• If you must perform a check or repair with the engine running: -First, fully apply the parking brake, move selector lever of
automatic transmission to "P" (Park). ..,