ignition AUDI A5 COUPE 2010 User Guide
[x] Cancel search | Manufacturer: AUDI, Model Year: 2010, Model line: A5 COUPE, Model: AUDI A5 COUPE 2010Pages: 360, PDF Size: 84.39 MB
Page 24 of 360
Driver information display
Service due
When the due date for service is reached, the message Service due
! appears in the instrument cluster immediately after you turn on
the ignition. Additionally, a warning tone sounds. After about 5
seconds the display switches back to normal.
Calling up the service schedules
If or when an oil change or inspection is due , can be shown in the
radio or MMI* display by selecting the service interval display in the
car menu. Select
[CAR]> Service interval display=> page 21, fig. 15.
Resetting the service interval display
Your authorized Audi dealer will reset the corresponding service
schedule after performing the appropriate service on your vehicle.
You also have the possibility to reset the oil change schedule after
having performed an oil change according to Audi specifications .
Select
(CAR]> Service interval display> Re set oil change interval.
0 Note
If you disconnect the battery terminals, no calculations can be
made for the service interva l display during this time and no service
reminder will appear. Remember that observing the proper service
interva ls is vita lly important to extending the life of your vehicle,
particularly the engine, and maintaining its value. Even if the
mileage driven is low, the maximum period of one year from one
service to the next must not be exceeded.
[ i ) Tips
• Do not reset the display between oil changes, o therwise the
display will be incorrect .
• The information in the Service Reminder remains stored
even
when the vehicle battery is disconnected. •
On-Board Diagnostic system (08D)
Malfunction Indicator Lamp (MIL)
The Malfunction Indicator Lamp (MIU in the instrument cluster
=> page 12, fig. 7 is part of the On-Board Diagnostic (OBD II) system.
The warning/ind icator light illuminates when the ignition is
switched on and goes out after the engine starts and the id le has
stabi lized. This indicates that the MIL is working proper ly .
If the light does not go out after the engine is started, or illuminates
while you are driving, a ma lfunction may exist in the engine system.
If the light illuminates, the catalytic converter could be damaged.
Continue driving
with reduced power (avoiding sustained high
speeds and/or rapid accelerations) and have the condition
corrected. Contact your authorized Audi dealer.
If the light illuminates, the electronic speed limiter may also be
malfunctioning. For more information=>
page 23, "Electronic speed
limiter".
An improperly closed fuel filler cap may also cause the MIL light to
illuminate
=> page 267. •
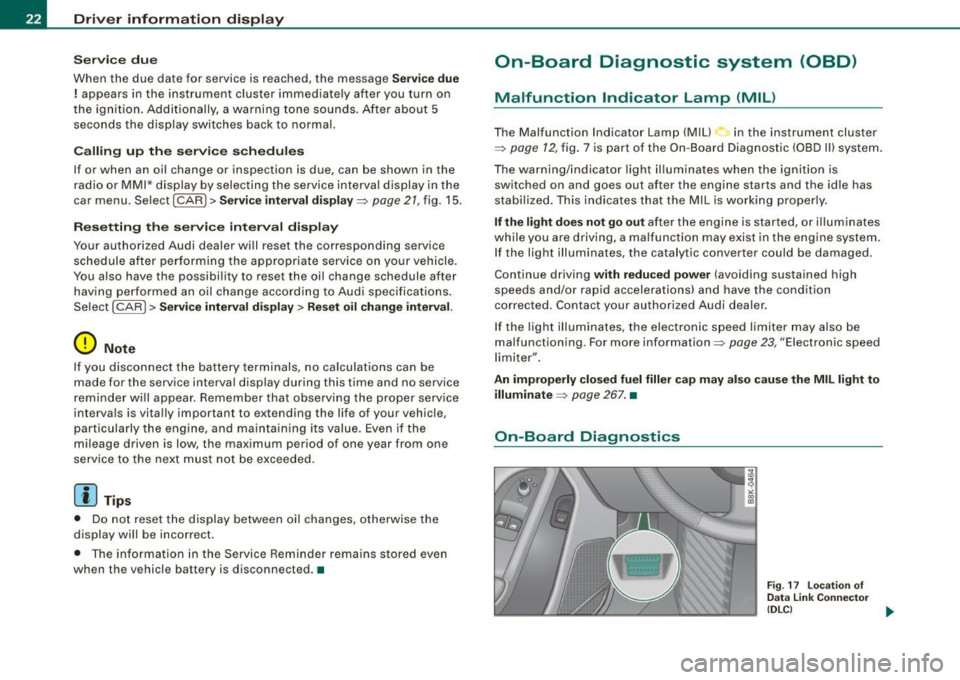
On-Board Diagnostics
Fig. 17 location of
Data Link Connector
(DLC)
ai,,,
Page 26 of 360
Driver information display
The following information is continuously evaluated by the trip
computer and can be disp layed sequentially in the instrument
cluster display:
Fuel range
The estimated cruising range in miles (km) appears in the display.
This tells you how far your vehicle will be able to trave l on the
current tank of fuel and with the same driving style. The display
changes in increments of 6 miles (10 km).
The cruising range is ca lculated based on the fuel consumption for
the last 18 miles (30 km). If you drive conservatively, the cruising
range will increase.
Average fuel mileage
The average fuel economy in MPG (1/100 km) since you last cleared
the memory appears in this display. You can use this display to
adjust your driving technique to achieve a desired mileage.
Current fuel mileage
The instantaneous fuel consumption in mi les per ga llon 0/100 km)
is shown in this display. You can use this display to adjust your
driving technique to achieve a desired mileage.
Fuel consumption is recalcu lated at intervals of 33 yards (30
meters). This display switches to gal lons/hour (liters/hour) when the
vehic le is not moving .
Average speed
The average speed in mph (km/h) since the last time the display was
reset appears in the display.
Elapsed time
The length of t ime that you have been driving since you last reset
the memory appears in this display.
Distance
The distance that has been covered since the last time the memory
was cleared appears in the display.
[ i ] Tips
• Fuel consumpt ions (average and current), range and speed are
displayed in metric units on Canadian models.
• All stored values will be lost if the vehicle battery is
disconnected. •
Memori es
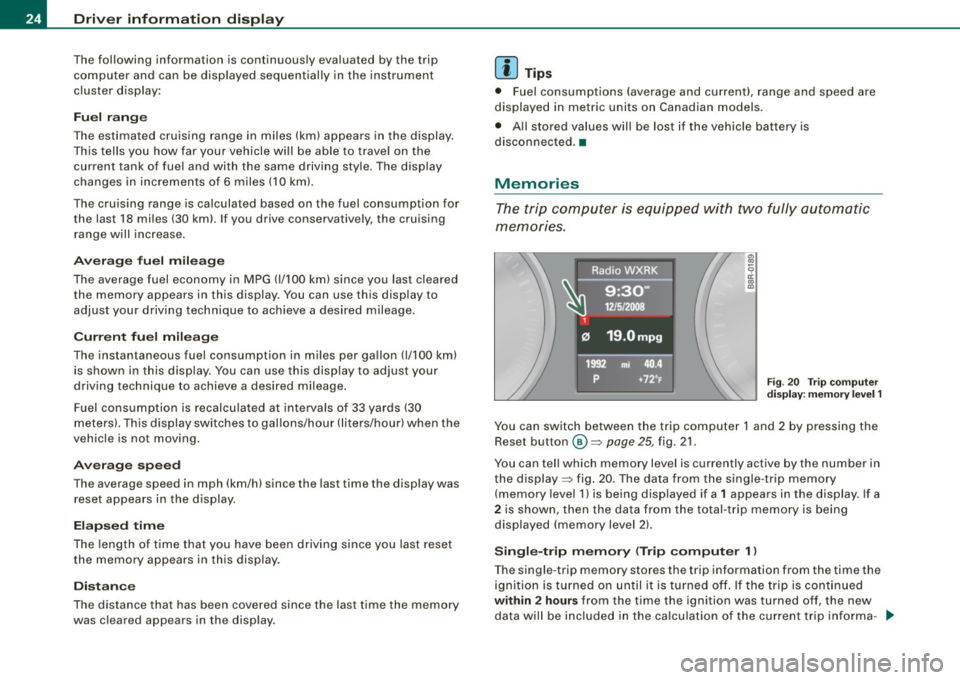
The trip computer is equipped with two fully automatic
memories.
Fig . 20 Trip computer
display: memory level 1
You can switch between the trip computer 1 and 2 by pressing the
Reset button
@ ~ page 25, fig . 21.
You can tell which memory level is currently active by the number in
the display ~ fig. 20. The data from the single -trip memory
(memory leve l 1) is being displayed if a
1 appears in the display. If a
2 is shown, then the data from the total-trip memory is being
displayed (memory level 2l.
Single-trip memory (Trip computer 1 l
The single -trip memory stores the trip information from the time the
ignition is turned on until it is turned off. If the trip is continued
within 2 hours from the time the ignition was turned off, the new
da ta will be included in the calculation of the current trip informa -_.,,
Page 27 of 360
tion. If the trip is interrupted for more than 2 hours the memory is
reset automatica lly.
Total-trip memory (Trip computer 2)
Unlike the single-trip memory, the total-tr ip memory is not reset
automatically. This permits you to evaluate your driving data for the
entire period between manual resets. •
Operation
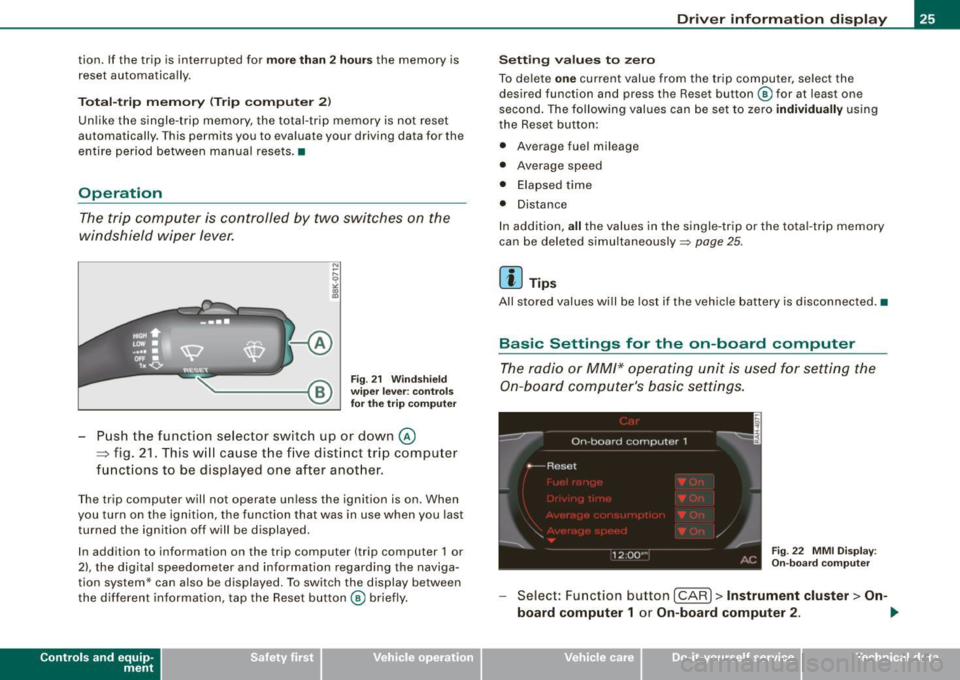
The trip computer is controlled by two switches on the
windshield wiper lever.
Fig. 21 Windshield
wiper lever: controls
for the trip computer
Push the function selector switch up or down@
~ fig. 21. This will cause the five distinct trip computer
functions to be displayed one after another.
The trip computer will not operate unless the ignition is on. When
you turn on the ignition, the function that was in use when you last
turned the ignition off will be displayed.
In addition to information on the trip computer (trip computer 1 or
2), the digital speedometer and information regarding the naviga
tion system* can also be displayed. To switch the display between
the different information, tap the Reset button@ briefly.
Con tro ls and eq uip
ment
Driver information display
Setting values to zero
To delete one current value from the trip computer, select the
desired function and press the Reset button @ for at least one
second . The following values can be set to zero
individually using
the Reset button:
• Average fuel mileage
• Average speed
• Elapsed time
• Distance
In addition,
all the values in the single-trip or the tota l-trip memory
can be deleted simultaneously::::,
page 25.
[ i ] Tips
All stored values will be lost if the vehicle battery is disconnected. •
Basic Settings for the on-board computer
The radio or MM/* operating unit is used for setting the
On-board computer's basic settings.
Fig. 22 MMI Display :
On-board computer
Select: Function button [CAR]> Instrument cluster > On -
board computer 1
or On-board computer 2 . 1iJ,,
Vehicle care I I irechnical data
Page 28 of 360
Driver informati on displ ay
The values in the single-trip or the total-trip memory can all be reset
to zero at the same time under
Re set in the menu.
In addition , you can determine what information from the trip
computer should be shown in the instrument cluster display. If one
of the pieces of driver informa tion is turned
O ff , that driver informa
tion wi ll not be shown in the display. The information will continue
to be calculated by the trip computer and can be turned back
O n at
any tim e.•
Speed warning system
Overview
The speed warning system helps you to keep your driving
speed below a set speed limit.
The speed warning system warns if the driver exceeds a previously stored maximum speed . A warning tone wi ll sound as soon as the
vehicle speed exceeds the set speed by about 3 mph (3 km/h) . At the
same time, a warning symbol appea rs in the display. The symbol's
appearance might be different in some models.
The speed warning system has
t w o wa rning thr esholds that func
tion independent ly o f each other and that have somewha t di fferent
purposes:
S p eed war ning 1
You can use speed warning 1 to set the maximum speed while you
are driving. This setting will remain in effect un til you turn off the
ignition, assuming that you have not changed or res et the setting.
The speed warning symbol
8 (USA mode ls)/ 8 (Canada models) in
the warning 1 disp lay appears when you exceed the maximum
speed. It goes out when the speed falls be low the stored maximum
speed . T
he speed warning symbol wi ll also go out if the speed
exceeds the
stored maximum speed by more than about 25 mph
(40 km/h) for at
least
10 seconds . The stored maximum speed is deleted.
Setting speed warning 1
::;> page 26 .
S peed w arning 2
Storing warning 2 is recommended if you always want to be
reminded of a certain speed, for example when you are traveling in
a country that has a general maximum speed limit, or if you do not
want to exceed a specified speed for winter tires.
T he speed warning 2 symbol,
8 , (USA models)/ 0 (Canada models)
appears in the display when you exceed the stored speed limit .
Un like warning 1, it wi ll not go out until the vehic le speed drops
b el ow the stored speed limi t.
Setting speed warning 2
::;> page 27.
[ i ] Tips
Even though your vehicle is equipped with a speed warning system,
you shou ld still watch the speedometer to make sure you are not
driving faster than the speed l im it . •
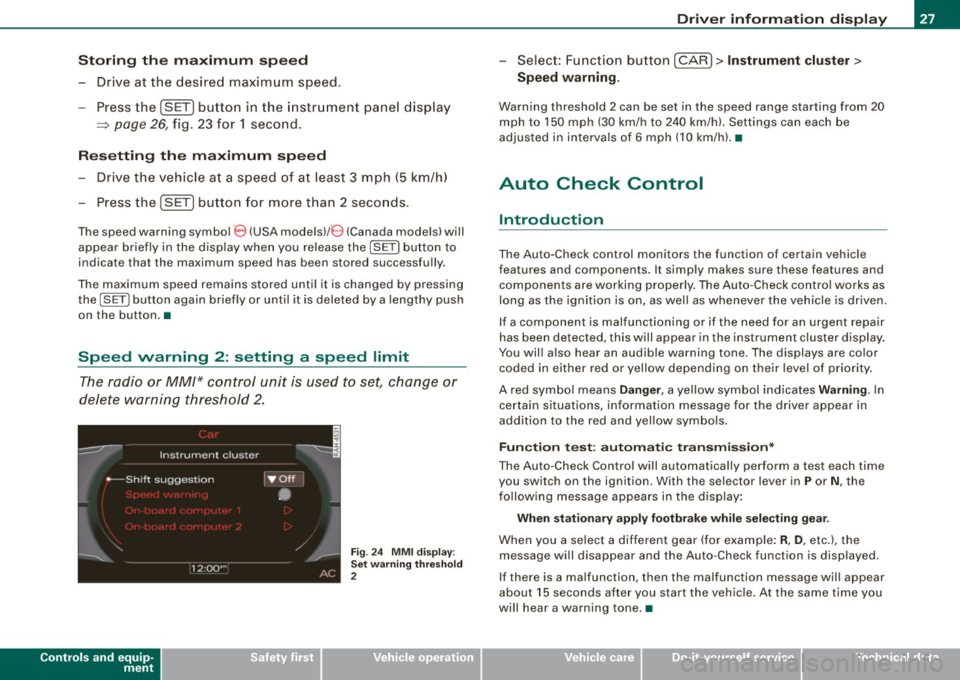
Speed warning 1: setting a speed limit
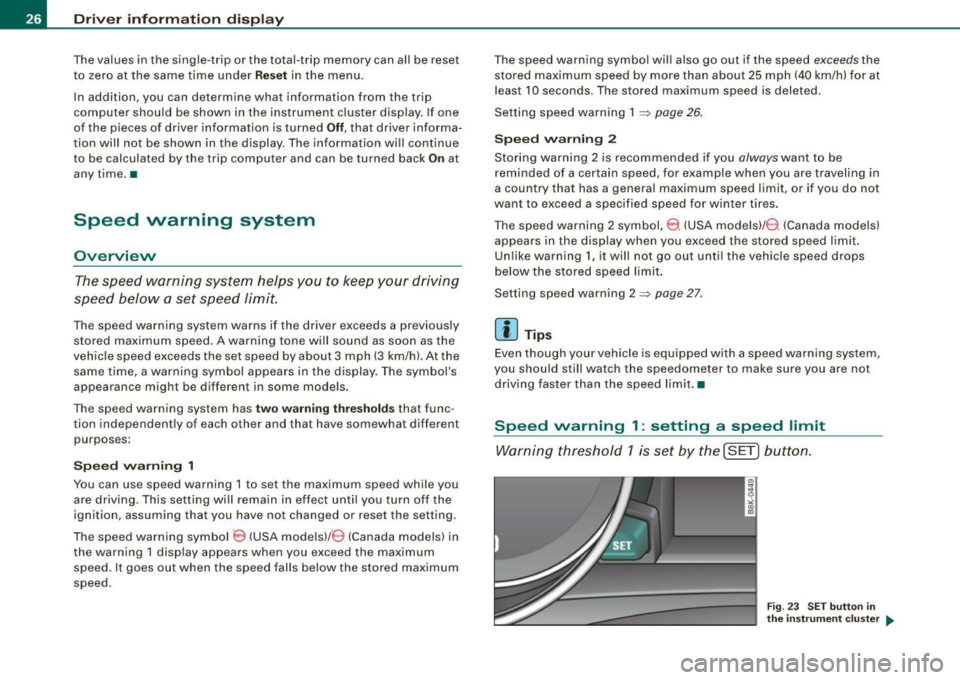
Warning threshold 1 is se t by the ( SET) button.
Fig. 23 S ET butt on in
th e inst ru me nt c lu ster ....
Page 29 of 360
Storing th e maximum sp ee d
- Drive at the desired max imum speed.
- Press the
(SET) button in the instrument pane l d isp lay
~ page 26, fig. 23 for 1 second.
R ese ttin g th e m ax imum sp eed
- Drive the vehicle a t a speed of at least 3 mph (5 km/h)
- Press the
(SETI button for more than 2 seconds.
The speed warning symbol 8 (USA modelsl/ e) (Canada mode ls) will
appear briefly in the display when you release the
[SE T) button to
indicate that the maximum speed has been stored successfully.
The maximum speed remains stored until it is changed by pressing
the
I S ET) button again briefly or unt il it is deleted by a lengthy push
on the button. •
Speed warning 2: setting a speed limit
The radio or MM/* control unit is used to set, change or
delete warning threshold 2.
Controls and equip
ment
Fig . 24 M MI d is pl ay :
Set warnin g thresho ld
2
Dr ive r informat ion di spl ay
- Select : Function button [ CAR l > In strument clu ster >
Spe ed warning.
Warning thresho ld 2 can be set in the speed range starting from 20
mph to 150 mph (30 km/h to 240 km/h). Settings can each be
adjusted in in tervals of 6 mph (10 km/h). •
Auto Check Control
Introduction
The Auto-Check control monitors the function of certain vehicle
features and components . It simply makes sure these features and
components are working properly. The Auto -Check contro l works as
long as the ignition is on, as well as whenever the vehic le is driven.
If a component is malfunctioning or if the need for an urgent repair
has been detected, this will appear in the instrument cluster d isplay .
You will also hear an audible warning tone . The displays are color
coded in either red or yellow depending on their level of priority.
A red symbo l means
D ang er, a yellow symbol ind icates W arning . In
certain situations, information message for the driver appear in
addition to the red and yel low symbo ls.
Fun ctio n t est: a uto matic t ransm iss ion *
The Auto -Check Control will automatical ly perform a test each time
you switch on the ignition . With the selector lever in
P or N , the
fo llowing message appears in the display :
When statio nar y a ppl y fo otb rake whil e se lecting g ear.
When you a se lect a different gear (for example: R , D , etc.), the
message will disappear and the Auto-Check function is displayed.
If there is a ma lfunction, th en th e malfunction message will appear
about 15 seconds after you start the vehic le. At the same t ime you
wi ll hear a warning tone. •
I • •
Page 31 of 360
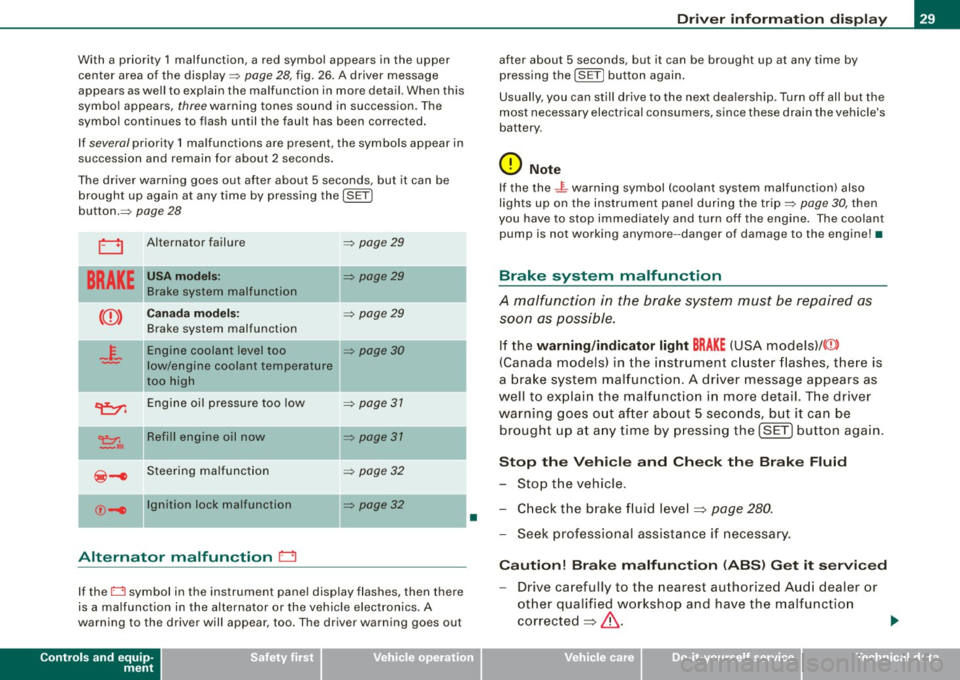
With a priority 1 malfunction, a red symbol appears in the upper
center area of the display=:>
page 28, fig. 26. A driver message
appears as well to explain the ma lfunction in more detail. When this
symbo l appears,
three warning tones sound in succession. The
symbol continues to flash until the fault has been corrected.
If
several priority 1 malfunctions are present, the symbols appear in
succession and remain for about 2 seconds .
T he driver warning goes out after about 5 seconds, but it can be
brought up again at any time by pressing the
I SE T]
button.=:>
page 28
LJ Alternator failure =:> page 29
BRAKE
USA model s: =:> page 29
Brake system malfunctio n
--
Ca nad a mod els: =:> page 29
Brake system malfunction
- F-Engine coolant level too =:> page 30
-low/engine coolant temperature
too high
~ Engine oil pressure too low =:> page 31
~,. Refill engin e oil now =:> page 31
~-e Steering ma lfunction =:> page 32
--
©-e Ignition lock malfunction
=:> page 32
Alternator malfunction 0
If the O symbol in the instrument pane l disp lay flashes, then there
is a malfunction in the alternator or the vehicle electronics. A
warning to the driver will appear, too . The driver warning goes out
Controls and equip
ment
•
Dr ive r informat ion di spl ay
after about 5 seconds, but it can be brought up at any time by
pressing the
ISETj button again .
Usually, you can still drive to the next dea lership . Turn off all but the
most necessary electrical consumers, since these drain the vehicle's
battery .
0 Note
If the the .JL warning symbol (coolant system ma lfunction) also
lights up on the instrument pane l during the trip=:>
page 30, then
you have to stop immediately and turn off the engine . The coolan t
pump is not working anymore --danger of damage to the engine! •
Brake system malfunction
A malfunction in the brake system must be repaired as
soon as possible.
If the warning /indi cator light BRAKE (USA models)/ (©)
(Canada models) in the i nstrument cluster flashes, there is
a brake sys tem mal funct ion . A driver message appears as
well to explain the malfunction i n more detail. T he driver
warning goes o ut after about 5 seco nds, but it ca n be
br ought up a t any time by p ressing the !SET] button aga in .
S top th e Vehi cle and Che ck the Brak e Fluid
- Stop the vehicle.
- Check the brake fluid level=> page
280 .
-Seek professional assistance if necessary .
Cauti on! Brake m alfun ction (ABS ) G et it s ervi ced
- Drive carefully to the nearest authorized Aud i dealer or
other qualified workshop and have the malfunction
corrected =>
&. .,_
I • •
Page 32 of 360
Driver information display
Parking brake Please get to a repair shop
-If this symbol appears when the vehicle is stationary or
after the ignition is turned on, check to see if the parking
brake can be released. Drive to an authorized Audi dealer
or other qualified workshop as soon as possible and have
the malfunction corrected. If the parking brake cannot be opened, then take it to an expert at an authorized Audi
dealer.
- If the symbol appears while you are driving, it is possible
that the traction control or the emergency brake has
malfunctioned. It is possible that the parking brake
cannot be applied. It is also possible that the parking
brake cannot be released after it has been applied. Drive
to an authorized Audi dealer or other qualified workshop
to have the malfunction corrected.
If the ABS system malfunctions, the ABS warning/indicator light illu
minates together with the brake system malfunction warning/indi
cator light=>& .
& WARNING
• Always observe the warnings in => page 263, "Engine compart
ment ", before opening the hood and checking the brake fluid.
• Driving with low brake fluid is a safety hazard. Stop the car and
get professional assistance.
• USA models: If the
BRAKE warning light and the warning
light come on together, the rear wheels could lock up first under
hard braking . Rear wheel lock-up can cause loss of vehicle control
and an accident. Have your vehicle repaired immediately by your
authorized Audi dealer or a qualified workshop. Drive slowly and
avoid sudden, hard brake applications.
• Canada models: If the brake warning light (Ci] and the ABS
warning light come on together, the rear wheels could lock up
& WARNING (continued)
first under hard braking. Rear wheel lock-up can cause loss of
vehicle control and an accident. Have your vehicle repaired imme
diately by your authorized Audi dealer or a qualified workshop.
Drive slowly and avoid sudden, hard brake applications. •
Engine cooling system malfunction _}_
A malfunction in the engine cooling system must be
repaired as soon as possible.
If the _p_ symbol flashes in the display, either the engine
coolant
temperature is too high or the engine coolant level
is too low. A driver message appears as well to explain the
malfunction in more detail. The driver warning goes out
after about 5 seconds, but it can be brought up at any time
by pressing the [ SET] button again.
Switch off engine and check coolant level
- Pull off the road.
- Stop the vehicle.
- Turn off the engine.
- Check coolant level~
page 278.
- Add coolant if necessary ~ page 279.
Continue driving only after the engine coolant
warning/indicator light goes out.
- Contact your authorized Audi dealer for assistance if
necessary.
If the engine coolant level is correct, then the radiator fan may be
the cause of the malfunction. ...
Page 34 of 360

Driver information display
Steering malfunction ~-
If there is a malfunction in the electronic steering column
lock, the steering cannot be unlocked.
If the @- symbol in the display blinks, there is a malfunc
tion in the electronic steering column lock. A driver
message appears as well to explain the malfunction in more
detail. The driver warning goes out after about 5 seconds, but it can be brought up at any time by pres sing the [SET]
button again.
Stop the vehicle and turn off the engine. Steering
defective
- Obtain professiona l assistance.
- Do
not tow your vehicle .
& WARNING
Your vehicle must not be towed in the event of a malfunction in the
electronic steering column lock because it cannot be steered due
to the locked steering. If it is towed with the steering locked , there
is the risk of an accident.
[ i ] Tips
The symbol's appearance might be different in some models.•
Ignition lock malfunction ©-
A malfunction in the ignition lock must be repaired imme
diately.
If the ©- symbol in the display blinks, there is a malfunction
in the electronic ignition lock. A driver message appears as
well to explain the malfunction in more detail. The driver warning goes out after about 5 seconds,
but it can be
brought up at any time by pressing the (SET] button again
Defective ignition switch Get it serviced!
-Do not turn the engine off.
- Drive immediately to an authorized service facility to
have the malfunction corrected.
If there is a malfunction in the electronic ignition lock, the ignition
cannot be turned off . Drive immediately to an authorized service
facility to have the cause of the ma lfunction corrected.
On vehicles with convenience key*, the engine should not be
switched off using the start/stop button because the engine cannot
be started again after the ignition has been switched off.
[ i ] Tips
The symbol's appearance might be different in some models. •
Yellow symbols
A yellow symbol means WARNING.
-en
9 a: gi
Fig. 27 Display: Yellow
warning symbol
Yellow symbols indicate a priority 2 malfunction -Warning!
Page 35 of 360
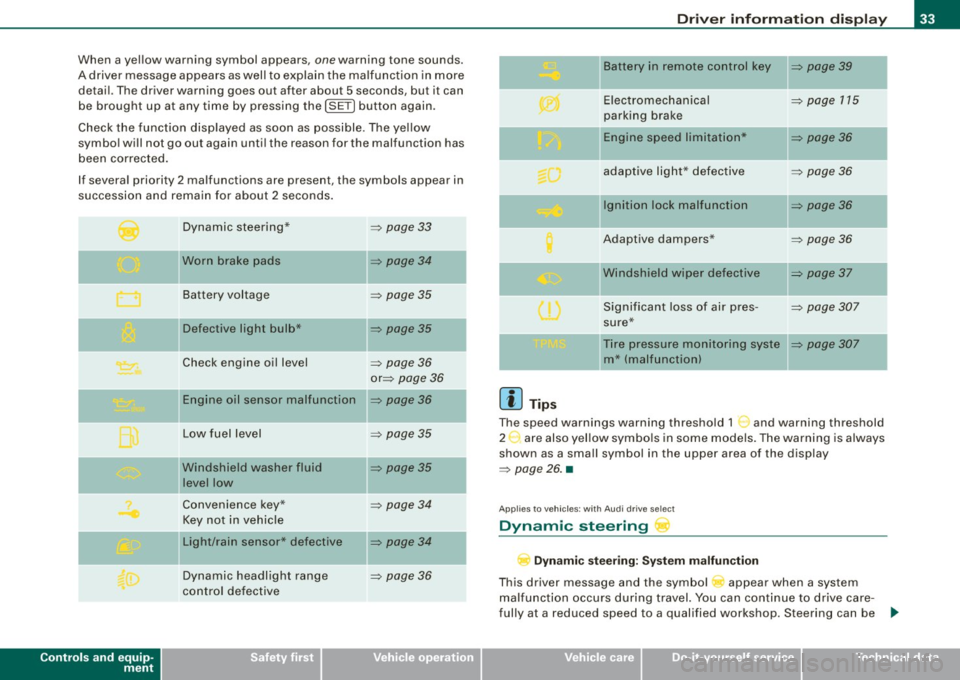
When a yellow warning symbol appears, one warning tone sounds.
A driver message appears as well to explain the malfunc tion in more
detail. The driver warning goes out after about 5 seconds, but it can
be brought up at any time by pressing the
!SE T) button again.
Check the function disp layed as soon as possible . The ye llow
symbol will not go out again until the reason for the malfunction has
been corrected.
If several priority 2 malfunctions are present, the symbols appear in
succession and remain for about 2 seconds .
Controls and equip
ment
Dynamic steering*
Worn brake pads
Battery voltage
II Defective light bulb*
Check engine oil level
Engine oil sensor malfunction
Low fuel level
Windshield washer fluid
level low
Convenience key*
Key not in vehicle
Light/rain sensor* defective
Dynamic headlight range
control defective =>
page 33
=> page 34
=>
page 35
=> page 35
-
=> page 36
or => page 36
=> page36
=> page 35
=> page 35
=> page 34
=> page 34
=> page 36
Dr ive r informat ion di spl ay
II Battery in remote control key => page 39
-
Electromechanical => page 115
parking brake
-Engine speed limitation* => page 36
adaptive light * defective => page 36
Ignition lock malfunction => page 36
Adaptive dampers* => page 36
"Windshield wiper defective => page 37
-
Significant loss of air pres -=> page 307
sure*
Tire pressure monitoring syste
=> page 307
m* (malfunction)
[ i ] Tip s
The speed warnings warning threshold 1 '") and warning threshold
2 :,. are also yel low symbo ls in some models. The warning is always
shown as a small symbol in the upper area of the display
=> page 26. •
Applies t o veh ic les: w ith Audi dri ve sele ct
Dynamic steering
D yn a m ic s te er ing : Syste m malfun cti on
This driver message and the symbol appear when a system
malfunction occurs during travel. You can continue to drive care
fully at a reduced speed to a qualified workshop. Steering can be .,_
I • •
Page 36 of 360
Driver information display
more difficult or sensitive than usual. The steering wheel can also
be at an angle when driving straight.
Dynamic steering: initialization
If this driver message appears and the indicator light is flashing
on the instrument panel, dynamic steering is being reinitialized.
Once you start the engine after this is finished, the steering wheel
wi ll be easy to move. Re-initialization might be necessary if the
steering whee l was moved hard to the left and right while the
vehicle was not moving. The display goes out as soon as initializa
tion is complete .
& WARNING
Have the dynamic steering system malfunction repaired as soon
as possible by an authorized Audi dealer or any qualified work
shop -risk of accident!
[ i ] Tips
The dynamic steering stability systems are not available in the event
of a system malfunction. •
Applies to vehi cles: wit h conven ienc e key
Key not in vehicle
Key not in vehicle
This reminder appears along with the symbol if the master key is
removed from the vehicle with the engine running. It is intended to
remind you (e .g. when changing drivers) not to continue the journey
without the master key.
If the master key is no longer in the vehicle, you cannot switch off
the ignition after stopping the engine and you also cannot start the
engine again . You also cannot lock the vehicle from the outside .•
Ap plies to vehi cles : w it h li ght/ ra in sensor
Light /rain sensor defective C../1
...i-Automatic headlights /automatic wipers defective
If the symbo l il luminates, the light sensor has failed . For safety
reasons the low beams are turned on permanently with the switch
in
AUTO . However, you can continue to turn the lights on and off
using the light switch. In the case of a defect in the rain sensor, the
windshie ld wiper lever functions are still available. Have the
light/rain sensor checked as soon as possible by an authorized Audi
dea ler. •
Worn brake pads
Brake pads!
If the warning light illuminates, immediately contact your autho
rized Audi dealer or qualified workshop to have all brake pads
inspected . On USA models the warning light 't comes on together
with the warning light
BRAKE . Both sets of brake pads on an axle must
a lways be replaced at the same time .
& WARNING
Driving with bad brakes can cause a collision and serious personal
injury.
• If the warning light and the warning lig ht
BRAKE1
l with the
message Brake pads! comes on in the instrument cluster display ,
immediately contact your authorized Audi dealer or qualified
workshop to have all brake pads checked or replaced if
necessary .•
1 1 BRAK£ : USA models only