ignition AUDI A5 COUPE 2010 Service Manual
[x] Cancel search | Manufacturer: AUDI, Model Year: 2010, Model line: A5 COUPE, Model: AUDI A5 COUPE 2010Pages: 360, PDF Size: 84.39 MB
Page 64 of 360
Clear vision
[ i J Tips
• The windshield wipers are switched off when the ignition is
turned off. Activate the windshield wipers after the ignition is switched back on by moving the windshield wiper lever to any posi
tion .
• Worn or dirty windshield wiper blades result in streaking. This
can affect the rain sensor * function. Check your windshield wiper
blades regularly.
• The rain sensor * is part of the interval wiping system. Turning off
the ignition will also deactivate the rain sensor*. To reactivate the sensor, switch off the interval wiping function, then switch it back
on again.
• The washer fluid nozzles of the windshield washer system are
heated at low temperatures when the ignition is on.
• When stopping temporarily, e.g. at a traffic light, the set speed of
the windshield wipers is automatically reduced by one speed .•
Service position
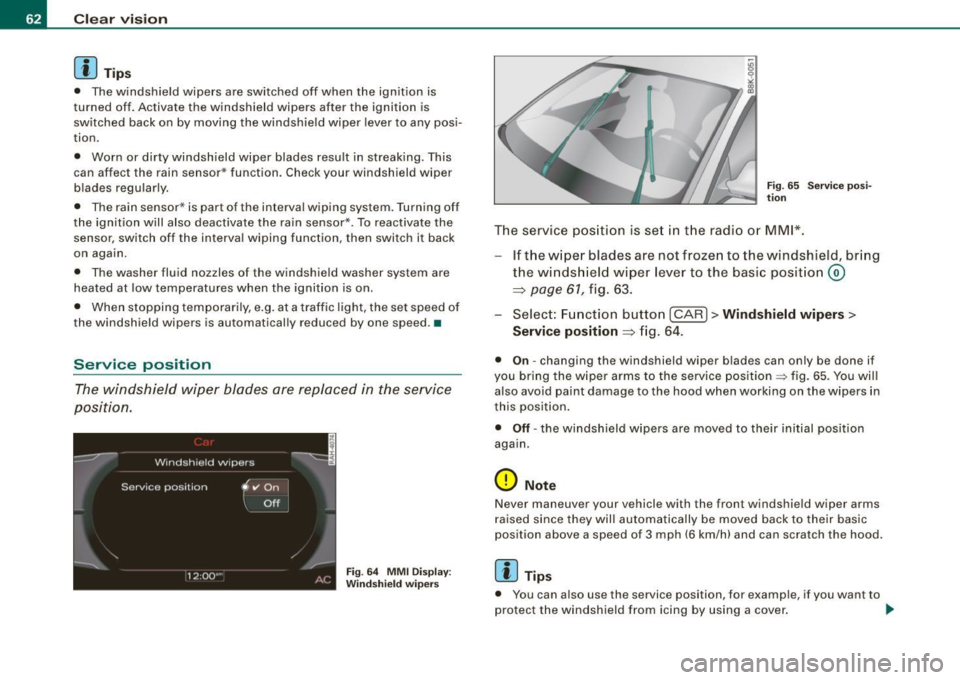
The windshield wiper blades are replaced in the service
position .
Fig. 64 MMI Display:
Windshield wipers Fig. 65
Servic e posi
tion
The service position is set in the radio or MMI*.
If the wiper blades are not frozen to the windshield, bring
the windsh ield wiper lever to the basic position@
~ page 61, fig. 63.
- Select: Function button
[CARI> Windshield wipers>
Service position ~
fig. 64.
• On -changing the windshield wiper blades can only be done if
you bring the wiper arms to the service position
=> fig. 65. You will
also avoid paint damage to the hood when working on the wipers in
this position .
• Off -the windshield wipers are moved to their initial position
again.
0 Note
Never maneuver your vehicle with the front windshield wiper arms
raised since they will automatically be moved back to their basic
position above a speed of 3 mph (6 km/h) and can scratch the hood.
[ i J Tips
• You can also use the service position, for example, if you want to
protect the windshield from icing by using a cover . _,,
Page 66 of 360
Clear vision
Anti-glar e setting
- Move the small leve r (located on the bottom edge of the
mirror) to the rear. •
Applies to vehi cles: wit h a utom atica lly dimm in g ins id e mirro r
Automatically dimming inside mirror
The aut omatic dimming function can be turned on and off
if required.
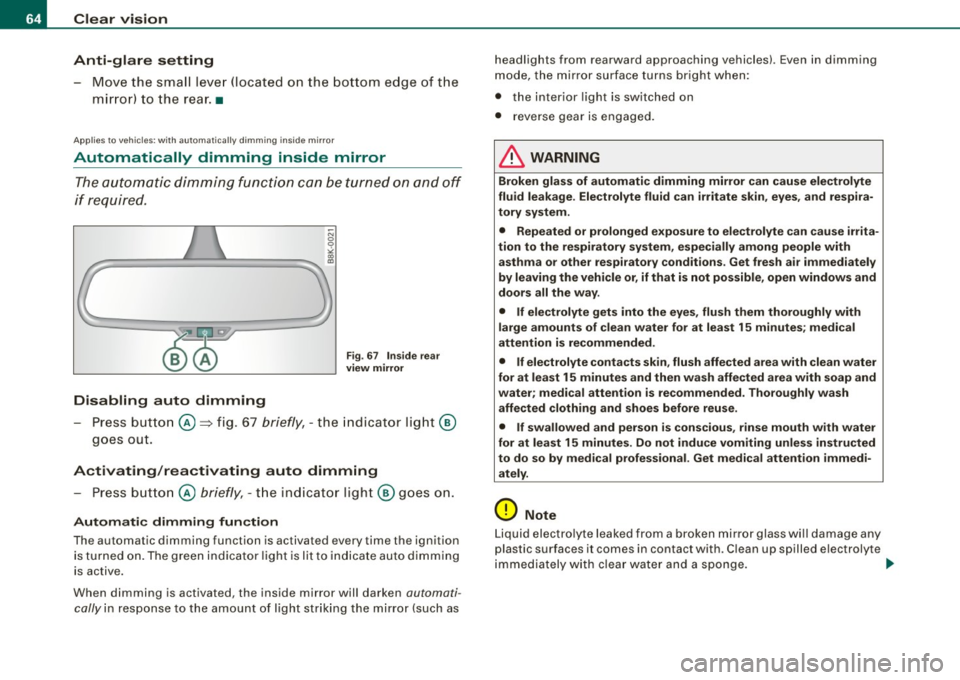
Disabling auto dimming
F ig . 6 7 Ins ide r ear
vi ew mirror
- Press button©=> fig. 67 briefly, -the indicator light @
goes out.
Activating /rea ctivating auto dimming
- Press button© briefly, -th e indicator ligh t@ goes on .
Automatic dimming fun ction
The automatic dimming function is activated eve ry time th e ignition
is turned on . The green indicator light is lit to indicate auto d imming
is active.
When dimming is activated , the inside mirror will darken automati
cally in response to the amount of light striking the mirror (such as headlights from rearward approaching vehicles). Even in dimming
mode,
the mirror surface t urns bright when:
• the inter ior light is switched on
• r everse gear is engaged.
& WARNING
Broken glas s of au tomati c dimming mir ror can cau se elect rol yte
flu id l eaka ge . Ele ctr olyte fluid can irritate s kin , eyes , and re s pir a
t o ry sy stem.
• Repeated or prolonged e xposure to el ectro lyte can cause irrita
ti on to the re spiratory sy stem , espe cially am ong people wi th
a sthm a or other re spirator y conditions . Get fr esh air immediatel y
by leavin g the vehicl e or , if that i s not po ssib le , open window s and
door s all the wa y.
• If electrolyte get s into the eye s, flu sh them thorough ly with
l a rge amou nts of cle a n wa ter for at le ast 15 mi nute s; me dic al
a tt ention is recommended .
• If ele ctrolyte cont acts sk in , flu sh affe cted are a w ith cle an w ater
for a t lea st 15 minute s and then wa sh affe cted ar ea with soap and
wa ter; medi cal attention is re commended . Thoroughl y w ash
affected cloth ing and shoe s before reu se .
• If swallo wed and person is consciou s, rinse mouth w ith w ater
for at lea st 1 5 minute s. Do no t indu ce vomiting unle ss instru cted
to do so by medi cal profess iona l. G et me dica l attenti on immedi
ately.
0 Note
Liquid electro lyte leaked from a broken mir ror glass wi ll damage any
plastic surfaces it comes in contact wi th . C lean up spilled electrolyte
immediately with c lear water and a sponge . ..
Page 67 of 360

[ i J Tips
• If you sw itch off the automatic dimming function on the in side
mirror, autom ati c dimming of the outs ide mirror s will likewise be
di sabled.
• Check to make sure there are no objects preventing light from
reaching the inside mirror.
• Do not attach any sticke rs to the windshield in front of the light
sensor*, as this wou ld interfere with both the automatic operation
of the headlights and the automatic dimming of the inside mirror .
• Be aware that automatic dimming of the inside mirror can on ly
operate proper ly if the rear window sun blind* is retracted .•
Outsid e mirrors
The outside mirrors are electrically adjusted (power
mirrors) .
Adjusting exterior mirrors
Fig. 6 8 Fo rwa rd
se ction of driver's
arm re st : po wer mirr or
c ontrol s
-Rotat e th e kno b to th e© pos ition (driver's exter ior
m ir ror) o r to the ® pos ition (passenger's exterior m irro r)
:::::, fig . 68.
- Rotate the knob a nd t he mi rror so that you have a clear
view to the r ear .
Con tro ls and eq uip
ment
Clear vision
Heated mirrors
- Rotate the knob to pos ition
@ .
Depending on the outside temperature, the mirror surfaces are
heated until the ignition is switched off -even if the knob is no
longer in position
@ .
You are well -advised to fold the outside mirrors in when maneu
vering in tight spaces or when leaving the car parked close to other
vehic les.
Mem ory for e xte rior mirrors *
On vehicles wi th memory for the d river's seat, the cur rent setting for
the ex ter ior mirrors is automatically s tored along wi th the seat posi
tion :::}
page 74.
Tilt function f or the passenge r's mirro r* (only w ith
memory for exterior mirrors )
When the reverse gear is engaged, the mirror surface t ilt s down
ward slight ly if the setting is for the passenger's mirror (knob in
pos it ion @ ~ fig. 68) . This allows you to see the curb during parallel
parking.
The mirror returns to its initia l pos ition as soon as reverse gear is
disengaged and vehic le speed is above about 9 mph (15 km/h) . T he
mirro r also returns to its initia l p osition if the swi tch is moved to the
driver's outside mirror© or the ignition is switched off.
I f the position of the mirror surface is changed on a ti lted mirror, this
new pos it ion will be automa tically assigned to the remote key when
the vehicle is taken out of reverse gear.
0 Note
Curved mirror surfaces (convex or spherical*) increase your field of
v iew . Remember that vehicles or o ther objects wi ll appear sma ller
and farther away than when seen in a flat mirror. If you use this
mirror t o estimate distances of following vehic les when changing
lanes, you cou ld estimate incorrectly and cause an acc ident. .,.
Vehicle care I I irechnical data
Page 68 of 360
![AUDI A5 COUPE 2010 Service Manual Clear vision
[ i ] Tips
If there should be a malfunction in the electrical system, you can
sti ll adjust the outside mirrors by pressing the edge of the mirror. •
Applies to AUDI A5 COUPE 2010 Service Manual Clear vision
[ i ] Tips
If there should be a malfunction in the electrical system, you can
sti ll adjust the outside mirrors by pressing the edge of the mirror. •
Applies to](/img/6/57582/w960_57582-67.png)
Clear vision
[ i ] Tips
If there should be a malfunction in the electrical system, you can
sti ll adjust the outside mirrors by pressing the edge of the mirror. •
Applies to ve hicles: with automatically adjusting outside m irrors
Automatic dimming for the outside mirrors
The outside mirrors dim at the same time as the inside mirror. When
the ignition is switched on, the mirrors automatically dim
depending on the amount of light striking the mirrors (such as head lights shining into the vehic le from the rear).
When the inte rior lighting is switched on and when reve rse gear is
engaged, the mirrors are switched back to their original brightness
{not dimmed) .
& WARNING
Broken glass of automati c dimming mirror can cau se e lectrolyte
fl uid leakage. Ele ctrolyte f luid c an irritate skin , eye s, an d re spir a
tory system .
• Repeated or pr olonged e xposure to electrol yte can cause irrita
tion to the resp iratory sy stem , e specially among people with
a sthma or oth er re spir atory condition s. Get fre sh air immedi ately
by leaving the vehi cle or, if that is not po ssibl e, op en windows and
d o ors all the way .
• If electrolyte get s into the eyes , flush them thoroughly with
large amount s of clea n water for at lea st 15 minute s; medi cal
attention is recommended .
• If electrolyte contact s skin, flush affe cted area w ith clean water
for at least 15 minute s and then wa sh affected area with soap and
water ; m edic al a ttention is recommend ed . Thoroughl y wash
affected clothing and shoes before reuse .
• If swallowed and per son is con sciou s, rinse mout h with water
for at least 15 minute s. Do not induce vomiting unles s ins tructed
& W ARN ING (continued )
to do so by m ed ical p rofess ional. Get medic al attent ion immedi
ately .
0 Note
Liquid electro lyte leaked from a broken mirror glass wi ll damage any
plastic surfaces it comes in contact with. C lean up spilled e lectrolyte
immediately with c lear wate r and a spo nge.
[ i ] Tips
• Switching off the dimming function of the inside rear view
mirror al so dea ctivate s the autom atic dimm ing fun ction of the e xte
rior mirrors .
• Automatic dimming for the mirror only operates properly if the
sun shade* for the rear window is not in use or the light striking the
inside mirror is not hindered by other objects. •
Page 69 of 360

Digital compass
Applies to vehicles: with di gital co mpass
Activating or deactivating the compass
The direction is displayed on the interior rear view mirror.
Fig . 69 Inside rear
view mirror : digital
co mpas s activated
To activate or deactivate, hold the@ button down until
the red display appears or disappears .
The digital compass only works with the ignition turned on. The
directions are displayed as initials :
N (North), NE (Northeast), E
(East), SE (Southeast), S (South), SW (Southwest), W (West), NW
(Northwest).
[ i ) Tips
To avoid inaccura te directions , do not allow any remote controls,
e lectrical systems, or metal parts close to the mirror. •
Contro ls and eq uip
ment
Clear vision
Ap plies to vehi cles: wit h dig ital compass
Setting the magnetic deflection zone
The correct magnetic deflection zone must be set in order
to display the directions correctly.
.
• ,_,;a;..~>, I I
I I
I I
I ' I I
I I
' I I I
I @ I
l '
l
I ' I ,, l ----
'
'
'
®
\, ,, ...... _______ ,.,.
©
@
Fig. 70 North America: magnetic deflection zone boundaries
Hold the@~ page 67, fig. 69 button down until the
number of the set magnetic deflection zone appears on
the interior rear view mirror.
Adjust the magnetic deflection zone by repeatedly
pressing on the @ button. The set mode automatically
deactivates after a few seconds . •
Vehicle care I I Technical data
Page 75 of 360
Applies to vehicles: w it h p ow er adju stable seats
Adjusting the seat
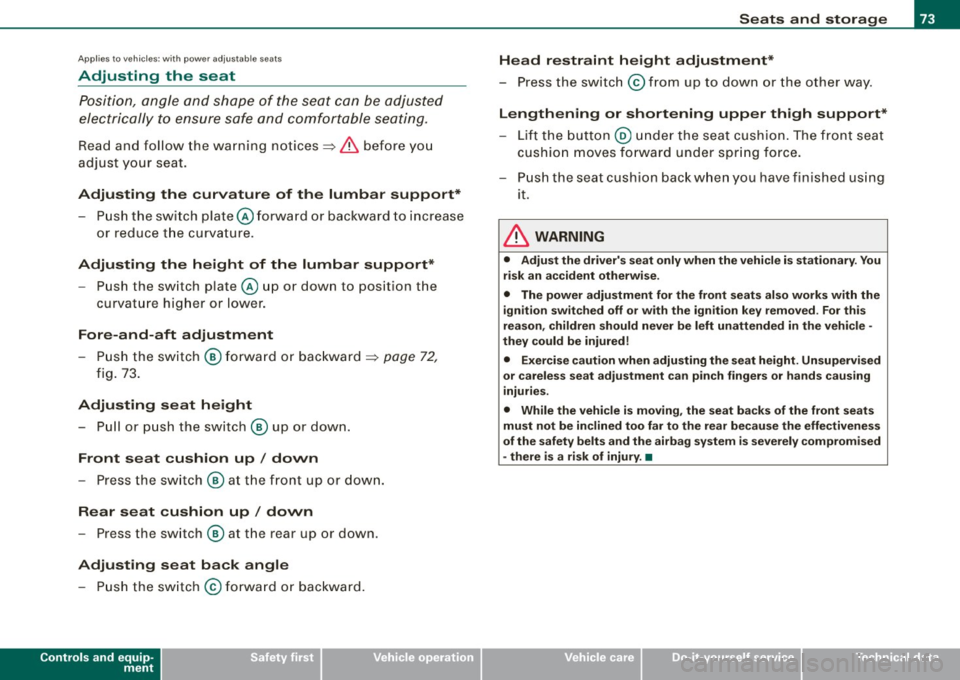
Position, angle and shape of the seat can be adjusted
electrically to ensure safe and comfortable seating.
Read and follow the warning notices~ & before you
adjust your seat.
Adjusting the curvature of the lumbar support* - Push the switch plate@forward or backward to increase
or reduce the curvature.
Adjusting the height of the lumbar support*
- Push the switch plate@ up or down to position the
curvature higher or lower.
Fore-and-aft adjustment
-Push the switch @ forward or backward ~ page 72,
fig. 73.
Adjusting seat height - Pull or push the switch @ up or down.
Front seat cushion up/ down
- Press the switch@ at the front up or down.
Rear seat cushion up / down
- Press the switch @ at the rear up or down.
Adjusting seat back angle - Push the switch @ forward or backward.
Controls and equip
ment
Seats and storage
Head restraint height adjustment*
- Press the switch @ from up to down or the other way .
Lengthening or shortening upper thigh support*
- Lift the button@ under the seat cushion. The front seat
cushion moves forward under spring force.
- Push the seat cush ion back when you have fin ished using
it.
& WARNING
• Adjust the driver's seat only when the vehicle is stationary. You
risk an accident otherwise.
• The power adjustment for the front seats also works with the
ignition switched off or with the ignition key removed . For this
reason, children should never be left unattended in the vehicle -
they could be injured!
• Exercise caution when adjusting the seat height. Unsupervised
or careless seat adjustment can pinch fingers or hands causing
injuries.
• While the vehicle is moving, the seat backs of the front seats
must not be inclined too far to the rear because the effectiveness
of the safety belts and the airbag system is severely compromised
- there is a risk of injury. •
I • •
Page 90 of 360
Seats and storage
Before you purchase any accessories, always read and follow the
information in=> page 341, "Additional accessories and parts
replacement".
& WARNING
• Use care when using the cigarette lighter. Inattentive or unsu
pervised use of the cigarette lighter can cause burns -risk of
injury!
• The cigarette lighter works when the ignition is switched off or
with the ignition key removed . Children should never be left unsu
pervised in the vehicle, or there could be risk of fire!
• The power outlets and therefore the electrical accessories
connected to them operate only with the ignition on. Improper use
of the outlets or of electrical accessories can lead to serious inju
ries or cause a fire. For this reason, children should never be left
unattended in the vehicle -they could be injured!
0 Note
• To avoid damaging the socket, only use plugs that fit properly .
• Only use the cigarette lighter socket as a power source for elec
trical accessories for short durations . Use the sockets* in the
vehicle when a power source is needed for longer durations.
[ i] Tips
When the engine is off and accessories are still plugged in and are
on, the vehicle battery can still be drained .•
Storage
General overview
There are numerous places to store items in your vehicle.
Glove compartment => page 89
Storage compartment in the roof =>
page 89
Coat hooks => page 89
- -Storage in the trim panels in the luggage
compartment
& WARNING
• Always remove objects from the instrument panel. Any items
not put away could slide around inside the vehicle while driving or
when accelerating or when applying the brakes or when driving around a corner .
• When you are driving make sure that anything you may have
placed in the center console or other storage locations cannot fall
out into the footwells. In case of sudden braking you would not be
able to brake, depress the clutch or accelerate.
• Any pieces of clothing that you have hung up must not interfere
with the driver's view. The coat hooks are designed only for light
weight clothing. Never hang any clothing with hard, pointed or
heavy objects in the pockets on the coat hooks . During sudden
braking or in an accident - especially if the airbag is deployed -
these objects could injure any passengers inside the vehicle . •
Page 97 of 360
You can adjust the air distribution so that air flows from specific
vents. In position
;J air flows only to the windows, in position :,J, it
flows to the driver or passenger, and in position
!,a it flows to the
footwell. There are additional combinations available to adjust air
dist ribution as needed .
To regu late air distribution automatically, switch to
( AU TO] .
When the radio or MMI* is turned on, the air distribution setting
appears for a few seconds on the screen=>
page 94, fig. 105 . •
A pp lies to vehicles: w ith de lu xe a utomat ic c limate co ntro l
Defrost [@ I
The windshield and side windows are defrosted or cleared
of condensation as quickly as possible.
- Press the button [@)to turn on the defroster .
- Press the b utton
(@J again, or press the [AUTO I button to
t ur n it off.
Temperature is control led automatical ly . The maximum amount of
air flows main ly from the vents below the windshield .
Pressing the[@] button sw itches off recirculation mode .•
Ap plies to ve hicles: w ith d elu xe au to m at ic c limate co ntro l
Rear window defogger [[jiiJ )
The rear window def ogger clears the rear window of
condensati on.
- Press the [QWJ button to turn the rear w indow defogger on
and off .
The rear window defogger works only when the engine is running .
T he indicator light in the button illuminates when the rear window
defogger is on .
Controls and equip
ment
W arm and cold
The rear window defogger is switched off automatica lly after 10 to
20 minu tes, depending on the ou tside tempera ture .
The rear window defogger can be turned on permanently by pressing the
[Ciul] button for more than two seconds. This remains
stored until the ignition is switched off . A rear window defogger that
was switched on also remains stored for 15 minutes after the igni
t ion is sw itched off .
I f the engine is restarted within these 15 minutes, the rear window
defogger is activated for 10 to 20 minutes, depending on ou tside
temperature . When a vehic le is parked for a short time , the rear
window defogger does not need to be manually activated again.
ci> For th e sake of the environment
As soon as the rear window is clea r, you shou ld switch the rear
window defogger off . The reduced power consumption has a bene
ficial effect on fuel consumption .•
Ap plies to vehic les: w it h d eluxe au tomat ic c limate co ntro l
AC mode [ACJ
Deactivating
- Press the [AC I button.
Activating
- Press the [AC] button again.
The cooling system is turned on in AC mode. The heating and venti
lation system is controlled automatica lly.
[ i ] Tip s
If the LED in the switch continues to illuminate after AC mode has
been turned off( = turning the AC off), there is a fault in an air -condi -_,.
I • •
Page 104 of 360
• .___w __ a _r _m _ a _n_d_ c_ o _ ld __________________________________________________ _
You can adjust the air distribution so that air flows from specif ic
vents. In position
:0 air flows only to the windows, in position :J, it
flows to the driver or passenger , and in position
!-0 it flows to the
footwell. There are additional combinations available to adjust air
dis tribution as needed .
To regulate a ir distribution automat ically, switch to [AUTO] .
When the MMI display is turned on, the air distribution setting appears for a few seconds on the screen=>
page 101, fig. 112. •
Applies to ve hicles: w ith Delu xe automa tic c lima te con tro l plus
Defrost [@ I
The windshield and side windows are defrosted or cleared
of condensation as quickly as possible.
- Press the 1@ 1 button to turn on the defroster .
- Press the
[@ j button again, or press the [ AUTO j button to
turn it off.
Temperature is controlled automatically. The maximum amount of
air flows mainly from the vents below the windshield.
Pressing the [@] button switches off recirculation mode. •
Applies to ve hicles: w ith Deluxe au to m ati c cli mate con tro l plus
Rear window defogger [CiWj
The rear window defogger clears the rear window of
condensation.
- Press the ICiW ] button to turn the rear window defogger on
and off.
The rear window defogger works only when the engine is running.
The indicator light in the button illuminates when the rear window
defogger is on. The
rear window defogger is switched off automatically after 10 to
20 minutes, depending on the outside temperature.
The rear window defogger can be turned on permanently by
pressing the
[Cial] button for more than two seconds. This remains
stored until the ignition is switched off . A rear window defogger that
was switched on also remains stored for 15 m inutes after the igni
tion is switched off.
If the engine is restarted within these 15 minutes , the rear window
defogger is activated for 10 to 20 minutes, depending on outside
temperature. When a vehicle is parked for a short time , the rear
window defogger does not need to be manually activated again.
~ For the sake of the environment
As soon as the rear window is clear, you should switch the rear
window defogger off. The reduced power consumption has a bene
ficial ef fect on fuel consumption .•
Ap plies to veh ic les: w ith Delux e au tomatic c limate co ntrol p lu s
AC mode [AC ]
Turning AC off
- Press the IACI button.
Turning AC on
- Press the IACj button again.
The cooling system is turned on in AC mode. The heating and v enti
lation system is controlled automatically .
[ i] Tips
If the LED in the switch does not illuminate after AC mode has been
turned on( = turning th e AC off), there is a fault in an air -conditioning .,_
Page 109 of 360

----------------------------------------------~O~n~t:!..h~ e:...!.:ro~a~d!._ _J-
On the road
Steering
Manually adjustable steering wheel
The height and reach of the steering wheel can be
adjusted.
First, adj ust t he drive r's seat correct ly.
F ig . 116 L ev er unde r
th e steeri ng col umn
- Pull the lever~ fig . 11 6 -A rrow- ~ /n..
- Move the steering wheel to the desired position.
Push the lever against the steering column until it locks.
T here must be at l east 10 inches (25 cm) between your chest and the
center of the steering wheel. If you cannot sit more than 10 inches
(25 cm) from the steering wheel, see if adaptive equipment is avail
able to help you reach the pedals and increase the distance from the
steering wheel.
F or detailed information on how to ad just the driver's seat, see
=> page 72.
Con tro ls and eq uip
ment
The steering wheel can be adjusted even when the ignition is turned
off. For vehicles with seat memory, the individual positions for the
steering whee l can be stored along with the seat position.
& WARNING
Improper u se of ste ering wheel adju stme nt and improper se ating
po sition can cau se seriou s per sonal injury .
• Adju st the steering wheel column onl y when the vehi cle is not
moving to preven t los s of vehicl e control.
• Adjust the dr iver' s se at or steering wheel so that there is a
minimum of 10 inch es (25 cm ) b etwe en your che st and the
s tee ring wheel
=> pag e 170 , fig. 1 8 0. If you cannot maintain th is
minimum di stance, the airbag sy ste m cannot protect you prop
erly .
• If physical limitation s prevent you from sitting 1 O inche s (25
c m ) or mo re from the steering whee l, check with your authori zed
Audi dealer t o see if adaptive equipment i s available .
• If the stee ring whe el i s a ligned with you r fa ce, the supple
men tal driver' s airbag cannot provide as much prot ect ion in an
a c cident . A lw ays m ake sure that the steering wheel i s aligned with
your chest .
• Alway s hold t he steer ing wheel with yo ur h and s at the 9 o'c lock
a nd 3 o'clock po sition s to reduce the ri sk of per son al injury if the
dri ver' s airb ag dep lo ys .
• Neve r hold the steering wheel at the 12 o'clock po siti on or with
your hand s insid e the steeri ng wheel rim or on the steer ing wheel
hub. H olding the steerin g wheel th e wrong way can cause seri ous
i nj urie s to the h ands , arm s and head if the dr iver' s a irbag
deploy s.•
Vehicle care
I I irechnical data