lumbar support AUDI A5 COUPE 2010 Owners Manual
[x] Cancel search | Manufacturer: AUDI, Model Year: 2010, Model line: A5 COUPE, Model: AUDI A5 COUPE 2010Pages: 360, PDF Size: 84.39 MB
Page 72 of 360

Seats and storage
- Position the head restraint according to the occupant's height =>
page 76. For maximum protection, the top of
the head restraint should be at least at eye level, prefer
ably higher and ideally level with the top of the head
=>
page 173 , fig. 182.
& WARNING
Never place any objects in the driver's footwell. An object could
get into the pedal area and interfere with pedal function . In case
of sudden braking or an accident, you would not be able to brake
or accelerate. •
Front passenger's seat
Always move the front passenger seat into the rearmost position.
To avoid contact with the airbag while it is deploying, do not
sit any closer to the instrument panel than necessary and
always wear the three-point safety belt provided adjusted
correctly. We recommend that you adjust the passenger's
seat in the following manner :
- Bring the backrest up to an (almost) upright position.
Do
not ride with the seat reclined.
- The ideal pos ition for the head restraint is with the upper
edge of the restraint level with the top of your head
=> page 76. You should not lower the top of the restraint
below the level of your eyes.
- Place your feet on the floor in front of the passenger's
seat .•
Adjusting front seats manually
Ap plies to vehicles : w ith manu ally adju sta ble seats
Seat adjustment controls
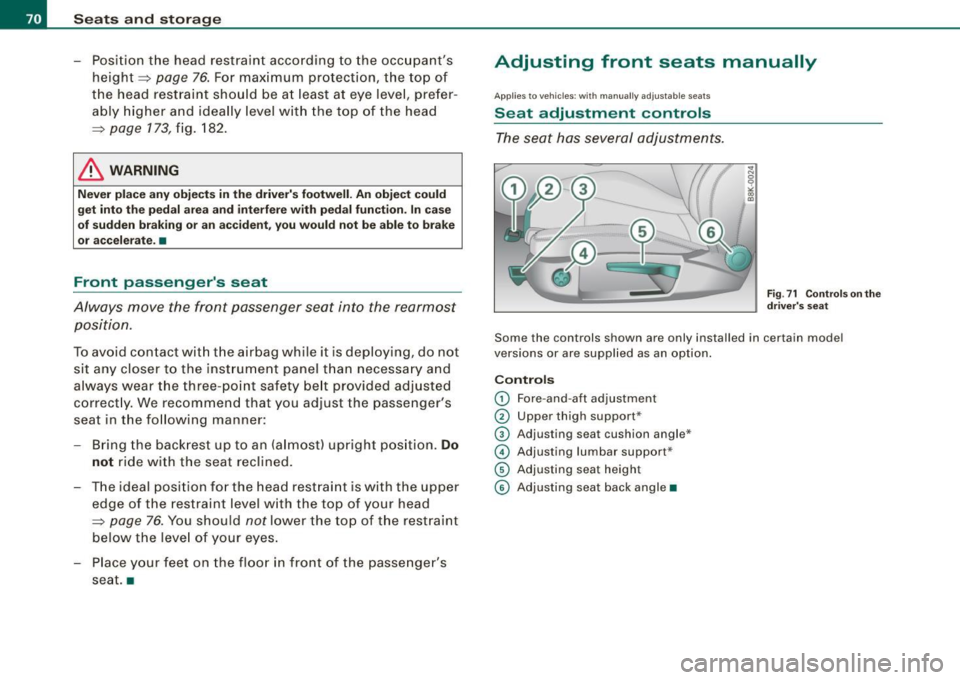
The seat has several adjustments.
Fig . 71 Controls on the
driver's seat
Some the controls shown are only installed in certain mod el
versions or are supplied as an option.
Controls
0 Fore-and-aft adjustment
0 Upper thigh support*
© Adjusting seat cushion angle*
© Adjusting lumbar suppor t*
© Adjusting seat height
© Adjusting seat back angle •
Page 73 of 360

Applies to vehicles : w it h manua lly adj ustab le seats
Adjusting the seat
Position and shape of the seat can be adjusted manually
to ensure safe and comfortable seating.
Read and follow the warning notices=> & before you
adjust your seat.
Fore-and-aft adjustment
- Pull the lever CD=> page 70, fig. 71 up and push the seat
to the desired position.
- Release the lever CD and continue to move the seat until
it locks into place.
Lengthening or shortening upper thigh support*
- Lift the button @ under the seat cushion. The front seat
cushion moves forward under spring force.
- Push the seat cushion back when you have finished using
it.
Adjusting seat cushion angle*
- Pull or push the lever ®=> page 70, fig. 71 up or down
(pumping motion).
Adjusting the curvature of the lumbar support*
- Push the switch plate @forward or backward to increase
or reduce the curvature.
Adjusting the height of the lumbar support*
- Push the switch plate© up or down to position the
curvature higher or lower.
Controls and equip
ment
Seats and storage
Raising or lowering seat height
- Pull or push the lever©=> page 70, fig. 71 up or down
(pumping motion) .
Adjusting seat back angle
-Remove weight from the seat back (do not lean against
it).
- Turn the hand wheel©=> page
70, fig. 71 to adjust the
angle of the seat back accordingly.
& WARNING
• Adjust the driver's seat only when the vehicle is stationary. You
risk an accident otherwise.
• Exercise caution when adjusting the seats. Adjusting the seat
carelessly or without checking can pinch hands and fingers.
• While the vehicle is moving, the seat backs of the front seats
must not be inclined too far to the rear because the effectiveness
of the safety belts and the airbag system is severely compromised
- there is a risk of injury. •
I • •
Page 74 of 360

Seats and storage
Applies 10 vehicles: with manually adjustab le seats
Easy entry function
The easy entry function makes it easier for the rear
passengers to enter and leave the vehicle.
Fig . 72 Driver's seat:
Latch on the seat back
Tilt the seat back forward and push the front
seats forward
- Lift the latch
=} fig. 72.
- Hold the latch and tilt the seat back forward.
- Release the latch and push the seat forward.
Push the front seats back and fold the seat back
up
- Push the front seat back
before you fold the seat backs
up . Otherwise the seat cannot be pushed back to its orig
inal position.
& WARNING
Always be certain that the front seats are upright and securely
latched when you drive. •
Power front seat adjustment
Applies to vehicles: with power adjustable seats
Seat adjustment controls
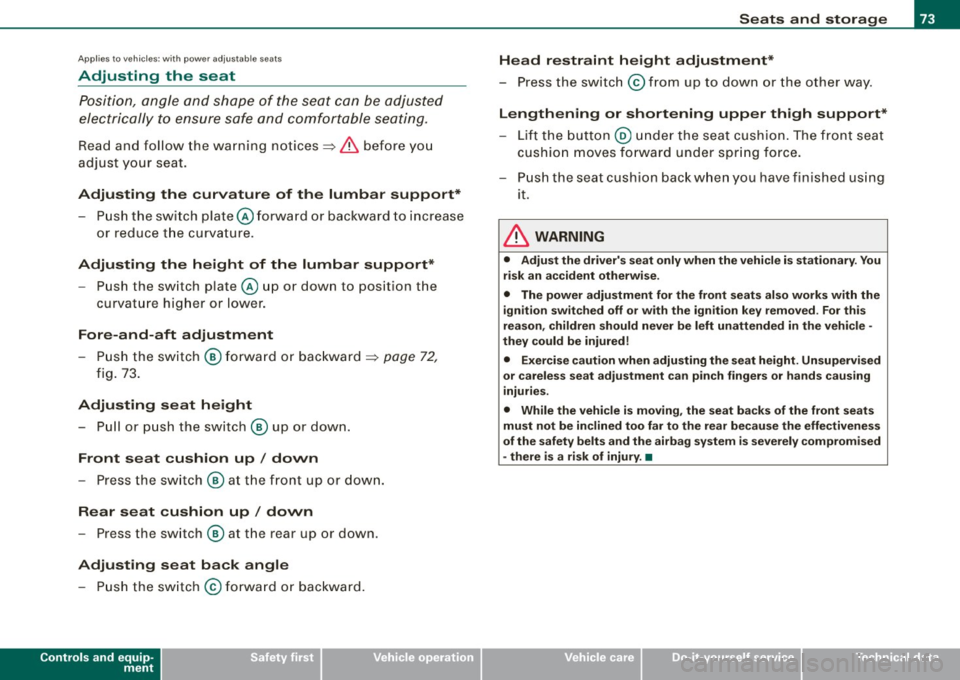
The operating logic for the switches corresponds to the
construction and function of the seat.
.,
~ 9
"' "' m
Fig . 73 Front seat:
Controls for seat
adjustment
The switches to adjust the seat cushion and the seat back corre
spond to the layout, the design and the function of the seat. The
seats are adjusted by moving the switches following this logic.
Controls
© Lumbar support
@ Seat adjustment
© Seat back and head restraint height adjustment*
© Upper thigh support *•
Page 75 of 360

Applies to vehicles: w it h p ow er adju stable seats
Adjusting the seat
Position, angle and shape of the seat can be adjusted
electrically to ensure safe and comfortable seating.
Read and follow the warning notices~ & before you
adjust your seat.
Adjusting the curvature of the lumbar support* - Push the switch plate@forward or backward to increase
or reduce the curvature.
Adjusting the height of the lumbar support*
- Push the switch plate@ up or down to position the
curvature higher or lower.
Fore-and-aft adjustment
-Push the switch @ forward or backward ~ page 72,
fig. 73.
Adjusting seat height - Pull or push the switch @ up or down.
Front seat cushion up/ down
- Press the switch@ at the front up or down.
Rear seat cushion up / down
- Press the switch @ at the rear up or down.
Adjusting seat back angle - Push the switch @ forward or backward.
Controls and equip
ment
Seats and storage
Head restraint height adjustment*
- Press the switch @ from up to down or the other way .
Lengthening or shortening upper thigh support*
- Lift the button@ under the seat cushion. The front seat
cushion moves forward under spring force.
- Push the seat cush ion back when you have fin ished using
it.
& WARNING
• Adjust the driver's seat only when the vehicle is stationary. You
risk an accident otherwise.
• The power adjustment for the front seats also works with the
ignition switched off or with the ignition key removed . For this
reason, children should never be left unattended in the vehicle -
they could be injured!
• Exercise caution when adjusting the seat height. Unsupervised
or careless seat adjustment can pinch fingers or hands causing
injuries.
• While the vehicle is moving, the seat backs of the front seats
must not be inclined too far to the rear because the effectiveness
of the safety belts and the airbag system is severely compromised
- there is a risk of injury. •
I • •
Page 323 of 360

Fuses and bulbs -
------------------
Fuse Location, Instrument Panel left
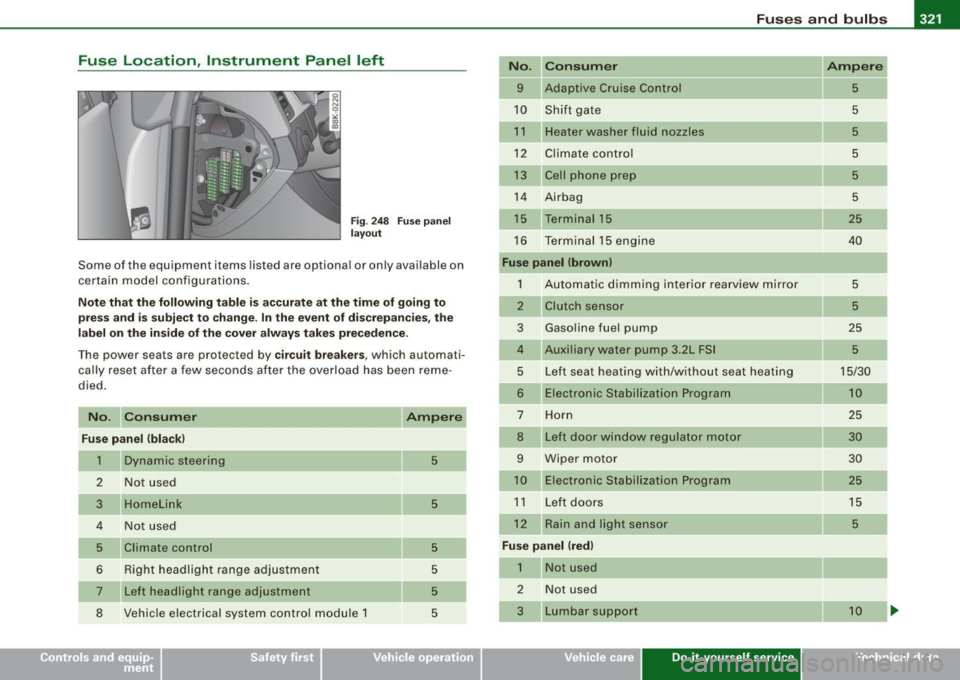
Fig . 248 Fuse panel
layout
Some of the equipment items listed are optional or only available on
certain model configurations.
Note that the following table is accurate at the time of going to
press and is subject to change. In the event of discrepancies, the
label on the inside of the cover always takes precedence.
The power seats are protected by circuit breakers , which automati
cally reset after a few seconds after the overload has been reme
died.
No. Consumer
Fuse panel (black)
1 Dynamic steering
2 Not used
3 Homelink
4 Not used
5 Climate control
6 Right headlight range adjustment
___ ,
7 Left headlight range adjustment
8 Vehicle electrical system control module 1
5
5
5
5
5
5
No.
9
10
11
12
13
14
16
Consumer
Adaptive Cruise Control
Shift gate
Heater washer fluid nozzles
Climate control
Cell phone prep
Airbag
Terminal 15
Te rminal 15 engine
Fuse panel (brown)
1 Automatic dimming interior rearview mirror
2
3
5
6
7
8
9
Clutch sensor
Gasoline fuel pump
Auxiliary water pump 3.2L FSI
Left seat heating with/without seat heating
Electronic Stabilization Program
Horn
Left door window regulator motor
Wiper motor Electronic Stabilization Program
11 Left doors
12 Rain and light sensor
Fuse panel Ired)
1
2
Not used
Not used
Lumbar support
Vehicle care Do-it-yourself service
Ampere
5
5
5
5
5
5
25
40
5
5
25
5
15/30 10
25
30 30
25
15
5
10
irechnical data