AUDI A5 COUPE 2018 Workshop Manual
Manufacturer: AUDI, Model Year: 2018, Model line: A5 COUPE, Model: AUDI A5 COUPE 2018Pages: 409, PDF Size: 67.63 MB
Page 51 of 409
® Central switch* for opening or closing all side
windows at the same time
A WARNING
- Always take the vehicle key with you when
leaving the vehicle, even for a short period
of time. This applies particularly when chi l
dren rema in in the vehicle. Otherwise ch il
dren could start the engine or operate elec
trical equipment (such as power windows),
wh ich increases the r isk of an accident. The
powe r windows con tinue to function unt il
the driver 's door or front passenger 's door
has been opened .
- Pay ca reful attent ion when closing the win
dows. P inching co uld cause serious injuries .
- When loc king the veh icle from outside, the
vehicle must be unoccupied since the win
dows can no longer be opened in an emer
gency.
(D Tips
You ca n still open and close the w indows fo r
approxima tely 10 minutes after turning the
ign it ion off. T he power windows do no t switch
off until the driver's door or front passe nger's
door has been opened.
Convenience opening/closing
App lies to: vehicles with convenience key
All of the windows and the roof* con be opened/
closed ot the same time.
F or power top* convenience opening/clos ing, re
fer to the in formation
in ~ page 55.
Convenience opening feature
.,. Press and hold the IT! button on the remote con
t rol key until all of the windows reach the de
s ir ed position and the roof* is tilted open.
Con venience closing feature
.,. Press the ('.D button on the remote control key
until the roof* is closed
~ .&. , or
;;§ .,. Touch the sensor* on the doo r hand le until a ll
;::; of the windows and the roof* are closed. Do not ,....
8 place your hand in the door handle when doing
3 th is .
Sett ing conven ienc e op ening in the
Infota inm ent sy stem
.,. Select in the Infotainment system: I MENU ! but
ton
> Vehicle > left control b utton > V ehicle
setti ng s> C entral lock ing > Long p ress to
o pen windo ws.
A WARNING
= -- To reduce the r isk of injury, never close the
windows or the roof* carelessly or in a n un
con trolled man ner .
- For secur ity reaso ns, the windows and the
roof* can on ly be opened and closed with
the remote con trol key a t a maximum dis
tance of approx imately 6.S fee t (2 m) aw ay
from the vehicle . Always pay atten tion when
using the
tfJ button to close the windows
and the roof* so that no one is pinched . The
clos ing process will stop immediately when
the
tfl button is released.
(D Tips
Applies to: vehicles with panorama glass roof:
the power sunshade also opens/closes when
opening/closing the roof.
Correcting power window malfunctions
You can reactivate the one -touch up/down func
tion if it malfunctions.
.,. Pull the powe r window switch up until the win
dow is completely raised.
.,. Release the switch and pu ll it up again fo r at
least one second .
49
Page 52 of 409
Opening and clo sin g
Panorama glass roof
Panorama glass roof, opening /closing the
sunshade
Applies to: vehicles with panorama glass roof
The front segment can tilt and slide open.
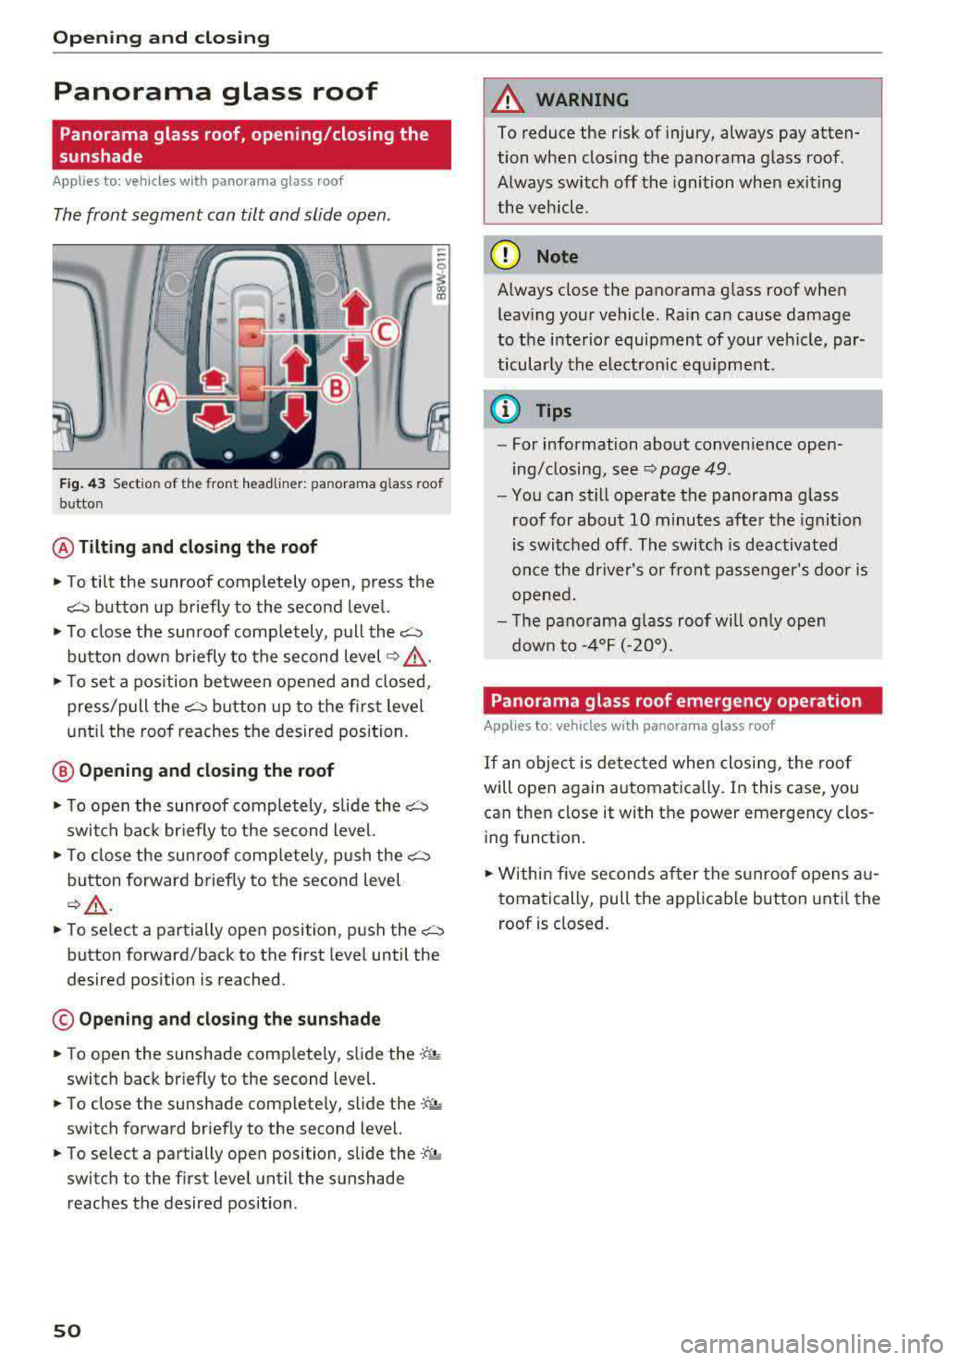
Fig . 43 Sect ion of the front headliner: panorama glass roof
button
@ Tilting and cl osing th e ro of
., To tilt the sunroof completely open, press the
~ button up briefly to the second level.
., To close the sunroof comp letely, pull the~
button down briefly to the second level ~ &
., To set a pos ition between opened and closed,
press/pull
the~ button up to the first level
unt il the roof reaches the desired position.
@ Opening and closing the roof
., T o open the sunroof completely, slide the~
switch back br iefly to the second level.
., To close the sunroof comp letely, push the~
button forward briefly to the second leve l
~A -
.. To se lect a partially ope n position, push the~
button forward/back to the first level until the
desired position is reached.
© Opening and clos ing the sunshade
., To open the sunshade comp letely, sli de the .;f",j,,
switch back briefly to the second level.
., To close the sunshade comp lete ly, slide the.-; ;, .
switch forward briefly to the second level.
., To select a partially open position, slide the -:a ,.
switch to the first level until the sunshade
reaches the desired position .
50
A WARNING
To reduce the risk of injury, always pay atten
tion when closing the panorama glass roof.
Always switch off the ignition when exit ing
the vehicle.
(D Note
Always close the panorama g lass roof when
leav ing your vehicle. Ra in can cause damage
to the i nterio r equipment of your veh icle, par
ticularly the electron ic equ ipment.
@ Tips
- For information about convenience open
ing/closing,
see~ page 49.
- You can still operate the panorama glass
roof for about 10 minutes after the ignition
is switched off. The switch is deactivated
once the dr iver's o r front passenger's door is
opened.
- T he pano rama g lass roof will on ly open
dow n to - 4°F (-20°).
Panorama glass roof emergency ope ration
Applies to : vehicles with panorama glass roof
If an object is de tected when clos ing, the roof
will open again automatica lly. In this case, you
can then close it with the power emergency clos
ing function .
., Within five seconds after the s unroof opens au
tomatically, pu ll the app licable button unti l the
roof is closed .
Page 53 of 409
Valet parking function
Applies to: vehicles wit h valet parking funct ion
The valet parking function protects the luggage
comportment from unauthorized access.
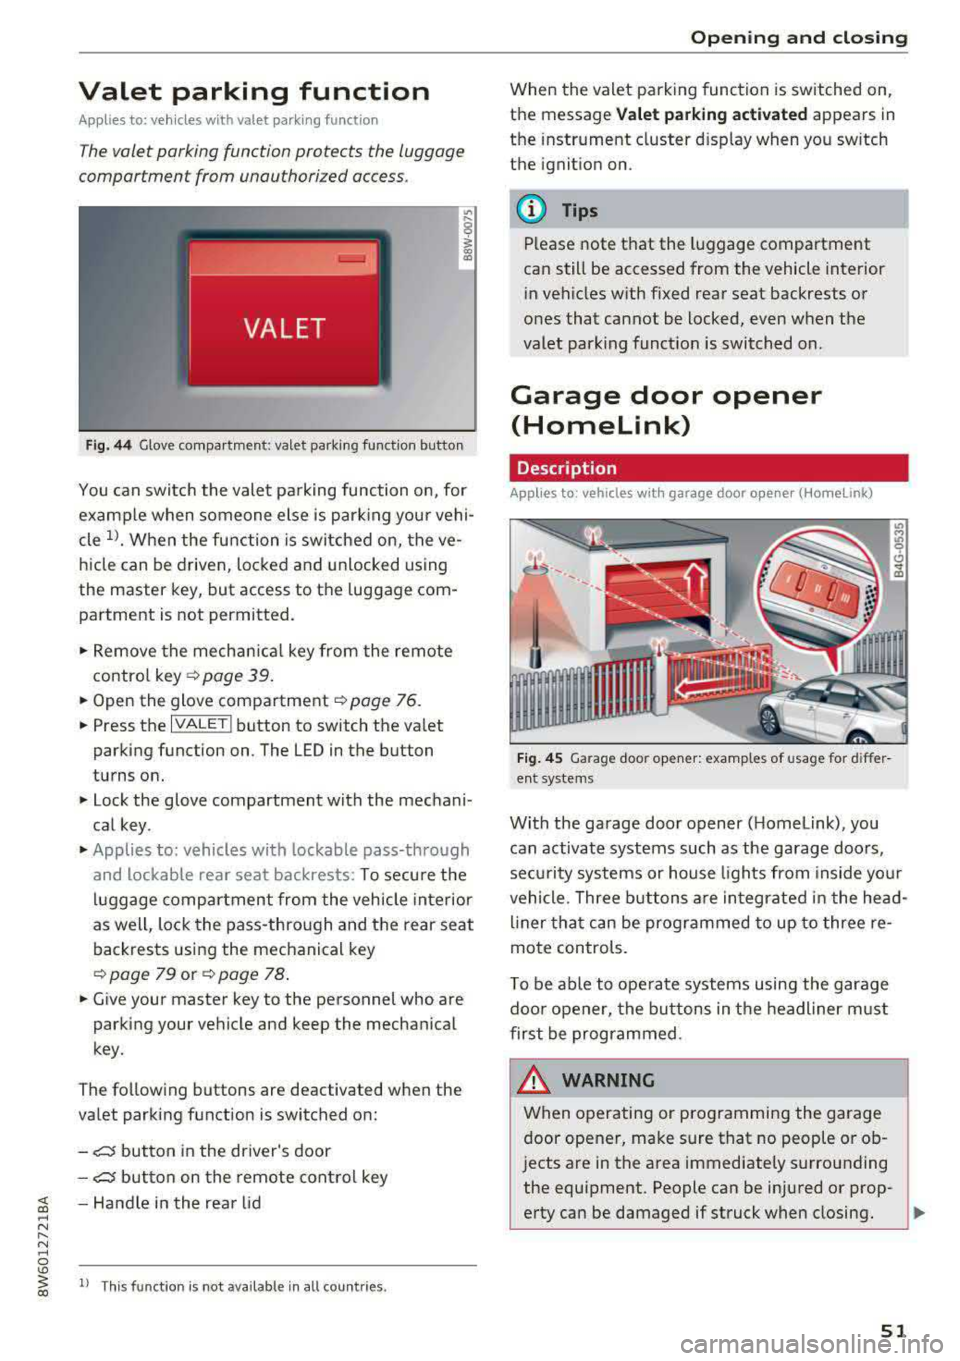
Fig. 44 Glove compartment: valet parking function butto n
You can switch the valet parking function on, for
example when someone else is parking your vehi
cle
l)_ When the function is switched on, the ve
hicle can be driven, locked and unlocked using
the master key, but access to the luggage com
partment is not permitted .
.,. Remove the mechan ical key from the remote
contro l
key~ page 39 .
.,. Open the glove compartment ~ page 76 .
.,. Press the IVALET I button to switch the valet
parking function on . The LED in the button
turns on.
.,. Lock the glove compartment with the mechani
cal key .
.,. Applies to: vehicles with lockable pass-through
and lockable rear seat backrests: To secure the
luggage compartment from the vehicle interior
as well, lock the pass-through and the rear seat
backrests using the mechanical key
~ page 79 or ~ page 78 .
.,. Give your master key to the personnel who are
parking your vehicle and keep the mechanical
key.
The following buttons are deactivated when the
va let parking function is switched on:
-,c:;5 button in the driver's door
-,c:;5 button on the remote control key
~ -Handle in the rear lid ..... N
" N ..... 0
'° ~ ll Th is function is not available in all countr ies . co
Open ing and closing
When the valet parking function is switched on,
the message
Valet parking activated appears in
the instrument cluster disp lay when you sw itch
the ignition on.
@ Tips
Please note that the luggage compartment
can still be accessed from the vehicle interior
in vehicles with fixed rear seat backrests or
ones that cannot be locked, even when the
valet park ing funct ion is switched on.
Garage door opener
(Homelink)
Description
Applies to: vehicles with garage door opener (Home Link)
Fig. 45 Garage door opener: examples of usage for differ
ent system s
With the garage door opener ( Homelink), you
can activate systems such as the garage doors,
sec urity systems or house lights from inside your
vehicle. Three buttons are integrated in the head
liner that can be programmed to up to three re
mote controls.
T o be able to operate systems using the garage
door opener, the buttons in the headliner must
first be programmed .
_& WARNING ~
When operating or programming the garage
door opener, make sure that no people or ob
jects are in the area immediately s urrounding
the equipment. People can be injured or prop-
erty can be damaged if struck when closing.
Ill>
51
Page 54 of 409
Opening and clo sin g
@ Tips
- For security reasons, we recommend that
you clear the programmed buttons before selling the vehicle.
- For additional information about HomeLin k,
vis it www.homelink.com.
- Fo r an explanation on conformity with the
FCC regulations in the United States and the
Industry Canada regu lations, see
¢ page 392.
Operation
Appl ies to: ve hicles w ith ga ra g e doo r opener (Homeli nk)
Requirements: the button in the headliner must
be programmed
c::> page 52 and the vehicle
must be within range of the sys tem, such as the
garage door.
• Press the button to open the garage door . The
L E D @ c::> page 52, fig . 46 bli nks or turns on .
• Press the button again to open the garage
doo r.
@ Tips
When open ing o r closing the garage door, do
not p ress and hold the butto n longer ten sec
onds o r the ga rage door opene r will sw itch to
programmi ng mode.
Programming button s
App lies to: ve hicles w ith gara g e doo r opener (Homeli nk)
1 1 11~111
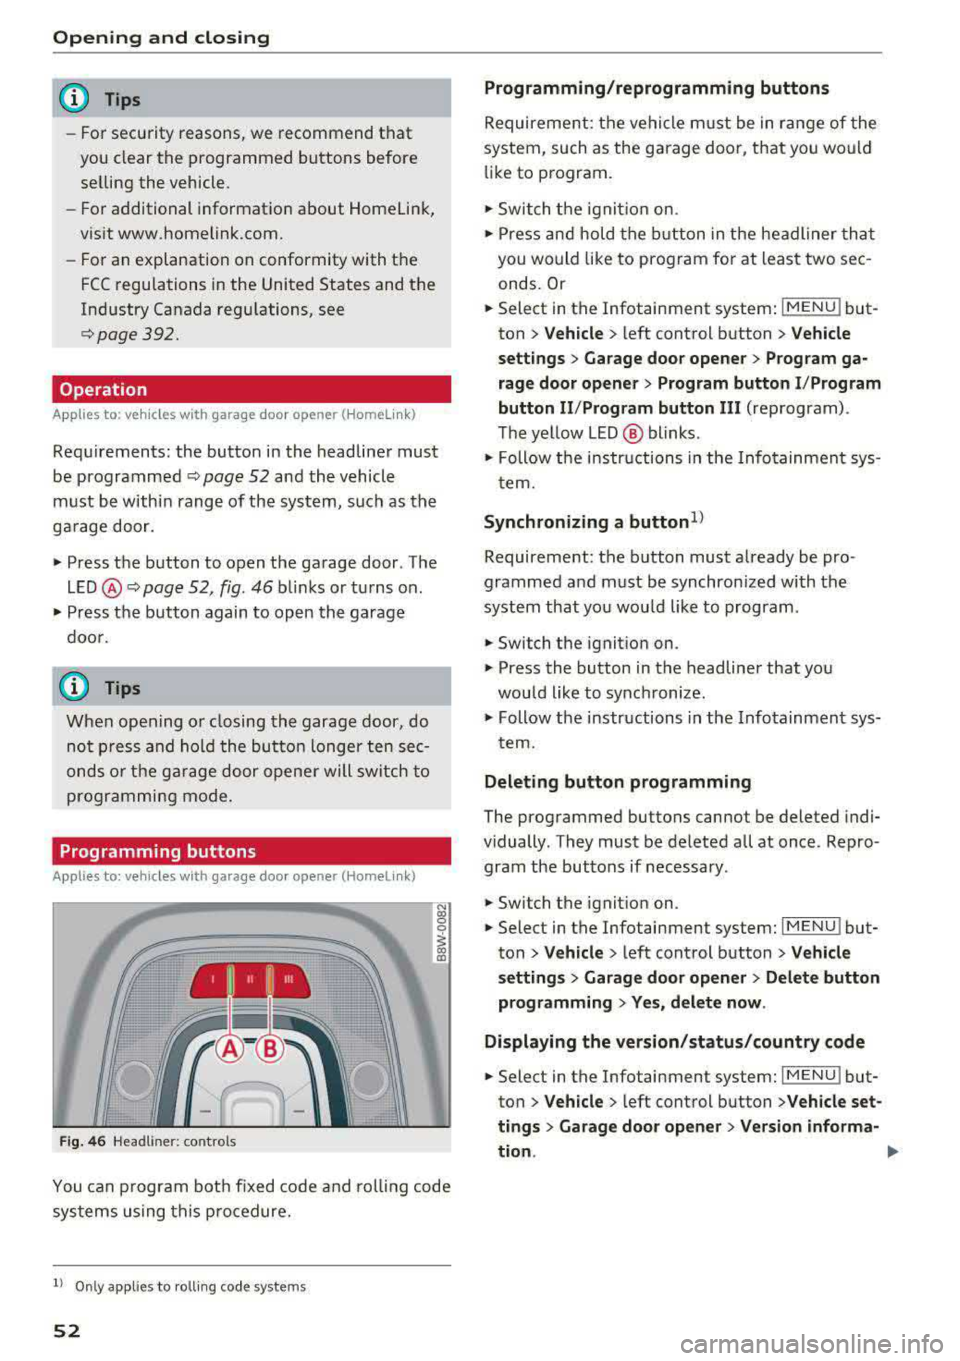
Fig . 4 6 Headliner: controls
N
"' 0
0
~ a,
You can p rogram bot h fixed code and roll ing code
sys tems using this procedure.
l) Only appl ie s to ro lli ng code system s
52
Programming /reprogramm ing buttons
Requireme nt: the vehicle m ust be in range of the
system, such as the garage door, that you would
li ke to program.
• Switch t he ignit io n on.
• Press and hold the b utton in the headliner that
you would like to program for at least two sec
onds. Or
• Select in the Infotainment system : IMENUj but
ton
> V ehicle > left control button > Vehicle
s e tting s> Garage door opener > Prog ram ga
rage door opener
> Prog ram bu tton I /P rogram
button II /Prog ram button
II I (reprogram) .
The ye llow LED @ blinks .
• Follow the in structions in the Info tainment sys-
tem.
Synchronizing a button1 )
Requireme nt: the button must already be pro·
grammed and must be synchronized with the
system that you wou ld like to program .
• Switch the ignition on .
• Press the button in the headliner that you
would like to synchronize.
• Follow the instructions in the Infotainment sys·
t ern.
Deleting button programming
The programmed buttons cannot be deleted indi·
vidually . They must be deleted all at once. Repro·
gram the buttons if necessary .
• Switch the ignit ion on.
• Select in the Infotainment system: IMENU j but·
ton
> Ve hicle > left control button > Vehicle
s etting s
> Garage door opener > Del ete button
programming
> Y es, del ete now .
Displa ying the version /status /country code
• Select in the Infotainment system: IMENUj but
ton
>V ehicle > left control button >V ehicle set·
ting s
> Garag e door opener > Version informa-
tion .
.,..
Page 55 of 409
<( a, .... N ,....
N .... 0 \0
3 a,
@ Tips
-The garage door opener may need to be
synchronized with the system motor after
the programming. Follow the manufactur
er's instructions for doing this.
- The programming process can take up to 30
seconds. The hand transm itter may need to
be operated again during the process.
- Make sure the batteries in the hand trans
mitter are charged before starting the pro
gramming process.
- In some cases, the system must be pro
grammed using an alternative mode. Select i n the Infotainment system:
IMENU I > Vehi
cl e
> left cont rol button > Vehicle s etting s >
Garage door opener > Program garage door
op ener >
right control button > UR-Mode /
D -Mode . Op
ening and cl osing
53
Page 56 of 409
Power top
Power top
Automatic power top
General information
Applies to: vehicles with power top
The power top opens and closes automat ically .
W hen open, the powe r top is stored comp lete ly
i n t he power top comp artmen t. T he power top
can be opened or closed at speeds up to 30 mph
(SO km/h).
Unde r no rma l condi tions, the powe r top is wind
and wa terp roof. In rare cases, small d rople ts of
water m ay form under ext reme wea ther condi
tions such as torrentia l or prolonged ra in. That is
norma l and no cause for concern .
F ollow t he care ins truct ions to keep the power
top free of leaks and to main tain i ts appearance
c::> page 362, Core and cleaning. Also observe the
following:
- Open and s tow t he power to p only whe n it is
cl ean and dry. Stowi ng the power top when it is
damp can create imp rints in it, and mi ldew and
othe r damage can res ult if it is left stowed
whi le damp for long periods of time. To prevent
scratc hing or damaging the power top, do not
use a ny sharp-edged objects to remove ice and
snow . The rear window may be clea red w ith a
standard ice scraper .
- Do not leave the power top open for several
weeks o r th e creases in it may become discol
o red .
- Do not ope n the power top when the tem pera
tu re is be low 32 °F (0 °C) . The fabric i n the
power top loses elast ic ity in s ub- zero tempera
tu res.
- The powe r top w ill not open when the tempera
tu re is be low- 5 °F (-1 5 °().
54
· Opening/closing the power top
Applies to: vehicles with power top
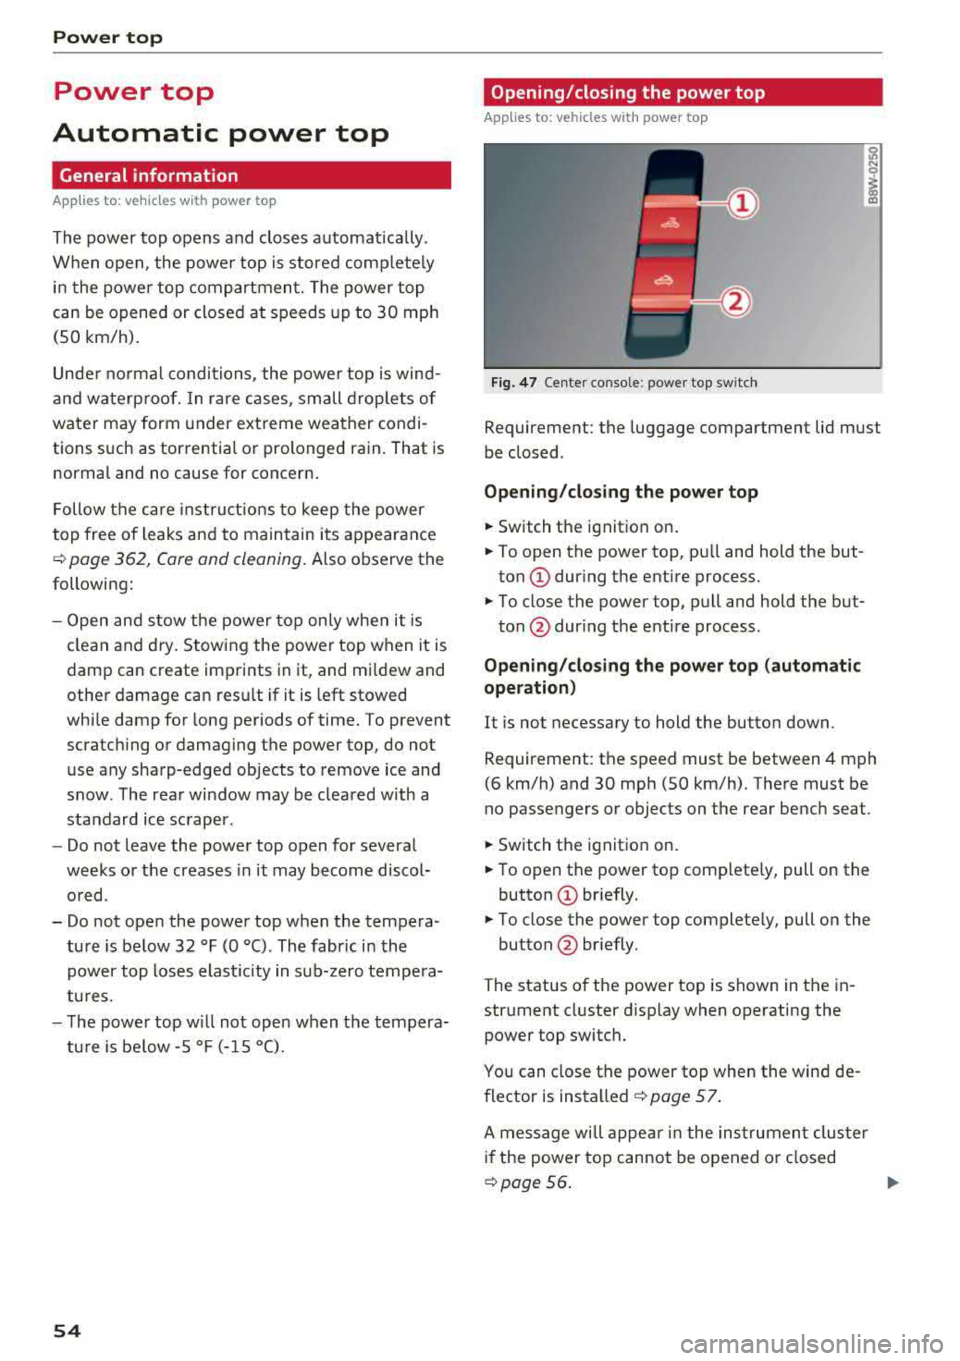
Fig. 47 Ce nte r co nso le : powe r top sw itc h
Requireme nt: the luggage compartment lid must
be closed .
Opening/closing the power top
.,. Switch the ignit io n on.
.,. To open the power top, pu ll and hold the but
ton
(D dur ing the entire process.
.,. To close the power top, pu ll and hold the but-
ton @dur ing the ent ire process .
Opening/cl osing the power top (automatic
operation)
It is not necessary to hold the butto n down.
Requirement: the speed must be between 4 mph
(6 km/h) and 30 mph (SO km/h). The re must be
no passengers or objects on the rear bench seat .
.,. Switch the ignition on.
.,. T o open the power top complete ly, pull on the
button
(D br iefly.
.,. To close the power top complete ly, pull on the
button @ briefly.
The status o f the power top is shown in the in
str ument cl uster d isplay when operating the
power top switch.
You can close the power top when the win d de
flector is installed
c::> page 57 .
A message wi ll appe ar in the ins trumen t clus te r
if the power top cannot be opened o r closed
c::> page 56. .,.
Page 57 of 409
_& WARNING
-When operating the power top, make sure
the funct ion is not affected by wind or other
factors and that it does not interfere with other dr ivers .
- Visibility to the rear is limited when operat ing the power top . Avoid operating the top
wh ile driving in reverse .
- Never drive with the power top unlocked .
The wind from driving could cause the pow
er top to open. This can result in injur ies and
damage to the vehicle.
- Make sure no one will be injured by the pow
er top suppo rts or other moving compo
nents when open ing and closing the top.
- T he headroom in the rear is reduced when
opening a nd clos ing the power top. Make
sure the rear passengers keep enough d is
tance from the power top to reduce the risk
of injury.
(D Note
To prevent damage to the power top:
- do not store any objects in the power top storage compartment.
- make sure there is enough space above the
vehicle when opening or clos ing the power
top.
@ Tips
- To prevent the vehicle battery from draining unnecessari ly, do not open or close the pow
er top repea tedly whe n the engine is switch
ed off.
- The power top can also be operated manual
l y temporari ly if there is a malfunc tion
c::, page 58, Power top emergency opera·
tion . An author ized A udi dealer or author
ized Audi Service Facility should diagnose
and correct the cause of the ma lfunction as
soon as possib le.
- If the vehicle is parked with the power top
open, the vehicle inter ior is not protected
from damaging weather or unauthorized ac
cess. Lock any items you leave behind in the
luggage compartment . C lose the power top
before leaving the vehicle .
Powe r top
-The side windows automatically lower
slightly when opening or closing the power
top .
Power top convenience opening/closing
App lies to : vehicles wit h powe r top
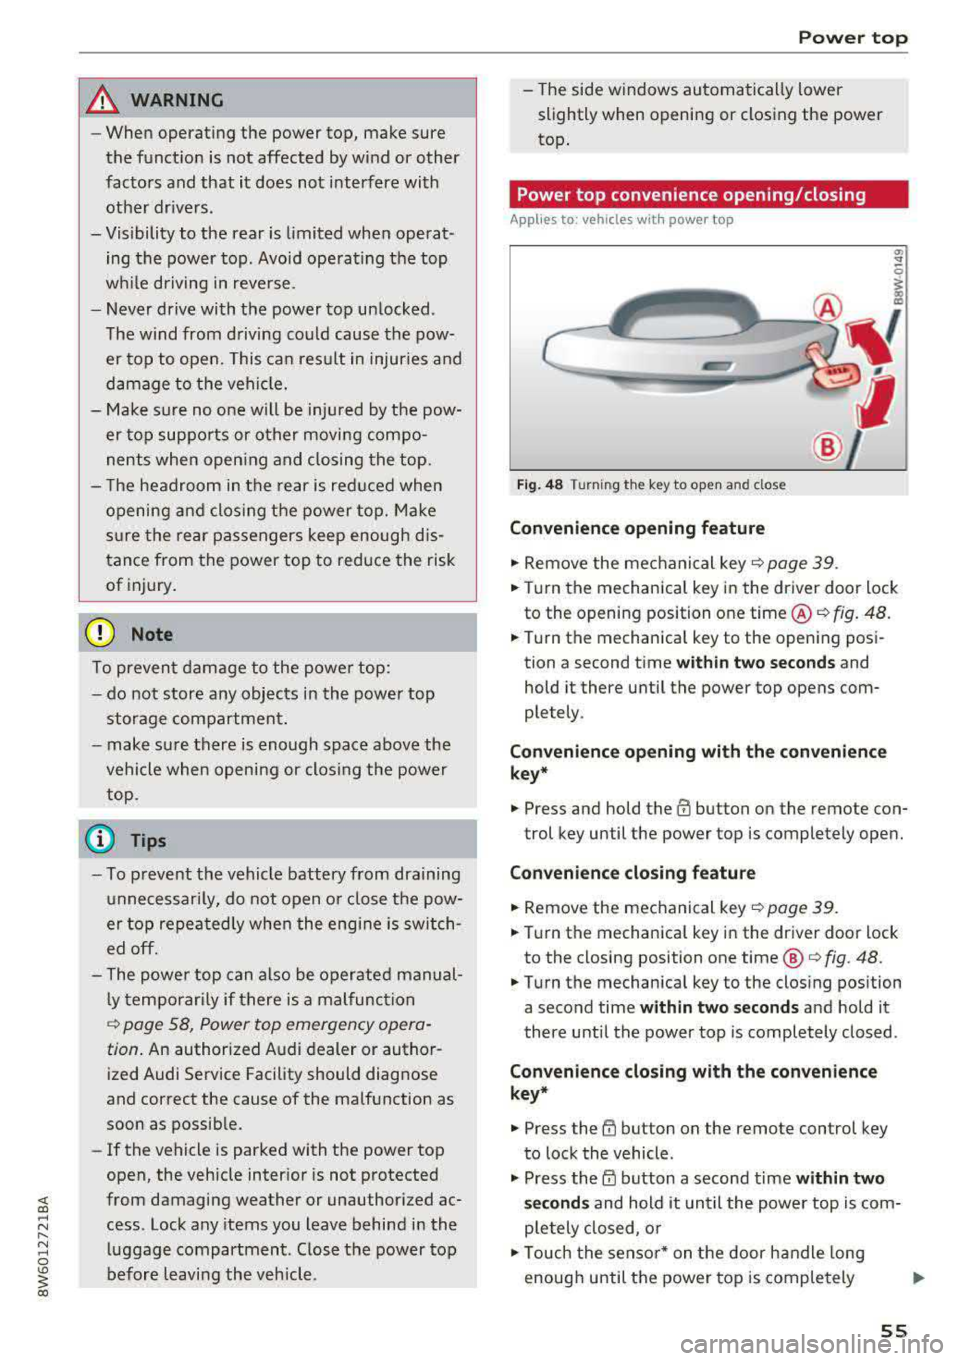
Fi g. 48 Turni ng th e key to open a nd close
Convenien ce opening feature
.,. Remove the mec hanical key c::> page 39 .
.,. Turn the mechanica l key in the driver door lock
to the opening position one time @
c::, fig. 48.
.,. Turn the mechanica l key to the opening posi
tion a second time
wi th in tw o se cond s and
hold it there until the power top opens com
ple tely .
Co nven ien ce opening with th e co nv eni enc e
key*
.,. Press and hold the m button on the remote con-
trol key until the power top is completely open.
Conv enience clo sing featur e
.,. Remove the mechanical key c::, page 39.
.,. Turn the mechanical key in the dr iver door lock
to the closing posit ion one time @
c:> fig. 48.
.,. Turn the mechanical key to the clos ing position
a second time
within two seconds and hold it
there until the power top is completely closed .
Convenienc e closing with th e con ven ience
key*
.,. Press the tfJ button on the remote control key
to lock the vehicle .
.,. Press the CD button a second time within two
s e cond s
and hold it until the powe r top is com
ple tely closed, o r
.,. Touch the sensor * on the door handle long
enough until the power top is completely
Ill>
55
Page 58 of 409
Power top
closed. Do not place your hand in the door han
dle when do ing this.
The opening or closing p rocess w ill stop
immedi
ately
if you release the key or stop to uch ing t he
button. Opening a nd clos ing with t he conven
ie nce k ey* is possible from up to 13 ft (4 m)
away .
A WARNING
Read and follow t he important safety p recau
tions
i:> & in Opening/closing the power top
on page
55 .
Power top storage compartment
Applies to: veh icles with power top
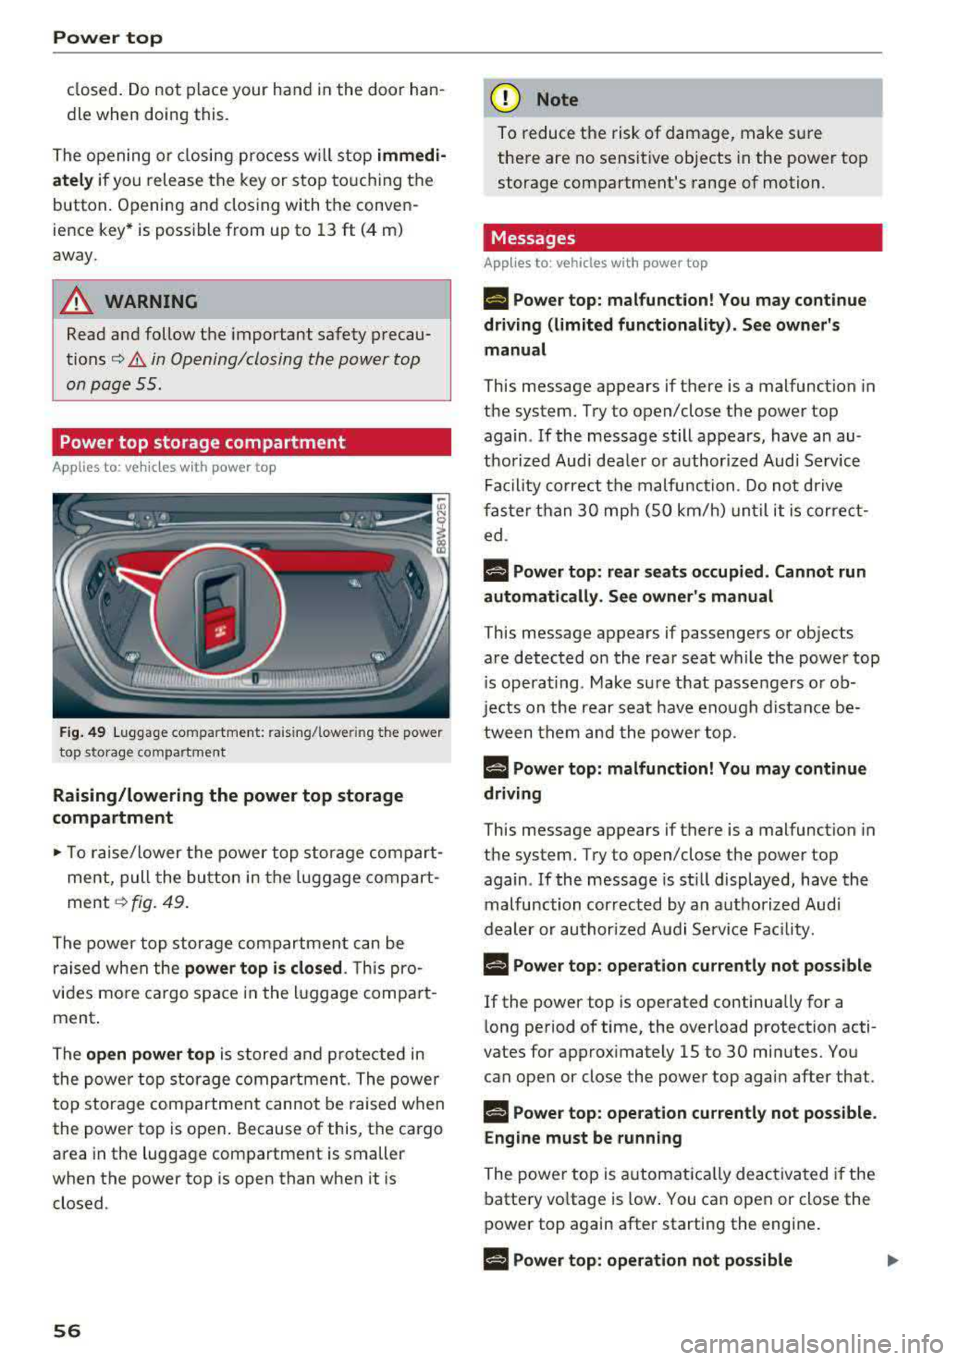
Fig. 49 Luggage co mpartme nt: ra isi ng/ lowe ring the powe r
top s to rage co m partment
Raising/lowering the power top storage
compartment
.- To ra ise/lower the power top storage compart
ment, pull the bu tton in the luggage comp art
ment
i:> fig. 49.
The power top st orage compartment c an be
raised when t he
power top is closed . This pro
vides mo re ca rgo s pace in the l uggage compa rt
ment .
T he
open power top is stored and p rotected in
the powe r top storage compartmen t. T he power
top storage compartment canno t be raised w hen
the power top is open . Because of this, the cargo
area in the luggage compartment is smaller
when the power top is open than when it is
closed .
56
(D Note
To reduce t he risk of damage, make s ure
the re are no sensit ive objects in the power top
storage compartment's range of motion.
Messages
Applies to: vehicles with power top
II Power top: malfunction! You may continue
driving (limited functionality). See owner's
manual
This message appears if there is a malfunction in
the system. Try to open/close the power top
again . If the message still appears, have an au
thorized Aud i dea le r or authori zed Audi Service
Fa cility co rrect the malfunction . D o not d riv e
fas ter than
30 mph (SO km/h) un til it is cor rec t
ed .
f-j "ower top: rear seats occupied . Cannot run
automatically. See owner 's manual
This message appears if passengers or objects
are detected o n the rea r seat while the powe r top
i s ope ra ti ng . Make s ure t hat passe ngers o r ob
je cts on the rear sea t have eno ugh distance be
tween them and the power top .
f¥-j "ower top: malfunction! You may continue
driving
This message appears if there is a malfunction in
the system. Try to open/close the power top
again . If the message is st ill displayed, have the
malfunction correc ted by an a uthorized Aud i
dealer or author ized A udi Service Fac ility.
H "ower top: operation currently not possible
If the power top is operated continua lly for a
l ong period of time, the overload protection acti
vates for app rox imately 15 to
30 minutes. Yo u
can ope n or close the power top agai n after that .
§-j "ower top: operation cu rrently not possible .
Engine must be running
The powe r top is a utomat ica lly deac tiva ted if the
batte ry vo ltage is low . You can open or close the
power top aga in after start ing the engine .
§-j "ower top: operation not possible
Page 59 of 409
This message appears when there is a malfunc
tion. The power top can be operated manually
r::!) page 58.
.&_ WARNING
Never drive with the power top unlocked. The
wind from driving could cause the power top
to open. This can result in injuries and dam
age to the vehicle.
Wind deflector
Applies to: ve hicles with wind deflecto r
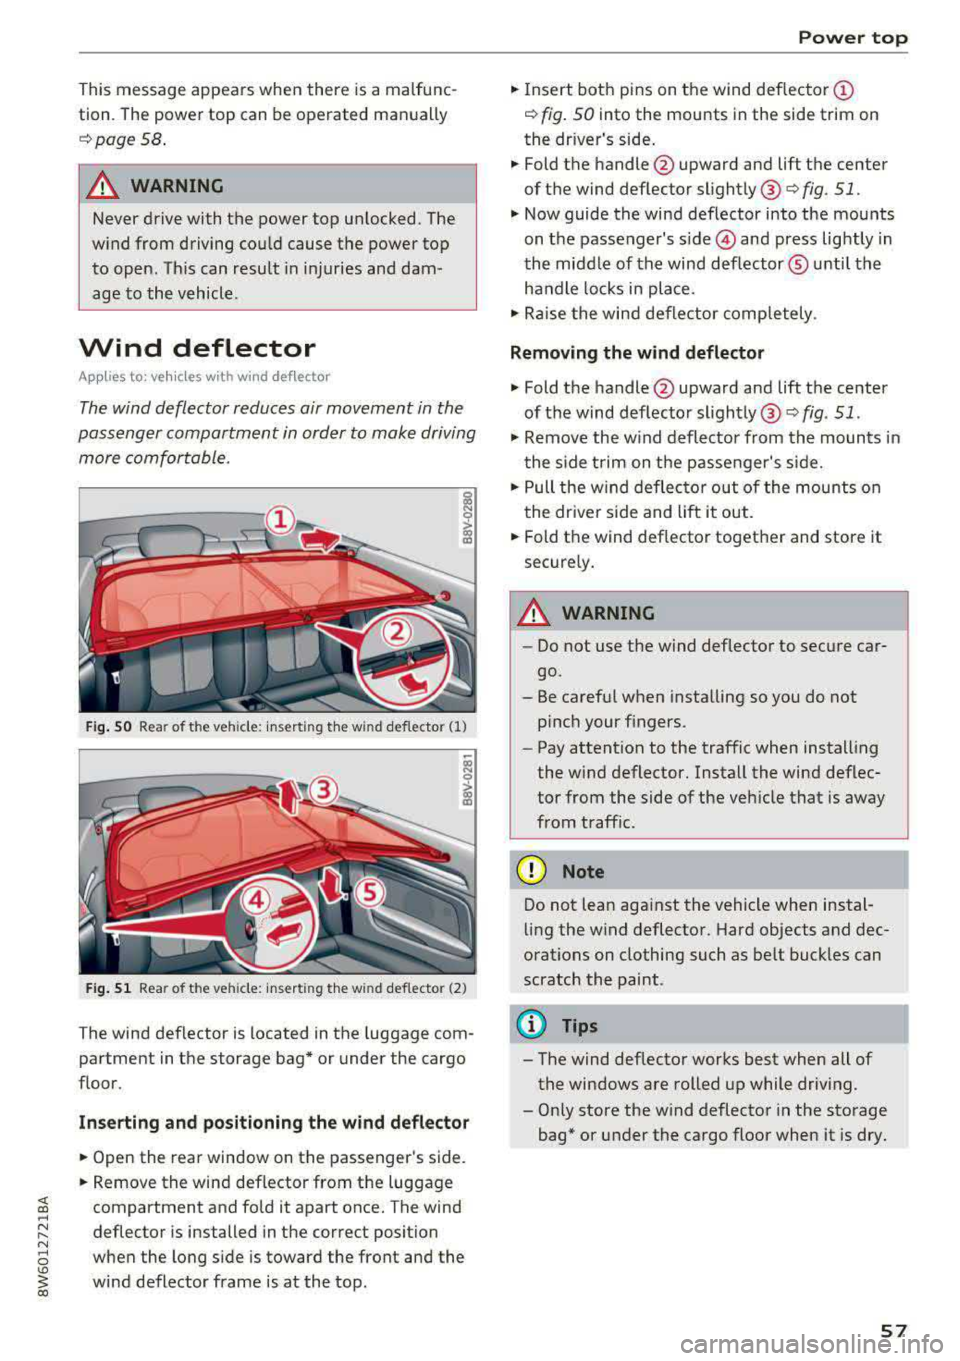
The wind deflector reduces air movement in the
passenger compartment in order to make driving more comfortable.
Fig. SO Rea r of t he ve hicle: insert ing the w ind deflecto r (1)
Fig . 51 Rea r of the ve hicle: insert ing the w ind deflecto r (2)
The wind deflector is located in the luggage com
partment in the storage bag* or under the cargo
floor.
Inserting and positioning the wind deflector
.,. Open the rear window on the passenger's side .
.,. Remove the wind deflector from the luggage
compartment and fold it apart once. The wind
deflector is installed in the correct position
when the long side is toward the front and the
wind deflector frame is at the top .
Power top
.,. Insert both pins on the wind deflector @
r::!) fig. 50 into the mounts in the side trim on
the dr iver's side .
.,. Fold the handle @upward and lift the center
of the wind deflector slightly @
c> fig. 51 .
.,. Now guide the wind deflector into the mounts
on the passenger's
s ide © and press lightly in
the middle of the wind deflector ® unti l the
handle locks in place.
.,. Raise the wind deflector completely .
Removing the wind deflector
.,. Fold the handle@upward and lift the center
of the wind deflector slightly ®
c> fig. 51.
.,. Remove the wind deflector from the mounts in
the side trim on the passenger's side .
.,. Pull the w ind deflector out of the mounts on
the driver side and lift it out .
.,. Fold the wind def lector together and store it
securely .
.&_ WARNING ~
-Do not use the wind deflector to secure car-
go.
- Be careful when installing so you do not
pinch your fingers.
- Pay attention to the traffic when installing
the wind deflector. Install the wind deflec
tor from the side of the veh icle that is away
from traff ic.
(D Note
Do not lean aga inst the vehicle when instal
ling the w ind deflector. Hard objects and dec
orat ions on clothing such as be lt buckles can
scratch the paint.
@ Tips
- The wind deflector works best when all of
the windows are rolled up while driving.
- Only store the wind deflector in the storage
bag* or under the cargo floor when it is dry .
57
Page 60 of 409
Power top
Power top emergency
operation
Preparation
Applies to: vehicles with power top
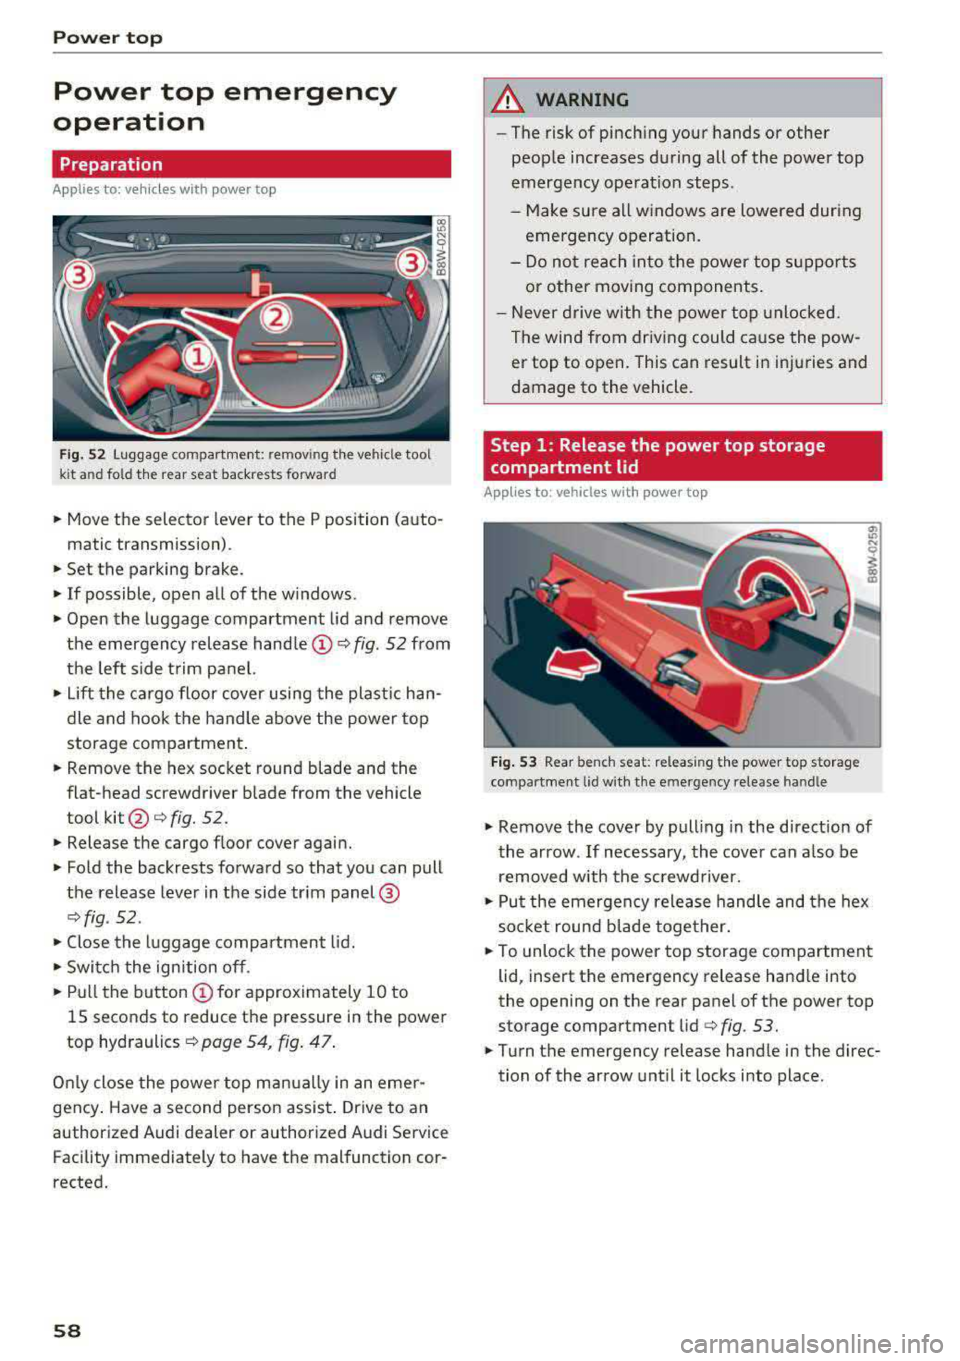
f ig. 52 Luggage compartme nt: remov ing the vehicle tool
k it a nd fo ld the rear seat back rests forward
• Move the selector lever to the P position (auto-
matic transmission) .
• Set the parking brake.
• If possible, open all of the w indows .
• Open the luggage compartment lid and remove
the emergency release
handle@Q fig. 52 from
the left side trim panel.
• Lift the cargo floor cover using the plastic han
dle and hook the handle above the power top
storage compartment .
• Remove the hex socket round blade and the
flat-head screwdriver blade from the vehicle
tool
kit @ c:> fig. 52.
• Release the cargo f loor cover again.
• Fold the backrests forward so that you can pull
the release lever in the side trim panel@
Qfig . 52 .
• Close the luggage compartment lid.
• Switch the ignition off.
• Pull the button @for approximately 10 to
15 seconds to reduce the pressure in the power
top hydraulics
c:> page 54, fig. 47 .
Only close the power top manually in an eme r
gency . Have a second person assist . Drive to an
authorized Audi dealer or authorized Audi Service Facility immediately to have the malfunction cor
rected.
58
A WARNING
- The risk of pinch ing your hands or other
people increases during all of the power top
emergency operation steps .
-Make sure all windows are lowered during
emergency operation.
-Do not reach into the power top supports
or other moving components.
- Never drive with the power top unlocked.
The wind from driving could cause the pow
er top to open. This can result in injuries and
damage to the vehicle.
Step 1 : Release the power top storage
compartment lid
Applies to : vehicles with power top
Fig. 53 Rear bench seat: releas ing the power top storage
compartment lid w ith the e mergency release han dle
"' Ill
I
"' Remove the cover by pulling in the direct ion of
the arrow . If necessary, the cover can a lso be
removed with the screwdriver.
• Put the emergency release handle and the hex
soc ket round b lade together.
• To unlock the power top storage compartment
lid, insert the emergency release handle into
the opening on the rear panel of the power top
storage compartment lid
c:> fig. 53.
• Turn the emergency release handle in the direc
tion of the arrow until it locks in to place.