acc AUDI A7 2018 Repair Manual
[x] Cancel search | Manufacturer: AUDI, Model Year: 2018, Model line: A7, Model: AUDI A7 2018Pages: 274, PDF Size: 42.77 MB
Page 107 of 274

a co .... N
" N .... 0 00 \.J '
Applies to: vehicles with night vision assist
Night vi sion assist : S ys te m fault
The system cannot guarantee correct function
and is sw itched off . See an author ized Audi deal
er or authorized Audi Service Facility for ass is
tance.
Night vision a ssist : Currently una vailabl e
The system cannot guarantee correct function at
this t ime and is switched off.
Night vis ion assi st: Onl y av ailable at night with
light s turned on
Nig ht vision ass ist only wo rks when it is dar k out
side and the head lights are on.
Night vision a ssist : Pede strian marking curr ent
l y unavail abl e
The pedestrian and wild animal marking was
sw itched off by the system .
Audi drive select (drive
settings)
Introduction
Drive select makes it possible to experience dif
ferent types of veh icle settings in one vehicle .
The dr iver can se lect
Comf ort , Auto a nd D ynamic
modes in the I nfota inme nt system to switch be
tween , fo r example , a sporty and a comfo rtable
driving mode .
I n the
Indi vidual mode, the sett ings can be ad
justed to your perso nal preferences . This makes
it poss ible to comb ine settings such as a sporty
engine setting with light steering.
Description
The fo llowing systems, among other things, are
infl uenc ed by drive select:
Engine and automatic transmission
D epending on the mode, the e ng in e and auto
mat ic transmission respond more q uickl y o r in a
more balanced manner to accelerator pedal
A ss istance systems
movements . In the sporty dynamic mode, the
transmission shifts at higher speed ranges .
Adaptive air suspension*
The adapt ive a ir suspens ion* is an e lectron ica lly
contro lled air suspens io n and dampi ng sys tem.
T he adjustment depends o n the dr iving mode se
l ected, steering movements, the driver's braking
and acce leration, and as the road surface, ve hicle
speed and load.
T he vehi cle ground clearance depends on t he
mode selected and the speed . When you are in
the
a uto mode, the highway setting is activated
when you dr ive above 75 mph (120 km/h) for
more than 30 seconds. The ground clearance is
increased automatically if the speed drops below
44 mph (70 km/h) for more than 120 seconds .
Suspension control*
With the Audi Dynamic Ride Contro l damping
contro l, dampening characteristics of the vehicle
can be individually adjusted us ing drive select.
This makes it possib le to satisfy the des ire for
sporty suspens ion (DYNAMIC) and comfortable
suspension (COMFOR T) without g iv ing up bal
anced tu ning (AUTO) .
Steering
The power steering adapts. Indirect steering that
moves easily as in comfort mode is espec ially
su ited to long drives on a highway . The dynamic
mode provides sporty, direct steeri ng .
Applies to: vehicles with dynamic steering
The steering ratio changes based on veh icle
speed in order to maintain optimum steering ef
fort for the driver at all times . Th is sets the steer
i ng to be less sensitive at h igher speeds i n orde r
to prov ide improved ve hicl e cont rol. At red uced
speeds, stee ring is more d irect in orde r to keep
the steering effort as minimal as possible when
the driver is maneuvering the ve hicle. At low and
average speeds, dynamic steering * additionally
provides more responsive steering performance.
Sport differential *
As a compone nt o f the all whee l dr ive sys tem
(qua ttro)
q page 124, the sport different ia l dis -
tributes the driving power to the rear axle
.,.
105
Page 108 of 274

Ass is tanc e system s
depending on the situation. The distribution of
power varies from balanced (comfort) to sporty
(dynamic) depending on the selected mode. The
goal is a high leve l of agility and ab ility to accel
erate on curves. The ve hicle is very respons ive to
steer ing .
Co rne ring light *
The cornering light adapts the high beams to the
direction of the curve depending on the speed.
The pivot ing action and the light ing also adapt to
the mode.
Adapti ve c ruise control *
The behavior when acce lerating can be adjusted
from comfortable to sporty, depending on the
drive select mode. Adaptive cruise control a lso
responds to the driving behavior of the veh icle
ahead in a more conservative or sporty manner.
Engine sound *
The engine sound adapts to the current mode
and can be subtle to sporty .
@ Note
Applies to: vehicles with adaptive air suspension
-Make sure there is enough clearance above
and below t he ve hicle when parking. The
height of the vehicle (ground clearance) can
change once it is parked due to temperature
fl uctuations, changes to t he load condit ions
and c hanges to the d rivi ng modes.
- When transporting the veh icle on a car car
r ier, tra in, sh ip or by other means, only t ie
the ve hicle dow n at t he ru nning surface of
the tires, w hich is the outer circ umfe rence.
Securing t he vehi cle at t he axle compo
nents, suspension struts or towing eyes is
not permitted because the pressu re in t he
a ir s uspension struts can change dur ing
Adjusting the Individual mode
transport . The vehicle may not be secured
sufficiently if this happens.
(D Tips
- In some models, the max imum ve hicle
speed can on ly be reached in t he auto and
dynamic modes.
- Th e S se lector lever position a utomat ica lly
engages if the dynamic mode is selected.
- Applies to: vehicles with dynamic steering:
operating noise is heard when sta rting o r
stopping the engine. This does not indicate
a problem .
Selecting the driving mode
.,. To select the mode, select the follow ing in the
Infotainment:
! CAR ! function button> Comfort ,
Auto , Dynamic or Individual.
.,. Applies to: vehicles with a ti:~ button on the
steering wheel: press the button repeatedly u n
til the desired mode appea rs in the instrument
cl uste r d isplay.
You
can change the driv ing mode whe n the vehi
cle is stationary or while d riv in g. If traff ic per
mits, afte r changing modes, briefly t ake your
foot o ff t he accelerator pedal so t hat the recently
selected mode is also activated for t he engine.
Comfort -provides a comfort-or iented vehicle
setup a nd is s uited fo r long d rives o n highways.
Auto -provides a n overall comfortable yet dy
nam ic dr iv ing feel and is suited for everyday use .
Dynamic -gives the driver a sporty driving fee l
and is suited to a sporty driving style .
Individu al -¢ page 106 .
A WARNING
Pay attention to traffic when ope rating the
drive select to reduce the r isk of an accident.
-
You can adjust the vehicle settings to your personal preferences .
.,. Select: the !CAR! function button > S et individ
ual
control b utton . Once you select the men u,
106
you will a utomatica lly drive in the Indi vidual
mode .
Page 111 of 274

a co ,...,
N
" N ,...,
0 00 <..:l '
Description
Applies to: vehicles with parking system plus
Parking system plus provides audio and visual
signals when parking .
Fig . 115 D is p lay field
Sensors are located in the front and rear bump
ers . If t hese detect an obstacle , audible and visu
al signa ls warn you.
Make sure the sensors are not covered by stick
ers, deposits or any other obstructions as it may
impair the sensor function. Fo r information on
cleaning, see
¢ page 228.
The display field begins approximate ly at:
® 4 ft (1.20 m)
® 3 ft (0.90 m)
© 5 .2 ft (1.60 m)
@ 3 ft (0.90 m)
The closer you get to the obstacle, the sho rter
the interval between the audible signals. A co n
tinuous tone so unds whe n the obstacle is less
than approximately 1 foot (0.30 meters) away .
D o not cont inue driving forwa rd o r in reverse
¢ .&. in General information on page 108, ¢Q) in
General information on page
108!
If the d ista nce to an obstacle remains constant,
the vol ume of the distance wa rning gradually
d rops afte r abo ut four seconds (th is does not
ap
p ly in the continuous tone range) .
Parking systems
Switching on/off
Applies to: vehicles with parking system plus
Fig. 116 Center co nsole : p arkin g aid b utto n
Switching on
.,. Shift into reverse, or
.,. Press the PwA button in the center conso le
¢ fig . 116 . A short confirmation tone sounds
and the LED in the b utton turns on .
Switching off
.,. Drive faster than 6 mph (10 km/h), or
.,. Press the PwA button, or
.,. Switch the ignit ion off.
Vi sual d isplay
T he segments in front of and behind the veh icle
help you to determine the distance betwee n you
and an obstacle .
T he red lines mark the expected direction of trav
el according to the steer ing angle. A white seg
ment indicates an identified obstacle that is out
side of the vehicle 's path. Red segments show
identified obs tacles that are in your vehicle's
path. As your vehicle comes closer to the obsta
cle, the segments move closer to the veh icle . The
collision a rea has been reached whe n the next to
last segment is displayed . Obstacles in the co lli
s ion area, including those outs ide of the vehicle's
pa th , are shown in red. Do not cont in ue driving
f orward or in reverse
¢ .&. in General information
on page 108 ,
¢@ in General information on
page
108!
109
Page 112 of 274
Parking systems
Rearview camera
Introduction
Applies to: vehicles with rearview camera
I ' I
....
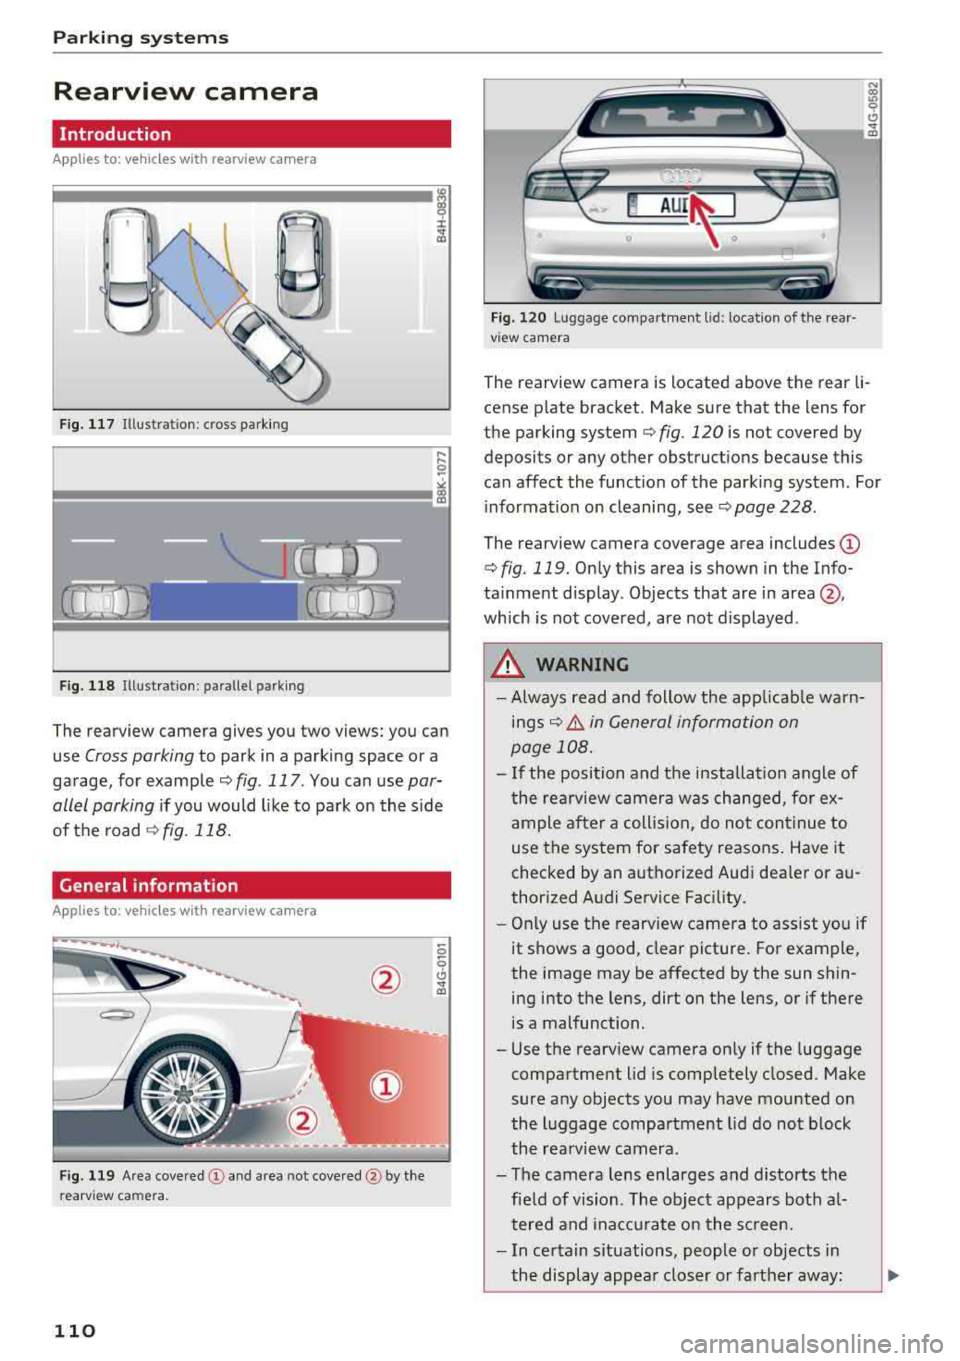
F ig. 117 Illustration: cross parking
Fig. 118 Illustration: parallel parking
The rearview camera gives you two views: you can
use
Cross parking to park in a parking space or a
garage, for example¢
fig. 117 . You can use par
allel parking
if you would like to park on the side
of the road
¢fig. 118.
General information
Applies to: ve hicles with rearview camera
F ig. 119 Area
covered (!) and area not covered@by the
re arv iew camera .
110
Fig. 120 Luggage compartmen t lid : location of the rear
v iew camera
The rearview camera is located above the rear li
cense plate bracket. Make sure that the lens for
the parking system
¢ fig. 120 is not covered by
deposits or any other obstructions because this
can affect the function of the parking system . For
information on cleaning, see ¢
page 228.
The rearview camera coverage area includes (D
¢ fig. 119. Only this area is shown in the Info
ta inment display . Objects that are in
area @,
which is not covered, are not displayed .
.&, WARNING
-Always read and follow the applicable warn
ings¢.&. in General information on
page 108.
- If the position and the installation angle of
the rearview camera was changed, for ex
ample after a collision, do not continue to
use the system for safety reasons. Have it
checked by an authorized Audi dea ler or au
thorized Audi Service Facility.
- Only use the rearv iew camera to assist you if
it shows a good, clear picture. For example,
the image may be affected by the sun shin ing into the lens, dirt on the lens, or if there
is a malfunction.
- Use the rearview camera only if the luggage
compartment lid is completely closed. Make
sure any objects you may have mounted on
the luggage compartment lid do not block
the rearview camera.
- The camera lens enlarges and distorts the field of vision . The object appears both al
tered and inaccurate on the screen.
- In certain situations, people or objects in
the display appear closer or farther away :
Page 113 of 274
a co ,...,
N
" N ,...,
0 00 <.,;) '
such as th e bumper of a parked vehicle, a
tra ile r hitch or the rear of a truck. Do not
us e the orientation lines in this case.
- If driven from a level surface onto an in
clin e, or a downward slope.
- If driven toward protrud ing objects.
- If the vehicle is carrying too much load in
the rear.
- Applies to: vehicles with air s uspension: the
accuracy of the orientation lines and blue
surfaces decreases when the vehicle is raised/lowered
<=)page 105.
(D Note
- Always read and follow the applicable warn
ings
Q 0 in General information on
page 108.
- The orange-colored or ientation lines in the
Infotainment display show the vehicle path
based on the steering wheel angle. The
front of the vehicle swings out more than
the rear of the veh icle . Ma inta in plenty of
distance so that an exterio r mirror or a cor
ner of the ve hicle does not co llide wit h any
obstacles.
Switching on /off
App lies to : vehicles wit h rearv iew camera
Switching on
.,. S hift i nto reve rse, or
.,. Press t he P' #A button in the cente r console
Qpage 109, fig. 116 . A short confirmat io n
tone sounds and the LED in the button turns
on .
Switching between the rearview camera and
optical di splay
.,. Press the Graphic control button ®
Qpage 111, fig. 121 to see the optica l display.
.,. Press the Rear view contro l button to see the
rearview camera image.
Switching off
.,. Drive faster than 6 mph ( 10 km/h), or
.,. Press the p,,,A button, or
.,. Switch the ignition off.
Parking systems
(D Tips
- The visua l display in the left part of the d is
play sho uld he lp you detect the critical veh i-
cle areas.
- You ca n change the vol ume and pitch of the
signa ls as well as the d isplay
Q page 118.
· Perpendicular parking
Applies to : veh icles w it h rearv iew camera
This view may be used when parking in a garage
or in a parking space .
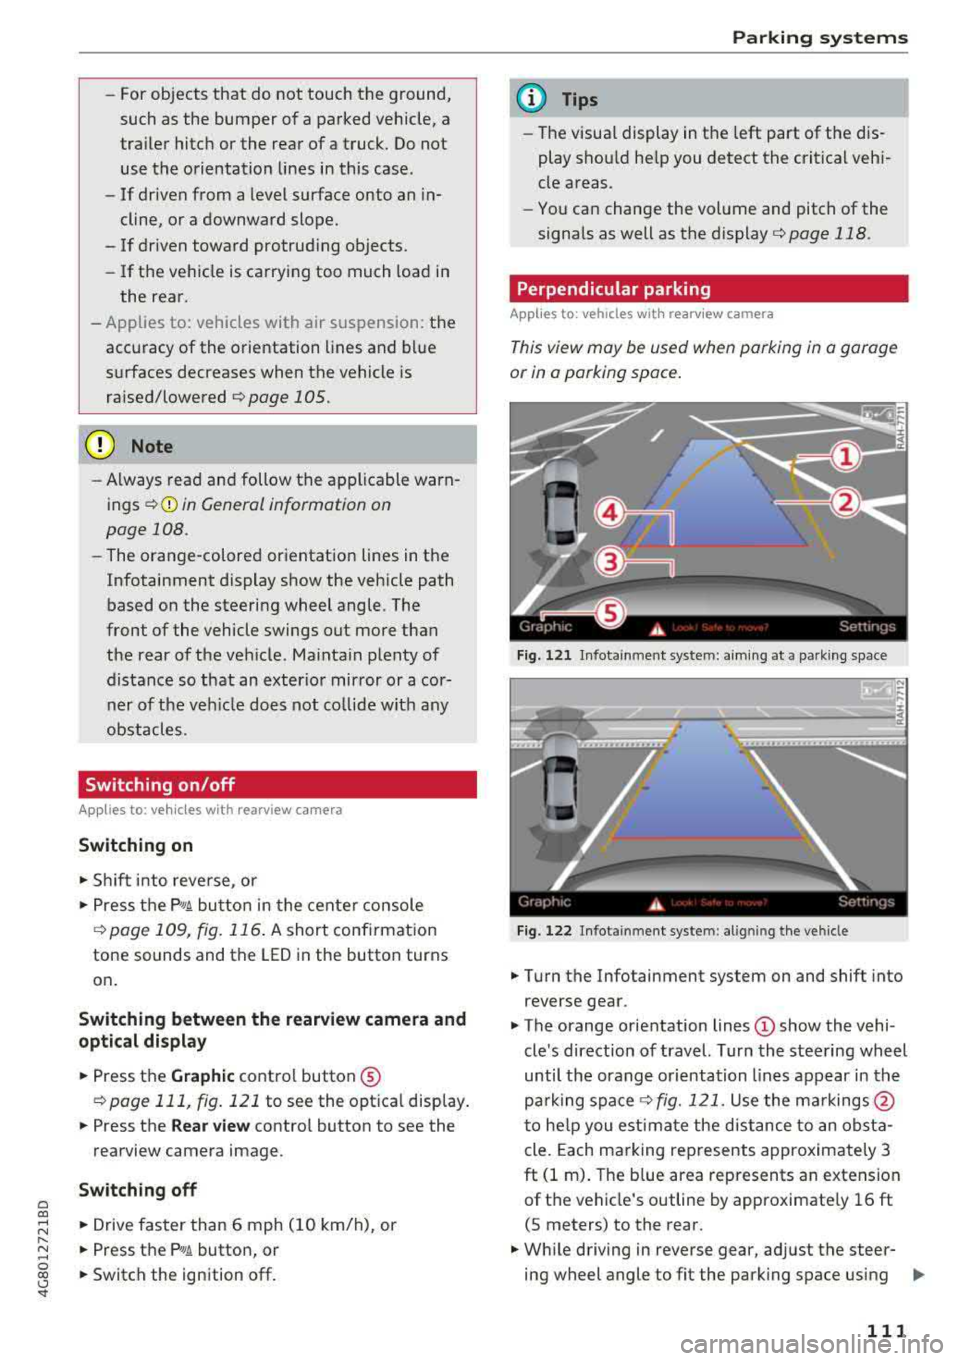
Fig. 1 21 Infotainme nt system: aim ing at a park in g space
Fi g. 122 In fotainment system: al ig nin g the ve hicle
.,. Tu rn the Infotainment system on and shift into
reverse gear.
.,. The orange orientation lines © show the vehi
cle 's direction o f travel. Turn the stee ring wheel
until the orang e orientation lines appear in th e
pa rk ing space
Q fig. 121. Use the ma rkings @
t o he lp you estima te the distance to an obst a
cle. Each ma rking represents approximately 3
ft (1 m) . The b lue area represents an extension
of t he vehicle's outline by approximate ly 16 ft
(S meters) to the rear .
.,. Wh ile driving in reverse gear, ad just the steer-
ing wheel angle to fit the park ing space using
..,_
111
Page 115 of 274
a co ,...,
N
" N ,...,
0 00 <.,;) '
The left or right orientation lines and surfaces
w ill be displayed, depending on the turn sig
nal being used.
Peripheral cameras
Introduction
Appl ies to : vehicles wit h peripheral cameras
With this equipmen t, the parking system p lus*
¢ page 109 is supplemented with various pe riph
e ral cameras .
Depending on vehicle equipment, you are prov id
ed wit h the following views: area around the
ve
hicle, front co rner view and rea r corner view, view
in front of the vehicle and behind the vehicle .
General information
Applies to: vehicles with pe ripheral came ras
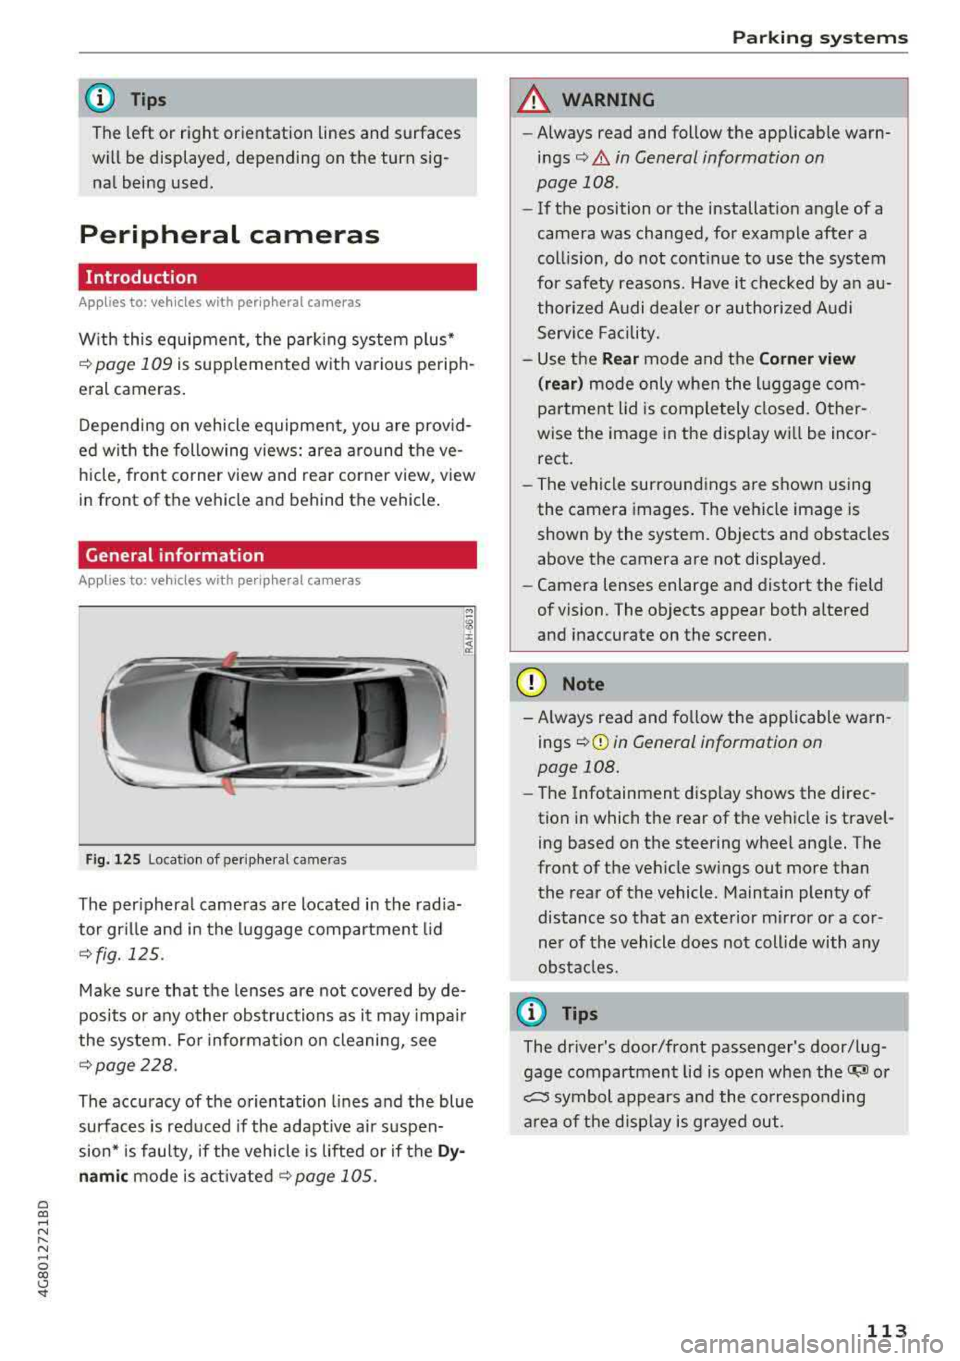
F ig . 1 25 Loca tion of periphe ral came ras
The per ipheral came ras are located in the rad ia
tor gr ille and in the luggage compartment lid
¢ fig. 125 .
Make sure that the lenses are not cove red by de
posits or any other obstructions as it may impa ir
the system . Fo r information on cleaning, see
¢ page 228.
The accuracy of the orientation lines and the blue
surfaces is reduced if the adapt ive a ir suspen
sion * is fau lty, if the vehicle is lifted or if the
Dy
namic mode is act ivated ¢ page 105.
Parking systems
A WARNING
- Always read and follow the applicab le warn
in gs¢ &. in General information on
page 108 .
-If the position or the installat io n angle of a
camera was changed, for example afte r a
coll is ion, do not cont inue to use the system
for safety reaso ns. Have it c hec ked by a n
au
thorized A udi dealer or authori zed A udi
Serv ice Faci lity .
- Use the
Rear mode and the Corner view
( rear )
mode only whe n the l uggage com
p ar tme nt lid is completely closed. O ther
wise the image in the disp lay wi ll be incor
rect.
- T he vehicle surroundings are shown using
the camera images . The vehi cle image is
shown by the system. Objects and obstacles
above the camera are not disp layed.
- Camera lenses enlarge and distort the field
of vision. The objects appear both a ltered
and inaccurate on the screen.
(D Note
- Always read and fo llow the applicable warn
ings
~ CD in General information on
page 108.
- The Infotainment d isplay shows the direc
tion in which t he rear of the ve hicle is travel
ing based on the steering wheel ang le. The
front of the veh icle swings out more than
the rear of the vehicle. Maintain plenty of
dis tance so that a n exte rior m irror or a cor
ner of the vehicle does not coll ide with any
obsta cles.
(0 Tips
The dr iver's door/front passenger's door/lug
gage compartment li d is open when the
Ci;lJ or
c::::5 symbol appears and the co rrespo nding
a re a of t he d isp lay is gr ayed out .
113
Page 122 of 274
Intelligent Technology
Intelligent Technology Electronic stabilization
control (ESC)
Description
Elect ronic stabili zation control ( ESC) suppo rts
driver safety. It red uces the risk of slipping and
improves dr iving stabi lity. ESC detects crit ica l sit
uations such as the vehicle overstee ring and un
dersteeri ng or the w heels are sp inning. The vehi
cle is stabilized by app lying the brakes or reduc
i n g e ngine torque . As soon as the ESC is active ly
regula ting, t he
Ii) indicato r light blink s in the in
s trumen t clus ter.
The fo llow ing systems are in tegrated in the ESC:
Anti-lock braking system (ABS)
ABS p reve nts the whee ls from lock ing whe n brak
ing. The vehicle can st ill be steered even d uring
hard brak ing. Apply steady press ure to the bra ke
pedal. Do not pump the pedal. A puls ing in t he
b rake pedal indicates that the system is act ing to
s tabili ze the vehicle .
Brake assist system
The brake assist system can dec rease brak ing dis
tance. It inc reases brak ing power when the d river
presses the brake pedal q uick ly in eme rgency sit
uations . You must press and hold t he b rake pedal
until the dangerous si tuatio n is ove r. In veh icles
w ith adapt ive c ruise con trol*, the bra ke assist
sys te m is more sensitive if t he di stan ce detec ted
t o the veh icle dr iv ing a head is too small. On
ve hicl es w ith ac tivated and funct io ni ng night vi
sion assist*, the brake assist system can respond mo re sensit ively if there is a warning .
Anti-Slip Regulation (ASR)
ASR reduces eng ine power when the drive w heels
beg in sp inning a nd ad ap ts the force to the road
conditions. This makes i t easie r to sta rt, acceler
ate and dr ive up h ills.
Electronic differential lock (EDL)
ED L appl ies the bra kes to a w heel that st arts
sp inning and transfe rs th e dr ive powe r to the
120
othe r driving whee ls. This func tion is no t ava ila
ble at higher s peeds .
I n extre me cases , EDL au tomat ic al ly swi tches off
to keep t he b rake o n the br aked whee l from ove r
h eating. The ve hicle is still wo rking co rrect ly. EDL
will switch on agai n automatically when co ndi
tions have returned to normal.
Steering recommendation
The ES C he lps to s tabili ze th e vehicle by ch ang ing
t h e steer ing torque.
In veh icles wi th dyna mic steer ing*, ESC a lso
h elps to stab ilize the steer ing in cr it ica l sit ua
t ion s.
Selective wheel torque control
Se lective wheel to rque con trol is used when driv
i ng o n curves . The fron t whee l on the inside of
t h e curve or bo th whee ls on the i nside of th e
cu rve are braked se lective ly as needed. This al
l ows mo re prec ise dr iving in curves .
Automatic post -collision braking system
The "automa tic post -coll is io n braking system"
can hel p t o reduce the risk of sl iding and of addi
tiona l co llisions after an acc iden t. If th e a irbag
c ontro l modu le de tec ts a c ollisi on above a cert ain
vehicle speed, the ve hicle is brak ed by the ESC.
The veh icle does not brake automatically if :
- the drive r presses t he acce lerator pedal, or
- the bra kin g force generate d by the presse d
brake pedal is greater than the b raking force
that wo uld be in itiated by the system, or
- the ESC, the bra ke system or the ve hicle elect ri
cal system are not functioning.
A WARNING
- The ESC and its integ rated systems can not
overcom e the lim its imposed by natura l
p hys ica l laws . Thi s is esp ec ially impo rtan t
on s lippery or wet roa ds. If the sys te m s be
g in a cting to stab ilize y our vehicle, y ou
s ho uld immedi ately alter y o ur speed to
match the road an d traffic condi tions . Do
not let the increased safety provi ded tem pt
Page 123 of 274

a co ,...,
N
" N ,...,
0 00 <..:l '
your risk of a collision.
- Please note the risk of a co llision increases
when driving fast, especially through curves
and on slippery or wet roads, and when driv
ing too close to objects ahead. The ESC and
its integrated systems cannot always pre
vent collisions -there is still a risk of acci
dents!
- Press the accelerator pedal carefully when
accelerating on even, slippery surfaces such
as ice and snow. The drive wheels can spin
Switching on /off
Intelligent Technology
even when these control systems are instal
led and this can affect driving stability and increase the risk of a collision.
(D Tips
- ABS and ASR only function correctly when
all four wheels are equipped with identical
tires. Different tire sizes can lead to a reduc tion in engine power.
- You may hear noises when the systems de
scribed are working.
ESC turns on automatically when you start the engine.
Fig . 138 Ce nter console: O FF ~ button
The following examples are unusual situations
where it may make sense to switch sport mode
on in order to allow the wheels to spin:
ESC levels
Sport mode on
- Rocking the vehicle to free it when it is stuck
- Driving in deep snow or on loose ground
- Driving with snow chains
Applies to: RS models: the ESC is designed to
function in levels. Depending on the level that is
selected, the stabil izat ion function of the ESC is
limited or switched off. The amount of stabiliza
tion control will differ depending on the level.
Sport mode off
Behavior
The ESC and ASR stabilization functions Th
e full stabilization function of the ESC
are limited
c:::> &. . and ASR is available again.
Operation Press the I~ OFF I button . Press the I~ OF FI button again .
Indicator .turns on. II turns off.
lights
Me ssa ges Stabilization control (ESC): Sport Warn- Stabilization control (ESC): On
ing! Reduced stability
121
Page 125 of 274
a co .... N
" N .... 0 00 \.J '
the brakes in wet weather.
The braking effect can also be reduced if you are
driving on salted roads and you do not apply the
brakes for long periods of time. The layer of salt
on the brake rotors and pads must be worn off
first when the brakes are applied.
Due to its surface, the ceramic brake rotor* ab
sorbs moisture in certain situations. Therefore,
there will temporarily be less braking force than
when the brakes are dry. You can compensate for
this by pressing the brake pedal harder.
Corrosion
Leaving the vehicle parked for long periods of
time, low mileage and avoiding heavy braking
can contribute to corrosion on the brake rotors
and to dirty brake pads.
If you usually avoid heavy braking or if there is
corrosion present, occasional heavy braking at
high speeds is recommended to clean the brake
rotors and
pads ¢.&. .
Brake system malfunction
If you notice that the brake pedal travel has sud
denly increased, then a brake circuit in the dual
circuit brake system may have malfunctioned. Drive to an authorized Audi dealer or authorized
Audi Service Facility immediately to have the
problem corrected. On the way there, drive with
reduced speed and keep in mind that you will
need a longer distance to stop and you will need
to press the brake pedal harder .
Low brake fluid level
When the brake fluid level is low, malfunctions in
the brake system may occur . The brake fluid level
is electronically monitored .
Brake booster
The brake booster amplifies the pressure you ap
ply to the brake pedal. It only works when the en
gine is running.
A WARNING
-Only apply the brakes for the purpose of
cleaning the brake system when road and
-
Intelligent Technology
traffic conditions permit. You must not en
danger other road users. This increases the
risk of an accident.
- Never let the vehicle roll while the engine is
stopped because this increases the risk of an
accident.
- New brake pads do not achieve their full
braking effect during the first 250 mi
(400 km) . They must be "broken in" first.
The break-in period can be considerably lon
ger for vehicles with ceramic brake rotors*.
However, you can compensate for the
slightly reduced braking force by pressing
firmly on the brake pedal. Avoid heavy brak
ing during the break-in period.
- Certain weather and operating conditions
such as driving through water, driving in
heavy rain or driving after washing your ve
hicle can impair the effectiveness of the
brakes. In the winter, ice may build up on
the brake pads, rotors and drums. Check
these components by braking carefully. Ap
plying the brakes carefully several times
dries the brakes and removes ice build-up .
- The efficiency of the brakes can also be im
paired by driving for long stretches on roads
covered with salt without using the brakes.
You can remove salt deposits from the
brake rotors and pads by carefully applying
the brakes several times.
- If the front spoiler is damaged or you install
another spoiler, make sure the front wheel
brakes are ventilated properly. Otherwise,
the brake system could overheat, which re
duces their effectiveness.
- Failure of a brake circuit impairs braking
performance, which increases braking dis
tance. Avoid driving the vehicle and have it
towed it to the nearest authorized Audi
dealer or authorized Audi Service Facility.
- If the brake booster is not working, you will
have to press much harder on the brake
pedal to compensate for the lack of the
booster .
@ Note
-Never let the brakes "rub" by pressing the
pedal lightly when braking is not actually
123
Page 127 of 274
a co ,...,
N
" N ,...,
0 00 <..:l '
By using all wheel d rive, yo ur vehicle has good
forward motion with standard t ires in winter con
ditions. However, in winter we recommend using
wint er or all season t ires on all four wheels, be
cause this will improve the braking effect.
Snow chains
If
t h ere are snow cha in laws, snow chains must
a lso be used on vehicles with a ll wheel drive
¢ page 221, Snow chains.
Replacing tires
For vehi cles w ith all whee l dr ive , only whee ls w ith
the same rolling circumferen ce s hou ld be used .
Avoid using tires with different tread depths
¢ page 212, New tires or wheels .
Offroad vehicle?
Your Audi is not an offroad vehicle -there is not
enough g round clearance. For this reason, avo id
d ifficult terrain .
_& WARNING
-Also, in vehicles with a ll wheel drive, adapt
yo ur dr iv ing style to the cu rrent road and
traff ic conditions . Do not let the increased
sa fety provided tempt you into taking risks ,
because th is increases the r isk of an acci
dent .
- The braking ability of your veh icle is limited
to the tract ion of t he wheels . In this way, it
is not diffe rent from a two whee l dr ive vehi
cle. Do not be tempted to accelerate to a
hig h speed when t he road is slippe ry, be
ca use this increases the risk of a n accide nt .
- Note that on wet streets , the fro nt wheels
can "hyd roplan e" if d riving at speeds that
are too hig h. Unlike front whee l drive
vehicles, t he eng ine does not rev highe r su d
den ly when the vehicle begins hydroplaning .
For this reason, adapt your speed to the
road conditions to reduce the risk of an acc i
dent.
Intelligent Technology
Rear spoiler
T he extendable rear spoiler increases driving sta
bilit y.
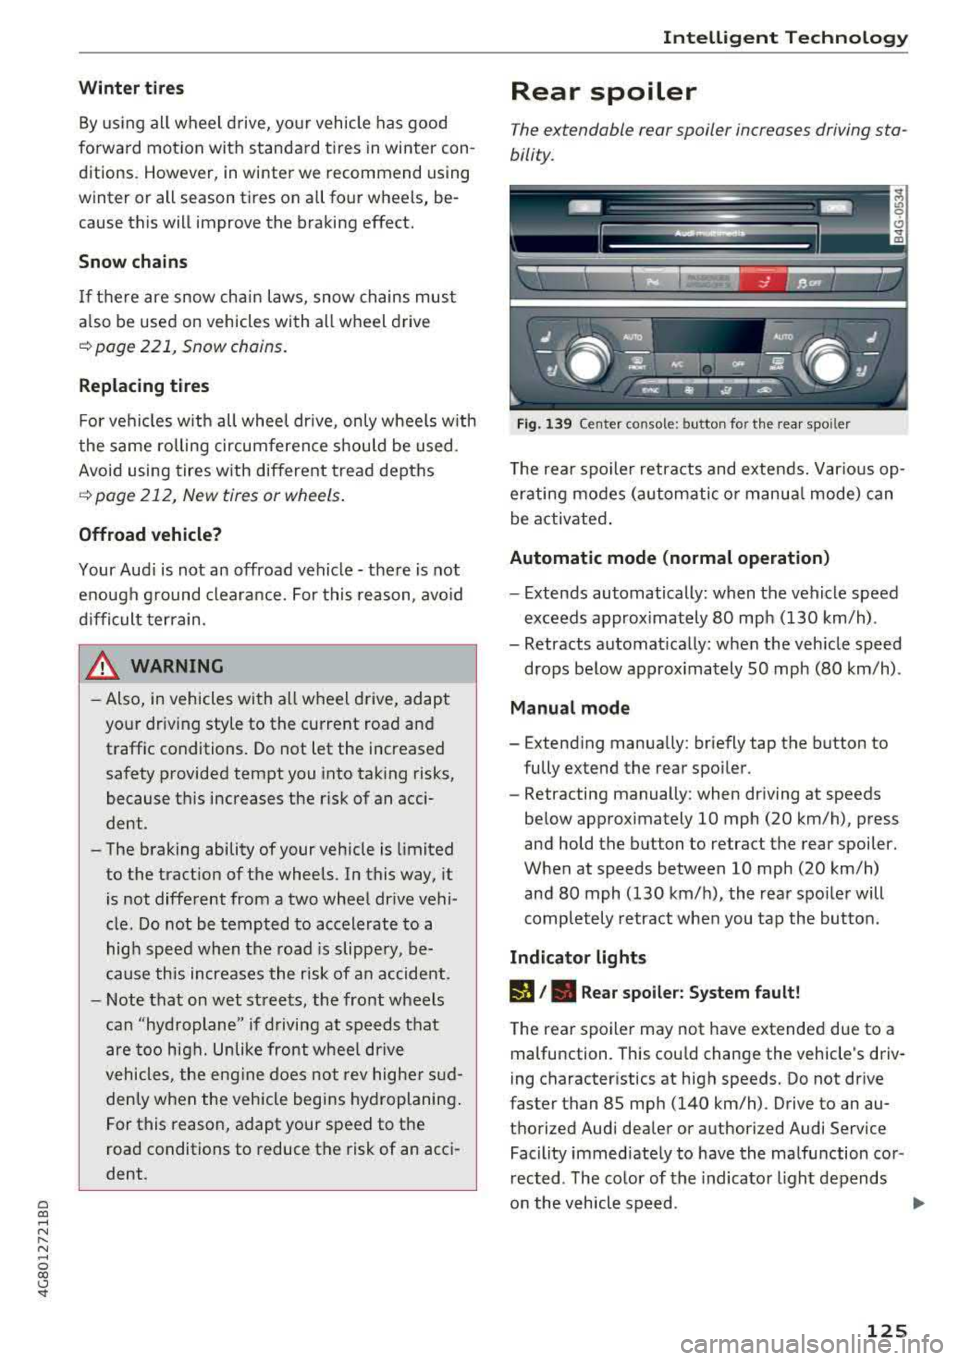
Fig. 1 39 Cen ter conso le : b utton for t he rea r spo iler
T he rear spo iler retracts and extends. Var ious op
erating modes (automatic o r manua l mode) can
be a ctivated .
Automatic mode (normal op eration)
- Extends automatically: when the vehicle speed
exceeds approx imately 80 mph ( 130 km/h) .
- Retracts automat ica lly: when the veh icle speed
drops be low approx ima tely SO mph (80 km/h) .
Manual mode
- Extend ing manua lly: br iefly tap the button to
fully extend the rear spo iler.
- Retracting manually: when dr iving at speeds
be low approximately 10 mph (20 km/h), press
and hold the button to retract the rear spoiler.
When at speeds between 10 mph (20 km/h)
and 80 mph (130 km/ h), the rea r spo ile r will
comp letely retract whe n you tap the butto n.
Indicator lights
,A I. Rear spoiler: System f ault!
The rear spoiler may not have extended due to a
malfunction . This cou ld change the vehicle 's driv
i ng character istics at high speeds. Do not dr ive
faster than 85 mp h (140 km/h) . Drive to an au
thorized Audi dea ler or authori zed Audi Service
Facility immed iate ly to have the malfu nction cor
rected . T he color of the indicato r light depends
o n the vehicle speed .
125