display AUDI A8 2017 Owner's Manual
[x] Cancel search | Manufacturer: AUDI, Model Year: 2017, Model line: A8, Model: AUDI A8 2017Pages: 354, PDF Size: 88.68 MB
Page 49 of 354
C) C0 ....
"' " "' .... 0 0 :r
• Se lect in the MMI: !CAR ! func tion button > Car
sy stems
control button > Vehicle setting s > In
terior lighting
> On.
Adjusting the brightness /turning off
You can adjust the brigh tness for the four zones
Front top , Front footwell , Rear top and Rear
footwell
or for All area s at the same time.
• In the Infota inment system , se lect: ICARlfunc
t io n button >
Car sy stem s control b utton > Ve·
hicle setting s
> Interior lighting > Brightnes s.
• Turn the knob to the desired ve hicle area and
press the knob . The bar that appears indicates
the se lected br ightness .
• To increase or red uce the br ightness, turn the
knob and p ress it.
Selecting a color profile*
You can se lec t from the Ivory , Pol ar and Rub y/
Polar
color profi les .
• Se lect in the M MI: !CAR I func tion button>
Car
systems
cont rol b utton > Vehicle setting s> In
terior li ghting
> Color profile.
The ambient lighting turns on when this func tion
is t urned on the Inf ot ainmen t sys tem and the
l ow be ams are tu rned on whe n the ign ition is
switche d on.
(D Tips
The set tin gs are automatically store d and as
sig ned to the remo te con tro l key th at is i n
use.
Lights and V ision
Instrument lighting
The brightness of the instrument and display
lighting as well as the Head-up display * can be
adjusted.
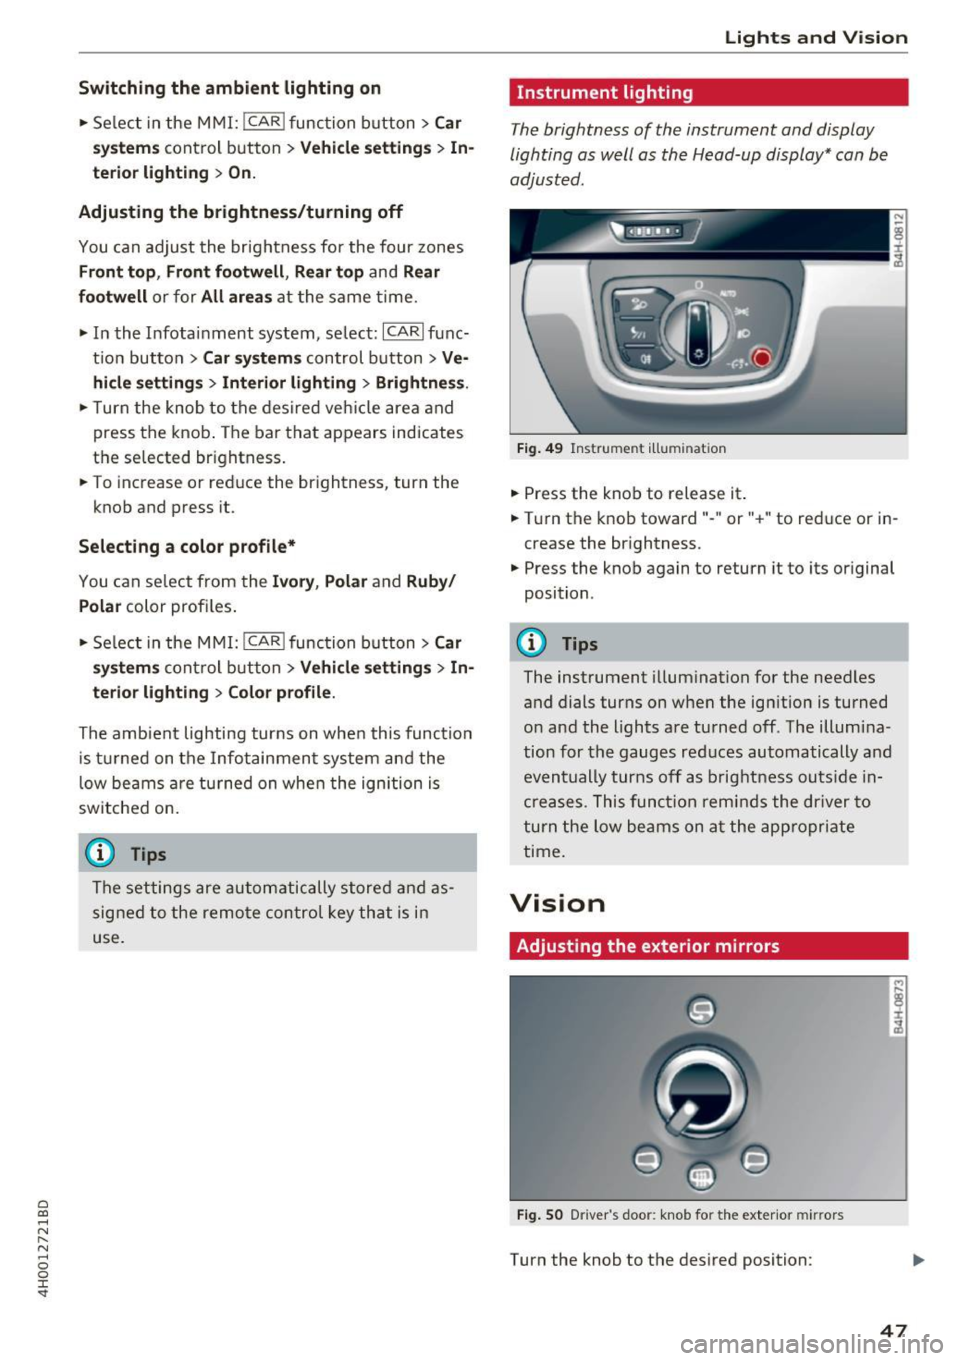
Fig. 4 9 Instrume nt illumin ation
• Press the knob to release it .
• Tur n the k nob toward" -" or" +" to reduce or in
crease the br ightness .
• Press the knob again to return it to its or iginal
position .
@ Tips
The instrument illum ination for the needles
and dials turns on when the ign ition is turned
o n and the lights are tu rned off . The illum ina
tion for the gauges red uces automatically and
even tually turns off as b rig htness outs ide in
crea ses . T hi s f unct ion reminds the dr iver to
tur n the low be ams on a t th e app ropriate
time.
Vision
Adjusting the exterior mirrors
Fig. SO D river 's doo r: k nob fo r the exter io r mir rors
Turn the knob to the des ired position:
47
Page 54 of 354
Lights and Vision
• Switch the windshield wipers off (position @
¢page 50, fig. 56).
• Select: the ICARI function button > Car systems
control button
> Servicing & checks > Wiper
service position.
> On .
Removing the wiper blade
• Fold the windshield wiper arm away from the
windshield.
• Press the locking knob@c:>
fig. 57 on the wiper
blade . Hold the wiper blade firmly.
• Remove the wiper blade in the direction of the
arrow .
Installing the wiper blade
• Insert the new wiper blade into the mount on
the wiper arm @until it clicks into place.
• Place the wiper arm back on the windshield.
• Turn the service position off.
A WARNING
For safety reasons, the windshield wiper
blades should be replaced once or twice each
year.
(D Note
- The windshield wiper blades must only be
folded away when in the service position!
Otherwise, you risk damaging the paint on
the hood or the windshield wiper motor.
- You should not move your vehicle or press
the windshield wiper lever when the wiper
arms are folded away from the windshield.
The windshield wipers would
move back in
to their original position and could damage
the hood and windshield.
- You can also use the service position, for ex
ample, if you want to protect the windshield
from icing by using a
cover.
- You cannot activate the service position
when the hood is open.
52
Digital compass
Switching the compass on and off
Applies to: vehicles wit h digital com pass
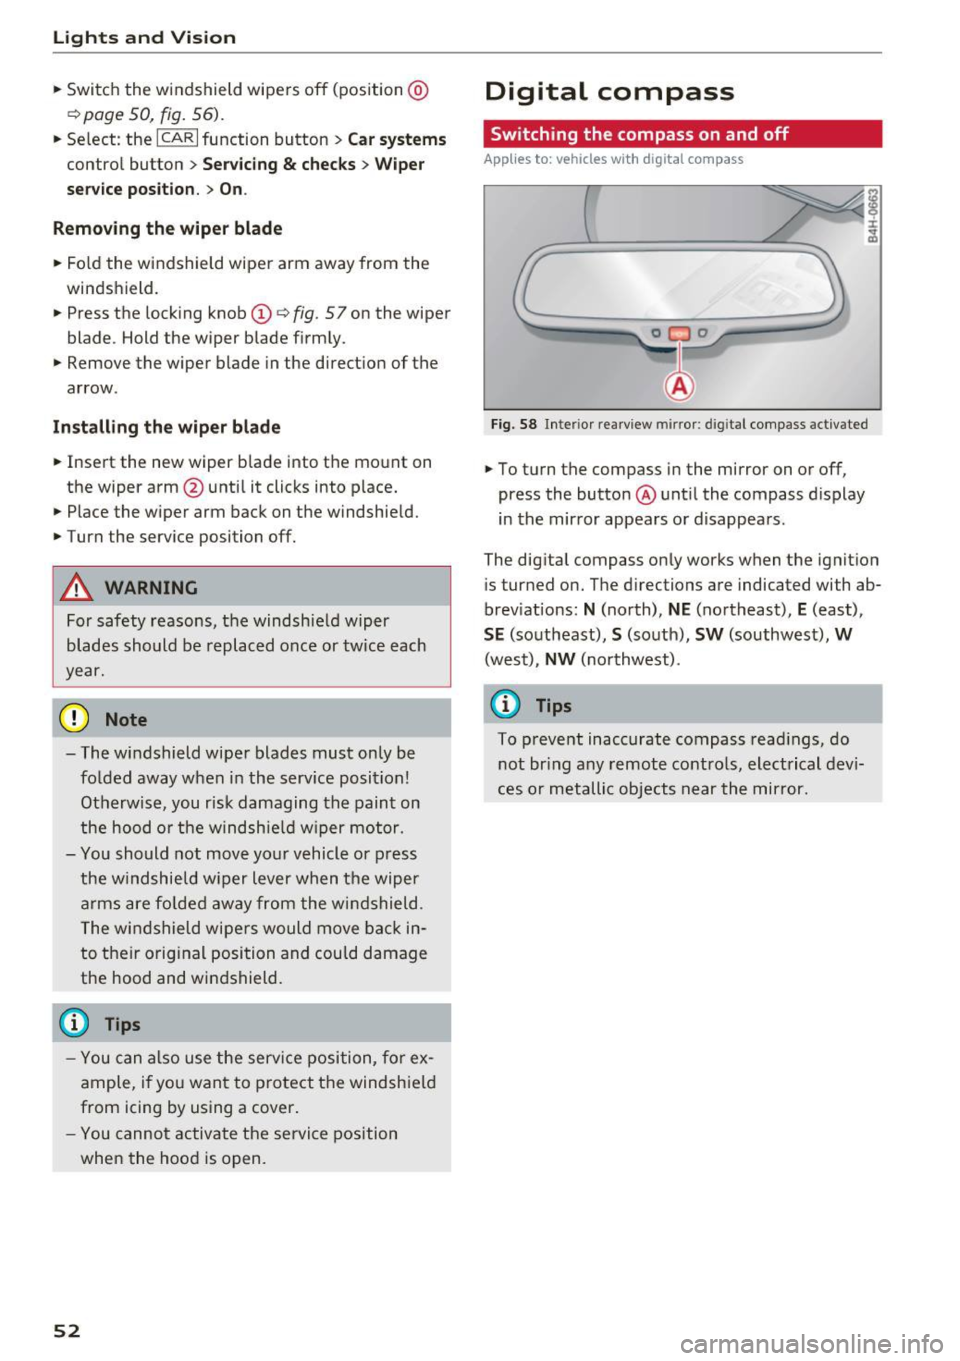
Fig. 58 Inter ior rearview mirror : d ig ital compass activated
• To turn the compass in the mirror on or off,
press the button @ until the compass display
in the mirror appears or disappears.
The digital compass only works when the ignition
is tur ned on. The directions are indicated with ab
breviations:
N (north), NE (northeast), E (east),
SE (southeast), S (south), SW (southwest), W
(west), NW (northwest).
(D Tips
To prevent inaccurate compass readings, do
not bring any remote controls, electrical devi
ces or metallic objects near the mirror.
Page 55 of 354
C) C0 ....
"' ,....
"' .... 0 0 :r
Applies to: vehicles with digital compass
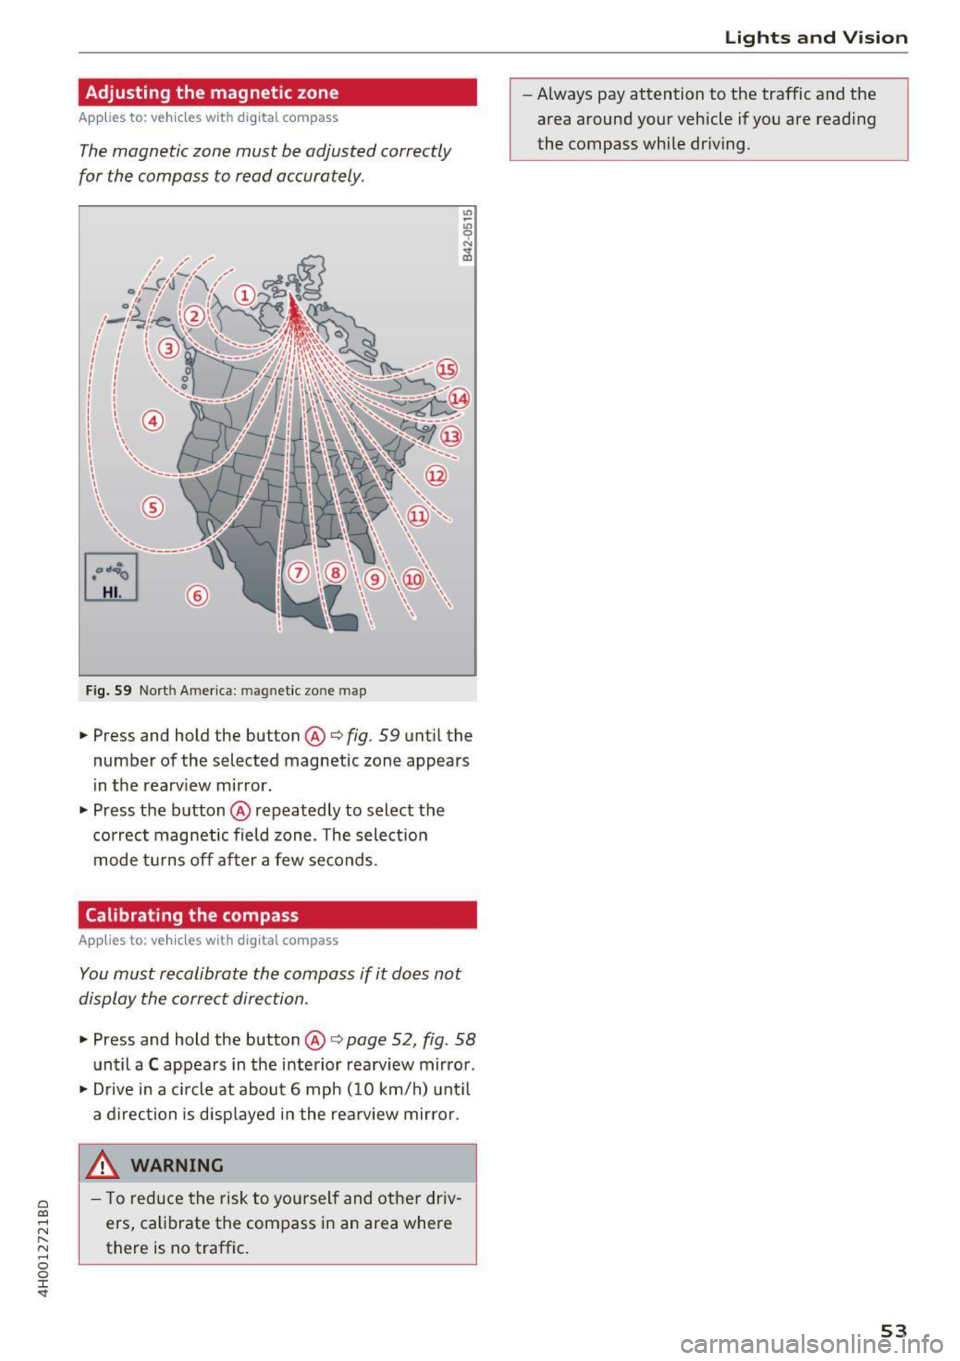
The magnetic zone must be adjusted correctly
for the compass to read accurately .
®
Fig. S9 Nort h Americ a: magn etic zone map
• Press and hold the button @i=> fig. 59 unt il the
number of the selected magnetic zone appears
in the rearv iew mirror.
• Press the button @repeatedly to select the
correct magnetic field zone . T he select io n
mode t urns off after a few seconds.
Calibrating the compass
Applies to: vehicles with digital compass
You must recalibrate the compass if it does not
display the correct direction .
• Press and hold the button @i=> page 52, fig . 58
unt il a C appears in the interior rearview mirror .
• Drive in a c ircle at about 6 mph ( 10 km/h) unt il
a d irection is disp layed in the rea rview mirror.
_& WARNING ,___
- T o reduce the risk to you rself and other driv
ers, calibrate the compass in an area where
there is no traffic.
Lights and V ision
-Always pay attention to the traffic and the
area around your vehicle if you are reading
the compass while dr iv ing .
53
Page 58 of 354
Seat s and sto rage
Adju st ing lumbar support
.,. To a djust the cu rvature of the lumbar support,
press the b utton @to the left/right.
.,. To adj ust the he ight of the lumbar support,
press the button @upward/downward.
Adjusting th e head rest raint angle
.,. To adjust the head restraint so t hat it is more
vertical/more ang led, press the bu tton @ for
ward/back.
Adjusting th e seat position
.,. To adjust the seat forward/back, press the but
ton © forwa rd/back.
.,. To move the seat up/down, press t he button ©
upward/downward .
Adjusting the massage function *
.,. To adjust the "pulsating"/"wave" massage
funct ion, press the button © to the left/r ight.
T he massage f unction is at i ts strongest level
when three LEDs in the butto n turn on.
.,. To reduce the massage level, press the © but
ton again .
.,. To switc h the massage function off, press the
button repeatedly until the L ED turns off.
Adju st ing th e re clining position
.,. To adjust the reclining position, press and hold
the button @ until the seat reaches its end po
sition .
.,. Applies to vehicles with reclining seat*: if you
select the reclining position, the front passeng
er's seat moves forward and the backrest re
clines. Depending on the last setting, the leg
support may fold out at the same t ime . The
front passenger 's seat can no longer be used in
the re clining posit ion ¢..&, . You can adjust the
l eg suppo rt or fold the display fo rwa rd in the
reclining position.
Selecting the standard seat position
.,. To adjust the sta ndard seat pos it ion, press and
hold the button © unt il the seat reaches its
end posit ion .
.,. Applies to vehicles with reclining seat*: if you
select the standa rd sea t position, the fron t pas
senger's seat moves back into the norma l posi-
56
tion, the head restraint moves to the upright
position and the leg support folds inward¢..&, .
Adjusting the d isplay*
.,. To t ilt the display fo rwa rd/bac k, press and hold
the left/r ight button @) until the d isp lay reach
es the des ired position .
.,. Applies to vehicles with reclining seat*: to
maintain a clear view of the road when the seat
is in the reclining pos ition, press and hold the
r ight button @) until the disp lay has folded for
ward. Make sure the driver has a clear view of
the exter ior mirrors . If so, confirm the quest io n
in the Infotainment system w ith
Ye s. If you an
swe r
No or do not respond to the q uest ion, the
disp lay w ill return to the up right pos ition.
Adju sting the leg support (vehicles with
reclining seat*)
Requirement: the reclining position must be se
l ected
¢ page 56.
.,. To fold the leg support out/in, press and hold
the left/r ight button @ until the leg support
reaches the desired pos it ion.
.,. To angle the leg suppo rt so that it is more up
r igh t/mo re reclined or to move it fo rward/back,
adj usting the front passenge r's sea t accord ing
ly .
Adjusting the front passenger 's seat
.,. Make sure that the front passenger's seat ad
jus tment is switc hed on in the Infotainment
system
¢ page 58 .
.,. To activate the front passenger's seat adjust
ment, press the button ®·
.,. To adjust the front passenger's seat forward/
back, press the button © forward/back.
.,. To move the front passenger's seat up/down,
press the button © upward/downward.
.,. To adjust the front passenger's seat backrest so
that is more upright/more recl ined, press the
button @ forward/back .
.,. App lies to ve hicles with reclin ing seat*: to ad
just the reclin ing/standard sea t position, press
and hold the b utton @!© unt il the front pas -
senger's seat reaches its end position. .,.
Page 59 of 354
C) C0 ....
"' " "' .... 0 0 :r
-The power seats can also be adjusted when
the ignition is switched off. For this reason,
children should never be left unattended in
the vehicle - they could be injured!
- Be careful when ad justing the seat. Unsu
pervised or careless seat adjustment can
pinch fingers o r hands ca using injur ies.
- Applies to vehicles with reclining seat*:
- Do not use the fron t passenger's seat for
seating when it is in the reclining position .
This increases the risk of serious injury or
death.
- Never adjust the reclining position when
the front passenger 's seat is occupied.
This increases the risk of injury.
- Do not tilt the display if the driver's view
of the right exterior mirror w ill be ob
structed .
- Make sure the area between the leg sup
port and the front passenger 's seat back
rest is clear before folding the leg support
in so that you are not pinched.
(D Tips
- The massage function switches off auto
matically after approx imately 10 minutes.
- If you
cannot ad just the reclining seat * or
the front passenger's seat from the rear, it is possible that:
- t he front passenger's seat memory fu nc
t ion is swi tched off~ page
59, or
- the c hild safety lock is switched on (the~
button ~ page 37 or the right
T button
~ page 37 is turned on in the dr iver's
door), o r
- the front passenger seat adjustment is
switched off in the Infotainment system
~ page
SB.
Seats and storag e
Massage function remote control
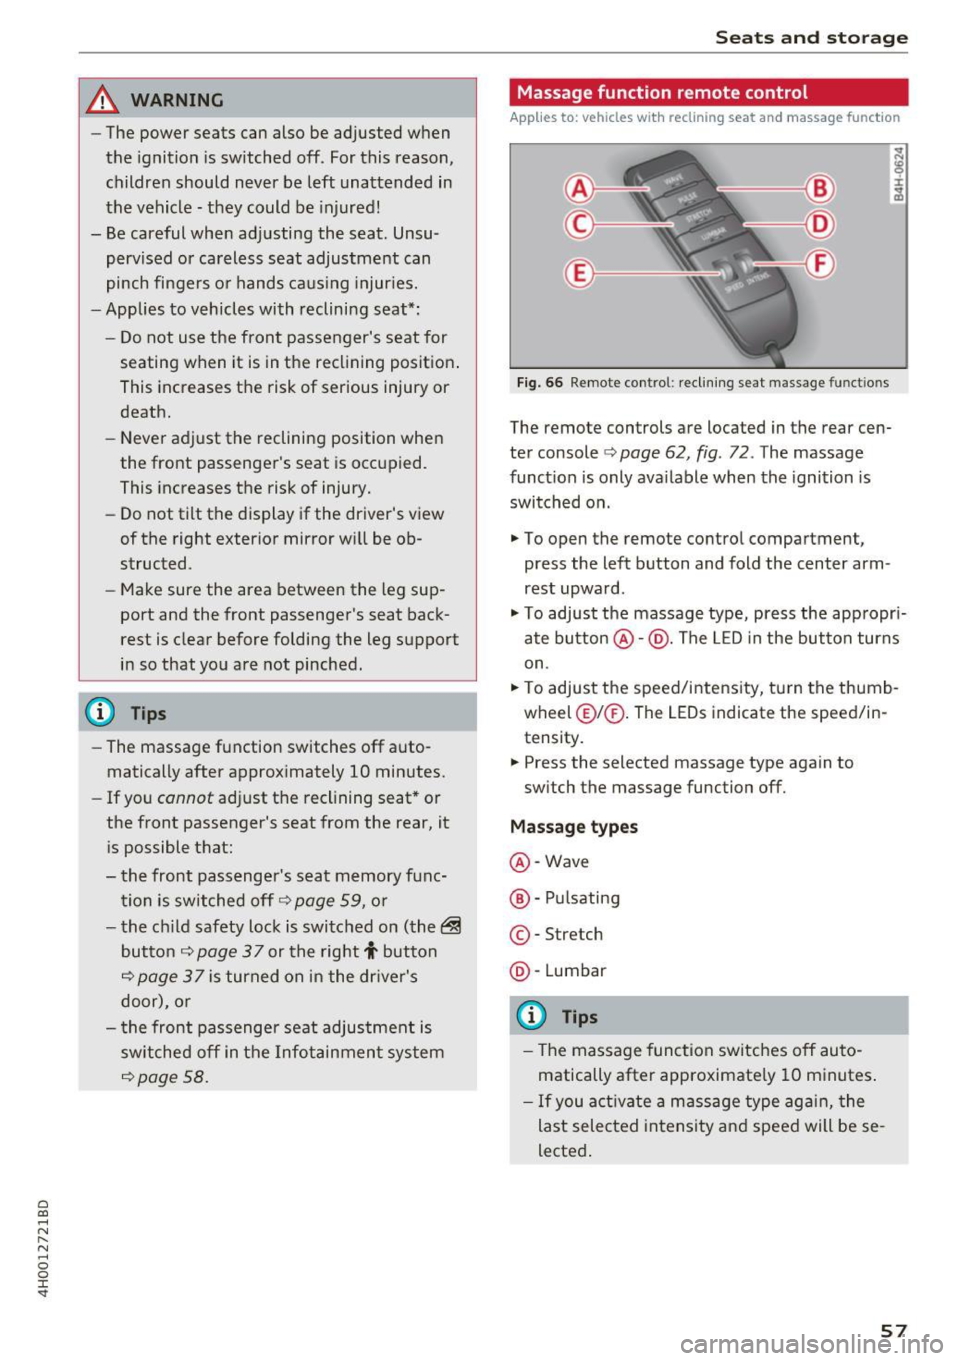
Applies to: vehicles with reclining seat and massage function
Fig. 66 Remote cont rol: rec lin ing seat massage functions
The remote controls are located in the rear cen
ter console ¢ page 62, fig. 72 . The massage
funct ion is only ava ilable when the ignition is
switched on.
.,. To open the remote control compartment,
press the left button and fold the center arm
rest upward .
.,. To adjust the massage type, press the appropr i
ate button @·@ . The LED in the button turns
on .
.,. To adjust the speed/inte nsity, turn the thumb
wheel @I® . The LEDs indicate the speed/in
tensity.
.. Press the selected massage type again to
sw itch the massage function off.
Massage types
@ -Wave
@ -Pul sating
© -Stretch
@ -Lumbar
(D Tips
- The massage function switches off auto
matically after approximate ly 10 minutes .
- If you activate a massage type aga in, the
last selected intensity and speed will be se
lected .
57
Page 79 of 354

0 co .... N ,..._
N .... 0 0 :c '
-Some noise after starting the engine is nor
mal and is no cause for concern.
- If you leave the vehicle with the ignition
switched on, the ignition will switch off af
ter a certain amount of time. Make sure that
electrical equipment such as the exterior
lights are switched off.
Stopping the engine
"'Bring the vehicle to a full stop.
"'Select the P or N selector lever position.
"'Press the
I START ENGINE STOPI button
r::?v page 76, fig. 90.
Steering lock
The steering locks when you turn the engine off
using the
I START ENGINE STOPI button and
open the driver's door. The locked steering helps
prevent vehicle theft.
Emergency off function
If it is absolutely necessary, the engine can also
be turned off while driving in the R, Dor S selec
tor lever position at speeds below 6 mph (10 km/
h). To stop the engine, press and hold the
I START ENGINE STOPI button and also press the
brake pedal.
& WARNING
-Never turn off the engine before the vehicle
has come to a complete stop. The full func
tion of the brake booster and the power
steering is not guaranteed. You must use
more force to turn or brake. Because you
cannot steer and brake as you usually
would, this could lead to accidents and seri
ous injuries .
- Always take the key with you whenever you
leave your vehicle. Otherwise, the engine
could be started or electrical equipment
such as the power windows could be operat
ed. This can lead to serious injury.
- For safety reasons, always park the vehicle
with the selector lever in the P position.
Driving
Otherwise, there is the risk that the vehicle
could roll unintentionally.
@ Note
If the engine has been under heavy load for
an extended period of time, heat builds up in
the engine compartment after the engine is
switched off and there is a risk of damaging
the engine. For this reason, let the engine run
at idle for approximately two minutes before
shutting it off.
(D Tips
After the engine has been switched off, the
radiator fan can continue to run for up to 10
minutes -even with the ignition switched off .
It can also switch on again after some time if
the coolant temperature rises as the result of
heat buildup or if the engine is already warm
and the engine compartment is also heated
by the sun's rays.
Messages in the instrument cluster display
Turn off ignition before leaving car
This message appears and a warning tone sounds
if you open the driver's door when the ignition is
switched on.
Press brake pedal to start engine
This message appears when you press the
I START ENGIN E STOP ! button to start the engine
and do not press the brake pedal while doing so .
The engine can only be started when the brake
pedal is pressed.
= Key not in vehicle?
This indicator light turns on and this message ap
pears if the ignition key was removed from the
vehicle when the engine was running. If the igni
tion key is no longer in the vehicle, you cannot switch on the ignition or start the engine once
you stop it. You also cannot lock the vehicle from
the outside.
Shift to P, otherwise vehicle can roll away.
Doors do not lock if lever is not in P.
77
Page 82 of 354

Driving
-The interior temperature differs from the tem
perature se lected in the A/C system.
- The windshield is being defrosted~
page 71.
-The brake pedal is pressed seve ral t imes in a
row.
- The vehicle ba tte ry charge leve l is too low.
- Power consumption is high .
Ignition is switched off automaticall y
To prevent the veh icle battery from drain ing, the
ignit ion will switch off
automatically under the
following conditions:
- The vehicle must have already been driven.
- The Start/Stop system has stopped the engine.
- T he driver's door must be open .
- T he driver's safety be lt mus t be unb uck led.
- The brake pedal must not be p ressed .
- The vehicle must be stationary .
In this case, the activated low beam is replaced
by the parking light. The parking lights will
sw itch off after app roximately 30 minutes or
when you lock the vehicle .
If the Start/Stop system has not turned off the
engine or if you have sw itched the Start/Stop sys
tem off manually, the ignition will not be auto mat ically switched off and the engine w ill conti n
ue to ru n ~ & .
A WARNING
To red uce the risk of poisoning, neve r allow
t he engine to r un i n confined s paces.
(D Tips
If you select the D, N or S selector lever posi
tion after shifting into reverse, the vehicle
m ust be driven faste r than 6 mph (10 km/h)
in orde r fo r the engine to switch off again.
80
-
Manually switching the Start /Stop system
off /on
Appl ies to : vehicles wi th Start/Stop sys te m
If you do not wish to us e th e system, you con
switch i t off manually.
Fig . 93 Ce nte r console: Start/Stop system butto n
.,. To switch the Start/Stop-System off/on man
ually, press the
l (A) ~I button. The LED in the but
ton turns on when the system is switched off.
0) Tips
If yo u switch the system off d uring a stop
phase, the engine will start aga in automati
cally .
Messages in the instrument cluster display
Applies to : vehicles wit h Start/Stop syste m
Start-stop system deactivated: Please restart
engine manually
This message appears w hen spec ific cond itions
are not me t during a stop phase. The S tart/S top
system will
not b e a ble to re sta rt the eng ine. If
the D or R se lector lever positions were engaged,
P will be selected a utomat ically . The eng ine must
be started with the
I START ENGI NE STOPI but
ton.
Start -stop system: System fault! Currently
unavailable
There is a ma lfunction in the Start/Stop system.
Drive the vehicle to an authorized Audi dealer or
aut horized Serv ice Facility as soon as possible to
have the malfunction corrected .
Page 83 of 354

C) C0 ....
"' " "' .... 0 0 :r
parking brake
Fig . 94 Center conso le: park ing brake
Your vehicle is equipped with an e lectromechani
cal parking brake@~
fig. 94. The parking brake
is designed to prevent the vehicle from rolling
un intentionally and replaces the hand brake.
Setting/manually releasing the parking
brake
.. Pull the<®> switch to set the parking brake. The
LED in the switch illuminates. The -(USA
models)/ . (Canada models) indicator light al
so turns on in the instrument cluster display .
.. To release the parking brake manually, press
the brake or acce lerator pedal while the igni
t ion is switched on and press the© switch at
the same time. The LED in the button and the
indicator light in the display turn off.
Releasing the parking brake automatically
Requirement: the driver's door must be closed,
the dr iver's safety belt must be latched and the
parking brake must be set.
.,. To start driving and release the park ing brake
automatically, press the acce lerator peda l as
usual.
In addition to releasing the parking brake auto mat ically, other convenience and safety funct ions
are available when you start driving~
page 82,
Starting from a stop.
Preventing the automatic parking brake
release
The vehicle could begin rolling unintentionally,
depending on the hill or if towing a trailer.
Driving
.. To prevent the parking brake from releasing au
tomatically, pull and hold the(®) switch and press the accelerator peda l. The parking brake
remains set and prevents the vehicle from roll
ing backward .
.,. You can release the<®> switch again once you
are sure that you are giving enough driving
force to the wheels by press ing the accelerator
pedal.
Emergency braking function
You can use the emergency braking function in an
emergency situation, or if the standard brake op
eration malfunctions or is disabled.
.. Pull and hold the(®) switch.
.. As soon as you release the <®> switch or acceler-
ate, the braking stops.
Pulling and ho lding the© switch wh ile driving
the vehicle activates the emergency braking func
tion. The vehicle is braked at all four wheels by
activating the hydraulic brake system. The brak
ing effect is sim ilar to heavy braking ~_& .
To reduce the risk of activating the emergency
braking by mistake, a warning tone (buzzer)
sounds when the© switch is pulled . Emergency
braking stops as soon as the© switch is released
or the accelerator pedal is pressed.
Parking
.. Press the brake pedal to stop the veh icle.
.,. Pull the(®) switch to set the parking brake.
.,. Select the P selector lever position .
.,. Tu rn the engine off~_& .
.,. Turn the steering w heel when parking o n in
clines so that the wheels w ill roll into the curb
if the vehicle starts moving.
& WARNING
-
-Do not press the acce lerator peda l inadver
tently if a gear is selected when the vehicle
is stationary and the engine is running. Oth
erwise, the vehicle will start to move imme
diately and this could result in an accide nt.
- Eme rgency braking should only be used in
an emergency, when the normal brake pedal
has failed or the brake pedal is obstructed . ..,.
81
Page 85 of 354
C) C0 ....
"' " "' .... 0 0 :r
place on all h ills (for example, if the ground
is slippery or icy).
- To reduce the risk of an accident, always
make sure the vehicle is situated safely
wh ile stat io nary.
Automatic transmission
Introduction
The automat ic transmission is cont rolled e lec
tron ica lly . Power is transferred using a torque
converter.
The transm ission shifts up or down a utomat ica lly
depending on w hich drive program is sele cted.
When a
moderate driving style is used , the
transmission selects the most economical d riving
mode. The t ransm iss ion upsh ifts at a lowe r RPM
a nd downshifts at a highe r RPM to imp rove fuel
effi ciency .
The transm ission sw itches to a spo rty mode after
a ki ck-down or when the drive r uses a
sporty
driving style
c haracterized by quick accelerator
pedal movements, heavy acce leration , freq uent
changes in speed and traveling at the maximum
speed.
If desired , the dr iver can also select the gears
manually (tiptronic mode)
c::> page 86 .
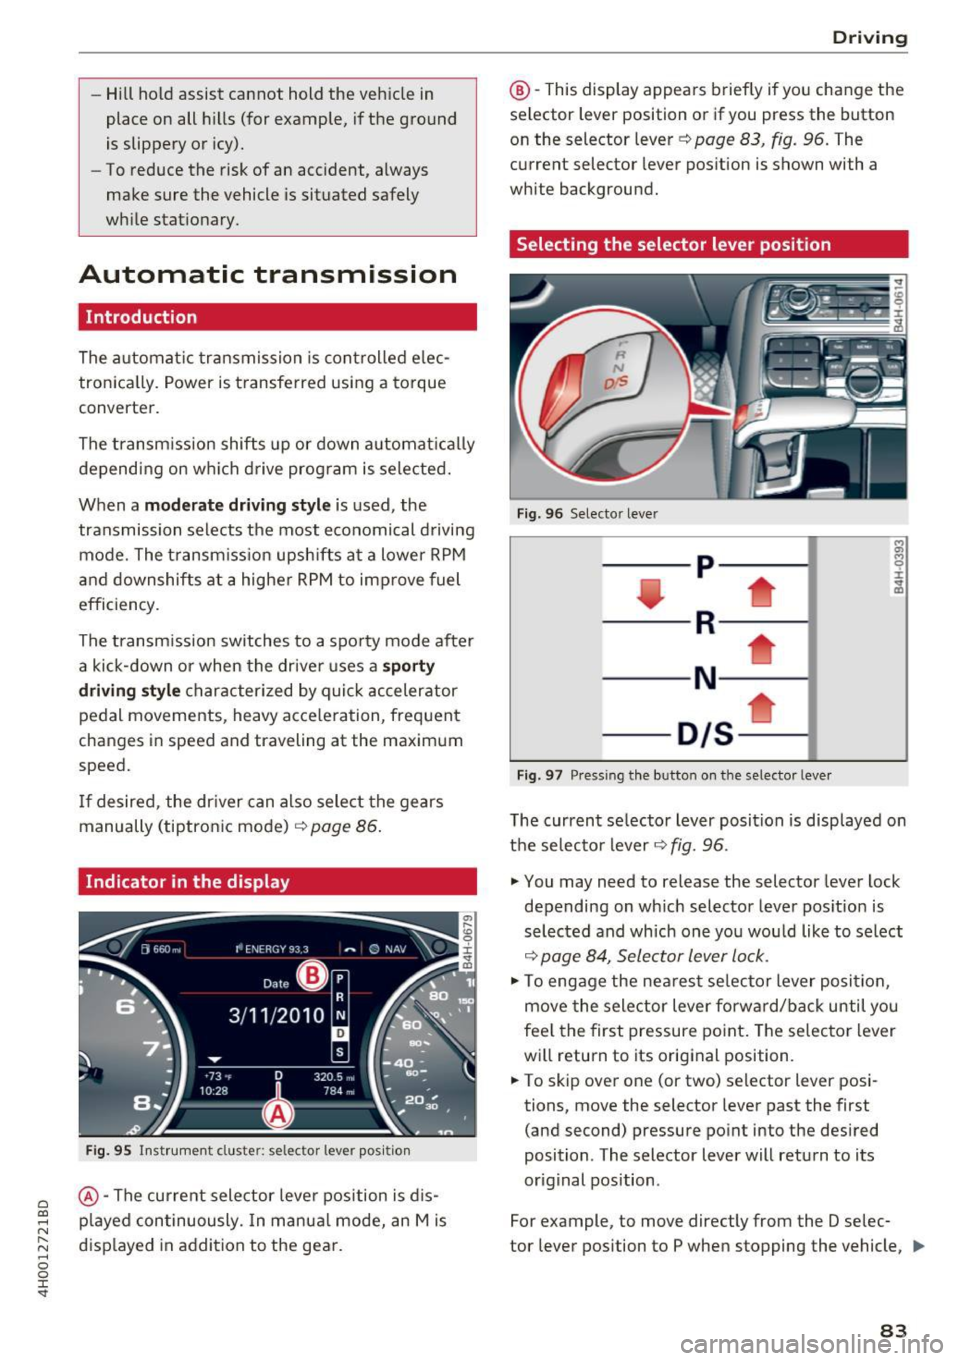
Indicator in the display
Fig . 9 5 Inst rumen t cluste r: s elec to r leve r po sit io n
@ -The current sele ctor leve r position is d is
p layed continuously. In manua l mode, an Mis
d isp layed in addi tion to the gea r.
D rivi ng
@ -This display appea rs brief ly if you change the
sel ector lev er posit ion or if you pr ess the button
on the selector lever
c::> pag e 83 , fig . 96. The
current selector lever pos ition is shown with a
white background.
Selecting the selector lever position
Fi g. 9 6 Selecto r lever
-- p----
----R--- --1
----N - -- ---
- D/S--
Fig . 97 Pres sin g the b utto n on the se lector leve r
The current se lector lever position is disp layed on
t h e se lector lever
c::> fig. 96 .
.,. You may need to release the selector lever lock
depending on wh ich selector lever pos ition is
selected and which one yo u wou ld like to se lect
c::> page 84, Selector lever lock .
.,. To engage the ne arest se lector lever posi tion,
move the selector lever forw ard/back until you
fee l the first pressure po int. The selector lever
wi ll return to its orig inal position .
.,. To skip ove r one (or two) selector lever posi
tions, move the selector lever past the first
(and second) pressure po int into the desired
position . T he selector lever will return to its
or iginal position .
For example, to move directly from the D selec-
tor lever position to P when stopping the vehicle,
ll>
83
Page 88 of 354

Driving
-Do not inadvertent ly press the acce lerator
pedal when the vehicle is stationary. Other
wise the vehicle will start to move immedi
ately, eve n if the parking brake is set. This
cou ld resu lt in a crash .
(D Tips
For safety reasons, the parking brake is re
leased automatically only when the dr iver's
safety belt is engaged in the buckle .
Hill descent control
The hill descent control system assists the driver
when driving down hills .
Hill descent control activates when the transmis
sion is in the Dor S pos ition and you press the
brake pedal. The transmiss ion automatically se
lects a gear that is suitable for the hill . H ill de
scent control tries to mainta in the speed ach
ieved at the time of braking, within phys ical and
technical limi tations. If may sti ll be necessary to
adj ust the speed with the b rake pedal.
H ill descent contro l switches off o nce the hill lev
e ls out o r you press the accelerator peda l.
When operating the cruise contro l system
i::> page 92, hill descent control is also activated
when the speed is set.
A WARNING
H ill descent control cannot overcome phys ica l
lim itations, so it may not be able to maintain
a constant speed under all condit ions. Always
be ready to apply the brakes .
86
Manual shifting
The shi~ paddles allow the driver to shift the
gears manually .
Fig. 98 Steer ing whee l: s hifting man ually
.., To shift to a higher or lowe r gear temporari ly,
tap the
0 or 0 shift padd le i::> fig . 98 .
.., To switch manua l mode on , press the~ but
ton. Mand the gear that is currently engaged
@ appear in the instrument cluster display
i::>page 83, fig. 95.
I :i: .. m
.., To shift up one gear, tap the right shift paddle
G) c::>fig . 98.
.., To shift down one gear, tap the left shift pad
dle
Q .
.., To switch manua l mode off, press the ~ but-
ton again, or
.., Move the se lector lever back and re lease it.
When yo u accelerate or reduce the speed, the
transmission au tomatically shifts into the correct
gear shortly before reaching the RPM limit. If yo u
select a lower gear than the one currently shown
in the disp lay, the automatic transmission will
only shift down once there is no dang .er of ex
ceeding the maximum RPM.
The eng ine braking effect increases when you
downshift when going downh ill.
Kick-down
Kick-down enables maximum acceleration.
When yo u press the accelerator pedal down be
yond the res istance point, the automatic trans
mission downshifts into a lower gear and the en
gine ut ilizes its full power, depending on vehicle
speed and engine RPM. It shifts up into the next .,,_