instrument cluster AUDI A8 2018 Owners Manual
[x] Cancel search | Manufacturer: AUDI, Model Year: 2018, Model line: A8, Model: AUDI A8 2018Pages: 356, PDF Size: 54.71 MB
Page 4 of 356
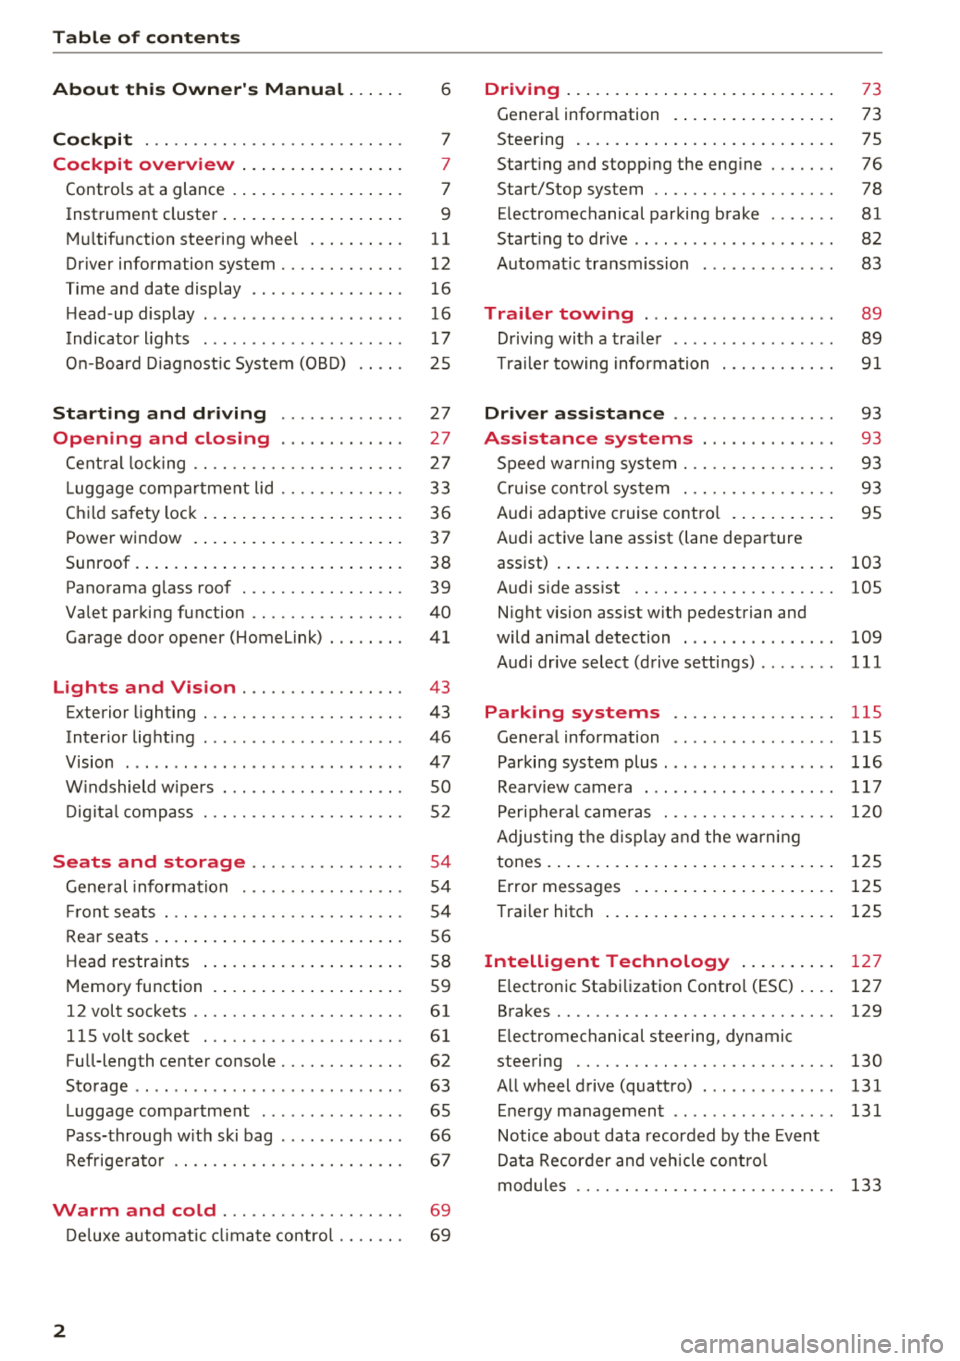
Table of contents
About this Owner's Manual. . . . . .
6
Cockpit . . . . . . . . . . . . . . . . . . . . . . . . . . . 7
Cockpit overview . . . . . . . . . . . . . . . . . 7
Controls at a glance . . . . . . . . . . . . . . . . . . 7
Instrument cluster . . . . . . . . . . . . . . . . . . . 9
M ultif unction steering wheel . . . . . . . . . . 11
Driver information system . . . . . . . . . . . . . 12
T ime and date display . . . . . . . . . . . . . . . . 16
H ead-up display . . . . . . . . . . . . . . . . . . . . . 16
Indicato r lights . . . . . . . . . . . . . . . . . . . . . 17
O n-B oard Diagnost ic System (OB D) . . . . . 25
Starting and driving . . . . . . . . . . . . . 27
Opening and closing . . . . . . . . . . . . . 27
Cent ral lock ing . . . . . . . . . . . . . . . . . . . . . . 27
L ugg age com pa rt ment lid . . . . . . . . . . . . . 33
Ch ild safety lock . . . . . . . . . . . . . . . . . . . . . 36
P ower window . . . . . . . . . . . . . . . . . . . . . . 37
Sunroof. . . . . . . . . . . . . . . . . . . . . . . . . . . . 38
Panorama glass roof . . . . . . . . . . . . . . . . . 39
Valet par king function . . . . . . . . . . . . . . . . 40
Garage doo r opener (Home Link) . . . . . . . . 41
Lights and Vision . . . . . . . . . . . . . . . . . 43
Exterior lighting . . . . . . . . . . . . . . . . . . . . . 43
Interior lighti ng . . . . . . . . . . . . . . . . . . . . . 46
V1s1on . . . . . . . . . . . . . . . . . . . . . . . . . . . . . 47
W indshield w ipe rs . . . . . . . . . . . . . . . . . . . 50
D ig ita l compass . . . . . . . . . . . . . . . . . . . . . 52
Seats and storage . . . . . . . . . . . . . . . . 54
Gene ral information . . . . . . . . . . . . . . . . . 54
Fr ont seats . . . . . . . . . . . . . . . . . . . . . . . . . 54
Rear seats . . . . . . . . . . . . . . . . . . . . . . . . . . 5 6
Head restraints . . . . . . . . . . . . . . . . . . . . . 58
M emory function . . . . . . . . . . . . . . . . . . . . S9
12 volt sockets . . . . . . . . . . . . . . . . . . . . . . 61
llSvoltsocket . ............. .... .. . 61
Fu ll-length center console. . . . . . . . . . . . . 62
Storage . . . . . . . . . . . . . . . . . . . . . . . . . . . . 63
L uggage compartment . . . . . . . . . . . . . . . 65
P ass-throug h w it h ski bag . . . . . . . . . . . . . 66
R efrige rato r . . . . . . . . . . . . . . . . . . . . . . . . 67
Warm and cold . . . . . . . . . . . . . . . . . . . 69
D eluxe a utomat ic cli ma te contro l . . . . . . . 69
2
Driving ... .. .. .... .. ... .. ..... ... . .
Genera l information . .... .. ..... ... . .
Steering . ... .. .... .. ... .. ..... ... . .
Start ing and stopping the eng ine ..... . .
Start/Stop system .. .. ............. . .
E lectromechanical parking brake ...... .
Start ing to drive .. .. .. .............. .
A utomat ic transmission
Trailer towing ... .. .............. .
D rivi ng with a tra ile r .. .............. .
T ra ile r towing information .......... . .
Driver assistance .. .............. .
Assistance systems .. .. ..... ... . .
S peed warning system . ............. . .
Cru ise cont rol sys tem . ............. . .
Audi adaptive cruise contro l ...... ... . .
Audi active lane assist (lane departure 73
73
7 5
76
78
81
82
83
89 89
9 1
93
93
93
93
95
assist) . . . . . . . . . . . . . . . . . . . . . . . . . . . . . 103
Audi s ide ass ist . . . . . . . . . . . . . . . . . . . . . 105
N ight vision assist w ith pedestrian and
wild animal detection . . . . . . . . . . . . . . . . 109
Audi drive select (drive setti ngs) ........ 111
Parking systems . . . . . . . . . . . . . . . . . 115
General information . . . . . . . . . . . . . . . . . 115
Parking system plus ... ............... 116
Rearv iew camera . . . . . . . . . . . . . . . . . . . . 117
Per iphera l came ras . . . . . . . . . . . . . . . . . . 120
Adjus ting the d isp lay and the wa rn in g
tones. . . . . . . . . . . . . . . . . . . . . . . . . . . . . . 125
Error messages . . . . . . . . . . . . . . . . . . . . . 125
T raile r hitch . . . . . . . . . . . . . . . . . . . . . . . . 125
Intelligent Technology . . . . . . . . . . 127
E lectronic Stabi lization Contro l (ESC). ... 127
Brakes .... .. .. .. .. .. ............. .. 129
E lectromechanical steering, dynamic
steering . . . . . . . . . . . . . . . . . . . . . . . . . . . 130
All wheel drive (quattro) . . . . . . . . . . . . . . 131
Energy management . . . . . . . . . . . . . . . . . 131
Notice about data recorded by the Event
Data Recorder and veh icle co ntro l
modules . . . . . . . . . . . . . . . . . . . . . . . . . . . 133
Page 11 of 356
lL t:0 ....
"" ......
"" .... 0 0 :c '
Instrument cluster
Instrument cluster overview
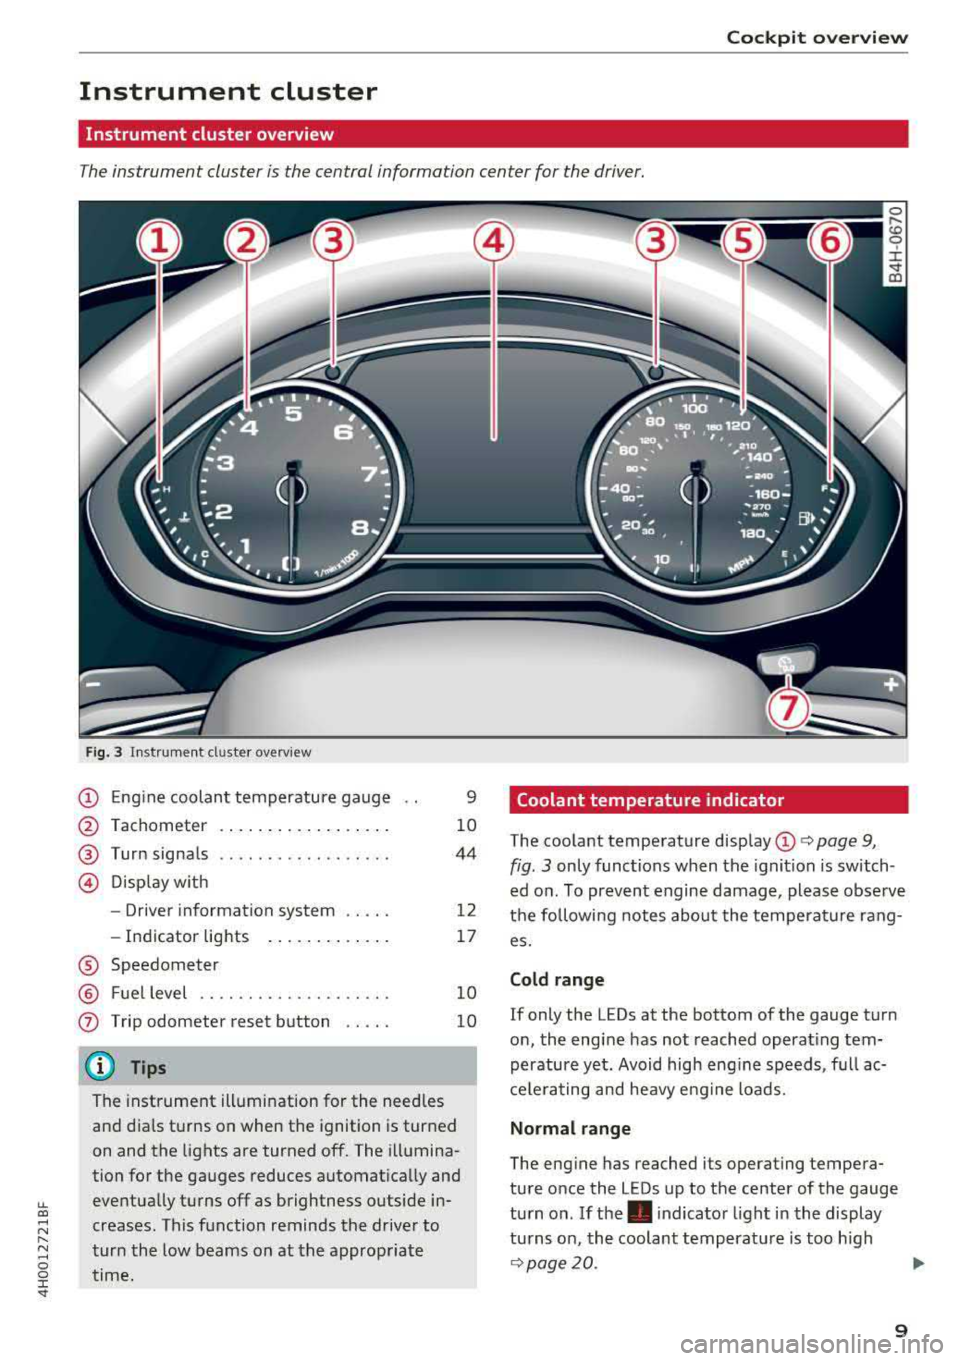
The instrument cluster is the central information center for the driver.
Fig. 3 Instrument cl uster overview
@ Eng ine coolan t temperature gauge
@ Tachometer ... .. ..... ... .. .. .
®
@
Turn signals
D isp lay w ith
- Driver information system .. .. .
- In dicator lights ..... ... .. .. .
® Speedometer
@ Fuel level ................. .. .
(j) Trip odometer reset b utton .. .. .
@ Tips
9
10
44
12
17
1 0
10
The instrument illumination for the need les
and dia ls t urns on when the ignition is turned
on and the lights are turned off. The illumina
tion for the gauges reduces automat ica lly and
eventually turns off as brightness outside in
creases. This function reminds the drive r to
tur n the low beams on at the appropriate
time.
Coolant temperature indicator
The coolant temperature disp lay @ i:> page 9,
fig. 3
only func tions when the ignition is switch
ed o n. To preven t engine damage , please observe
t h e following notes about the temperatu re rang
es.
Cold range
If only the LEDs at the bottom of the gauge turn
o n, the engine has not reached operat ing tem
perature yet. Avoid high eng ine speeds, f ull ac
c e le ra ting and heavy e ng ine loads.
Normal range
The eng ine has reached its operating tempera
ture once the LEDs up to the center of the gauge
tu rn on . If
the . indica tor light i n the display
tu rns on, th e coolant temperat ure is too h igh
c=> page 20.
9
Page 12 of 356
Cockpit overv iew
CD Note
- Auxiliary headlights and other accessories in
front of the cooling-air intake impair the
cooling effect of the coolant. This increases
the r isk of the engine overheat ing during
high outside temperatures and heavy en-
gine load.
- The front spoiler also helps to distr ibute
cooling air correctly wh ile driving. If the
spoiler is damaged, the cooling effect will
be impaired and the risk of the engine over
heating will inc rease. See an a uthorized
A ud i dealer or authorized Audi Service Fa
cility for assistance .
Tachometer
The tachometer displays the engine speed in rev
olutions per minute
(RPM).
You should shift to the next lowest gea r when
the speed is below 1,500 RP M. The beginn ing of
the red zone in the tachometer ind icates the
maximum permissible engine speed fo r all gears
once the engine has been broken in and when it is
warmed up to operating temperature . Before
reaching this zone, you should shift into the next
highest gear, select the D selector lever position,
or remove your foot from the accelerator pedal.
~ Note
The needle in the tachometer @ c:> page 9,
fig. 3 may only be in the red area of the gauge
for a short time or there is a risk of engine damage. The locat ion where the red zone be
gi ns varies depending on the engine.
@ For the sake of the environment
Upshifting early helps you to save fuel and re
duces operating noise.
Fuel level
The display @ only works when the ignition is
sw itched on. If the fuel level drops below 4 gal
(15
L), a red L ED will light up and the Ill indica
tor light will turn on
c:> page 24. The red LED
will blink when the fuel level is very low.
10
The fuel tank capacity of your ve hicle is listed in
the
Techn ical Data section c:> page 334.
CD Note
Neve r drive until the tank is comp letely emp
ty. The irregu lar supply of fuel th at results
from that can cause engine misfires . Uncom
busted fuel w ill then enter the exhaust sys
tem. This can cause overheating and damage
to the catalyt ic converter.
Odometer
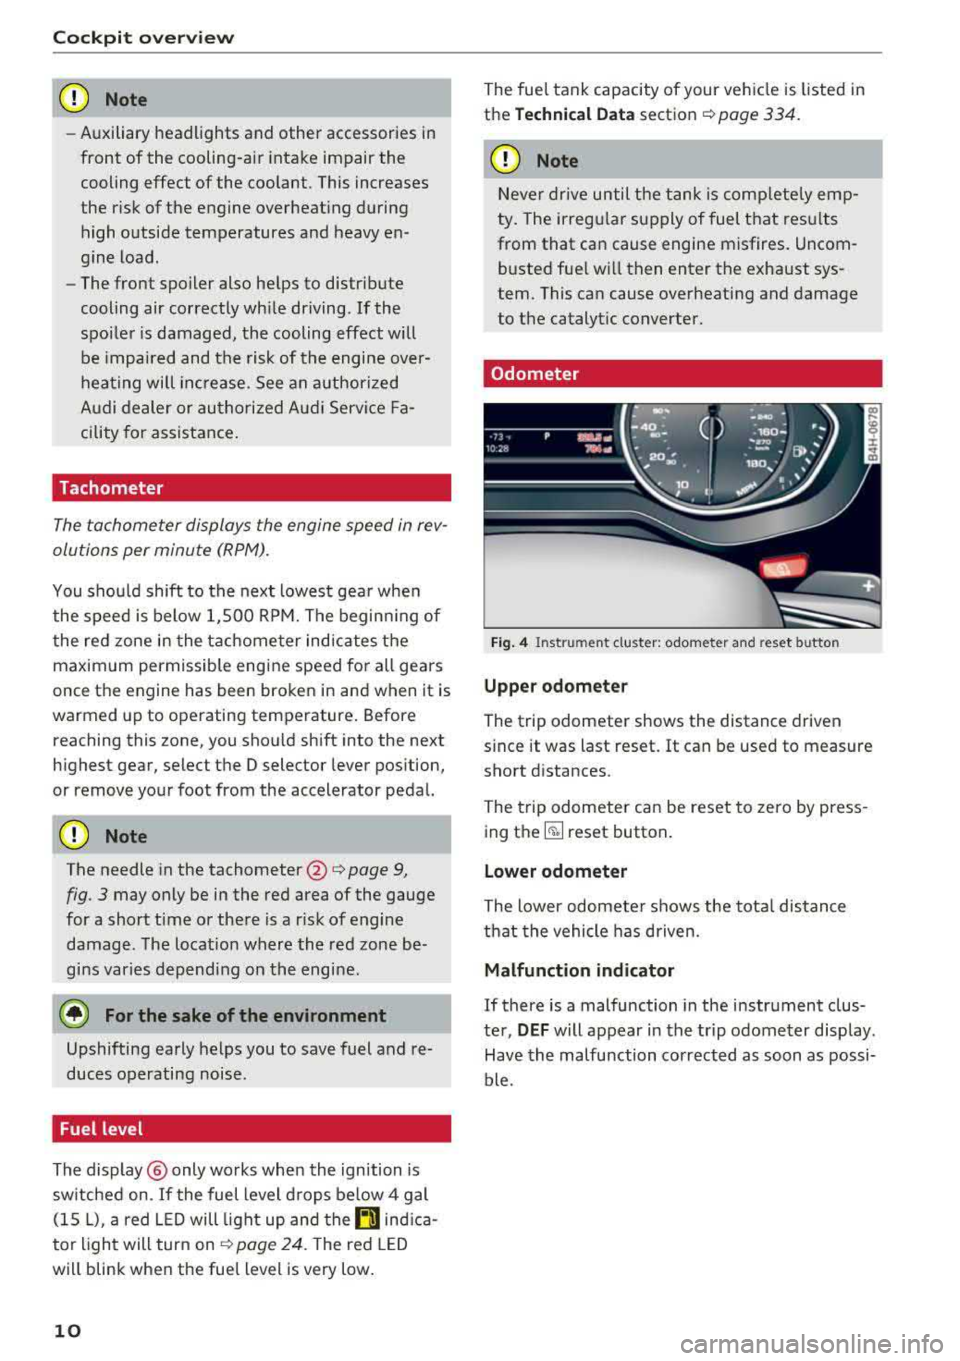
Fig. 4 Instru ment cluster: odometer and reset button
Upper odometer
The trip odometer shows the distance driven
s ince it was last reset.
It can be used to measure
short distances.
The trip odometer can be reset to zero by press
ing
the ~ reset button.
Lower odometer
The lower odomete r shows the total distance
that the vehicle has driven.
Malfunction indicator
If there is a malfunction in the instrument clus
ter,
DEF will appear in the trip odometer display.
Have the malfunction corrected as soon as possi
ble.
Page 14 of 356
![AUDI A8 2018 Owners Manual Cockpit overv iew
(D G!J Button
- Repeating th e la st na vig ation prom pt :
press
the
[J] button.
- Changing the voice guidance volume : turn the
right thumbwhee l up o r down dur in AUDI A8 2018 Owners Manual Cockpit overv iew
(D G!J Button
- Repeating th e la st na vig ation prom pt :
press
the
[J] button.
- Changing the voice guidance volume : turn the
right thumbwhee l up o r down dur in](/img/6/57608/w960_57608-13.png)
Cockpit overv iew
(D G!J Button
- Repeating th e la st na vig ation prom pt :
press
the
[J] button.
- Changing the voice guidance volume : turn the
right thumbwhee l up o r down dur ing vo ice
guidance.
@ 51 Button
- Switching the voi ce reco gnition syste m* on :
press the 5J button briefly on the multifun c
tion s teer ing whee l. Say the desired command
after the
Beep.
- Switc hing th e voice re cogniti on sys tem * off :
press and hold the 51 butto n. Or : say the com
mand
Cancel.
For mo re information abo ut the vo ice recog nition
system, see
¢ page 142.
@ Right thumbwheel
You can adjust the vo lume of an audio source or a
system message (for example, from the voice recognit ion system*) when the sound is playing.
- In crea sin g or d ecreasing the volume : turn the
right thumbwhee l up or down .
-Mut ing o r pausing : turn the right thumbwheel
down.
Or : press the right thumbwheel.
-Un mut ing o r resum ing : turn the right thumb
whee l up .
Or: press the right thumbwheel.
© Manua l shift ing
See q page 86.
Driver information
system
On-board computer
F ig . 8 Instrument cluster: fuel consumpt ion d isplay
12
You can call up the fo llowing info rmat ion in the
on-board computer:
- Da te
- Dr iv ing t ime from the short-te rm memory
-Average consumption from the short -term
memory
- Average speed from the short-term memory
- Distance driven from the short-term memory
- Current fuel consumption
- Short-term memory overv iew
- Long -te rm memory overv iew
The short-term memory collects drivi ng informa
tion from the time the ignition is switched on un
ti l it is switched off . If you continue driving with
i n two hours after switch ing the ignit ion off, the
new values are included when ca lculating the cur
rent trip information.
Un like the sho rt -term memory, the long-term
memory is not erased automatically. You can se
l ect the time period for evaluating trip informa
tion yourself .
Fuel consumption
The current f uel consumption can be shown us
i ng a bar graph ¢
fig. 8. The average consump
tion stored in the short-term memory is also d is
played. If the bar is green, your vehicle is sav ing
fuel through one of the following functions :
-Rec uperation : electrical energy can be stored in
the vehicle battery when the vehicle is coast ing
or driving down hill. T he bar will move toward
0.
-Cy linder on demand system*: the engine auto
matically switches four cylinders (4 .0L TFSI) or
six cylinders (6.3L FSI) off when lower power
output is required and other conditions are
met. Th is change is not noticeable to the pas
sengers . The cylinders w ill switch on aga in
when higher power output is needed .
Page 15 of 356

lL t:0 ....
"' " "' .... 0 0 :c '
Applies to: ve hicles with effic ie n cy program
Fig. 9 Instrument cluster : en ergy consumers
Fig. 10 Inst rument cluster: economy t ip
The efficiency program can help you to use less
fuel. It shows other consumers that are us ing
fuel and economy tips give advice on how to drive
efficiently. The efficiency prog ram receives dis
tance and cons umption data from the on-board
computer.
To disp lay the efficiency program, open the
Vehi
cl e fun cti ons
menu and se lect the Efficien cy pr o
gram
menu item .
Other consum ers
The Energ y con sum ers view lists other equip
ment that is currently affecting fuel consump
tion. The display shows up to three other equip
ment items
@ c:::> fig. 9. The equipment using the
most power is listed first. If more than three
items using power are sw itched on, the equip
ment that is currently using the most power is
displayed.
A gauge @also shows the current total con
sumpt ion of all other consumers.
Coc kpit o verview
E conom y tips
In certain situations, economy tips appear auto
matically for a short time in the efficiency pro
gram
c:::> fig. 10 . If you follow these economy tips,
yo u can reduce your vehicle's fuel consumption.
T o turn an economy tip off immediately after it
appea rs, press any button on the mu ltifunction
steering wheel.
(D Tips
- If
you erase the data in the eff icien cy pro
gram, the va lues in the on-board computer
w ill also be reset.
- Once yo u have turned an economy tip off, it
will only appear again after you turn the ig
nition on again.
- T he economy tips are not disp layed in
every
instance, but rather in interva ls over a peri
od of time .
Radio
Applies to: vehicles wit h mult ifu nction stee rin g w hee l
Fig . 11 Radio me nu
Requirement: radio mode must be started
c:::> page 178 and the radio/media tab must be
displayed.
.,. Press the ~ button on the multifunction steer
ing wheel.
- Sele cting the fr equenc y band : select and con
fi rm a frequency band.
- Select ing a sta tion from th e statio n list: select
and confirm a radio station.
- Sel ect ing a stat ion fr om th e pre set s l is t : select
and confirm
Pre sets and then select a radio sta
tion .
13
Page 18 of 356
Cockpit overv iew
~ WARNING
The ro ute calcu lated by the navigation system
is a recommendation for reaching your desti
nation. Obey traffic lights, stopping restric
tions, one-way streets, lane change restric
tions, etc.
@ Tips
An asterisk" *" in front of the street name in
dicates that the information about this street
or this section of the route is not complete in
the navigation data that the MMI contains.
Obey traffic laws in one-way streets and pe
destr ian zones.
Time and date display
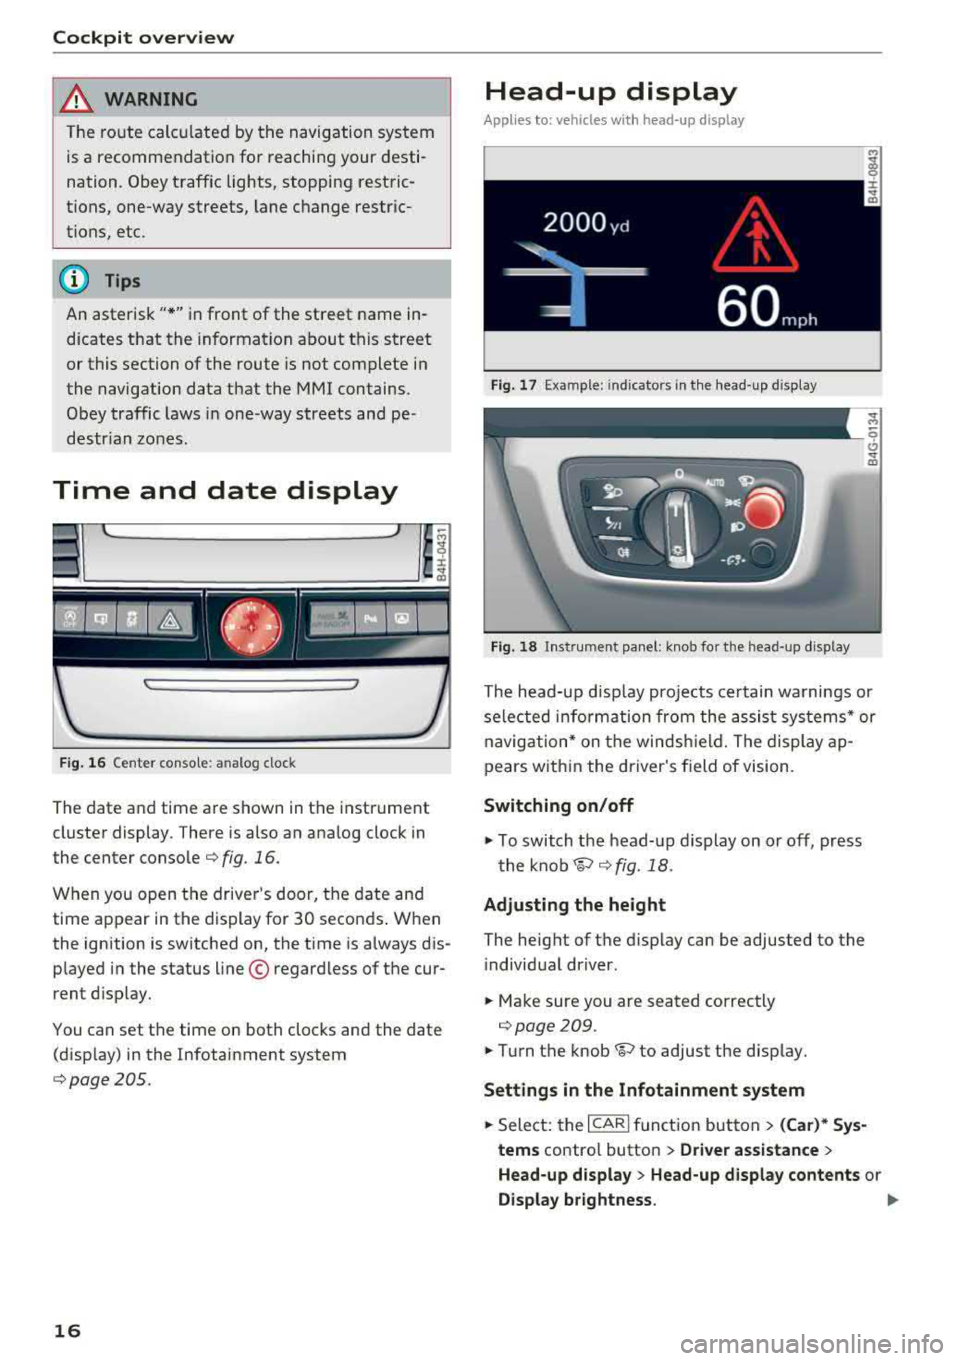
F ig . 16 Center console: analog clock
The date and time a re shown in the instrument
cluster display . There is also an ana log clock in
the center conso le
¢ fig. 16.
When you open the drive r's door, the date and
time appear in the display for 30 seconds . When
the ignition is switched on, the time is a lways dis
played in the status line © regardless of the cur
rent d isplay.
You can set the time on both clocks and the date (disp lay) in the Infotainment system
¢page 205.
16
Head-up display
Applies to: vehicles wi th head-up display
Fig. 17 Example: indicators in the head-up display
Fig. 18 In strument panel: knob for the head-up display
The head-up disp lay pro jects certain wa rnings or
selected information from the assist sys tems* or
navig ation* on the windsh ield. The display ap
pears w ith in the driver's field of vision.
Switching on /off
.,. To switch the head-up display on or off, press
t he
knob~ ¢ fig. 18.
Adjusting the height
The height of the d is play can be adjusted to the
i ndivid ual driver .
.,. Make sure you are seated correctly
¢page 209.
.,. Turn the knob~ to adjust the d isplay.
Setting s in the Infotainment system
.,. Select: the I CARI function button > (Car)* Sy s
tem s
contro l button > Driver a ssistance >
He ad-up display > Head-up displ ay content s or
Display br ightness . ..,_
Page 25 of 356
u. co .... N
" N .... 0 0 :c '
fully to the nearest a uthorized Audi dea ler or
authorized Audi Service Fac ility and have the
ma lf u nction corrected .
(D Tips
For additional information on ESC and ABS,
re fer to
c:> page 12 7.
i i !i.' Safety systems
The II (USA models)/ m (Canada mode ls) indi
cator l ight monitors the safety systems .
I f the
II (U SA mode ls)/ m (Canada models) in
d icator light turns on or blinks, the re is a mal
function in a safety system such as the airbag or belt tensioner system .
Drive to an autho riz ed Aud i dea le r or a uthori zed
Aud i Service Facility immediately to have the
malfunct ion corrected.
A WARNING
Have the ma lf u nct ion in the safety systems
inspected immediately . O therwise, the re is a
r is k th at the systems may not activate during
a co llision, which increases the risk of serious
injury or deat h.
Lt Brake booster
II Brake ser vo: limited functionalit y. You can
continue driving . Contact workshop
-
There is a malfunc tion in the brake booster. The
b ra ke booster is availab le, bu t its effec tiveness is
r educed. Braking be havior may be different from
h ow it normally functions and the brake peda l
may vibrate.
Dri ve to an autho rize d Aud i de aler o r a uth o rized
Aud i Service Faci lity immediately to have t he
malfunction corrected.
{ 0 } Brake pads
EiJ Brake pads!
The brak e pads are wo rn.
Coc kpit o ver view
Drive to an authori zed A udi dealer or authori zed
Audi Service Facility immediate ly to have the
bra ke pads checked .
Applies to : USA mode ls
T he EiJ indicator light turns on togethe r wi th the
1111 indicator light.
EPC Engine control (gasoline engine)
~ Engine control: system m
alfunction! Reduce speed. Please contact dealer
T he re is an eng ine contro l ma lf u nction.
Immed iate ly dr ive s low ly to an author ized A udi
dealer or au thor ized A udi Se rvice Fa cility to have
t h e mal func tion corrected.
o Malfunction indicator lamp (MIL)
The ma lf u nction indicator lamp ( MIL) is pa rt of
t h e On -Board D iagnost ic System (080 II). The
¢..ij c;ymbo l turns on when the ignition is sw itched
o n and turns off aga in once the engine is started
and run ning at a steady idle speed . This indicates
t h at the MIL is f unction ing cor rectly .
The ind icator light tu rns on if there is a malfunc
t ion in the engine electronics . See an authorized
Audi dealer or author ized A udi Service Fac ility to
have the malfunct ion cor rected . Fo r additional
i nforma tion, see
c:> page 25 .
The ind icator light can a lso turn o n if the fuel fill
er cap is not closed correctly
c:> page 2 70 .
!?' Engine speed limitation
App lies to : vehicles wit h engine speed limitatio n
(m Maximum engine speed XXXX RPM
The eng ine speed is automatically limited to the
RPM shown in the instrument cluster d isplay.
This protects the engi ne from over heat ing .
The eng ine speed limitation deactivates once the
engine is no longe r in the critical temperatu re
range and you have re leased the accelerator ped
al once .
If the engine speed limitation was activated by
an engine cont rol malfunction,
the ~ indicato r ..,
23
Page 27 of 356
u. co .... N
" N .... 0 0 :c '
Audi Service Facility immediately to have t he
mal funct ion corrected.
~ D Light/rain sensor
El Automatic headl ights / automatic wipe rs:
System fault
The light/rain sensor is malfunctioning.
The low beams remain swi tched on at all times
for safety reasons when the light switch is in the
AU TO position. You can continue to turn the
lights on and
off using the light switch . You can
still control all functions that are independent of
the ra in sensor through the w indshie ld w iper lev
er .
Drive to an aut horized Audi dea ler or a uth orized
Aud i Service Facility immediately to have the
malfunct ion corrected.
!-: Sport differential
Applies to: vehicles with sport differential
(I Sport differential : Sy stem fault
T here is a malfunction with the sport differentia l.
Dri ve to an authorized Aud i dea le r o r a uth orized
Audi Service Facility immediately to have t he
malfunction corrected.
I'll Sport differential : Ov erh eating
The transm iss ion temperature has increased s ig
ni ficantly due to the sporty driving manne r. D rive
in a less sporty manner until the temperature re
turns to the normal range and the ind icator ligh t
sw itches of .
A WARNING
Contact an author ized A udi dealer or au tho r
ized Aud i Serv ice Facility if the sport diffe ren
tial is fau lty or mal functioning. The repair
must be performed by tra ined personne l us
ing the correct oi l in order to ens ure safety .
Cockpit o ver view
¢¢Turn signals
If the B or 1B in d icator light blinks , the tur n
s ignals a re act ivated. If bot h ind icator lights are
blinking, the emergency flashers are activa ted.
If an ind icator light blinks tw ice as fast as usual,
a turn signal b ulb has fai led. Carefully d rive to an
a utho riz ed Aud i dea le r or autho rized Aud i Serv ice
F ac ility immed iate ly to have the ma lfunction co r
rected . The indicator light does not indicate a
malfunction if a turn signal on the trailer o r on
the vehicle fa ils in trailer towing mode.
(D Tips
F o r more information on the turn signa ls, re
fer
to~ page 44.
On-Board Diagnostic
System (OBD)
Malfunction Indicator Lamp (MIL)
The Ma lfunction Indicato r Lamp ( MIL) ¢..ijj in the
instrument cluster is part of the On -Board Diag
nostic (OBD II) system .
T he warning/indicator lig ht ill uminates w hen the
ignition is switched on and goes out after the en
gine starts and the id le has stabilized . This indi
cates that the MIL is wor king properly.
If the light doe s not go out after the eng ine is
started, or i lluminates while you are driving, a
malfunction may exist in t he engine system. If
the light ill uminates, the catalytic converter
could be damaged.
Continue driving
w ith reduced powe r (avoiding
s u stained high speeds and/or rapid accelera
tions) and have the condit ion corrected. Contact
your authori zed Aud i dea ler .
If the light i lluminates, the electronic speed lim
iter may also be malf unctioning. For more infor
mation
c> page 26, Electronic speed limiter .
An improperly closed fue l filler cap may also
ca use the M IL light to ill uminate
c> page 2 70.
25
Page 43 of 356
lL t:0 ....
"' ......
"' .... 0 0 :c '
va let parking function is switched on :
-1""'1 button in the driver's door
-I ""' I button on the remote control key
- Handle in the rear lid
When the valet parking function is switched on,
the message
Valet parking activated appears in
the instrument cluster display when you switch
the ignition on.
Garage door opener (Homelink)
Description
Ap plies to: vehicl es with garage door opener (Homeli nk)
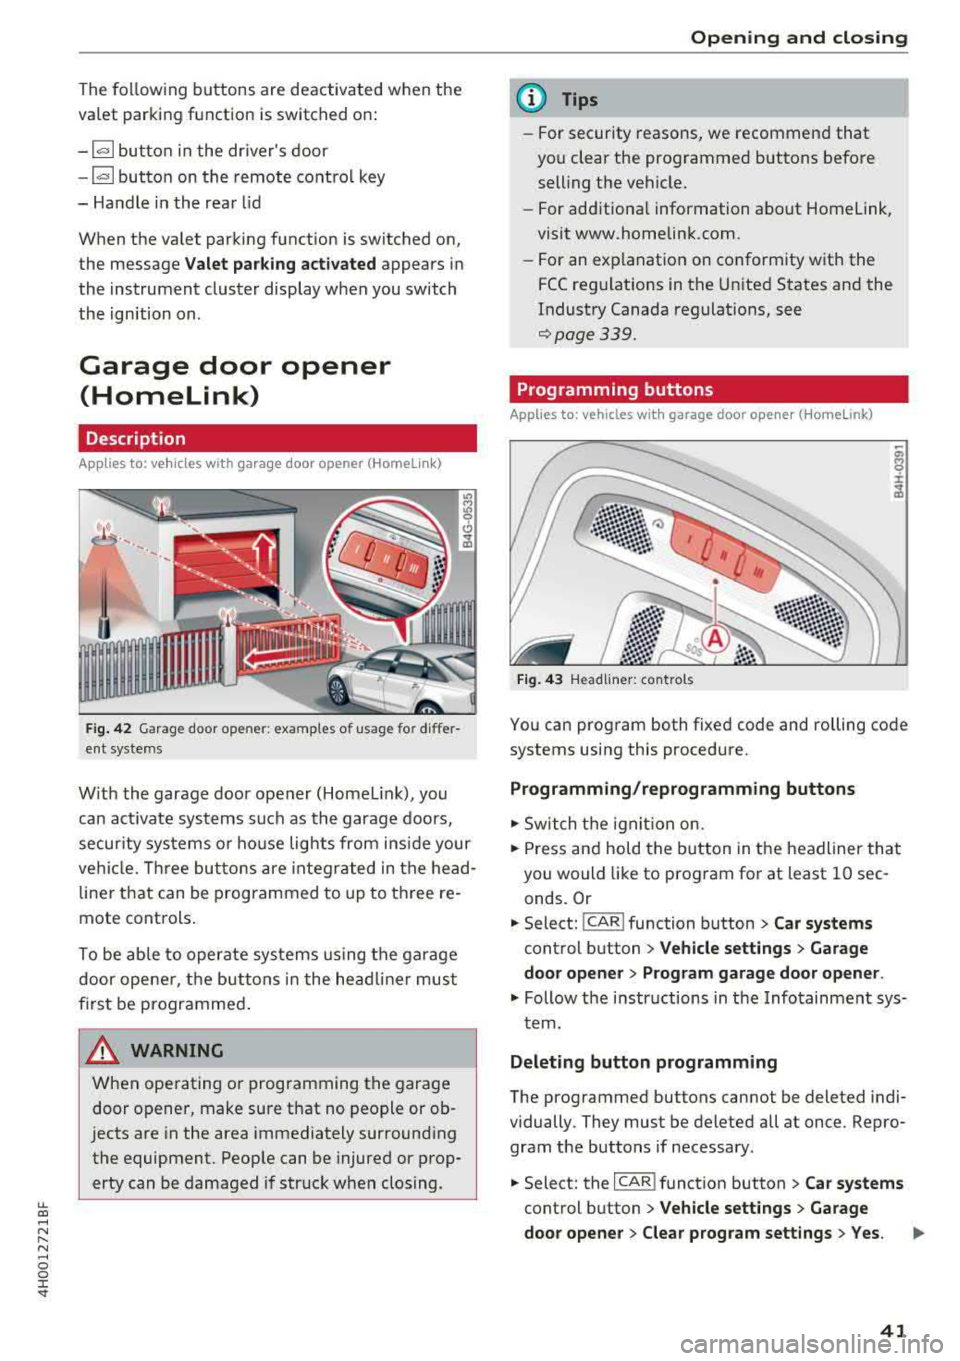
Fig. 42 Garage door opene r: examples o f usage for differ
ent systems
W ith the garage door opener (Homel ink), you
can activate systems such as the garage doors,
security systems or house lights from ins ide your
vehicle. Three buttons are integrated in the head
liner that can be programmed to up to three re
mote controls.
To be able to operate systems using the garage
door opener, the buttons in the headliner must
first be programmed .
A WARNING
When operating or programming the garage
door opener, make sure that no people or ob
jects are in the area immediately surrounding
the equipment. People can be injured or prop erty can be damaged if struck when closing.
Opening and closing
(D Tips
-For security reasons, we recommend that
you clear the programmed buttons before selling the vehicle.
- For add itiona l information about Homelink,
visit www.homelink.com.
- For an explanation on conformity with the
FCC regulations in the United States and the
Industry Canada regulations, see
¢page 339.
Programming buttons
App lies to: vehicles with garage door opener (Home link)
Fig. 43 Headliner: controls
You can program both fixed code and rolling code
systems using this procedure.
Programming/reprogramming buttons
.. Switch the ignit ion on.
.. Press and hold the button in the headliner that
you would like to program for at least 10 sec
onds. Or
.. Select: ! CAR ! function button> Car systems
control button > Vehicle settings > Garage
door opener > Program garage door opener.
.. Follow the instr uctions in the Infotainment sys-
tem.
Deleting button programming
The programmed buttons cannot be deleted indi
vidually. They must be deleted all at once. Repro
gram the buttons if necessary .
.. Select: the ICAR !function button> Car systems
control button > Vehicle settings > Garage
door opener > Clear program settings
> Yes.
41
Page 46 of 356
Lights a nd Vis ion
detected by the light sensors. So a lways
switch on the headlights
§.D under these
weather conditions and when driving in the
dark .
- Crashes can happen when you cannot see
the road ahead and when you cannot be
seen by other motorists . Always turn on the
headlights so that you can see ahead and so
that others can see your
car from the back.
- The rear fog lights should only be turned on in accordance with traffic regulat ion, as the
lights are bright for following traffic.
- Please observe legal regulations when using
the light ing systems described .
@ Tips
-The light sensor* for automatic dynam ic
headlight range control* is located in the
rear view mirror mount . You should there
fore not apply any st ickers to the w indshield
i n this area in order to prevent malfunctions
or fail ures .
- In the event of a ligh t sensor malfunct ion,
the driver is not ified in the instrument clus
ter
d isplay~ page 25.
- You w ill hear a wa rning tone if you open the
driver door when the exter ior lights are
switched on .
- In cool or damp weather, the inside of the
headlights, turn s ignals and tail lights can
fog over due to the temperature difference between the inside and outside . They will
clear short ly after switching them on . This
does not affect the service life of the light
i ng .
44
Turn signal and high beam lever
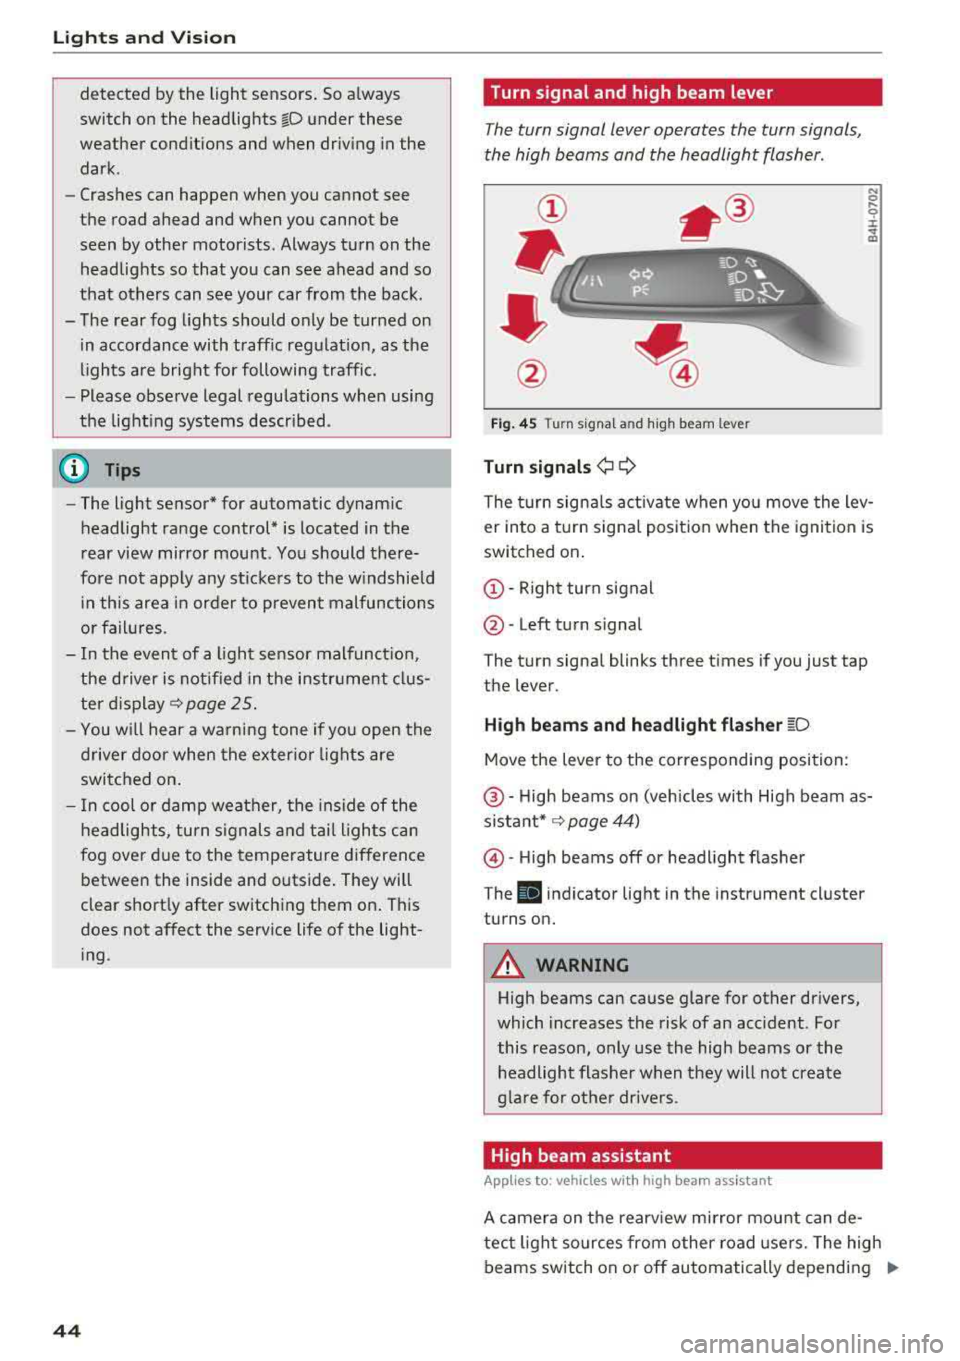
The turn signal lever operates the turn signals,
the high beams and the headlight flasher .
Fig. 45 T urn signa l an d high beam leve r
Turn signa ls¢ Q
N 0 .... 0 :i:
"' m
The t urn signa ls act ivate when you move the lev
er into a turn signa l position when the ignit ion is
switched on.
(D -Right turn signal
@ -Left turn signal
The turn signa l blinks three times if you just tap
the lever.
H igh be ams and h eadlight fla sh er ~D
Move the lever to the corresponding position:
@ -High beams on (vehicles with High beam as
sistant* ~ page 44)
@-High beams off or headl ight flasher
T he
El indicator light in the instrument cluster
turns on.
A WARNING
High beams can cause glare for other drivers,
which increases the risk of an accident . For
this reason, only use the high beams or the
headlight flasher when they will not create
g la re for othe r drive rs .
High beam assistant
App lies to: vehicles with high beam ass istant
A camera on the rearv iew mirror mount can de-
tect light sources from other road use rs. The high
beams switch on or off automatically depending
IJI>