brakes AUDI Q3 2015 Owners Manual
[x] Cancel search | Manufacturer: AUDI, Model Year: 2015, Model line: Q3, Model: AUDI Q3 2015Pages: 258, PDF Size: 64.9 MB
Page 15 of 258
M N
M N
0 ::i co ,...., \!) 1.1'1 ,...., 1.1'1 ,....,
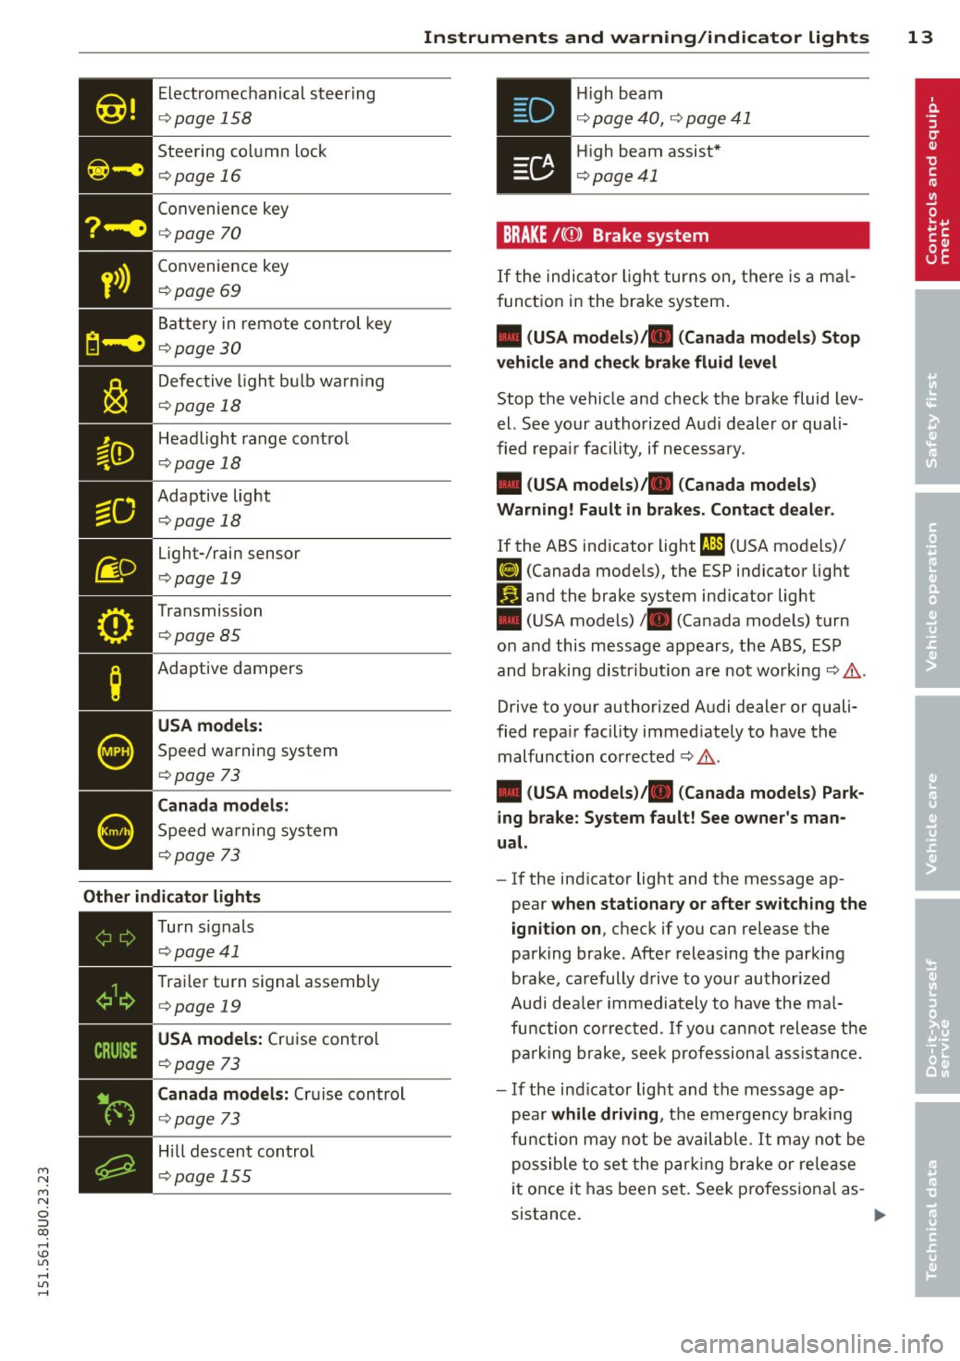
Electromechanical steering
¢page 158
Steering column lock
¢page 16
Convenience key
¢page 70
• Convenience
key ¢page 69
Battery in remote control key
¢ page 30
Defective light bulb warn ing
¢ page 18
Headlight range control
¢page 18
- Adaptive light
- ¢page18
Light-/rain sensor
¢ page 19
Transmission
¢page 85
Adaptive dampers
USA models:
Speed warning system
¢page 73
Canada models:
Speed wa rning system
¢page 73
Other indicator lights
•iii
Turn
signals
¢ page41
• T
rai ler turn signal assembly ¢ page 19
• USA models:
Cruise control
¢
page 73
Canada models: Cruise control
¢page 73
Hill descent control
¢page 155
Instruments and warning/indicator lights 13
.Hi gh beam
• ¢ page 40, ¢ page 41
• High beam assist*
¢page41
BRAKE /((D ) Brake system
If the indicator light turns on, there is a mal
function in the brake system.
• (USA models)/ . (Canada models) Stop
vehicle and check brake fluid level
Stop the veh icle and check the brake fluid lev
el. See your authorized Aud i dealer or quali
fied repa ir facility, if necessary.
• (USA models)/ . (Canada models)
Warning! Fault in brakes. Contact dealer .
If the ABS indicator light t1l1 (USA models)/
fiJ (Canada models), the ESP indicator light
Iii and the brake system ind icator light
• (USA models)/ . (Canada models) turn
on and this message appears, t he ABS, ESP
and braking distr ibution are not working¢&.
Drive to your authorized Audi dealer or quali
fied repa ir facility immed iately to have the
malfunction corrected ¢ & .
• (USA models)/ . (Canada models) Park
ing brake: System fault! See owner's man
ual.
- If the indicator light and the message ap
pear
when stationary or after switching the
ignition on,
check if you can release the
park ing brake . After releasing the parking
brake, carefully drive to your author ized
Audi dea le r im mediately to have the mal
function corrected. If you can not release the
park ing brake , seek professional assistance.
- If the ind icator light and the message ap
pea r
while driving , the emergency brak ing
function may not be available. It may not be
possible to set the parking brake or release
it once it has been set. Seek pro fessiona l as-
sistance. .,.
Page 16 of 258
![AUDI Q3 2015 Owners Manual 14 Instrum ent s and w arn ing /indic ato r light s
(USA models): If the warning light . and the
warning light
ll] appear together, immedi
ately contact your authorized Audi deale AUDI Q3 2015 Owners Manual 14 Instrum ent s and w arn ing /indic ato r light s
(USA models): If the warning light . and the
warning light
ll] appear together, immedi
ately contact your authorized Audi deale](/img/6/57629/w960_57629-15.png)
14 Instrum ent s and w arn ing /indic ato r light s
(USA models): If the warning light . and the
warning light
ll] appear together, immedi
ately contact your authorized Audi dealer or
qua lified workshop to have all brake pads in
spected
¢ page 17.
When the light comes on, an audib le warning
signal is also given .
.&_ WARNING
- Always observe the warnings in
¢ page 179, before opening the hood
and checking the brake fluid.
- Driv ing with low brake fluid is a safety
hazard. Stop the car and get professional
assistance.
- If the . (USA models) . (Canada
models) brake system indicator light
turns on together with the ABS and ESC
indicator lights, the ABS/ESC regu lating
function may have failed. Functions that
stabilize the vehicle are no longer availa
ble. Th is could cause the vehicle to
swerve and increase the risk of sliding .
Drive carefully to the nearest a uthorized
Audi dealer or other qualified workshop
and have the malfunction corrected.
- If the brake warning/indicator light does
not go out after a few seconds and the
park ing brake is released, or lights up
wh ile you are driving, the fluid level in
the brake fluid reservoir is too low .
If you
believe that it is safe to do so, proceed
immediately at low speed to the nearest
authori zed Audi dealer o r qualified wo rk
shop and have the bra ke system inspect
ed.
- Always keep in m ind that after several
brake applicat ions, yo u will need greater
pressure on the brake peda l to stop your
vehicle. Do not re ly on strained brakes to
respond with maxim um stopping power
in critical situations. You must allow for
increased brak ing distances. The extra
distance used up by fad ing brakes could
lead to an acc ident.
PARK !<®> Electromechanical parking brake
The warning/indicator light monitors the
electromechanical parking brake .
If the indicator light. (USA models) •
(Canada models) turns on, the parking brake
was set.
• (USA model s)/. (Canada models ) Press
brake pedal to release parking b ra ke.
To re lease the park ing brake, press the brake
peda l and press the button(®) at the same
t ime or start driving with starting assist
¢ page 71, Starting from rest.
Ill Pa rking br ake : S ys tem f ault! See owne r's
manual.
If the I.II ind ic a tor light tu rns o n and this
message appears, there is a parking b rake
malfunction. Drive to your authorized A udi
dealer or qualified workshop immediately to
have the malfunct ion corrected.
@ Tips
More informat ion on the parking brake
¢page 70 .
-L Engine cooling system
A malfunction in the engine cooling system
must be repaired as soon as possible.
• Turn off engine and ch eck coolant level
T he coolant level is too low .
Do not continue dr iving and turn
off the en
gine. Check the coo lant level
¢ page 186.
-If the coo lant level is too low, add coo lant
¢ page 186. Only continue driving if the in
dicator light turns off.
- If the coo lant level is correct, then the ma l
function may be ca used by fa ilure of the
coolant fan. Do not continue driving. See
your authorized Audi dealer or qualified re pa ir fac ility .
• Coolant temperature! Let engine run
w ith vehicle stationar y.
Page 18 of 258
16 Instruments and warning/indicator lights
~ Safety belts
This warning/indicator light reminds you to
put on your safety belt.
The. warning/indicator light illuminates
when the ignition is sw itched on to remind
the dr iver and any front passenger to put on
the safety belt. Additionally, an acoustic warn
ing (gong) will also sound.
(D Tips
For more Information c> page 104, Safety
belt warning light.
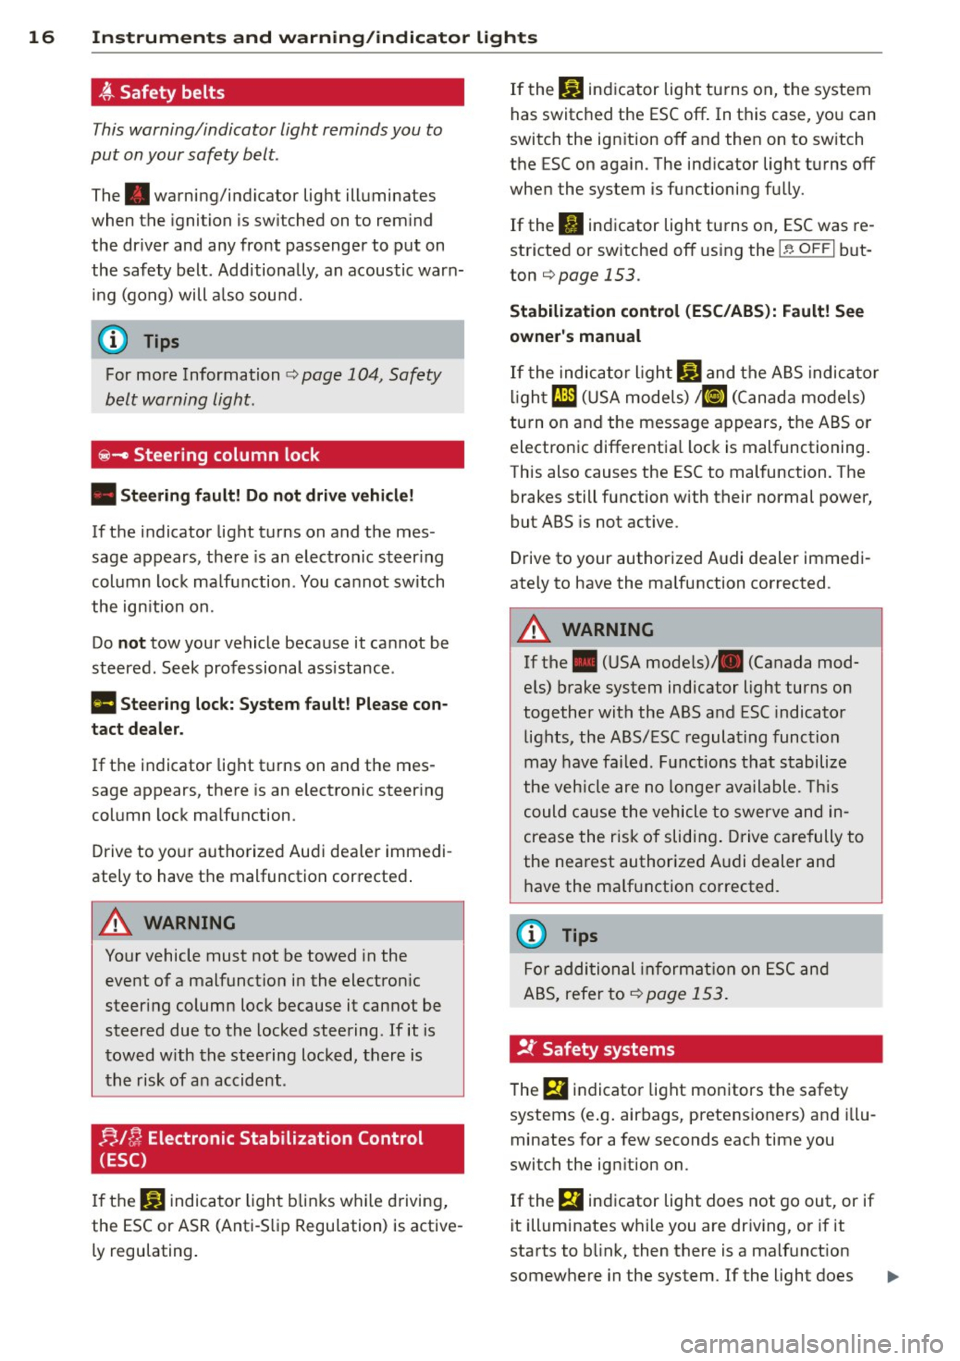
~- Steering column lock
• Steering fault! Do not drive vehicle!
If the indicator light turns on and the mes
sage appears, there is an electronic steering
column lock malfunction. You cannot switch
the ign ition on.
Do
not tow your vehicle because it cannot be
steered . Seek professional assistance.
Ill Steering lock: System fault! Please con
tact dealer.
If the indicator light turns on and the mes
sage appears, there is an electronic steer ing
column lock malfunction.
Drive to your authorized Audi dea ler immedi
ate ly to have the malfunction corrected .
A WARNING
-
Your vehicle must not be towed in the
event of a malfunct ion in the electron ic
steering column lock because it cannot be
steered due to the locked steering. If it is
towed with the steering locked, there is
the risk of an accident .
!;.IC; Electronic Stabilization Control
(ESC)
If the J;J indicator light blink s whi le driving,
the ESC or ASR (Anti-S lip Regulation) is active
ly regulating .
If the: JjJ indicator light turns on, the system
has switched the ESC
off. In this case, you can
switch the ign ition
off and then on to switch
the ESC on aga in. The indicator light turns
off
when the system is functioning fully.
If the II indicator light turns on, ESC was re
stricted or sw itched
off using the I~ OFFI but
ton
i=> page 153.
Stabilization control (ESC/ABS): Fault! See
owner's manual
If the indicator l ight GJ and the ABS indicator
light
t1l1 (USA mode ls) ;tiJ (Canada models)
tu rn on and the message appears, the ABS o r
electronic differentia l lock is malfunctioning.
This also causes the ESC to malfunction. The
brakes still function with their normal power,
but ABS is not active.
Drive to your authorized Audi dealer immedi
ate ly to have the ma lfunction corrected.
A WARNING "--
If the . (USA mode ls)/ . (Canada mod-
e ls) brake system indicator light turns on
together with the ABS and ESC indicator
lights, the ABS/ESC regulating function
may have failed. Functions that stabilize
the vehicle are no longer ava ilable. This
could cause the vehicle to swerve and in
crease the risk of slid ing. Drive carefully to
the nearest authorized A udi dealer and
have the ma lfunction corrected.
(D Tips
For additional informat ion on ESC and
ABS, refer to
c> page 153.
!t Safety systems
The fll indicator light monitors the safety
systems (e .g. airbags, pretensioners) and illu
minates for a few seconds each time you
switch the ign ition on .
If the
fll indicator light does not go out, or if
it illuminates while you are driving, or if it
starts to b link, then there is a malfunct ion
somewhere in the system. If the light does
Page 19 of 258
Instrument s and warnin g/indic ator ligh ts 17
M N
M N
0 ::i co ,...., \!) ..,.,
not illuminate when you switch the ignition
on, this also means there is a malfunction .
A WARNING
If you have a malfunction in the safety sys
tems, contact your author ized Audi dealer
immediately. Otherw ise the safety sys
tems may not work properly in an acci
dent .
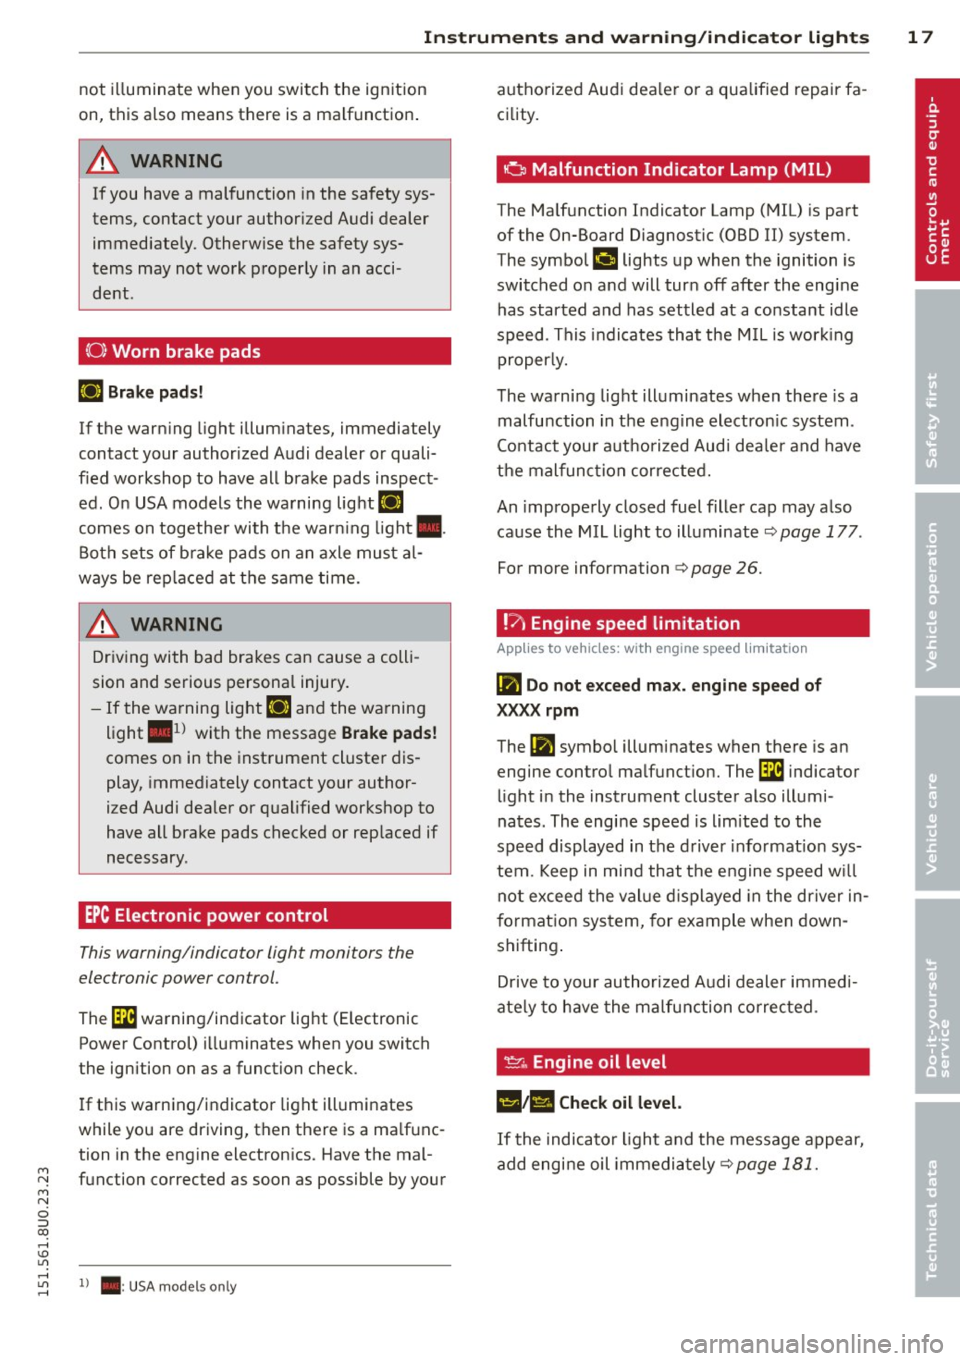
(0 ) Worn brake pads
Ill Brake pad s!
If the warn ing light illum inates, immediately
contact your authorized Audi dealer or quali
fied workshop to have all brake pads inspect
ed. On USA models the warning light
Ill
comes on together with the warn ing light •.
Both sets of b rake pads on an axle must al
ways be rep laced at the same time.
A WARNING
Dr iv ing with bad brakes can cause a coll i
sion and serious personal injury.
- If the wa rning light Ill and the warning
light
. ll with the message Brake pad s!
comes on in the instrument cluste r dis
play, immediately contact your author
i z ed Audi dealer or qualified workshop to
have all brake pads checked or replaced if
necessary .
EPC Electronic power control
This warning/indicator light monitors the
elec tronic power control .
The [31 warning/indicator light (E lectronic
Power Control) i lluminates when you switch
the ignition on as a function check .
-
If t his warning/indicator light ill uminates
while you are driving, then there is a ma lfunc
tion in the engine electron ics. Have the mal
function corrected as soon as possible by your
,....,
~ 1 ) . : USA models only
authorized Aud i dea le r or a qualified repair fa
cility.
· o Malfunction Indicator Lamp (MIL)
The Ma lfunction Indicator Lamp (MIL) is part
of the On-Board Diagnostic (OBD II) system.
The symbol
('4 lights up when the ignition is
switched on and will turn off after the eng ine
has started and has settled at a constant idle
speed . This i ndicates that the M IL is work ing
properly.
The warning light illuminates when there is a
malfu nction in the e ngine electron ic system .
Co ntact you r aut ho rized Aud i dea le r and have
t h e malfunc tion corrected.
An improperly closed fuel fille r cap may a lso
cause the MIL light to illuminate
q page 177 .
For more information q page 26.
!?; Engine speed limitation
App lies to vehicles: wi th engine speed limi tati on
(fl Do not e xce ed ma x. engin e speed of
XX.XX rpm
The Ill symbol illuminate s when there is an
engine contro l ma lf unct ion. The
(31 indicator
light in the instrument cluster also illumi
nates . The engi ne speed is limited to the
speed displayed in the d river info rmat ion sys
tem. Keep in mind that the engine speed w ill
not exceed the val ue d isplayed in the dr iver in
f ormat ion system, for example when down
shifting .
D rive to your authori zed A udi dealer immed i
ate ly to have the ma lfunction corrected .
!:( .. Engine oil level
1!1;111 Check oil level.
If the indicator light and the message appear,
add engi ne oil immediately
<=> page 181.
Page 56 of 258
54 Seats and storage
A WARNING
T he ciga rette lighter only works when the
ign ition is on . Improper use can cause seri
ous injury or start a fire. To avo id the r isk
of injury, nev er leave children unsupe r
vised in the vehicle with the key.
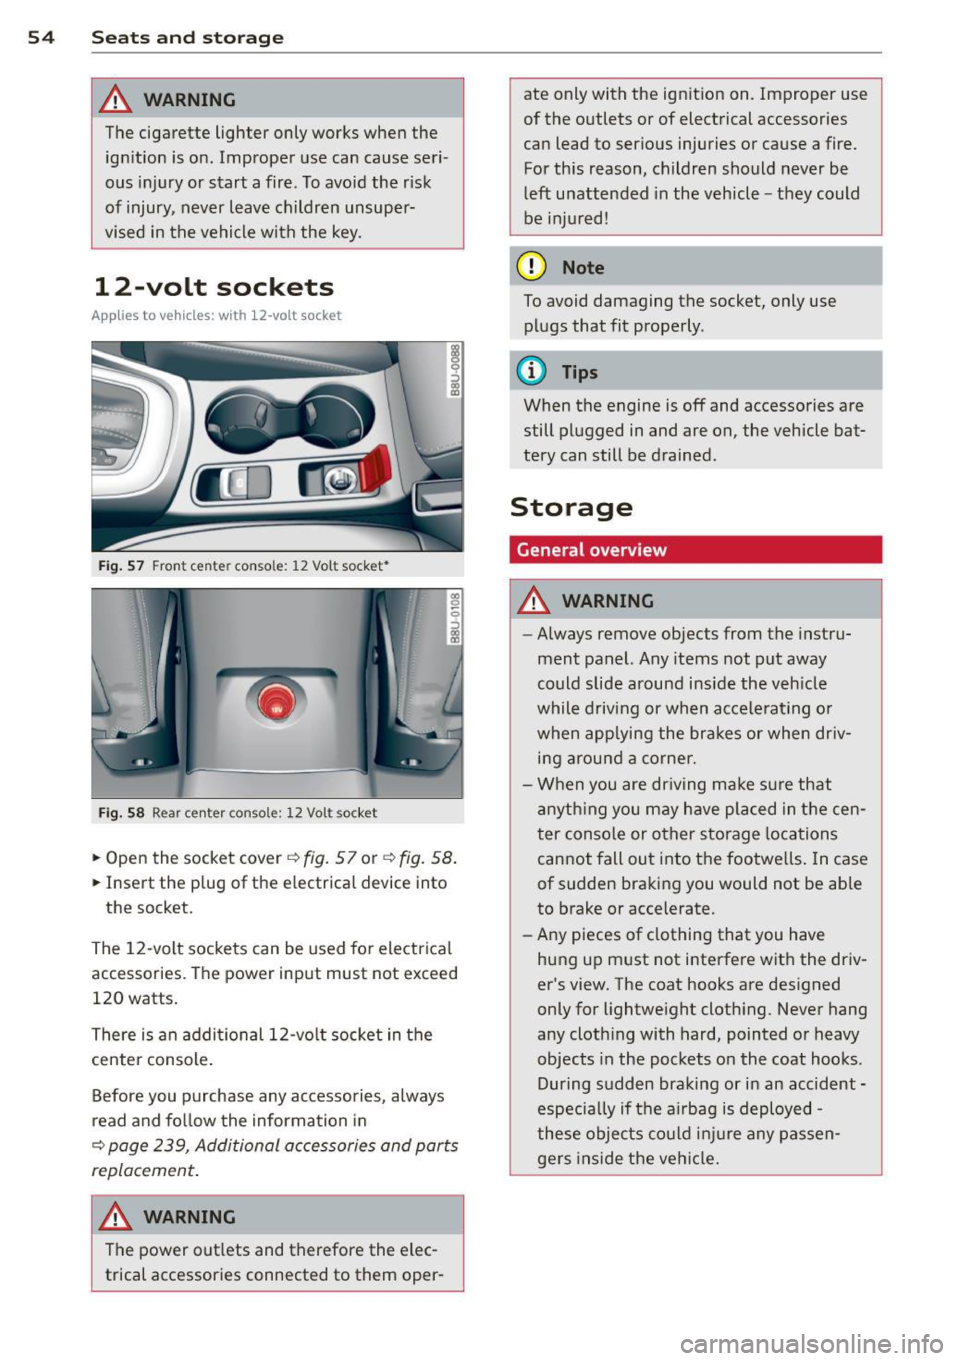
12-volt sockets
Ap plies to vehicles: with 12 -volt socket
Fi g. 57 Fro nt cen ter conso le: 12 Vo lt socket •
Fig. 58 R ear ce nter c onso le: 12 Vo lt socket
.. Open the socket cover ¢ fig. 57 or¢ fig. 58 .
.. Insert the p lug of the e lectrica l device into
the socket.
The 12 -volt sockets can be used fo r electr ical
accessories. The power input must not exceed
120 watts.
There is an addi tional 12-vo lt socket in the
center console .
Before you purchase any accessories, always
read and fo llow the informa tion in
¢ page 239, Additional accessories and parts
r e plac em ent .
A WARNING
The power out lets and therefore the elec
trical accessories connected to them oper- ate only with the ignit
ion on. Improper use
of the outlets or of electrical accessories
can lead to ser ious injuries or cause a fire.
For this reason, children should never be
l eft unattended in the vehicle -they could
be injured!
(D Note
To avoid damaging the socket, only use plugs that fit properly .
(D Tips
When the engine is off and accessories are
still plugged in and are on , the vehicle bat
tery can still be drained .
Storage
General overview
A WARNING
--
-Always remove objects from the instru
ment panel. Any items not put away
could slide around ins ide the veh icle
while driving or when ac cele rat ing o r
when applying the brakes or when dr iv
ing arou nd a corne r.
- When you are dr iving make s ure that
an yth ing you may have pla ced in the cen
ter conso le or other storage loca tions
cannot fall out into the footwe lls . In case
of sudden braking you would not be able
to brake or accelerate.
- Any pieces of clothing that you have
hung up must not i nterfere with the dr iv
er's view. The coat hooks are des igned
only for lightweight cloth ing . Never hang
any cloth ing with hard, pointed o r heavy
objects in the pockets on the coat hoo ks .
During s udden braking or in an accident -
especia lly if t he a irbag is deployed -
these objec ts co uld in ju re any passen
ge rs inside the ve hicl e.
Page 58 of 258
56 Seats and storage
in the vehicle while it is moving. In case
of an accident, sudden braking or other
vehicle movement, hot liquid could spill,
causing scalding burns . Spilled hot liquid
can also cause an accident and personal
injury.
- Use only soft cups in the cupholder. Hard
cups and glasses can cause injury in an
accident .
- Never use the cupholder or adapter as an
ashtray -risk of fire .
CD Note
Only drink containers with lids should be
carried in the cupholder . Liquid could spill
out and damage your vehicle's electronic
equipment or stain the upholstery, etc.
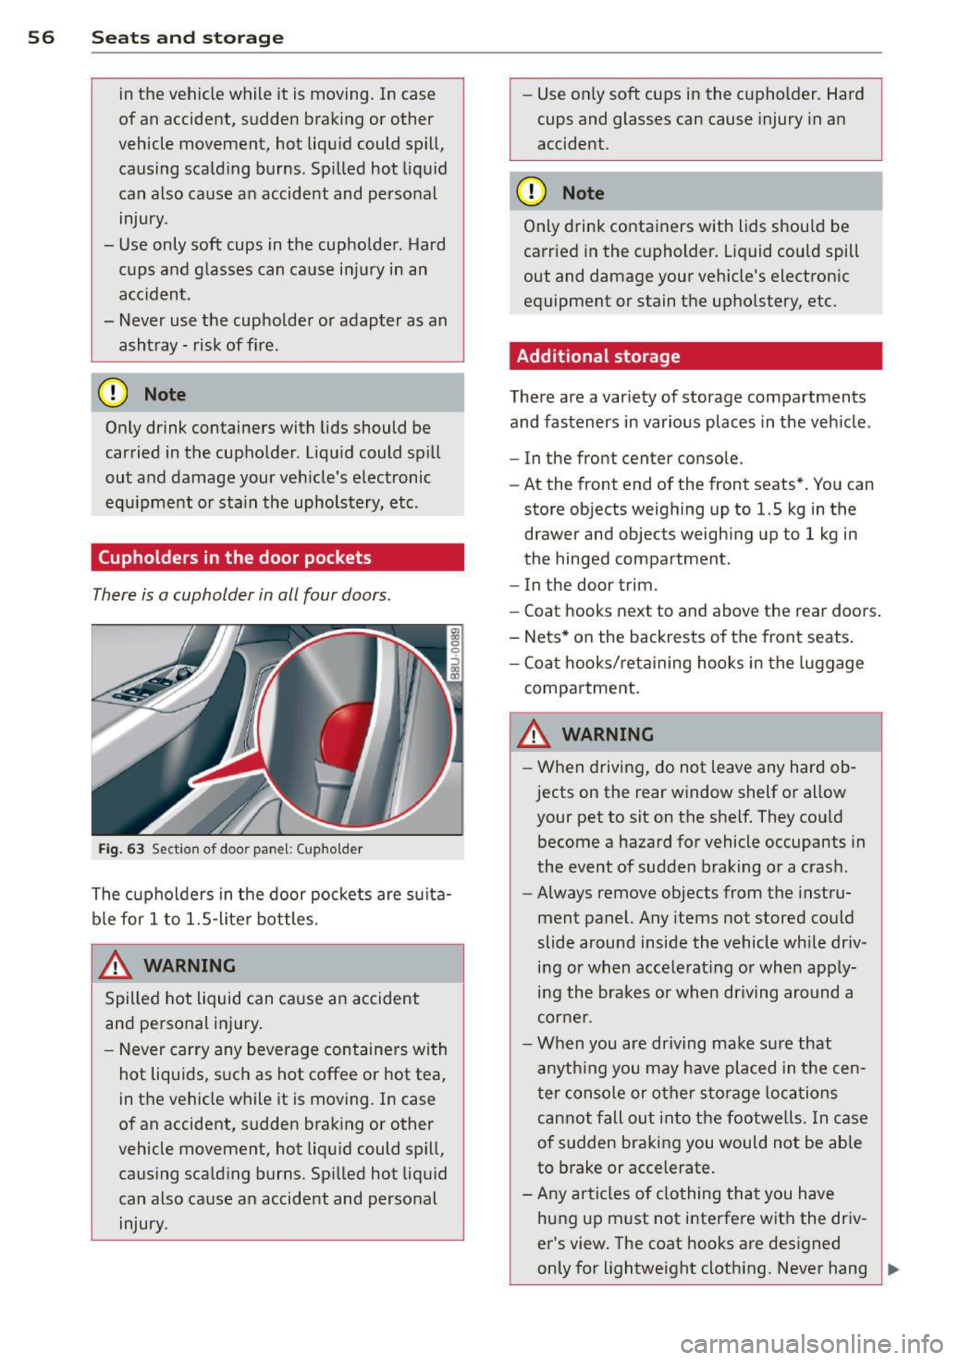
(upholders in the door pockets
There is a cupholder in all four doors .
Fig. 63 Sect ion of doo r panel: Cupho lder
The cupholders in the door pockets are suita
ble for 1 to 1.5-liter bottles.
_& WARNING ,~ ~
Spilled hot liquid can cause an accident
and personal injury.
- Never carry any beverage containers with
hot liquids, such as hot coffee or hot tea,
in the vehicle while it is moving. In case
of an accident, sudden braking or other
vehicle movement, hot liquid could spill,
causing scalding burns. Spilled hot liquid
can also cause an accident and personal injury . -
Use only soft cups in the cupholder. Hard
cups and glasses can cause injury in an
accident.
CD Note
Only drink containers with lids should be
carried in the cupholder. Liquid could spill
out and damage your vehicle's electronic
equipment or stain the upholstery, etc.
Additional storage
There are a variety of storage compartments
and fasteners in various places in the vehicle .
- In the front center console.
- At the front end of the front seats*. You can
store objects weighing up to 1.5 kg in the
drawer and objec ts weighing up to 1 kg in
the hinged compartment .
- In the door trim.
- Coat hooks next to and above the rear doors.
- Nets* on the backrests of the front seats.
- Coat hooks/retaining hooks in the luggage
compartment.
A WARNING
- When driving, do not leave any hard ob
jects on the rear window shelf or allow
your pet to sit on the shelf. They could become a hazard for vehicle occupants in
the event of sudden braking or a crash .
- Always remove objects from the instru
ment panel. Any items not stored could
slide around inside the vehicle while driv
ing or when accelerating or when apply ing the brakes or when driving around a
corner .
- When you are driving make sure that
anything you may have placed in the cen
ter console or other storage locations
cannot fall out into the footwells. In case
of sudden braking you would not be able
to brake or accelerate.
- Any articles of clothing that you have
hung up must not interfere with the driv
er's view. The coat hooks are designed
only for lightweight clothing. Never hang
~
Page 73 of 258
M N
M N
0 ::i co ,...., \!) ..,.,
,...., ..,., ,....,
Emergency brake function
An emergency brake ensures that the vehicle
can be slowed down even if the
normal brakes
fail c::>
page 72, Emergency broking.
& WARNING
If a drive range is engaged with the vehicle
stat ionary and the engine running, you
must in no instance accelerate care lessly.
Otherw ise the vehicle will start to move
immediately -risk of an accident.
(D Tips
- If the parking brake is applied with the
i gnition switched off, the indicator lights
• in the switch and. (USA models) /
• (Canada models) in the instrument
cluster w ill go out after a certa in period
of time.
- Occasional noises when the park ing
brake is applied and re leased a re norma l
and are not a ca use for concern.
- When the vehicle is parked, the parking
brake goes through a se lf-test cycle at
regular intervals. Any assoc iated noises
are norma l.
Parking
~ Press the brake peda l to stop the vehicle.
~ Pull the switch@c::> page 70, fig . 77 to set
the parking brake.
~ Move the selector lever to P.
~ Turn the engine off c::> _&.
~ When on incl ines or declines, turn the steer
ing wheel so that the vehicle w ill roll i nto
the curb if it begi ns to move.
& WARNING
- When you leave your veh icle - even if on
ly b riefly- a lways remove the ign ition
key . This applies particularly when chil
dren remain in t he vehicle . Otherwise the
children co uld start the engine, release
the parking brake or operate electrical
equipment (e.g. power windows). There is the r isk of an accident .
On th e ro ad 71
-When the veh icle is locked, no one - par
ticularly not children should rema in in
the vehicle. Locked doors make it more
difficult for emergency wo rkers to get in
to the vehicle - putting lives at risk .
Starting from rest
The starting assist function ensures that the
parking broke is released automatically upon starting.
Stopping and applying park ing brak e
~ Pull the sw itch C®l to apply the pa rking
brake.
Starting and automatically releasing the parking brake
~ When you start to drive as usual, the park
ing brake is a utomatically released and your
veh icle begins to move.
When stopping at a traffic signal or stopping in city traff ic on vehicles with an automatic
transmission, the parking brake can be ap
plied. The vehicle does not have to be held
with the footbrake. The parking brake elimi
nates the tende ncy to creep w ith a dr ive range
engaged. As soon as you d rive off as usual,
t he pa rking bra ke is re leased automatically
and the veh icle s tarts to move.
St arting on slopes
When starting on inclines, the starting assist
prevents the vehicle from un intent io nally roll
ing back. The braking force of the parking
brake is no t re leased unt il su ff ic ient d riving
force has been built up a t the wheels.
(D Tips
Fo r safety reasons, the parking bra ke is re
l eased automatically o nly when the d riv
e r's safety belt is eng aged in the buckle.
Page 76 of 258
7 4 On the road
-The brake lights turn on when the brakes
are activated .
Switching on
0
f
®t
0
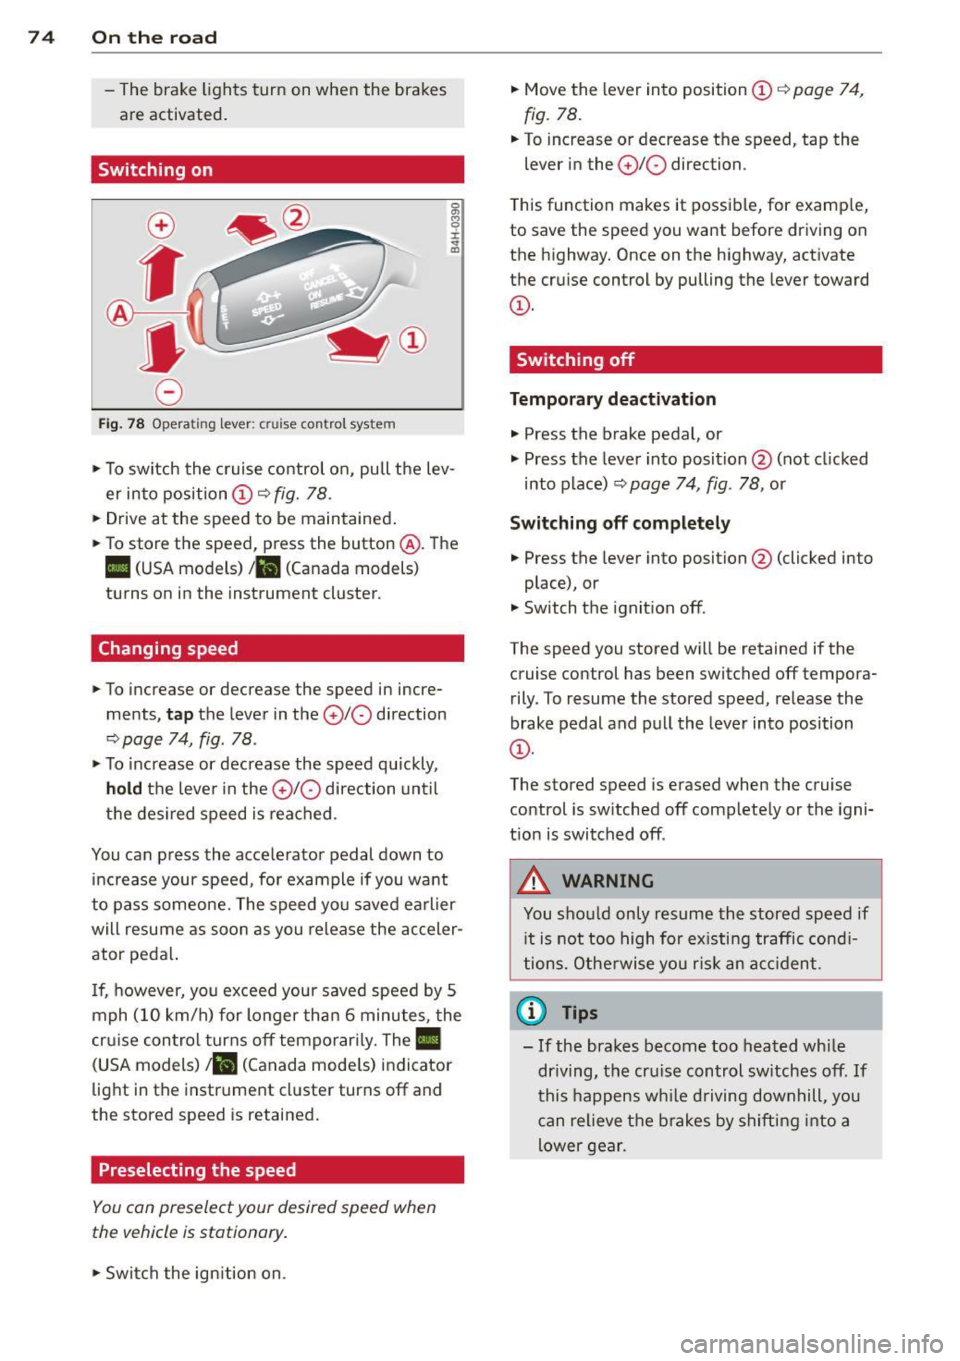
Fig. 78 Opera ting lever: crui se co ntro l system
0 O>
8
i
"' m
.,. To sw itch the cruise control on, pull the lev
er into position
CD c::> fig. 78 .
.,. Drive at the speed to be maintained .
.,. To store the speed, press the button @. The
II (USA models) Iii (Canada models)
turns on in the instrument cluster.
Changing speed
.,. To increase or decrease the speed in incre
ments,
tap the lever in the 010 direction
c::> page 74, fig. 78 .
.,. To increase or decrease the speed quickly,
hold the lever in the 0 10 direction until
the desired speed is reached.
You can press the acce lerator pedal down to
increase your speed, for example if you want
to pass someone. The speed you saved earlier
will resume as soon as you release the acceler
ator pedal.
I f, however, you exceed your saved speed by 5
mph (10 km/h) for longer than 6 minutes, the
cr uise contro l turns off temporarily. The
Ill
(USA models) ill (Canada mode ls) indicator
light in the instrument cluster turns off and
the stored speed is retained.
Preselecting the speed
You con preselect your desired speed when
the vehicle is stationary.
.,. Swi tch the ign ition on. .,.
Move the lever into position
CD c::> page 74,
fig. 78.
.,. To increase or decrease the speed, tap the
lever in the
0 10 direction.
T his function makes it possible, for examp le,
to save the speed you want before driving on
the highway. Once on the highway, activate
the cruise control by pulling the lever toward
CD-
Switching off
Temporary deactivation
.,. Press the brake pedal, or
.,. Press the lever into position @ (not cl icked
into p lace)
c::> page 74, fig. 78, or
Switching off completely
.,. Press the lever into position @(clicked into
place), or
.,. Switch the ignition off.
The speed you stored wi ll be retained if the
cruise control has been switched off tempora
rily . To resume the stored speed, release the
brake pedal and pull the lever into position
CD-
The stored speed is erased when the cruise
control is sw itched off complete ly or the igni
t ion is switched off .
A WARNING
-You should only resume the stored speed if
i t is not too high for existing traffic condi
tions. Otherwise you risk an accident.
(D Tips
-If the brakes become too heated while
dr iving, the cruise control switches off.
If
this happens while driving downhill, you
can relieve the brakes by shifting into a
lower gear.
Page 83 of 258
M N
M N
0 ::i co ,...., \!) 1.1'1 ,...., 1.1'1 ,....,
Automatic
transmission
tiptronic
Introduction
The automatic transmission is controlled elec
tronically. The transmission upshifts or down
shifts automatically depending on which drive
program is selected.
When a
moderate driving style is used, the
transmission selects the most economica l
driving mode. It will then change up early and
delay the downshifts to give better fuel econ
omy.
The transmission switches to a sporty mode
after a kick-down or when the driver uses a
sporty driving style characterized by quick ac
celerator pedal movements, heavy accelera
tion, frequent changes in speed and traveling
at the maximum speed.
If desired, the driver can also select the gears
manually
(tiptronic mode) o page 84.
In the tiptronic transmission, power is trans
ferred by a torque converter .
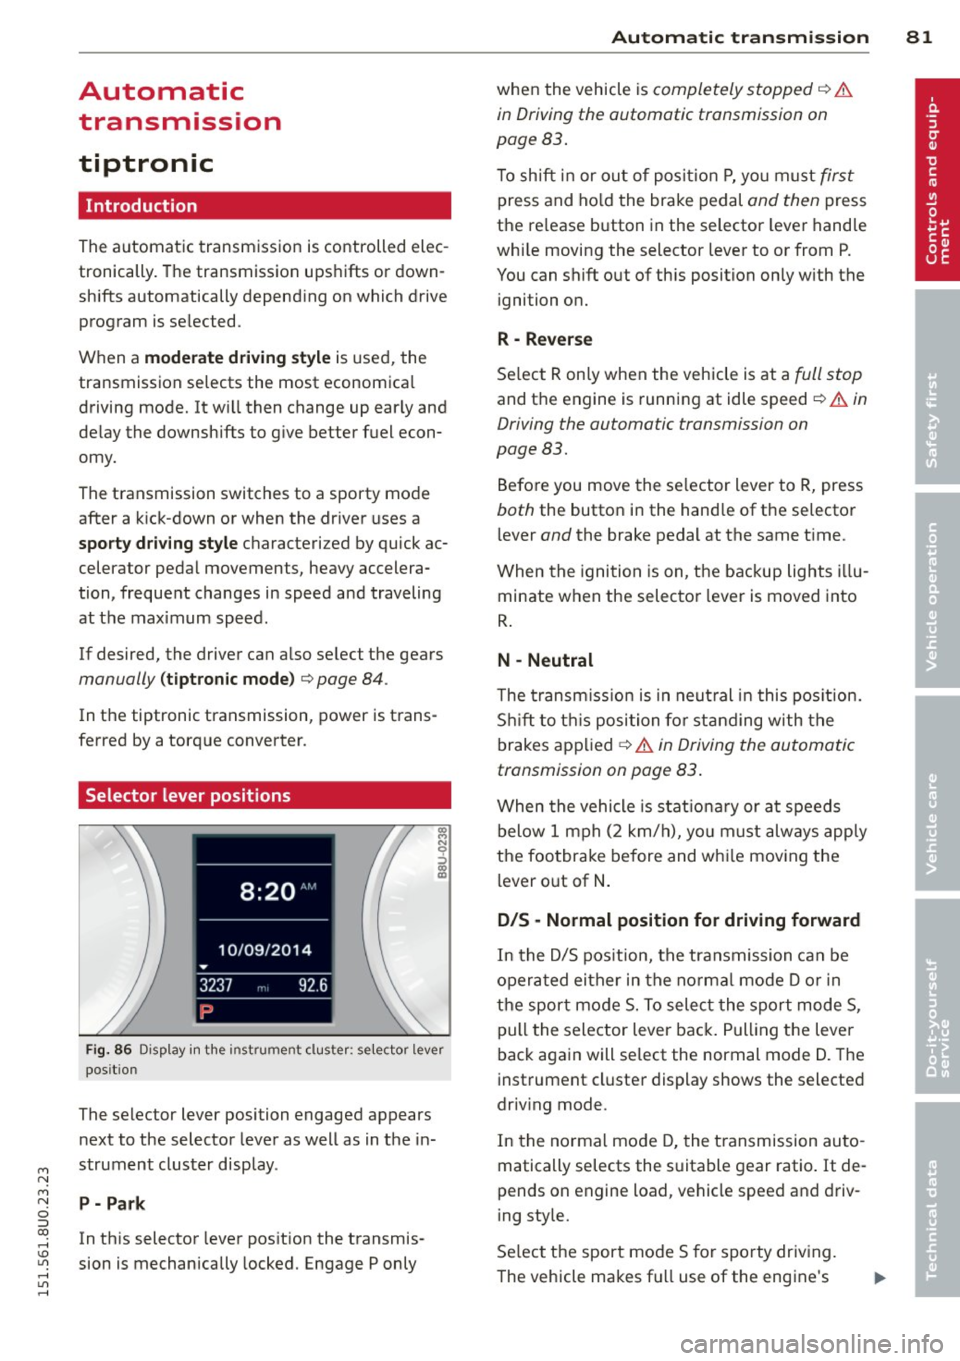
Selector lever positions
Fig. 86 Disp lay in the instru men t clu ster: se lecto r lever
pos it io n
The selector lever posi tion engaged appears
next to the selector lever as well as in the in
strument cluster display.
P- Park
In this selector lever posit ion the transmis
sion is mechanically locked. Engage P only
Automatic transmission 81
when the vehicle is completely stopped q A
in Driving the automatic transmission on
page 83.
T o shift in or out of position P, yo u must first
press and hold the brake pedal and then press
the re lease button in the selector lever handle
wh ile moving the selector lever to or from P.
You can shift out of th is position only with the
ignition on.
R -Reverse
Select R only when the vehicle is at a full stop
and the engine is running at idle speed¢.&. in
Driving the automatic transmission on
page 83.
Before you move the selector lever to R, press
both the button in the hand le of the selector
l ever
and the brake pedal at the same time .
When the ignition is on, the backup lights illu
minate when the selector lever is moved into
R.
N -Neutral
The transmission is in neutral in this position.
Shift to this position for standing with the
brakes applied
q A in Driving the automatic
transmission on page 83.
When the vehicle is stat ionary or at speeds
below 1 mph (2 km/h), you must always apply
the footbrake before and whi le moving the
lever out of
N.
D/S -Normal position for driving forward
In the D/S position, the transmission can be
operated either in the norma l mode D or in
the sport mode S. To select the sport mode S,
pull the selector lever back. Pulling the lever
back again will select the normal mode D. The
instrument cluster display shows the selected
driv ing mode .
In the normal mode D, the transmission auto
matically selects the suitable gear ratio. It de
pends on engine load, vehicle speed and driv
ing style.
Select the sport mode S for sporty driving.
The vehicle makes fu ll use of the engine's
Page 85 of 258
M N
M N
0 ::i co ,...., \!) 1.1'1 ,...., 1.1'1 ,....,
selector lever position such as D/S and re
lease the button.
~ Wait briefly until the transmission has shift
ed (you will feel a slight movement).
~ Remove your foot from the brake pedal and
accelerate.
St opp ing tem porar ily
~ Keep the vehicle stationary using the brak
ing peda l, for examp le at traffic lights.
~ Do not press the accelerator pedal when do
ing this.
~ To prevent the veh icle from roll ing when you
start driving, set the parking brake when
stopp ing on steep inclines
c::, ,& .
~ The parking brake will re lease automatically
and the vehicle will s tart moving once you
press the accelerator peda l.
Stopping/p ar king
If the selecto r lever is not in the P position
when you ope n the dr iver's door, the vehicle
could ro ll. The message
Shift to P and turn
off i gniti on, o therwi se vehicle ca n roll aw ay
appears.
~ Press and ho ld the brake pedal unt il the ve-
hicle has come to a complete stop.
~ Apply the parking brake c::, page 71, Parking.
~ Se lect the P selector leve r position c::, ,& .
Stopping on an incline
~ Always press the brake peda l to hold the ve
hicle i n place and prevent it from " rolling
back "
c::> &_. Do not try to prevent the vehi
cl e from "roll ing back" when a gea r is en
gaged by increasing the engine speed
c::> (D .
Starting on an incline
~ Activate the parking b rake .
~ With the d riving gea r se lected, press the ac
c e lerator pedal ca refully. The parking brake
will release automat ica lly if yo ur seat belt is
f astened.
Unde r ce rtain circumstances, such as dr iv ing
in the moun tains, it may be useful to swi tch
tempo rari ly to the manua l shift prog ram in o r-
Automa tic tran sm iss ion 83
der to ad just the gears to the driving condi
tions by hand
c::, page 84.
On s lopes, activate the parki ng b rake first and
then move the selec to r l ever to the P posi tion.
T his prevents too much stress from being
placed on the locking mechanism .
A WARNING
-The vehicle can also roll when the engine
is stopped.
- Unintended vehicle movement can cause
serio us injury.
- Never leave your vehicle with the engine
ru nning while in gear. If you must leave
your veh icle when the engine is running,
activate the parking brake and move the
selector lever to P.
- Power is still transm itted to the wheels
when the engine is runn ing at idle. To
prevent the vehicle from "creeping", you
must keep your foot on the brake when
the eng ine is ru nning and the se lector
leve r is in D/S o r R or "t ipt ron ic" mode is
selec ted .
-Do not press the accelerator pedal when
changing the se lector lever posi tion
while the veh icle is stationary and the
engine is running .
- Never sh ift into R or P wh ile driving.
- Before driving down a steep slope, re-
duce your speed and shift into a lowe r
gear wi th "tiptronic".
- Do not ride the bra kes o r press the bra ke
pe dal too often or too long when d riving
down a hi ll. Constant braking causes the
brakes to overheat and substantially re
duces braking performance, increases
brak ing distance or causes complete fa il
ure of the brake system .
- To prevent the vehicle from ro lling back
when stopp ing o n inclines, always ho ld it
in place with the brake pedal or parking
brake .
- Never hold the vehicle on an incline with
a slipping clutch. The clutch opens auto matically when it becomes too hot from