lock AUDI Q5 2016 Service Manual
[x] Cancel search | Manufacturer: AUDI, Model Year: 2016, Model line: Q5, Model: AUDI Q5 2016Pages: 300, PDF Size: 75.02 MB
Page 95 of 300
..... N
co ~ CX)
..... I.Cl U"I
..... I.Cl .....
engine will no t be switched off in the following
situations:
- The eng ine has not reached the m in imum re
quired temperature for Start-Stop-mode.
- T he interior temperature selected by the A/C
system has not been reached.
- The outs ide temperatu re is ext remely h igh/low.
- The w indshield is being defrosted
¢ page 82.
-The parking system* is switched on.
- The battery charge level is too low.
- The steering whee l is sharply turned or there is
a steering movement.
- After engaging the reverse gear.
- On sharp inclines .
IIJ appears in the instrument cluster display and
§ii;Ff&Ff ~lso appears in the tr ip comp ute r.
Engine automatically re starts
The stop phase is interrupted in the following sit
uations, for example . The eng ine restarts without
any action by the driver .
- The interior temperature varies from the tem
perature se lected in the A/C system .
- The windshield is beeing defrosted
¢ page 82.
- The brake pedal is pressed several times in a
row.
- The battery charge level becomes too low.
- High power cons umption .
IIJ appears in the instrument cluster display and
H§;Ff&Fii ~lso appears in the tr ip comp ute r.
Switching the ignition off autom atically
To prevent the battery from draining, the ignition
will switch off
automati cally when all of the fol
lowing cond itions have been met:
- The veh icle has already been driven.
- The eng ine has been turned off by the Start-
Stop-System .
- The driver's door is opened .
- T he dr iver's seat bel t is removed.
- The brake pedal is not pressed down.
- T he veh icle is stationary .
In this case, the activated low beam will be re
placed by the s ide marker lights . The side marker
D rivi ng
lights will switch of f after approximate ly 30 m i
nutes or when you lock the veh icle.
If t he Start-S top-System has not turned off the
engine or if you have swi tched the S tart -Stop
System off manually, the ignition will
not be au
tomatica lly switched off and the eng ine wi ll con
t in u e to run¢& .
A WARNING <= -
Never allow the engine to run in confined
spaces -danger of asphyx iation.
(D Tips
If you shift into the 0/S or N positions after
shifting into reverse, the vehicle must be dr iv
en faster than 6 mph (10 km/h) in order for
the engine to switch off again .
Switching the Start-Stop -System on /off
manually
App lies to vehicles: wi th Start -S top-Syste m
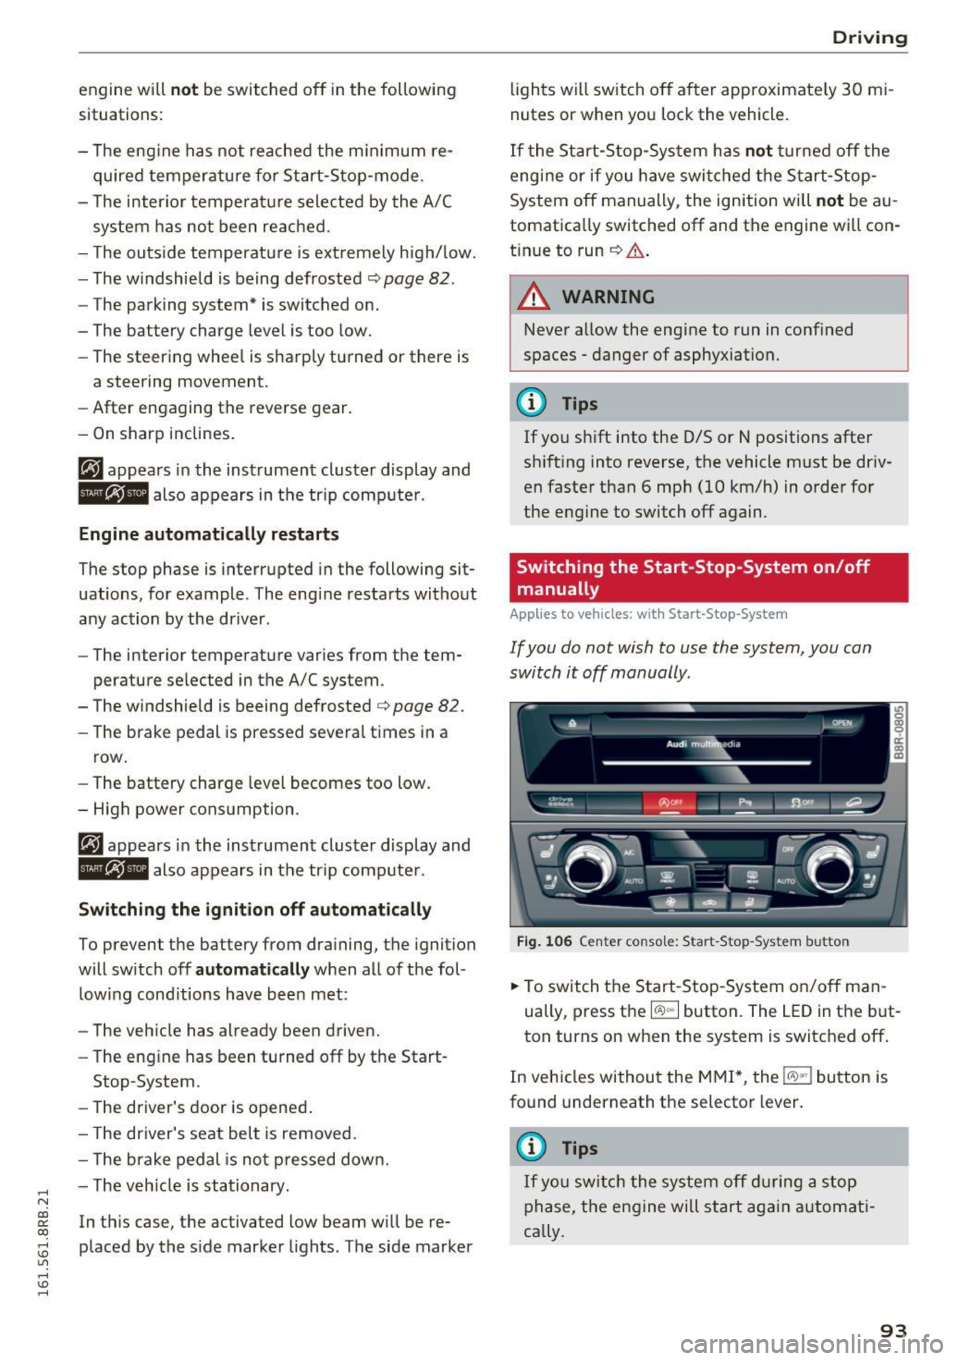
If you do not wish to use the system, you can
switch it off manually.
= , __ (A)Off _ --"'-- f'~-.::a-----
Fig . 10 6 Cen ter co nsole: S ta rt -Stop -System button
.. To switch the Start -Stop-System on/off man
ually, press the
I CAJ ,,.I button. The LED in the b ut
ton turns on when the system is switched off .
In vehicles without the M MI*, the
!CA.> "'! button is
found underneath the se lector lever.
(D Tips
If y ou swit ch the system off d uring a stop
phase, the engine will st art aga in automati
ca lly.
93
Page 106 of 300
Hybrid
@ Tips
The Energy flow display will not shown in the MMI display when the reverse gear is engag-
ed, due to safety reasons.
Consumption display
App lies to veh icles: w ith hybrid drive
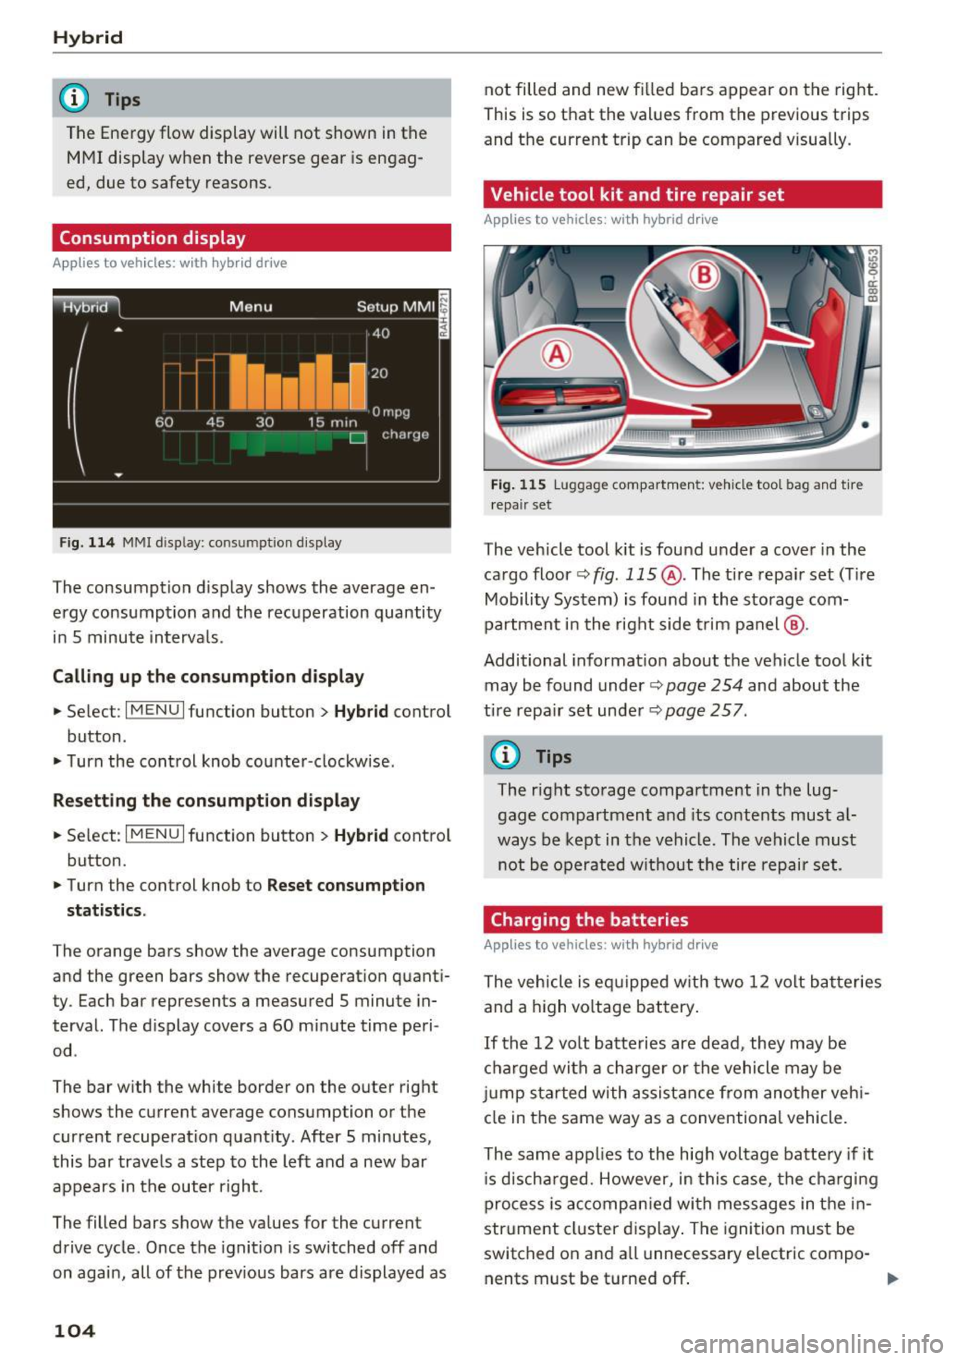
Fig. 114 MMI disp lay : co nsum ption display
The consumption display shows the average en
ergy consumption and the recuperation quantity
in 5 minute intervals .
Calling up the consumption display
• Select : I MENU I function button> Hybrid control
button .
• Turn the control knob counter -clockwise.
Resetting the consumption display
• Select : I MENU I function button > Hybrid control
button.
• Turn the control knob to
Reset consumption
statistics.
The orange bars show the average consumption
and the green bars show the recuperation quanti
ty . Each bar represents a measured 5 minute in
terval. The display covers a
60 minute time peri
od .
The bar with the white border on the outer right shows the current average consumption or the
current recuperation quantity. After 5 minutes,
this bar travels a step to the left and a new bar
appears in the outer right.
The filled bars show the values for the current
drive cycle. Once the ignition is switched off and
on again, all of the previous bars are displayed as
104
not filled and new filled bars appear on the right.
This is so that the values from the previous trips
and the current trip can be compared visually .
Vehicle tool kit and tire repair set
Applies to vehicles: with hybrid drive
Fig. 115 Luggage compartmen t: v ehicle tool bag and tir e
repair set
The vehicle tool kit is found under a cover in the
cargo floor~
fig. 115 @. The tire repair set (Tire
Mobility System) is found in the storage com
partment in the right side trim panel @.
Additional information about the vehicle tool kit
may be found under~
page 254 and about the
tire repair set under
~page 257 .
@ Tips
The right storage compartment in the lug
gage compartment and its contents must al
ways be kept in the vehicle. The vehicle must
not be operated without the tire repair set .
Charging the batteries
Applies to vehicles: with hybrid drive
The vehicle is equipped with two 12 volt batteries
and a high voltage battery.
If the 12 volt batteries are dead , they may be
charged with a charger or the vehicle may be
jump started with assistance from another vehi
cle in the same way as a conventional vehicle.
The same applies to the high voltage battery if it
is discharged. However, in this case, the charging
process is accompanied with messages in the in
strument cluster display. The ignition must be
switched on and all unnecessary electric compo- nents must be turned off. ..,.
Page 120 of 300
Audi side assist
(D Tips
-Si de assist is not active w hile you are mak
i ng t he a dju stment .
- You r settings are automatic ally store d an d
assi gned to t he remote co ntrol key being
u sed.
Driver messages
A ppl ies to ve hicles: w ith Audi side assis t
If side ass ist switches off by itself, the LED in the
button turns off a nd a message will appear in the
i n str ument cluster d isp lay :
Audi side assist unavailable: Sensors blocked
The rada r senso rs ' vision is affected. Do not cove r
the area in front of the sensors with b ike wheels,
stickers , dirt or other objects. Clean the area in
front of the sensors, if necessary
c> page 116 ,
fig. 130.
Audi side assist: Currently unavailable
Side assist cannot be switched on tempo rar ily be
cause there is a malfunction (for example, the
battery charge level may be t oo low).
Audi side assist: System fault!
The system cannot guarantee that it wi ll detect
ve hicl es co rrectly and it is switc hed off. The sen
sors have been d isp laced or are fa ulty. Have the
system checked by an a uthorized Audi dealer or
author ized Audi Se rvice Facility soon.
Audi side assist: Unavailable when towing
Side assist sw itches off automati ca lly w hen a fac
to ry -installed trailer hitch is connected to t he
electrical connector on the trailer. The re is no
gua rantee the system w ill sw itch off whe n using
a retrofitted tra ile r hitc h. Do not use side assist
when towing a trailer.
118
Page 124 of 300
Automatic transmissio n
Automatic transmission
tiptronic
Introduction
The automat ic transmission is controlled e lec
tron ically . The transmission upshifts or down
shifts automatically depending on wh ich dr ive
p rogram is selected. The powe r is transferred by
a torque converter .
When a
moderate driving style is used, the
transmission se lects the most economical d riving
mode .
It will then change up early and de lay the
downshifts to give better fuel economy .
The transm ission switches to a spo rty mode afte r
a kick-down or when the drive r uses a
sport y
d riv ing sty le
charac ter ized by quick accelerator
pedal movements, heavy acce leration, frequent
changes in speed and traveling at the maximum
speed.
If desired, the dr iver can a lso select the gears
manually ( tiptronic mod e) ¢ page 126.
Selector lever positions
0 ;:t 0 ct CX) a,
Fig. 1 34 Disp lay in the instrument cl uster: selector lever in
position P
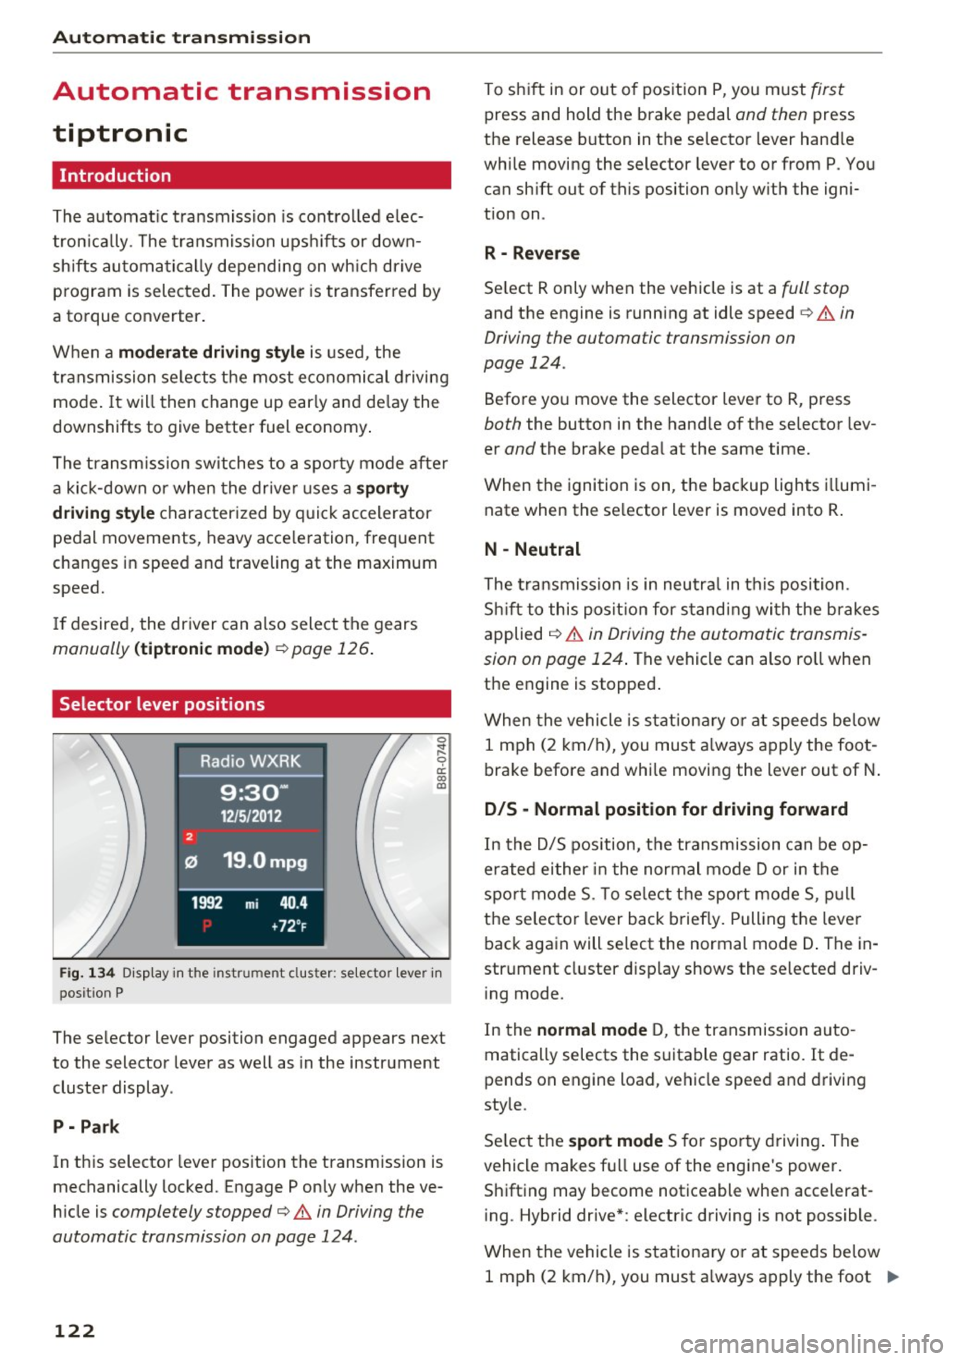
The selector lever position engaged appears next
to the selector lever as well as in the instrument
cluster display .
P -Pa rk
In this selector lever position the transmission is
mechanically locked. Engage P only when the ve
h icle is
completely stopped¢.& in Driving the
automatic transmission on page 124 .
122
To shift in or out of pos ition P, you m ust first
press and hold the brake pedal and then press
the release button in the selector lever hand le
while moving the selector lever to or from P. You can sh ift out of this position on ly w ith the igni
tion on .
R -Reve rse
Se lect R only when the vehicle is at a full stop
and the engine is running at idle speed c> .& in
Driving the automatic transmission on
page 124.
Befo re yo u move the selector lever to R, press
both the button in the hand le of the se lector lev
er
and the brake peda l at the same time.
When the ignition is on, the backup lights i llumi
nate when the se lector lever is moved into R .
N -Neutral
The t ra nsmission is in neutra l in this position .
S hi ft to this pos it ion for s tand ing wi th the brakes
applied
¢ .&. in Driving the automatic transmis
sion on page 124 .
The vehicle can also ro ll when
the engine is stopped .
When the vehicle is stationa ry o r at speeds be low
1 mph (2 km/h), you must a lways apply the foot
brake before and whi le moving the lever out of N .
D/S -Normal position for driving forward
In the D/5 position, the transmission can be op
erated either in the normal mode Dor in the
spo rt mode 5. To se lect the sport mode 5, p ull
t h e se lecto r lever back briefly. Pulling the leve r
back again will select the normal mode D . The in
strument cluster d isplay shows the se lected driv
i ng mode.
In the
normal mode D, t he transmission auto
matically selects the suitable gear ratio . It de
pends on engine load, vehicle speed and d riving
style.
Se lect t he
sport mode 5 for sporty drivi ng . The
vehicle makes fu ll use of the engine 's power.
Shifting may become noticeable when accelerat
i ng . Hybrid drive* : electric driving is not possible .
When the vehicle is stationary o r at speeds be low
1 mph (2 km/h), you must a lways apply the foot ..,.
Page 125 of 300
..... N
co ~ CX)
..... I.Cl U"I
..... I.Cl ..... brake before and wh
ile moving th e le ver to D/S
out of N.
A WARNING
Read and follow all WARNINGS¢ & in Driv
ing the automatic transmission on
page 124.
(D Note
Coasting downhill with the transmission in N
and the engine not running will result in dam
age to the automatic transmission and possi
bly the catalytic converter .
(D Tips
-On vehicles with Audi drive select*, you can
adjust the sporty shift characteristics in the
Dynamic driving mode .Swill appear in the
i nstrument cluster display instead of 0.
- If you accidentally select N while driving ,
take your foot off the accelerator pedal im
mediately and wa it for the engine to slow
down to idle before selecting D/S .
- Hybrid drive*: if the
l-,,sv ! button r::::;, page 100
is pressed while in sport mode S, the trans
mission switches automatically to the nor
mal mode D.
- If there is a power failure, the selector lever
will not move out of the P posit ion. The
eme rgency release can be used if this hap
pens
¢ page 127.
'
Automatic transmission
Automatic Shift Lock (ASL)
The Automatic Shift Lock safeguards you again st
accidentally shifting into a forward or the re
verse gear and causing the vehicle to move unin
tentionally .
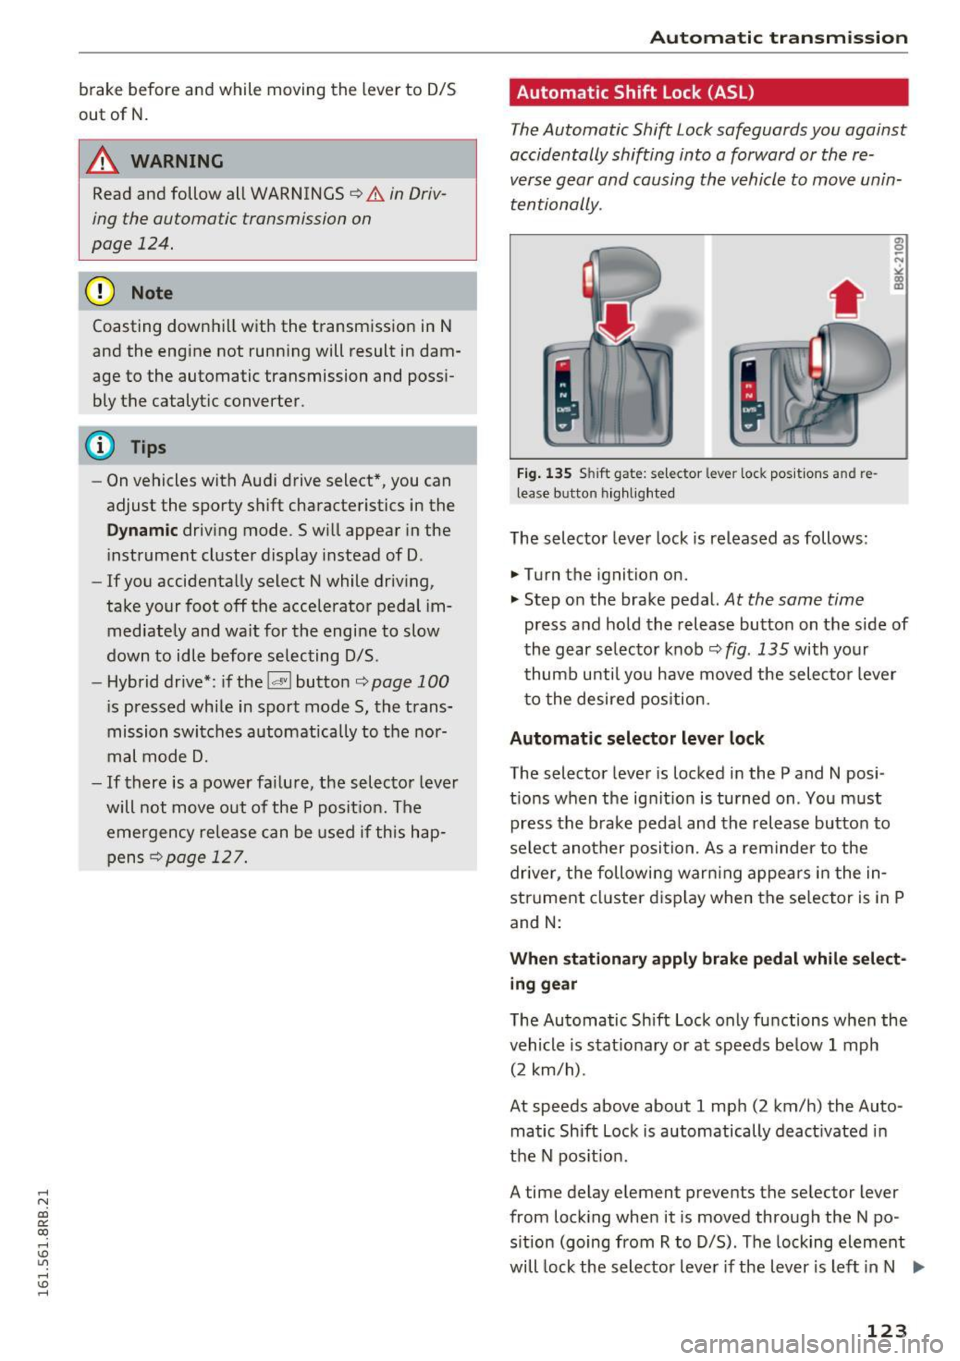
Fig. 13S Shi ft gat e: se lec tor le ver loc i< po sition s and re
lea se butto n highlighted
The selector lever lock is released as follows :
.,. Turn the ignition on.
"" Step on the brake pedal.
At the same time
press and hold the release button on the side of
the gear selector knob
r::::;, fig. 135 with your
thumb until you have moved the selector lever
to the desired position .
Automatic selector lever lock
The selector lever is locked in the P and N po si
tions when the ignit ion is turned on . You must
press the brake peda l and the release button to
select another position. As a reminder to the
driver , the following warn ing appears in the in
strument cluster d isplay when the se lector is in P
and N:
When stationary apply brake pedal while select
ing gear
The Automatic Shift Lock only functions when the
vehicle is stat ionary or at speeds be low 1 mph
(2 km/h) .
At speeds above about 1 mph (2 km/h) the Auto ·
matic Shift Lock is automatically deact ivated in
the N pos it ion .
A time delay element preven ts the selec tor lever
from locking when it is moved through the N po
sition (going from R to D/S). The locking element
will lock the selector lever if the lever is left in N .,..
123
Page 126 of 300
Automatic transmissio n
(N eu tra l) for more than approx imately 1 second,
w ithout th e brake peda l being pressed.
Release button
The release button on the se lec to r lever preven ts
the lever from being accidentally sh ifted into cer
tain posit ions . Press ing t his but ton deactivates
the selector lever lock . Depending on the direc
tion of the shift, the selector lever locks at differ
ent positions. The positions are high lighted in
the illustrat ion ¢
fig. 135 .
Ignition key safety int erlock
The key cannot be removed from the igni tion un
less the selector lever is in the P park pos ition .
When the ignition key is removed, the selector lever will be locked in the P pos ition.
Driving the automatic transmission
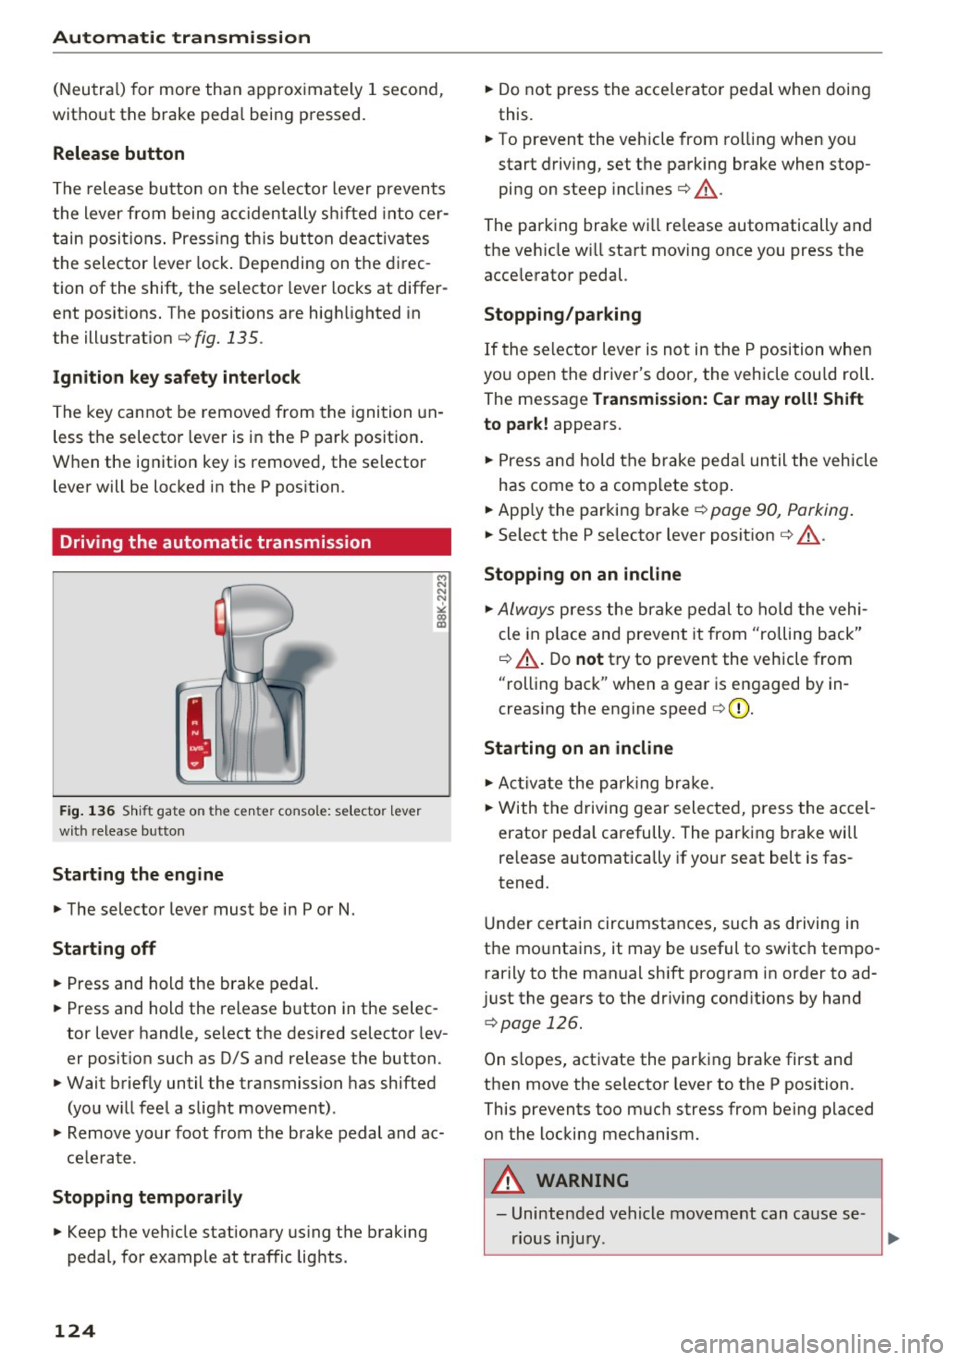
F ig. 1 36 Shi ft gat e on t he c en te r co nsole : se lecto r lev er
w ith release b utto n
Starting the engine
~ The selector lever must be in P or N.
Starting off
~ Press and hold the brake pedal.
~ Press and hold the release button in the selec
tor lever handle, se lect the des ired selector lev
er posit ion such as D/S and release the button.
~ Wait briefly until the transmission has shifted
(you w ill feel a slight movement) .
~ Remove your foot from the brake pedal and ac
cele rate .
Stopp ing temporarily
~ Keep the veh icle stationary us ing the braking
pedal, for example at traffic lights .
124
~ Do not press the acce lerato r pedal when doing
this.
~ To prevent the veh icle from ro lling when you
start driving, set the parking brake when stop
ping on steep incl ines¢ &_.
The parking brake wi ll re lease automatically and
the ve hicle w ill start moving once you press the
acce lerator pedal.
Stopping /par king
If the se lector lever is not in the P position whe n
you open the driver's door, the vehicle cou ld roll.
The message
Tr ansmis sion: Car may roll! Shift
to park!
appears.
~ Press and hold the brake peda l un til the vehicle
has come to a comp lete stop .
~ Apply the parking brake¢ page 90, Parking .
~ Select the P selector lever posit ion ¢ &_ .
Stopping on an incline
~ Always press the brake pedal to ho ld the vehi
cle in p lace and prevent it from "rolling back"
¢ &_ . D o
not try to prevent the vehicle from
"rolling back" when a gear is engaged by in
creas ing the engine speed ¢(D .
Starting on an incline
~ Ac tivate the pa rk ing br ake.
~ With the d riving gear selected, press the accel
erator pedal carefully. The parking brake will
release a utomatica lly if your seat belt is fas
tened.
Under certain circumstances, such as driving in
the mounta ins, it may be useful to switch tempo
rarily to the manual sh ift program in order to ad
j ust the gears to the dr iv ing cond it ions by hand
¢ page 126.
On slopes, activate the parking b rake first and
then move the selector lever to the P position.
This prevents too m uch stress from being placed
on the locking mechanism.
A WARNING
- Unintended vehicle movement can cause se
rious injury .
Page 127 of 300
,....,
N
co
er::
co
,....,
running while in gear. If you must leave
your vehicle when the engine is running, ac tivate the parking brake and move the selec
tor lever to P.
- Power is still transmitted to the wheels
when the engine is running at idle. To pre
vent the vehicle from "creeping", you must keep your foot on the brake when the en
gine is running and the selector lever is in D/
5 or R or "tiptronic" mode is selected .
- Do not press the accelerator pedal when
changing the selector lever position while
the vehicle is stationary and the engine is running.
- Never shift into R or P while driving.
- Before driving down a steep slope, reduce
your speed and shift into a lower gear with "tiptronic" .
- Do not ride the brakes or press the brake
pedal too often or too long when driving
down a hill. Constant braking causes the
brakes to overheat and substantially re
duces braking performance, increases brak
ing distance or causes complete failure of
the brake system .
- To prevent the vehicle from rolling back
when stopping on inclines, always hold it in
place with the brake pedal or parking brake.
- Never hold the vehicle on an incline with a
slipping clutch. The clutch opens automati
cally when it becomes too hot from the
overload . An indicator lamp
[ijJ illuminates
and a driver message appears
c> page 126
when the clutch is overloaded .
- If the engine must remain running, never
have any driving position engaged when
checking under the hood.
Make sure these
lector lever has securely engaged and is
locked in P with the parking brake set
c> page 220. Otherwise, any increase in en
gine speed may set the vehicle in motion,
even with the parking brake applied.
(D Note
- When stopping on an incline, do not try to
hold the vehicle in place by pressing the ac
celerator pedal while a driving gear is se-
Automatic transmission
lected. This can cause the transmission to
overheat and can damage it. Activate the
parking brake or press the brake pedal to
prevent the vehicle from rolling.
- Allowing the vehicle to roll when the engine
is stopped and the selector lever is in N will
damage the transmission because it is not
lubricated under those circumstances.
(!) Tips
For safety reasons, the parking brake is re
leased automatically only when the driver's
safety belt is engaged in the buckle.
Hill descent control
The hill descent control system assists the driver
when driving down decline s.
Hill descent control is activated when the selec
to r lever is in D/S and you press the brake pedal.
The transmission automatically selects a gear
tha t is suitable for the incline. Hill descent con
trol tries to maintain the speed achieved at the
time of braking, within physical and technical
limitations. It may still be necessary to adjust the
speed with the brakes .
Hill descent control switches off once the decline
levels out or you press the accelerator pedal.
When the speed is set in the cruise control sys
tem
c> page 95 , hill descen t control is also ac ti
vated .
A WARNING
Hill descent control cannot overcome physical
limitations, so it may not be able to maintain
a constant speed under all conditions . Always
be ready to apply the brakes.
125
Page 129 of 300
..... N
co ~ CX)
..... I.Cl U"I
..... I.Cl ..... The transmission temperature has increased sig
nificantly due to the sporty driving manner. Drive
in a less sporty manner until the temperature re
turns to the normal range and the indicator light
switches of .
rm Transmission malfunction: You can continue
driving
There is a system malfunct ion in the transmis
sion. You may continue driving. Drive to your au
thorized Audi dealer or qualified repair facility
soon to have the malfunction corrected.
rm Transmission malfunction: Limited driving
functionality
There is a system malfunction in the transmis
sion . T he transmission is sw itching to emergency
mode. This mode only shifts into certain gears or
will no longer shift at all. The engine may stall.
Drive to your authorized Audi dea ler or qualified
repair facility immediately to have the malfunc
tion corrected .
rm Transmission malfunction: Stop vehicle and
shift to park.
Do not continue driving. Select the P selector lev
e r position and see your a uthorized Aud i dea ler
or qualified repair facility for assistance .
(D Note
If the transmission switches to emergency
mode, you sho uld take the vehicl e to an au
thorized Audi dealership as soon as possible
to have the condition corrected.
Automatic transmission
Selector lever emergency release
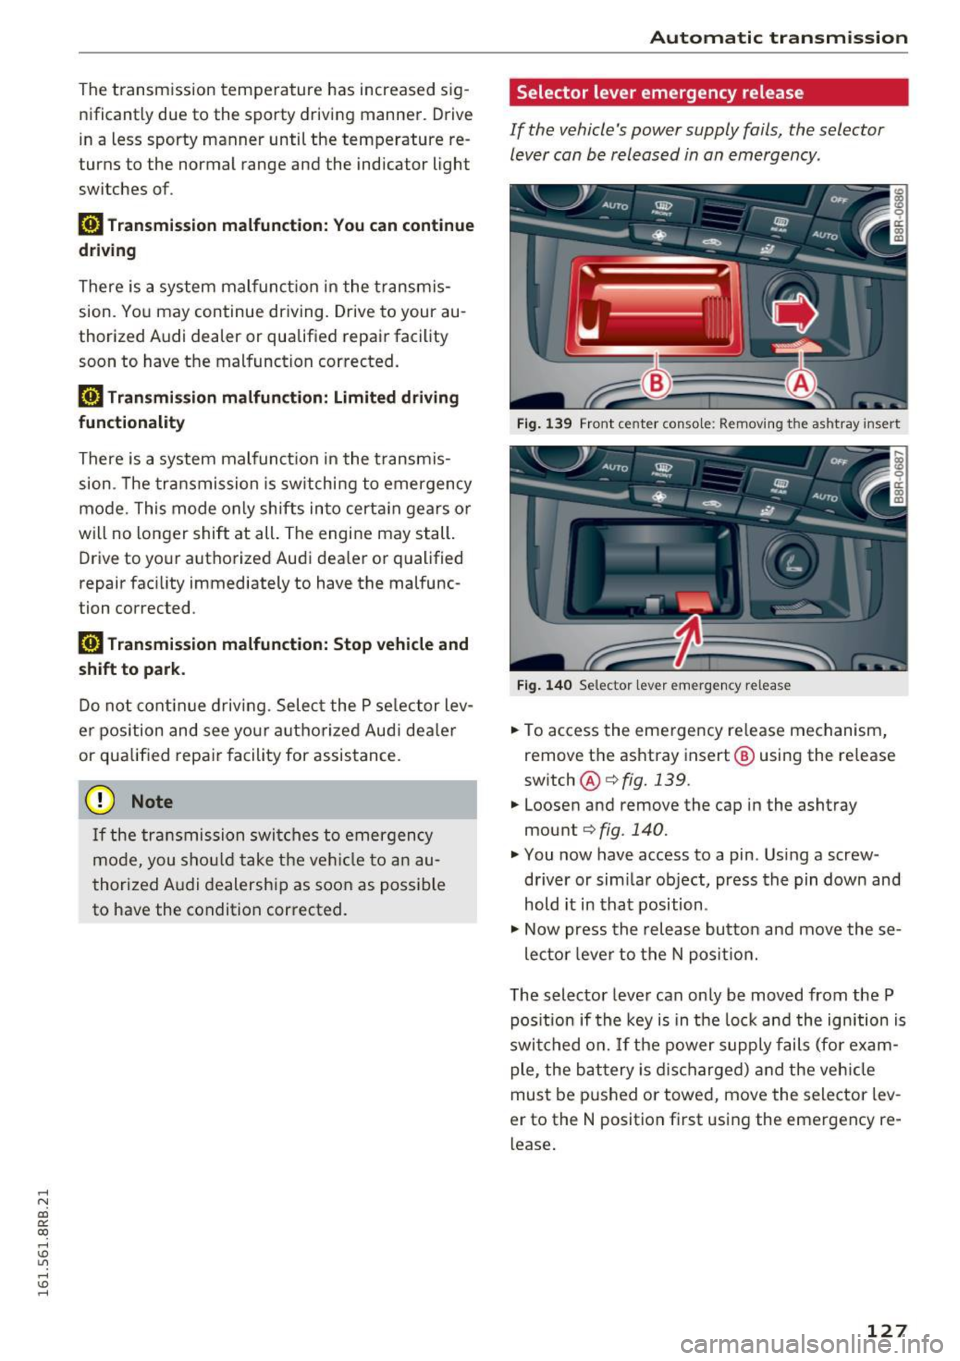
If the vehicle 's power supply fails, the selector
lever can be released in an emergency .
Fig. 139 Front center conso le: Removing the ashtray insert
Fig. 140 Selector lever emergency release
.,. To access the emergency re lease mechanism,
remove the ashtray insert@ using the release
switch @Qfig.139.
.,. Loosen and remove the cap in the ashtray
mount
Q fig. 140.
.,. You now have access to a pin . Using a screw
driver or sim ilar object, press the pin down and
hold it in that position .
.,. Now press the release button and move these-
lector lever to the N position.
The selector lever can only be moved from the P
pos ition if the key is in the lock and the ignition is
switched on. If the power supply fails (for exam
ple, the battery is discharged) and the vehicle
must be pushed or towed, move the selector lev
er to the N position f irst using the emergency re
lease .
127
Page 132 of 300
Parking system
Switching on and off
Applies to veh icles: w ith Aud i park ing system p lus w ith rear
view ca mera
The rearview camera switches on automatically
together with the acoustic and visual park assist
when you put the vehicle in reverse.
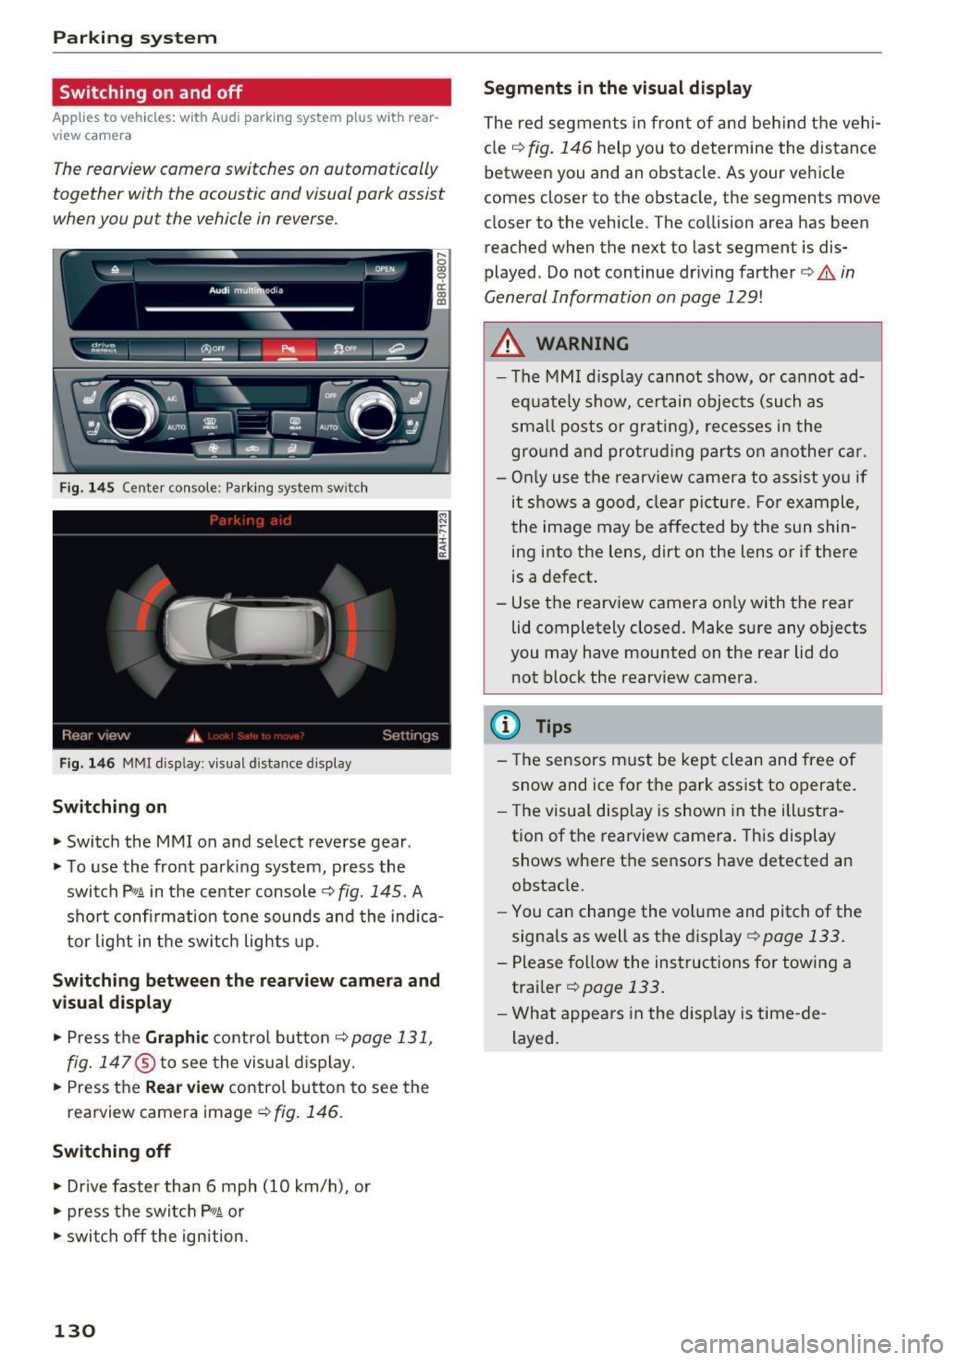
F ig. 145 Center console: Pa rking system sw itch
F ig. 146 MM I d isp lay : v isual d istance display
Sw itch ing on
• Switch the MM I on and select reverse gear .
• To use the front parking system, press the
switch
P11A in the center console¢ fig. 145. A
sho rt confi rmation to ne sounds and the indica
tor light in the switch lights up.
Sw itching betwe en th e re arview came ra and
visual display
• Press t he Graphi c control but ton ¢ page 131,
fig. 147
® to see the vis ual d isplay.
• Press the
Re ar view contro l button to see the
rearview camera image¢
fig. 146.
Switching off
• Drive faster than 6 mph (10 km/h), or
• press the switch
P"1A or
• swit ch off the ignition.
130
S egments in the vis ual d isplay
The red segments in front of and behind the vehi
cle
¢ fig. 146 help you to determine the distance
between you and an obstacle . As your vehicle
comes closer to the obstacle, the segments move
closer to the vehicle . The collision area has been
reached when the next to last segment is dis
played . Do not continue dr iving farther ¢.&.
in
General Information on page 129!
,& WARNING
- The MMI display cannot show, or cannot ad
equate ly show, certain objects (such as
sma ll posts or grati ng), re cesses in the
gro und and protrud ing parts on another car.
- On ly use the rearv iew camera to ass ist you if
it shows a good, clear picture . For example,
the image may be affected by the sun shin
ing into the lens, dirt on the lens o r if there
is a defect .
- Use the rearview camera on ly with the rear
lid completely closed. Make sure any ob jects
you may have mounted on the rear lid do
not block the rearview camera.
(D Tips
- The sensors m ust be kept clean and free of
snow and ice for the park assist to operate .
- The visu al display is shown in the illustra
tion of the rearview camera. This display
shows where the sensors have detected an obstacle.
- Yo u can change the vol ume and pitch of the
signals as well as the disp lay ¢
page 133.
-Please follow the instruc tions for tow ing a
trailer
¢ page 133.
- What appears in the display is time -de
layed .
Page 138 of 300
Driving safety
For detailed information on how to adjust the
driver's seat, see ¢
page 64.
A WARNING
Drivers who are unbelted, out of position or
too close to the airbag can be seriously in
jured by an airbag as it unfolds. To help re
duce the risk of serious personal injury:
- Always adjust the driver's seat and the
steering wheel so that there are at least
10 inches (25 cm) between your breastbone
and the steering wheel.
- Always hold the steering wheel on the out
side of the steering wheel rim with your
hands at the 9 o'clock and 3 o'clock posi
tions to help reduce the risk of personal in
jury if the driver's airbag inflates.
- Never hold the steering wheel at the
12 o'clock position or with your hands at
other positions inside the steering wheel
rim or on the steering wheel hub. Holding
the steering wheel the wrong way can cause serious injuries to the hands, arms and head
if the driver's airbag deploys.
- Pointing the steering wheel toward your
face decreases the ability of the su pplemen
tal driver's airbag to protect you in a colli
sion.
- Always sit in an upright position and never lean against or place any part of your body
too close to the area where the airbags are
located.
- Before driving, always adjust the front seats
and head restraints properly and make sure
that all passengers are properly restrained.
- Never adjust the seats while the vehicle is
moving . Your seat may move unexpectedly
and you could lose control of the vehicle.
- Never drive with the backrest reclined or
tilted far back! The farther the backrests are
tilted back, the greater the risk of injury due
to incorrect positioning of the safety belt
and improper seating position.
- Children must always ride in child safety
seats¢
page 171. Special precautions ap
ply when installing a child safety seat on the
front passenger seat
¢page 151.
136
-
Proper seating position for the front
passenger
The proper front passenger seating position is
important for safe, relaxed driving.
For your own safety and to reduce the risk of in
jury in the event of an accident, we recommend
that you adjust the seat for the front passenger
to the following position :
.,. Adjust the angle of the seatback so that it is in
an upright position and your back comes in full
contact with it whenever the vehicle is moving.
.,. Adjust the head restraint so the upper edge is
as even as possible with the top of your head. If
that is not possible, try to adjust the head re
straint so that it is as close to this position as
possible
¢ page 137.
.,. Keep both feet flat on the floor in front of the
front passenger seat.
.,. Fasten and wear safety belts correctly
¢page 146.
For detailed information on how to adjust the
front passenger's seat, see
¢ page 63.
A WARNING
Front seat passengers who are unbelted, out
of position or too close to the airbag can be
seriously injured or killed by the airbag as it
unfolds. To help reduce the risk of serious
personal injury:
- Passengers must always sit in an upright po
sition and never lean against or place any
part of their body too close to the area
where the airbags are located.
- Passengers who are unbelted, out of posi
tion or too close to the airbag can be seri
ously injured by an airbag as it unfolds with
great force in the blink of an eye.
- Always make sure that there are at least
10 inches (25 cm) between the front pas
senger's breastbone and the instrument
panel.
- Each passenger must always sit on a seat of
their own and properly fasten and wear the
safety belt belonging to that seat.
- Before driving, always adjust the front pas senger seat and head restraint properly.