coolant level AUDI Q7 2009 Owner´s Manual
[x] Cancel search | Manufacturer: AUDI, Model Year: 2009, Model line: Q7, Model: AUDI Q7 2009Pages: 426, PDF Size: 97.13 MB
Page 16 of 426

Instruments and warning/indicator lights
Warning light in the instrument cluster -t
When the _L warning light in the instrument cluster starts to flash,
this can mean one of two things: either the coolant
temperature is
too high, or the coolant
level is too low~ page 33.
If the needle is well in the upper area of the gauge, the coolant
temperature is too high.
Stop the vehicle, switch the engine off and
allow the engine to cool.
If the warning light comes on again after
driving a short distance, contact an authorized dealer.
& WARNING
• Always observe the warning in ~ page 324, "Engine compart
ment", before opening the hood and checking the engine coolant
level.
• Never open the engine hood if you see or hear steam, or if you
see engine coolant dripping from the engine compartment . You
could burn yourself. Let the engine cool off first so that you cannot
hear or see any steam or engine coolant.
0 Note
• Mounting additional lights or accessories in front of the air inlets
reduces the cooling effect of the radiator. At high outside tempera
tures or high engine load, the engine could overheat.
• The front spoiler has been designed to properly distribute the
cooling air when the vehicle is moving. If the spoiler is damaged,
this could reduce the cooling effect and the engine could then
over
heat. Ask your authorized Audi dealer for assistance. •
Tachometer (engine rev counter)
The tachometer indicates the engine RPM (revolutions per
minutes).
The tachometer 0 ~ page 13, fig. 2 is the left of the two large clock
type displays. The
engine turns at a speed
1,000 times the single digit in the
display, e.g. if the needle is pointing at the "2" the engine is turning
at 2,000 RPM.
If engine RPM drops below 1,500, you should downshift to the next
lower gear. The red area at the end of the scale indicates maximum
permissible engine RPM after the break -in period. Before reaching
this area, move the selector lever to position "D (Drive)" or ease your
foot off the accelerator pedal.
0 Note
The tachometer needle should not move into the red range. If it
does, then only for a
very short period of time. You could damage
your engine by driving at high RPM .
'£> For the sake of the environment
Upshifting early saves fuel and reduces engine noise.•
Digital clock with date display
Date and time of day can be set in the MM/.
Fig . 3 Instrument
cluster with digital
clock
The date, time of day, and time and date format can be set in the
MMI. You can find out more in the MMI manual. .,_
Page 33 of 426

Driver messages and yellow symbols
If a yellow symbol appears in the display, a driver message is also
displayed automatically.
For example, the symbol appears in the display, indicating low
windshield washer fluid level. The following message also appears:
Please top up washer fluid
The driver message disappears after a few seconds. The driver
message can be displayed again by briefly pressing the
I CH ECK]
button. •
Red symbols
A red symbol means DANGER.
-Pull off the road.
- Stop the vehicle.
Turn off the engine.
Fig . 18 Display: engine
coolant level warning
(priority 1)
- Check the malfunctioning system. Contact your autho
rized Audi dealer or a qualified workshop for assistance.
Red symbols indicate a priority 1 malfunction -Danger!
Con tro ls and eq uip
ment
Driver information display
With a priority 1 malfunction, a large symbol appears in the center
area of the display => fig. 18. When the symbol appears,
three
warning tones sound in succession. The symbol continues to blink
until the malfunction has been repaired.
If there are
more than one priority 1 malfunctions, the symbols
appear one after the other for about 2 seconds.
An additional driver message can also be displayed by briefly
pressing the
! CHECK ] button.
The red symbols mean:
0
BRAKE
[ i] Tips
Alternator malfunction
USA models:
Brake system malfunction
Canada models:
Brake system malfunction
Engine coolant level too
low/engine coolant temperature
too high
Engine oil pressure too low
Faulty steering
Faulty ignition switch
=> page32
=> page 32
=> page32
=> page33
=> page 33
=> page 34
=> page 34
• If the warning/indicator light BRAKE (USA models)/ © (Canada
models) in the instrument cluster flashes, there is a brake system
malfunction. By pressing the
I CH ECK] button, you can bring up a
driver message which explains the malfunction in more detail.
Please note
=> page 32. ..
Vehicle care
I I irechnical data
Page 34 of 426

Driver information display
• Speed warnings threshold 1 8 (USA modelsl/8 (Canada
models) and threshold
2 e , (USA modelsl/ 8 (Canada models) are
also shown as red symbols. The warning is always shown as a small
symbol in the upper area of the display=>
page 38. •
Alternator malfunction 0
If the O symbol in the instrument panel display flashes, then there
is a malfunction in the alternator or the vehicle electronics. A
warning to the driver will appear, too. The driver warning goes out
after about
5 seconds, but it can be brought up at any time by
pressing the
( CHECK ] button again.
Usually, you can still drive to the next dealership. Turn off all but the
most necessary electrical consumers, since these drain the vehicle's
battery.
0 Note
If the _t warning symbol (coolant system malfunction) also lights
up on the instrument panel during the trip=>
page 33, then you
have to stop immediately and turn off the engine. The coolant pump
is not working anymore -danger of damage to the engine! •
Brake system malfunction
A malfunction in the brake system must be repaired as
soon as possible.
If the warning/indicator light BRAKE (USA models)/ (©)
(Canada models) in the instrument cluster flashes, there is
a brake system malfunction. By pressing the [ CHECK]
button, you can bring up a driver message which explains
the malfunction in more detail.
Stop vehicle and check brake fluid level
-Pull off the road.
- Stop the vehicle.
- Turn off the engine.
- Check the brake fluid level=>
page 341.
-Contact your nearest authorized Audi dealer or qualified
workshop if necessary.
Warning! Fault in ABS brake system. Contact
workshop
- Drive carefully to the nearest authorized Audi dealer or
qualified workshop and have the malfunction corrected
=> & .
If the ABS system malfunctions, the ABS warning/indicator light illu
minates together with the brake system malfunction warning/indi
cator light=>& .
& WARNING
• Always observe the warnings in => page 324, "Engine compart
ment", before opening the hood and checking the brake fluid .
• Driving with low brake fluid is a safety hazard. Stop the car and
get professional assistance .
• USA models: If the BRAKE warning light and the .-..-warning
light come on together, the rear wheels could lock up first under
hard braking. Rear wheel lock-up can cause loss of vehicle control
and an accident . Have your vehicle repaired immediately by your
authorized Audi dealer or a qualified workshop. Drive slowly and
avoid sudden, hard brake applications.
• Canada models: If the brake warning light
warning light come on together, the rear wheels could lock up
first under hard braking. Rear wheel lock-up can cause loss of _.,
Page 35 of 426
& WARNING (continued)
vehicle control and an accident. Have your vehicle repaired immediately by your authorized Audi dealer or a qualified workshop.
Drive slowly and avoid sudden, hard brake applications. •
Engine cooling system malfunction -L
A mo/function in the engine cooling system must be
repaired as soon as possible.
When the _ t symbol in the display blinks, then either the
engine coolant temperature is too high, or the coolant level
is too low. An additional driver message can also be
displayed by pressing the [ CHECK] button:
Switch off engine and check coolant level
- Pull off the road .
- Stop the vehicle.
- Turn off the engine.
- Check coolant level => page 338.
- Add coolant if necessary => page 339.
- Continue driving only after the engine coolant
warning/indicator light goes out.
- Contact your authorized Audi dealer for assistance if
necessary.
If the engine coolant level is correct, then the radiator fan may be
the cause of the malfunction.
If the O warning symbol (alternator malfunction) also lights up on
the instrument panel~
page 32, then the fan belt may be damaged .
Controls and equip
ment
Driver information display
& WARNING
• If your vehicle should break down for mechanical or other
reasons, park at a safe distance from moving traffic, turn off the
engine and turn on the hazard warning lights
~ page 76, "Emer
gency flasher
A".
• Never open the hood if you see or hear steam or coolant
escaping from the engine compartment -you risk being scalded.
Wait until you can no longer see or hear steam or coolant
escaping.
• The engine compartment of any vehicle is a dangerous area.
Before you perform any work in the engine compartment, turn of
the engine and allow it to cool. Follow the warning stickers
~ page 324, "Engine compartment".
0 Note
Do not continue driving if the _f_ symbol illuminates. There is a
malfunction in the engine cooling system -you could damage your
engine. •
Engine oil pressure malfunction "l::;r.
The red engine oil pressure warning symbol requires
immediate service or repair. Driving with a low-oil -pres
sure indication is likely to inflict severe damage to the
engine.
If the 'l::::11 symbol appears in the display and blinks, the oil
pressure is too low. An additional driver message can also
be displayed by pressing the [CHECK] button:
Switch off engine and check oil level
Immediate actions
- Pull off the road.
I • •
Page 304 of 426

llffl!I Driving off road __ _...,______;, _____________________________ _
Driving off road
Driving in difficult road conditions
and offroad
General information
The operat ion o f the Elect ronic Stab ilizat ion Prog ram ( ESP) is
e x panded for operation away from paved roads . In situations where
s lip o r a di fferential lockin g function is required, the ESP o ffroad
mode can be activated~
page 288. Hill descent contro l is also avai l
able in the ESP off road m ode, w hich a utomat ical ly bra kes t he
vehicle and thereby keeps speed constant when different whee l
speeds are de tected whe n descend ing a hill ~
page 289 . You r Audi
a lso has permanent all -wheel drive in add ition .
Howeve r, your Audi is not a pure offroad vehicle . It was n ot bu ilt fo r
dr ivin g und er ex tre me cond itions, e.g . for tr ips t hat ar e in t he n atu re
of an expedition.
Drive only on roads and offroad sections which match the design of
your vehicle and your abilitie s as a driver . Never take r isks!
Before driving offr oad
• Check the engine oil level, tire pressure, coolant level, and the
fl uid level in t he windshie ld wash er r eservo ir.
• Stow luggage items and other objects in the luggage compart
ment, and secure the m aga inst sl iding around .
After driving offroad • After trips offroad, remove any twigs and other forei gn ob jects
from the gri ll, the underbody and the whee ls. Pay special attention
t o foreig n objects (stones) which have become lodged in t he tire
tread.
• Clean the body and the vehicle underside, and inspect the
veh ic le for possible damage. •
Clean dirty windows, headlamp lenses, rea r lights, and license
plates.
• Perform a bra ke check (particularly af ter travel ling through
wa ter).
& WARNING
• Drive especially attentively and plan ahead in difficult road
c onditions and when offroad . Excessive speed or in correct maneu
vers can cause injuries and damage to the vehicle.
• Alway s adapt your speed and d riv ing style to road , offroad,
traffic, and weather conditions. Drive especially slowly offroad
when your v iew is restri cted .
• Please be aware that in ESP offroad mode , particularly on a
smooth and slippery road , the wheels may have an in creased
tendency to spin and the vehicle may break away -danger of skid
ding !
• Stability is limited in the ESP offroad mode.
[ i ] Tips
On ly dr ive where it is perm itted and s tay on marked roads a nd
paths.
Explanation of some technical terms
T he fol lowing data refer to idea l conditions. Depending on vehic le
lo ad and g round cond itions and the environ ment, t he num ber s may ...
Page 340 of 426
___ C_h_ e_ c_k _in --== g'-- a_n _d_ f_il _li _n ..:::g:::..- ___________________________________________ _
models; 60% for Canadian models). This mixture both assures the
necessary frost protection and protects metal components in the
engine's cooling system from corrosion and scaling. It also raises
the boiling point of the coolant.
Do not reduce the concentration of the coolant in the summer by
adding plain water.
Th e pro port io n of coo la nt additi ve mu st be at
lea st 50 % but n ot mor e th an 60 %
to maintai n ant ifreeze protection
and cooling efficiency. If the coolant frost protection is too low , the
coolant could free ze and damage the veh icle heating and engine
cooling system .
For year-round driving , antifreeze is added at the factory for temper
atures down to:
• -31 °F ( -35 °c1 usA
• - 40 °F ( - 40 °C) Canada.
You can mix the
Gl 2+ + coolant additive with other additives (G12+
or G12). Always check w ith your authorized Audi dealer.
& WARNING
B efo re you che ck anyt hing in th e eng ine compartmen t, alway s
re ad a nd he ed all WARN ING S~
& in " Working in the engine
c ompar tm ent " on
page 33 1.
0 Not e
• Before winter sets in, have the coolant checked to see if the
coo lant additive in your vehicle is sufficient to meet the climate
conditions. This is especia lly important if you live in a region where
the winter is extremely cold . If necessary, increase the proportion of
coolant additive to 60%.
• When adding coolan t additive to your coo ling system,
remember:
-We recommend using only coolant additive
G12+ + (check the
label) for your vehicle. This coolant additive is avai lable at autho
riz ed Audi dealers. Other types of antifreeze can significantly reduce corrosion protection. The resulting corrosion can cause a
loss of coolant and serious engine damage.
• Do not add any type of radiator leak sealant to your vehicle's
engine coolan t. Adding radiator repair fluid may adversely affect the
function and performance of your cooling system and could result
in damage not covered by your New Vehicle Limited Warranty. •
Checking the engine coolant level
The engine coolant level can be checked with a quick
glance.
F ig . 287 E ngine
com partm ent : Cool ant
ex pans io n tank
Before you check anything in the engine compartment,
alw ays read and h eed all WARNINGS ~
& in "Working in
the eng ine compartment" on page 331.
- Turn off the ignition.
- Let the engine coo l dow n.
Place a thick rag over the coola nt expansio n tank
~ fig . 287 and carefully twist the cap counter-c lockwise
~ & - .,
Page 341 of 426
___________________________________________ C_ h_e _c_ k_ i_n _g _ a_n _d_ f_il _li _n _g __ lR
•
- Read the engine coolant level in the open coolant expan
sion tank :::::>
page 338, fig. 287. With a cold engine, the
coolant level should be between the "min" and "max"
markings. When the engine is warm, the level may be
slightly above the "max" marking.
The location of the coolant expansion tank can be seen in the
engine compartment illustration~
page 332.
To obtain an accurate reading, the engine must be switched off.
The expansion tank in your vehicle is equipped with an electric
coolant level sensor.
When the coolant level is too low, the warning light in the Auto
Check System~
page 33will blink until you add coolant and the
level has been restored to normal. Even though there is an electric
coolant level sensor, we still recommend you check the coolant level
from time to time .
Coolant loss
Coolant loss may indicate a leak in the cooling system . In the event
of coolant loss, the cooling system should be inspected immedi
ately by your authorized Audi dealer . It is not enough merely to add
coolant.
In a
sealed system, losses can occur only if the boiling point of the
coolant is exceeded as a result of overheating.
& WARNING
The cooling system is under pressure and can get very hot. Reduce
the risk of scalding from hot coolant by following these steps.
• Turn off the engine and allow it to cool down.
• Protect your face, hands and arms from escaping fluid and
steam by covering the cap with a large, thick rag.
& WARNING (continued)
• Turn the cap slowly and very carefully in a counter-clockwise
direction while applying light, downward pressure on the top of
the cap .
• To avoid being burned, do not spill antifreeze or coolant on the
exhaust system or hot engine parts. Under certain conditions, the
ethylene glycol in engine coolant can catch fire.
0 Note
Do not add any type of radiator leak sealant to your vehicle's engine
coolant. Adding radiator repair fluid may adversely affect the func
tion and performance of your cooling system and could result in
damage not covered by your New Vehicle Limited Warranty. •
Adding coolant
Be very careful when adding engine coolant.
Before you check anything in the engine compartment,
always read and heed all WARNINGS:::::> & in "Working in
the engine compartment" on
page 331.
- Turn off the engine.
Let the engine cool down.
Place a thick rag over the coolant expansion tank
=:> page 338, fig. 287 and carefully twist the cap counter
clockwise :::::>& .
Add coolant.
- Twist the cap on again
tightly.
Replacement engine coolant must conform to exact specifications
~ page 337, "Coolant". Even in an emergency, if coolant additive .,,
Vehicle care I t •
Page 343 of 426
_____________________________________________ C_h_ e_ c _ k_in -= g_a _ n_d _ f_il _li _n ..;::g =-- ____.•
& WA RNING ! continued )
• The auxiliary ele ctric fan is temperature controlled and can
s w itch on suddenly even wh en t he engine is not runn ing .
• The auxiliary radiator fan swit ches on automatic ally when the
engin e coolant rea che s a cer tain temperature and will con tinue to
run until the coolant temperature drop s. •
Brake f luid
Checking brake fluid level
The brake fluid level c an be checke d with a quick gl ance .
Fig. 288 E ngine
comp artm ent: B ra ke
flui d rese rvoir
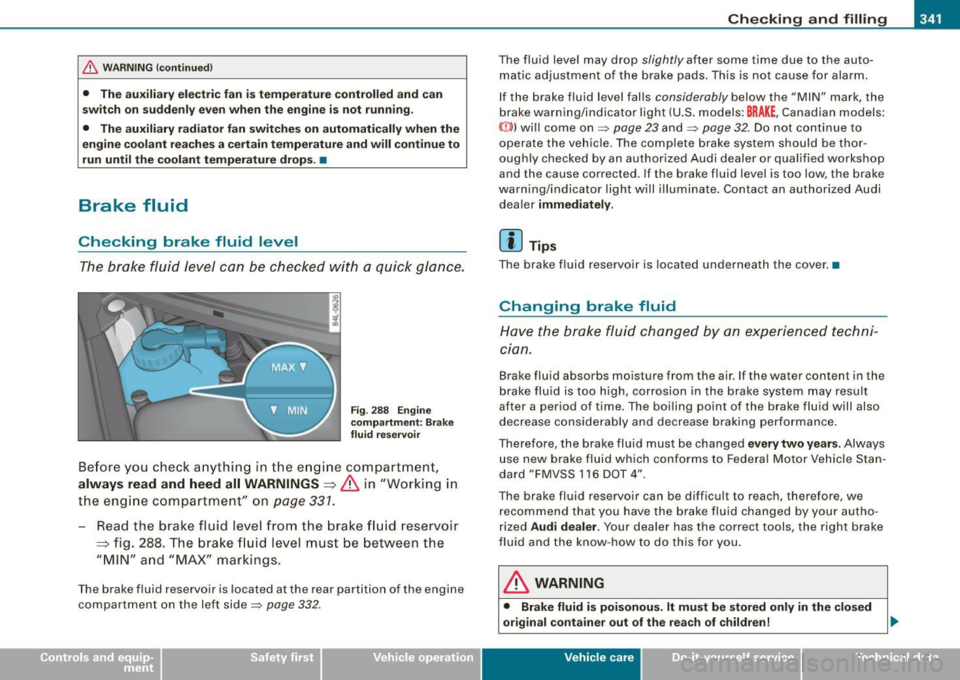
Be fore you check a nything in th e en g in e co mpart ment,
always read and heed all WARNINGS=> & in "Working in
t h e eng ine compartment" on
page 331.
- Read the brake fluid l eve l from the brake fluid reservoir
=> fig. 288. The brake flu id level mus t be between the
"MIN" and "MAX" markings.
The brake fluid reservoir is locate d at the rear partition of the engine
compartment on the left side=>
page 332.
The fluid level may drop slightly after some time due to the auto
ma tic adjustment of the brake pads. This is not cause for alarm .
If the brake fluid leve l falls
considerably below the "MIN" mark , the
brake warning/indicator light (U.S. models:
BRAKE , Canadian models:
«D> l will come on=>
page 23 and=> page 32 . Do not continue to
operate the vehicle. The complete brake system should be thor
oughly checked
by an author ized Audi dealer or qua lif ied workshop
and the cause corrected . If th e brake fluid level is too low, the brake
warning/indicator light w ill illumi nate. Contact an authorized Audi
dea ler
immedi ately .
[ i ] Tips
The brake fluid reservoir is located underneath the cover .•
Changing brake fluid
Have the brake fluid changed by an experience d techni
cian.
Brak e fluid absorbs mois ture from the air. If the wate r conten t in the
brake fluid is too high, corrosion in the brake sys tem may res ult
after a period of time . The boiling point of the brake fluid will also
decrease conside rably and decrease braking performance .
Therefore , the brake fluid mus t be changed
every two year s. Always
use new brake fluid which conforms to Federal Motor Vehicle S tan
da rd "FMVSS 116 DOT 4".
The brake fluid reservoir can be difficul t to reach, therefore , we
recommend that y ou have the brake fluid changed by your autho
rized
Audi deal er. Your dealer has the correct tools, the right brake
fluid and the know -how to do this for you .
& WARNING
• Brak e fluid is poi sonou s. It mu st be stored only in the clo sed
o riginal conta iner out of the rea ch of children! ..,.
Vehicle care I I irechnical data
Page 405 of 426
__________________________________________________ C_o_ n _ s_u_ m_ e ___ r_l_ n _f_ o_ r _m...:....:.. a:.;..:. ti .... o:.. n ........ _llll
& WA RNIN G (continu ed )
• The engine compartment of any motor vehi cle i s a potentially
h az ardou s area. N ev er re ach into the are a arou nd or to uch the
r a di ator fan . It is temperature co ntrolled and can swi tc h o n
s uddenly -even wh en the engine i s off and the ignition key h as
been removed . The r adiator f an switches on autom atic all y w hen
the coolant reache s a certain temperature and will continue to run
until the coo lant t emper ature drop s.
• Alway s remov e th e ignition key befo re anyone get s under the
v ehi cle .
• Alway s s upport your vehi cle with safety sta nd s if it i s ne ces
sa ry to wor k unde rne ath the veh icle . The ja ck suppl ied with the
v ehic le i s not adequ ate for thi s purpo se and could coll ap se
c au sin g s eriou s per son al in jury .
• If you m ust w ork under neath the vehi cle with the wheel s on
the ground , alwa ys m ake sure the veh icle i s on l eve l ground , that
the wheels ar e always securely blocked and that the engine
ca nn ot be sta rted .
• Alway s mak e sure the tran sm iss ion selecto r leve r (automatic
tr ansmi ssion ) is in "P " (P a rk po sition ) and the park brake is firml y
applied .
c£> For the sake of the environment
• Changing the engine settings w ill adverse ly affect emission
levels . This is detrimenta l to the environment and increases fuel
consumption.
• Always observe environmenta l regu lations when disposing of
old engine oil, used brake fluid, dirty engine coolant, spent batteries
or worn out tires.
• Undeployed airbag modules and pretens ioners might be classi
fied as Perchlorate Material -specia l handling may apply, see
www .dtsc .ca .gov/hazardouswaste/perchlorate. When the vehicle or
parts of the restraint system including airbag modules safety belts
with pretens ioners are scrapped, all applicable laws and regu la-
Controls and equip
ment Safety first Vehicle operation
tions must be observed. Your authorized Audi dealer is familiar with
these requirements and we rec
ommend that you have your dea ler
perform this service for you .•
Additional accessories ,
modifications and parts replacement
Addition al a ccessori es and parts
replacement
Always c onsul t an authorized Audi dealer before
purchasing accessories.
Your vehicle incorporates the latest safety design features ensuring a high standard of act ive and passive safe ty .
This safety could be compromised by non -approved changes to the
vehic le . F or this reason, if par ts have to be replaced, please observe
the following points when insta lling additiona l accessories:
Approved Audi accessories and genuine Audi parts are avai lable
from authorized Audi dealers.
These dealers also have the necessary facilities, tools and trained specialis ts to install the parts and accessories prope rly.
& WARNING
Using the wrong spare part s or u sing non-approved acce ssorie s
can c ause seri ous persona l injur y.
• Use onl y acc essorie s ex pres sly approved by Audi and g enuine
Audi spare p art s
• The se p art s and acce ssorie s have been spe cia lly de signed to
be used on you r vehi cle .
• Nev er in stall acc ess orie s s uch a s telep hone cra d le s or
be ver age holder s on airb ag cover s or within th e airbag deploy-
Vehicle care Do-it-yourself service Tec hn ica l da ta
Page 410 of 426
lffll __ A_ l..:,. p _ h_ a_ b_e _t_ic_ a_l _in_ d_e_ x ____________________________________________ _
A
Accessories . . . . . . . . . . . . . . . . . . . . . . . . 403
Adaptive Air Suspension .... ... .. .... 206
Cargo mode in the MMI ....... .... 212
Controls . . . . . . . . . . . . . . . . . . . . . . . . 207
Description ... ...... ............ 206
High level . . . . . . . . . . . . . . . . . . . . . . . 207
Highway level . . . . . . . . . . . . . . . . . . . 207
Instrument cluster display .. .... ... 209
Jacking mode when changing a flat tire . 210
Low level ... ... ... .... ..... .. ... 207
Normal level . . . . . . . . . . . . . . . . . . . . 207
Segment display . . . . . . . . . . . . . . . . . 208
Setting the driving modes ......... 208
Trailer towing mode ... .... .... ... 211
Using sw itch for cargo mode .. .... 212
Warning/indicator lights . .......... 21
Adaptive Cruise Control .. .... ..... ... 152
Changing speed ................. 156
Driver information ............... 160
Driver intervention prompt ........ 164
Driving in traffic 154
Driving program .. .... .... .... ... 165
Error messages . . . . . . . . . . . . . . . . . . 163
Open road . . . . . . . . . . . . . . . . . . . . . . 154
Override . . . . . . . . . . . . . . . . . . . . . . . . 154
Request for driver to assume control 154
Save speed . . . . . . . . . . . . . . . . . . . . . . 156
Setting distance . . . . . . . . . . . . . . . . . 158
Setting time interval .............. 158
Settings ........................ 165
Specia l driving situations ......... 165 Status
messages . ....... ... .. ... . 163
Switching on and off .. ........... 155
System limits .. .................. 165
Temporarily turning off ......... .. 157
warn ing/indicator lights ........... 161
Adaptive Light .... ...... ...... ... ... . 76
defective ......................... 37
Adding Engine coolant ... ....... .... .... . 339
Engine oil ... .. .. . ... ....... .... . 336
Windshield washer fluid ...... .... . 346
Additiona l accessories .......... .... . 403
Additives Engine oil ....................... 336
Adjusting Instrument cluster i llumination . .... . 17
Steering column electrically ....... 141
Steering column manually ......... 140
Adjusting front seats .... .... .... . ... . 92
Advanced Parking System with rear view
camera
Adjusting the chimes -option 1 . ... 201
Adjusting the chimes -option 2 .... 202
front and back with visual display and
rear -view camera . . . . . . . . . . . . . . . 191
General information ......... ..... 191
Notes on distance information ... .. 200
Parking next to obstac les . . . . . . . . . . 199
Rear-view camera -parking mode 1 196
Rear -view camera -parking mode 2 . 198
Rear -view camera (Rear View) ... ... 194
Rear -view camera coverage area . . . . 195
Rear -view camera tips ............ 204 Special parking
situations ... .. .. .. 199
Switching the rear-view camera on and
off .... . ... .... .... ... .. .... ... 203
switching the visua l display on and off ..
203
System error message ............ 204
Towing hitch ...... .... ...... .... 201
Air conditioning
See Climate controls 123
Air distribution Climate controls ... ....... .... ... 127
Four -zone automatic comfort air
conditioning ................... 133
Air pol lutants fi lter
Climate controls ................. 123
Airbag Warning/indicator lights . ...... .... . 19
Airbag system .... .... .... ... ... 241, 258
Advanced Airbag System ...... .... 245
Advanced Airbag System components . ..
248
Care ........................ .... 255
Child restraints .................. 265
Children ... .... .... ... ...... ... . 264
Components (front airbags) . ....... 248
Danger of fitting a chi ld safety seat on the
front passenger seat . . . . . . . . . . . . 243
Disposal ............. ....... .... 255
Front airbags .. ........ ...... 245, 246
How do the front airbags work? . ... 250
How many airbags does my vehicle have? 248
How the Advanced Airbag System compo -
nents work together . ........ .... 249