ignition AUDI R8 SPYDER 2012 Owner's Manual
[x] Cancel search | Manufacturer: AUDI, Model Year: 2012, Model line: R8 SPYDER, Model: AUDI R8 SPYDER 2012Pages: 236, PDF Size: 59.24 MB
Page 39 of 236
Front lid
Opening/closing the front lid
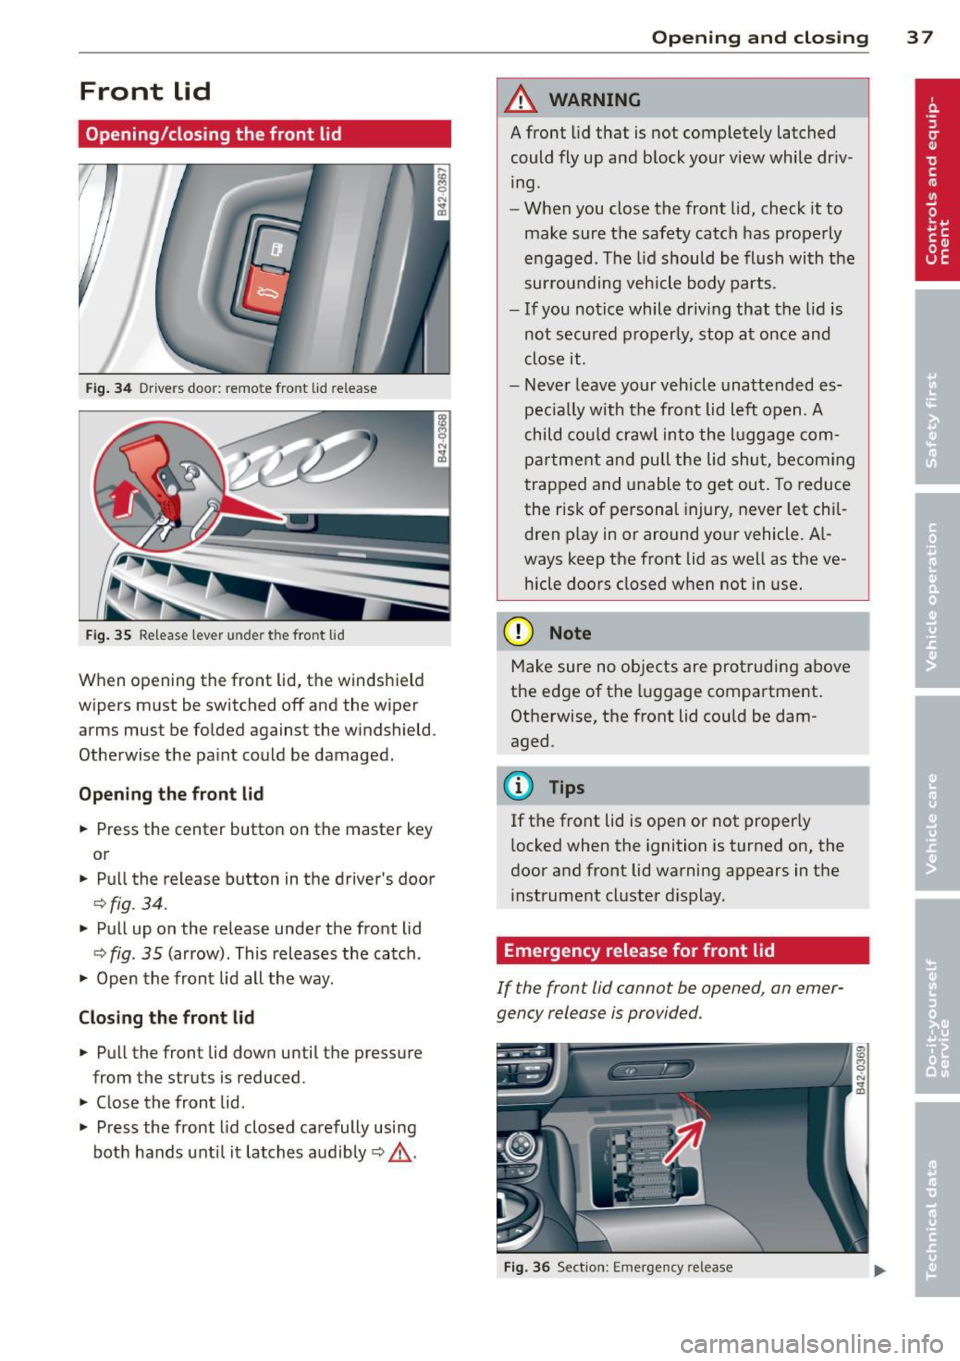
Fig. 34 Drive rs doo r: remote fro nt lid re le ase
Fig. 35 Releas e le ver under th e fron t lid
When opening the front lid, the windshield
wipers must be switched off and the wiper
arms must be folded against the windshield .
Otherwise the paint could be damaged.
Opening the front lid
.. Press the center button on the master key
or
.. Pull the release button in the driver 's door
Q fig . 34 .
.. Pull up on the release under the front lid
~ fig . 35 (arrow) . This releases the catch .
.. Open the front lid all the way .
Closing the front lid .. Pull the front lid down until the pressure
from the struts is reduced .
.. Close the front lid .
.. Press the front lid closed carefully using
both hands unti l it latches audibly
Q ,& .
Opening and closing 3 7
A WARNING
A front lid that is not completely latched
could fly up and block your view while driv
ing .
- When you close the front lid, check it to
make sure the safety catch has properly
engaged . The lid should be flush with the
sur rounding vehicle body parts.
- If you notice while driv ing that the lid is
not secured properly, stop at once and
close it.
- Never leave your vehicle unattended es
pecia lly with the front lid left open .
A
child could crawl into the luggage com
partment and pull the lid shut, becoming
trapped and unable to get out. To reduce
the risk of personal injury, never let chil
dren p lay in or around your vehicle. A l
ways keep the front lid as well as the ve hicle doors closed when not in use.
(D Note
Make sure no objects are protruding above
the edge of the luggage compartment.
Otherwise, the front lid could be dam
aged .
@ Tips
If the front lid is open or not properly
l ocked when the ignition is turned on, the
door and front lid warning appears in the
in strument cluster dis play.
Emergency release for front lid
If the fron t lid cannot be opened, an emer
gency release is provided .
Fig. 36 Section: Emerge ncy re lease
.
Page 40 of 236
38 Opening and closing
• Reach under the closed glove compartment .
There is a red plastic cord under the glove
compartment.
• Pull the red plastic cord towards you .
Anti-theft alarm
system
Description
The anti-theft alarm triggers on alarm if any
one attempts to break into the vehicle .
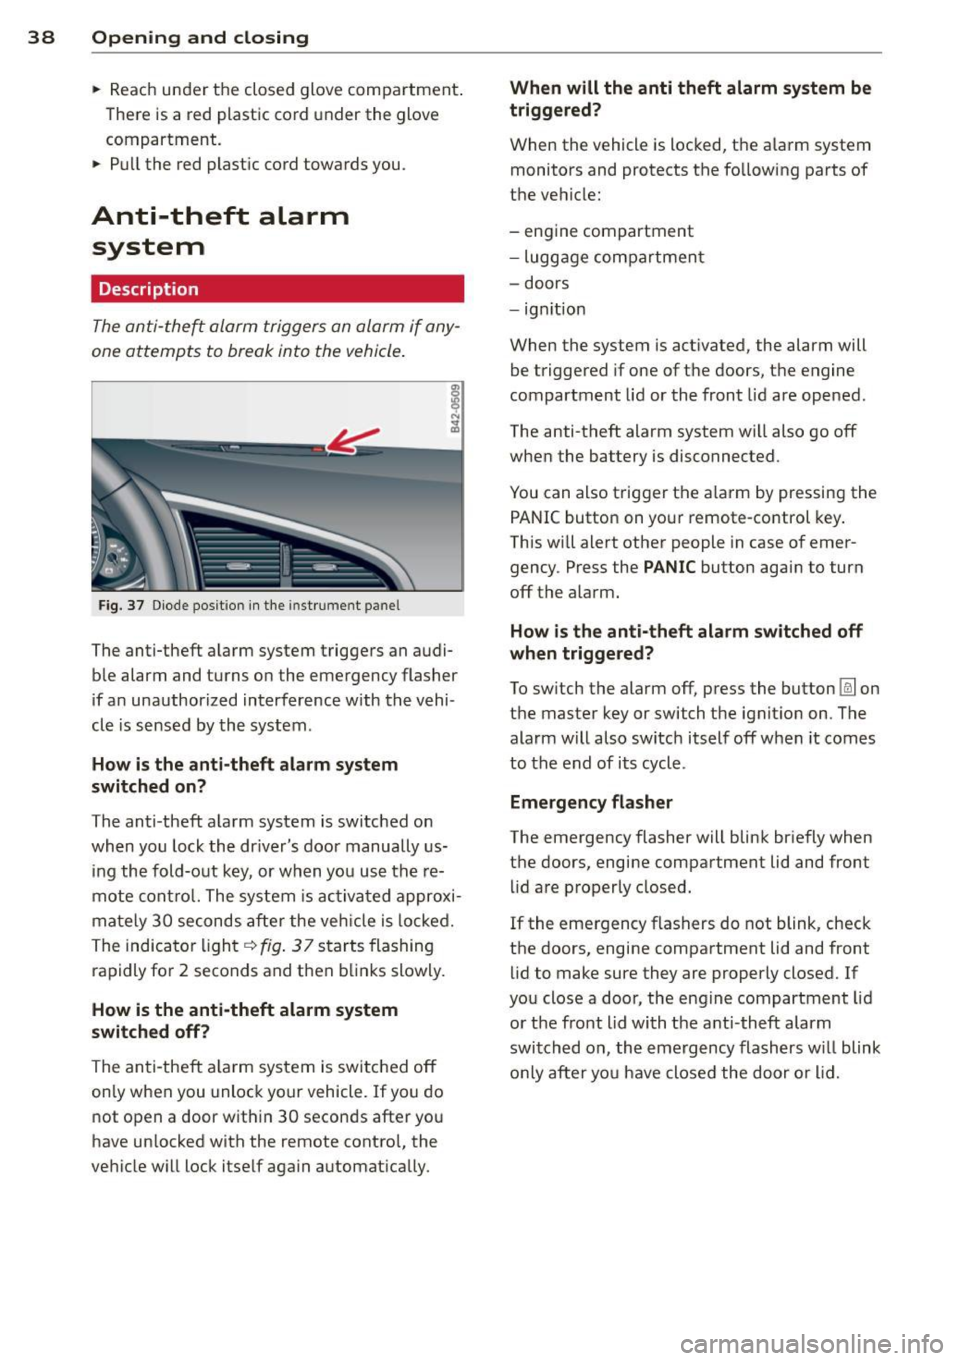
Fig. 37 Diode posit io n in the instr um ent p anel
The anti-theft alarm system triggers an audi
ble alarm and turns on the emergency flasher
if an unauthorized interference w ith the vehi
cle is sensed by the system .
How is the anti-theft alarm system
switched on?
The anti -theft alarm system is switched on
when you lock the driver's door manually us
ing the fold-out key, or when you use the re
mote control. The system is activated approxi
mately 30 seconds after the veh icle is locked.
The indicator light
q fig. 37 starts flashing
rapidly for 2 seconds and then blinks slowly.
How is the anti-theft alarm system
switched off?
The anti-theft a larm system is switched
off
only when you unlock your vehicle. If you do
not open a door within 30 seconds after you
have un locked with the remote contro l, the
vehicle will lock itself again automatically. When will the
anti theft alarm system be
triggered?
When the vehicle is locked, the alarm system
monitors and protects the following parts of
the vehicle:
- engine compartment
- luggage compartment
- doors
- ignition
When the system is ac tivated, the alarm will
be triggered if one of the doors, the engine
compartment lid or the front lid are opened.
The anti-theft alarm system wi ll also go
off
when the battery is disconnected .
You can also trigger the a larm by pressing the
PANIC button on your remote-control key.
This will alert other people in case of emer
gency . Press the
PANIC button again to turn
off the alarm.
How is the anti-theft alarm switched off
when trigge red?
To switch the alarm
off, press the button @Jon
the master key or switch the ignition on. The alarm will also switch itself off when it comes
to the end of its cycle .
Emergency flasher
The emergency flasher will blink briefly when
the doors, engine compartment lid and front lid are properly closed.
If the emergency flashers do not blink, check
the doors, engine compartment lid and front
lid to make sure they are properly closed. If
you close a door, the engine compartment lid
or the front lid with the anti -theft alarm
switched on , the emergency flashers will blink
only after yo u have closed the door or l id.
Page 42 of 236
40 Convertible top
Convertible top
Convertible top
General information
The fabric convertible top opens and closes
automatically. When it is open, it is stored in
the convertible top storage bay. The converti
b le top may be opened or closed at speeds up
to 31 mph (SO km/h) .
The convertible top is wind- and wate rproof
under normal conditions . Some moisture may
collect in the vehicle interio r, b ut only under
extreme ly adverse weather conditions such as
torrential rain . That is normal and no cause
for concern.
Follow the cleaning and maintenance instruc
tions ~
page 156 to ensure the convertible
top remains wind- and waterproof. Also note
the following points:
- Only stow the convertib le top when it is
clean and dry . Grains of sand or coarse dirt
particles can cause abrasions on the conver
tible top when stowed that can lead to dam
age to the fabric over time. Stowing the con
vertib le top when it is damp can cause
marks or permanent mildew spots to form .
- Do not leave the convertible top open for
several weeks or the creases in it may be
come discolored . This is especia lly true if the
top was stowed when damp .
- Remove ice and snow before opening the
convertible top . Do not use any sharp edged
objects to remove ice and snow or the con
vertib le top could be scratched or damaged.
T he rear window may be cleared with a
standard ice scraper.
- T he fabric in the convertible top loses elas
t icity in sub-zero temperatures. We recom
mend not opening or closing the convertib le
top when the temperature is below 32 °F (0 QC). The convertible top will not open
when the temperature is 5 °F (-15 QC) or be
low.
Opening/closing the convertible top
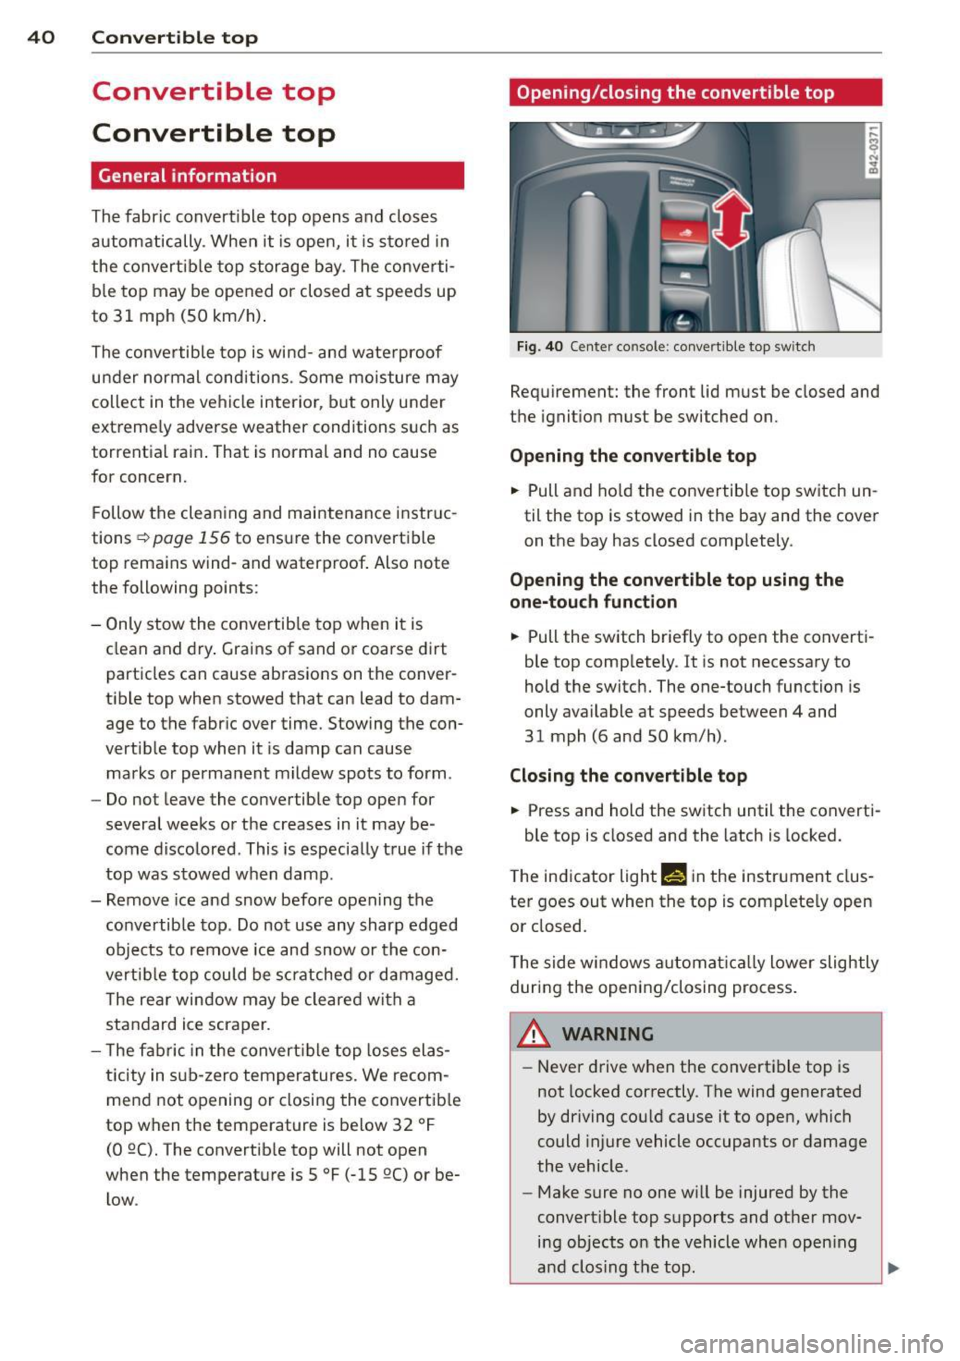
Fig. 40 Center co nsole : convertible top sw itc h
Requirement: the front lid must be closed and
the ignition must be switched on.
Opening the convertible top
.. Pull and hold the convertible top switch un
til the top is stowed in the bay and the cover
on the bay has closed completely.
Opening the convertible top using the
one-touch function
.. Pull the switch briefly to open the converti
ble top completely . It is not necessary to
hold the switch. The one-touch function is
only available at speeds between 4 and
31 mph (6 and 50 km/h) .
Closing the convertible top
.. Press and hold the switch until the converti-
ble top is closed and the latch is locked.
T he indicator light
M! in the instrument clus
ter goes out when the top is completely open
or closed.
The side w indows automa tica lly lower slightly
during the opening/closing process.
A WARNING ~
- Never drive when the convertible top is
not locked correctly . The wind generated
by driving cou ld cause it to open, which
could injure vehicle occupants or damage
the vehicle.
- Make sure no one will be injured by the
convertible top supports and other mov ing objects on the vehicle when open ing
and clos ing the top .
Page 45 of 236
The rear window can be extended comp lete ly
for cleaning. This is ca lled the cleaning posi
tion.
E xte nding the re ar w indow into the wind
defl ector po siti on
~ Pu ll and hold the rear window switch
¢fig. 44.
~ Release the switch once the rear w indow
has reached the wind def lector posit ion.
E xte ndin g th e rear window into the
cleaning po sition
~ Pull and hold the rear window switch
¢ fig . 44.
~ Release the switch once the rear window
has reached the wind deflector posit ion .
~ Pull and hold the rear window switch again .
~ Pull and hold the conve rtible top switch
within one second
¢ page 40, fig . 40.
R etra cting the re ar window
~ Press and ho ld the rear window switch until
the window has been retracted .
Ret racting the re ar w indow u sing the one
touch funct ion
~ Press the rear window switch briefly . There
is no need to hold the switch.
The rear w indow can on ly be operated when
t he ignition is switched on.
The rear window can also be extended or re
tracted when the convertib le top is closed.
_&. WARNING
- Do not use the rear window to secure car
go or other objects. This could result in
injury .
- Always pay attention and be careful
when extending or retracting the rear
window . It could cause injury by pinch
ing .
@ Tips
-Keeping all of the w indows raised pro
v ides the best wind protection.
Con vertible top 43
- The vehicle must be stationary to bring
the rear window into the cleaning posi
t ion . The rear window will retract once
you begin dr iv ing.
Convertible top
emergency operation
General information
The convertible top can be closed by hand if
there is a malfunction .
First check if overload protection is active
~ page 41. If this is the case, the convertible
top w ill operate again after a short de lay . Oth
erwise the following steps must be completed before closing the convertib le top:
~ Act ivate the park ing brake.
~ Open the side windows, if necessary.
~ Remove the key from the ignition.
Emergency loc king is not intended for long
term use o r long drives . The convertib le top
will not be completely waterproof after using
the emergency locking procedure because the
seals will not be seated correctly. Only close
the convertible top manually in an emergency .
Please see an au thorized Audi R8 dealer to
have the cause of the malfunction corrected .
_&. WARNING
-The ignition must be sw itched off during
the entire closing procedure.
- When positioning the convertible top,
avoid contact with the supports or other
mov ing parts. Otherwise you could p inch
your hands.
- Never drive when the convert ible top is
not locked correctly. The wind from d riv
ing could cause the convertible top to
open . This can resu lt in injuries and dam
age to the vehicle.
@ Tips
Have a second person assist when closing
the convert ible top. Opening the storage
bay lid and positioning the conve rtible top
is easier when a second person is assisting.
Page 46 of 236

44 Convertible top
Step 1: Retract the rear window
Fig. 45 Upper storage compa rtme nt: re mov ing the
cover
F ig. 46 Upper sto rage compartment: using the Allen
wrench as a crank to lower the rear win dow
M 0 N ... a,
... ... M 0
The rear window must be retracted in order to
close the convertible top. If the rear window
switch is not functioning¢
page 42, the rear
window can be cranked .
.. Open the upper storage compartment be
tween the seat backrests ¢
page 63 .
.. Remove the cover using the screwdriver
from the vehicle tool kit¢
fig. 45.
• Press the Allen wrench from the veh icle tool
kit firmly into the opening until it clicks into
place ¢
fig. 46.
• Turn the bolt clockwise until the rea r w in
dow is lowered .
Step 2: Release the pressure in the
hydraulic system
The pressure in the hydraulic system must be
re leased before the convertible top can be
closed.
.. Switch the ignition off.
.. Pu ll or press the convertible top switch
¢
page 40, fig. 40 for approximately 10 sec
onds.
A WARNING
-
If convertib le top operat ion fa ils when
opening o r closing the top, do not hold or
touch the supports or other moving parts
when releasing the pressure. The converti
ble top will sink down and could pinch your
hands.
Step 3 : Open the convertible top storage
bay lid
Fig. 47 E ng ine compartme nt: install ing the eme rgency
ope rat io n bolts
Fig. 48 Ra is ing t he sto rage bay lid and pulling it back
The engine compartment lid must be released
using the emergency procedure in order to re
l ease the storage bay lid
¢page 171.
Releasing the convertible top storage bay
lid
.. Tur n the emergency operation bolts on the
left and right sides of the engine compart
ment¢
fig. 47 clockw ise using the open end
wrench from the vehicle too l kit until t he
bolts are installed completely . The co nverti
ble top sto rage bay lid will raise app rox i
mate ly 0,4 in (1 cm) from the vehicle when
t he bolts are install ed comp letely.
• Close the engine compartment lid
r=;, page 170.
Page 51 of 236
Clear vision Lights
Switching the headlights on/off
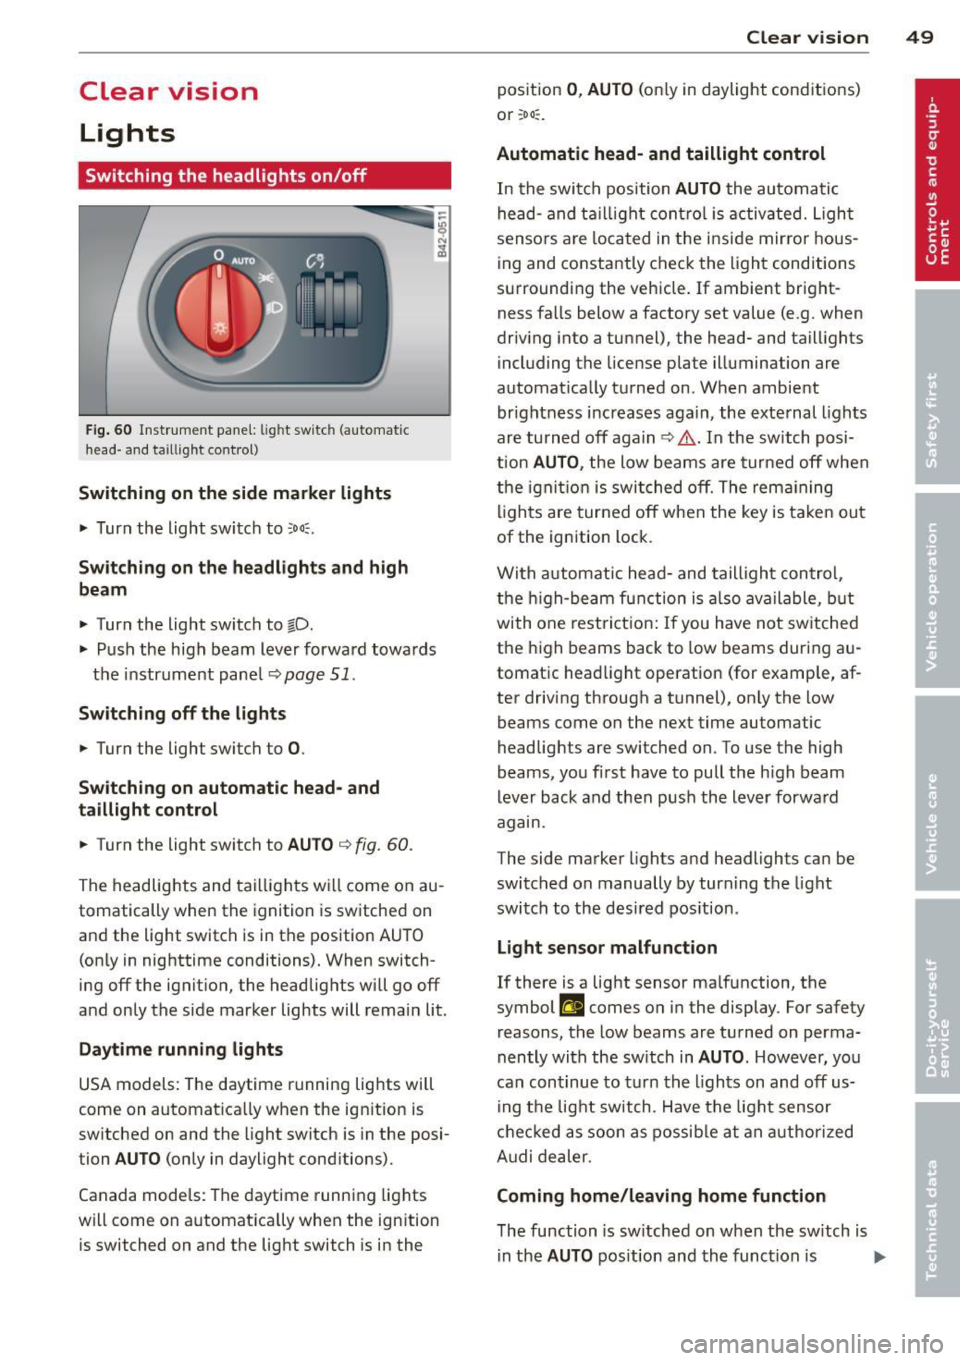
Fig. 60 Instr ume nt pa nel: lig ht sw itc h (automat ic
head· a nd taill ig ht control)
Switching on the side marke r lights
"' Turn the light switch to ::oo:.
Switching on the headlights and high
beam
"' Turn the light switch to tD.
.,. Push the high beam lever forward towa rds
t h e instrument pane l
Q page 51.
Switching off the lights
.,. Turn the light switch to 0.
Switching on automatic head- and
taillight control
.,. Turn the light switch to AU TO Q fig . 60 .
The headlig hts and tai lligh ts w ill come on au
tomatically when the ignition is sw itche d on
and the light switch is in the position AU TO
(on ly in nig httime conditions). When switch·
ing off the ignit io n, the headlig hts wi ll go off
and only the side marker lights will remai n lit.
Daytime running lights
USA models: The daytime r unning lig hts will
come on a utomat ica lly when the ig nition is
sw itched on and the light switch is in the posi·
tion
AUTO (only in daylight conditions).
Canada models : Th e daytime runni ng lights
will come on a utomat ically when the ignition
is switched on and the light switch is in the
Clear vi sion 49
position 0 , AUTO (on ly in daylight cond itions)
o r ;oo :.
Automatic head- and taillight control
In the swi tc h p osition AUTO the au tomati c
he ad- and t aillight con tro l is activ ated. Ligh t
senso rs ar e lo cated in t he i nside mirro r hous
ing and co nstantly chec k the light cond itions
su rroundi ng the vehicle. If ambient bright
ness fa lls below a factory set value (e .g. when
dr iv ing into a tu nnel), the head- and taill ights
i ncl uding the license plate illuminati on are
automat ica lly t urned on . When ambient
brightness i ncreases aga in, the exte rnal ligh ts
ar e turned off aga in
q &. . In the switch posi
t ion
AUTO , the low beams are tur ned off when
t h e ign ition is swi tched o ff. Th e rem aining
li gh ts are turned off when the key is ta ke n out
of the ignition lock.
W it h a utomat ic head- and taill igh t con trol,
the h igh-be am fu nction is also ava ilable , bu t
with one rest ric t ion : If you have not sw itche d
the h igh beams back to low beams during a u
tomat ic head light operat ion (for examp le, af
ter driving through a tunnel), on ly the low
beams come on the next time automatic
headlig hts are switched on. To use the high
beams, yo u fi rst have to pull the h igh beam
lever back and then push the lever forwa rd
agam .
The side ma rke r lights a nd headlights ca n be
sw itc hed on manually by turn ing the light
swi tc h to the des ired pos ition .
Light sensor malfunction
If there is a light sensor ma lfunction, the
symbol
El comes on in the display . For safety
reasons, the low beams are tu rned on perma
nently with t he sw itch in
AUTO . However , you
can con tinue to tu rn the lights on and off us
in g t he light switch . Have t he ligh t sensor
c h eck ed as soon a s possib le a t an au thori zed
A udi dealer.
Coming home/leaving home function
The function is sw itched on w hen the sw itch is
i n the
AUTO pos ition and th e funct ion is liJJ,,
Page 52 of 236
50 Clear vision
shown as active in the driver information
system.
The
coming home function illuminates the
area around the vehicle when the ignition is
switched off and the driver 's door is opened.
The length of time the lights rema in on can be
set in the menu display
(Lights> Exterior
lights > coming home) .
The leaving home function illuminates the
area around the vehicle when unlocking it.
.&_ WARNING
-Never use daytime running lights to see
where you are going. They are not bright enough and will not let you see far
enough ahead for safety, especially at dusk or when it is dark . Be aware of
changes in outside light conditions when
you are driving and respond by switching on your low beams.
- Automatic head- and taillight control is
only intended to assist the driver. This
feature does not relieve the driver of his
responsibility to check the headlights
and to turn them on manually according
to the current light and visibility condi
tions. For example, fog and rain cannot
be detected by the light sensors. Conse
quently, always switch the headlights on
under these weather conditions and
when driving in the dark .
- Crashes can happen when you cannot see
the road ahead and when you cannot be
seen by other motorists .
-Always turn on the headlights so that you can see ahead and so that others can see your car from the back.
- Please observe legal regulations when
using the lighting systems described .
@ Tips
-Always observe the specific local regula
tions for your area when to use your lights .
- Turn on low beams as evening ap
proaches or in conditions of poor visibili
ty. -
Do not attach stickers to the windshield
in front of the sensors as this can disable
the automatic head- and taillight control
and the automatic glare-dimming of the
rearview mirror(s)*.
- If you remove the ignition from the igni
tion lock while the headlights are still
on, a buzzer will sound as long as the
driver's door is open to remind you to
turn off the lights .
- In the AUTO mode, the low beams are
turned off when the ignition is turned
off . The remaining lights are turned off
when the key is taken out of the ignition.
- In cool or damp weather conditions the
headlights may fog over temporarily on
the inside .
- The critical factor is the temperature
difference between the interior and the
exterior of the headlight lens.
- With the main beams switched on, the
light-emitting area will be free of con
densation after a short time , however
the edges of the glass may still be fog
ged .
- This physical phenomenon has no ef
fect on the life of your vehicle's l ight
ing system .
Emergency flasher
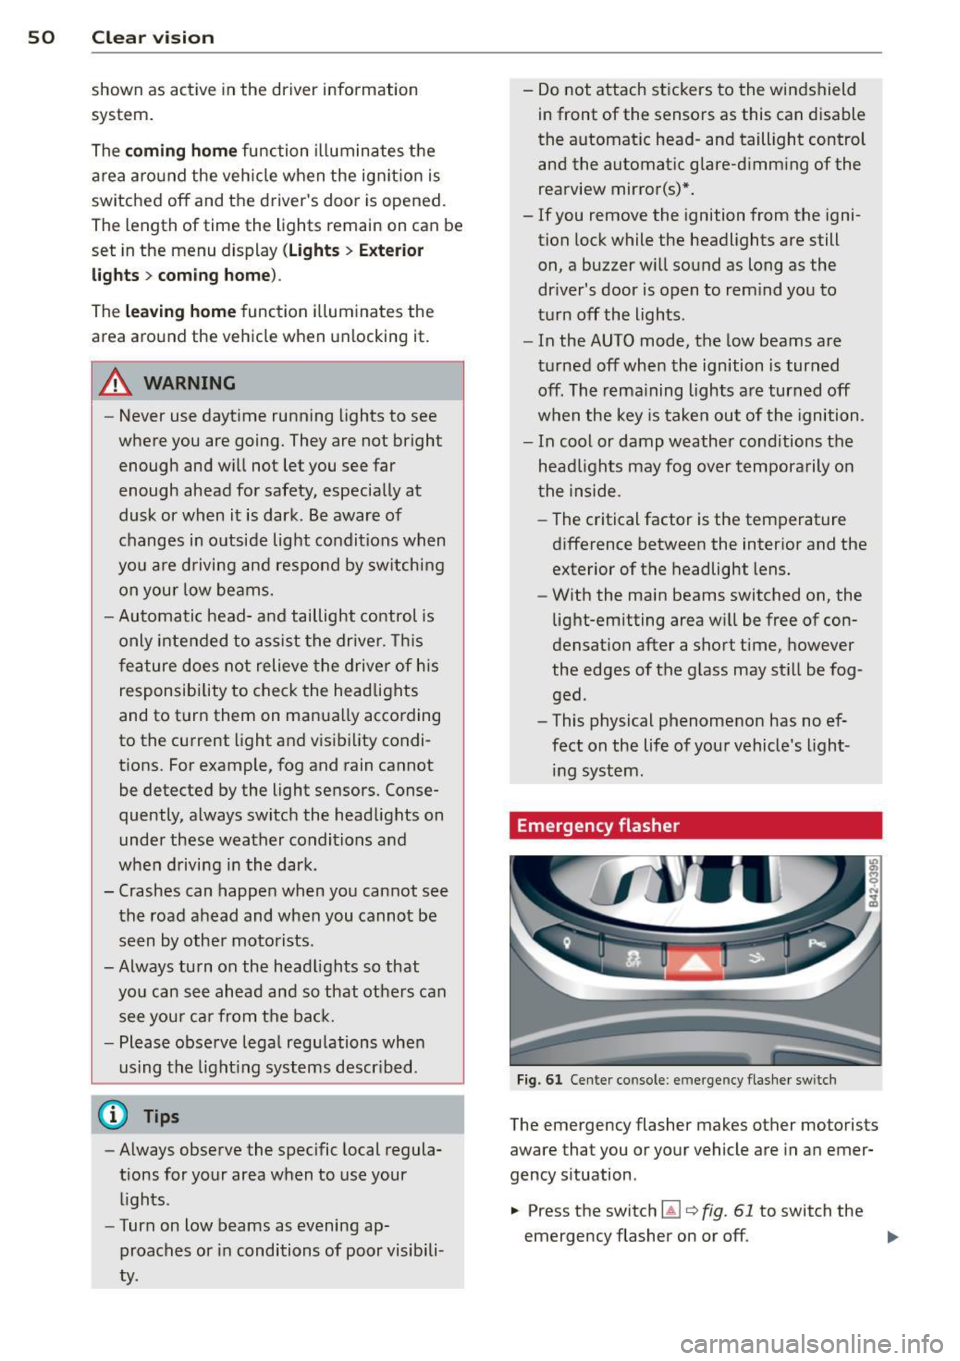
Fig. 61 Center console: em erge ncy flasher sw itc h
The emergency flasher makes other motorists
aware that you or your vehicle are in an emer
gency situa tion.
... Press the switch ~
Q fig. 61 to switch the
emergency flasher on or off .
ll>
Page 53 of 236
When the emergency flasher is on, all four
turn signal blink at the same time . The turn
signal ind icator lights
R II in the instrument
cluster, as well as the light in the emergency
flasher switch~ blink likewise . The emergen
cy flasher also works when the ignition is
switched off.
The emergency flasher wi ll automatically
sw itch on if you are in an acc ident where the
a irbag has deployed .
(D Tips
You should switch on the emergency flash
er when:
-you are the last vehicle standing in a traf
fic jam so that any other vehicles coming
can see you, or when
-your vehicle has broken down or yo u are
in an emergency situation , or when
- your vehicle is being towed by a tow
truck or if yo u are towing another vehicle
behind you.
Turn signals and high beam lever
The lever is used to operate the turn signals
and the high beam as well as the headlight
flasher .
t
t
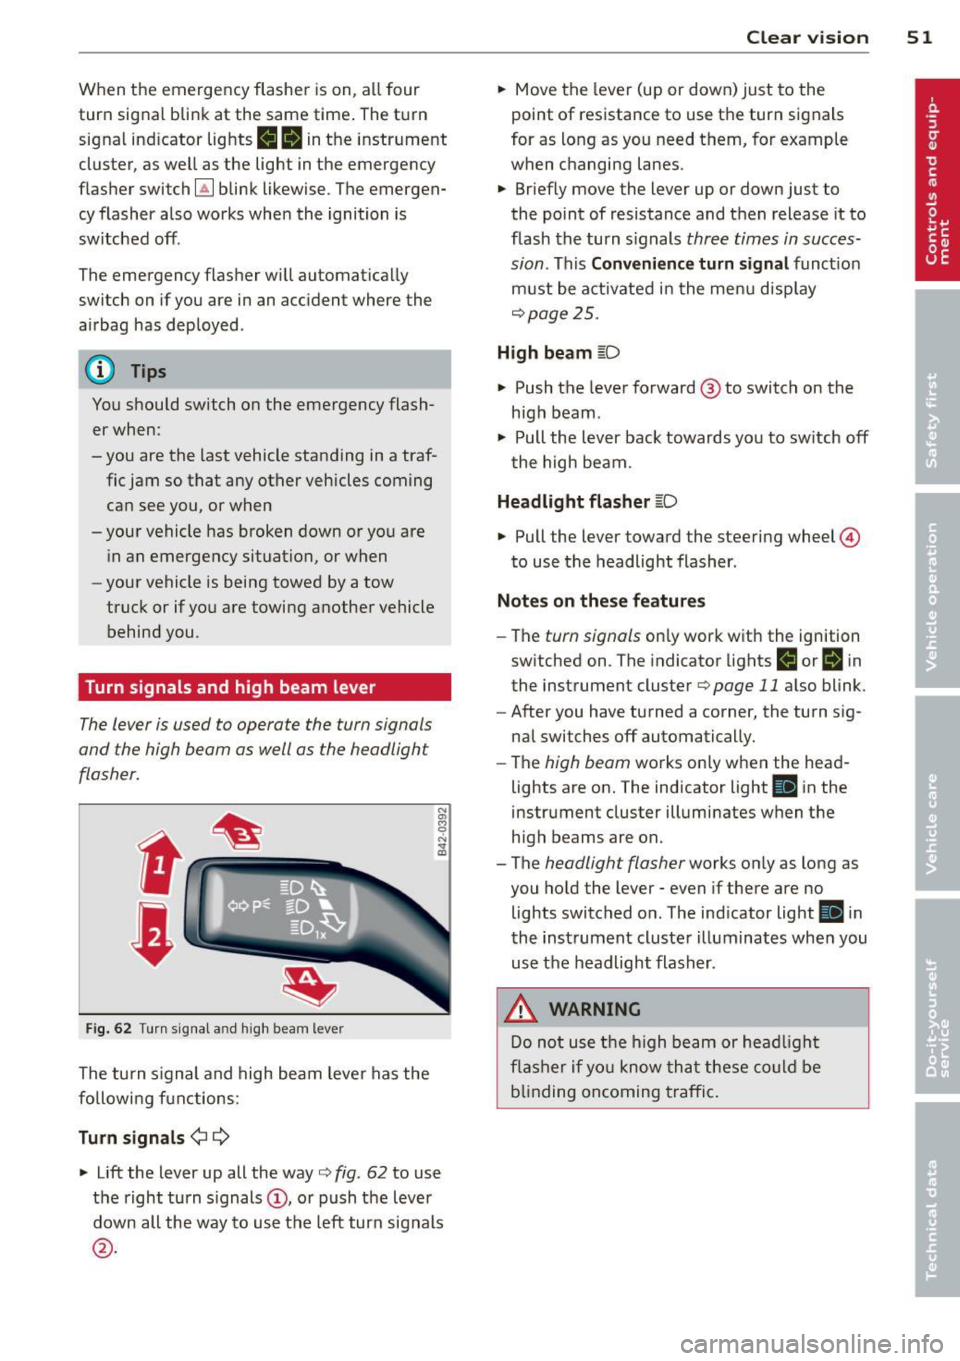
F ig . 6 2 Turn signa l an d h igh beam lever
The turn s ignal and high beam leve r has the
followi ng functions:
Turn sign als ¢ 9
N
"' 8
"' ... a,
~ Lift the lever up all the way c:> fig . 62 to use
the right turn s ignals
(D , or push the lever
down all the way to use the left turn signals
@ .
Clear vi sion 51
~ Move the lever (up or down) just to the
point of resistance to use the turn signals
for as long as you need them, for example
when changing lanes .
~ Briefly move the lever up or down just to
the point of resistance and t hen release it to
flash the turn s ignals three times in succes
sion . This
C o nveni ence turn signal funct ion
must be activated in the menu disp lay
c:> page25 .
High beam ~D
~ Push the lever forward @to switch on the
high beam .
~ Pull the lever back towards you to sw itch off
the high beam.
Headlight flasher ~D
~ Pull the lever toward the steering wheel ©
to use the headlight flasher .
Notes on the se feature s
-The turn signals only work with the ignition
switched on . T he indicator lights
IJ or Bi n
the instrument cluster c:> page 11 also blink.
- After you have turned a corner, the turn s ig-
nal switches off automatically.
- The high beam works only when the head
lights are on. The indicator light
II i n the
instrument cluster illuminates when the
high beams are on .
- The headlight flasher works only as long as
you ho ld the lever - even if there are no
lights switched o n. The ind icator light
II i n
the instrument cluste r illuminates whe n you
use the headlight flasher .
.&, WARNING
Do not use t he h igh beam or hea dligh t
fl ashe r if yo u know th at these could be
b lin ding oncoming t raffic .
Page 54 of 236
52 Clear vis ion
Interior lights
Interior lights
The interior lights include the reading lights
for the driver and the front passenger .
-
,-i.-,-,n--;)
"' "' "' 0
•
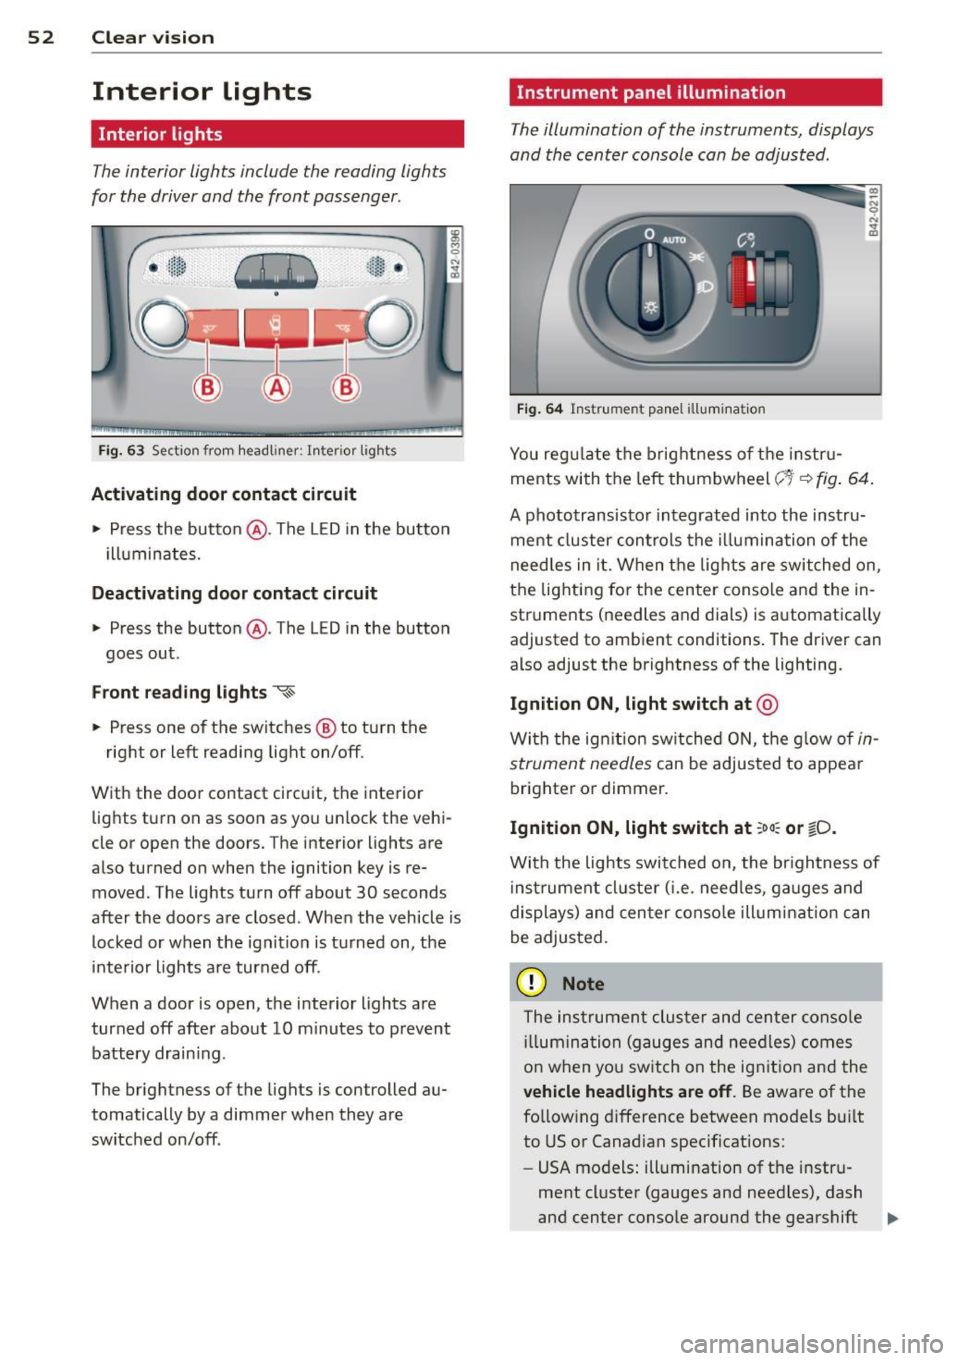
Fi g. 63 Section from headliner: I nterior l ights
Acti vating door contact circuit
• Press the button @. The LED in the button
i lluminates.
Deactivating door c ontact circu it
• Press the button @. The LED in the button
goes out .
Front re ad ing lights ~
• Press one of the switches @ to turn the
right or left reading light on/off.
With the door contact circuit, the interior lights turn on as soon as you unlock the vehi
cle or open the doors. The interior lights are
also turned on when the ignition key is re moved. The lights turn off about 30 seconds
after the doors are closed . When the vehicle is
locked or when the ignit io n is tu rned on, the
inte rior lights a re turned off.
When a door is open, the interior lights are
turned off after about 10 m inutes to prevent
battery drain ing.
The brightness of the lights is controlled au
tomatically by a dimmer when they are
switched on/off .
Instrument panel illumination
The illumination of the instruments, displays
and the center console can be adjusted .
Fig . 6 4 Instrument pa nel illuminat ion
You reg ulate the brightness of t he instr u
ments with the left thumbwheel
c;~-~ fig . 64 .
A phototransisto r integrated into the instru
ment cluster controls the illumina tion of the
need les in it. When the lights are switched on,
the lighting for the center conso le and the in
struments (needles and dials) is automatically
adjusted to ambient conditions . The driver can
also adjust the brightness of the lighting.
Ignition ON, light switch at @
With the ign ition sw itched O N, the g low of in
strument needles
can be adjusted to appear
brighter or dimmer.
Ignition ON, light switch at ;oo : or ~D.
With the lights switched o n, the br ightness of
instrumen t cluster ( i.e . need les, ga uges and
displays) and cen ter conso le illum inat ion can
be adjusted.
(D Note
The instrumen t cluster and cen ter conso le
ill umin ation (gauges and nee dles) comes
o n when yo u sw itch on the ignit io n and the
veh icle headlights are off . Be aware of the
fo llowing difference between models bui lt
to US or Canadian specifications:
- USA models: illumination of the instru
ment cl uster (gauges and need les), dash
and center conso le around the gearshift .,.
Page 56 of 236
54 Clear vis ion
Moving w ip er blade s to th e service
po sit ion
.. Do not lift the wiper arms away from the
glass when they are in their parked position;
this would damage the paint on the front
lid .
.. When there is a risk of frost, make sure t hat
the wiper blades are not frozen to the wind shield .
.. Move wipe r blades to the service pos it ion
¢page 55.
The windshield wipers and washer on ly work
when the ignition is turned on.
To reduce the sensit iv ity of the sensor, move
switch @down . To increase the sens itiv ity,
move the switch up. The higher you adjust the
sens itivity, the faste r th e sensor will react
when i t senses moisture on the w indshield.
The pauses between w iper t urns depend not
only on the sensitivity setting, but on the ve
hicle speed as well.
Du ring a temporary stop, e.g . at a t raff ic sig
na l, the set wipe r speed is automatically re
duced by one stage.
When the igni tion is tu rned on, the washer
jets are heated.
_& WARNING
- Wipe r blades a re cruc ial for safe driving!
Only when they are in good condition are
they able to clear the windows properly
to provide uncompromising visibility.
Worn or damaged wiper blades are a safety hazard ¢
page 55, Replacing
front wiper blades!
- The light/ra in sensor is only des igned to
assist and support the dr iver .
It remains
entirely the driver 's responsibility to
mon itor outs ide weather conditions and
to manually activate the w ipers as soon
as rain o r dri zz le red uces visibi lity
thro ugh the windshie ld.
- T he windshie ld must not be treated with
water-repe llent materials. They can in
crease glare under poor visib ility condi
tions such as wetness, darkness, or when the s
un is low on the horizon . In addi
tion, they can cause the w indshield w ip
ers to chatter .
(D Note
In freezing or near freezing conditions:
- Always check that the wiper blades are
not frozen to the g lass before you turn
the wipers on . Loosen a wiper blade
which is frozen in place before operating
the wipers to prevent damage to the
w iper blade or the wiper motor.
- Do not use the w ipers to clear a frosted
window. Us ing the wipers as a conven
ient ice scraper will destroy the wiper
blades .
- Before you take your veh icle to an auto
matic car wash, make sure you have the
w indshield w iper system switched off
(lever in position 0), otherwise the w ind
shield w iper system could get damaged
in the car wash if it should suddenly
come on .
(D Tips
-The windshie ld w ipers are switched off
when the ignit ion is turned off. Act ivate
t he winds hield wipers after the ignition
is switched back on by moving the wind
shield wiper lever to any position.
- Worn or dirty windshield wipe r blades
cause smearing, which can affect the op
eration of the light/rain sensor . Check
the cond ition of your windsh ield wiper
blades regularly.
- When the wipers are switched on man
ually and in ra in cond itions, the auto
matic headlights turn on¢
page 49 or
off during the day when the wipers are
no longer operating . The automat ic
head lights fu nction is avai lab le in this
case on ly w hen the light switch is in the
"A UTO" posit ion¢
page 49, fig. 60.
- Make su re the washer fluid reservoir is
t opped off before goi ng on a long tr ip.
Look up ¢
page 182 for checking and
filling the washe r container .