ignition AUDI R8 SPYDER 2012 Owner's Guide
[x] Cancel search | Manufacturer: AUDI, Model Year: 2012, Model line: R8 SPYDER, Model: AUDI R8 SPYDER 2012Pages: 236, PDF Size: 59.24 MB
Page 57 of 236
-If you switch off the ignition w ith the
windshield wiper lever still in the inter
val w ipe pos ition and then come back a
while later and drive off , the rain sensor
will reactivate itself after the vehicle
speed has exceeded 4 mph (6 km/h) .
Service position
It is only possible to change wiper blades if
you move the wiper arms to the service posi
tion .
In order to use the windshield wipers, the
front lid must be comp letely closed.
Mo ving w ipe r blade s to the service
position
.. When there is a r isk of frost, make s ure that
the wiper blades are no t frozen to the wind
shield .
.. Switch the ignition on .
.. Move the w iper leve r to position
0
c::> page 53, fig. 66 .
.. Press the I RESE T I button unt il the Display
type
menu appears in the Driver Informa
tion System display.
.. Using the rocker switc h and the
!R ESE T I but
ton, select the
Set > Wiper s > Front > Serv
i ce posit io n on
function . The windsh ield
wiper arms move to the service pos ition.
Moving w ipe r blade s to park po siti on
.. Make certain that the w ipe r arms are ly ing
against the w indshie ld .
.. Switch the ignition on and move the wiper
lever from position
O to 4 c::> page 53 ,
fig.
66. The wiper arms will move back to
t h e park pos ition .
(D Note
Never drive your vehicle when the wind
shie ld w iper arms are in the service pos i
tion and pulled away from the windshie ld.
When you dr ive faster than
4 mp h (6 km/
h), the w iper arms automat ica lly re turn to
t he par k position and could ca use pa int
damage to the front lid! Clear
vi
sion 55
@ Tips
- Yo u can also turn on t he service posit ion,
for example, if yo u want to protect the
w indshield from icing by using a cover.
- Th e service posit ion moves to
off a uto
matically when you operate the wind
shield wiper lever, or speed exceeds
4 mph (6 km/h).
Replacing front wiper blades
Wiper blades in good condition help keep the
windshield clear.
.-- --------..
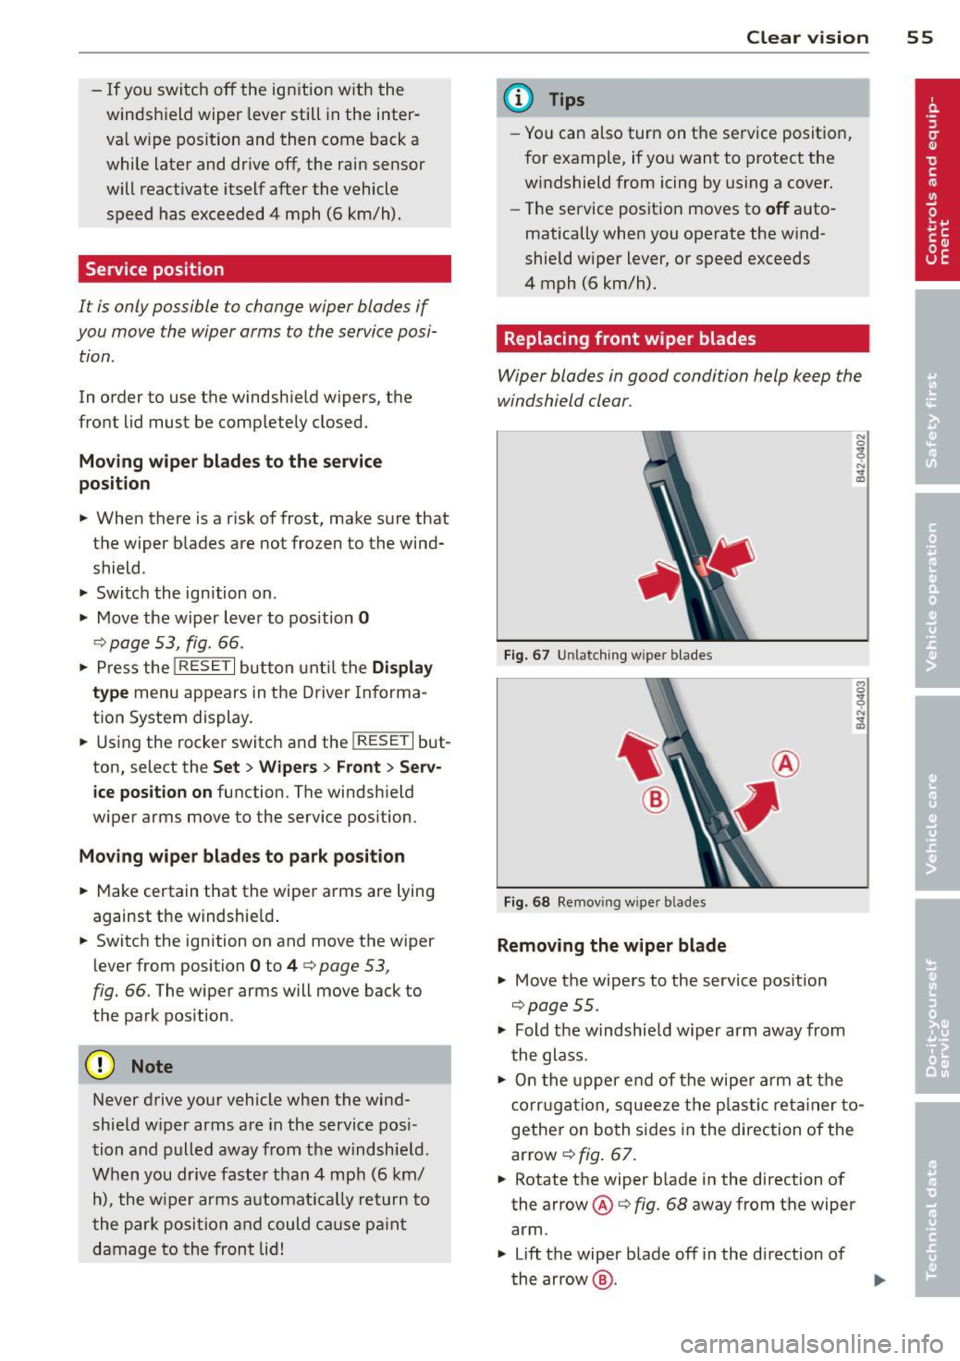
Fig. 67 Unl atching w ipe r blade s
'
@
Fig. 6 8 Remov ing w iper b lades
Removing the wiper blade
.. Move the wipers to the service pos ition
c::> pageSS .
.. Fold the w indshie ld w iper arm away from
the glass .
0
i ,:. .., m
.. On the upper end of the wiper arm at the
corr uga tion, squeeze the p lastic ret ainer to
gethe r on both s ides in the direction of the
arrow
c::> fig. 67.
.. Rotate the wiper b lade in the d irect ion of
the arrow @
c::> fig. 68 away from the wiper
arm .
.. Lift the wiper b lade off in the direction of
t he arrow @.
Page 58 of 236
56 Clear vis ion
In stall ing t he wiper blade
.,. Place the rounded end of the wiper onto the
end of the w iper arm in the
op pos ite direc
tion to the arrow @
c:::> fig. 68 .
.,. Squeeze the corrugation on the wiper until
you hear it click in the wiper arm .
.,. Fold the wiper arm back onto the wind
shield .
.,. Switch the ignition on and move the wiper
lever down briefly
c:::> page 53, fig . 66 . The
wipe r will move back to the park position.
_& WARNING
- Clean yo ur wiper blades regularly w ith a
windshield washer solution to prevent
streaking. If the wiper blades are very
dirty, for examp le with insects, carefu lly
clean the w iper blades with a sponge or a
soft brush.
- For your safety, you should replace the
wiper blades once or twice a year. See
your authorized Aud i dealer for replace
ment blades.
(D Note
- The w iper blades may only be changed
c:::> page 55 in the service position! Other
wise, you r isk damaging the paint on the
front lid or the windsh ield wiper motor .
- To prevent damage to the wiper system:
-Always loosen blades which a re fro zen
to the windshield before operating
w ipers.
- Do not use gasoline, kerosene, paint
t hinner, or o ther solvents on or near
the wipe r blades .
- Do not attempt to move the wipers by
hand.
{D) Tips
The front wiper blades are different
lengths; the blade o n the dr ive r's side is
longer.
Mirrors
Dimming the mirrors
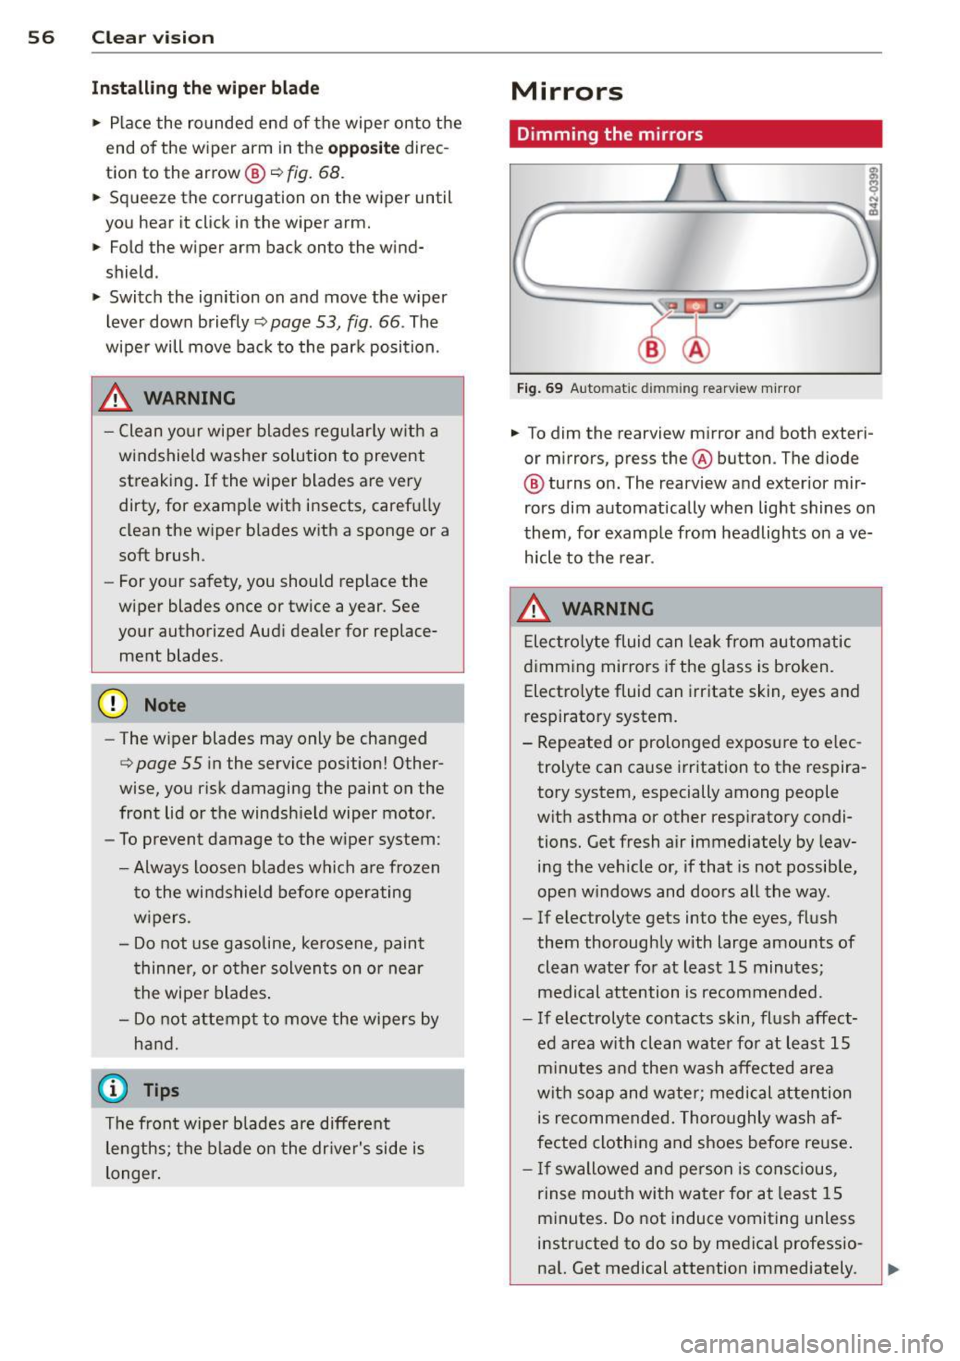
Fig . 69 Auto matic dimming rearview m irro r
.,. To dim the rearview mirror and both exteri
or m irrors, press the@ button . The diode
@ turns on. The rearview and exterior mir
rors dim automatically when light shines on
them, for example from headlights on ave
h icle to the rear .
_& WARNING
-
Elec tro lyte fluid can lea k from automatic
dimming mirrors i f the glass is b roken.
Electro lyte fluid can irritate skin, eyes and
respiratory system.
- Repeated or prolonged exposure to e lec
trolyte can cause i rr itation to the respira
tory system , especially among people
with asthma or other respiratory condi
tions. Get fresh air immediately by leav
ing the vehicle or, if that is not possib le,
open w indows and doors all the way .
- If electrolyte gets into the eyes, flus h
them thoroughly with large amou nts
of
clean water for at least 15 minutes;
medical attention is recommended.
- If electrolyte contacts skin, fl ush affect
ed area with clean wate r fo r at least 15
minutes and then wash affe cted area
wit h soap and wate r; medical attention
is recommended. Thoro ughly wash af
fected clothing and shoes before reuse .
- If swallowed and person is consc ious,
rinse mouth with water for at least 15
minutes . Do not induce vomiting unless
instructed to do so by medical professio na l. Get medical attention immediately.
Page 63 of 236
you do this while the vehicle is moving,
you will be out of position. Always adjust the driver's or front passenger seat when
the vehicle is not moving .
- Be careful when adjusting the seat
height. Check to see that no one is in the
way, or serious injury could result!
- Because the seats can be electrically ad
justed with the ignition key removed,
never leave children unattended in the
vehicle . Unsupervised use of the e lectr ic
seat adjustments may cause serious in
jury .
- To reduce the risk of injury in the case of
sudden braking or accident, front pas
sengers must neve r ride in a moving ve
hicle with the seatback reclined. Safety
belts and the airbag system offer maxi
mum protection on ly when the seatback
is upright and the safety belts are prop
erly posit ioned on the body. The more
the seatback is reclined, the greater the risk of personal injury from an incorrect
seating posit ion and improperly posi
tioned safety belts!
- Always make sure the front seatbacks are
in the upright position when dr iv ing .
Head restraints
Adjusting head restraints
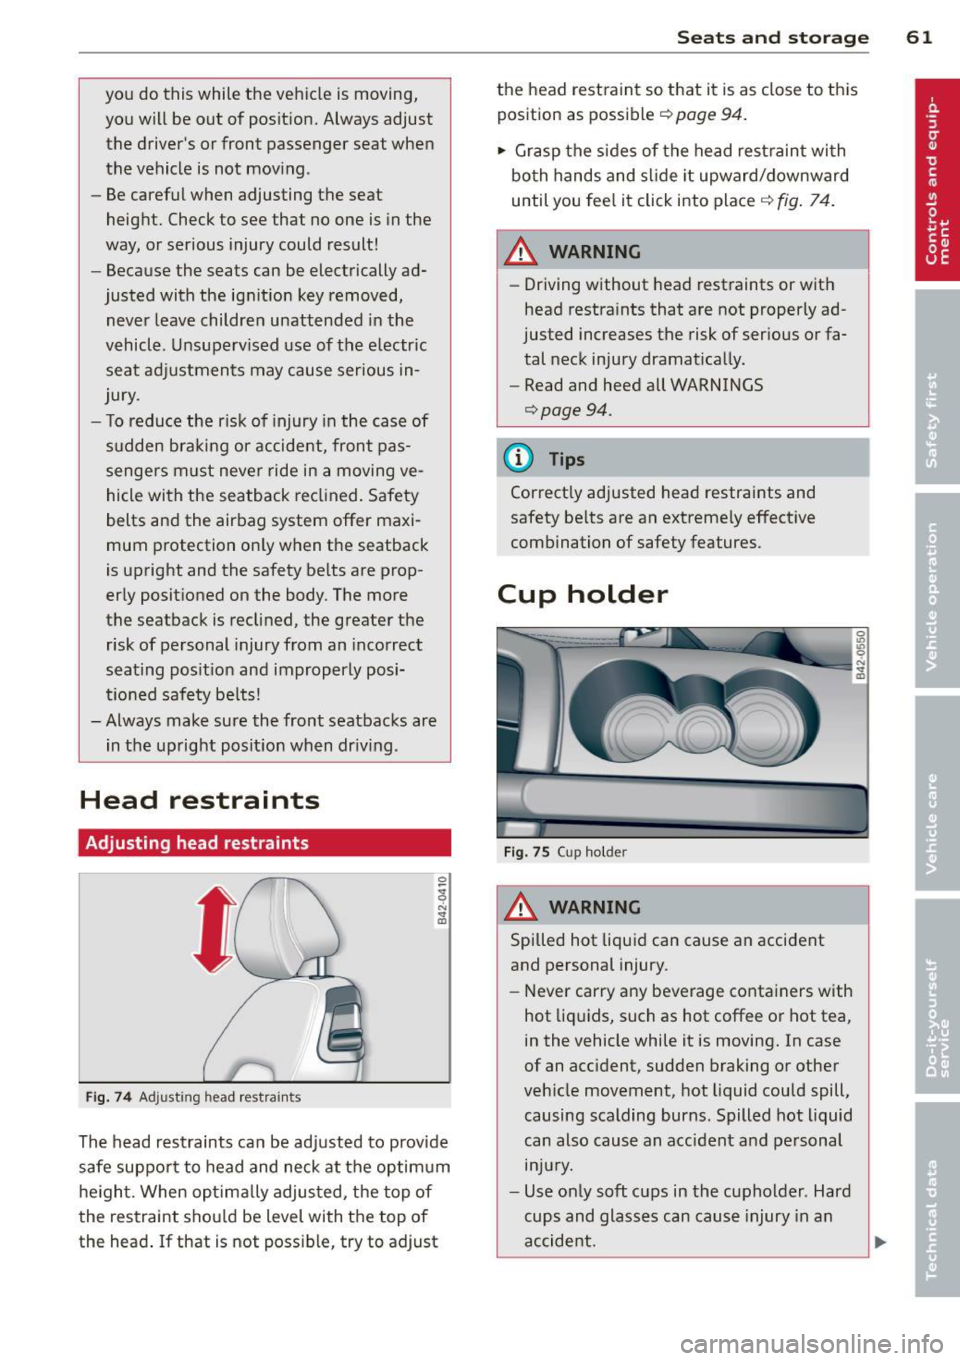
Fig. 7 4 Adjusting head restra ints
The head restraints can be adjusted to provide
safe support to head and neck at the optimum
h e ight. When optimally adjusted, the top of
the restraint shou ld be level with the top of
the head . If that is not possible, try to adjust
S ea ts a nd s to rage 61
the head restraint so that it is as close to this
position as possible¢
page 94.
1-Grasp the sides of the head restraint with
both hands and slide it upward/downward
until you fee l it click into place
¢ fig . 74.
& WARNING ~ -
-Driving without head restraints or with
head restra ints that are not properly ad
justed increases the risk of ser ious or fa
tal neck injury dramat ically.
- Read and heed all WARNINGS
¢page 94.
@ Tips
Correct ly adjusted head restraints and
safety be lts are an extreme ly effective
combination of safety features.
Cup holder
F ig. 75 Cup holder
A WARNING
0 U)
~ ., a,
-
Spilled hot liquid can cause an accident
and personal injury.
- Never carry any beverage containers with
hot liq uids, such as hot coffee or hot tea,
in the vehicle while it is moving. In case
of an acc ident, sudden braking or other
veh icle movement, hot liquid could spill,
causing scalding burns. Spilled hot liquid
can also cause an accident and personal
lnJU ry.
- Use only soft cups in the cupholder . Hard
cups and glasses can cause injury in an
accident.
Page 65 of 236
could slide around inside the vehicle
wh ile driving or when accelerating or
when applying the brakes or when driv
ing around a corner .
- When you are driving make sure that
anything you may have placed in the cen
ter console or other storage locations cannot fa ll out into the footwells . In case
of sudden braking you would not be able
to brake, depress the clutch or acceler
ate.
Glove compartment
The glove compartment is illuminated and
can be locked.
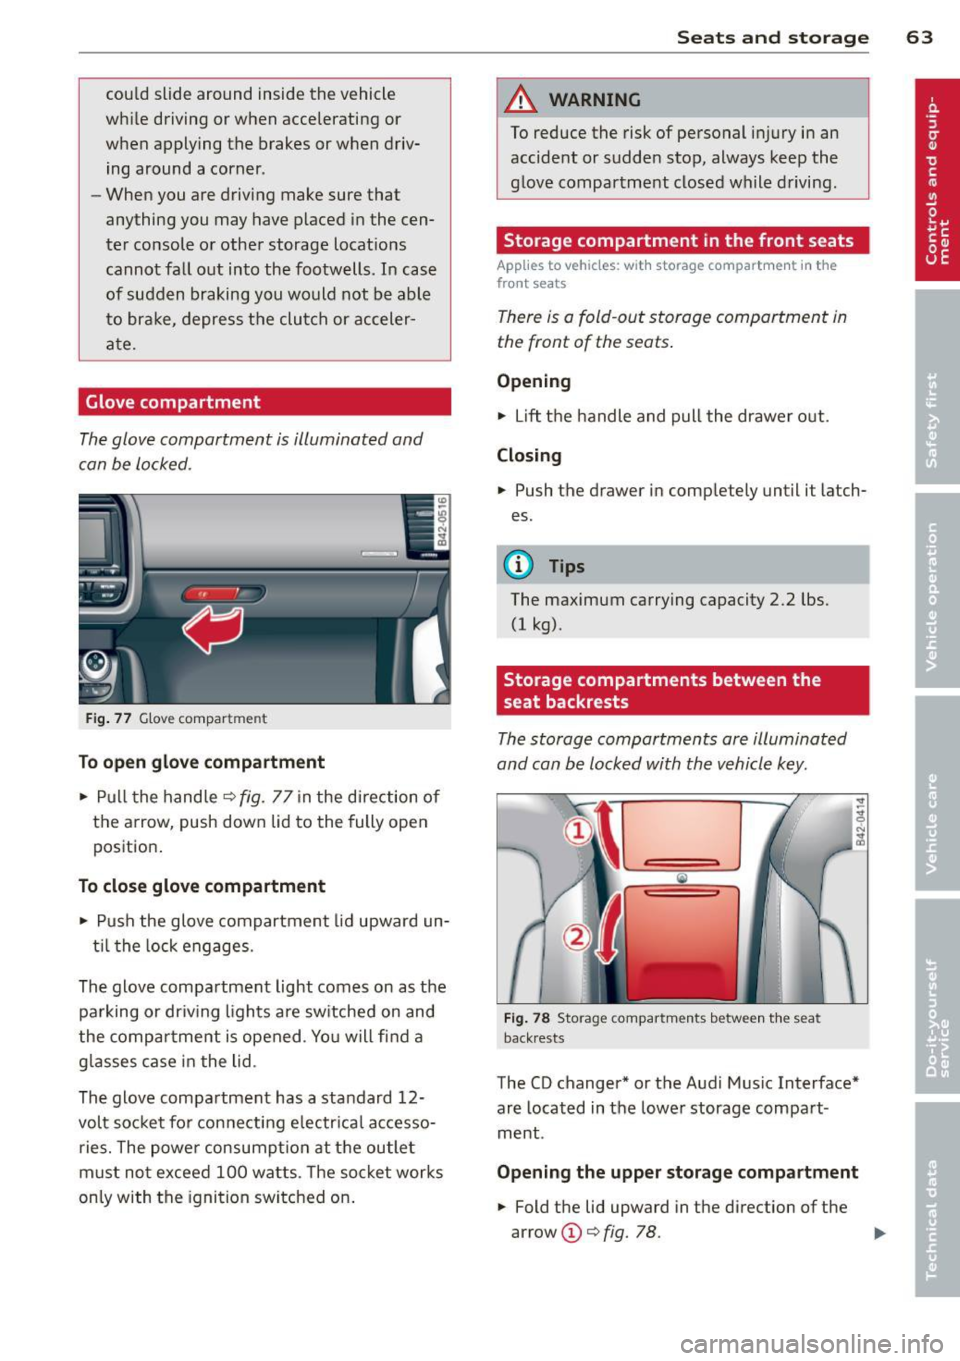
F ig . 77 G love compar tmen t
To op en glove compa rtm ent
... Pull the hand le ¢ fig . 77 in the direction of
the arrow, push down lid to the fully open
position.
To close glove compartm ent
.., Push the glove compartment lid upward un-
t il the lock engages.
The glove compartment light comes on as the parking or dr iving lights are sw itched on and
the compartment is opened . Yo u will find a
g lasses case in the lid .
The glove compartment has a standard 12-
volt socket for con necting e lectrica l accesso
ries. The powe r consumpt ion at the outlet
must not exceed 100 watts. The socket works
on ly with the ignition switched on .
Sea ts a nd s to rage 63
A WARNING
To reduce the risk of personal injury in an
accident or sudden stop, always keep the
glove compartment closed while driving.
Storage compartment in the front seats
Applies to vehicles: with storage compartment in the
front seats
There is a fold -out storage compartment in
the front of the seats .
Opening
.., Lift the handle and pull the drawer out.
Closing
... Push the drawer in completely until it latch
es.
(!) Tips
The maximum carrying capacity 2 .2 lbs.
(1 kg).
Storage compartments between the
seat backrests
The storage compartments are illuminated
and can be locked with the vehicle key.
F ig . 78 Storage compar tm ents betw een th e sea t
back rests
The CD changer* or the Audi Music Interface*
are located in the lower storage compart
ment .
Opening the upper storage compartment
... Fold the lid upward in the direction of the
arrow @¢
fig. 78. ..,_
Page 72 of 236
70 On the road
On the road
Steering
Adjusting the steering wheel column
The steering wheel position can be continu
ously adjusted in height and distance .
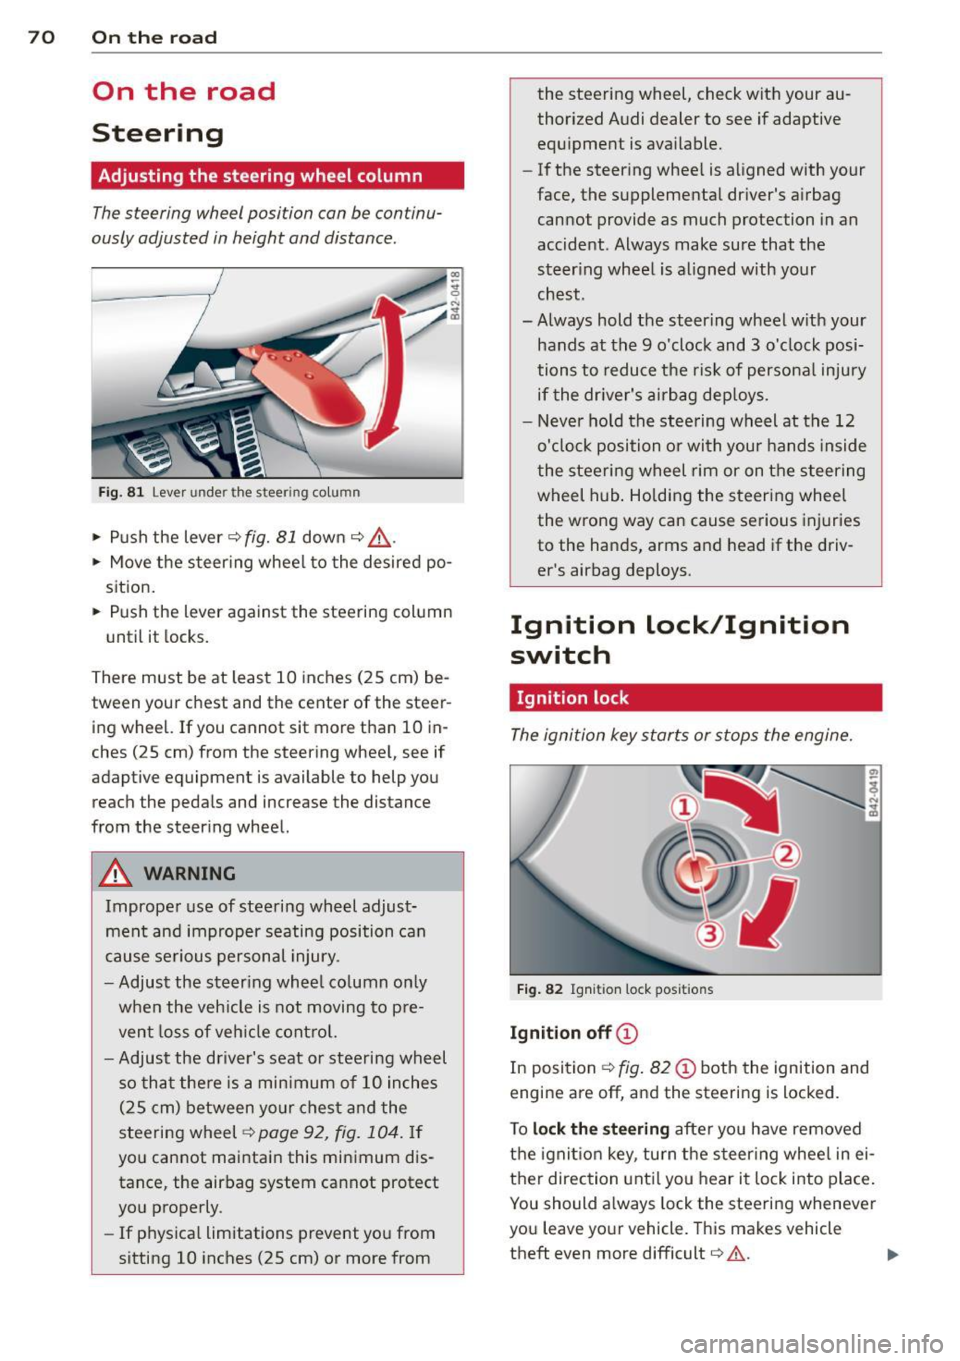
Fig. 81 Lever under the steering column
~ Push the lever¢ fig. 81 down ¢ .&_.
~ Move the s teer ing whee l to the desired po
sition.
~ Push the lever against the steering column
until it locks.
There must be at least 10 inches (25 cm) be
tween your chest and the center of the steer
ing wheel. If you cannot sit more than 10 in
ches (25 cm) from the steering wheel, see if
adaptive equipment is available to help you
reach the pedals and increase the distance
from the steer ing wheel.
A WARNING
Improper use of steering wheel adjust
ment and improper seating position can
cause serious personal injury.
- Adjust the steer ing whee l co lumn only
when the vehicle is not moving to pre
vent loss of veh icle control.
-
- Adjust the dr iver's seat or steering wheel
so that there is a minimum of 10 inches
(25 cm) between your chest and the
steering wheel ¢
page 92, fig. 104. If
you cannot maintain this minimum dis
tance, the airbag system cannot protect
you properly .
- If physical limitations prevent you from
sitting 10 inches (25 cm) or more from the steering wheel, check with your au
thorized Audi dealer to see if adaptive
equipment is
available.
- If the steer ing whee l is aligned with your
face, the supplemental dr iver's a irbag
cannot provide as much protection in an
accident . Always make sure that the
steer ing whee l is al igned with your
chest.
- Always hold the steering wheel w ith your
hands at the 9 o'clock and 3 o'clock posi
tions to reduce the risk of personal injury if the dr iver's airbag dep loys.
- Never hold the steering wheel at the 12
o'clock position or with you r hands inside
the steering wheel rim or on the steering
wheel hub . Ho lding the steering wheel
the wrong way can cause serious injuries
to the hands, arms and head if the driv
er's airbag deploys.
Ignition lock/Ignition
switch
Ignition lock
The ignition key starts or stops the engine.
Fig . 82 Ignit ion lock positions
Ig niti on off ©
In position ¢ fig. 82 (D both the ignition and
engine are
off, and the steering is locked .
T o
loc k t he steerin g after you have removed
the ignition key, turn the steering wheel in ei
ther direction unt il you hear it lock into place.
You should a lways lock the steering whenever
you leave your vehicle. This makes vehicle
theft even more difficult¢&. .
Page 73 of 236
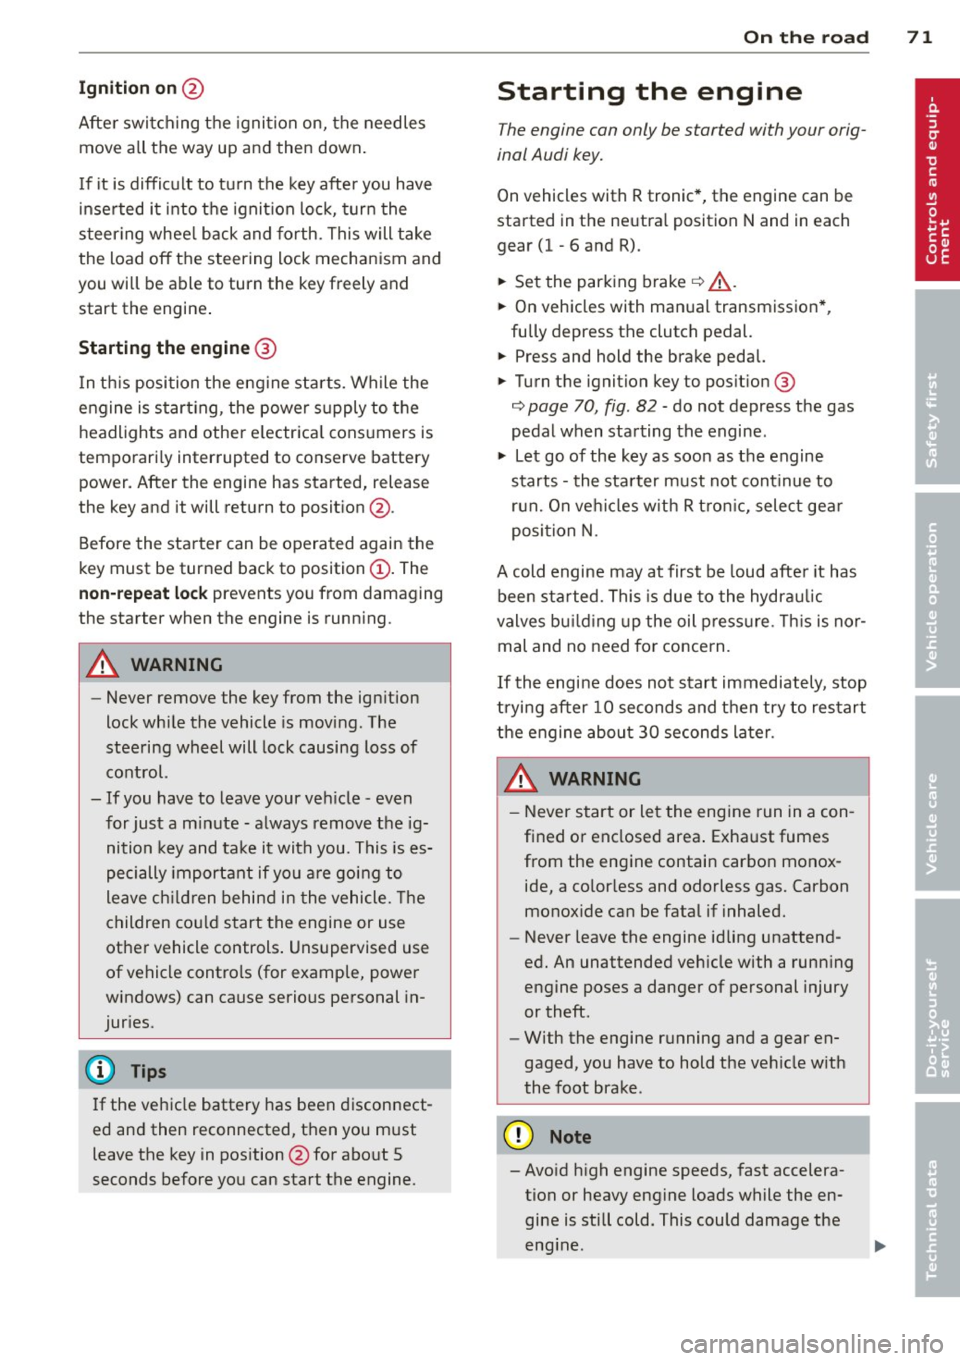
Ignition on @
Afte r switch ing the ignition on, the needles
move all the way up and then down .
I f it is difficult to turn the key afte r you have
i nse rted it into the ignit ion lo ck, tur n the
steer ing whee l back and forth. This will take
the load off the steering lock mechanism and
you will be able to turn the key freely and start the engine .
Starting the engin e@
In th is position the engine starts. While the
engine is start ing, the power s upply to the
headlights and other e lectrica l consumers is
temporari ly interrupted to conserve battery
pow er. Aft er the engine has started, release
the key and it will return to posit ion @.
Before the starter can be operated again the
key must be turned back to position@. The
non -repe at lock prevents you from damaging
the starter when the engine is runn ing .
A WARNING
-Never remove the key from the ign ition
lock whi le the vehicle is moving. The
steering wheel will lock causing loss of control.
- If you have to leave your veh icle -even
for just a m in ute - always remove the ig
nition key and take it with you. This is es
pecially important if you a re going to
leave c hildren behind in the vehicle. The
children co uld start the engine or use
other vehicle controls . Unsupervised use
of vehicle controls (for example, power
windows) can cause serious personal in
jur ies .
If the vehicle battery has been disconnect
ed and then reconnected, then you m ust
leave the key in pos ition @for abo ut 5
seconds before you can start the engine.
On th e ro ad 71
Starting the engine
The engine can only be started with your orig
inal Audi key.
On vehicles with R tronic *, the engine can be
start ed in the ne utra l position N and in each
gea r (1 - 6 and R).
.. Set the park ing brake ¢,&. .
.. On vehicles with man ua l transmission *,
fu lly depress the clutch pedal.
.. Press and hold the brake pedal.
.. Turn the ignition key to pos it ion ®
¢ page 70, fig. 82 - do not depress the gas
pedal when starting the engine .
.. Let go of the key as soon as the engine
starts - the sta rter must not cont inue to
r u n. On ve hicles w ith R t ro ni c, selec t gea r
posi tion N .
A cold engine may at first be loud afte r it has
been sta rted. This is due to the hydraulic
valves bu ild ing up the oil press ure . Thi s is nor
mal and no need for concern.
If the engine does not start immediately, stop
tryi ng after 10 seconds and then try to restart
the engine abou t 30 seconds later.
A WARNING
- Never start or let the eng ine run in a con
fined or enclosed area . Exha ust fumes
from the engine contain carbon monox
ide, a co lor less and odorless gas. Carbon
mo nox ide ca n be fatal if inhaled.
- Never leave the engine idling unattend
ed. An unattended veh icle with a runn ing
engine poses a danger of personal injury
or theft .
- With the engine r unning and a gear en
gaged, you have to hold the veh icle w ith
the foot brake .
(D Note
- Avoid h igh engine speeds, fast accelera
tion or heavy engine loads while the en
gine is still cold. This could damage the
eng ine .
Page 74 of 236
7 2 On the road
-The eng ine cann ot be started by pushing
or towing the vehicle.
@ For the sake of the env ironment
To avo id unnecessary engine wea r and to
red uce exhaust emissions, do not let your
vehicle stand and warm up . Be ready to
drive off immediately after starting your
veh icle.
Stopping the engine
On vehicles with R tronic*, the engine can be
turned off in the neutral position N and in
each gear (1 -6 and R).
.,. Turn the ign ition key to position ©
¢ page 70, fig. 82.
A WARNING
-Never turn off the eng ine unti l the vehi
cle has come to a complete stop.
- The brake booster and servotronic on ly
work when the engine is running. With
the ignition turned off, you have to apply
more force when stee ring or braking.
S ince you cannot steer and stop no rma l
ly, this can lead t o acciden ts and ser io us
injuries.
- If the engine has bee n under heavy load
fo r an ext ended period of time, heat
builds up i n the engi ne compa rtme nt af
ter the eng ine is sw itched off -there is a
risk of damaging the engine . Allow the
engine to continue to run at idle for a
sho rt time or drive until it has cooled
down before you turn it off¢
page 151.
- If the engine has been under heavy load
for an extended pe riod of time, it can be
come extreme ly hot. You should not park
your vehicle over easily combustible ob
j ects o r areas (e.g. g rass or leaves). There
i s a r isk of start ing a f ire.
(D Tips
After the engine has been switched off, the
radiator fan can continue to run for up to
10 minutes -even with the ignition switch
ed off. It can also sw itch on again after
some time if the coolant tempe rature rises
as the result of heat b uild up or if the en
g ine compartment is heated by the sun 's
r ays and the eng ine is hot.
Parking brake
Parking brake
When the parking brake is set, it prevents the
vehicle from rolling away unintentionally .
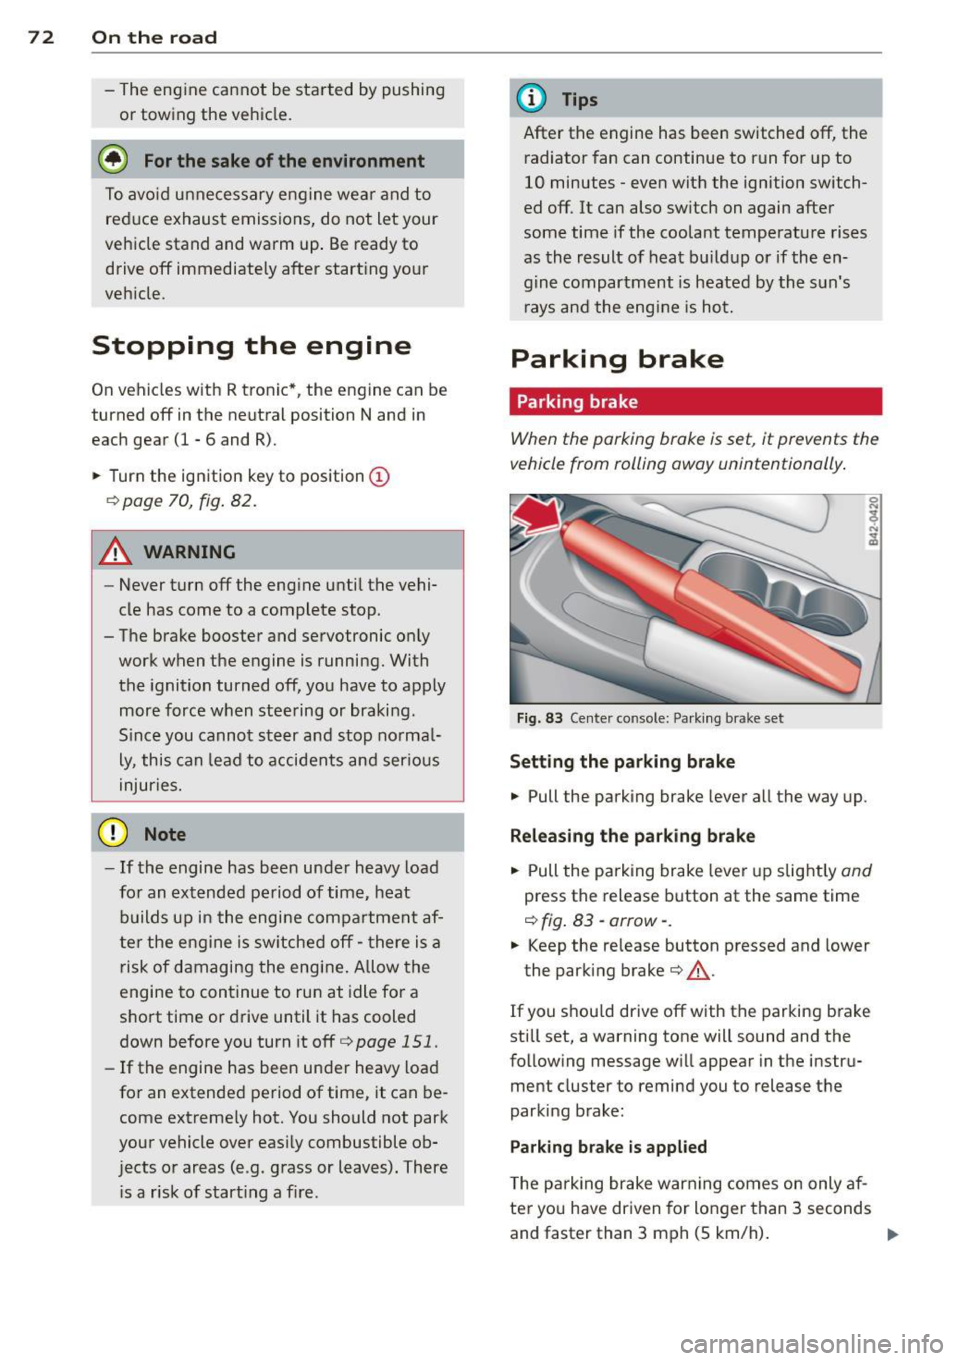
Fig. 83 Center console: Pa rk in g brake set
Setting the parking brake
.,. Pull the parking brake lever a ll the way up.
Releasing the park ing brake
.,. Pull the pa rking brake lever up slight ly and
press the release button at the same time
¢ fig . 83 -arrow- .
.,. Keep the release button pressed and lower
the parking brake¢&_.
If you s hou ld drive off with the parking b rake
st ill set, a warning tone will sound and the
following message wi ll appear in the instru
ment cluster to remind you to release the
parking brake:
Parking brake is applied
T he p arking brake war ning comes on only af
ter yo u have dr iven for longer than 3 seconds
and faster than 3 mph (5 km/h) . .,.
Page 75 of 236
The parking brake warning light_
(USA)/ . (CON) ill uminates when the parking
brake is set and you switch on the ignition .
A WARNING
-
Always release the parking brake com
pletely. A partially engaged brake will
overheat the rear brakes, reduce the ir ef
fectiveness and cause excess ive wear. This
cou ld lead to brake failure and an accident .
(D Note
Only after the ve hicle has come to com
plete stop, should you f irm ly set the park
ing brake and move the gearsh ift lever into
a gear .
Parking
To prevent a parked vehicle from rolling
away, there are a few things you should do.
.,. Stop the vehicle using the brake pedal.
.,. Set the parking brake firmly .
.,. Switc h off the engine .
" Engage a gear
~ &.-
What else you should do when parking
your v ehicle on an incline or decline
T u rn the steering wheel so that if the vehicle
should sta rt to ro ll, it will roll into the curb .
A WARNING
This is how yo u can reduce the risk of in
jury when le aving your veh icle.
- Never par k the vehicle whe re it ca n come
in contac t wi th dry grass, s pilled f uel or
any other flammable mater ials .
- Neve r allow anyone - especially small
ch ildren - to rem ain in the vehicle whe n
it is locked. Locked doors ma ke it mo re
difficult for rescuers to access the pas
senger compartment in the event of an
emergency. Danger to life!
- Never leave c hildren unsupervised in the
vehicle. Children co uld re lease the park
ing brake or move the gea rshift lever out
-
On th e ro ad 73
of gear . The vehicle cou ld sta rt to ro ll
away and cause an acc ident.
- No matte r what the season is, the tem
peratu re in a parked veh icle can reach
dangerous leve ls .
Starting on hills
App lies to vehicles : wit h hill ho ld assist
Hill ho ld assist makes it eas ier to start on
hills .
The system is activated when the brake peda l
is depressed
for a few seconds .
After releasing the brake pedal, the brake
power is held for a
brief moment to prevent
the ve hicle from rolling back when starting .
D uring this t ime, you can easily begin to move
your vehicle.
A WARNING
- If you did not begin moving immed iate ly
after rel easing the brake pedal, the vehi
cle could b eg in to roll bac kward unde r
cer ta in c ircu mstances . Dep ress the brake
pe dal imme diate ly or eng age the p arking
bra ke.
- If the engine sta lls, de pre ss the bra ke
pe dal imme diate ly or engage the pa rking
brake .
- T o prevent the vehicle from ro lling b ack
un intent iona lly when st arting in stop
an d-go tra ffic, keep the brake pedal de
pressed for a few seconds before d riving
off.
(D Tips
You can find o ut if yo ur vehicle is eq uipped
wi th "hi ll hol d assist" at an a uthorized Au
di dealer.
Page 79 of 236
Transmission Manual transmission
Gearshift lever
App lies to vehicles: with manual transmission
The clutch pedal must be depressed all the
way before you can start the engine.
T he manual transmission in your Audi is
equipped with an
interlock-feature.
• Depress the clutch pedal all the way.
• Start the engine with the gearshift lever in
Neutral and the clutch pedal depressed.
(D Note
Always depress the clutch pedal fully when
changing gears . Do not hold the vehicle on
a hill with the clutch pedal partially de
pressed. This may cause premature clutch
wear or damage .
@ Tips
- Resting your hand on the gearshift lever
knob while driving will cause premature
wear in the transmission.
- The back-up lights go on when you sh ift
into Reverse w ith the ignition on.
Gearshift pattern (6-speed manual
transmission)
Applies to vehicles: with 6-speed manual transmission
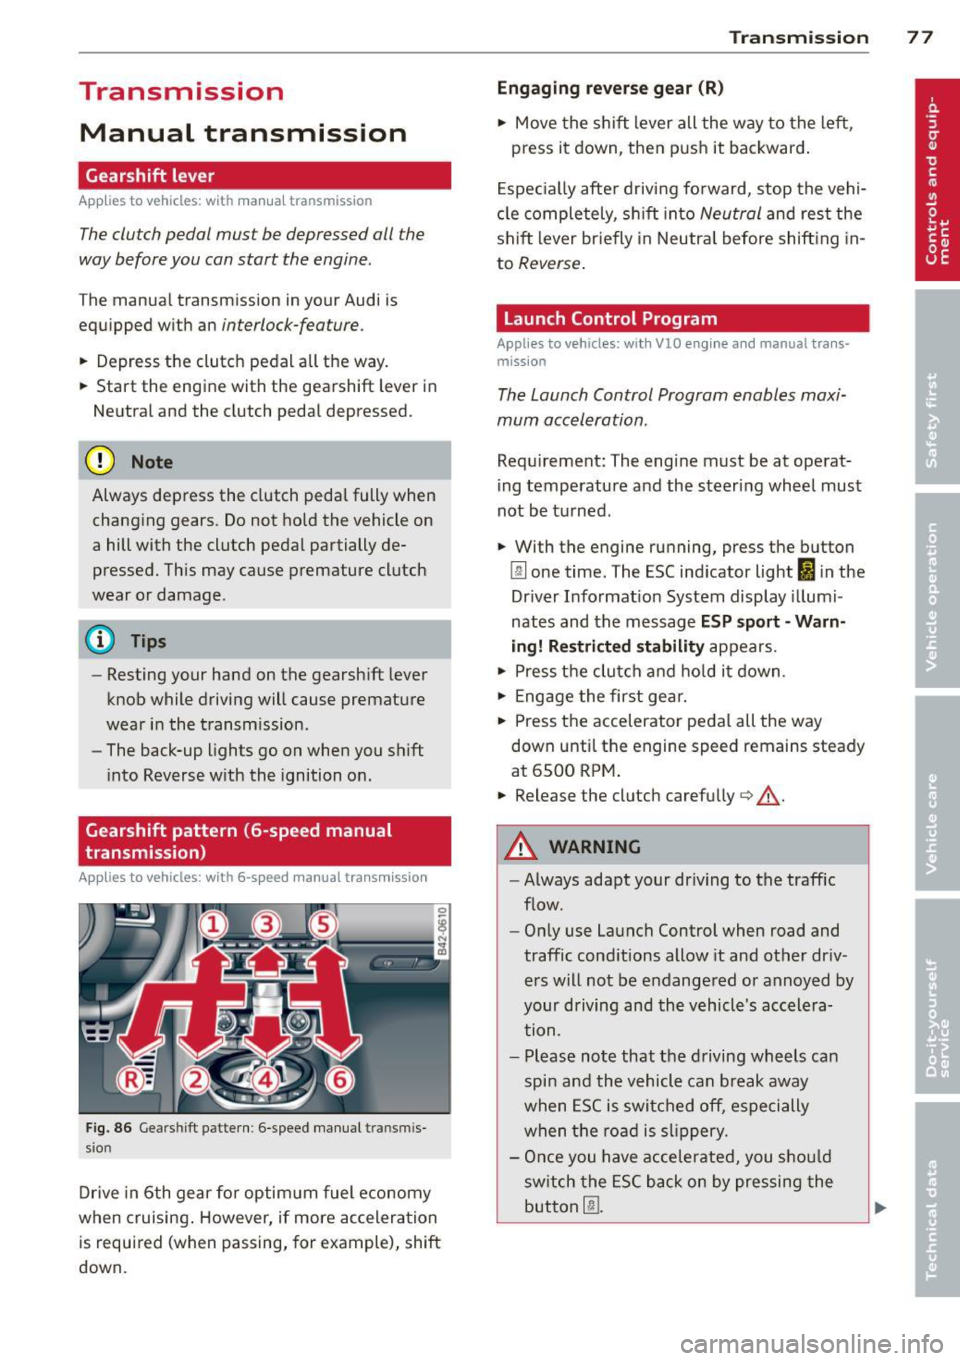
Fig. 86 Gearshift pattern : 6 -speed manual tran smi s
sio n
Drive in 6th gear for optim um fuel economy
when cruising . However, if more acceleration
is required (when passing, for example), shift
down.
Transmission 77
Engaging reverse gear (R)
• Move the shift lever all the way to the left,
press it down, then push it backward.
Especially after driving forward, stop the vehi
cle completely, sh ift into
Neutral and rest the
shift lever br iefly in Neutra l before shift ing in
to
Reverse .
Launch Control Program
Applies to vehicles: with VlO eng ine and manual t ra ns·
miss ion
The Launch Control Program enables maxi
mum acceleration .
Requirement: The engine must be at operat
ing temperature and the steering wheel must
not be turned .
• With the engine running, press the button
Im one time. The ESC indicator light 1B in the
Driver Informat ion System display illumi
nates and the message
ESP sport - Warn
ing! Restricted stability
appears.
• Press the clutch and hold it down.
• Engage the first gear.
• Press the accelerator pedal all the way
down until the engine speed remains steady
at 6500 RPM .
• Release the clutch carefu lly <=> .& ..
A WARNING
- Always adapt your dr iving to the traffic
flow.
- Only use Launch Control when road and
traffic conditions allow it and other dr iv
ers will not be endangered or annoyed by
your driving and the vehicle's accelera
tion.
- Please note that the driving wheels can
spin and the vehicle can break away
when ESC is switched off, especially
when the road is slippery.
- Once you have accelerated, you sho uld
sw itch the ESC back on by pressing the
button
[fil .
Page 81 of 236
even if the parking brake is firmly ap
plied.
- Before you or other persons open the en
gine compartment lid and work on a r un
ning eng ine, se lect neutral position
N
and firmly apply the handbrake. Follow
the warning notes .
(D Tips
If you accidentally sh ifted into N whi le
driving, you can engage a gear in the nor
mal way using the selector lever.
Manual operation
App lies to vehicles: with R tron ic
R tronic allows the driver to shift gears man
ually.
Starting from a stop
.. Press and ho ld the brake pedal.
.. Move the selector lever to the left.
.. Tap the se lector lever forward
0 -
.. Re lease the brake pedal and acce lerate
c> _& .
Shifting
.. To shift up, tap the selector lever fo rward
0 -
.. To shift down, tap the selector lever to the
rear
0 .
Stopp ing temporarily
.,. Prevent the ve hicl e from mov ing by using
the foot brake, e.g. at t raffic signa ls.
.. Do not accelerate.
If you do not press either
the brake peda l or the acce lerator pedal for
some time when stat ionary, neutral position
N is engaged automatically and a ch ime
sounds.
P a rking
.. Press and ho ld the brake pedal¢_& .
.. Apply the hand brake f irm ly.
.. Engage a gear.
.. Switc h the ignition
off .
Tran sm iss ion 79
Stopping on an incline
.. Always keep t he veh icle s tat io nary using
the foot brake to prevent it from "rolling
back" ¢_& . D o
not try to p revent the vehi
cle from "rolling back" when a gear is en
gaged by increasing engine speed.
.. App ly the hand brake firmly.
Sta rting on a hill
.. With a gear engaged, remove your foot
from the brake, acce lerate and slowly re
lease the hand brake .
When accelera ting, R tronic shifts into the
next gear i n gea rs 1, 2, 3, 4 and 5 short ly be
fore the maxim um permissible engine speed
is reached. Exception: You have activated the
sport funct ion ¢
page 78.
If you have se lected a lower gear tha n the c ur
rent one, R tro nic wi ll shift down only when
the engine will not be over-revved .
You can swi tch to a utomat ic operation at any
time
c> page 80 .
_& WARNING
- Never leave your vehicle with the engine
r u nning while in gear . If you must leave
your veh icle w ith the engine r unning, set
the park ing brake fi rm ly and engage neu
tral N.
- With the engine r unning and a gear en
gaged, you have to hold the ve hicle w ith
the foot brake .
- Do not accelerate when you s hift gears
wit h the vehicle stationary and the en
g ine runni ng .
- Before dr iving dow n a steep slope, re
duce your sp eed and shift i nto a lowe r
gea r with R tronic.
- Do not ride the brakes or apply the bra ke
pedal too ofte n or too long . Constant
b ra ki ng c auses the brakes to ove rheat
a nd substantially redu ce s bra king per
form ance, in cre ases br aking d ist ance or
causes complete fa il ur e of the brake sys
tem .