stop start AUDI S3 2015 Owners Manual
[x] Cancel search | Manufacturer: AUDI, Model Year: 2015, Model line: S3, Model: AUDI S3 2015Pages: 310, PDF Size: 76.15 MB
Page 4 of 310
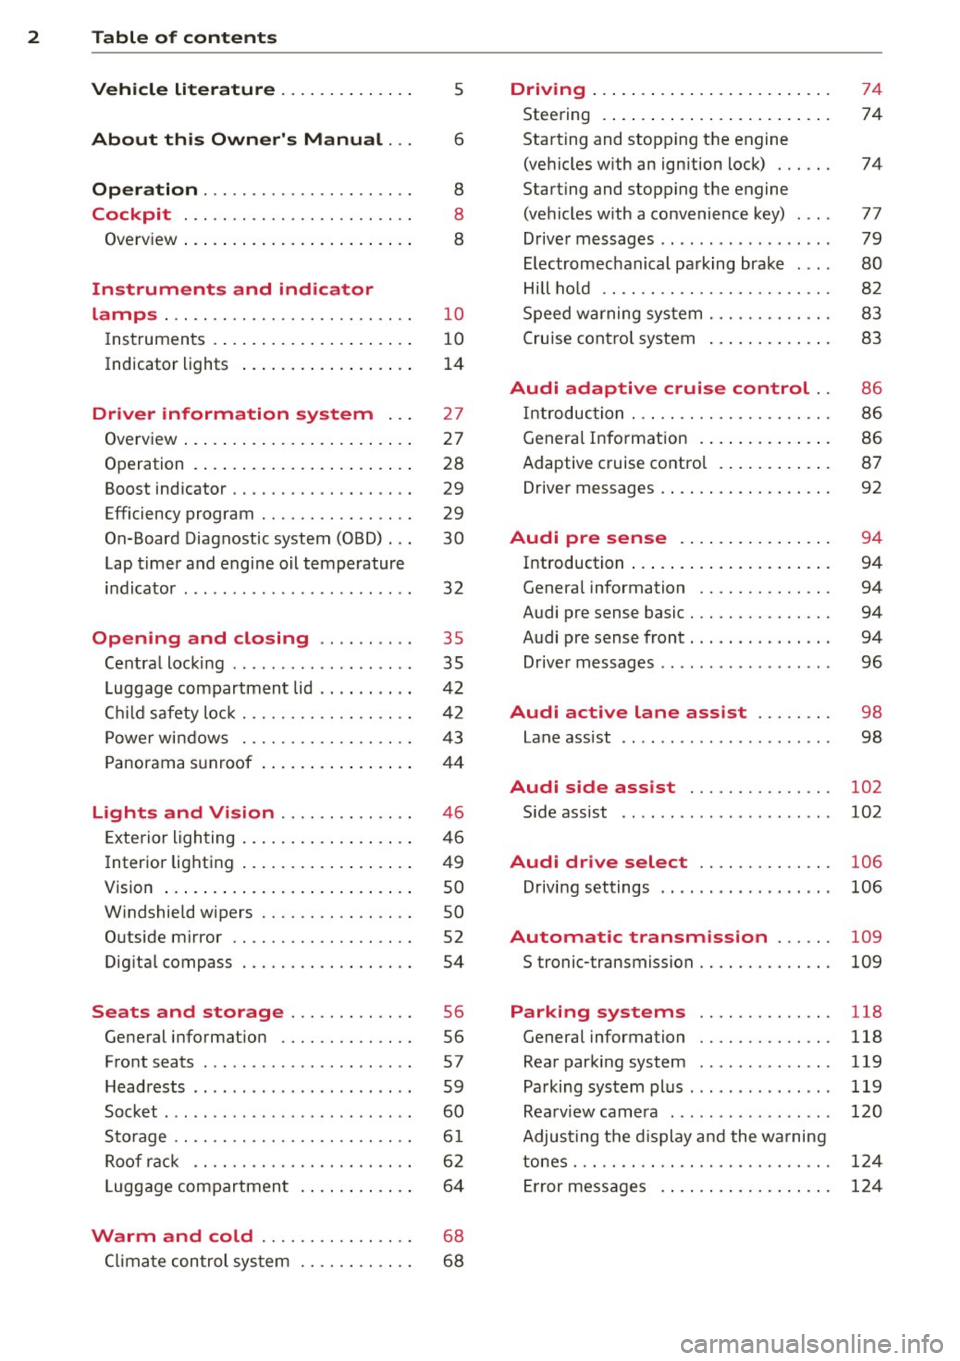
2 Table of contents Vehicle literature .. .. .. .. .. ... .
About this Owner's Manual ...
Operation .............. .... ... .
Cockpit ... ............. .... .. . .
Ove rv iew ... ... .. ..... ... .. .. ... .
Instruments and indicator
lamps ..... ............. .. .. .. . .
Ins truments . .. .. ..... ... .. .. ... .
Indicator lights ....... ... .. .. ... .
Driver information system .. .
Overview ... ... .. ..... ... .. .. ... .
Operation . .... .. ..... ... .. .. ... .
Boost indicator ........... .... ... .
Efficiency program ........ .. .. .. . .
On-Board Diagnostic system (OBD) . . .
Lap timer and engine oil temperature
indicator ............. ........ .. .
Opening and closing .. .. .. .. . .
Ce ntra l locking ................ .. .
L uggage compartmen t lid ... ... .. . .
C hil d safety lo ck ........ .. .. .. .. . .
P owe r wi ndows .......... .. .. .. . .
5
6
8
8
8
10
1 0
1 4
27
2 7
28
29
29
30
32
35
35
4 2
42
43
P anorama s unroof . . . . . . . . . . . . . . . . 4 4
Lights and Vision ............. .
Exte rior ligh ting ....... ... .. .. ... .
I nter ior light ing .. ..... ... .. .. ... .
V1s 1on ..... ... .. ..... ... .. .. ... .
W indshie ld wipers ........ .. .. ... .
O utside mirror ............... ... .
Dig ita l compass .......... .... ... .
Seats and storage ....... .. ... .
General i nformat ion ............. .
F ront seats ........... .... .... .. .
H eadrests .. ................ ... . .
Socket ... .. ... .... ...... .. .. .. . .
S to rage .... ... .......... .. .. .. . .
Ro of r ack .. ............. ....... .
L uggage compartmen t .. .. .. .. .. . .
46
46
4 9
so
so
52
54
56
56
57
59
60
6 1
6 2
6 4
Warm and cold . . . . . . . . . . . . . . . . 68
C lima te control sys tem . . . . . . . . . . . .
6 8
Driving ... .... .. ... .. ..... .... . .
Stee ring .. .... .. .. ... ..... ... .. .
Starting and stopp ing t he engine
(ve hicles with an ign ition lock) ... .. .
Starting and stopp ing th e engine
(ve hicles w ith a convenience key) ... .
Drive r m essages .. ... .. ....... ... .
El ectromechanical pa rking brak e ... .
Hill ho ld .. .. .. . .............. .. .
S peed w arning system .......... .. .
C ruise con tro l system .. ..... ... .. . 74
74
74
77
79
80
82
83
8 3
Audi adaptive cruise control .. 86
In troduc tion ..... ............... .
Genera l Info rmation . .. ..... ... .. .
Adaptive cruise contro l ...... .... . .
Drive r messages . .... .. ..... ... .. .
Audi pre sense .. .... .... ... .. .
Introduction ..... ... .. ..... .... . .
Genera l information ........... .. .
Audi pre sense basic .............. .
Audi pre sense front .............. .
Driver messages ................. .
Audi active lane ass ist ..... .. .
Lane assist .. .. ............ ..... . 86
8
6
87
92
94
94
94
94
94
96
98
98
Audi side assist . . . . . . . . . . . . . . . 102
Side assist ...... ............... .
Audi drive select ............. .
Driving settings ................. .
Automatic transmission ..... .
S tronic-transmiss ion ........... .. .
Parking systems
General information ........... .. .
Rea r parki ng system ............. .
Pa rking sys tem plus .............. .
Rea rv iew camera .... .. ....... ... .
Adju sting t he d isplay a nd the wa rning
tones . .... .... ................. .
Er ror messages . ... ... ..... ... .. .
102
106
106
109
109
118
118
119
119
120
124
124
Page 11 of 310
M N
0 > co ...... \!) ..,.,
M ..,., ......
CD
@
®
©
®
®
(J)
®
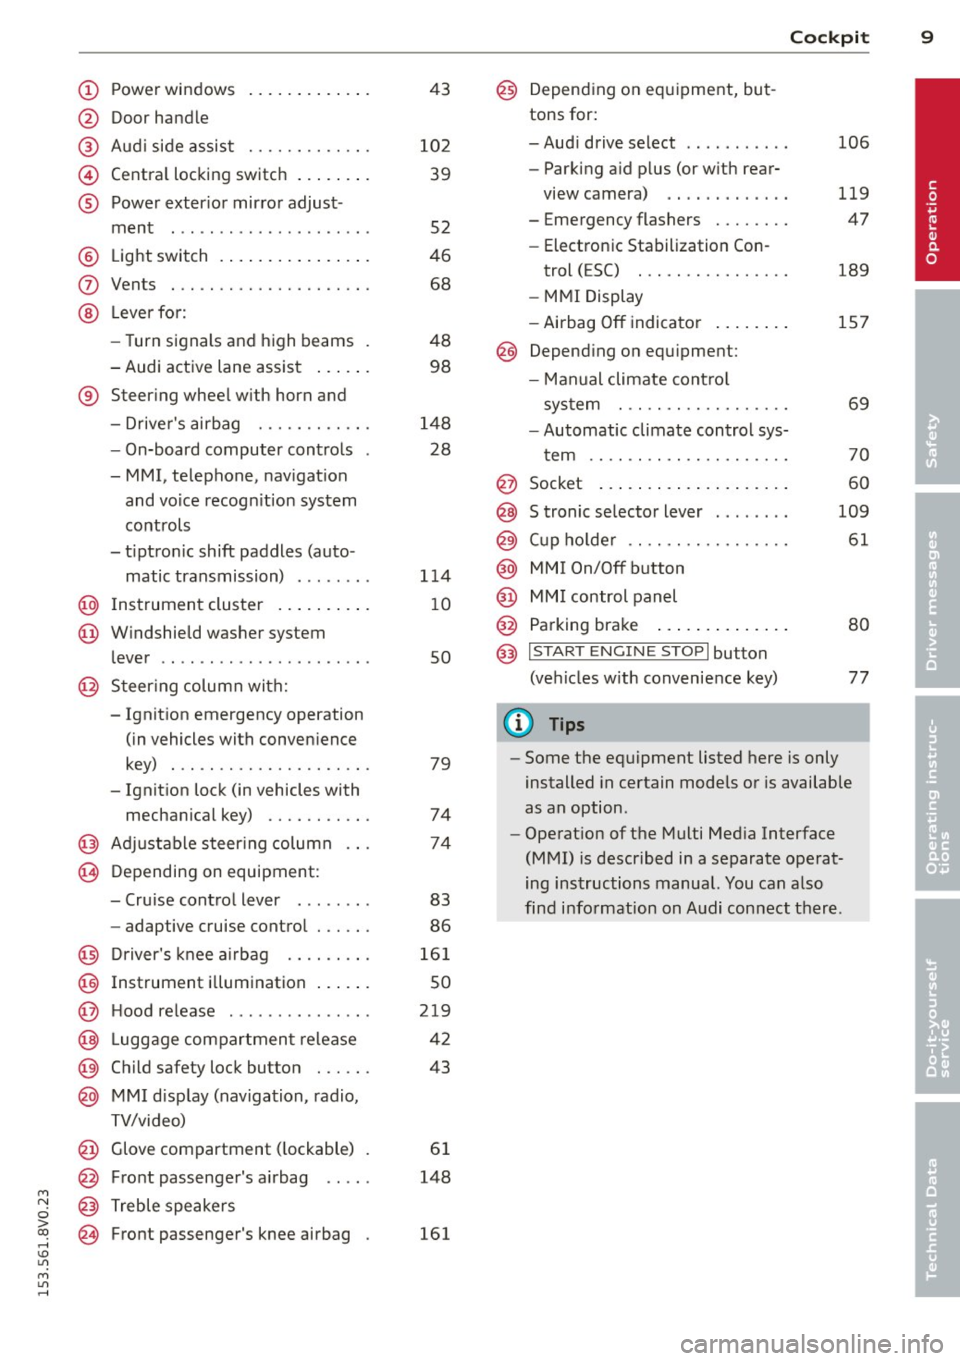
Power windows
Door handle
Aud i side assist
........ .... .
Centra l locking switch ... .. .. .
Powe r exter ior mirror adjust
ment
.. ... .............. ..
Light switch
Vents
L ever fo r:
- Turn signals and high beams
- Audi active lane assist ... .. .
® Steer ing wheel w ith horn and
- Drive r's airbag ....... .. .. .
- On-board computer controls
- MMI, telephone, nav igat ion
and voice recogn it ion system
controls
- tiptron ic shift paddles (auto-
matic transmission) ....... .
@ Instrument cluster .. ... .. .. .
@ W indshield washer system
l ever
' .. ... .............. . .
@ S teer ing column with:
- Ignit ion emergency operation
(in vehicles with conven ience
key) . .. ................. .
- Ignit ion lock (in vehicles with
mechanical key) ...... .. .. .
@ Adjustable s teer ing column
@ Depending on equipment :
- Cruise contro l lever . ...... .
- adaptive cruise contro l ... .. . 4
3
10 2
39
52
46
68
48 98
148 28
1 14
1 0
so
79
74
74
83
86
@ D river's knee a irbag . . . . . . . . . 161
@ Instrument i llumination . . . . . . 50
@ H ood re lease . . . . . . . . . . . . . . . 219
@ Lugg age compartmen t release 42
@ Child safety lock button . . . . . . 43
@ MMI d isp lay (navigation , radio,
TV/video)
@ Glove compartment ( lockable)
@ Front passenger's airbag .. .. .
@ Treble speakers
@ Front passenger's knee airbag 61
148
161
Cockpi t 9
@) Depending on eq uipment, but
tons for:
- Aud i drive select
- Parking a id p lus (or w ith rear-
view camera) .. . ... ...... .
- Emergency flashers ....... .
- Electron ic Stabilization Con-
trol ( ESC) . .. .... ........ .
- MMI Display
- Airbag
Off indicator ..... .. .
@ Depend ing on equ ipment:
- Manual climate cont ro l
system
- Automatic climate contro l sys
t em
. . .. .. .. .... .........
@ Socket
@ S tronic se lector lever ....... .
@ Cup ho lder .. .. .. . ......... .
@ MMI On/Off button
@ MM I control panel
@ Parking brake ... . ... ...... .
@ I START ENGI NE STOPI button
(ve hicles w ith convenience key)
(D Tips
106
119
47
189
157
69
70
60
109
61
80
77
- Some the eq uipment listed here is only
installed in certain models or is available
as an option.
- Operat ion of the Multi Med ia Interface
(MMI) is described in a separate operat
ing instructions manual. You can a lso
find info rmation on A udi con nect ther e.
•
Page 17 of 310
M N
0 > co ,...., \!) 1.1'1
M 1.1'1 ,....,
or
or
or
or
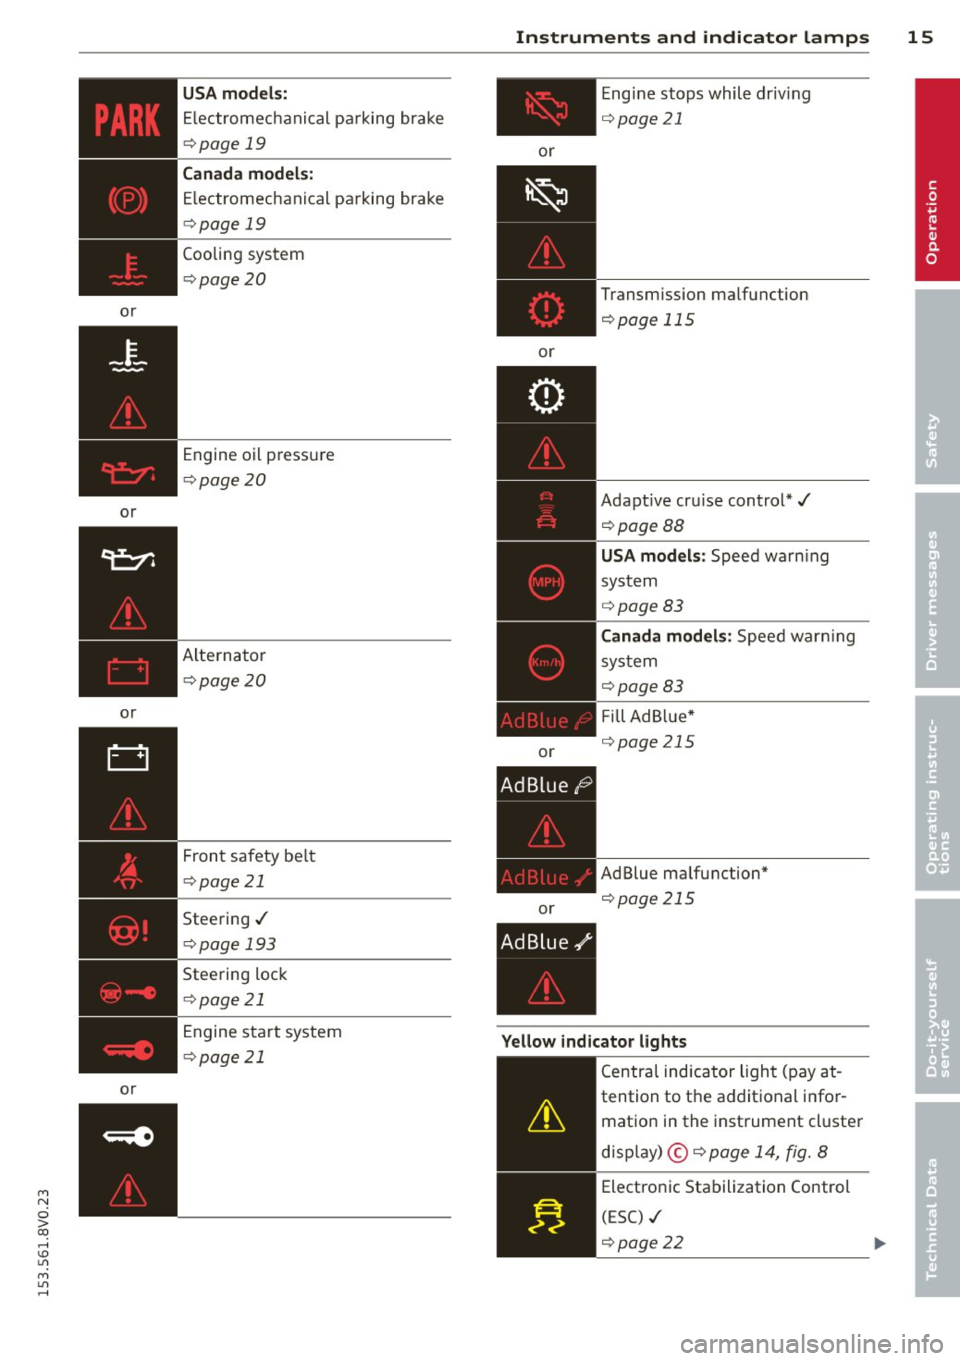
USA models:
Electromechanical parking brake
i:::> page 19
Can ada mode ls:
E lectromechanical parking brake
c::> page 19
Cooling system
c::>page 20
Engine oil pressure
c::>page20
Alternator
~page 20
Front safety be lt
c::> page 21
Steering./
c::>page 193
Steering lock
c::>page 21
Engine start system
c::>page 21
Instrum ent s an d indicator lamp s 15
or
or
or
or E
ngine stops while driv ing
i:::>page 21
Transmission malfunction
c::> page 115
Adaptive cru ise control*./
c::>pageBB
USA mode ls: Speed warn ing
system
c::> page 83
C ana da m odel s: Speed warn ing
sys tem
i:::>page83
F ill Ad Blue*
c::> page 21 S
AdBlue malfunction*
c::> page 215
Yellow indi cato r light s
-------------
Centra l indicator light (pay at -
tention to the additional infor
mation in the instrument cluster
disp lay) ©
c::> page 14, fig. 8
Electronic Stabilization Control
(ESC) ./
c::> page 22
•
Page 21 of 310
M N
0 > co ...... \!) ..,.,
M ..,., ......
-If the indicator light and the message ap
pear
when the vehicle is stationary or after
switching the ignition on,
check if you can
release the parking brake . If you cannot re
lease the parking brake, see your authorized
Audi dealer or authorized Audi Service Facili
ty. If you can release the parking brake and
the message still appears, see an authorized
Audi dealer or authorized Audi Service Facili
ty immediately to have the malfunction cor
rected.
- If the indicator light and message appear
while driving, the hill start assist or emer
gency braking function may be malfunction
ing.
It may not be possible to set the park
ing brake or release it once it has been set.
Do not park your vehicle on hills and see an
authorized Audi dealer or authorized Audi
Service Facility for assistance.
(USA models): If the. and&] indicator
lights turn on together, take your vehicle to an
authorized Audi dealer or authorized Audi
Service Facility immediately to have the brake
pads inspected c;, page 22 .
There is also a warning tone when the lights
turn on.
A WARNING
-
-Follow the warnings on c::;, page 217,
Working in the engine compartment
be
fore opening the hood and checking the
brake fluid level.
-If the brake system indicator light does
not turn off or it turns on while driving,
the brake fluid level in the reservoir is
too low, and this increases the risk of an
accident. Stop the vehicle and do not
continue driving. See an authorized Audi
dealer or authorized Audi Service Facility
for assistance.
-If the brake system indicator light turns
on together with the ABS and ESC indica
tor lights, the ABS/ESC regulating func
tion may be malfunctioning. Functions
that stabilize the vehicle are no longer
available . This could cause the rear of the
vehicle to swerve, which increases the
Instruments and indicator lamps 19
risk that the vehicle will slide. Drive care
fully to the nearest authorized Audi deal
er or authorized Audi Service Facility and have the malfunction corrected.
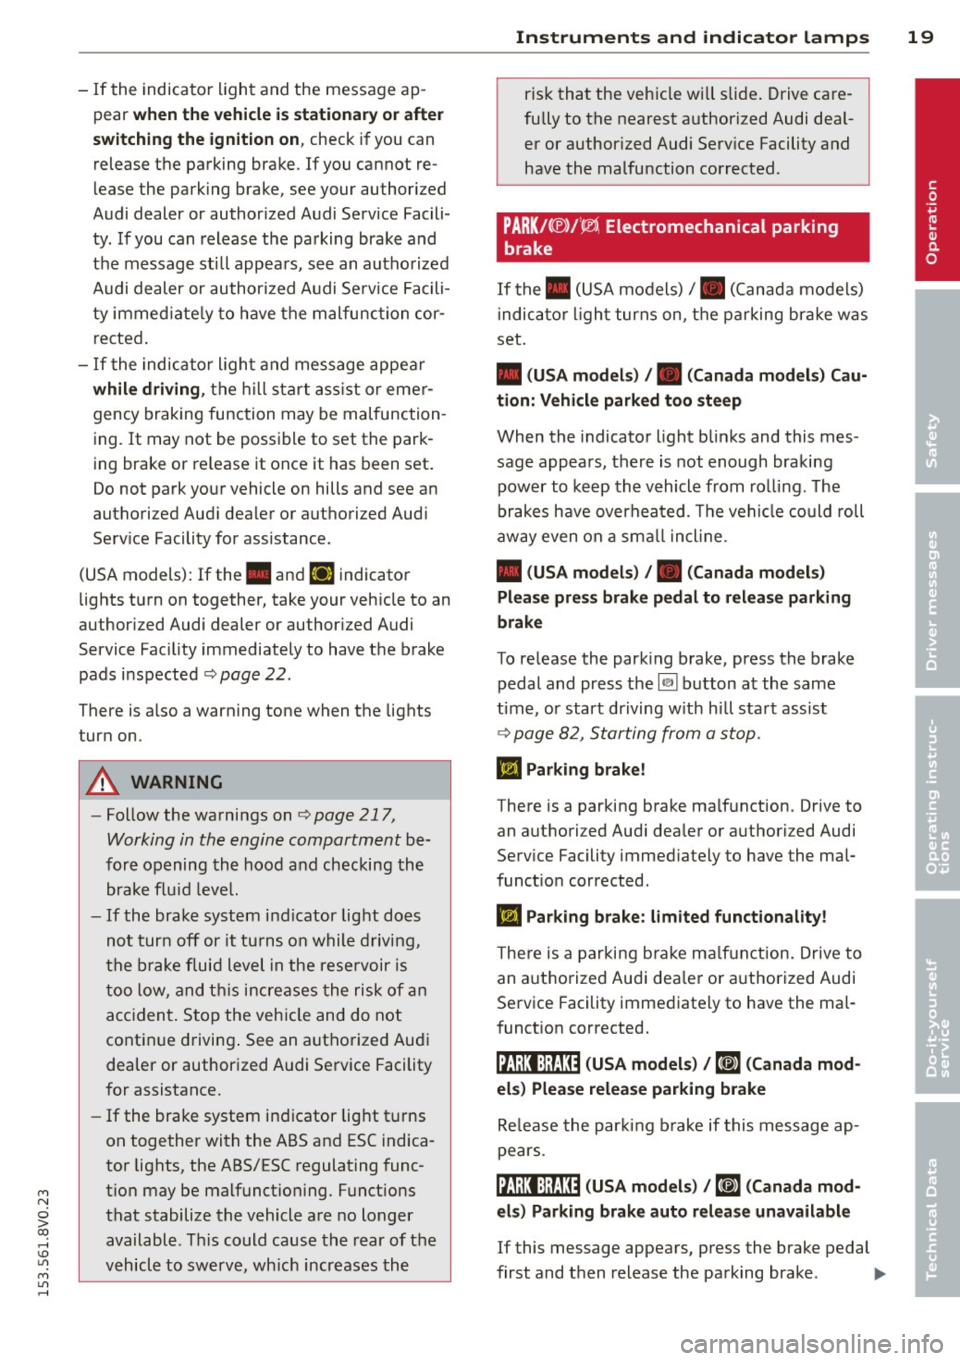
PARK /C®)/¢5, Electromechanical parking
brake
If the . (USA models) /. (Canada models)
indicator light turns on, the parking brake was
set.
• (USA models) I. (Canada models) Cau
tion: Vehicle parked too steep
When the indicator light blinks and this mes
sage appears, there is not enough braking
power to keep the vehicle from rolling. The
brakes have overheated. The vehicle could roll
away even on a small incline .
• (USA models) I. (Canada models)
Please press brake pedal to release parking
brake
To release the parking brake, press the brake pedal and press the~ button at the same
time, or start driving with hill start assist
c::;, page 82, Starting from a stop.
Ill Parking brake!
There is a parking brake malfunction. Drive to
an authori zed Audi dealer or authorized Audi
Service Facility immediately to have the mal
function corrected.
Iii Parking brake: limited functionality!
There is a parking brake malfunction. Drive to
an authorized Audi dealer or authorized Audi
Service Facility immediately to have the mal
function corrected.
ll:1;1:tl:j;J:134 (USA models) I mil (Canada mod
els) Please release parking brake
Release the parking brake if this message ap
pears.
ll,1;1:tl:j;(;134 (USA models) / mil (Canada mod
els) Parking brake auto release unavailable
If this message appears, press the brake pedal
first and then release the parking brake .
IJJ,,
•
Page 23 of 310
M N
0 > co ,...., \!) 1.1'1
M 1.1'1 ,....,
The starting abili ty may be impai red .
If thi s message tu rns off afte r a litt le w hile,
the ba ttery ch arged eno ugh wh ile driving.
If the message does not turn off, have and au
thor ized Audi deal er or au thori zed A udi Se rv
i ce Fa cility repa ir th e malfunc tio n.
~/ !f Safety systems
The fl (U SA mo dels) / El (C an ad a mod els)
i ndicator lig ht mon itors the sa fe ty sys tems.
Safety system
If the II (U SA mode ls) / m (Canada mode ls)
indi cator lig ht tur ns on or b links, the re is a
mal func tion in a safe ty system.
Dr ive to an authorized Aud i dea ler o r a uthor·
iz ed A udi Service Fac ility immed iate ly to have
the ma lfunction co rrected .
_& WARNING
Have the safety systems ins pect ed imme
diately. Otherwise, there is a ris k that the
systems may not a ct ivate d uring a colli
sion, which increases t he risk of ser ious in
jury or deat h.
~ Front safety belt
The . indicator light stays on unti l the driv
er 's and front passenger's safety belts are
buckled. There is a lso a war ning tone above a
certa in speed .
(D Tips
For addit ional information on safety be lts,
refe r to
¢ page 135.
~ - Steering lock
• Do not drive vehicle: steering defective
There is a malfunct io n in the electron ic steer
i n g lock. You cannot turn the ignition on.
D o
not tow your vehicle beca use it ca nnot be
steere d. See an a uthorized Aud i dea le r or au
thor ized Audi Serv ice Facility for assistance.
Instruments and indicator lamps 21
II Steering lock : system fault! Please con
tact Service
T he re is a m alfunction in the elec troni c steer
i ng lock.
D rive to an au thor ized A udi dealer or autho r·
iz ed Audi Se rv ic e Facili ty im mediately to have
t h e m alf unc tio n c orr ecte d.
_& WARNING
Do no t tow yo ur vehicle when there is a
mal func tion in the elec tronic s teer ing lock
• th is i ncreases the risk of an acci dent.
<=.e Engine start system
• Engine start system malfunction. Please
contact Service
Do not sw itch the igni tion off because yo u
may not be able to switch it on again.
Dr ive to an au thor ized A udi dealer or au tho r·
i zed Audi Serv ice Facili ty im media tely to have
the mal fun ction correcte d.
i·l i:ngine start system malfunction . Please
contact Service
T here is a malfunction in the eng ine starting
system.
- Ve hicles w ith an ignition
¢ page 75, Auto
matic start malfunction
- Ve hicles w ith a convenience key
¢ page 77, Automatic start malfunction
D rive to an authorized A udi dealer or author
ized Audi Se rv ice Facility immediately to have
the mal function corrected.
~ Engine
• Engine stopped : brake servo and power
steering not pos sible
There is a malfunction in the eng ine or in the
fuel supply system.
More force is needed to steer and bra ke t he
moving vehicle w hen the eng ine is sto pped. If
the ve hicle is ro lling, try to stop it caref ully on
the side of the road away from moving traff ic . ..,.
•
Page 33 of 310
If the light doe s not turn off after starting
the engin e
or turns on while driving, this may
indicate there is a malfunction in the eng ine.
If the indicator turns on, the catalytic convert
er may be damaged .
Drive
with reduc ed engine perfo rm ance
(avo id h igh speeds for extended periods of
time and/or fast accelerat ion) and have the
malfunction corrected. See an authorized Audi
dealer o r authorized Aud i Service Facility .
The indicator may turn on if the electron ic
speed limiter is faulty. For additional informa
tion, refer to
c:> page 31, Electronic speed
limiter" .
The MIL m ay also turn on if the fuel filler c ap
i s not clo sed co rre ctl y
c:> page 212 .
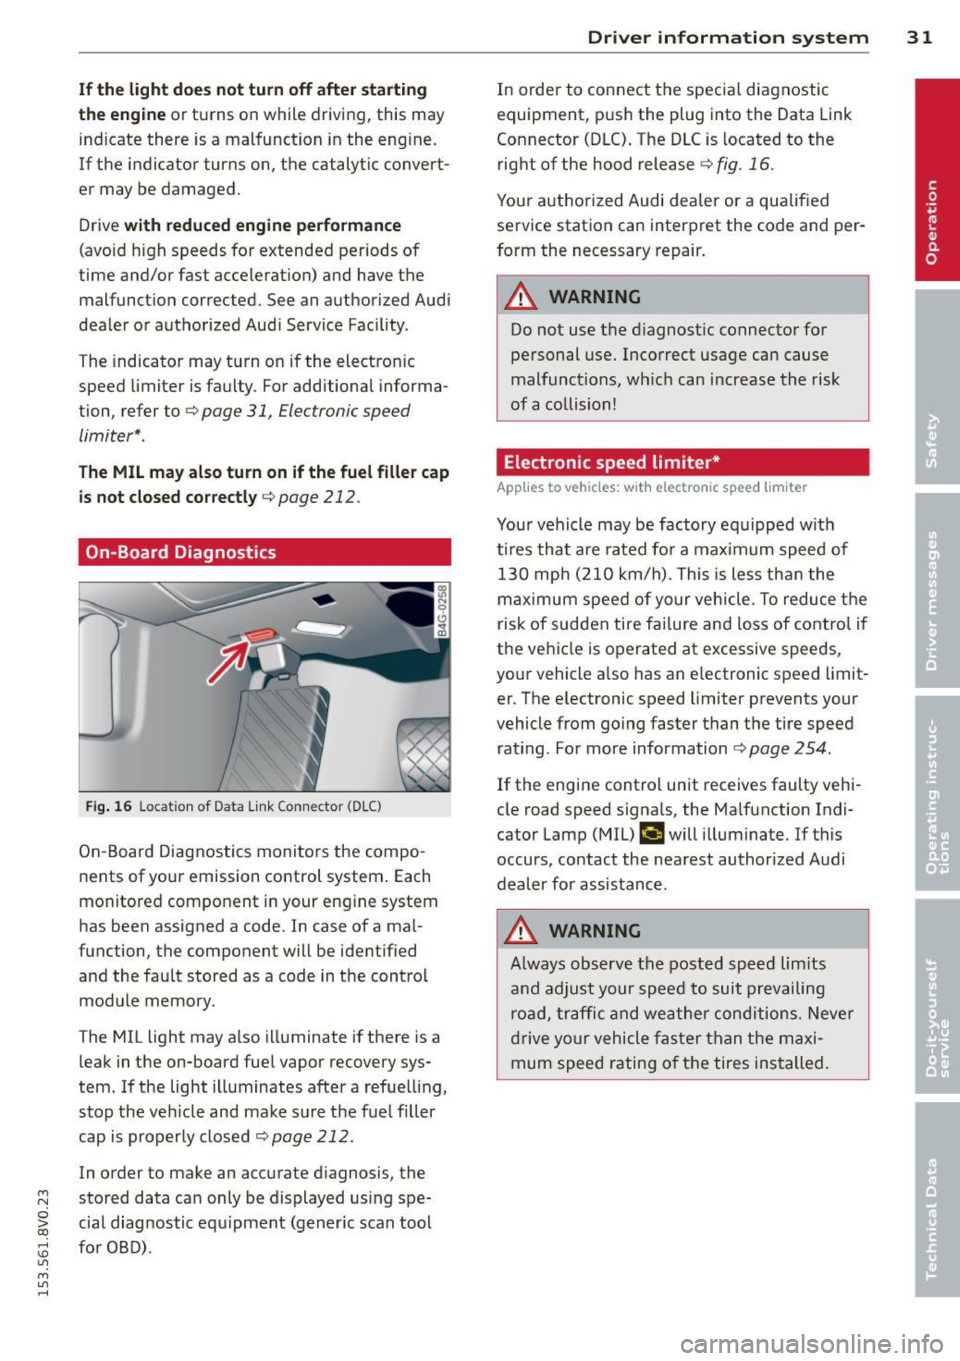
On-Board Diagnostics
Fi g. 16 Locat ion of Data Link Connector (DLC)
On -Board Diagnostics monito rs the compo
nents of you r emission control system . Each
monitored component in your engine system
has been assigned a code . In case of a ma l
function, the component will be ident ified
and the fau lt stored as a code in the control
module memory.
The MIL light may a lso illuminate if there is a
leak in the on-board fuel vapor recovery sys
tem. If the light illuminates after a refue lling,
stop the veh icle and make sure the fuel filler
cap is properly closed
c:> page 212.
In order to make an accurate d iagnosis, the
~ stored data can only be displayed us ing spe-
o iii cial diag nostic equipment (gener ic scan tool
:;, for OBD) .
"' M
"' ......
Driver in formation system 31
In order to connect t he specia l diagnostic
equipment, pus h the plug into the Data Link
Connector (DLC). The D LC is located to the
right of the hood release
c:> fig . 16.
Your authorized Audi dea ler or a qualified
service station can interpret the code and per
form the necessary repair.
_& WARNING
Do not use t he diagnostic connector for
personal use. Incorrect usage can cause
malfunctions, wh ic h can increase the risk
of a collision!
Electronic speed limiter *
Applies to vehicles: wit h electro nic s peed limiter
-
Your vehicle may be factory equipped w ith
t ires that are rated for a maximum speed of
130 mph (210 km/h). Thi s is less tha n the
maximum speed of your vehicle. To reduce t he
risk of sudden tire fai lure and loss of contro l if
the ve hicle is operated at excessive speeds,
your vehicle a lso has an e lectronic speed limit
er . T he e lectronic speed limiter prevents your
vehicle from go ing faster than the tire speed
rating . For more information
c:> page 254.
If the engine contro l unit receives faulty vehi
cle road speed signa ls, the Ma lfunction Indi
cator Lamp (MIL)
¢'4 will illuminate. If this
occurs, contact the nearest authorized Audi
dealer for assistance .
_& WARNING
Always observe the posted speed lim its
a nd adjust your speed to suit prevailing
road, traffic and weather conditions. Neve r
drive yo ur vehicle fas ter than the maxi
mum speed rating of the tires installed.
-
Page 34 of 310
32 Driver information system
Lap timer and engine
oil temperature
indicator
Introduction
Applies to vehicles: with lap timer (S mode ls)
The engine oil temperature is only shown in
the lap timer disp lay .
Lap timer
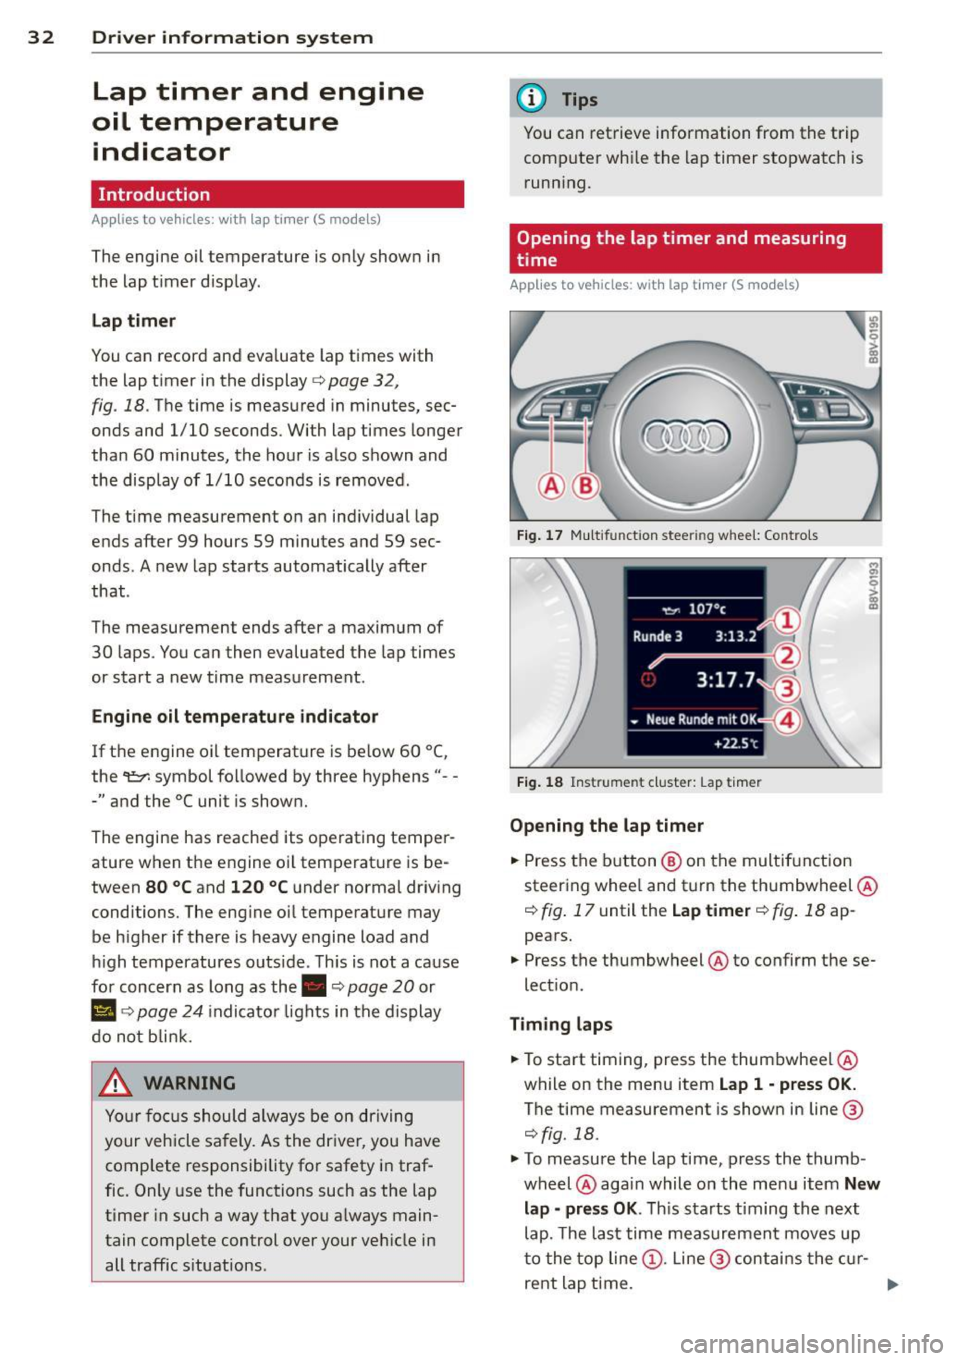
You can record and evaluate lap times with
the lap timer in the display
c:> page 32 ,
fig . 18. The time is measured in minutes, sec
onds and 1/10 seconds. With lap times longer
than 60 minutes, the hour is also shown and
the display of 1/10 seconds is removed .
The time measurement on an individual lap
ends after 99 hours 59 minutes and 59 sec
onds . A new lap starts automatically after
that .
The measu rement ends after a maximum of
30 laps . You can then evaluated the lap times
or start a new time measurement .
Engine oil temperature indicator
If the engine oil temperature is be low 60 ° (,
the 't::7-symbol followed by three hyphens" --
-" and the °C uni t is shown.
The engine has reached its operating temper
ature when the engine oil temperature is be
tween
80 °C and 120 °C under normal driving
conditions. The engine oil temperature may be h igher if there is heavy engine load and
high temperatures outs ide. This is not a cause
for concern as long as the.
c:> page 20 or
Ill c:> page 24 indicator lights in the display
do not b link.
.&, WARNING
Your focus should always be on driving
your vehicle safely. As the dr iver, you have
complete responsibility for safety in traf
fic. Only use the functions such as the lap
timer in such a way that you a lways main
tain complete control over your veh icle in
all traffic situations .
(D Tips
You can retrieve information from the trip
computer wh ile the lap timer stopwatch is
running.
Opening the lap timer and measuring
time
Applies to vehicles: with lap timer (S models)
Fig. 17 Mult ifun ction stee ring w hee l: Con trols
Fig. 18 Instrume nt clust er: L ap timer
Opening the lap timer
... Press the button® on the multif unction
steering whee l and turn the thumbwheel @
¢ fig. 17 until the Lap timer ¢ fig. 18 ap
pears .
... Press the thumbwheel @to confirm these
lect ion.
Timing laps
... To start timing, press the thumbwheel @
while on the menu item
Lap 1 -press OK.
The time measurement is shown in line@
¢fig. 18.
... To measure the lap time, press the thumb
wheel @again while on the menu item
New
lap -press OK. This starts t iming the next
lap. The last time measurement moves up
to the top line@. Line @ contains the cur-
rent lap time. ..,.
Page 37 of 310
M N
0 > co ,...., \!) ..,.,
M ..,., ,....,
Opening and closing
Central locking
Key set
Fig . 20 Your vehicle key set
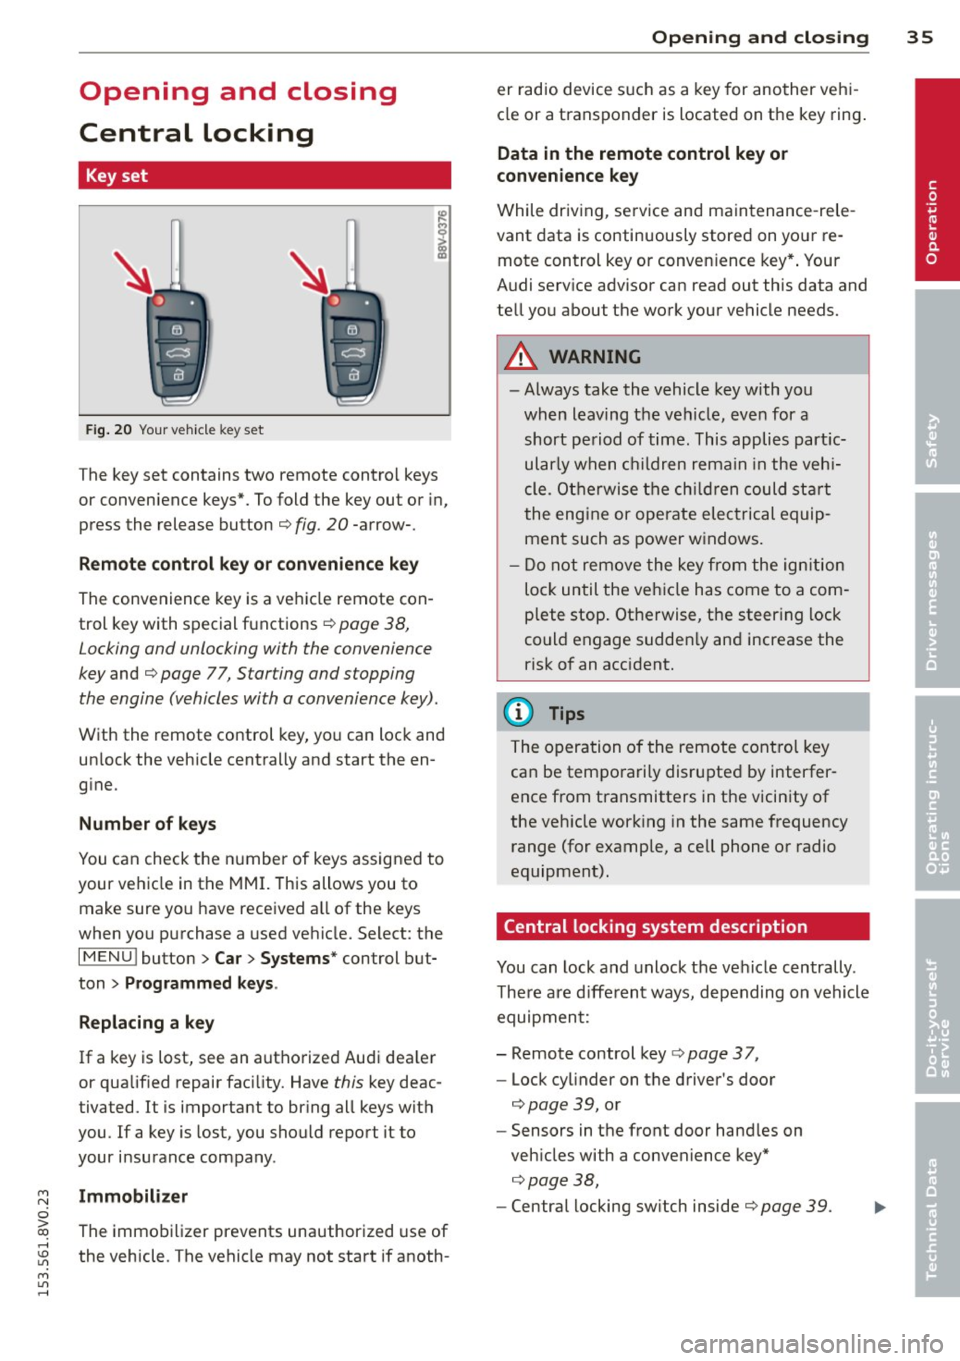
The key set contains two remote contro l keys
or convenience keys*. To fold the key out or in,
press the release button
q fig. 20 -arrow-.
Remote control key or convenience key
The convenience key is a vehicle remote con
trol key with special functions
q page 38,
Locking and unlocking with the convenience
key and q page 77, Star ting and stopping
the engine (vehicles with a convenience key).
With the remote control key, you can lock and
un lock the vehicle centrally and start the en
g ine.
Number of keys
You can check the number of keys assigned to
your vehicle in the
MMI. T his allows you to
make sure you have received a ll of the keys
when you purchase a used vehicle. Select: the
I MENU I button > Car> Systems* control but
ton
> Programmed keys.
Replacing a key
If a key is lost, see an authorized Audi dea ler
or qualified repair facility. Have
this key deac
tivated. It is important to br ing all keys with
you.
If a key is lost, you should report it to
your insurance company .
Immobilizer
The immobilizer prevents unauthorized use of
the vehicle . The vehicle may not start if anoth -
Opening and closing 35
er radio device such as a key for another veh i
cle or a transponder is located on the key ring.
Data in the remote control key or
convenience key
While driving , service and maintenance -rele
vant data is continuously stored on your re
mote control key or convenience key*. Your
Audi serv ice advisor can read out this data and
tell you about the work your vehicle needs.
_& WARNING
- Always take the vehicle key with you
when leaving the vehicle, even for a
short period of time. This applies partic
ularly when children remain in the vehi
cle . Otherwise the children could start
the engine or operate electrical equip
ment such as power windows.
- Do not remove the key from the ignition
lock until the vehicle has come to a com
plete stop. Otherwise, the steering lock
could engage sudden ly and increase the
risk of an accident.
{i) Tips
The operation of the remote control key
can be temporarily disrupted by interfer
ence from transmitters in the vicinity of
the veh icle working in the same frequency
range (for example, a cell phone or radio
equipment).
Central locking system description
You can lock and unlock the vehicle centrally .
There are different ways, depending on vehicle
equipment:
- Remote control key
q page 3 7,
- Lock cylinder on the driver's door
qpage 39, or
- Sensors in the front door handles on
veh icles with a convenience key*
q page 38,
-Central locking sw itch inside q page 39. •
Page 41 of 310
....,
N
0 > co
rl I.O
"' ....,
"' rl
WARNING
----Read and following all WARNINGS. ¢ & in
Key set on page 35
@ Tips
If your vehicle is left standing for a long
period of time, note the following:
- The proximity sensor switches off after a
few days to save energy. You then have
to pull once on the door handle to unlock
the vehicle and a second time to open it.
- To prevent the battery from draining and
to retain the starting ability of yo ur vehi
cle as long as possible, the energy man
agement system gradua lly tuns off un
necessary convenience functions You
may not be able to unlock your vehicle
using the convenience key .
- For an explanation on conformity with
the FCC regulations in the United States
and the Industry Canada regulations, re
fer to ¢page
292 .
Unlocking/locking with the key
In the event that the power locking system
fails, the driver's door can locked and un
locked using the door lock .
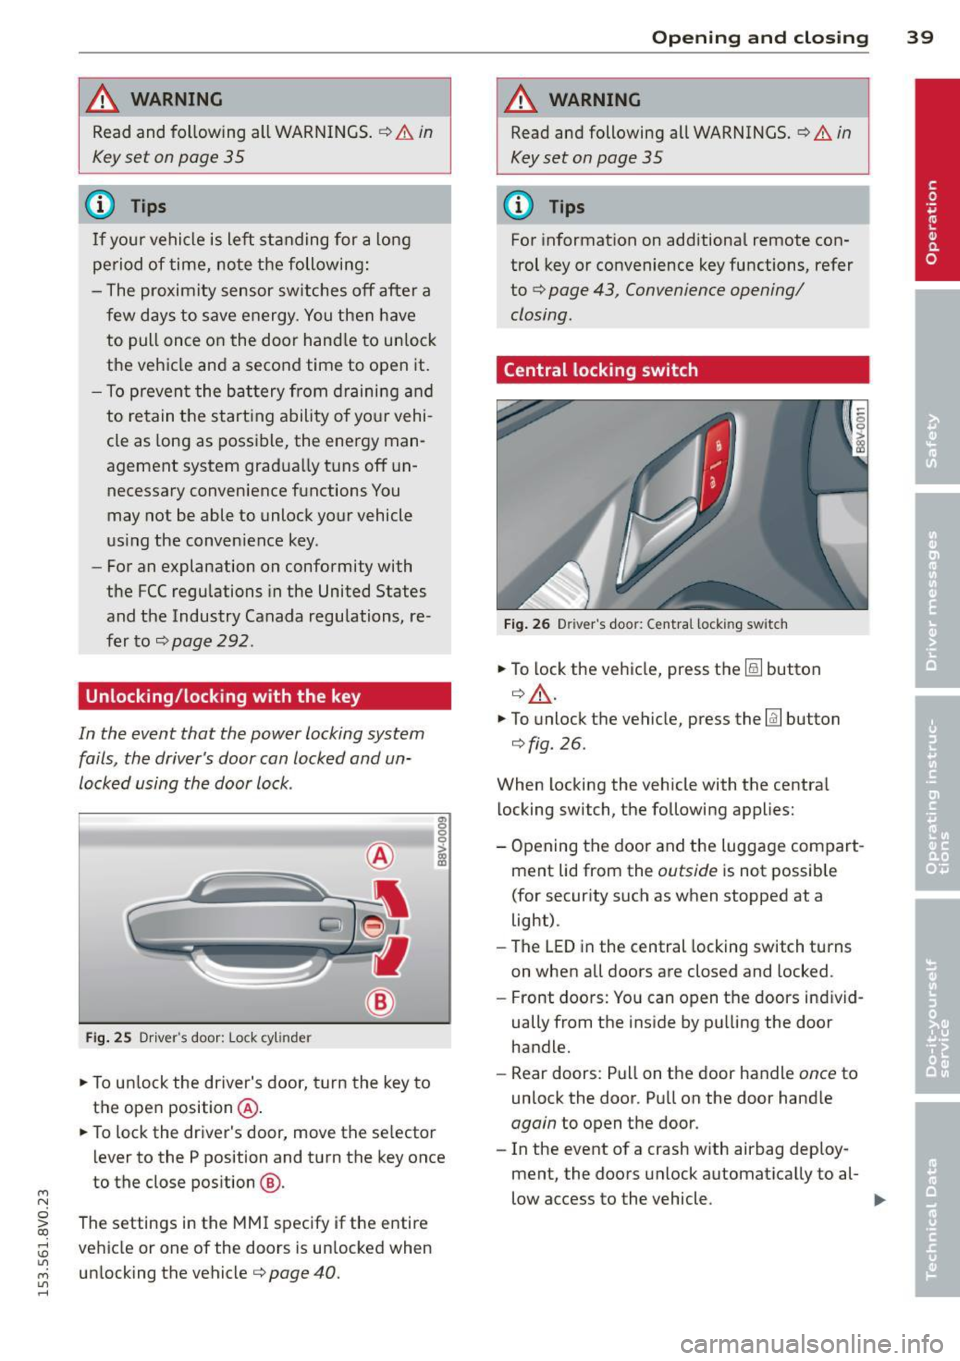
Fig. 25 Driver 's door: Lock cy linder
.,. To unlock the driver's door, turn the key to
the ope n position @.
en 0 g
~
.,. To lock the driver's door, move the se lector
lever to the P position and turn the key once
to the close position
@ .
The settings in the MMI specify if the entire
vehicle or one of the doors is un locked when
unlocking the vehicle¢ page 40 .
Opening and closing 39
A WARNING
Read and following all WARNINGS. ¢ & in
Key set on page 35
(D Tips
For information on additional remote con
trol key or convenience key functions, refer
to
¢ page 43, Convenience opening/
closing.
Central locking switch
Fig. 26 Drive r's doo r: Centra l locki ng sw itch
.,. To lock the vehicle, press the@! button
¢.&, .
.,. To unlo ck the vehicle, press the @J button
¢fig.
26.
When locking the vehicle with the central locking switch, the following applies:
- Opening the door and the Luggage compart
ment lid from the outside is not possible
(for security such as when stopped at a
light).
- The
LED in the central locking switch turns
on when all doors are closed and locked .
- Front doors: You can open the doors ind iv id
ually from the inside by pulling the door
handle.
- Rear doors: Pull on the door handle once to
unlock the door. Pull on the door hand le
again to open the door .
- In the event of a crash w ith airbag deploy·
ment, the doors unlock automatically to al-
low access to the vehicle. ..,.
Page 46 of 310
44 Opening and clo sing
• Hold the key in the driver's door lock until all
windows and the panorama sunroof* have
reached the desired position .
Conveni ence closing
• Hold the key in the d river's door lock i n the
lock pos ition until a ll wi ndows and the pan
o rama sunroo f* are closed .
Convenience closing with the convenience
key*
• To uch the sensor* on one of the front door
h and les and cont in u e touching it unt il all of
the windows and the panorama s unroof* are
closed . Do not place your hand in the door
hand le when doing th is.
Adjusting the convenience opening in the
MMI
• Se lect : the I MENU ! button> Car> Systems *
control button > Vehicle sett ings > Central
locking > Long -press to open windows
To enab le convenience opening of the win -
dows and the roo f*, the
Front windows , Rear
w indows *
and Roof* functions must be
sw itched
On .
A WARNING
-Never close the windows or pano rama
sunroof* carel essly or in an uncontro lled
m ann er, be cause th is increases the risk
o f i njury.
- Fo r se curity reasons, the windows can
only be opened with the remote c ontro l
k ey at a maxim um dis tance of ap proxi
ma tely 6 feet ( 2 meters) from the ve hi
cle .
- Pa y att ention when using the lock cyli n
der to close the windows and t he panora
ma sunroof* so that no one is pinche d.
Clos ing stops whe n the key is moved into
the start ing pos ition.
Correcting power window malfunctions
After disconnecting the vehicle battery , the
one-touch up and down feature must be acti vated again .
• Pull the power window switch u ntil the win
dow is completely ra ised .
• Release the sw itch and pull it agai n for at
l e ast one s econd .
Panorama sunroof
Description
Applies to vehicles: with panoramic sunroof
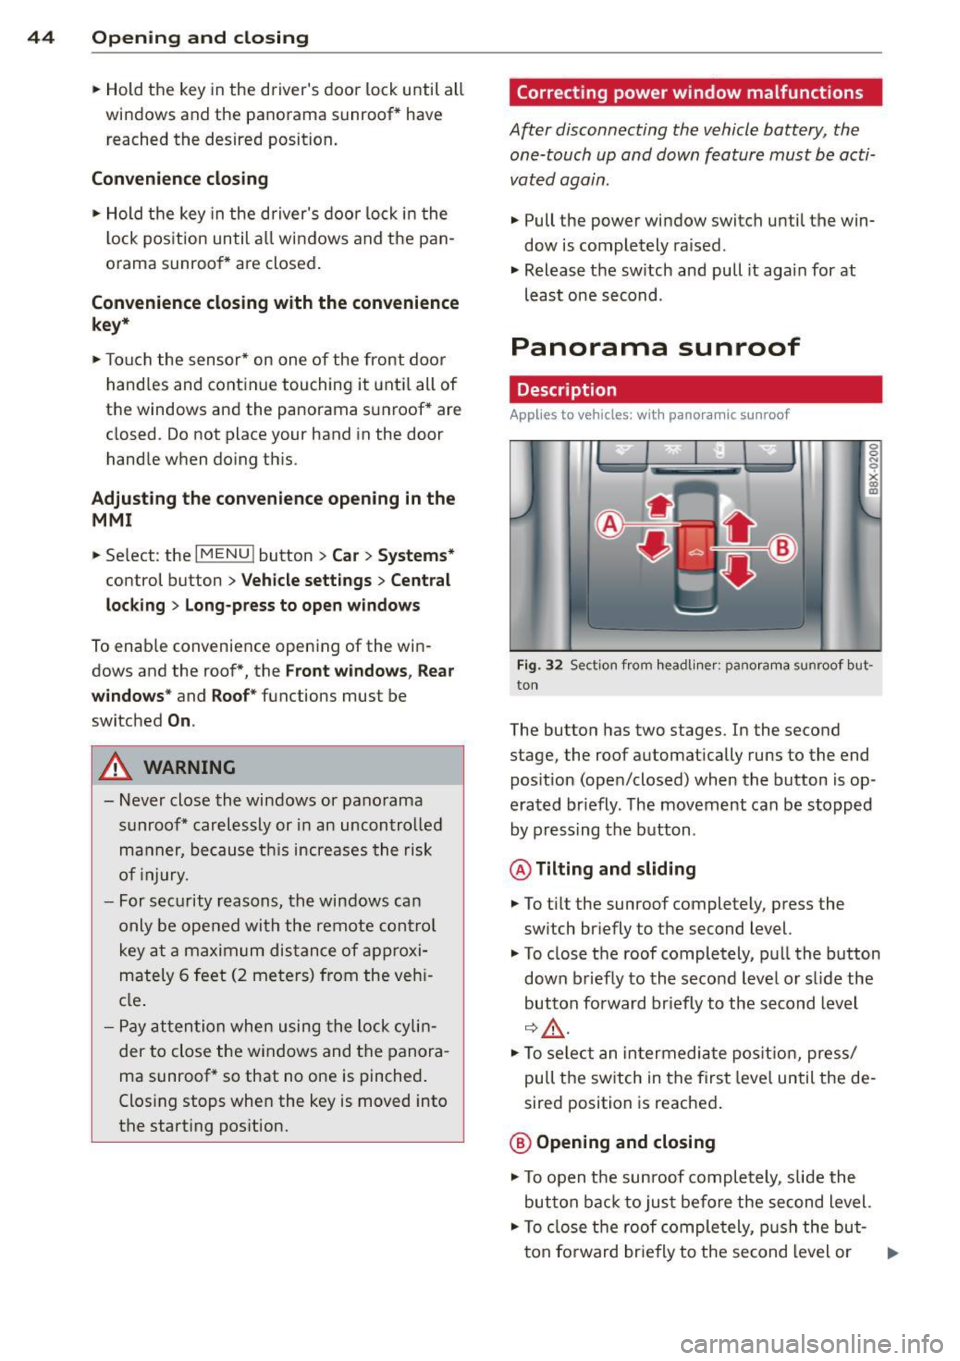
Fig. 32 Sect io n fr om headli ner: pano ra m a s unroof but
to n
The butto n has two stages . In the second
stage, the roof automat ically runs to the end
pos ition (open/closed) when the button is op
era ted br iefly . T he movement ca n be s topped
by pressing the b utton .
@Tilting and sliding
• To t ilt the sunroof completely , press the
sw itch br iefly to the second level.
• To close t he roof completely, pu ll the button
down b riefly to the seco nd leve l or s lide the
button forward br iefly to the s econd level
~~-
.. To se le ct an in termedia te pos it ion , press/
pull t he sw itch in the firs t leve l until the de
sired position is reached .
@ Opening and closing
• To open t he su nroof completely, sli de the
button bac k to ju st befo re the second level.
• To close t he roof comple tely, p ush the but-
t on fo rward br ie fly to the se cond level or .,..