alarm AUDI S3 SEDAN 2015 Owners Manual
[x] Cancel search | Manufacturer: AUDI, Model Year: 2015, Model line: S3 SEDAN, Model: AUDI S3 SEDAN 2015Pages: 282, PDF Size: 71.14 MB
Page 36 of 282
Opening and closing
only the driver 's door or the entire vehicle should
un lock when unlocking
q page 3 7 .
Automatic locking (Auto L ock )
The Auto Lock funct ion loc ks all doors and the
luggage compartmen t lid once the speed has ex
ceeded approximate ly 9 mph (15 km/h).
The ca r is unlocked aga in once the ignition key is
removed . In add ition, the vehicle can be unlo cked
if the opening function in the power locki ng sys
tem sw itch is used or one o f the door handles is
pu lled .*
Add it io nally, in the event of a cr ash with a irbag
dep loymen t the doors are au tom atic ally un
lo cked to allow access to the vehicle.
Anti-theft alarm system*
If th e a nti-theft alarm system detects a ve hicle
break-in, audio and v is u a l warning s ignals are
tr iggered.
The ant i-theft alarm system tu rns on automati
cally when you lock the veh icle. It deact ivates
wh en unlocking usi ng the remote cont ro l key or
by to uchin g the se nsor on the door handle ( con
ven ience key).
To switch the a larm off, press th em butto n on
the r emote co ntro l key or convenience key or
sw itch the igni tion on. The alarm a lso stops au to
ma tica lly aft er a cer ta in amoun t of time.
Turn signals
W hen you unlock the vehicle, the t urn signa ls
flash twice . W hen you lock the vehicle, the t urn
signals flash once.
If they do not flash, one of the doo rs, the lug
gage compartment lid or the hood is not loc ked
or the ignition is still sw itched on (the la tter ap
plies to veh icles with a convenience key).
Unintentionally locking yourself out
In the following cases there safeguards to pre
ve nt you lock ing you r remote master key in the
ve hicle:
- The vehicle does not lock with the centra l lock
ing switch if the driver's door is open
c> page 37 .
34
-On veh icles with a convenience key*, the l ug
gage compa rtment lid unlocks again after clos
ing if the most recently used key is in the lug
gage compa rtment.
Do not loc k your vehicle w ith the remote control
key or convenience key * until all doors and the
l uggage compartment lid a re closed. In this way
you avoid locking yourse lf out accidentally .
@ Tips
-Do not leave va luab les unattende d in the ve
hicle. A locked veh icle is not a safe!
- If the LE D in the u pper edge of the drive r's
doo r tu rns o n for a bout 30 seconds after
the vehicle is locked, there is a ma lf u nction
in the power locki ng or the anti-theft alarm
system*. Have the problem corrected by an
autho rized Aud i dealer or autho rized Audi
Service Facility .
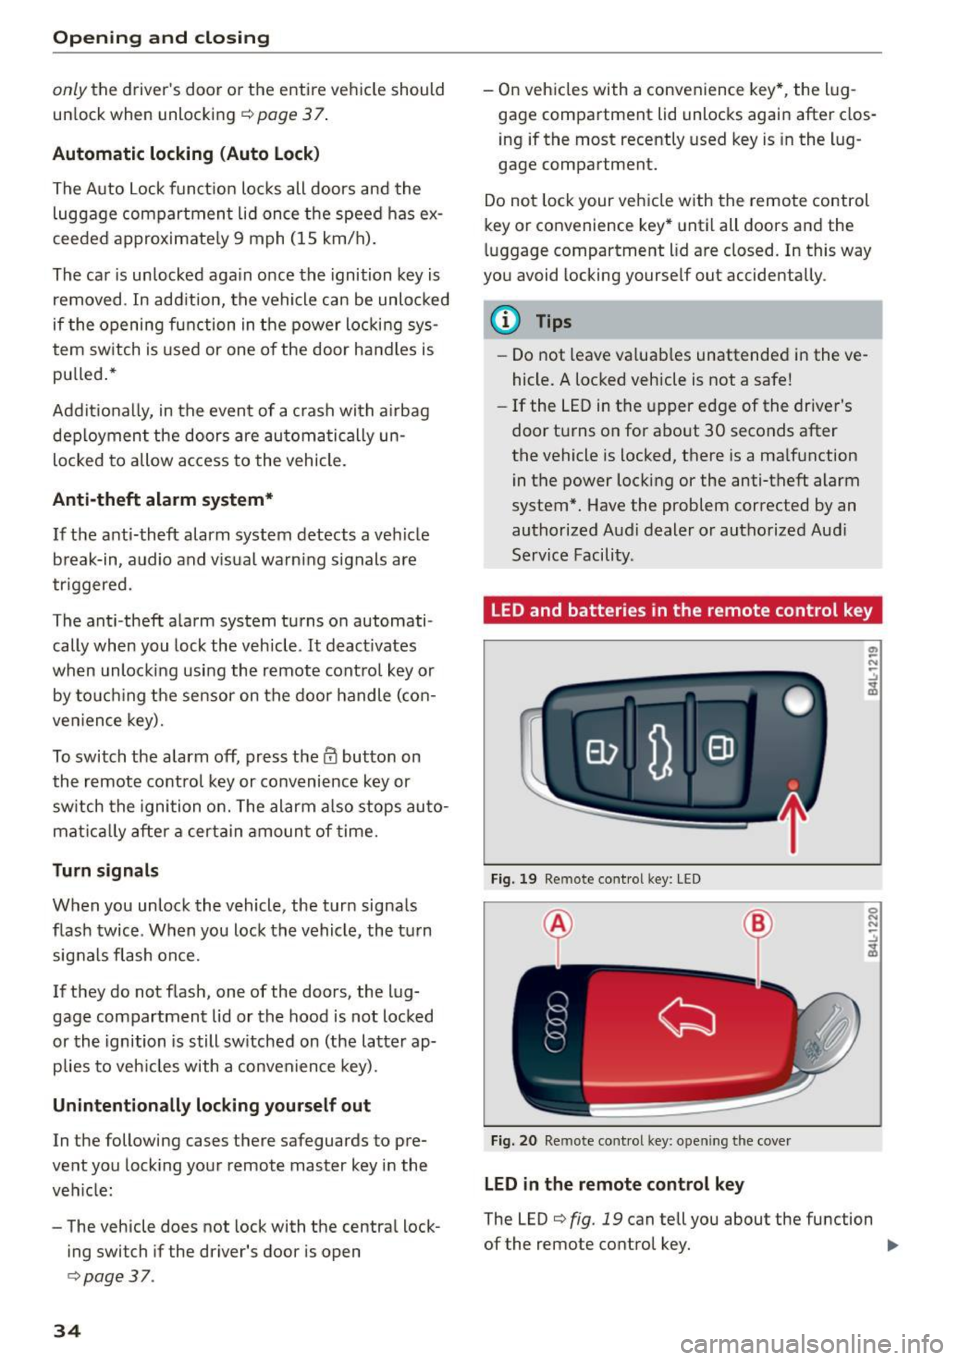
LED and batterie s in the remote control key
Fi g. 19 Remote con trol key: LED
Fig. 20 Remote con trol key: open ing the cove r
LED in the remote control key
The LED c> fig. 19 can tell you about the fu nction
of the remote control key. ..,_
Page 37 of 282
....,
N
0 > co
rl I.O
"'
"'
"'
rl
• If you press a button quickly, the LED blinks
once .
• If you press a button longer (convenience open
ing*), the LED blinks several times.
• If the LED does not blink, the remote control
key battery is dead. The message=
Please
ch ange ke y batt ery
can also appear in the in
strument cluster d isplay . Replace the battery .
Replacing the remote cont rol ke y batte ry
"Pry off the cover with a co in c;, fig. 20.
• Insert the new battery w ith the" +" facing up .
• Press the cover back onto the key until it clicks
into place .
We recommend having the battery replaced by
an authorized Audi dealer or authorized Audi
Service Fac ility .
@.) For the sake of the environment
Dead batteries must be disposed of using
methods that will not harm the env ironment.
Do not dispose of them i n household trash .
{!) Tips
The replacement battery must meet the same
specifications as the original battery .
Remote control key synchronization
The remote control key must be synch ron ized if
the vehicle does not lock and unlock with the re
mote cont ro l.
• Press the remote control key button
l@J .
• Insert the key in the dr iver door lock within 30
seconds.
• Press the
[m] button o r Im button.
Opening and clo sing
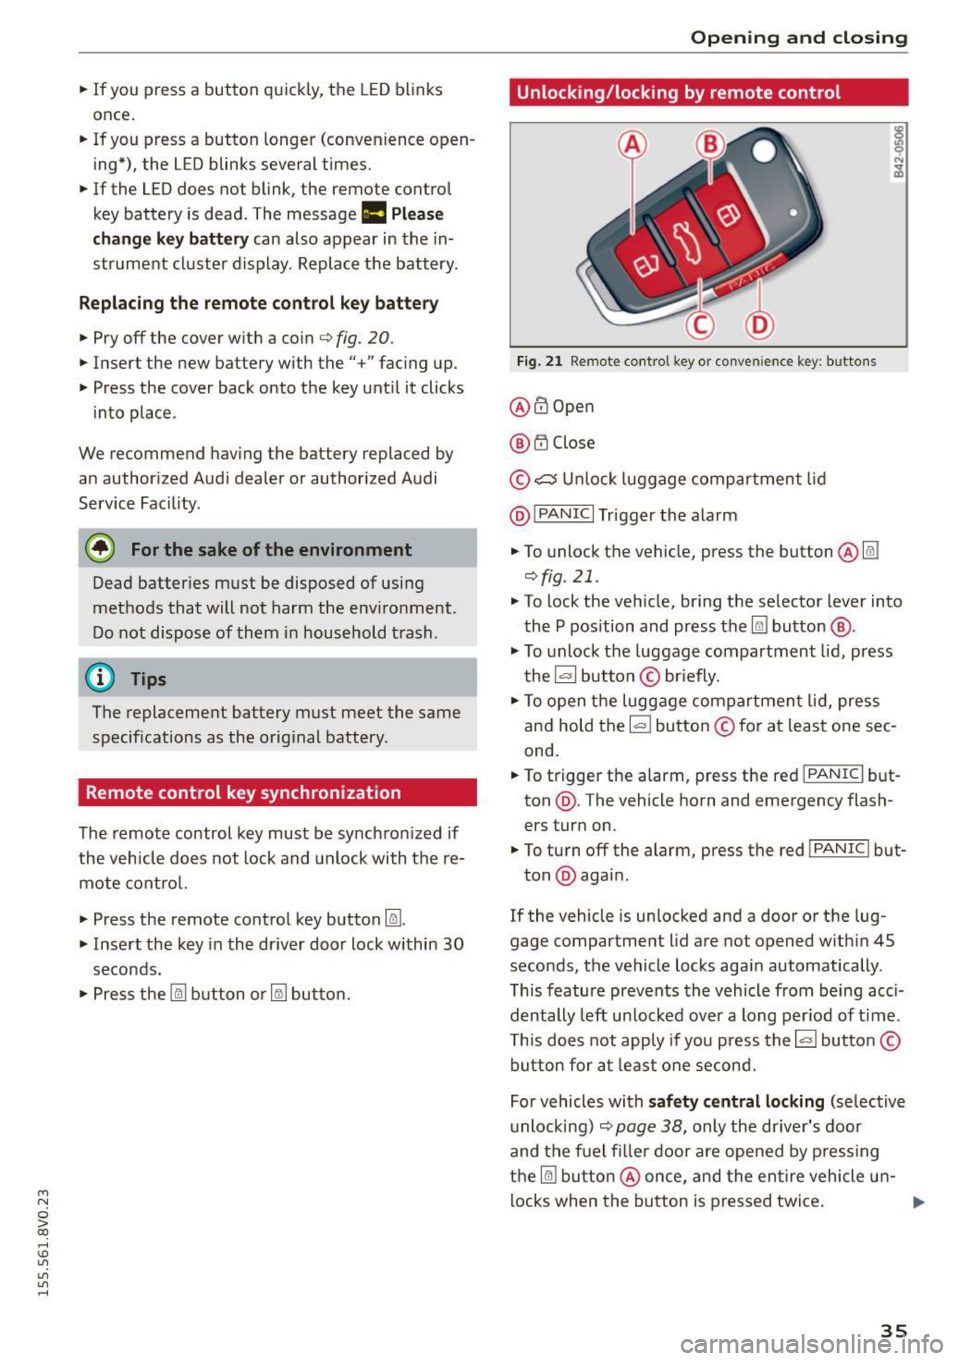
Unlocking/locking by remote control
Fig. 2 1 Remote cont rol key o r conven ience key: b uttons
@ @Open
@ t'.D Close
© ,;:::::::, U nlock luggage compartment lid
@ I
PANIC I Trigger the alarm
• To unlock the vehicle, press the button @@:!
¢fig.21 .
• To lock the ve hicle, br ing the selector lever into
the P position and press the
Im button @ .
• To unlock the luggage compartment lid, press
the~ button © briefly .
• To open the luggage compartmen t lid, press
and hold the I= ! button © for at least one sec
ond.
• To trigger the alarm, press the red I
PANIC I but
ton @. The vehicle horn and emergency flash
ers turn on.
• To turn off the alarm, press the red I
PANIC ! but-
ton @again .
If the vehicle is unlocked and a door or the lug
gage compartment lid are not opened w ith in 45
seconds, the vehicle locks aga in automatically .
This feature prevents the vehicle from being acci
dentally left un locked over a long per iod of t ime .
T his does not app ly if you press the~ button©
button for at least one second.
For vehicles with
s af ety ce ntral locking (se lective
u nlocking)
c;, page 38, only the dr iver's door
and the fuel filler door are opened by press ing
the
@I button @once, and the en tire vehicle u n-
locks when the button is pressed twice. ..,.
35
Page 38 of 282
Opening and closing
A WARNING
Read and following all WARNINGS. ¢ & in
Key set on page 33
(D Tips
- Only use the remote control key or conven
ience key within view of the vehicle.
- Do not use the remote control when you are
inside the vehicle. Otherwise, you could un
intentionally lock the vehicle. If you then
tried to start the engine or open a door, the
alarm would be triggered. If this happens, press the unlock button
m.
- The vehicle can only be locked when these
lector lever is in the
P posit ion.
- Only use the panic function in an emergen
cy.
- For information on additional remote con
trol key or convenience key functions, refer
to ¢
page 41, Convenience opening/clos
ing .
Locking and unlocking with the
convenience key
A ppl ies to veh icles: w ith conve nien ce key
The front doors and the luggage compartment
lid can be unlocked and locked without using the
remote control key .
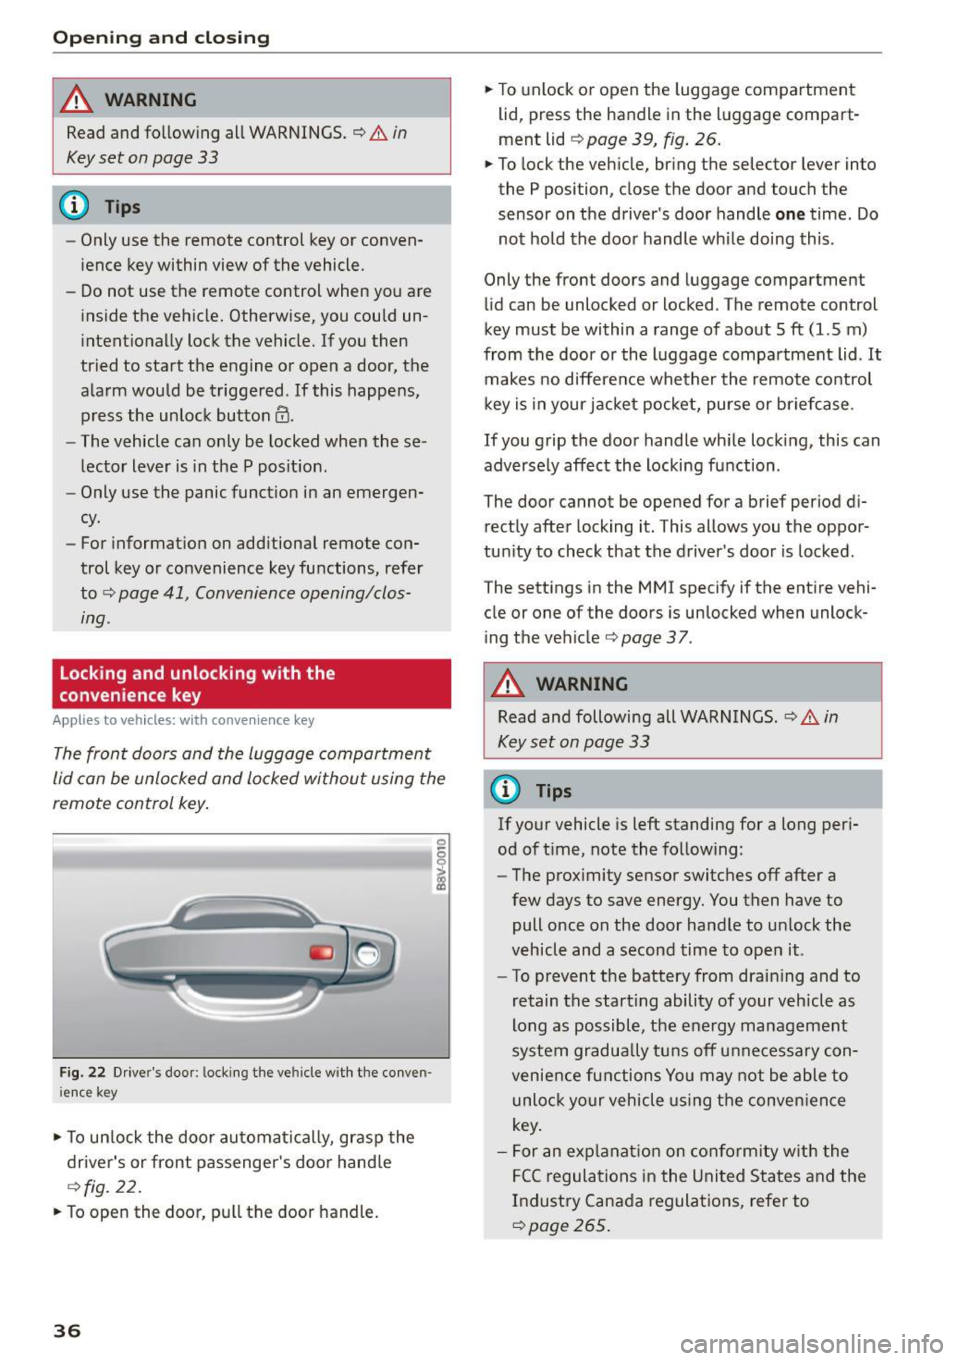
Fig. 22 Driver's door : locking the ve hicle with the conven
i ence key
• To unlock the door automatically, grasp the
driver's or front passenger 's door hand le
¢ fig. 22.
• To open the door, pull the door handle.
36
• To unlock or open the luggage compartment
lid, press the handle in the luggage compart
ment lid
¢ page 39, fig. 26.
• To lock the vehicle, bring the selector lever into
the P position, close the door and touch the
sensor on the driver's door handle
one time. Do
not hold the door handle while doing this .
Only the front doors and luggage compartment
lid can be unlocked or locked . T he remote control
key must be within a range of about
5 ft (1.5 m)
from the door or the luggage compartment lid . It
makes no difference whether the remote control
key is in your jacket pocket, purse or briefcase .
If you grip the door handle wh ile locking, this can
adversely affect the locking function .
The door cannot be opened for a brief period di rectly after locking it. This allows you the oppor
tunity to check that the driver's door is locked .
The settings in the
MMI specify if the entire vehi
cle or one of the doors is unlocked when unlock
ing the vehicle¢
page 37.
A WARNING
Read and following all WARNINGS . ¢ & in
Key set on page
33
@ Tips
If your vehicle is left standing for a long peri
od of time, note the following:
- The proximity sensor switches off after a
few days to save energy. You then have to
pull once on the door handle to unlock the
vehicle and a second time to open it.
- To prevent the battery from drain ing and to
retain the starting ability of your vehicle as
long as possible, the energy management
system gradua lly tuns off unnecessary con
venience functions You may not be able to
unlock your vehicle using the convenience
key .
- For an exp lanation on conformity with the
FCC regulations in the United States and the
Industry Canada regulations, refer to
¢page 265.
Page 40 of 282
Opening and closing
"'Select: the IMENU ! button> Car> Systems*
control button > Vehicle settings > Central
locking > Door unlocking.
Selecting All and pressing the~ button on the
remote control key unlocks the entire vehicle.
If you select
Driver and then press the~ button
on the remote control key, only the driver's door
will unlock. In vehicles with a convenience key,
only the front door whose handle you pull will
unlock. If you press the~ button twice, the en
tire vehicle will unlock. If you press the~ button,
the entire vehicle will always lock.
Folding* the exterior mirrors
"'Select: the IMENU ! button> Car> Systems*
control button > Vehicle settings > Central
locking > Fold mirrors when locking.
For more
information, refer to
c:> page 47, Adjusting
the exterior mirrors.
If you select On, the outside mirrors will fold in
automatically when you press the~ button on
the remote control key
i:> page 47.
Tone when locking
"'Select : the IMENU ! button> Car> Systems*
control button > Vehicle settings > Central
locking> Tone when locking.
When checked off./, a tone will sound when you
lock the vehicle.
If you press the~ button twice, the entire vehi
cle will lock. There is a locking tone at the same
time
1l .
Electronic immobilizer
The immobilizer prevents unauthorized use of
your vehicle.
A microchip in the key automatically deactivates
the electronic immobilizer when the key is locat
ed in the vehicle.
If you remove the key from the
vehicle, the electronic immobilizer activates
again automatically.
l) Thi s fu nct io n is not availabl e in all cou ntri es .
38
A WARNING ,_ -
Always take the key with you whenever you
leave your vehicle. The electronic immobilizer
can be deactivated with the key, so this could
make it possible for unauthorized persons to
start the engine and operate vehicle systems
such as the power windows or sunroof. This
can increase the risk of serious injury.
(D Tips
-The vehicle cannot be started if an unau
thorized key is used.
It may not be possible
to start the vehicle under certain circum
stances, for example if there is another ra
dio module like the key from another vehicle
or a transponder on the same keychain.
- For an explanation on conformity with the
FCC regulations in the United States and the
Industry Canada regulations, refer to
i:>page 265.
Safety central locking
App lies to vehicles : wi th safe ty cen tral lock ing
Safety central locking provides the possibility, to
only unlock the driver's door and the fuel filler
door. The rest of the vehicle remains locked.
Unlocking the driver's door and the fuel filler
door
"' Press the remote control key or convenience key
Ifill button once or turn the key once in the open
ing direction.
Unlocking all doors, the luggage
compartment lid and the fuel filler door
"' Press the remote control key or convenience key
Ifill button twice within five seconds or turn the
key
twice within five seconds in the opening di
rection.
When unlocking just the driver's door, the anti
theft alarm system* is also immediately deacti
vated.
In vehicles with an MMI, you can directly adjust
the safety central locking
c:> page 3 7.
Page 123 of 282
M N
0 > co ,...., \!) 1.1"1
1.1"1
1.1"1
,....,
Adjusting the display and the warning tones
App lies to vehicles: with pa rking system p lus/rearv iew cam
era
The display and warning tones con be adjusted in
the MMI.
~ Select: the I MENU ! button >Car> Systems *
control button > Driver assistance > Parking
aid.
Display
On* -
optical display is shown for the parking sys
tem plus, rearview camera image is shown for
parking system plus with rearv iew camera *.
Off -when the parking system is switched off, on
l y audible signals are given.
Warning tones
Front volume -
Volume for the front and side*
area
Rear volume -Volume for the rear area
Front frequency -Frequency for the front and
side* area
Rear frequency -Frequency for the rear area
Entertainment volume lowering -When the
parking system is turned on, the volum e of the
audio/video source is lowered.
The newly adjusted value is briefly heard from
the signal generator.
- The warning tones can also be adjusted di
re ctly from the visual d isplay or the rearview
camera image*. Simply press the
Settings
control button.
- The settings a re automatically stored and
ass igned to the remote control key that is in
use.
Error messages
Ap plies to vehicles: with park ing system p lus/rearv iew cam
era
There is an error in the system if the LED in the
p, ,1 A. button is blinking and you hear a continuous
Parking systems
alarm for a few seconds after switching on the
parking system or when the parking system is al
ready activated .
If the error is not corrected be
fore you switch
off the ignition, the LED in the P1
1,
button w ill blink the next time you switch on the
parking system by shift ing into reverse .
Parking system plus*
If a sensor is faulty, the~ symbol will appear in
front of/behind the vehicle in the MMI display. If
a rear sensor is faulty, only obstacles that are in
areas @and @are shown ¢
page 116, fig. 101.
If a front sensor is faulty, only obstacles that are
i n areas © and @are shown .
Drive to an authorized Audi dealer or authorized
Audi Serv ice Facility immediately to have the
malfunction corrected .
121
Page 212 of 282
Checking and Fill in g
negative cable on the battery must be dis·
connected. If you are just going to replace a
light bulb, then it is enough to switch off
the lights .
- Before disconnecting the battery, switch off
the anti-theft alarm system! Otherwise you
will set off the alarm .
- When disconnecting the battery, first dis
connect the negative cable and then the
posit ive cab le.
- Before reconnect ing the battery, make sure
all electrical consumers are switched off . Re
connect the pos itive cable first and then the
negative cable . Never intercha nge the ca
bles -th is could star t a fire!
- Never charge a froze n or a thawed-out bat
te ry.
It co uld explode! If a batte ry has fro
zen, then it m ust be repl aced. A d isc harged
b at tery can free ze over at 3 2 °F (0 °C).
- Make sure the vent hose is always attached
to the opening on the side of the battery .
- Never use batte ries which are damaged.
T he re is the danger of an explos ion! Always
replace a damaged battery.
_& WARNING
California P ropos ition 65 Warning:
- Battery posts , termina ls and re lated acces
sories contain lead and lead compounds ,
chemicals known to the Sta te of C alifornia
to cause ca nce r and reproductive problems.
Wash hands after hand ling.
(D Note
- Do not d isconnect t he ve hicle battery when
the ignition is o n or when the engine is run
ning, othe rwise , you w ill damage electronic
components in the electrical system .
- If your vehicle is going to stand for a long
period of time without be ing driven, p rotect
the battery from "freezing", otherwise it
will be damaged and will then have to be re
placed.
210
Battery charging
Starting the engine requires a well charged bat
tery .
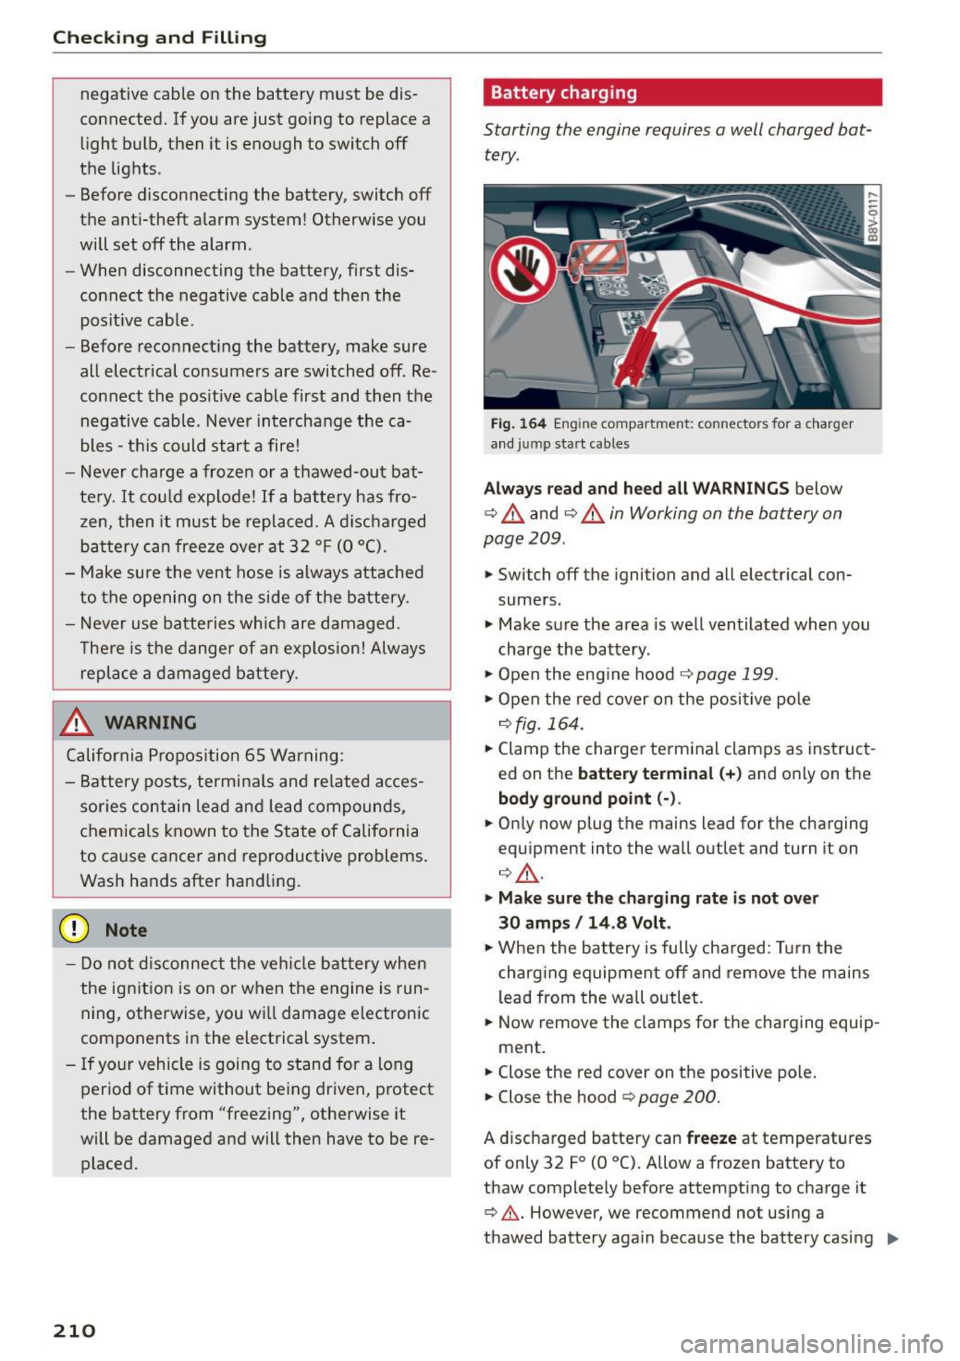
Fig. 16 4 En g in e compa rtmen t: connecto rs fo r a c harg er
and jump start c ables
Always read and heed all WARNINGS below
c> .& and q .& in Working on the battery on
page 209 .
.,.. Switch off the ignition and all elec trical con
sumers.
.,.. Make s ure the area is we ll ventilated when you
charge the battery .
.,.. Open the eng ine hood
q page 199 .
.,.. Open the red cover on the positive pole
q fig. 164 .
.,.. Clamp the charge r te rm inal clamps as inst ruct
ed on the
battery terminal (+ ) and o nly on the
body ground point (· ).
.,.. On ly now plug the mains lead for the charging
equ ipmen t in to the wall outlet and turn it on
~ .& -
... Make sure the charging rate is not ov er
30 amps / 14 .8 Volt .
.,.. When the bat tery is fully cha rged : Tur n the
charg ing equipment off and remove the mains
lead from the wall outlet.
.,.. Now remove the clamps fo r the charging equip -
ment .
.,.. Close the red cover on the positive pole.
.,.. Close the hood
c> page 200.
A d ischarged battery can freeze at temperatures
of only 32 F
0 (0 °C) . Allow a frozen battery to
thaw complete ly before attempting to charge it
~ .&. . However, we recommend not using a
thawed battery aga in because the battery casing ..,_
Page 251 of 282
....,
N
0 > co
rl I.O
"'
"'
"'
rl
-Some of the equipment listed in the follow
ing tables applies only to certain model
versions or certain opt ional equ ipment.
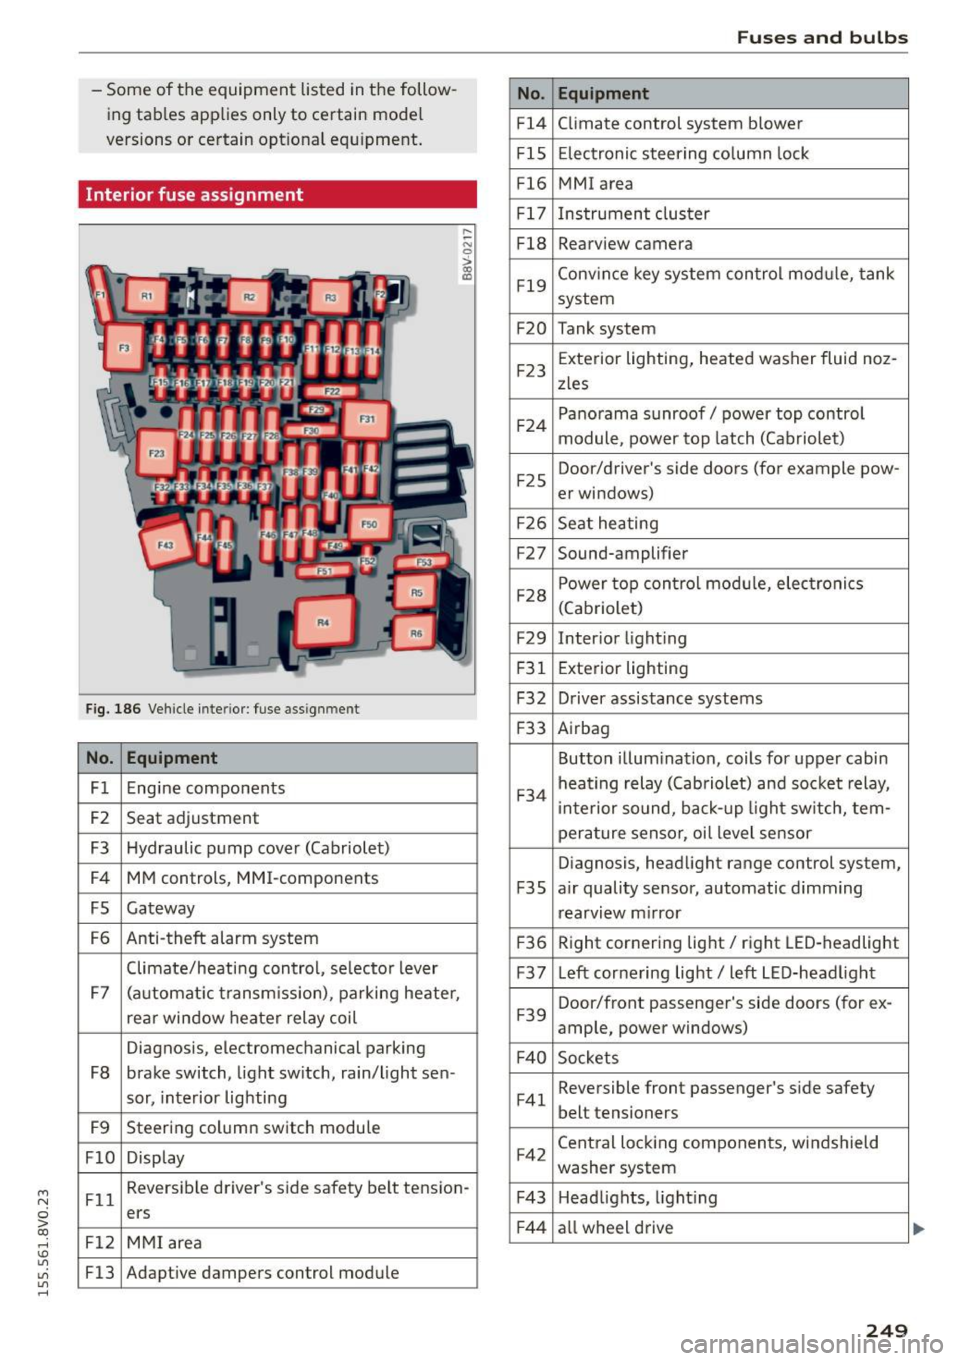
Interior fuse ass ignment
F ig. 186 Vehicle interior: fuse assignment
No. Equipment
Fl Engine components
F2 Seat
adjustment
F3 Hydraulic pump cover (Cabriolet)
F4 MM
controls, MMI-components
FS Gateway
F6 Anti-theft
alarm system
Climate/heati ng control, selector lever
F7 (automat ic transm ission), parking heater,
rear window heater relay coil
Diagnosis, electromechanical parking
F8 brake switch, light switch, rain/light sen-
sor, interior lighting
F9 Steering column switch module
FlO Display
.... ~ N
0
>
"' (0
Fll Reversible
driver's side safety belt tension-
ers
F12 MMI area
F13 Adapt ive dampers control module
No.
Fl4
FlS
Fl6
F 1 7
F18
F19
F20
F23
F 24
F 25
F 26
F27
F28
F29
F 31
F32
F 33
F34
F3S
F 36
F37
F 39
F 40
F 41
F42
F43
F 44
Fu ses a nd bulb s
Equipment
Climate control system blower
Electronic steering co lumn lock
MMI area
Instrument cluster
Rearview camera
Conv ince key system control mod ule, tank
system
Tank system
Exterior lighting, heated washer fluid noz-
zles
Panorama sunroof/ power top control
module, power top latch (Cabriolet)
Door/driver 's side doors (for example pow-
er windows)
Se at heating
Sound-amplifier
Power top control modu le, electronics
(Cab riolet)
Inter ior light ing
E xterior lighting
Driver assistance systems
Airbag
Button illumination, coils for upper cabin
heating relay (Cab riolet) and socket relay,
i nte rior sound, back- up light sw itch, tern-
perature sensor, oi l level sensor
Diagnosis, headlight range control system,
a ir quality sensor, automatic d imming
rearview m irror
Right cornering light/ right LED-headlight
Left cornering light/ left LED-headlight
Door/front passenger's side doors (for ex-
ample, power windows)
Sockets Reversible front passenger's side safety
belt tensioners
Central locking components, windshield
washer system
Head lights, l ight ing
a ll wheel drive
249
Page 268 of 282
Index
A
A/C
refer to Climate control system (automatic) .66
re fer to Climate control system (manual) . 65
A/C (automatic climate control system) . . . . 66
A/C (manual climate control system) . . . . . . 65
Accessories . . . . . . . . . . . . . . . . . . . . . . . 5 7, 2 64
Active lane ass ist . . . . . . . . . . . . . . . . . . . . . 106
Activating vibration warning . . . . . . . . . . . 108
Adjusting steering time . . . . . . . . . . . . . . . 108
Clean ing the camera area . . . . . . . . . . . . . 236
Driver messages . . . . . . . . . . . . . . . . . . . . . 107
Indicator light . . . . . . . . . . . . . . . . . . . . . . 107
switching on and
off . . . . . . . . . . . . . . . . . 107
Adapt ive cruise control. . . . . . . . . . . . . . . . . . 96
Automatic transmission . . . . . . . . . . . . . . 100
C leaning the sensor . . . . . . . . . . . . . . . . . . 236
Driver messages . . . . . . . . . . . . . . . . . . . . . 102
General Information . . . . . . . . . . . . . . . . . . 97
Request for driver intervention . . . . . . . . . 102
Stop-and-go traffic . . . . . . . . . . . . . . . . . . 100
Adaptive dampers.................. ... 112
Indicator light . . . . . . . . . . . . . . . . . . . . . . . 25
Adaptive light .. .... .... ..... .. .. .. 43, 112
I ndicator l ight . . . . . . . . . . . . . . . . . . . . . . . 24
AdBlue . . . . . . . . . . . . . . . . . . . . . . . . . . . . . . 195
Filling . . . . . . . . . . . . . . . . . . . . . . . . . . . . . 197
Messages . . . . . . . . . . . . . . . . . . . . . . . . . . 196
Adjusting air distribution (Climate control sys-
t em).... .. .. .. ................. .. .... 67
Ad justing air vents . . . . . . . . . . . . . . . . . . . . . 68
Adjusting air vents (manual climate control
system) . . . . . . . . . . . . . . . . . . . . . . . . . . . . . . 65
Adjusting automatic headlights . . . . . . . . . . 45
Adjusting the center console lighting . . . . . . 47
Adjusting the temperature manual climate control system . . . . . . . . . . 65
advanced key
refer to Convenience key . . . . . . . . . . . . . . . 75
Airbag . . . . . . . . . . . . . . . . . . . . . . . . . . . . . . 148
Indicator light . . . . . . . . . . . . . . . . . . . . . . . 20
Airbag system . . . . . . . . . . . . . . . . . . . . . . . . 168
Advanced Airbag-System . . . . . . . . . . . . . . 152
Advanced Airbag System components . . . 155
Ca re. . . . . . . . . . . . . . . . . . . . . . . . . . . . . . . 163
Children . . . . . . . . . . . . . . . . . . . . . . . . . . . 174
266
Child restraints ..... .. .............. . 174
Components (front airbags) . . . . . . . . . . . 155
Danger of fitting a ch ild seat on the front
passenger seat . . . . . . . . . . . . . . . . . . . . . . 149
Disposal . . . . . . . . . . . . . . . . . . . . . . . . . . . 163
Front airbags . . . . . . . . . . . . . . . . . . . 152, 153
How do the front airbags work? . . . . . . . . 158
How many a irbags does my vehicle have? 155
How the Advanced Airbag System compo-
nents work together . . . . . . . . . . . . . . . . . 157
Important information . . . . . . . . . . . . . . . 148
Important safety instructions on the knee
airbag system . . . . . . . . . . . . . . . . . . . . . . . 166
Knee a irbags. . . . . . . . . . . . . . . . . . . . . . . . 164
Monitoring . . . . . . . . . . . . . . . . . . . . . . . . . 160
PASSENGER AIR BAG OFF light . . . . . . . . . 160
Repairs . . . . . . . . . . . . . . . . . . . . . . . . . . . . 163
Safety instructions . . . . . . . . . . . . . . . . . . . 162
Side a irbags . . . . . . . . . . . . . . . . . . . . . . . . 166
Side curtain airbags . . . . . . . . . . . . . . . . . . 169
Warning/Indicator lights . . . . . . . . . . . . . 160
When must the system be inspected? . . . 160
Alarm system
refer to Anti-theft alarm system . . . . . . . . . 33
Alignment pin (changing the whee l) . . . . . . 241
All-weather lights (LED headlights) . . . . . . . . 43
All season tires . . . . . . . . . . . . . . . . . . . . . . . 229
All wheel drive . . . . . . . . . . . . . . . . . . . . . . . 127
Alternator
refer to A lternator (indicator light) . . . . . . 19
Alternator (indicator light) . . . . . . . . . . . . . . 19
Ambient lighting . . . . . . . . . . . . . . . . . . . . . . 46
Ant i-freeze
refer to Engine coolant . . . . . . . . . . . . . . . 205
Anti-lock braking system . . . . . . . . . . . . . . . 123
Ind icator light . . . . . . . . . . . . . . . . . . . . . . . 21
Anti-slip regulation . . . . . . . . . . . . . . . . . . . 123
Indicator light . . . . . . . . . . . . . . . . . . . . . . . 21
Ant i-theft alarm system . . . . . . . . . . . . . . . . . 33
Anti -theft protection
Electronic immobilizer . . . . . . . . . . . . . . . . . 38
Audi active lane assist
refer to Active lane assist . . . . . . . . . . . . . 106
Audi adaptive cruise control
refer to Adaptive cruise control. . . . . . . . . . 96
Audi adaptive light
refer to Adapt ive light . . . . . . . . . . . . . . . . . 43