headlights AUDI S6 2009 Owners Manual
[x] Cancel search | Manufacturer: AUDI, Model Year: 2009, Model line: S6, Model: AUDI S6 2009Pages: 398, PDF Size: 43 MB
Page 14 of 398
Instruments and warning /indicator lights
Instruments and warning/indicator lights
Instruments
Instrument cluster and controls
The instrument cluster is your central source of informa
tion.
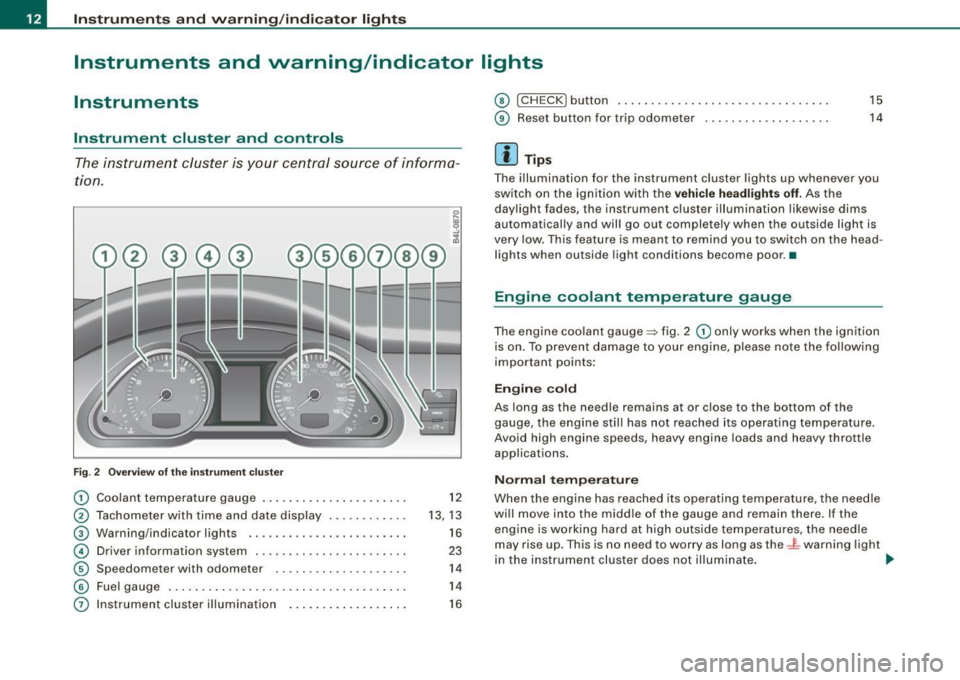
Fig. 2 Overview of the instrument cluster
G) Coolant temperature gauge ....... ........ ...... .
@ Tachometer with time and date display .. .... .... . .
G) Warning/indicator lights .. ............. ...... .. .
© Driver information system ...................... .
© Speedometer with odometer . .... ........ .... .. .
© Fuel gauge .... .... ... ...... .... ...... .... ... . .
0 Instrument cluster illumination ................ . .
12
13, 13
16
23
14
14 16
© I CH ECK] button ............. ..... .... ... ..... •.
® Reset button for trip odometer .................. .
[ i ] Tips
15
14
The illumination for the instrument cluster lights up whenever you
switch on the ignition with the
vehicle headlights off. As the
daylight fades, the instrument cluster illumination likewise dims
automatically and wil l go out complete ly when the outside light is
very low . This feature is meant to remind you to switch on the head
lights when outside light conditions become poor. •
Engine coolant temperature gauge
The engine coolant gauge~ fig. 2 G) only works when the ignition
is on. To prevent damage to your engine, please note the fo llowing
important points:
Engine cold
As long as the needle remains at or close to the bottom of the
gauge, the engine still has not reached its operating temperature .
Avoid high engine speeds, heavy engine loads and heavy throttle
applications .
Normal temperature
When the engine has reached its operating temperature, the needle
will move into the middle of the gauge and remain there. If the
engine is working hard at high outside temperatures, the needle
may rise up. This is no need to worry as long as the -~-warning light
in the instrument cluster does not illumina te. ..,.
Page 18 of 398
Inst rum ent s a nd warning /indi cato r li ghts
Instrument cluster illumination
The basic brightness of the illumination for the instru
ments, the center console and the display can be
adjusted .
Fig. 6 Instrume nt
c lu ster illu minat io n
Press the"+" button to increase the brightness during the
hours of darkness.
- Press the" -" button to decrease the brightness during the
hours of darkness.
A light sensor in the instrument cluster controls the illumination for
the instrument cluster, the center console and the displays. In a
bright environment, using the buttons to change the brightness has
no effect.
[ i J Tip s
The illumination for the instrument cluster lights up whenever you
switch on the ignition with the vehicle headlights off . As the
daylight fades, the instrument cluster illumination likewise dims
automatically and will go out completely when the ou ts ide light is
very low. This feature is meant to remind you to switch on the head
lights when outside light conditions become poor .•
Warning/indicator lights
Overview
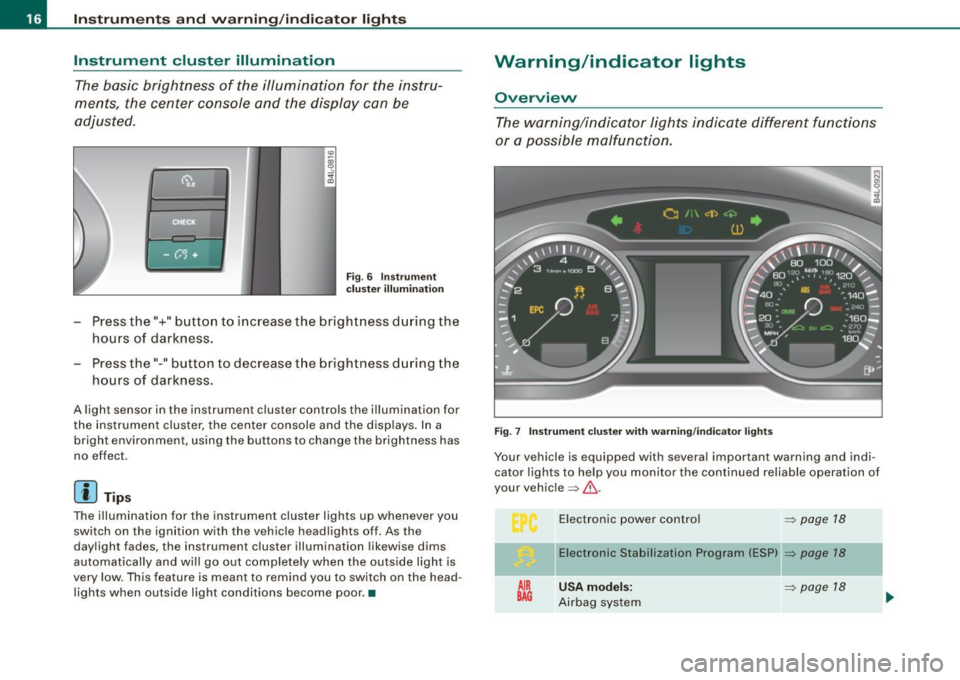
The warning/indicator lights indicate different functi ons
or a possible malfunction.
F ig. 7 Instr um ent clu ste r wi th w arnin g/indica tor lights
Your vehicle is equipped with several important warning and indi
cator lights to he lp you monitor the continued reliab le operation of
your vehic le => & .
AIR
BAG
E lectronic power contro l
=> page 18
Electronic Stabili zation Program (ES P) => page 18
U SA model s: => page 18
Airbag system
Page 65 of 398
Clear vision
Lights
Switching the headlights on and off ·'t!-·
In the "AUTO " position, a light sensor automatically
s w itches t he head- and tailligh ts on and off in response to
l ight con ditio ns.
Fig . 5 1 In strument
p an el: l ight swit ch
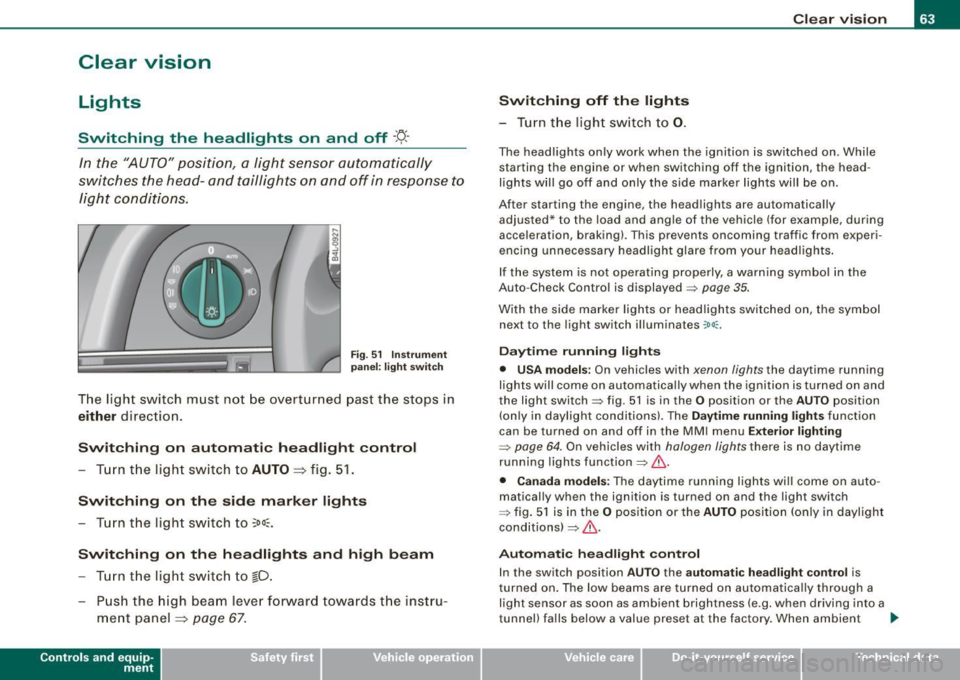
The light switch must not be ove rt u rned pas t the stops in
either direction .
Switching on automatic headlight control
-Tu rn the light swi tch to AUTO => fig. 51 .
Switching on the side marker lights
- Turn t he light switch to ~oo~ .
Switching on the headlights and high beam
-Tur n t he light switch to gD.
- Pu sh th e hi gh bea m le v er for ward tow ards t he inst ru-
m ent panel
=> page 67 .
Con tro ls and eq uip
ment
Switching off the lights
- Tu rn the light sw itch to 0. Clear vision
The head
ligh ts only work when the ignitio n is switched on . While
starting the engine or when switching off the ignition, the head
lights wil l go off and only the side marker lights wil l be on.
After starting the engine, the headlights are automatica lly
adjus ted* to the load and ang le of the vehicle (for example, du ring
acceleration, braking) . This prevents oncoming traffic from experi
encing unnecessary headlight glare from you r headlights .
If the system is not operating properly, a warning symbol in the
Auto -Check Contro l is displayed
=> page 35.
With the side marker lights or headlights switched on, t he sym bol
next to the light switch illuminates
coo:.
Daytime running light s
• USA models :
On vehicles with xenon lights the daytime running
ligh ts will come on automa tically when the ignition is tur ned on and
the light switch=> fig. 51 is in the
O position or the AUTO position
(on ly in daylight conditions). The
Daytim e running lights func tion
can be turned on and off in the MMI menu
Exteri or lighting
=> page 6 4. On vehicles with halogen lights there is no daytime
running ligh ts function=> &,.
• Canada models: The daytime running lights wi ll come on au to
matically when the ignition is turned on and the ligh t switch
=> fig. 5 1 is in the O position or the AUTO positi on (only in dayligh t
conditions)
=> &, .
Automatic headlight control
In the switch posi tion AUTO the automatic headlight contro l is
turned on . The low beams are turned on automatica lly through a
light sensor as soon as ambient brightness (e .g. when driving into a
tunnel) fa lls below a value preset at the factory . When ambie nt ..,_
Vehicle care I I irechnical data
Page 66 of 398
Clear vision
brightness increases again, the low beams are turned off again
a uto matically =>& .
In t he
AUTO pos it ion the low b eams ar e switched off automatically
when the ignition is turned off .
Light Sensor Malfunction
In the e vent of a lig ht sensor m alfu n ction, th e drive r is noti fie d in the
instrument cluster display:
e. Automat ic headlights /automatic wipers defective
F or safe ty r eas o ns th e low bea ms are tur ned o n perma nently w ith
th e switch in
AUTO . However, you can continue to tur n the lights on
and off u sing the ligh t switc h. Have the light sen sor checked as s oon
as possib le at a dealership.
& WARNING
• Never use daytime running lights to see where you are going.
They are not bright enough and will not let you see far enough ahead for safety , espe cially at dusk or when it is dark. Always
switch on the low beams at dusk or when it is dark .
• Automatic headlights are only intended to assist the driver .
They do not relieve the driver of his responsibility to check the headlights and to turn them on manually according to the current
light and visibility conditions. For example , fog and rain cannot be
detected by the light sensors . So always switch on the headlights
under these weather conditions and when driving in the dark
tD .
• Crashes can happen when you cannot see the road ahead and
when you cannot be seen by other motorists.
-Always turn on the headlights so that you can see ahead and
so that others can see your car from the back.
[ i ] Tips
• W it h the sw it ch in AUTO front fo g ligh ts and re a r fo g ligh ts
cannot be turned on i n addition . • T
he light sensor for head light control is located in the rear view
mi rror mount . Do no t ap ply a ny s ticker s to th e windshie ld in thi s
area to p revent malfunctions or failures.
• I f you remov e the ignition fr om the ignition l oc k whil e th e he ad
l ights are still on, a buzzer will sound as long as the driver's door is
open to re mind you t o turn off the li g ht s.
• Al ways observe the specific local regulations for your area as to
w he n to u se yo ur ligh ts .•
Adjusting exterior lighting
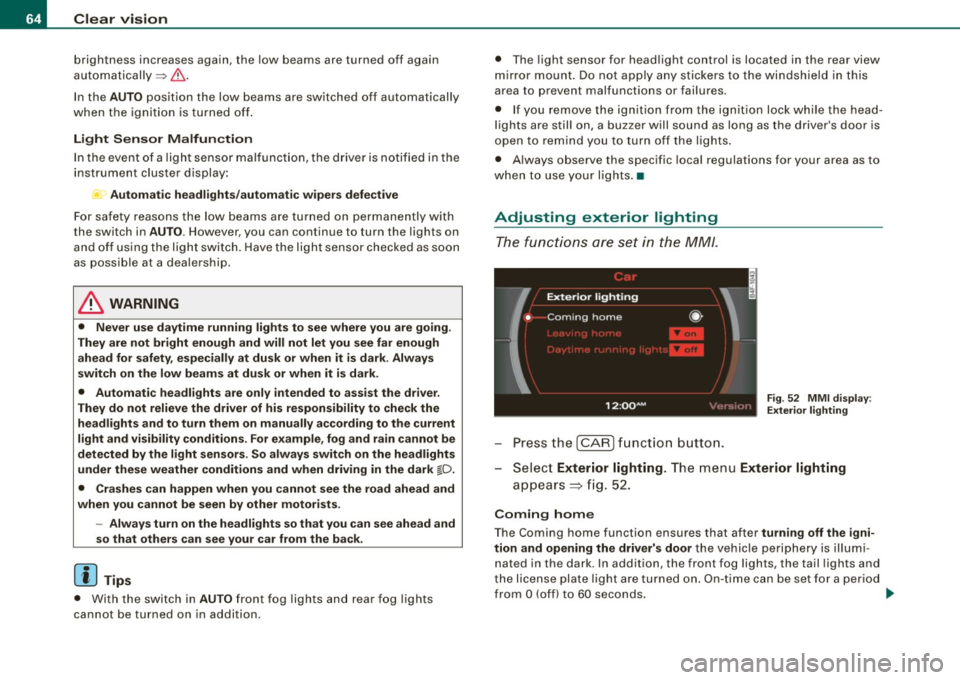
T he functi o ns are se t in th e MM /.
Fig. 52 MM I d is pl ay:
Exterior lighting
- Pre ss th e [ C AR] fun ction bu tto n.
- Selec t
Exterior lighting. The menu Exterior lighting
a pp ears => fig. 52.
Coming home
The Coming home function ensures that after turning off the igni
tion and opening the driver's door
t h e v ehicle per ip he ry is ill um i
nated in the dark. In addition, the front fog lights, the tail lights and
th e lic ense p la te li g ht are tur ned o n. O n-tim e ca n be set for a pe riod
from
O (off) to 60 seconds. .,,_
Page 70 of 398
Clear vision
High beam
~D
-Push the lever forward 0 to switch on the high beam.
Pull the lever back towards you to switch off the high
beam.
Headlight flasher
~D
- Pull the lever toward the steering wheel © to use the
headlight flasher.
Notes on these features
• The turn signals only work with the ignition turned on. The indi
cator lights ¢ or¢ in the instrument cluster~ page 16 also blink.
• After you have turned a corner, the turn signal switches off auto
matically.
• The high beam works only when the headlights are on. The indi
cator light ~D in the instrument cluster illuminates when the high
beams are on.
• The headlight flasher works only as long as you hold the lever -
even if there are no lights turned on. The indicator light [Din the
instrument cluster illuminates when you use the headlight flasher.
0 Note
Do not use the high beam or headlight flasher if you know that these
could blind oncoming traffic. •
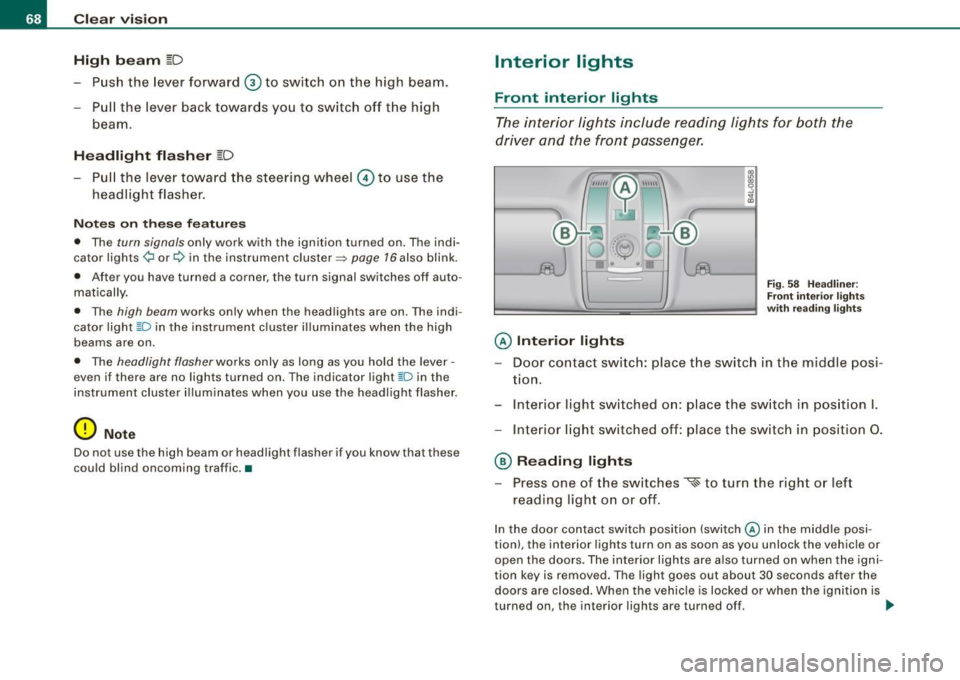
Interior lights
Front interior lights
The interior lights include reading lights for both the
driver and the front passenger.
@ Interior lights
Fig . 58 Headliner :
Front interior lights
with reading lights
- Door contact switch: place the switch in the middle posi -
tion.
- Interior light switched on: place the switch in position I.
- Interior light switched off: place the switch in position 0.
@ Reading lights
- Press one of the switches
~ to turn the right or left
reading light on or off.
In the door contact switch position (switch@ in the middle posi
tion), the interior lights turn on as soon as you unlock the vehicle or
open the doors. The interior lights are also turned on when the igni
tion key is removed. The light goes out about 30 seconds after the
doors are closed. When the vehicle is locked or when the ignition is
turned on, the interior lights are turned off. ..,_
Page 75 of 398
• Always check that the wiper blades are not fro zen to the glass
before you turn the wipers on. Loosen a wiper blade which is frozen
in place before operating the wipers to prevent damage to the wiper
blade or the wiper motor.
• Do not use the wipers to clea r a frosted window . Using the
wipers as a convenient ice scraper will destroy the wiper blades.
• Before you take your v ehicl e to an automatic car wash, make sure
you have the windshield wiper system switched off (lever in position
Ol, otherwise the windshield wiper sys tem could get damaged in the
car wash if it should suddenly come on.
[ i] Tips
• The rain sensor is part of the interval wiping system . Turning off
the ignition will also deactivate the rain sensor . To reactivate the
sensor, switch off the interval wiping function, then switch it back
on again.
• Worn or dirty windshield wiper blades cause smearing which
can affect the operation of the rain sensor. Check the condition of
your windshield wiper blades regularly.
• Make sure the washer fluid reservoir in the engine compartment
is topped off before going on a long trip. Look up~
page 316for
checking and filling the washer container .•
A pplies to ve hicles: wit h hea dligh t wa sher sys tem
Headlight washer system
The headlight washer system cleans the headlights.
- Operate the windshield wiper/washer system~ page 71,
fig. 65 ® with the headlights turned on by holding the
lever for longer than one second.
The washer jets extend forward out of the front bumper driven by
water pressure to spray the front headlights with water.
Controls and equip
ment
Clear vision
You should inspect the headlights regularly (for example when refu
eling) and clean off any solid dirt or insects from the lenses.
To ensure the system works properly in winter , keep the washer jets
free of snow and
remove any ice using a de -icing spray .•
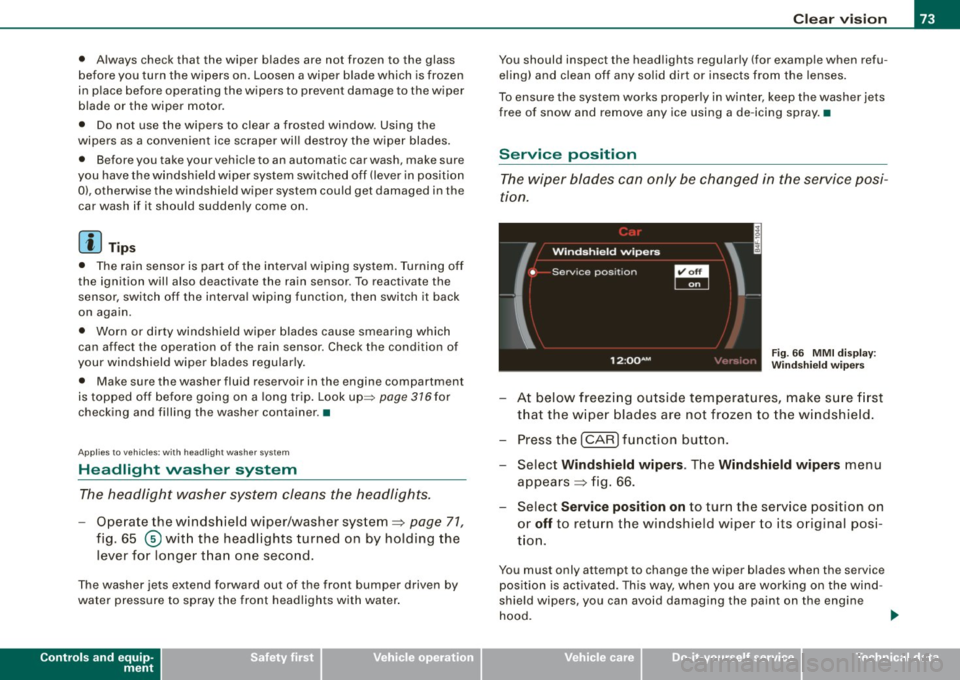
Service position
The wiper blades can only be changed in the service posi
tion.
Fig. 66 MMI display :
Windshield wipers
At below freezing outside temperatures, make sure first
that the wiper blades are not frozen to the windshield.
- Press the [CAR] function button.
- Select Windshield wipers . The Windshield wipers menu
appears ~ fig. 66.
- Select Service position on to turn the service position on
or
off to return the windshield w iper to its orig inal posi
tion .
You must only attempt to change the wiper blades when the s ervice
position is activated. This way, when you are working on the wind
shield wipers , you can
avoid damaging the paint on the engine
hood.
~
I • •
Page 77 of 398
& WARNING
Be sure to in sp ec t the co n dition of your wip er bl ade s regularl y. See
your authori zed Audi de aler for replaceme nt blade s.
(D Note
To prevent damage to the wiper system:
• Always loosen blades which are frozen to the windshield before
operating wipers.
• Do not use gasoline, kerosene, paint thinner , or other solvents on
or near the wiper blades.
• Do not attempt to move the wipers by hand .
• The windshield wiper blades mus t only be replaced when in the
service position =>
page 73! Otherwise, you risk damaging the paint
on the hood or the windshield wiper motor.
[ i J Tips
Commercial hot waxes app lied by automatic car washes affec t the
cleanability of the windshie ld. •
Mirrors
Manual anti -glare adjustment
Standard setting
Move the sma ll lever ( located o n the bottom edge of t he
mirr or) to the front.
Anti-glare setting
-Move the sma ll lever ( loc ate d on t he bo ttom e dge of t he
m ir ror) to th e rear. •
Contro ls and eq uip
ment
Clear vision
A pp lies to vehicles: w ith automatically dimming in side mi rror w it h digita l com pass
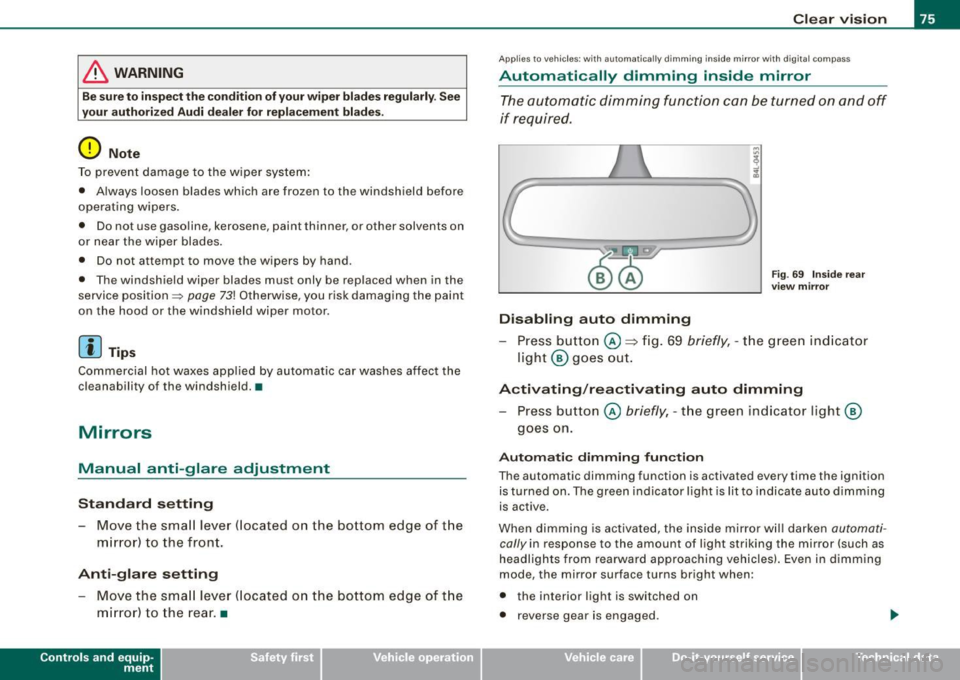
Automatically dimming inside mirror
The automatic dimming function can be turned on and off
if required .
Disabling auto dimming
Fig . 69 In side rear
vi ew mirror
Pr ess button @ => fig. 69 briefly , -th e g reen ind ic ato r
light @ goes ou t.
Activating /rea ctivating auto dimming
Press button @ briefly, -th e green ind icator light @
goes on.
Automati c dimming fun ction
The automatic dimming function is activated every time the ignition is turned on. The green indicator light is lit to indica te auto dimming
is active .
When dimming is activated, the inside mirror w ill darken
automa ti
cally in response to the amount of light striking the mirror (such as
headlights from rearwa rd approaching vehicles). Even in d imm ing
mode, the mirror surface turns bright when:
• the interior light is switched on
• reverse gear is engaged .
Vehicle care I I irechnical data
Page 78 of 398
Clear vision
& WARNING
Broken glass of automatic dimming mirror can cause electrolyte
fluid leakage. Electrolyte fluid can irritate skin, eyes, and respira
tory system .
• Repeated or prolonged exposure to electrolyte can cause irrita
tion to the respiratory system, especially among people with
asthma or other respiratory conditions. Get fresh air immediately
by leaving the vehicle or, if that is not possible, open windows and
doors all the way.
• If electrolyte gets into the eyes, flush them thoroughly with
large amounts of clean water for at least 15 minutes; medical
attention is recommended.
• If electrolyte contacts skin, flush affected area with clean water
for at least 15 minutes and then wash affected area with soap and
water; medical attention is recommended. Thoroughly wash
affected clothing and shoes before reuse.
• If swallowed and person is conscious, rinse mouth with water
for at least 15 minutes. Do not induce vomiting unless instructed
to do so by medical professional. Get medical attention immedi
ately.
0 Note
Liquid electrolyte leaked from a broken mirror glass will damage any
plastic surfaces it comes in contact with . Clean up spilled electrolyte
immediately with clear water and a sponge .
[ i ] Tips
• If you switch off the automatic dimming function on the inside
mirror, automatic dimming of the outside mirrors will likewise be
disabled.
• Check to make sure there are no objects preventing light from
reaching the inside mirror. •
Do not attach any stickers to the windshield in front of the light
sensor, as this would interfere with the automatic operation of the
headlights and the automatic dimming of the inside mirror.
• Be aware that automatic dimming of the inside mirror can only
operate properly if the rear window sun blind * is retracted .•
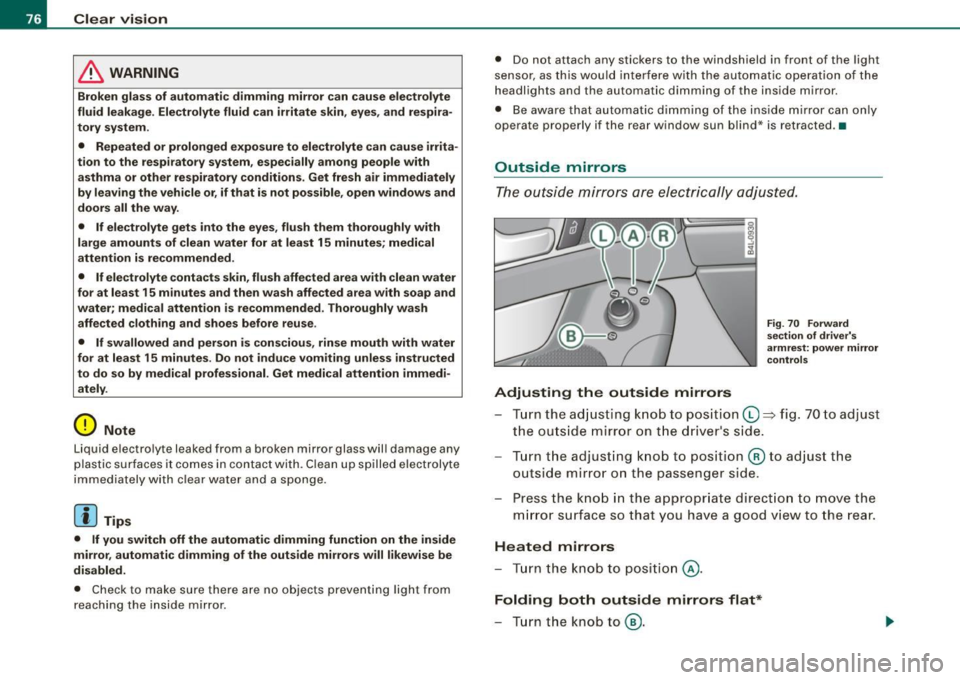
Outside mirrors
The outside mirrors are electrically adjusted.
Adjusting the outside mirrors
Fig. 70 Forward
section of driver's
armrest: power mirror
controls
Turn the adjusting knob to position (D => fig. 70 to adjust
the outside mirror on the driver's side.
Turn the adjusting knob to position
@ to adjust the
outside mirror on the passenger side .
Press the knob in the appropriate direction to move the
mirror surface so that you have a good view to the rear .
Heated mirrors
- Turn the knob to position
@.
Folding both outside mirrors flat*
- Turn the knob to® ·
Page 79 of 398
Depending on the outside temperature, the mirror surfaces are
heated unti l the ignition is switched off -even if the knob is no
longer in posi tion
@ .
We recommend folding * the outside mirrors flat to he lp when
par king your ve hicle or when maneuvering in very tight spaces .
Memory setting for the outside mirrors*
When the seat position is saved in the memory, the position of the
outside mirrors is saved at the same time~
page 84.
If the position o f the mi rror surface is changed o n a ti lted mirror, this
new pos ition wi ll be automatically saved to th e remote key when th e
vehicle is taken out o f reverse gear.
Tilting the passenger 's side out side mirror (on ly with
seat memory )
When you move the selector lever into R (Reverse), the mirror on the
front passenger's d oor (knob t urn ed to@ ~
page 76, fig. 70) will tilt
s lightly downward. This make is easier for you to see the curb when
you are backing into a parking space .
The mirror returns to its initia l position as soon as reverse gear is
disengaged and vehic le speed is above about 9 mph (15 km/h). The
mirror also returns to its initia l position if the switch is moved to the
driver's outside mirror
0 or the ignition is switched off.
Automatic anti -glare for the outside mirror s*
The outside mir ro rs dim at the same time as the inside mirro r. When
the ign ition is switched on, the mirrors automat ically dim
depending on the amount of light striking the mirrors (such as head
lights shining into the vehicle from the rear).
When you turn on the interior light, or wh en you move the selector
lever int o
R (Reverse), the ant i- g lare function stops a nd the mirro rs
return to their original condition (not darkened).
Controls and equip
ment
Cl ea r vision
0 Note
• Curved ( i.e . convex) mirror sur faces increase your fie ld o f view .
Remember that vehicles or other objects w ill appear smal ler and
f arther away than when seen in a flat mirror. If you use th is mi rror to
estimate distances of fol lowing vehicles when changing lan es, you
cou ld esti mate incor rect ly a nd cause an acc ident .
• I f the mirror housing is moved un intentionally (for example,
wh ile pa rking your veh ic le), then you must first fold the mirror elec
trically . Do not readjust the mirror housing manually. You cou ld
damage the motor which controls the mirror.
[ i ] Tips
If t here s hould be a malfunct io n in the electrica l system, you ca n
sti ll adjust the outside mirrors by pressing the edge of the mirror .•
Ap plies to vehicles: wit h automatic dimm in g for ou tsi de m irr ors
Automatic dimming for outside mirrors
The outside mirr ors are d immed t oge the r with the au tomati c
dimming of the inside mirror. When the ignition is switched on , the
mir ro rs darken automat ically depending on the light s triking the m
(e.g . headlights from the rear) .
When the interior lighting is switched on and when reverse gear is engaged, the mi rrors are switched back to the ir or iginal br ightness
(not dimmed).
_& WARNING
Broken glass of automatic dimming mirror can cause electrolyte
fluid leakage . Electrolyte fluid c an irritate skin , eyes , and respira
tory system .
• Repeated or prolonged exposure to electrolyte can c ause irrita -
tion to the respiratory system , e specially among people with .,_
I • •
Page 286 of 398
llffll __ C_ le_ a _ n_i_n ~g _ a_ n_ d __ p_r _o _t _e _c_ t_ i_o _n ___________________________________________ _
0 Note
• Never try to remove d irt, mud or dust if the surface of the vehicle
is dry . Never use a dry cloth or sponge, since this cou ld scratch your
vehic le's paint or w indows.
• Never wash your car in bright sunlight. Drops of water act as
magnify ing lenses and may damage your paint.
• When you wash your car in the winter : if you rinse your vehicle
with a hose, be careful not to aim the stream of water directly at
locks, or at door or hatch openings -they can freeze shut.
• Never use sponges designed to remove insects, or any kitchen
scouring sponges or similar products. They can damage your paint
finish .
• Never use a dry cloth or sponge to c lean the head ligh ts. Only use
wet cloths or sponges to prevent scratches . It is best to use soapy
water.
For the sake of the environment
In the interest of the environment, the vehicle should on ly be
washed in specia l wash bays. •
Washing your vehicle with a power washer
Cleaning the exterior of your car with a high -p ressure
power washer is safe as l ong as y ou observe a few simple
rules .
-Before using the power washer, make s ure you have read
and understood the WAR NINGS=::;,
& in "General infor
mati on" o n
page 282.
-Always follow the operating instructions for the power
washer. - Make sure that the jet o
n the spray hose pro duces a "fan
sha ped sp ray".
D o
not hold the spray nozzle too close to soft materials.
When cleaning the vehicle with a power washer always follow the
operating instructions. This applies particula rly to the
operating
pre ssure
and the spraying di stance . Maintain a sufficient distance
to soft materia ls such as rubber hoses and sound/vibration dead
ening materia ls (part icularly on the underside of the engine hood).
Do not use a jet which sprays water in a
direct stream or one that
has a
rotating jet.
Water temperature should not exceed 140 °F (60 °Cl.
& WARNING
Never wash tire s with a jet that sp ra ys water in a dir e ct stream .
Thi s could cau se invisible damage to the tire s and we ake n them ,
eve n if th e spra y is from a re lativel y lo ng dis tanc e an d f or a sh o rt
time . Damaged and weakened tire s can f ail and cau se ac cident s
a nd per sona l injur y.
0 Note
To avoid damaging your vehicle, always make sure that there is
suffic ient distance between the spray head and soft materia ls like
rubber hoses, plastic parts and sound -deadening materials . Never
aim the spray head at the same p oint for a long time . This also
applies to cleaning headlights and painted bumpers . Remember :
the c loser the nozzle is to the surface of the material, the greater the
stress on the mater ial. •