wheel AUDI TT COUPE 2016 Owners Manual
[x] Cancel search | Manufacturer: AUDI, Model Year: 2016, Model line: TT COUPE, Model: AUDI TT COUPE 2016Pages: 322, PDF Size: 52.86 MB
Page 4 of 322
Downloaded from www.Manualslib.com manuals search engine Table of contents
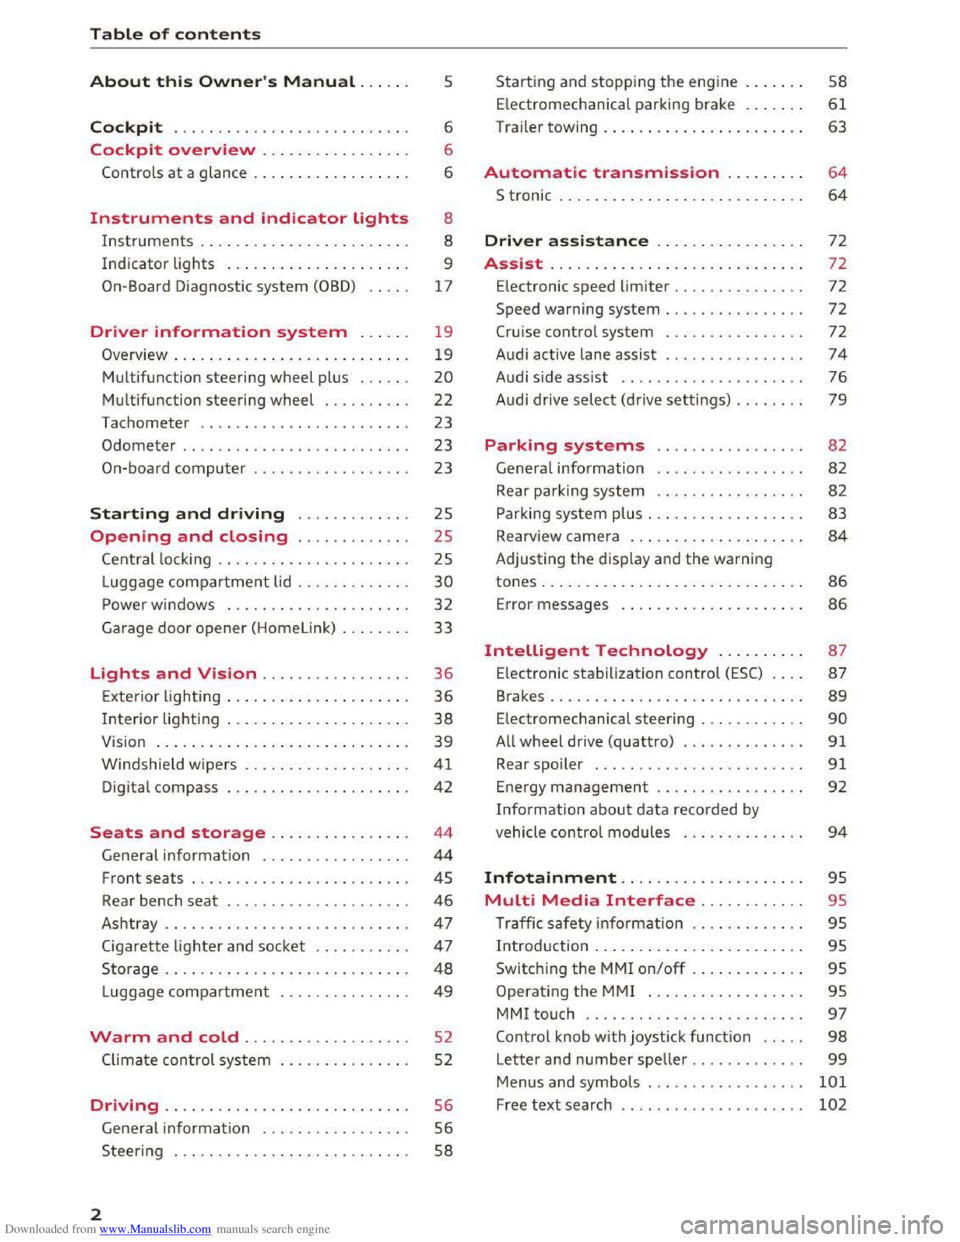
About this Owner's Manual. . . . . . 5
Cockpit . . . . . . . . . . . . . . . . . . . . . . . . . . . 6
Cockpit overview . . . . . . . . . . . . . . . . . 6
Controls at a glance . . . . . . . . . . . . . . . . . . 6
Instruments and indicator lights 8
Instruments . . . . . . . . . . . . . . . . . . . . . . . . 8
Indicator lights . . . . . . . . . . . . . . . . . . . . . 9
On-Board Diagnostic system
(OBD) . . . . . 17
Driver information system . . . . . . 19
Overview . . . . . . . . . . . . . . . . . . . . . . . . . . . 1 9
Multifunction steering wheel plus . . . . . . 20
Multifunction steering wheel . . . . . . . . . . 22
Tachometer ....................... .
Odome ter
......................... . 23
23
On-boa rd computer . . . . . . . . . . . . . . . . . . 23
Starting and driving . . . . . . . . . . . . . 25
Opening and closing . . . . . . . . . . . . . 25
Cent ral lock ing . . . . . . . . . . . . . . . . . . . . . . 25
L ugg age com pa r
tment lid . . . . . . . . . . . . . 30
Power windows . . . . . . . . . . . . . . . . . . . . . 32
Garage door opener (Home
link) . . . . . . . . 33
Lights and Vision . . . . . . . . . . . . . . . . . 36
Exte rio r ligh ting . . . . . . . . . . . . . . . . . . . . . 36
I
nterior lighting . . . . . . . . . . . . . . . . . . . . . 38
V1s1on . . . . . . . . . . . . . . . . . . . . . . . . . . . . . 39
W indshield wipers . . . . . . . . . . . . . . . . . . . 41
Dig ita l compass . . . . . . . . . . . . . . . . . . . . . 42
Seats and storage . . . . . . . . . . . . . . . . 44
General information . . . . . . . . . . . . . . . . . 44
Front seats . . . . . . . . . . . . . . . . . . . . . . . . . 45
Rear bench seat . . . . . . . . . . . . . . . . . . . . . 46
Ashtray . . . . . . . . . . . . . . . . . . . . . . . . . . . . 47
Cigarette li
ghter and sock et . . . . . . . . . . . 47
Storage . . . . . . . . . . . . . . . . . . . . . . . . . . . . 48
L ugg age com par t
ment . . . . . . . . . . . . . . . 49
Warm and cold . . . . . . . . . . . . . . . . . . . 52
Clima te con trol system . . . . . . . . . . . . . . . 52
Driving ........................... .
General information ........... ..... .
S teer ing . .. .. .
.................... .
2
56
56
58
Starting and stoppin g the engine . . . . . . . 58
E lectromechanical parking brake . . . . . . .
61
Trailer towing . . . . . . . . . . . . . . . . . . . . . . . 63
Automatic transmission . . . . . . . . . 64
S tronic . . . . . . . . . . . . . . . . . . . . . . . . . . . . 64
Driver assistance . . . . . . . . . . . . . . . . . 72
Assist.. .. .. .. .. .. .. .... ....... .. .. 72
E lectronic speed
limiter . . . . . . . . . . . . . . . 72
Speed warning system . . . . . . . . . . . . . . . . 72
Cruise control system . . . . . . . . . . . . . . . . 72
Audi active lane assist . . . . . . . . . . . . . . . .
74
Audi side assist . . . . . . . . . . . . . . . . . . . . . 76
Audi drive select
(drive setti ngs) . . . . . . . . 79
Parking systems 82
Genera l information . . . . . . . . . . . . . . . . . 82
Rear parking system . . . . . . . . . . . . . . . . . 82
Parking system plus . . . . . . . . . . . . . . . . . . 83
Rearv iew camera . . . . . . . . . . . . . . . . . . . .
84
Adjusting th e disp lay and the wa rning
tones... .. .. .. .. .. .. .. .. ....... .. .. 86
Error messages . . . . . . . . . . . . . . . . . . . . .
86
Intelligent Technology . . . . . . . . . . 87
E lectronic stabilization control (ESC) . . . . 87
Brakes . . . . . . . . . . . . . . . . . . . . . . . . . . . . . 89
E lectromechanical steering . . . . . . . . . . . . 90
All w heel drive (quattro) . . . . . . . . . . . . . . 91
Rear spoiler . . . . . . . . . . . . . . . . . . . . . . . . 91
Energy management . . . . . . . . . . . . . . . . . 92
Information abou t data recorded by
vehicle
control modules . . . . . . . . . . . . . . 9 4
Infotainment. . . . . . . . . . . . . . . . . . . . . 95
Multi Media Interface . . . . . . . . . . . . 95
Tra ffic sa fe ty in fo rmation . . . . . . . . . . . . . 95
Introdu ction . . . . . . . . . . . . . . . . . . . . . . . . 95
Switching the MMI on/off . . . . . . . . . . . . . 95
Operat ing t he M MI . . . . . . . . . . . . . . . . . . 95
MMI touch . . . . . . . . . . . . . . . . . . . . . . . . . 97
Control knob with joystick function . . . . . 98
Letter and number speller . . . . . . . . . . . . . 99
Menus and symbo ls . . . . . . . . . . . . . . . . . . 101
Free text search . . . . . . . . . . . . . . . . . . . . . 102
Page 6 of 322
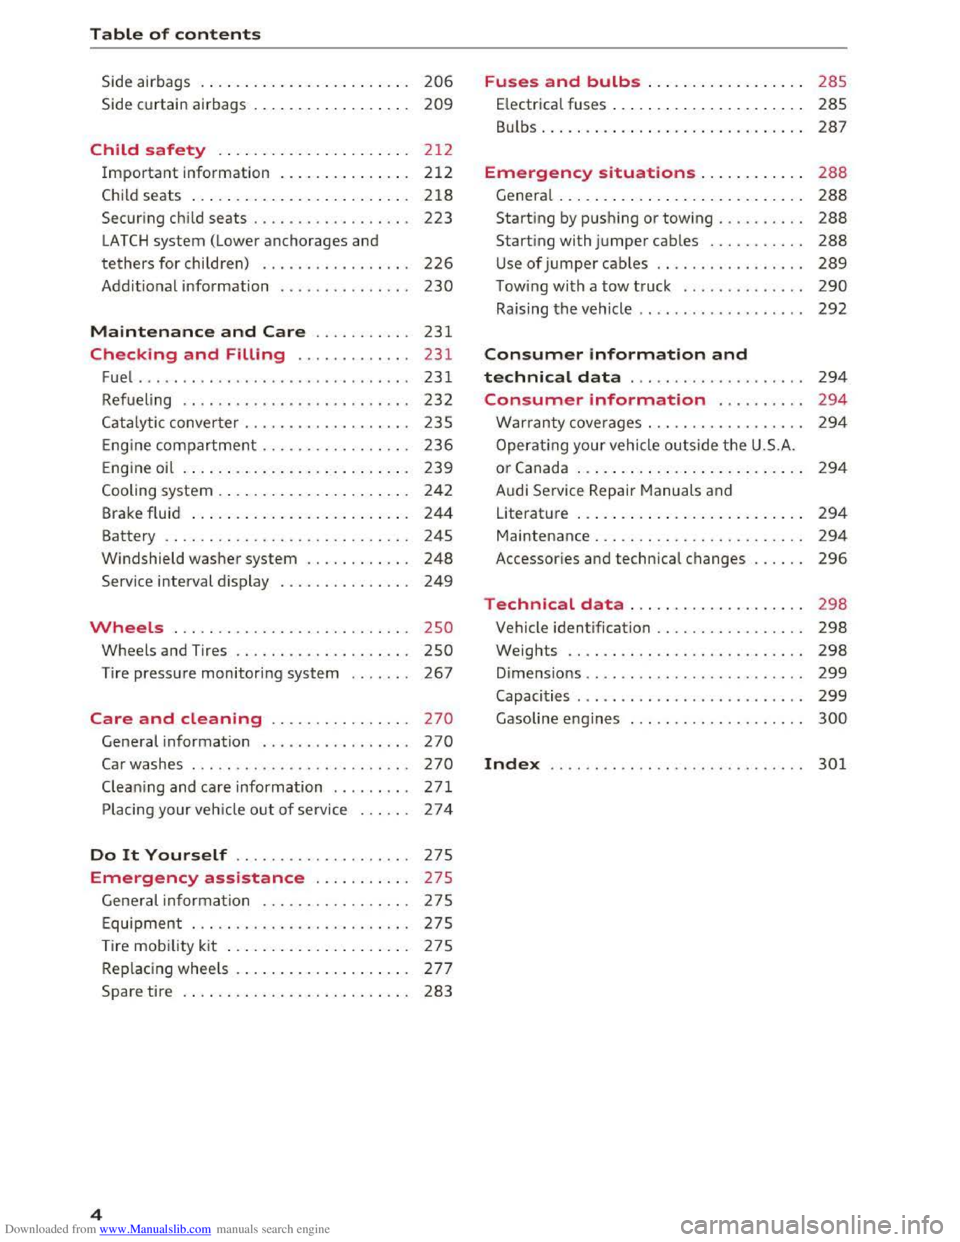
Downloaded from www.Manualslib.com manuals search engine Table of contents
Side airbags . . . . . . . . . . . . . . . . . . . . . . . . 206
Side cu rtain airbags . . . . . . . . . . . . . . . . . . 209
Child safety . . . . . . . . . . . . . . . . . . . . . . 212
I
mportant information . . . . . . . . . . . . . . . 212
Child seats . . . . . . . . . . . . . . . . . . . . . . . . . 218
Secur ing child seats . . . . . . . . . . . . . . . . . . 223
LATCH system (Lower anchorages and
tethers
for children) . . . . . . . . . . . . . . . . . 226
Add it io nal info rmation . . . . . . . . . . . . . . . 230
Maintenance and Care ........... 231
Checking and Filling . . . . . . . . . . . . . 231
Fuel
..... .. .. ................... .. . 23 1
Refueling . . . . . . . . . . . . . . . . . . . . . . . . . . 23 2
Cat alytic conver te r . . . . . . . . . . . . . . . . . . . 235
E ng ine com partment . . . . . . . . . . . . . . . . . 236
Eng ine oil . . . . . . . . . . . . . . . . . . . . . . . . . . 239
Cooling system . . . . . . . . . . . . . . . . . . . . . . 242
Brake fluid . . . . . . . . . . . . . . . . . . . . . . . . . 244
Battery . . . . . . . . . . . . . . . . . . . . . . . . . . . . 245
W indshield washer system . . . . . . . . . . . . 248
Service in terval display . . . . . . . . . . . . . . . 249
Wheels . .. .. .. ................... . 250
Wheels and Tires . . . . . . . . . . . . . . . . . . . . 250
Tire pressu re monitoring system 267
Care and cleaning . . . . . . . . . . . . . . . . 270
General information . . . . . . . . . . . . . . . . . 270
Car washes . . . . . . . . . . . . . . . . . . . . . . . . . 270
C leaning and care information ...... .. . 271
Placing your veh icle out of service 274
Do It Yourself . . . . . . . . . . . . . . . . . . . . 275
Emergency ass istance . . . . . . . . . . . 275
General information . . . . . . . . . . . . . . . . . 275
Equipment ... .. ................... . 275
Tire mobility kit . . . . . . . . . . . . . . . . . . . . . 275
R ep lacing wheels . . . . . . . . . . . . . . . . . . . . 277
Spare tire . . . . . . . . . . . . . . . . . . . . . . . . . . 283
4
Fus e s and bulbs . . . . . . . . . . . . . . . . . . 285
E lectrica l fuses . . . . . . . . . . . . . . . . . . . . . . 28S
Bulbs. . . . . . . . . . . . . . . . . . . . . . . . . . . . . . 287
Emergency situations . . . . . . . . . . . . 288
Genera l . . . . . . . . . . . . . . . . . . . . . . . . . . . . 288
Starting by push ing o r towing . . . . . . . . . . 288
Starting with jumper cables . . . . . . . . . . . 288
Use o f jumper cables . . . . . . . . . . . . . . . . . 289
T ow ing with a tow t ruck . . . . . . . . . . . . . . 290
Raising the vehicle . . . . . . . . . . . . . . . . . . . 292
Consumer information and
technical data . . . . . . . . . . . . . . . . . . . . 294
Consumer information . . . . . . . . . . 294
Warranty coverages . . . . . . . . . . . . . . . . . . 29 4
Operat ing you r vehicle outs ide th e U .S.A.
or Canada . . . . . . . . . . . . . . . . . . . . . . . . . . 294
Audi Service Repair Manuals and
Literature . . . . . . . . . . . . . . . . . . . . . . . . . . 294
Maintenance. . . . . . . . . . . . . . . . . . . . . . . . 294
Accessor ies and technical changes . . . . . . 296
Technical data . . . . . . . . . . . . . . . . . . . . 298
Vehicle identification . . . . . . . . . . . . . . . . . 298
Weights . . . . . . . . . . . . . . . . . . . . . . . . . . . 298
Dimens ions . . . . . . . . . . . . . . . . . . . . . . . . . 299
Capacities . . . . . . . . . . . . . . . . . . . . . . . . . . 299
Gasoline eng ines 300
Index ........ ...... ............... 301
Page 9 of 322
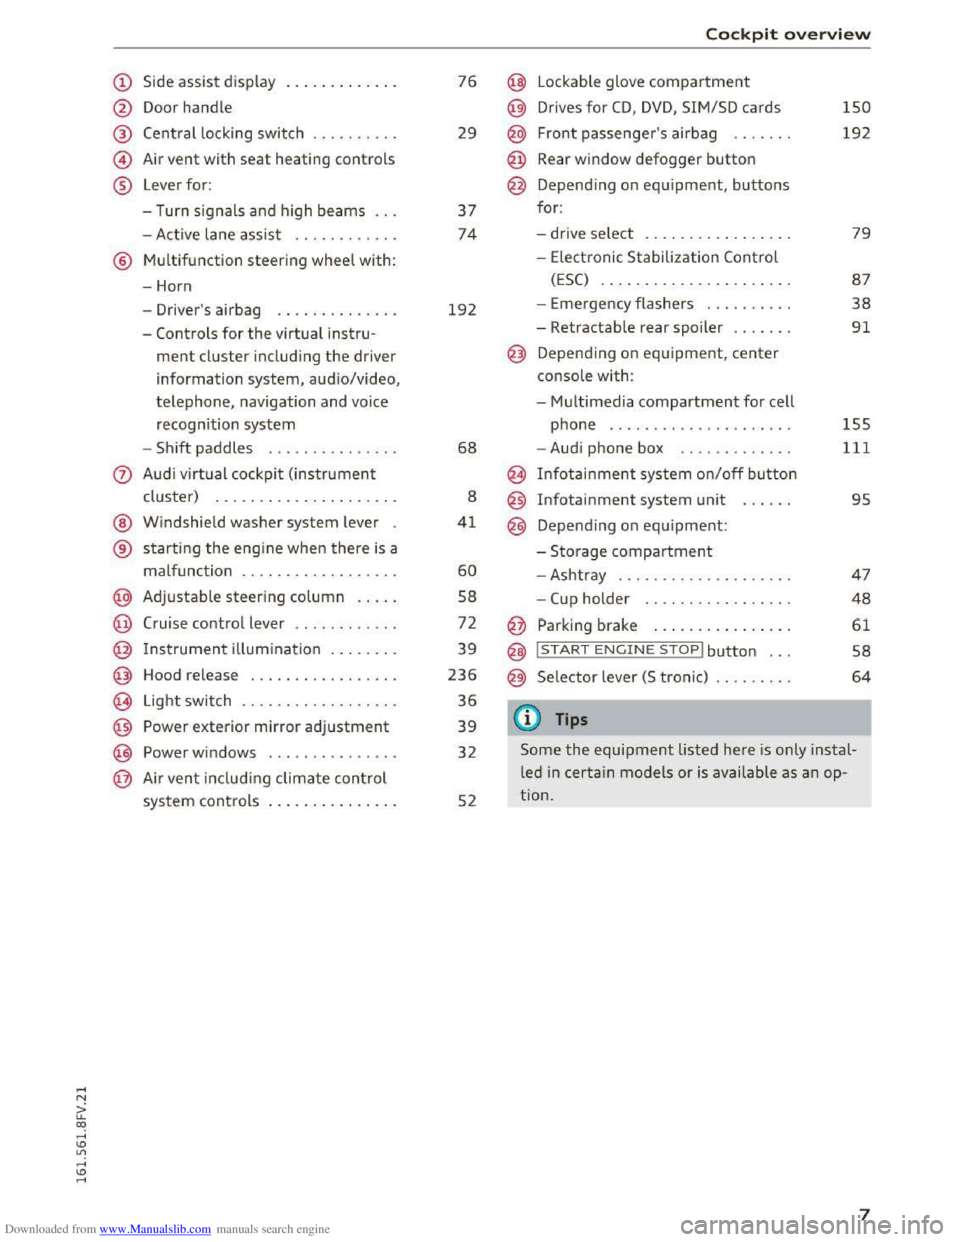
Downloaded from www.Manualslib.com manuals search engine (!) Side assist display ............ .
@ Door handle
@
©
®
Central locking switch
Air
vent with seat heating controls
Lever for:
- Turn signals and high beams .. .
- Active lane assist
........... .
® Multifunction steering wheel with:
- Horn
- Driver's airbag
............. .
- Controls
for the virtual instru-
ment cluster including the driver
information system, audio/video,
telephone, navigation and voice
recognition system
-
Shift paddles .............. .
@ Windshield washer system lever
® starting the engine when there is a
malfunction .. ............... .
@ Adjustable steering column .... .
@ Cruise control lever ........... .
@ Instrument illumination ....... .
@ Hood release ................ .
€3) Light switch ................. .
@ Power exterior mirror adjustment
@ Power windows .............. .
@ Air vent including climate control
system controls .............. .
76
29
37
74
192
68
8
41
60
58
72
39
236
36
39
32
52
Cockpit overview
@ Lockable glove compartment
@ Drives for CD, DVD, SIM/SD cards
@ Front passenger's airbag ...... .
@ Rear window defogger button
@ Depending on equipment, buttons
for:
- drive select .. .
............. .
- Electronic Stabilization
Control
(ESC) ....... .............. .
- Emergency flashers
......... .
- Retractable rear spoiler
...... .
@ Depending on equipment, center
console
with:
-
Multimedia compartment for cell
phone .... .. .............. .
- Audi phone box
........... . .
@ Infotainment system on/off button
@
@
Infotainment system unit
Depending on equipment:
-Storage compartment
-Ashtray ... .. .. ............ .
-
Cup holder . . .. ............ .
@ Parking brake ............... .
@ I START ENGINE STOPl button ...
@ Selector lever (S tronic)
@Tips
150
192
79
87
38
91
155
111
95
47
48
61
58
64
Some the equipment listed here is only instal
led in certain models or is available as an op
tion.
7
Page 11 of 322

Downloaded from www.Manualslib.com manuals search engine indicator light will turn on ¢page 16. The bot
tom LED blinks red when the fuel level is very
low.
The
fuel tank capacity of your vehicle is listed in
the Technical Data section¢ page 299.
0 Note
Never drive until the tank is completely emp
ty.
The irregular suppl y of fuel that results
from that can cause engine misfi res. Uncom
busted fuel will then enter the exhaust sys
tem. Th is can cause overheating and damage
to the catalytic converter.
Indicator Lights
Description
The indicator lights in the instrument cluster
blink or turn on. They indicate functions or mal
functions.
Wit h some ind icator lights, messages may ap
pear and warning signals may sound. The indica
tor lights and messages in the display can be cov
ered by other displays. To show them again, se
lect the tab for the indicator lights and messages
using the multifunction steering wheel
¢page 19. If there are several malfunctions,
you can display them one at a time using the
thumbwheel.
Some indicators lights in the display can turn on
in several colors.
Overview
Some indicator lights turn on briefly as a function
check when you switch the ignition on. These sys
tems are marked with a./ in the following tables.
I f
one of these indicator lights does not turn on,
there is a malfunction in that system.
Red indicator lights ~~~~~~~~~~~~~~-
US A models:
Brake system
¢page 11
Instruments and indicator lights
Canada models:
Brake system
¢page 11
USA models:
Electromechanical parking brake
¢page 12
Canada models:
Electromechanical parking brake
¢page 12
Cooling system
¢page 12
Engine oil pressure
¢ page 13
Alternator
¢page 13
Engine stop while driving
¢page 13
Front safety belt
¢page 13
Electromechanical steering ./
¢ page 90
Steering lock
¢page 13
Central indicator light
¢page 14
Engine start system
¢page 14
USA models:
Speed warning system*
¢page 72
Canada models:
Speed warning system*
¢page 72
Transmission malfunction
¢page 70
Rear spoiler
¢page 91
Yellow indicator lights
USA models: safety systems ./
¢page 15
Canada models: safety systems ./
¢page 15
9
Page 22 of 322
Downloaded from www.Manualslib.com manuals search engine Driver information system
Multifunction steering
wheel plus
Operating
Apples to: vehicles with multifunction steering wheel plus
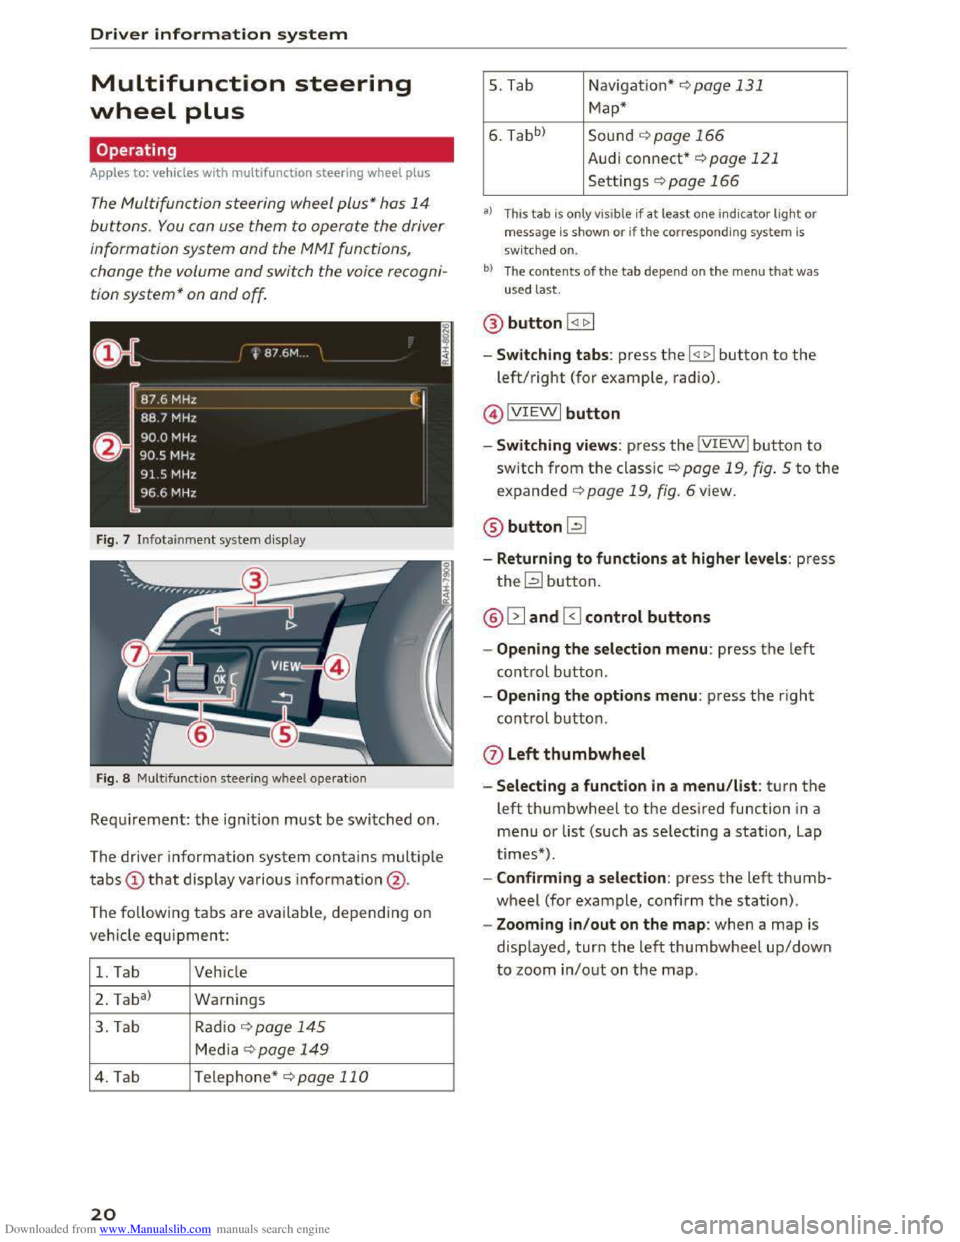
The Multifunction steering wheel plus* hos 14
buttons. You con use them to operate the driver
information
system and the MMI functions,
change the volume and switch the voice recogni
tion system* on and off.
Fig. 7 Infotainment system display
Fig. 8 Multifunction
steering wheel operation
Requ irement: the ignition must be switched on.
The driver information
system contains multiple
tabs CD that display various information @.
The
following tabs are available, depend ing on
vehicle
equipment:
1. Tab Vehicle
2 . Ta
ba)
Warnings
3. Tab
Rad io¢ page 145
Media~ page 149
4. Tab Telephone* ¢page 110
20
5. Tab Navigation*¢ page 131
Map*
6. Tabb >
Sound ¢page 166
Audi connect* ¢page 121
Settings ¢page 166
a) This tab is only visible if at least o ne indicator light or
message is shown or if the correspon ding system is
sw i
tched on.
bl The contents of the tab depen d on the men u that was
used last.
® button I <11> I
- Switching tabs: press the I
left/right (for example, radio).
@IVIEWI button
-Switching views: press the IVIEWI button to
switch from the classic¢ page 19, fig. 5 to the
expanded ¢ page 19, fig. 6 view.
® buttonl2J
-Returning to functions at higher levels: press
the~ button.
@ 12] and 0 control buttons
-Opening the selection menu: press the left
control button.
-Opening the options menu: press the right
control button.
Q) Left thumbwheel
-Selecting a function in a menu/list: turn the
left thumbwheel to the desired function in a
menu or list (such as selecting a station, Lap
times*) .
-
Confirming a selection: press the left thumb
wheel (for example, confirm the station).
-Zooming in/out on the map: when a map is
displayed, turn the left thumbwheel up/down
to zoom in/out on the map.
Page 23 of 322
Downloaded from www.Manualslib.com manuals search engine ..... N
G: CX)
.....
"' U"I
.....
"' .....
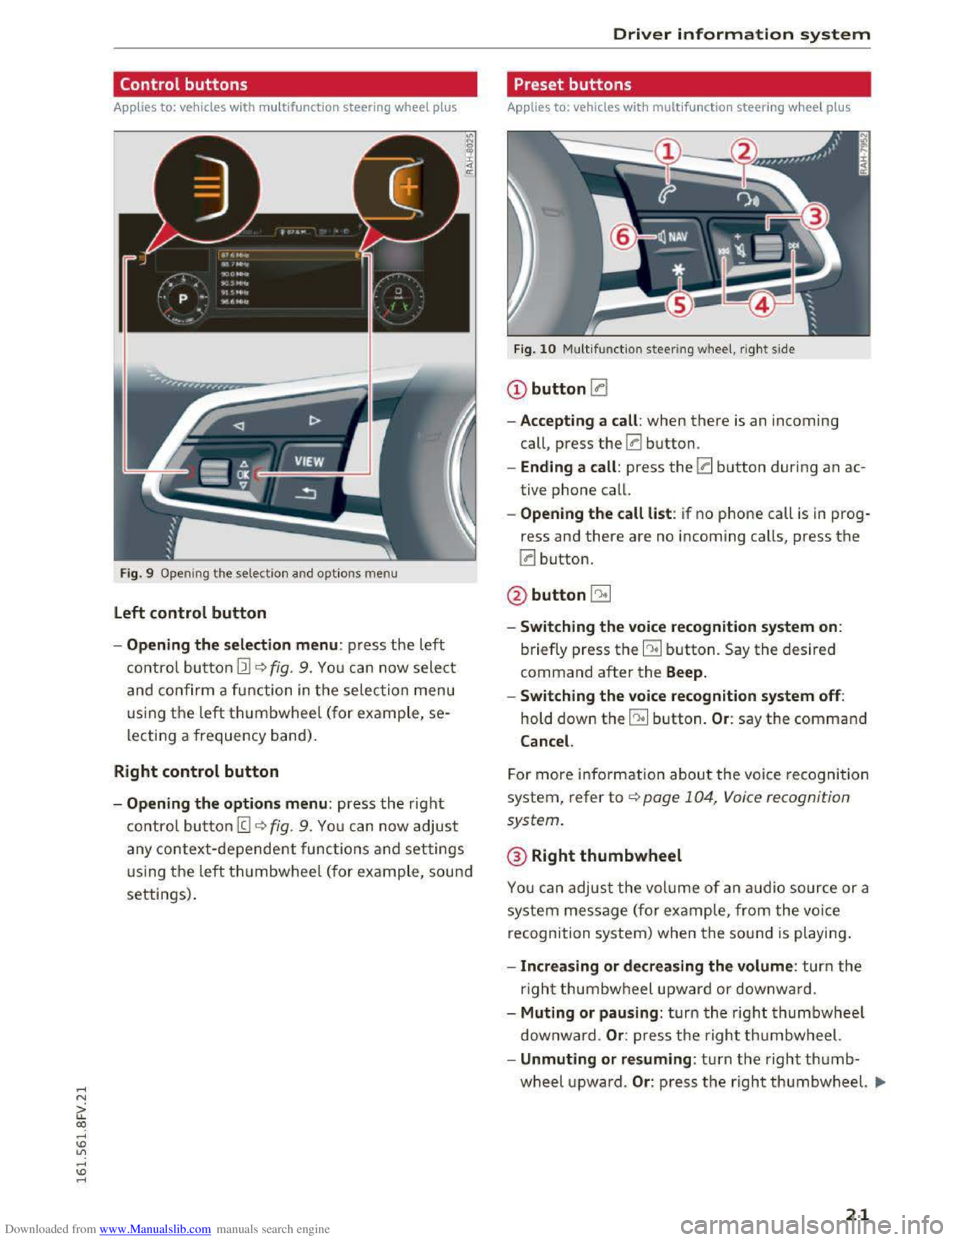
Control buttons
Applies to: vehicles with multifu nction steering wheel plus
F ig . 9
Open ing th e selectio n and optio ns menu
Left control button
- Opening the selection menu : press the left
co ntrol bu tton Ill~ fig. 9. You can now select
and co nfirm a fu nction in the selection menu
using th e left thumbwheel (for ex ample, se
lecting a frequency band) .
Right control button
-Opening the options menu: press the right
co ntrol bu tton (g ~fig. 9. You ca n now adjust
any context-dependent functions and settings
u sing th e left thumbwheel (for ex ample, sou nd
settings).
Driver information system
Preset buttons
Applies to: vehicles with multifunction steering wheel plus
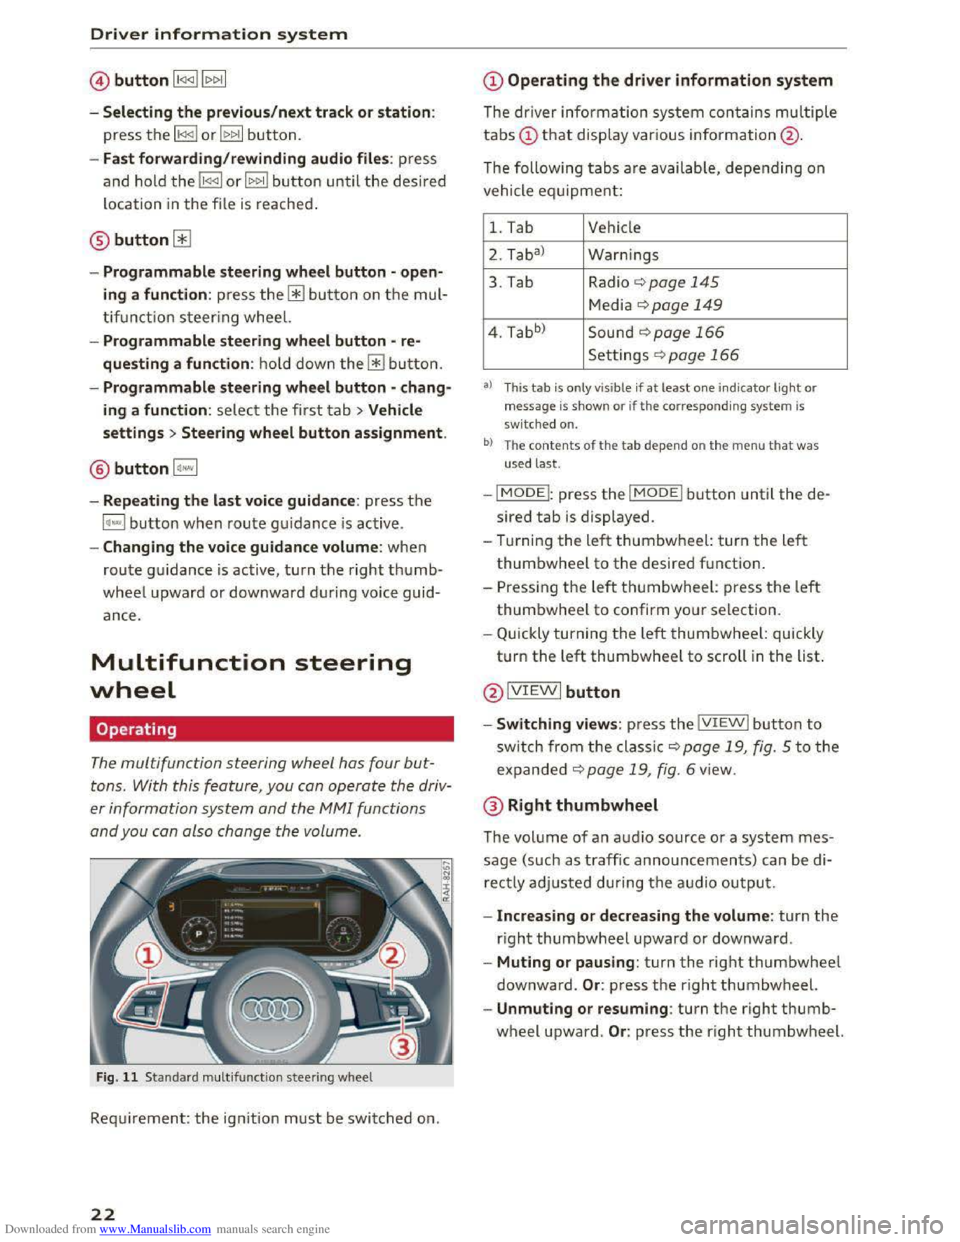
Fig. 10 Multifun ctio n steering wheel, rig ht s ide
CD button !:a
-Accepting a call : when there is an incoming
call,
press the 0 button.
- Ending a call : press the 0 button during an ac
tive
phone call.
- Opening the call list: if no phone call is in prog
ress and there are no incoming calls, press the
0 button.
@button5l
-Switching the voice recognition system on:
briefly press the EE! button. Say the desired
command after the Beep.
- Switching
the voice recognition system off:
hold down the EE! button. Or: say the command
Cancel.
For more info rm ation about the voice recogni tion
system, refe r to ~page 104, Voice recognition
system.
®Right thumbwheel
You can adjus t the volume of an audio source or a
system message (for ex am ple, from the voice
recognition
system) when t he sou nd is playin g.
-Increasing or decreasing the volume : turn the
righ t thumbwheel upward or d ownward .
- Muting or pausing : turn th e right thumbwheel
downw ard .
Or: press the righ t thumbwheel.
-Unmuting or resuming : turn the right thumb
wheel upwa rd. Or: p ress th e righ t thumbwheel. .,..
21
Page 24 of 322
Downloaded from www.Manualslib.com manuals search engine Driver information system
©button l1<1<1l l1>1>1I
- Selecting the previous/next track or station :
press the ll
- Fast forwarding/rewinding audio files: press
and ho ld the li
loca tion
in the file is reached.
@button0
-Programmable steering wheel button -open
ing a function : press the@ button on th e mul
ti fu nct i
on steering wheel.
- Programmable steering wheel button -re
questing a function : hold dow n the@button.
- Programmable steering wheel button -chang
ing a function : select the first tab >Vehicle
settings > Steering wheel button assignment .
® button l~·"I
-Repeating the last voice guidance : press th e
l~""I button w hen route guidance is active .
-Changing the voice guidance volume: when
route guidance is active, turn the right thumb
wheel upward or dow nward during voice guid
ance.
Multifunction steering
wheel
Operating
The multifunction steering wheel has four but
tons. With this feature , you can operate the driv
er information system and the M MI functions
and you can also change the volume .
Fig . 11 Standard multifu nction steering wheel
Requirement: the ign ition must be switched on.
22
@Operating the driver information system
The driver information system contains multiple
tabs(!) t h a t display various information@ .
The following t
abs are availab le, depending on
vehicle equipment:
1. Tab Vehicle
2. Taba )
W
arnings
3. Tab Radio 9page 145
Media ¢page 149
4. Tabb )
Sound ¢page 166
Settings r=.>page 166
a) This tab is only v is ible if at least o ne indicator ligh t or
message is show n or if th e c orresponding sys te m is
sw i
tched on.
b ) The co ntents of th e t ab depe nd on th e men u t hat was
u sed l
ast.
-IMODEI: press the I MODEi button until the de
sired tab is displayed.
- Tur ning
the left thumbwheel: turn the le ft
thumbwheel to the desired f unctio n.
-
Pressi ng the left t humbwh eel: press th e left
thumbwheel to confirm your selection.
- Q uick ly turning t he left thumbwheel: quickly
t u rn
the left thumbwheel to scroll in the list.
@ IVIEWI button
-Switching views: press the IVIEWI button to
sw itch from the cla ssic 9 page 19, fig. 5 to the
expanded 9 page 1 9, fig. 6 view .
@Right thumbwheel
The volume of an audi o source or a system mes
sage (such as traffic announcements) can be di
rectly adjusted during th e audio outpu t.
- Increasing or decreasing the volume : turn the
right thumbwheel upward or downwa rd .
- Muting or pausing: turn the right thumbwheel
downward. Or : press the right thum bwheel.
-Unmuting or resuming : turn the right thumb
wheel upward. Or: press the right thumbwh eel.
Page 38 of 322
Downloaded from www.Manualslib.com manuals search engine Lights and Vision
Lights and Vision
Exterior Lighting
Switching lights on and off
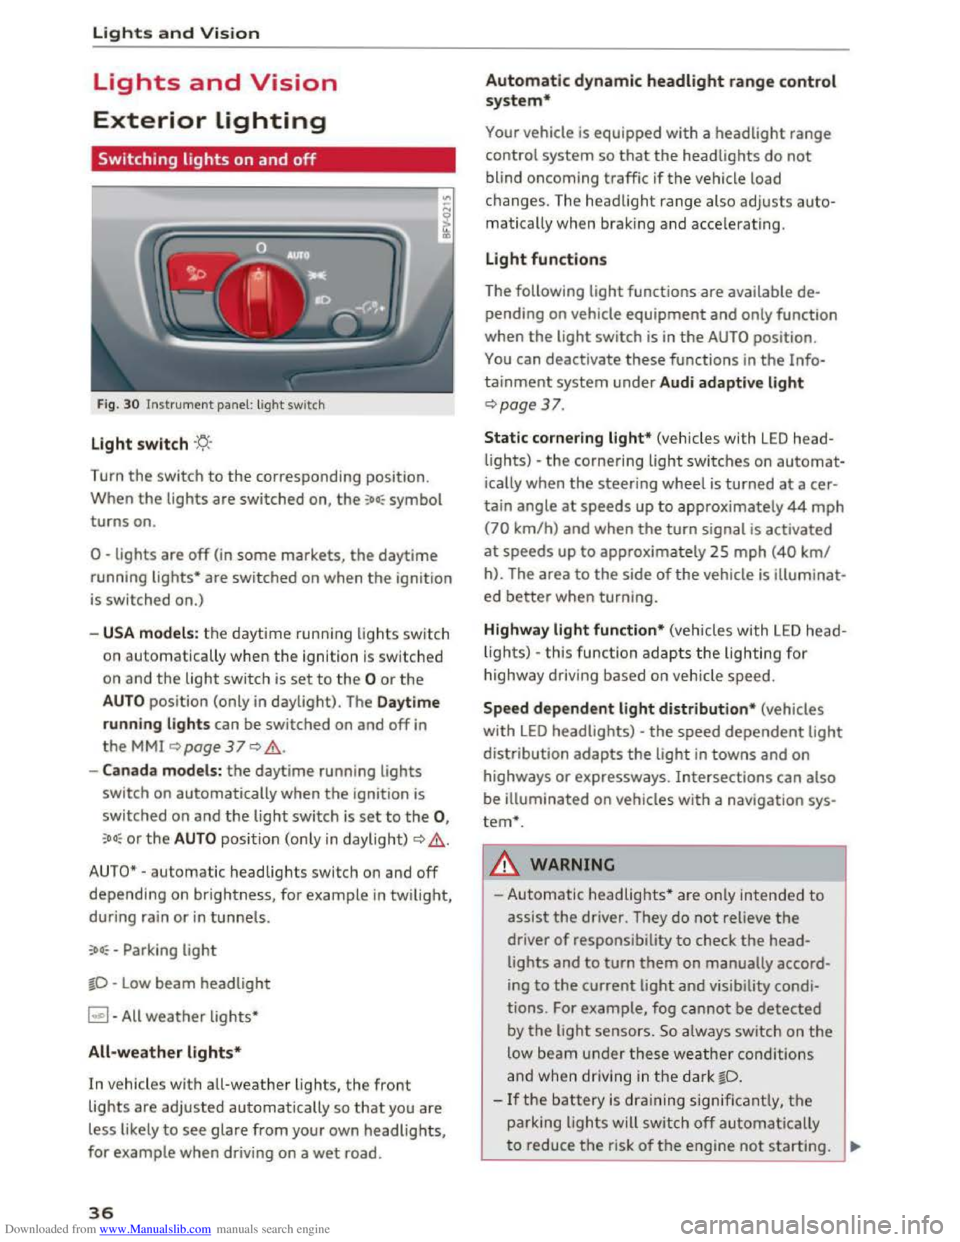
Fig. 30 Instrument panel: light switch
Light switch ·'t/;
Turn the switch to the corresponding position.
When
the lights are switched on, the :oo: symbol
turns on.
0 -lights are off (in some markets, the daytime
running
lights* are switched on when the ignition
is switched on.)
-USA models: the daytime running lights sw itch
on automatica
lly when the ignition is sw itched
on and
the light switch is set to the 0 or the
AUTO position (only in daylight). The Daytime
running lights
can be switched on and off in
the MMI ~page 37 Q &.
-Canada models: the daytime running lights
switch on automatically when the ignition is
switched on and the light switch is set to the 0,
:oo: or the AUTO position (only in daylight) QA .
AUTO* -automatic headlights switch on and off
depending on brightness, for example in twilight,
during rain
or in tunnels.
:oo: -Parking light
~D -Low beam headlight
~ -All weather lights*
All-weather lights*
In vehicles with all-weather lights, the front
lights are adjusted automatically so that you are
less likely
to see glare from your own headlights,
for example when driving on a wet road.
36
Automatic dynamic headlight range control
system*
Your vehicle is equipped with a headlight range
control system
so that the headlights do not
blind oncoming traffic if the vehicle load
changes. The headlight range also
adjusts auto
matically when braking and accelerating .
Light functions
The following light functions are available de
pending on vehicle equipment and only function
when the
light switch is in the AUTO position.
You can deactivate these functions in the Info
tainment system under Audi adaptive light
Qpage 37.
Static cornering light* (vehicles with LED head
lights) -the cornering light switches on automat
ically when the steeri ng wheel is turned at acer
tain angle at speeds up to approximately 44 mph
(70 km/h) and when the turn signal is activated
at speeds up to approxim ately 25 mph (40 km/
h). The area
to the side of the vehicle is illuminat
ed better when turning.
Highway light function* (vehicles with LED head
lights) -this function adapts the lighting for
highwa y driving based on vehicle speed.
Speed dependent light distribution* (vehicles
with LED headlights) -the speed dependent light
distribution adapts the light in towns and on
highways
or expressways. Intersections can also
be illuminated on vehicles
with a navigation sys
tem*.
A WARNING
- Automatic headlights * are only intended to
assist the driver. They do not reliev e the
driver
of responsibility to check the head
lights and to turn them on manually accord
ing to the current ligh t and visibility condi
tions. For example, fog cannot be detected
by
the light sensors . So always switch on the
low beam under these weather conditions
and when
driving in the dark ~D.
-If the battery is dra ining significantly, the
parking lights will switch off automatically
to reduce the risk of the engine not starting . ..,..
Page 46 of 322

Downloaded from www.Manualslib.com manuals search engine Seats and storage
Seats and storage
General information
Why is your seat adjustment so important?
The safety belts and the airbag system can only
provide
maximum protection if the front seats
are correctly adjusted.
There are various ways of adjusting the front
seats to provide safe and comfortable support
for the driver and the front passenger. Adjust
your seat properly so that:
- you can easily and quickly reach all the switches
and controls in the instrument panel
-your body is properly supported thus reducing
physical
stress and fatigue
-the safety belts and a irbag system can offer
maximum protection ¢ page 188.
In the following sections, you will see exactly
how you can
best adjust your seats.
There are special regulations and instructions for
installing a ch ild
seat on the front passenger's
seat. Always follow the information regarding
child
safety provided in ¢ page 212, Child safe
ty .
A WARNING
Incorrect seating position of the driver and all
other passengers can result in serious person
al injury.
- Always keep
your feet on the floor when the
vehicle is in motion - never put your feet on
top of the instrument panel, out of the win
dow or
on top of the seat cushion. This ap
plies especi ally to the passengers. If your
seating pos ition is i nco rrect, you increase
the risk of injury in the case of sudden brak
ing
or an accident. If the airbag inflates and
the seating position is incorr ect, this could
result in personal injury or even death.
-It is important for both the driver and front
passenger to keep a distance of at least
10 in (25 cm) between themselves and the
steering wheel and/or instrument panel. If
yo u'r e sitting any closer than this, the air
bag system cannot protect you properly . In
44
addition, the front seats and head restraints
m ust be adjusted to yo ur body height so
that they can give you maximum protection.
-Always try to keep as much distance as pos
sible
between yourself and the steeri ng
wheel or instrument panel.
-Do not adjust the driver's or front passeng
er's seat while the veh icle is moving. Your
seat may move unexpectedly, causing sud
den loss of vehicle control and personal in
jury. If you adjust yo ur seat while the veh icle
is moving, you are o ut of pos ition.
Driver's seat
The correct seat position is important for safe
and relaxed driving.
We recommend that you adjust the driver's seat
in the following manner:
.... Adjust the seat in fore and aft direction so that
you can easi ly push the pedals to the floor
while keeping your knees slightly
bent¢ f1::::.. in
Why is your seat adjustment so important? on
page
44.
I
.... Adjust the backrest so that when you sit w ith
your back against the backrest, you can still
grasp the top of the steering wheel.
A WARNING
Neve r place any objects in the driver's foot
well. An object could get into the pedal area
and interfere with pedal function . In case of
sudden braking or an accident, you would not
be able to brake or accelerate.
Front passenger's seat
Always move the front passenger seat into the
rearmost position.
-
To avoid con tact wit h the airbag while it is de
ploying ,
do not sit any closer to the instrument
panel than necessary and always wear th e three
po int safety belt provided adjusted correctly . We
r
ecommend that you adjust the passenger's seat
i n the following manner: .,..
Page 47 of 322

Downloaded from www.Manualslib.com manuals search engine ..... N
G: CX)
..... I.Cl U"I
..... I.Cl .....
.. Bring the backrest up to an (almost) upright
position. Do not ride with the seat reclined .
.. Place your feet on the floor in front of the pas
senger's seat.
Front seats
Power seat adjustment
Fig. 42 Front seat: powe r seat adjustment
@-lumbar support or multifunction button*
¢ page 45. To adjust the lumbar support, press
the button in the applicable location.
@
-movi ng the seat up/down: press the button
up/down. To adjust the front seat cushion, press
the front button up/down. To adjust the rear seat
cushion, press
the rear button up/down.
@
-movi ng the seat for wa rd/back: press the
button forward/back.
©
-adjusting the backrest angle: turn the ad
justing wheel.
@
-lengthening/shortening the upper thigh sup
port*: lift the grip handle .
.&.. WARNING
-Only adjust the front seat with when the ve
hicle is stationary . Otherwise, this increases
the risk of an accident
- The power adjustment for the front seats al
so works with the ignition switched off or
with the ignition key removed . For this rea
son, children should never be left unattend
ed in the veh icle - they could be injur ed!
- Exerc i
se caution when adjusting the seat
height. Unsuperv ised
or careless seat ad
justment can pinch fingers or hands causing
injuries .
Seats and storage
-The front seat backrests must not be re
clined
too far back when driving, because
this impairs the effectiveness of the safety
belts and airbag system, which increases
the risk of injury.
-
To reduce the r isk of i njury during sudden
braking or in a
collis ion, the dri ver and front
passenger should not have their backrests in
the recl ined position while driving or rid ing.
T
he safe ty belts and airbag system can pro
vide the greatest protectio n possib le when
the backrests are in th e upright position and
the safety belts are worn correctly. The
more a backrest is reclined, the greate r
the
risk of injury due to an incorrect seating po
sition and safety
belt position.
Multifunction button
Applies to: veh icles with multifunct ion button
You can adjust the side bolsters using the multi
function button.
.. If you turn the multif unc tion button@
¢page 45, fig. 42 to the left or right, the later
al support in the seat will increase/decrease us
ing
the s ide bo lsters on the seat backrests .
@Tips
The air in the side bolsters* is released as
soon as the driver's door opens. This makes is
possib le to enter and exit the vehicle more
comfortably.
As soon as you start dri ving the
vehicle,
the side bolsters fi LL.
45