engine overheat AUDI TT ROADSTER 2008 Owners Manual
[x] Cancel search | Manufacturer: AUDI, Model Year: 2008, Model line: TT ROADSTER, Model: AUDI TT ROADSTER 2008Pages: 316, PDF Size: 70.1 MB
Page 16 of 316
Instruments and warning/indicator lights
& WARNING
• Always observe the warning in=;, page 212, " Engine compart
ment" before opening the engine hood and checking the engine
coolant level.
• Never open the engine hood if you see or hear steam , or if you
see engine coolant dripping from the engine compartment . You
c ould burn your self. Let the engine cool off first so that you cannot
hear or see any steam or engine coolant .
0 Note
• Mounting additiona l lights or accessories in front of the a ir inlets
reduces the co oling effect of the radiat or. At high outside tempera
tures or h igh engi ne load, the eng ine could overheat.
• The fron t spoile r has been designed t o properly dis trib ute the
coo ling air when the veh icle is mov ing . If the spo iler is damaged,
this could red uce the coo ling effect and the engine co uld then ove r
heat. Ask your authorized Audi deale r for assistance. •
Fuel gauge
The fuel gauge wor ks only when the ignition is on .
When the needle reaches the red area, the warning light in the i nstrument cluster w ill illu m ina te =;,
page 35 . Thi s means yo u
have approx imate ly 1.9 gallons (7 litres) of fuel left in the tank.
Time
to refuel!
The tota l tank capacity of your vehicle is listed in=;, page 297. Be
awa re of the diffe rent ta nk capaci ties of front -wheel a nd q uat tro®
a ll- w hee l d ri ve models .
0 Note
Never run the tank comple tely dry! An irre gular suppl y of fuel can
cause engine m isf iring and fuel could enter into the exhaust system.
The catalytic converter could then overheat and be
damag ed. •
Speedometer with odometer
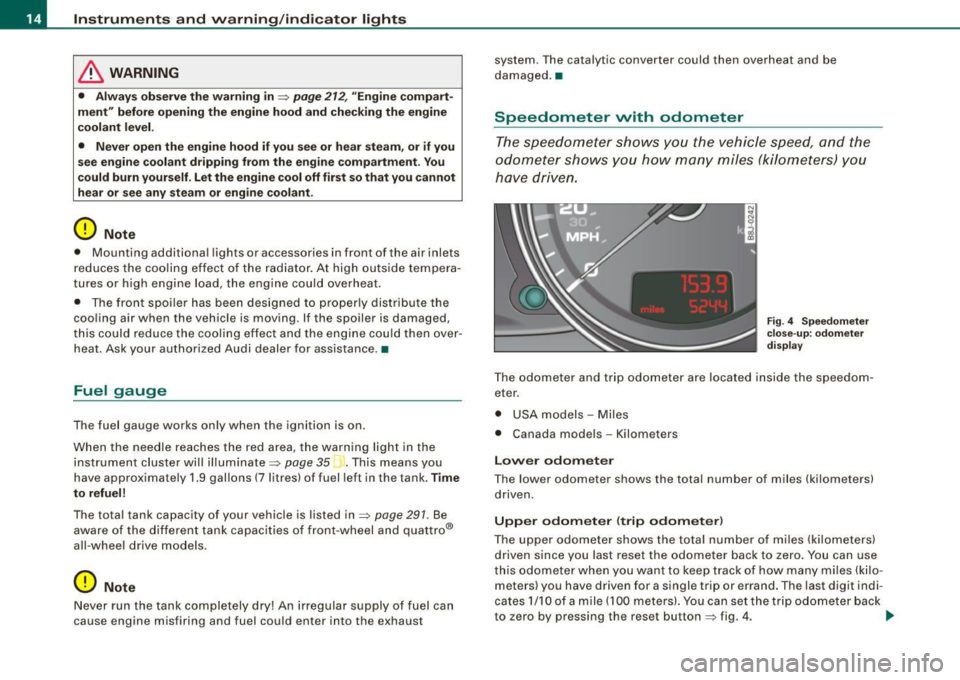
The speedometer shows y ou t he vehic le speed, and the
o dome ter sho ws you ho w ma ny m iles (kilo meters) yo u
have dri ven.
Fig . 4 Speedomete r
close -up : odomet er
displ ay
T he od ometer an d trip odo mete r are locate d insid e th e spe edom
eter .
• USA model s - Miles
• Canada mode ls - Kilometers
Lower odometer
The lower odometer shows the total number of miles (kilometers)
d riven.
Upper odometer (trip odometer )
The upper o dometer shows the tota l number o f mi les ( kilom eters)
driven since you last reset the odometer bac k to ze ro . You can use
thi s odomete r w hen you want to keep track of how ma ny m iles ( kilo
meters) you have driven for a single trip or errand. The last digit indi
cates 1/10 of a m ile (10 0 meters). You ca n set t he trip od o meter back
to zero by pressing the reset button
=;, fig . 4 . ..,,
Page 110 of 316
• ..__O_ n_ t_h _ e_ r_ o_ a_ d ____________________________________________________ _
0 Note
Do not stop the engine immediately after hard or extended driving.
Keep the engine running for approximately two minutes to prevent
excessive heat build-up. •
Parking brake
Parking brake
When the parking brake is set, it prevents the vehicle from
rolling away unintentionally.
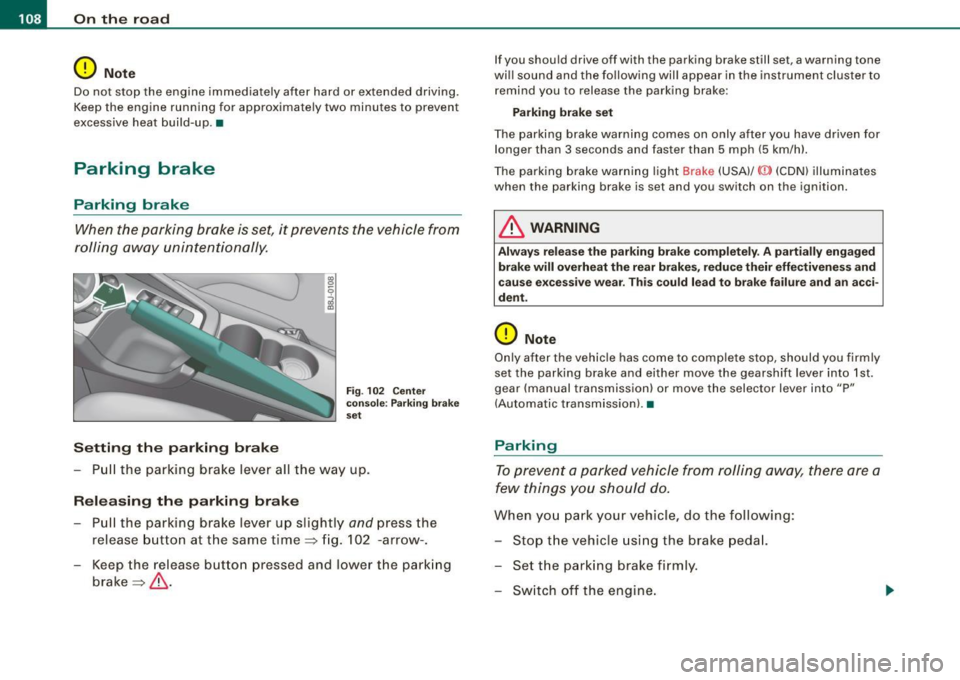
Setting the parking brake
Fig . 102 Center
console: Parking brake
set
- Pull the parking brake lever all the way up.
Releasing the parking brake Pull the parking brake lever up slightly
and press the
release button at the same time=> fig. 102 -arrow-.
Keep the release button pressed and lower the parking
brake=>
& -
If you should drive off with the parking brake still set, a warning tone
will sound and the following will appear in the instrument cluster to remind you to release the parking brake:
Parking brake set
The parking brake warning comes on only after you have driven for longer than 3 seconds and faster than 5 mph (5 km/h).
The parking brake warning light Brake (USA)/
{CD) (CON) illuminates
when the parking brake is set and you switch on the ignition.
& WARNING
Always release the parking brake completely . A partially engaged
brake will overheat the rear brakes, reduce their effectiveness and
cause excessive wear. This could lead to brake failure and an acci
dent.
0 Note
Only after the vehicle has come to complete stop, should you firmly
set the parking brake and either move the gearshift lever into 1st .
gear (manual transmission) or move the selector lever into "P"
(Automatic transmission). •
Parking
To prevent a parked vehicle from rolling away, there are a
few things you should do.
When you park your vehicle, do the following:
- Stop the vehicle using the brake pedal.
- Set the parking brake firmly.
- Switch off the engine.
Page 117 of 316
Transmission -
----------------
& WARNIN G (continu ed )
vehi cle w it h the footbrake . When idl ing , the tr ansmission of power
does not stop completely -the vehicle "creeps ".
• Do not ac celerate when you change the selector lever position
with the vehicle stationary and the engine running -risk of an acci
dent!
• Never place the selector lever
in the R or N position while the
vehicle is mov ing -risk of an accident !
• If you have to bring your vehicle to a stop while on an incline ,
keep the foot brake depressed all the way down so that the vehicle
does not start to roll backward. You should never hold the vehicle
using the clutch pedal if you are going to be stopped on an incline .
If you do , the clutch will start to slip when it overhe ats cau sed by
the constant overload . This is dangero us because if the vehicle
starts to roll backward , you could cause an accident. If the clutch
should start to slip , you will feel the vehicle "jerk" and the sele ctor
lever display will start blinking.
• Before driving down a steep slope , reduce your speed and shift
into a lower gear with "tiptronic ".
• Do not ride the brakes or apply the brake pedal too often or too
long. Constant braking causes the brakes to overheat and
substantially reduces braking performance , increases braking
di stance or cau ses complete failure of the brake system. •
Controls and equip
ment
Ap plies to vehic les: w ith S tronic®
Selector lever positions
All the selec tor le ver posi tions are e xplai ned in this
se cti on.
Fig . 108 D ispl ay:
Selector lever po si
tion s
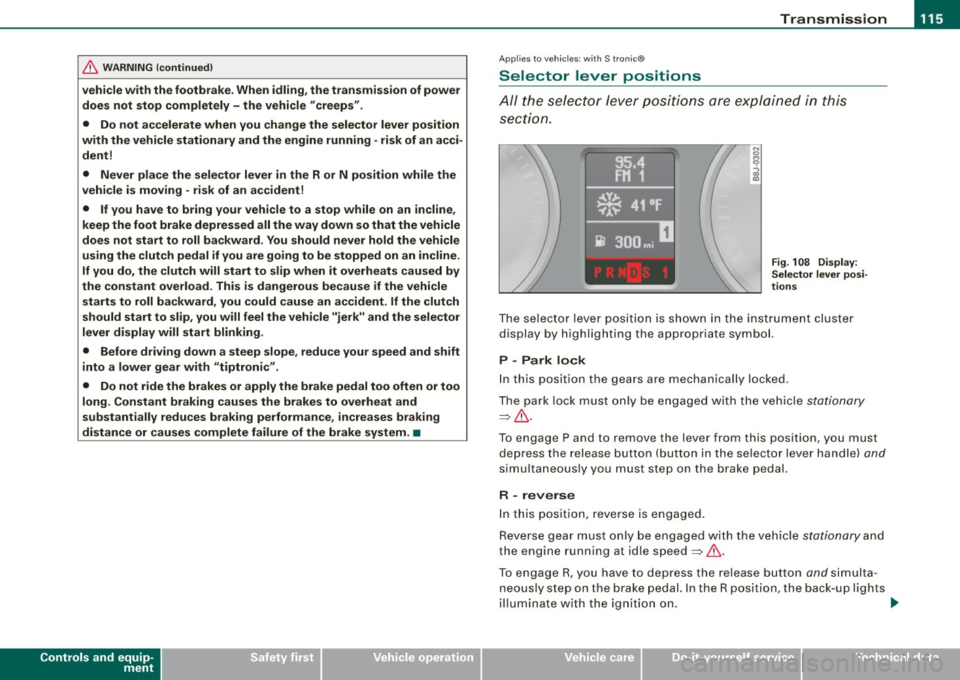
The se lector l ever po siti on i s sho wn in t he instr ument cluste r
display by highlighting the appropriate symbol.
P -Park lock
In this position the gears are mechanically locked .
T he pa rk lock must only be e ngage d with th e ve hicle
stationa ry
=> & .
T o engage P and to remove the lever from this position, you must
de press the re lease button (but to n i n the se lec to r l ever ha ndle)
and
simu ltaneously you must step on the brake pedal.
R -reverse
In this positio n, reve rse is engaged.
Reverse gear mus t o nl y be engaged with the vehic le
stationary and
the engine running at id le speed =>& .
To e ngage R, you ha ve to depres s the re lease button
and s im ult a
neous ly st ep on the brake p edal. In the R position, the back -up l ights
il lu mina te with the ig niti on on. ...
I • •
Page 188 of 316
___ ln_ t _e_ ll-'"ig ...,_ e_ n_t _t_ e_ c_ h _ n_o _ l_o _,.g= y,_ __________________________________________ _
Electronic differential lock (EOL)
The electronic differential lock monitors the rotational
speed of the drive wheels.
General notes
The electronic differential lock (EDU helps the car to start moving,
accelerate and climb a gradient on surfaces providing poor or
almost no grip. Without EDL, this would be difficult, if not impos
sible.
How the system works
Th e EDL operates automatically. It monitors the rotational speed of
the drive wheels on an axle with the help of the ABS sensors
=> page 189. If a noticeable difference in rotational speed between
the drive wheels on one axle is detected (e.g. on slippery ground
on
one side),
the spinning wheel is braked, thereby transferring power
to the other drive wheel or wheels (all-wheel drivel. This is done up
to a speed of about 60 mph (100 km/hl. Noises from the brake
system signal that wheel spin is being controlled.
Driving off
When driving off, always be sure to keep road conditions in mind as
you accelerate . If one drive wheel spins because it is on a surface
with less grip, gradually increase the pressure on the accelerator
pedal until the car starts to move. The wheel less able to transfer
power spins.
Overheating of brakes
To prevent the disc brake of the braked wheel from overheating if
subjected
to excessive loads, the EDL cuts out temporarily . The
vehicle remains operational and behaves in the same way as a
vehicle without EDL.
As soon as the brake has cooled down, EDL switches on again auto
matically.
& WARNING
• When accelerating on slippery surfaces, such as on ice or snow,
always be careful when depressing the accelerator pedal. Even
with the EDL working, the drive wheels can spin and reduce your ability to control your car. -Risk of crash!
• The increased safety afforded by EDL does not mean that you
can take safety risks. Always adapt your driving style to the road
conditions and traffic situation.
[ i] Tips
If a fault occurs in the ABS, the EDL is also not functioning . This is
indicated by the ABS warning light=>
page 20. •
Anti-Slip Regulation System (ASR)
The Anti-Slip Regulation System prevents the driven
wheels from spinning when the car is accelerating.
General notes
The Anti-Slip Regulation System (ASR) is integrated in the electronic
stabilization program (ESP). When the vehicle starts up and acceler
ates , the wheels are prevented from spinning by adjusting the
engine power to match the amount of grip available from the road
surface .
How the system works
ASR performs automatically, i.e. without the driver's intervention .
With the aid of the ABS sensors =>
page 189, ASR monitors the
speed of the driven wheels. If the wheels start to spin, the engine
torque is reduced automatically until the tires find enough grip to
lock onto the road surface . The system is active across the entire
speed range.
The ASR works in conjunction with the ABS. If a malfunction should
occur in the ABS, the ASR will also be out of action .
~
Page 191 of 316
Faults in the brake syst em
If you shou ld notice a sudden i ncrease in brake pedal travel, then
one of the two brake circuits may have failed=>
& -
Low brake fluid level
Ma lfunctions can occur in the brake system if the brake fluid leve l is
t oo low. The brake fluid level is moni tored e lect ronica lly .
Brake pow er assist unit
The brake p ow er assist un it increas es th e pressure that you
generate with the brake peda l. It works only when the engine is
running.
& WARNING
• You should perform braking maneuver s for the purpose of
c leaning the brake system only if road conditions permit . Other
road users must not be put at ri sk -you may cause an accident!
• Before des cending a steep grade , redu ce speed and sh ift trans
mi ssion into a lower gear or lower driving position . Do not ride the
br akes or hold the pedal down too long or too often . This could
cause the brakes to get hot and diminish braking efficiency .
• Do not "ride the brakes " by resting your foot on the pedal when
you do not intend to brake . Thi s may cause the brakes to overheat,
premature we ar and increased stopping distan ce .
• Under certain cl imatic and operating condit ions such as
pas sing through water , driv ing in heavy rain or after washing the
vehicle, the effectiveness of the brake s can be reduced . In winter ,
ice can ac cumulate on the brake pads , linings , discs and drums .
Cautiously apply brakes for a te st. Brakes will dry and ice coatings
will be cleaned off after a few cautious brake appli cations .
• Driving for an extended period of time on salt -covered road s
without using your brakes can also affect brak ing effic iency . Clean
off accumulated salt coating from brake discs and pads with a few
c autiou s brake applications .
Controls and equip ment Safety first Vehicle operation
Intelligent technology
& W
ARNING (continued )
• If you damage the front spo iler , or if you install a different
s poiler , be sure the air flow to the front brakes is not obstructed.
Otherwise the brake system could overheat redu cing the effective
ness of the entire br ake system.
• Failure of one brake circuit will impair the braking capability
resulting in an increa sed stopping distance. Avoid driving the
vehicle and have it towed to the nearest Audi dealer or qualified
workshop.
• Never let the veh icle roll to a stop with the engine shut off .
• If the b rake booster is not working , for e xample when towing
your vehicle, or because the brake booster has somehow been
damaged , the brake pedal must be pre ssed considerably harder to
make up for the lack of booster assistance . •
Anti- lock brake system (ABS)
ABS p revents the wheel s from loc king unde r br ak ing.
The anti -lock brake sys te m (ABS) makes a major contri but ion to
i ncreasing act ive d riv in g sa fety . You should not expect that brakin g
distances wi ll be
shortened unde r all c ircums tances wi th ABS.
B rak in g distance may even become somewhat
longer , for e xa m ple ,
on gravel or in new snow on s lippery ground, even if you are driving
carefully and slowly.
ABS operation
W hen a veh icle speed o f about 10 mph (20 km/ h) is reac hed , an au to
matic test sequence is run. Some noise from the pum p may be
audible.
I f the speed of a wheel s lows down too much re lative to vehicle
speed and i t starts to lock, br ake pressu re to th is whee l is reduce d.
T his adjustment process can be felt as a
pulsing motion of the b rake
pedal ,
accompanied by some noises. Yo u as the d rive r are in tent io n
a lly being g iven the in fo rmation that the wh eels a re tendin g to lock
Vehicle care Do-it-yourself service Technical data
Page 195 of 316
New brake pads
Remember that new brake pads do not have a full braking
effec t during the first 250 miles (400 kilometres) after they
are installed.
New brake pads have to be "burnished in" before they have optima l
grab=> &.
During the break -in period, you should avoid putting severe loads
on the brakes. Severe loads include, for example, sudden hard
braking, in particular at very high speeds or, for example, on moun
tain passes.
& WARNING
U ntil the y develop the m axim um "b ite " fo r be st stoppi ng p owe r,
th e s urfaces on new br ake p ads re quir e some " brea king -in " during
th e ini tia l 100 to 150 miles 1 150 to 200 k ilom etres) of nor ma l c ity
driving . You can comp ensa te fo r thi s by press ing the brak e ped al
more fi rml y. T his appl ie s w henev e r ne w pad s a re in sta lled . •
Catalytic converter
It is very important that your emission control system
(catalytic converter) is fu nctioning properly to ensure that
y o ur vehicle is running in an environmentally s ound
manner.
- Always use lead-free gasoline~ page 214, "Fuel supply".
- Never run the tank down a ll the way to empty.
- Never put too much motor o il in your engine~
page 225,
"Adding engine oi l 'l=:;r\11
•
- Neve r try to push -or tow -s tart your ve hicle.
Controls and equip
ment Safety first Vehicle operation
Dri
ving and environm ent
The catalytic converter is an efficient "clean-up" device built into the
exhaust system of the vehicle . The cataly tic converter burns many
of the pollutants in the exhaust gas before they are re leased into the
atmosphere.
The exclusive use of un leaded fuel is critica lly important for the l ife
of the catalytic converter and proper functioning of the engine.
& WARNING
• Do not park or oper ate th e ve hi cle in are a s whe re the hot
exha ust sys te m may c ome in conta ct wi th dr y grass, bru sh , fu el
s pill or other mat eri al which can cau se a fi re.
• Do not app ly a dditi onal u nder co at ing or ru stpr oofing on or
near the exhau st m anifold , exh au st pipe s, cata ly tic convert er or
he at shi elds. During dri ving, the s ubstance use d f or und ercoa ting
c ould ov erheat an d ca u se a fire.
0 Note
• Be aware that just one tank fi lling with
le ad ed fuel wi ll a lready
seriously degrade the performance of the catalytic converter.
• Do not exceed the correct engine oil level =>
page 225.
• Do not drive until the fuel tank becomes completely empty. The
engine could misfire . Unburned fuel could a lso get into the exhaust
system and this could cause the catalytic converter to overheat .
• Do not turn off the igni tion wh ile the vehicle is moving.
• Do not continue to operate your vehicle under these conditions,
as otherwise fue l can reach the cata lytic converter. This could resu lt
in overheating of the converter, requiring its replacement .
• To assure efficient operation of the Emiss ion Control System:
- Have your vehicle maintained properly and in accordance with
the service recommendations in your Maintenance & Warranty
booklet.
Vehicle care Do-it-yourself service Technical data
Page 197 of 316
one half. Never drive faster than the posted speed limit and weather
conditi ons permit. •
Reducing unnecessary Idling
Even when your car is just idling it burns up fuel.
- Shut the eng ine off when you are not driving the vehicle .
- Do not warm up the vehicle by letting the eng ine run at
idle.
I t makes sense to shut off the engine in traffic jams, when waiting
for trains to pass at railroad crossings, or at traffic lights that have long waits on red. Turning the engine off for just 30 -40 seconds
saves more fue l than is burned s tarting the engine again .
It takes a long time for the engine to warm up fully when it is
running at idle . However, wear and noxious emissions a re especial ly
high when the engine is warming up . So you should drive away as
soon as you start the engine and avoid running at high RPMs whi le
the engine is stil l warming up .
0 Note
Do not leave engine idling unattended after starting . If warning
lights should come on to indicate improper operation, they would
go unheeded. Extended idl ing also produces heat, wh ich cou ld
result in overheating or other damage to the vehicle or other
property .•
Regular maintenance
A badly tuned en gine unnecessarily wastes a lot of fuel.
- Have your v ehicl e serv ice d at reg ular intervals.
Controls and equip
ment Safety first Vehicle operation
Dri
ving and environm ent
By having your vehicle regularly serviced by an Audi dea ler helps to
ensure that i t runs properly and economically . The conditio n of your
vehic le not only affects its safety and abi lity to hold its va lue, it also
affects
fuel consumption .
Check your oil each time you fill your tank.
The amount of oil used is related to engine load and speed .
I t is normal for the oi l consumption of a new eng ine to reach its
lowest va lue after a certain mi leage has been driven.
You must drive your vehicle about 3,000 miles (5,000 kilometres) be fore you can proper ly assess o il consumpt ion.
This also applies to fuel consumption and engine output .
0 Note
• Have your vehicle maintained properly and in accordance with
t he service recommendations in your Main tenance
& Warranty
booklet. Lack of proper ma intenance as well as improper use of the
vehicle wi ll impair the function of the emission control system and
cou ld lead to da mage.
• Do not alter or remove any component of the Emission Contro l
System unless approved by the manufacturer .
• Do no t al te r or remove any device, such as heat shields,
switches, ignition wires, valves, which are designed to protect your
veh ic le' s Emission Control System and o ther i mportant vehicle
components. •
Fewer short trips
Fu el consu mption will alwa ys be relatively high on shor t
trips.
- Try to avo id driving short dista nce s wi th a cold engine.
Vehicle care Do-it-yourself service Technical data
Page 229 of 316
_____________________________________________ C_h_ e_ c_k _in ____ g_ a_n _d_ f_il _li _n __ g ____ fflllll
•
0 Note
Never mix oil additives with your engine oil. These additives can
damage your engine and adversely affect your Audi Limited New
Vehicle Warranty .
W For the sake of th e environm ent
• Before changing your oi l, first make sure you know where you
can properly dispose of the used oil.
• Always dispose of used engine oil properly. Do not dump it on
garden soil, wooded areas, into open streams or down sewage
drains .
• Recycle used engine oi l by taking it to a used engine oil collec
tion fac ility in your area, or contact a service station. •
Engine cooling system
Coolant
The engine coolant performs two functions: it keeps the
engine from overheating and it protects the engine from
freez ing in the winter.
The coo ling system is sealed and generally requires little attention.
T he coo ling system has been filled at the factory with a permanent
coolant which does not need to be cha nged . The coolant consists of
a mixture of water and the manufacturer's glycol-basedcoolant
addit ive G 12 + antifreeze with an ticorrosi on addit ives (50% for USA
models; 60% for Canadian models). This mixture both assures the
necessary frost protection and protects metal components in the
engine's cooling system from corrosion and scaling . It a lso raises
the boiling point of the coo lant .
Do not reduce t he concentration of the coolant in the summer by
adding plain water.
The prop ort ion of coolant additi ve mu st be at le
as t 50 % but not more th an 60 %
to maintain antifreeze protection
and co oling effic iency . If the coo lant fros t protect ion is too low, the
coolant could freeze and damage the vehic le heating and engine
coo ling system.
For year-round driving, antifreeze is added at the factory for temper
atures down to:
• - 31 °F ( - 35 °C) USA
• -40 °F ( -40 °C) Canada.
You can mix the G12 + coo lant additive with other additives (f or
examp le G11 or G12l. Always check with your authorized Audi
dea ler .
& WARNING
Before you check anything in the engine compartment , alway s
read and heed all WARNIN GS
=:> & in "Working i n the engine
c ompartment " on
page 220.
0 Note
• Before winter sets in, have the coolant checked to see if the
coolant additive in your vehicle is sufficient to meet the climate
conditions . This is especia lly important if you live in a region where
the winter is extremely cold. If necessary, increase the proport ion o f
coo lant additive to 60%.
• When adding coolant additive to your coo ling system,
remember :
- We recommend using only coolant additive G12+ (check the
label) for your vehicle. This coolant additive is avai lable at autho
rized Audi dealers. Other types of antifreeze can significantly
reduce corrosion protection. The resulting corrosion can cause a
loss of coolant and serious engine damage.
• Do not add any type of radiator leak sea lant to your vehicle's
engine coolant. Adding radiator repair fluid may adverse ly affect the _.,
Vehicle care I t •
Page 230 of 316
___ C_h_ e_ c_k _in --== g'-- a_n _d_ f_il _li _n ..:::g:::..- ___________________________________________ _
function and performance of your cooling system and could result
in damage not covered by your New Vehicle Limi ted Warranty .•
Checking the engine coolant level
The engine coolant level can be checked with a quick
g lance .
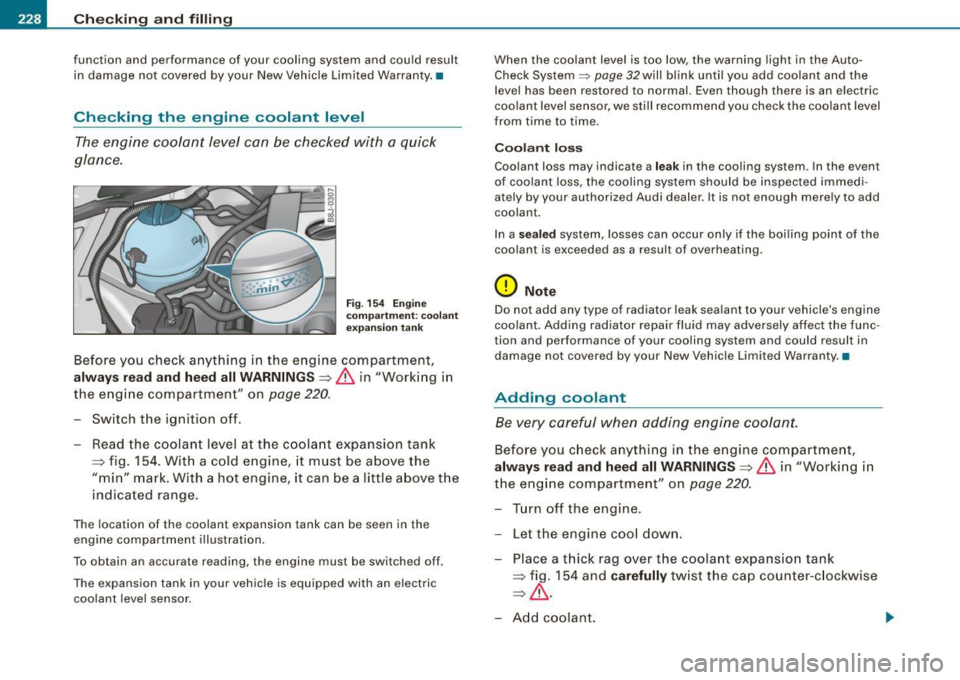
Fig. 154 Engin e
co mpartment : coo lan t
e xpansio n tank
Before you check anything in the engine compartment,
always read and heed all WARNINGS =>
& in "Working in
the engi ne compa rtment" on
page 2 20.
- Switch t he ignition off.
- Rea d the coo lan t leve l at th e co ola nt e xpansion tank
=> fig . 154. Wit h a c old engine , it must be a b ove the
"min" mark . With a hot engine, it can be a little a bove t he
indicated range .
The location of the coo lant expansion tank can be seen in the
engine compartment i llustration.
To obtain an accurate reading, the engine must be switched off .
The expans io n tank in your vehicle is equipped with an electric
coo lant level sensor . When the coolant leve
l is too low , the warning light in the Auto
Check System ~
page 32will blink un til you add coolant and the
level has been restored to normal. Even though there is an electric
coo lant level sensor, we still recommend you check the coolant level
from time to time .
Coolant los s
Coolant loss may indicate a leak in the cooling system . In the event
of coo lant loss, the cooling system should be inspec ted i mmedi
a tely by your authorized Audi dealer . It is no t enough mere ly to add
coolant.
In a
sealed system, losses can occur only if the boi ling point of the
coolant is exceeded as a result of overheating.
0 Note
Do not add any type of radiator leak sea lant to your vehicle's engine
coo lant. A dding ra diator repair fluid may adversely affec t the func
tion and performance of your cooling system and could result in
damage not cove red by your New Veh icle Limi ted War ranty. •
Adding coolant
Be very careful when adding en gine coolant.
Before you c heck anything in the engine compartment,
always read and heed all WARNINGS =>
& in "Working in
the eng ine compa rtment" on
page 220 .
-Turn off the engine.
- Let the engine coo l dow n.
- Place a t hick rag
over th e coola nt expansio n tank
=> fig . 154 and carefully twist the cap cou nter -c lockwise
=> & .
- Add coolant .