jump start AUDI TT ROADSTER 2015 Owners Manual
[x] Cancel search | Manufacturer: AUDI, Model Year: 2015, Model line: TT ROADSTER, Model: AUDI TT ROADSTER 2015Pages: 244, PDF Size: 60.74 MB
Page 5 of 244
Knee airbags . . . . . . . . . . . . . . . . . . . . . 123
Side airbags . . . . . . . . . . . . . . . . . . . . . 125
Child Safety . . . . . . . . . . . . . . . . . . . 129
Important things to know ......... .
Child safety seats ................ .
Instal ling a chi ld safety seat .. .. .. . .
Additional Information ........... .
Vehicle operation ............ .
Intelligent technology .. .. .. . .
Notice about data recorded by vehicle
control modules .............. ... .
Electronic Stabilization Control (ESC) .
Rear spoiler ................ ... . .
Braking ........................ .
E lect ro-me chan ical power assis t ... . .
D riving w ith your quattro ......... .
Energy management ............. .
Driving and environment .....
The first 1,000 miles (1,500 km) and
afterwards .............. .. .. .. . .
Avoid damaging the vehicle ........ .
Driving through water on roads ... . .
Catalytic converter ............... .
Shutting down vehicle ............ .
Operate your vehicle economically and
minimize pollution ............... . 129
134
137
140
141
141
141
14 1
143
144
145
1 46
146
1 4 9
149
150
150 150
151
15 1
Tra iler towing . . . . . . . . . . . . . . . . . . . . 153
Vehicle care . . . . . . . . . . . . . . . . . . . 154
Vehicle care and cleaning . . . . . 154
General information . . . . . . . . . . . . . . 154
Car washes . . . . . . . . . . . . . . . . . . . . . . 154
Cleaning and care information . . . . . . 155
Fuel supply and filling your
fuel tank . . . . . . . . . . . . . . . . . . . . . . .
160
Gasoline . . . . . . . . . . . . . . . . . . . . . . . . 160
Fuel tank. . . . . . . . . . . . . . . . . . . . . . . . 161
Checking and filling . . . . . . . . . . . 164
Engine hood . . . . . . . . . . . . . . . . . . . . . 164
Eng ine oil . . . . . . . . . . . . . . . . . . . . . . . 166
Eng ine cooling system ............. 171
Brake fluid ...................... 174
Table of contents 3
Battery . . . . . . . . . . . . . . . . . . . . . . . . . 175
Windshield/headlight washer
container . . . . . . . . . . . . . . . . . . . . . . . 179
Tires and wheels ........... .. .
Tires ..... .. .... .. . .. .......... .
Tire pressure monitoring system ... .
Run-flat tire s .. .. ............... .
Do-it-yourself service ........ .
What do I do now? ........... .
Trunk escape handle ............. .
Vehicle tool kit .... .............. .
T ire repai r .... ... .. ............. .
What should I be aware of when
h . t
' 7 c angmg a ire .................. .
Fuses and bulbs .. .. .. ..... ... .
El ectr ical fuses . .. .. ............. .
Bulbs .......................... .
Emergency situations ........ .
General ........................ .
Starting by pushing or towing ...... .
Starting with jumper cables ....... .
U se of jump er cables ............. .
Emergency towing with commercia l
tow truck ...................... .
Lifting vehicle .. .. ............... . 180
180
198
201
204
204
204
204
205
208
212
212
215
2 16
216
216
216
217
218
221
Technical data . . . . . . . . . . . . . . . . . 222
Technical Data . . . . . . . . . . . . . . . . . 222
Vehicle identification . . . . . . . . . . . . . . 222
Weights . . . . . . . . . . . . . . . . . . . . . . . . 222
Dimensions . . . . . . . . . . . . . . . . . . . . . . 223
Capacities . . . . . . . . . . . . . . . . . . . . . . . 223
Gasoline engines . . . . . . . . . . . . . . . . . 224
Consumer Information . . . . . . . 225
Warranty coverages . . . . . . . . . . . . . . . 225
Operating your vehicle outside the
U.S. A. or Canada . . . . . . . . . . . . . . . . . 225
Audi Service Repair Manuals and
Literature . . . . . . . . . . . . . . . . . . . . . . . 225
Maintenance. . . . . . . . . . . . . . . . . . . . . 225
Additional accessories, modifications
and parts rep lacement . . . . . . . . . . . . 227
•
•
Page 168 of 244
166 Checking and filling
Engine compartment
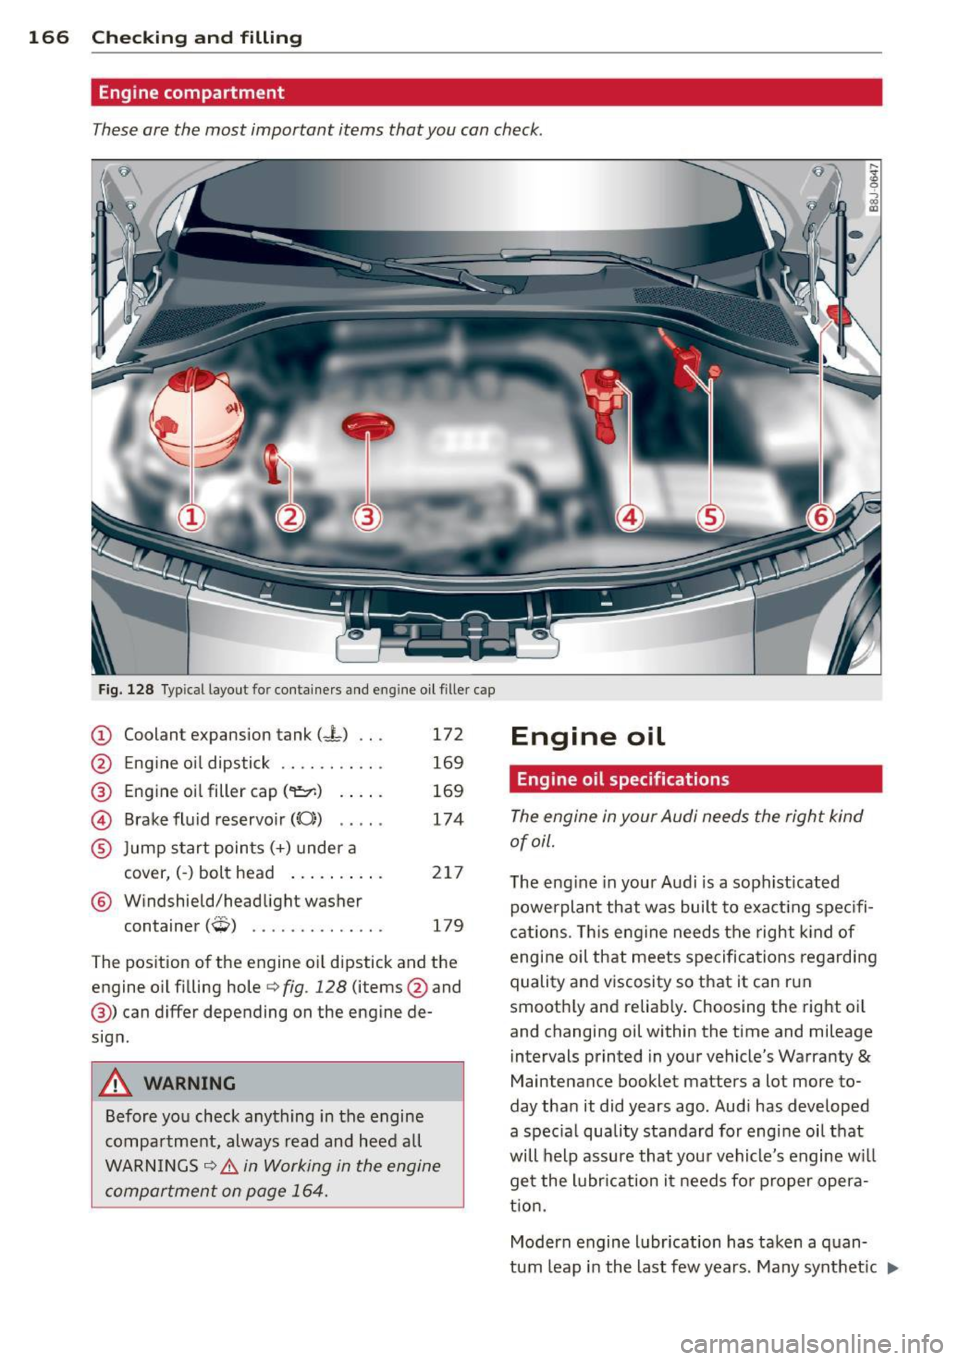
These are the most important items that you can check .
•
Fig. 128 Typ ica l layout for containers and eng ine oil filler cap
CD Coolant expansion tank (-L) .. .
'2' E . 'l d. . k \61 ngIne 0 1 1pst1c .......... .
@ Engine oil filler cap ('1:::r.) .. .. .
@ Brake fluid reservoir((();) .. .. .
® Jump start points(+) under a
cover, (-) bolt head .... ... .. .
® Windshield/headlight washer
t . (
;;p, ) con ainer ,-!,, •••.•••.•.•••.
172
169
169
174
217
179
The pos ition of the engine o il dipstick and the
engine o il fi lling hole
r::> fig. 128 (items @and
@) can differ depending on the engine de
sign .
A WARNING
Before you check anything in the engine
compartment, always read and heed all
WARN INGS
c::> .& in Working in the engine
compartment on page 164.
Engine oil
Engine oil specifications
The engine in your Audi needs the right kind
of oil.
T he eng ine in your Aud i is a soph ist icated
powerplant that was built to exact ing spec ifi
cat ions . T his engine needs the right kind of
engine oil that meets specifications regarding
quality and viscosity so that it can run
smooth ly and reliably . Choosing the right o il
and changing oil within the time and mileage
i ntervals printed in your vehicle's Warranty
&
Maintenance booklet matters a lot more to
day tha n it did years ago. Audi has developed
a spec ia l quality standard for engine oil that
will help assure that you r vehicle's engine w ill
get the lubr ication it needs fo r proper opera
t ion.
Modern engine lubr ication has taken a quan
tum leap in the last few years. Many synthet ic
1J.
Page 218 of 244
216 Emergency situations
Emergency situations
General
This chapter is intended for trained emer
gency crews and working personnel who
have the necessary tools and equ ipment to
perform these ope rations.
Starting by pushing or
towing
Q;) Note
Vehicle s with an automati c transmission
cannot be started by pushing or towing .
Starting with jumper
cables
If necessary, the engine can be started by
connecting it to the battery of another vehi
cle.
If the engine should fail to start because of a
discha rged or wea k batte ry, the battery can be
connected to the battery o f
another vehicle,
using a
pair of jumper cables to start the en
g ine .
Jumper cables
Use only jumper cab les of sufficiently
large cross section to safely carry the starter
cur rent. Refer to the manufacturer's specifica
ti ons.
Use on ly jumper cables which have
insulated
termina l clamps and are properly marked for
d istinction :
plus(+) cable in most cases colo red red
minu s(-) cable
in most cases colo red black .
_& WARNING
Batterie s contain elec trici ty, a cid, and ga s.
Any of th ese c an cause ve ry seri ous or f ata l
inju ry . Follow the instructions below fo r
safe han dling of your ve hicle's battery.
- Alw ays s hield yo ur eyes and avoid lean
ing over the batte ry w henever possib le . -
A discharged battery can a lready freeze
at temperatures just be low 32 °F (0 °C).
Before connect ing a jumper cab le, the
frozen battery must be thawed com
p letely, othe rwise it cou ld explode .
- Do not allow batte ry acid to contact eyes
or skin . Fl ush any contacted a rea wi th
water immediat ely .
- Imp roper use of a booster battery to
s tart a vehicle may cause an explosion.
- Vehicle batter ies generate explosive gas
es . Keep sparks, flame and lighted ciga
rettes away from ba tte ries .
- Do not try to jump start a ny ve hicle w ith
a low ac id leve l in the battery .
- The vo ltage of the booster batte ry m ust
a lso have a 12-Vo lt rat ing . The capacity
(A h) of the booster batte ry should not b e
lowe r than that of the discharged bat
tery . U se o f batt erie s of d iffe ren t voltage
or subs tanti ally diffe ren t "Ah" rat ing
may c ause an exp losion and person al in
ju ry .
- N ever ch arge a fr ozen bat te ry. Gas t rap
ped in the ice may ca use an ex plosion .
- N ever ch arge o r use a batt ery th at has
been fro zen. T he battery case may have
be weakened.
- Us e of batt erie s of di ffere nt vo lta ge or
substan tially differen t ca pa city (Ah) rat
i ng may cause an exp losion and injury.
T he capac ity (Ah) of the booster battery
should not be lower than that of the dis
charged batte ry.
- Before you check anything in the engine
compartment, always read and heed a ll
W ARNI NGS
c::;,page 164, Working in the
engine compartment .
@ Note
-App lying a hig her voltage booster ba t
tery will cause expens ive damage to se n
sitive electronic components, such as
cont ro l units , relays, rad io, etc.
- There must be no electrical contact be
twee n the vehicles as otherwise current
cou ld already start to flow as soo n as th e
posi tive (+) term inals are connect ed. ""
Page 219 of 244
@ Tips
The discharged battery must be properly connected to the vehicle's electrical sys
tem.
Use of jumper cables
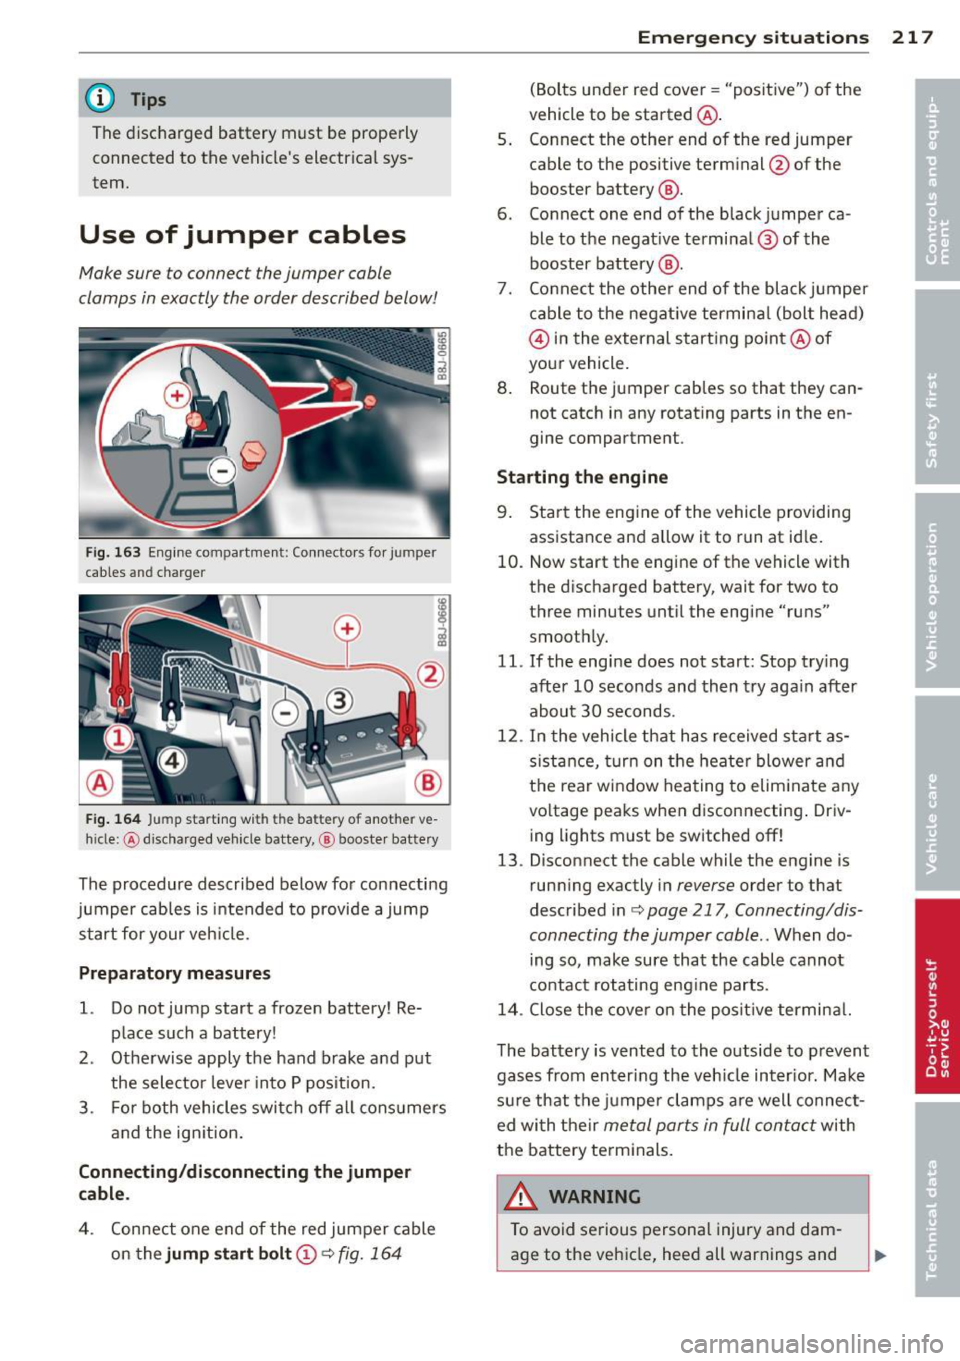
Make sure to connect the jumper coble
clomps in exactly the order described below!
Fig. 163 Eng ine compartme nt: Co nnecto rs for jumper
cables and charger
F ig . 164 Jump start ing with the battery of another ve
h icle: @discharged ve hicle batte ry, @ booste r battery
The procedure described below for connecting
jumper cables is intended to provide a jump
start for your veh icle.
Preparatory me asures
1. Do not jump start a frozen battery! Re
place such a battery!
2 . Otherwise apply the hand brake and put
the selector leve r into P pos ition.
3. For both vehicles swi tch off all cons umers
and the ignit ion.
Conn ecting /disconnecting the jumper
cable .
4. Con nect one end of the red jumper cable
on the
jump st a rt bo lt @ ¢ fig. 164
Emergenc y situ ation s 21 7
(Bolts under red cover = "positive") o f the
vehicle to be started @.
5 . Connect the other end of the red jumper
cable to the positive terminal @ofthe
booster battery @.
6 . Connect one end of the black jumper ca
ble to the negat ive terminal ® of the
booster battery @.
7. Co nnect the othe r end of the black jumper
c able to the negat ive termina l (bolt head)
@ in the external starting po int @ of
your vehicle.
8 . Route the jumper cables so that they can
not catch in any rotat ing parts in the en
gine compartment.
Sta rting th e engine
9. Sta rt the eng ine of the vehicle providing
assistance and allow it to run at idle.
10. Now start the engine of the vehicle with
the discharged battery, wait for two to
three minutes until the engine "runs"
smooth ly.
11. If the eng ine does not start: Stop try ing
after 10 seconds and then try aga in after
about 30 seconds.
12 . In the vehicle that has received sta rt as
s istance, tur n on the heate r blower and
the rear window hea ting to elim inate a ny
vo ltage peaks when disconnecting . Driv
ing lights must be switched off!
13 . Disconnect the cable while the engine is
runn ing exactly in
reverse order to that
described in<=>
page 217, Connecting/dis
connecting the jumper coble ..
When do
ing so, make sure that the cable cannot
contact rotating eng ine parts.
14 . Close the cove r on the posit ive termina l.
T he battery is vented to the outside to p revent
gases from enter ing the veh icle inter ior. Make
s ur e that the jumper clamps a re well connec t
ed with their
me tal parts in full contact with
the battery terminals.
A WARNING
To avoid serious personal injury and dam
age to the vehicle, heed all warnings and
Page 234 of 244
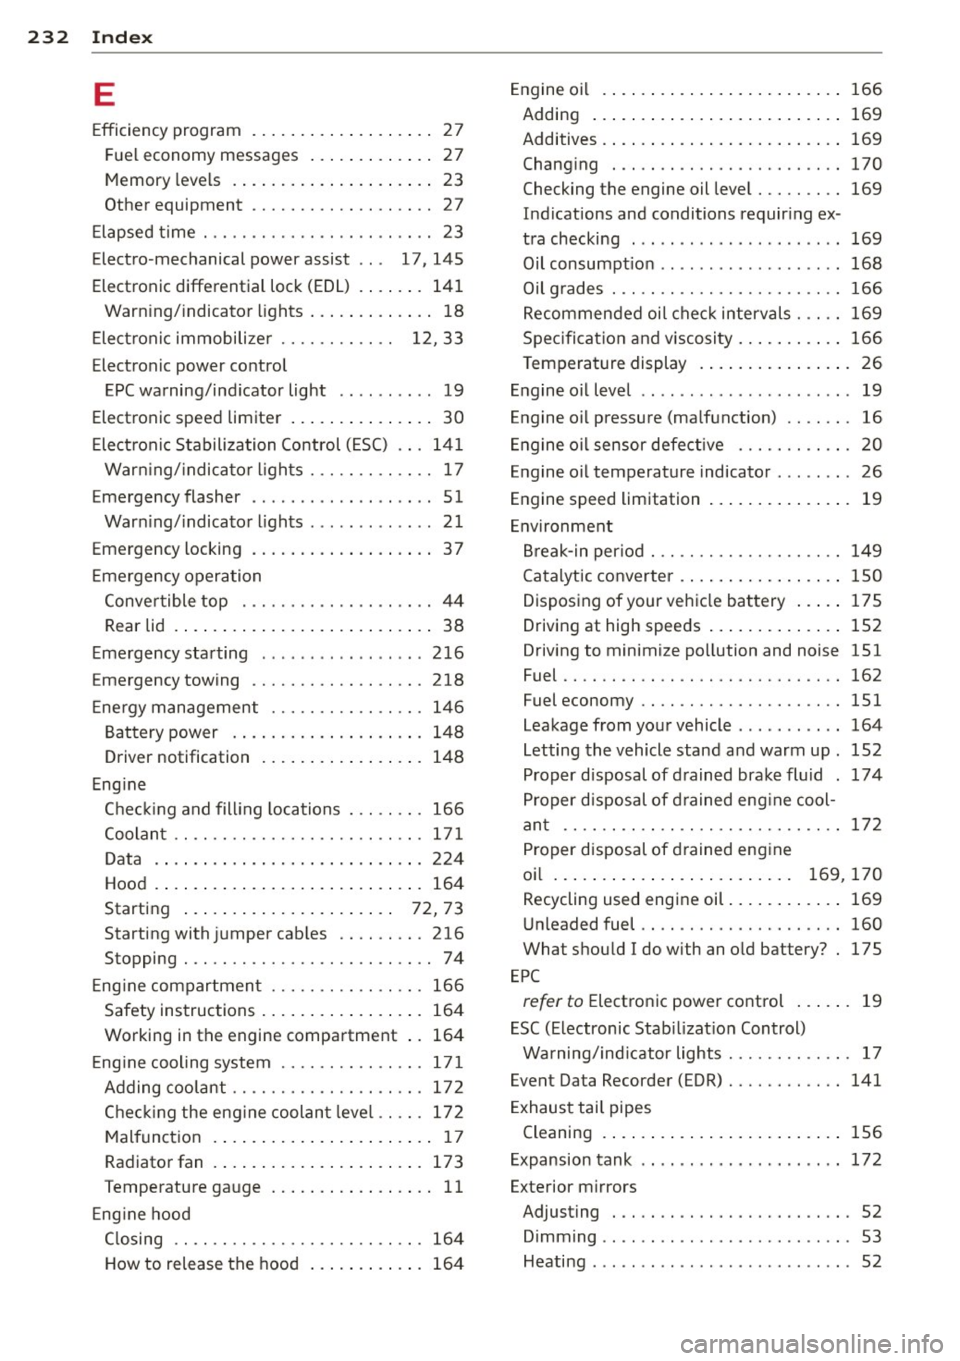
232 Index
E
Efficiency program ....... .. .. .. .... .. 27
F ue l economy messages ... .. .. .... .. 27
Memory levels . . . . . . . . . . . . . . . . . . . . . 23
Other equipment .. ......... .. .. .. .. 2 7
E lapsed time ... .... ....... .. .. .. .. .. 23
Electro -mechanical power assist . . . 17 , 145
Elect ronic differential lock (EDL) . . . . . . . 141
Warn ing/ indicato r lights ... .. .. .... .. 18
E lect roni c immobili ze r . . . . . . . . . . . . 12, 33
Electronic power co ntrol
EPC warning/ind icator light .. .. .. .... 19
Electronic speed limiter . . . . . . . . . . . . . . . 30
E lect ron ic S tabilization Control ( ESC) .. . 141
War ning/ indica tor l ights . .. .. .. .. .. .. 17
E mergency flasher . . . . . . . . . . . . . . . . . . . 51
War ning/ indicator lights . ...... .. .. .. 21
Emergency locking . . . . . . . . . . . . . . . . . . . 3 7
E mergency opera tion
Conve rtible top .......... .. .. .. .. .. 44
Rear lid . . . . . . . . . . . . . . . . . . . . . . . . . . . 38
E mergency sta rting .. ... ... .. .. .. .. . 216
Emergency towing ......... .. .. .. .. . 218
Ene rgy management ....... .. .. .. .. . 14 6
B att ery power . . . . . . . . . . . . . . . . . . . . 148
D river notification . . . . . . . . . . . . . . . . . 148
Eng ine
C he ckin g and fill ing locations . .. .. .. . 166
Coolan t .. .. ............. .... .. .. . 17 1
D ata .... .. ... ... .... ... .. .. .... . 224
Hood . ..... ... . ...... ... .. .. .... . 164
Starting . . . . . . . . . . . . . . . . . . . . . . 72, 73
Starting with jumper cab les .. .. .... . 216
Stopping . ................. ...... .. 74
E ng ine compartmen t ....... .. .. .. .. . 166
Safety instructions ... ... .. .. .. .... . 164
Working in the engine compa rtment .. 164
E ng ine cooling system ...... .. .. .. .. . 17 1
A dding coolant ........... .. ...... . 17 2
Chec king the eng ine coolan t leve l .. .. . 172
M alfunc tion . . . . . . . . . . . . . . . . . . . . . . . 17
Radiato r fan . .. .. ..... ... .. .. .... . 173
Temperature ga uge .. ... .. .. .. .... .. 11
E ng ine hood
C losing .. ............... .... .... . 164
H ow to release the hood ... .. .. .... . 164 E
ngine oi l .. .... .. ... .. ..... .... . .. 166
Adding ... .... .. .. ... ..... ... .. .. 169
Additives . ... .. .. ... .. ..... ... .. .. 169
Changi ng ..... .. ............. .... 170
Checking the engine oil level ..... .... 169
Indications and conditions requir ing ex -
tra checking ... .. ... .. .. ... ..... .. 169
Oil consumpt io n .. .......... ...... . 168
Oil g rades . .. .... ............. .. .. 166
Recommende d oi l c he ck interv als . .. .. 169
Spec ifi cat ion an d viscosity .. ... .. .. .. 166
T emperature display . .. ..... .... . .. . 26
En gine o il level .. .. ................ .. 19
Engine oi l pressure (ma lfunction) .. .. .. . 16
En gine oi l sensor defective . . . . . . . . . . . . 20
Engine oil temperature indicator ........ 26
Engine speed limitation .. ..... ... .. .. . 19
En vironment
Br eak-in per io d ... ............. .. .. 149
Catalytic converter . .. .. ..... ... .. .. 150
Disposing of your veh icle ba ttery ... .. 175
Driving at high speeds . . . . . . . . . . . . . . 152
Driving to minimi ze po llution and noise 151
Fuel ...... .... .. .. ............... 162
Fuel economy .... ................. 151
Leakage from your vehicle ..... ... ... 164
L etting the vehicle stand a nd warm up . 152
Proper disposal of d rained brak e flu id . 174
P roper d isposal of d rained eng ine cool-
an t ...... .... .. ................. 172
Proper disposal of d rained eng ine
oi l . . . . . . . . . . . . . . . . . . . . . . . . . 169, 170
Recycling used engine oil ..... ... .. .. 169
Un leaded fuel .. .. ............. .. .. 160
What shou ld I do with an o ld battery? . 175
EP C
refer to Elect ronic power co ntrol ... .. . 19
E SC (Electronic Stab ilizat io n Control)
Warning/ind icator lights ........ .. .. . 17
Event Data Recorder (EDR) ........ .... 141
E xhaust tail pipes
Cleaning . ..... .. ... .. ..... .... . .. 156
E xpansion tank . . . . . . . . . . . . . . . . . . . . . 172
Exterior m irrors
Adjust ing . .... .. ............. .... . 52
Dimming ...... .. ..... ....... ... .. . 53
Heating ....... .. ..... ....... ... .. . 52
Page 236 of 244
234 Index
How often should I check my t ire pres -
sures? . ..... ... . ...... ... .. .. .... . 187
H ow safety belt pretensioners wo rk ... . 106
Hydroplaning ............... .. .... . 191
I
Ignition key . . . . . . . . . . . . . . . . . . . . . . . . . 72
I gnition key safety lock . . . . . . . . . . . . . . . 73
Ignition lock . . . . . . . . . . . . . . . . . . . . . . . . 72
I gnition lock positions . . . . . . . . . . . . . . . . 72
I mmobilizer . ................ ... ... . 12
Important things to do before driving ... 91
I mproperly wor n safety be lts . .. .. .... . 10 5
Indicator light Airbag system . . . . . . . . . . . . . . . 118, 1 19
Aud i magnetic ride ...... .. .. .. .. .. .. 21
C lutch ove rheati ng . . . . . . . . . . . . . . . . . . 86
PASSENG ER A IR BAG O FF .. .. .. .. .. . 119
Indicator lights
refer to Wa rni ng/ind icator lights .. .. . . 1 2
Infant seats . ............. .. .. .. .. . 134
I ns tal ling ch ild safety sea ts
Safe ty bel ts ............. .... .... . 13 7
Instrument cluster and controls .. .. .... 10
Instrument panel i llum ination ... .. ... . 52
I ns trumen ts a nd controls
General illus tration ..... .. .. .. .. .. . .. 8
Interior lights . . . . . . . . . . . . . . . . . . . . . . . 51
L uggage compartment . ... .. .. .. .. . . 52
J
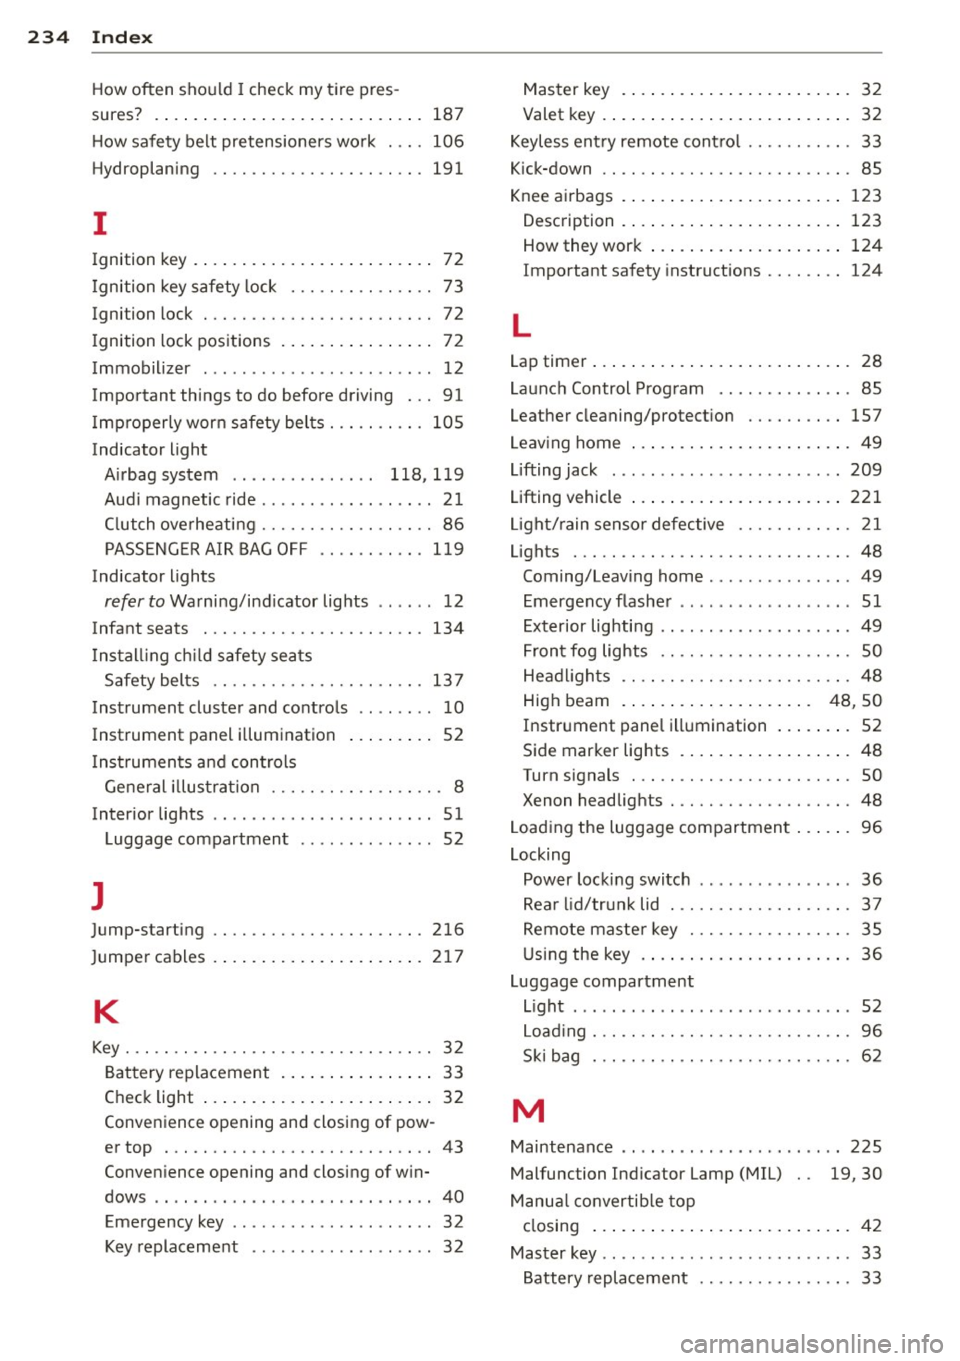
Jump-starting 216
Ju mper cables . .. .. ..... ... .. .. .... . 21 7
K
Key ... .. .... ... .......... .. .. .. .. .. 3 2
B at tery replacement . ... .. .. .. .... .. 33
Check light .... .. ..... ... .. .. .... .. 32
Conve nience opening and closing of pow-
er top . ...... ........... .... .... .. 43
Conve nience opening and closing of w in-
dows .. .... ........ ..... .. ........ 40
Emergency key . . . . . . . . . . . . . . . . . . . . . 32
Key replacement . . . . . . . . . . . . . . . . . . . 32 Master key
.... .. ... .. ..... .... . .. . 32
Valet key . ..... .. .. ... ..... ... .. .. . 32
K eyless ent ry remote cont ro l ...... .... . 33
K ick-down .. .... .. ................. . 85
Knee a irbags . ..... .. ... ..... ... .. .. 123
Description . ..... ... .. ..... ... .. .. 123
How they wor k ... .. ... ..... ... .. .. 124
Important sa fety instructions .... .... 124
L
Lap timer ... .... .. .. ... ..... ... .. .. . 28
Launc h Control Prog ram ...... ... .. .. . 85
Leathe r cleaning/protect ion ...... .... 157
L eav ing home ... .. ... .. ..... ... .. .. . 49
Lifting jack ..... .. .. ... ....... ... .. 209
Lifting vehicle ..... .. ... ..... ... .. .. 221
Li gh t/rain senso r defective ........... . 21
Lights . .... .... .. ............. ..... 48
Coming/Leav ing home ............. .. 49
E mergency flashe r . . . . . . . . . . . . . . . . . . 51
E xterior lig hting .. .... ...... ... .. ... 49
F ront fog lights . . . . . . . . . . . . . . . . . . . . 50
He ad ligh ts .. .. .. ... .......... .. .. . 48
High beam . . . . . . . . . . . . . . . . . . . . 48, 50
I n strument panel illumination ... .. .. . 52
Side marker lig hts . .... ..... ... .. .. . 48
Turn signals ... .. ................. . 50
Xenon headlights . ............. ..... 48
L oad ing the luggage compartmen t ... .. . 96
Locking Power locki ng switch .............. .. 36
Rea r lid/trun k lid . ... .......... .. .. . 37
R emote mas te r k ey .......... .. .. .. . 35
U sin g the key .... .. .... .... ... .. .. . 36
L uggage compartment
L ight . ..... ... .. .. ........ ... ... .. 52
L oad ing ... .. .. .. .. ... ........ .... . 96
S ki bag . .. .. .. .. ............. .. .. . 62
M
Maintenance .... .... ... ..... ... .. .. 225
Malfunction Ind icator Lamp (MIL) 19,30
Manu al convertib le top
cl osing ... .... .. .. .... . ..... ... .. . 42
Master key .. .. .. .. ... .. .. ... ..... .. . 33
Battery replacement . . . . . . . . . . . . . . . . 33