oil additives AUDI TT ROADSTER 2016 Owners Manual
[x] Cancel search | Manufacturer: AUDI, Model Year: 2016, Model line: TT ROADSTER, Model: AUDI TT ROADSTER 2016Pages: 306, PDF Size: 31.82 MB
Page 244 of 306

Downloaded from www.Manualslib.com manuals search engine Checking
and topping up fluids
months so that you can continue to operate your
vehicle reliably. Ask at your filling station wheth
er the diesel fuel available there is suitable for
the current conditions and for the temperatures
which could potentially occur.
CD CAUTION
- Never use FAME fuels (biodiesel), petrol,
heating oil, thinners or any other fuels or
additives, as these could cause serious dam
age to the fuel system and the engine.
- Never start the engine if you fill up with the
wrong type of fuel, as this could damage
the fuel system and the engine. Obtain pro
fessional assistance.
Filling the tank
Procedure for filling the tank
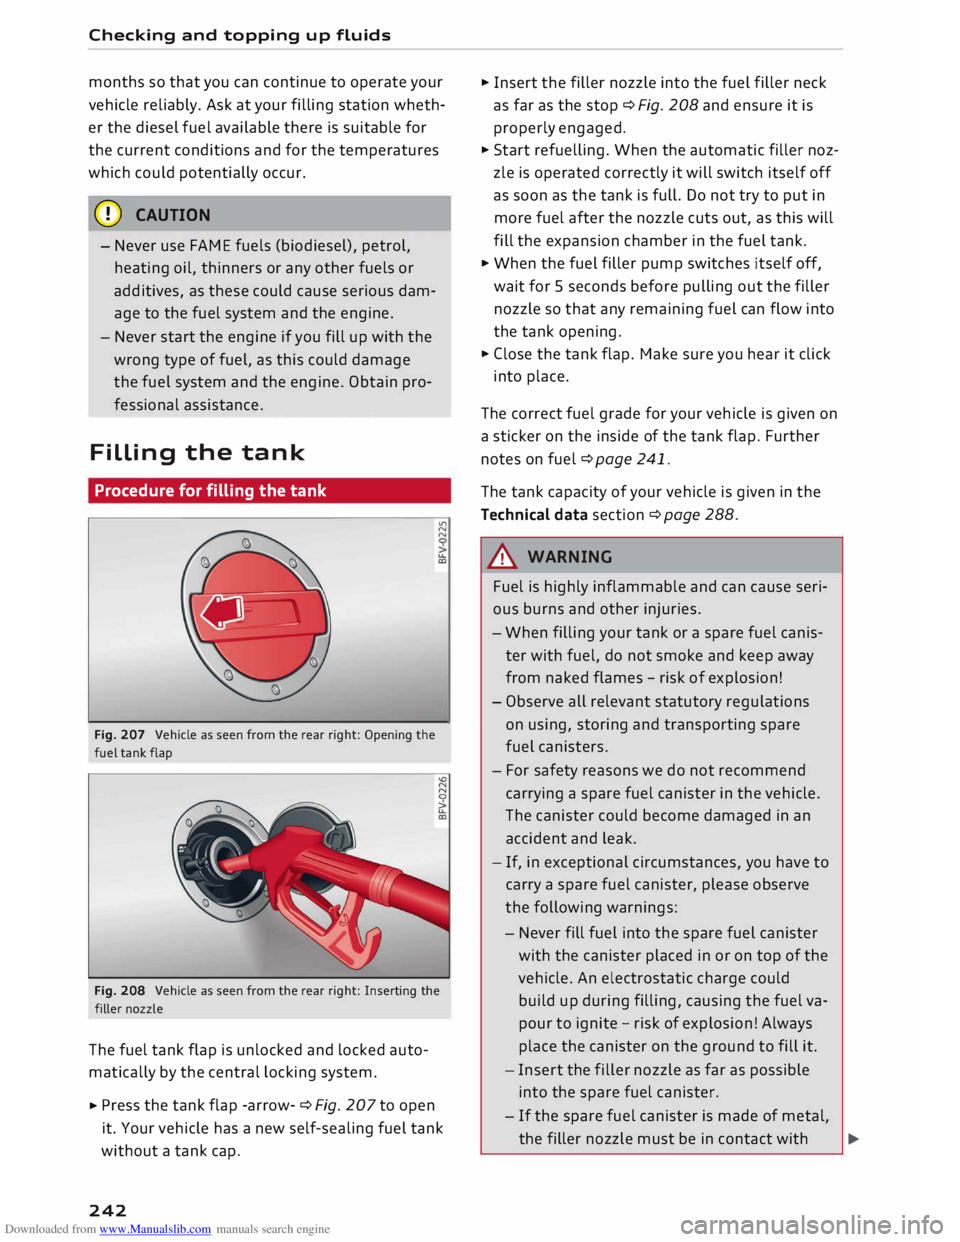
Fig. 207 Vehicle as seen from the rear right: Opening the
fuel tank flap .,..
N
N
u..
a,
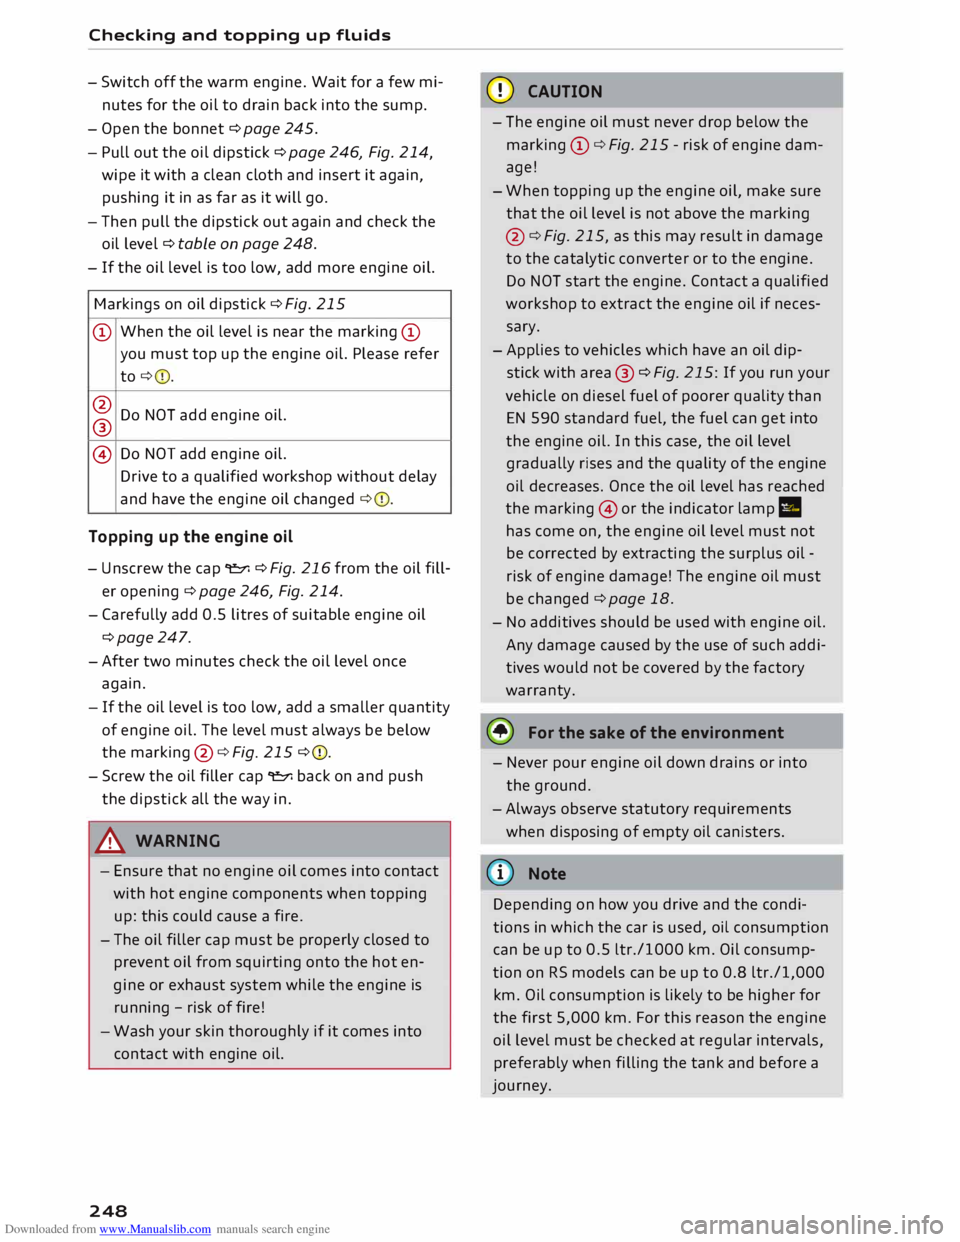
Fig. 208 Vehicle as seen from the rear right: Inserting the
filler nozzle
The fuel tank flap is unlocked and Locked auto
matically by the central Locking system.
... Press
the tank flap -arrow- ¢ Fig. 207 to open
it. Your vehicle has a new self-sealing fuel tank
without a tank cap.
242 ...
Insert the filler nozzle into the fuel filler neck
as far as the stop ¢ Fig. 208 and ensure it is
properly engaged .
... Start refuelling. When the automatic filler noz
zle is operated correctly it will switch itself off
as soon as the tank is full. Do not try to put in
more fuel after the nozzle cuts out, as this will
fill the expansion chamber in the fuel tank.
.., When the fuel filler pump switches itself off,
wait for 5 seconds before pulling out the filler
nozzle so that any remaining fuel can flow into
the tank opening.
... Close the tank flap. Make sure you hear it click
into place.
The correct fuel grade for your vehicle is given on
a sticker on the inside of the tank flap. Further
notes on fuel ¢ page 241.
The tank capacity of your vehicle is given in the
Technical data section ¢ page 288 .
A WARNING
Fuel is highly inflammable and can cause seri
ous burns and other injuries.
- When filling your tank or a spare fuel canis
ter with fuel, do not smoke and keep away
from naked flames -risk of explosion!
- Observe all relevant statutory regulations
on using, storing and transporting spare
fuel canisters.
- For safety reasons we do not recommend
carrying a spare fuel canister in the vehicle.
The canister could become damaged in an
accident and Leak.
- If, in exceptional circumstances, you have to
carry a spare fuel canister, please observe
the following warnings:
- Never fill fuel into the spare fuel canister
with the canister placed in or on top of the
vehicle. An electrostatic charge could
build up during filling, causing the fuel va
pour to ignite -risk of explosion! Always
place the canister on the ground to fill it.
- Insert the filler nozzle as far as possible
into the spare fuel canister .
- If the spare fuel canister is made of metal,
the filler nozzle must be in contact with �
Page 250 of 306

Downloaded from www.Manualslib.com manuals search engine Checking
and topping up fluids
- Switch off the warm engine. Wait for a few mi
nutes for the oil to drain back into the sump.
- Open the bonnet ¢page 245.
- Pull out the oil dipstick ¢page 246, Fig. 214,
wipe it with a clean cloth and insert it again,
pushing it in as far as it will go.
- Then pull the dipstick out again and check the
oil level ¢table on page 248.
- If the oil level is too low, add more engine oil.
Markings on oil dipstick ¢ Fig. 215
@ When
the oil Level is near the marking @
you must top up the engine oil. Please refer
to ¢ 0.
@ Do NOT add engine oil.
®
@ Do
NOT add engine oil.
Drive to a qualified workshop without delay
and have the engine oil changed ¢0.
Topping up the engine oil
- Unscrew the cap "E::71 ¢Fig. 216from the oil fill
er opening ¢ page 246, Fig. 214.
- Carefully add 0.5 litres of suitable engine oil
¢page 247.
-After two minutes check the oil level once
again.
- If the oil level is too low, add a smaller quantity
of engine oil. The level must always be below
the marking @¢Fig. 215 ¢0.
- Screw the oil filler cap "E::71 back on and push
the dipstick all the way in.
A WARNING
- Ensure that no engine oil comes into contact
with hot engine components when topping
up: this could cause a fire.
- The oil filler cap must be properly closed to
prevent oil from squirting onto the hot en
gine or exhaust system while the engine is
running -risk of fire!
- Wash your skin thoroughly if it comes into
contact with engine oil.
248 CD
CAUTION
- The engine oil must never drop below the
marking (!)¢ Fig. 215 -risk of engine dam
age!
- When topping up the engine oil, make sure
that the oil level is not above the marking
@ ¢Fig. 215, as this may result in damage
to the catalytic converter or to the engine.
Do NOT start the engine. Contact a qualified
workshop to extract the engine oil if neces
sary.
- Applies to vehicles which have an oil dip
stick with area® ¢Fig. 215: If you run your
vehicle on diesel fuel of poorer quality than
EN 590 standard fuel, the fuel can get into
the engine oil. In this case, the oil Level
gradually rises and the quality of the engine
oil decreases. Once the oil level has reached
the marking @or the indicator lamp II
has come on, the engine oil level must not
be corrected by extracting the surplus oil -
risk of engine damage! The engine oil must
be changed ¢ page 18.
- No additives should be used with engine oil.
Any damage caused by the use of such addi
tives would not be covered by the factory
warranty.
® For the sake of the environment
- Never pour engine oil down drains or into
the ground.
-Always observe statutory requirements
when disposing of empty oil canisters.
@ Note
Depending on how you drive and the condi
tions in which the car is used, oil consumption
can be up to 0.5 Ltr./1000 km. Oil consump
tion on RS models can be up to 0.8 ltr./1,000
km. Oil consumption is likely to be higher for
the first 5,000 km. For this reason the engine
oil level must be checked at regular intervals,
preferably when filling the tank and before a
journey.
Page 254 of 306

Downloaded from www.Manualslib.com manuals search engine Checking
and topping up fluids
... Now connect the battery charger to the mains
and switch on.
... After charging the battery: switch off the bat-
tery charger and disconnect the mains cable .
... Detach the charger cables from the terminals.
... Refit
the red cap onto the positive terminal.
... Close the bonnet ¢page 245.
A WARNING
- A highly explosive mixture of gases may be
given off when the battery is under charge.
Only charge the vehicle battery in a well
ventilated area.
- When it is discharged the vehicle battery
can freeze at temperatures around 0°
(. You
must not use a vehicle battery which has
frozen, even after it has thawed, because
the ice may have cracked the battery casing
and allowed the battery acid to escape -risk
of explosion and chemical burns! Please
contact a qualified workshop if you have any
questions.
- Do not connect or disconnect the charging
cables during the charging process -risk of
explosion!
1 Note
- Use only the terminals in the engine com
partment to charge the vehicle battery.
- Before you charge the vehicle battery, al
ways read and follow the manufacturer's in
structions for using the battery charger.
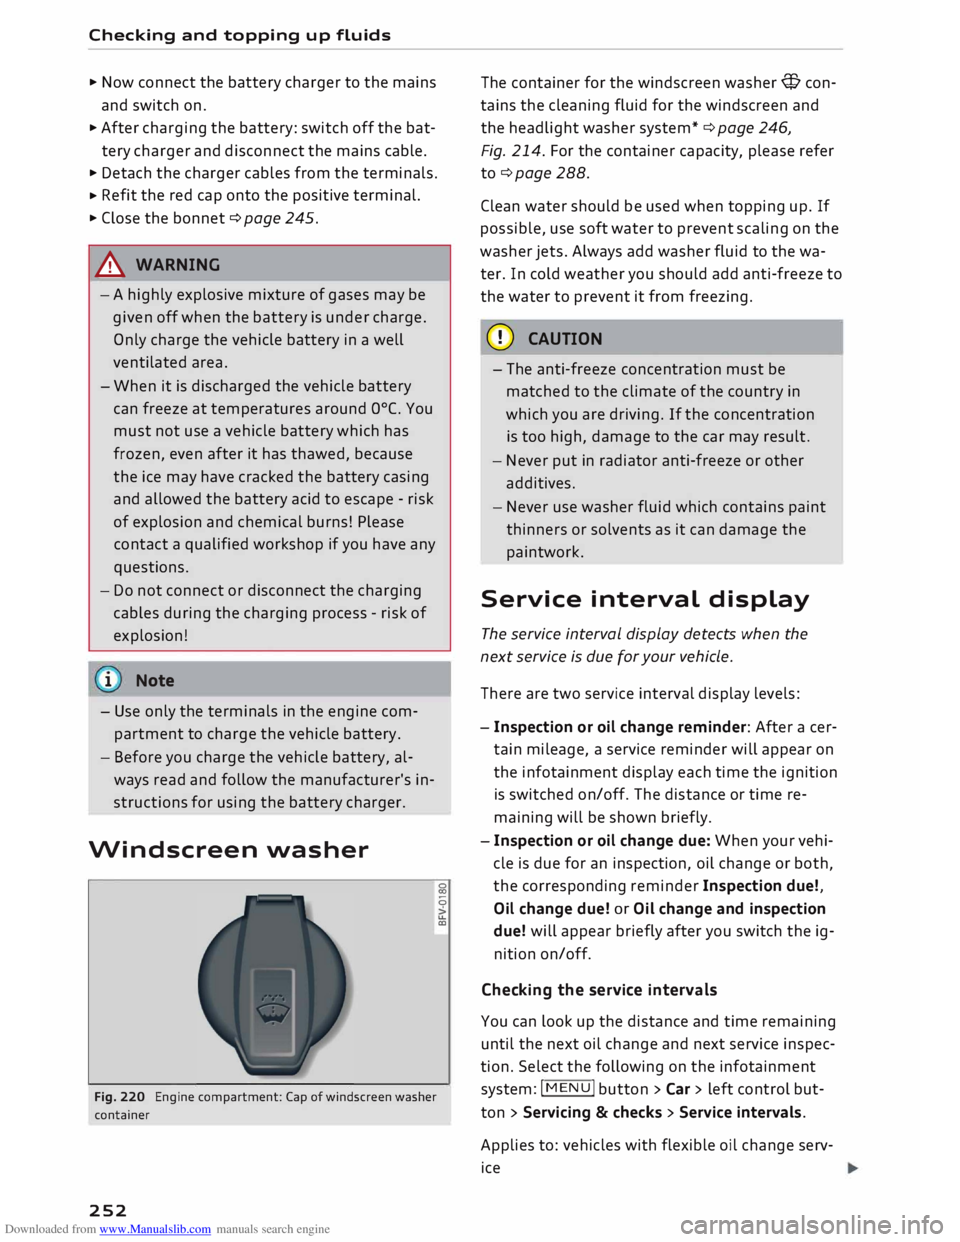
Windscreen washer
Fig. 220 Engine compartment: Cap of windscreen washer
container
252 �
0
>
u..
co The
container for the windscreen washer@ con
tains the cleaning fluid for the windscreen and
the headlight washer system* ¢ page 246,
Fig. 214. For the container capacity, please refer
to¢ page 288 .
Clean water should be used when topping up. If
possible, use soft water to prevent scaling on the
washer jets. Always add washer fluid to the wa
ter. In cold weather you should add anti-freeze to
the water to prevent it from freezing.
CD CAUTION
- The anti-freeze concentration must be
matched to the climate of the country in
which you are driving. If the concentration
is too high, damage to the car may result.
- Never put in radiator anti-freeze or other
additives.
- Never use washer fluid which contains paint
thinners or solvents as it can damage the
paintwork.
Service interval display
The service interval display detects when the
next service is due for your vehicle .
There are two service interval display levels:
- Inspection or oil change reminder: After a cer
tain mileage, a service reminder will appear on
the infotainment display each time the ignition
is switched on/off. The distance or time re
maining will be shown briefly.
- Inspection or oil change due: When your vehi
cle is due for an inspection, oil change or both,
the corresponding reminder Inspection due!,
Oil change due! or Oil change and inspection
due! will appear briefly after you switch the ig
nition on/off.
Checking the service intervals
You can look up the distance and time remaining
until the next oil change and next service inspec
tion. Select the following on the infotainment
system: IM EN u I button > Car > left control but
ton > Servicing & checks > Service intervals.
Applies to: vehicles with flexible oil change serv
ice