ing harness BMW M3 1995 E36 Repair Manual
[x] Cancel search | Manufacturer: BMW, Model Year: 1995, Model line: M3, Model: BMW M3 1995 E36Pages: 759
Page 245 of 759
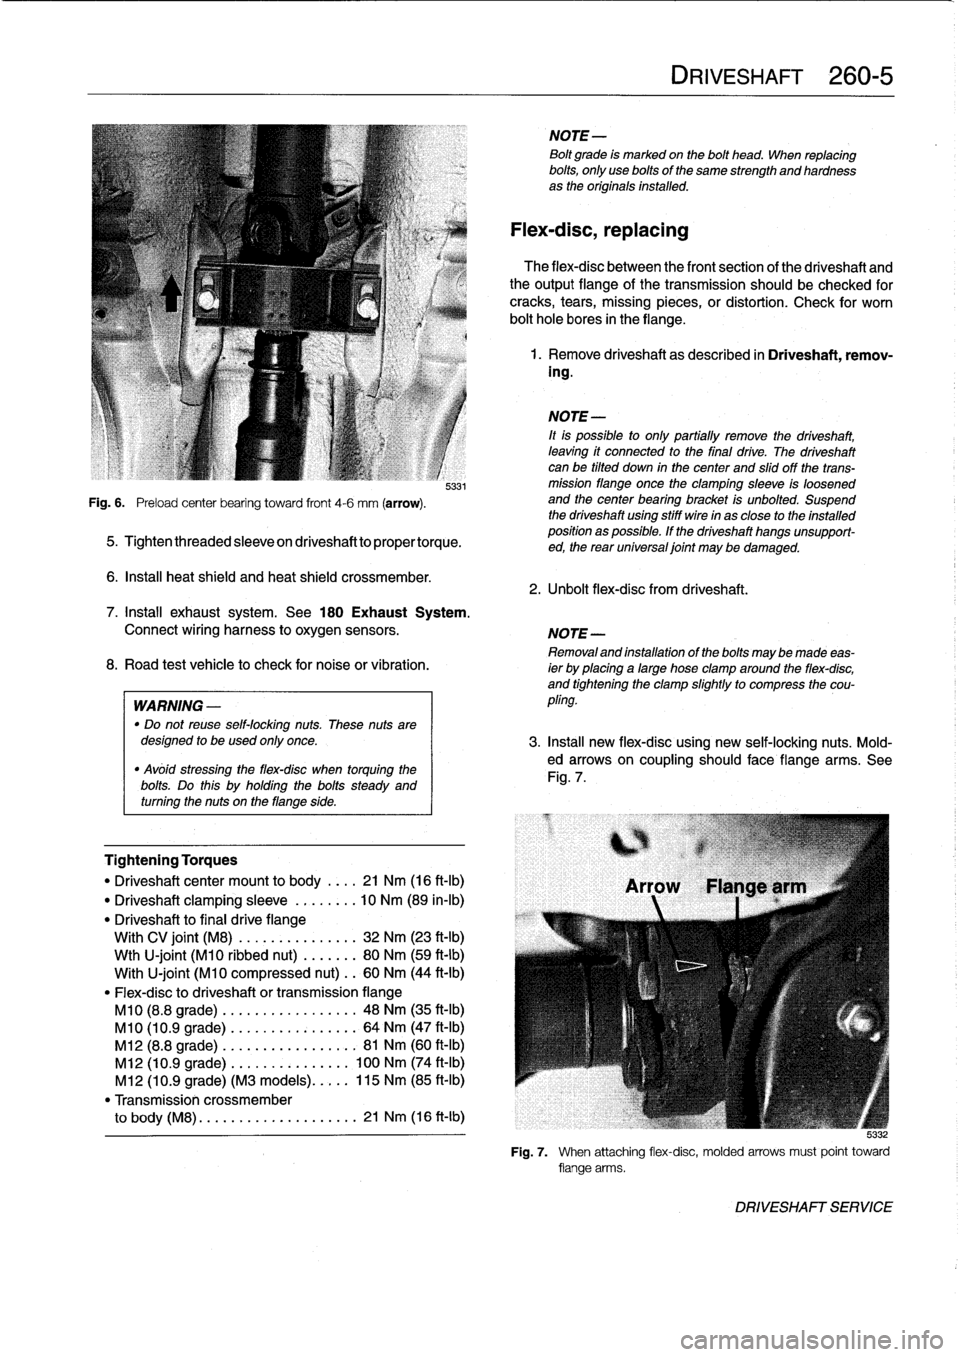
Fig
.
6
.
Preload
center
bearing
toward
front
4-6
mm
(arrow)
.
5331
5
.
Tightenthreadedsleeveondriveshafttopropertorque
.
6
.
Insta¡¡
heat
shield
and
heat
shield
crossmember
.
Tightening
Torques
"
Driveshaftcenter
mount
to
body
.
.
..
21
Nm
(16
ft-Ib)
"
Driveshaft
clamping
sleeve
.....
.
.
.
10
Nm
(89
in-lb)
"
Driveshaft
to
final
drive
flange
With
CV
joint
(M8)
............
...
32
Nm
(23
ft-Ib)
Wth
U-joint
(M10
ribbed
nut)
....
...
80
Nm
(59
ft-Ib)
With
U-joint
(M10
compressed
nut)
..
60
Nm
(44
ft-Ib)
"
Flex-disc
to
driveshaft
or
transmissionflange
M10
(8.8
grade)
.........
.
....
..
.
48
Nm
(35
ft-Ib)
M10
(10
.9
grade)
........
.
....
...
64
Nm
(47
ft-Ib)
M12
(8.8
grade)
........
.....
..
.
.
81
Nm
(60
ft-Ib)
M12
(10
.9
grade)
.
.
....
......
...
100
Nm
(74
ft-Ib)
M12
(10
.9
grade)
(M3
models)
..
.
.
.
115
Nm
(85
ft-Ib)
"
Transmission
crossmember
to
body
(M8)
.
....
...........
....
21
Nm
(16
ft-Ib)
NOTE-
Bolt
grade
is
markedon
the
bolt
head
.
When
replacing
bolts,
only
use
bolts
of
the
same
strength
and
hardnessas
the
originalsinstalled
.
Flex-disc,
replacing
The
flex-disc
between
the
front
section
of
the
driveshaft
and
theoutputflange
of
the
transmission
should
be
checked
for
cracks,
tears,
missing
pieces,
or
distortion
.
Check
for
worn
bolt
hole
bores
in
theflange
.
1
.
Remove
driveshaft
as
described
in
Driveshaft,
remov-
ing
.
NOTE-
¡t
is
possible
to
only
partially
remove
the
driveshaft,
leaving
it
connected
to
the
final
drive
.
The
driveshaft
canbe
tilted
down
in
thecenter
and
slidoff
the
trans-
mission
flange
once
the
clamping
sleeve
is
loosened
and
the
center
bearing
bracket
is
unbolted
.
Suspend
the
driveshaft
using
stiff
wire
in
as
close
to
the
installed
position
as
possible
.
If
the
driveshaft
hangs
unsupport-
ed,
the
rear
universal
joint
may
be
damaged
.
2
.
Unbolt
flex-dísc
from
driveshaft
.
DRIVESHAFT
260-
5
7
.
Install
exhaust
system
.
See
180
Exhaust
System
.
Connect
wiring
harness
to
oxygen
sensors
.
NOTE-
Removaland
installation
of
the
boltsmaybe
made
eas-
8
.
Road
test
vehicle
to
check
for
noiseor
vibration
.
ier
by
placing
a
large
hose
clamp
around
the
flex-disc,
and
tightening
the
clamp
slightlyto
compress
the
cou
WARNING
-
pling
.
"
Do
not
reuse
self-locking
nuts
.
These
nuts
aredesigned
to
beused
only
once
.
3
.
Insta¡¡
new
flex-disc
using
new
self-locking
nuts
.
Mold-
"
Avóid
stressing
the
flex-disc
when
torquing
the
ed
arrows
on
coupling
should
face
flange
arms
.
See
bolts
Do
this
holding
the
bolts
Fig
.
7
.
steady
and
.
uy
turning
the
nuts
on
theflange
side
.
5
:132
Fig
.
7
.
When
attaching
flex-disc,
molded
arrows
must
point
toward
flange
arms
.
DRIVESHAFT
SERVICE
Page 258 of 759
310-2
FRONT
SUSPENSION
WARNING-
"
Physical
safety
could
be
impaired
if
procedures
described
here
areundertaken
without
the
proper
service
tools
and
equipment
.
Be
sure
to
have
the
right
tools
onhand
before
beginning
any
job
.
"
Do
notreuse
self-locking
nuts
or
bolts
.
They
are
designed
to
beused
only
once
and
may
fail
if
re-
used
.
Always
replace
self-locking
fasteners
any
timethey
are
loosenedor
removed
.
"
Do
not
install
bolts
and
nuts
coated
with
under-
coating
wax,
as
the
correct
tightening
torque
can-
not
beassured
.
Always
clean
the
threads
with
solventbefore
installation,
or
install
new
parts
.
"
Do
not
attempt
to
weld
or
straighten
any
suspen-
sion
components
.
Replace
damaged
parts
.
SHOCK
ABSORBERS
AND
SPRINGS
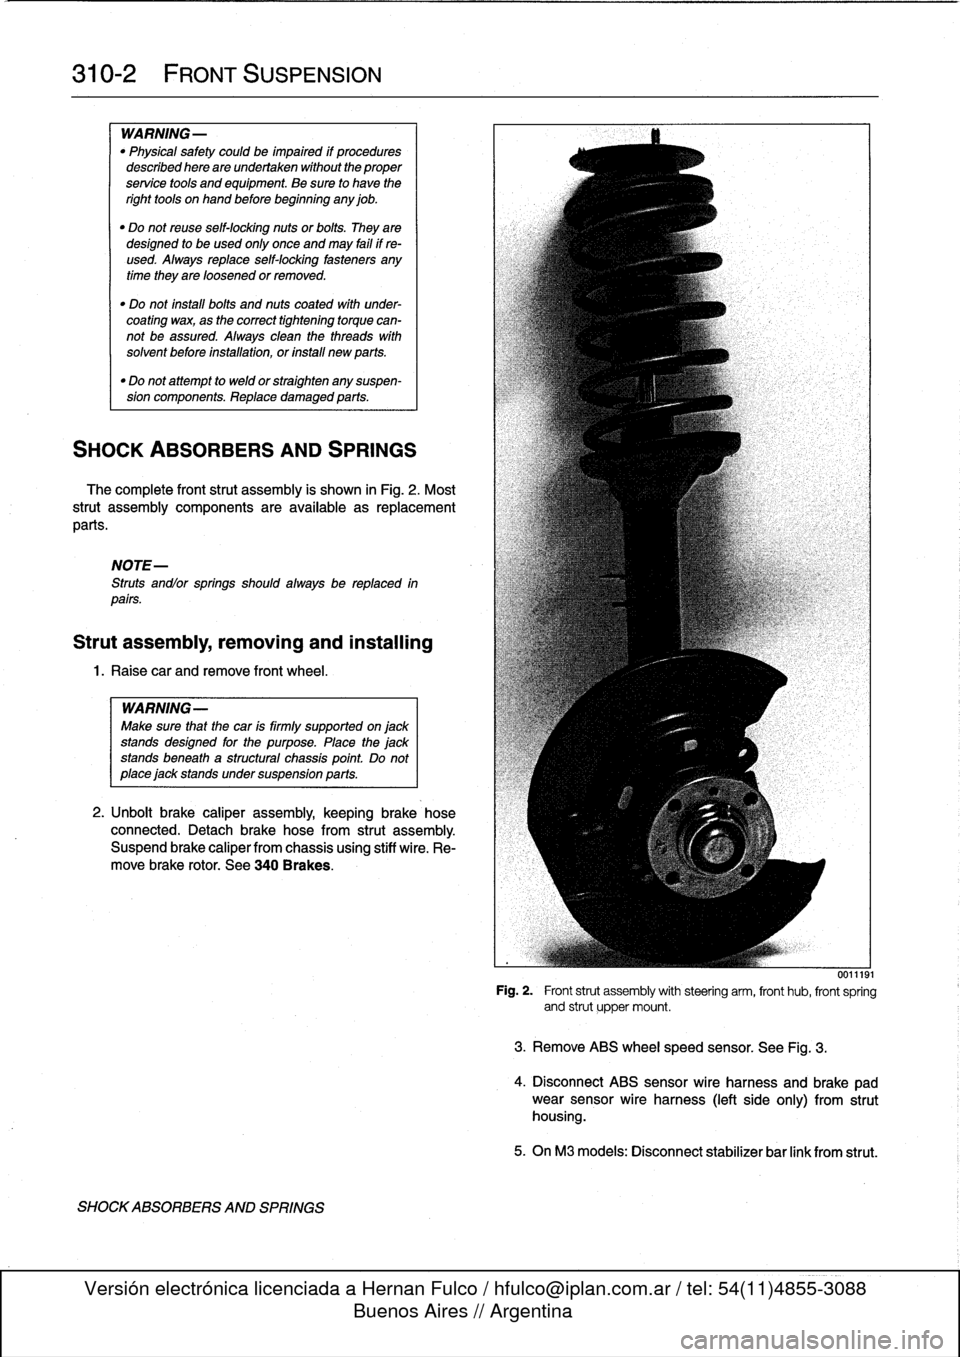
The
complete
front
strut
assembly
is
shown
in
Fig
.
2
.
Most
strut
assembly
components
are
available
asreplacement
parts
.
NOTE-
Struts
andlor
springs
shouldalways
be
replaced
in
parts
.
Strut
assembly,
removing
and
installing
1
.
Raisecar
and
remove
front
wheel
.
WARNING-
Make
sure
that
the
car
is
firmly
supported
on
jack
standsdesigned
for
the
purpose
.
Place
the
jack
standsbeneath
a
structural
chassis
point
Do
not
place
jack
stands
under
suspension
parts
.
2
.
Unbolt
brake
caliper
assembly,
keepingbrake
hose
connected
.
Detach
brake
hose
from
strut
assembly
.
Suspend
brake
caliper
from
chassis
using
stiff
wire
.
Re-
move
brake
rotor
.
See
340
Brakes
.
SHOCKABSORBERS
AND
SPRINGS
0011191
Fig
.
2
.
Front
strut
assembly
with
steering
arm,
front
hub,
front
spring
and
strut
upper
mount
.
3
.
Remove
ABS
wheelspeed
sensor
.
See
Fig
.
3
.
4
.
Disconnect
ABS
sensor
wire
harness
and
brake
pad
wear
sensor
wire
harness
(left
side
only)
from
strut
housing
.
5
.
OnM3
modeis
:
Disconnect
stabilizer
bar
link
from
strut
.
Page 284 of 759
330-
1
2
REAR
SUSPENSION
Upper
control
arm,
removing
and
installing
1.
Raise
rear
end
of
car
and
remove
wheel
.
WARNING
-
Make
sure
that
the
car
is
firmly
supportedon
jack
stands
designed
for
the
purpose
.
Place
the
jack
stands
beneatha
structural
chassis
point
.
Do
not
place
jack
stands
under
suspension
parts
.
2
.
Remove
drive
axle
as
described
earlier
.
3
.
Remove
stabilizer
bar
link
fromupper
control
arm
.
4
.
Support
trailing
arm
from
below
with
a
transmission
jackorequivalent
.
WARNING
-
It
is
recommended
that
a
retaining
chain
be
in-
stalled
between
the
bottom
coil
of
the
coil
spring
and
the
upper
control
arm
to
retain
thespring
in
case
of
accidental
release
.
Personal
injury
can
re-
sult
if
the
compressed
coil
spring
ís
not
released
slowly
and
carefully
.
5
.
Remove
lower
shock
absorber
bolt
.
Refer
to
Fig
.
18
.
Slowly
lower
trailing
arm
until
coil
spring
is
fully
re-
leased
.
Remove
restraining
chain
and
remove
spring
.
7
.
Installation
is
reverse
of
removal
.
"
Always
use
new
self-locking
nuts
.
"
Have
car
professionally
aligned
when
job
is
complete
.
"
Insta¡¡
drive
axle
as
described
earlier
.
Tightening
Torques
"
Drive
axleto
final
drive
flange
M8
Torx
bolt
..........
..
.
..
....
64
Nm
(47
ft-Ib)
M10
Torx
bolt
.........
..
..
.
...
100
Nm
(74
ft-Ib)
"
Shock
absorber
to
trailing
arm
..
..
..
77
Nm
(57
ft-Ib)
"
Upper
control
arm
to
final
drive
carrier
(M12
bolt)
...
..
.
77
Nm
(57
ft-Ib)
"
Upper
control
arm
to
trailing
arm
(M12
bolt)
.........
110
Nm
(81
ft-Ib)
Lower
control
arm,
1
.
Raise
rear
end
of
car
and
support
it
securely
on
jack-
stands
.
Remove
rear
wheel
.
2
.
Remove
both
lower
control
arm
mounting
bolts
.
FINAL
DRIVE
CARRIER
3
.
Use
a
soft
hammer
to
tap
control
arm
out
of
its
mount-
ing
points
.
4
.
Installation
is
reverse
of
removal
.
NOTE-
Use
a
new
bolt
and
washer
assembly
at
the
final
drive
carrier
mountíng
point
forthe
control
arm
.
Tightening
Torque
"
Lower
control
arm
to
final
drive
carrier
(M12
bolt)
......
77
Nm
(57
ft-Ib)
"
Lower
control
arm
to
trailing
arm
(M12
bolt)
....
..
.
..
110
Nm
(81
ft-Ib)
FINAL
DRIVE
CARRIER
Final
drive
carrier,
removing
and
installing
1
.
Raise
rear
end
of
car
and
support
it
securely
on
jack
stands
.
Remove
rear
wheels
.
2
.
Remove
driveshaft
.
See
260
Driveshaft
.
3
.
Remove
both
drive
axles
as
described
earlier
.
6
.
Remove
both
upper
control
arm
mounting
bolts
.
Re-
move
control
arm
.
4
.
Disconnect
stabilizer
bar
from
upper
control
arms
.
Re-
move
stabilizer
bar
mounts
.
5
.
Disconnect
speedometer
harness
connector
on
final
drive
(where
applicable)
.
6
.
Remove
rear
section
of
exhaust
system
.
See
180
Ex-
haust
System
.
NOTE-
It
may
be
easier
to
remove
complete
exhaust
asonepiece
.
See
180
Exhaust
System
.
7
.
Remove
upper
and
lower
control
arms
as
described
earlier
.
8
.
Support
final
drive
carrierwith
transmissíon
jack
.
Re-
move
mounting
bolts
and
nuts
at
final
drive
carrier
bushing
mounts
.
See
Fig
.
22
.
9
.
Slowly
lower
final
drive
and
final
drive
carrier,
detaching
removing
and
installing
wire
harness
and
connectors
as
necessary
.
10
.
Finaldrive
may
now
be
unbolted
from
final
drive
carrier
.
Page 289 of 759
Final
driveinputshaft
oil
sea¡,
replacing
1
.
Raise
car
and
support
safely
.
2
.
Drain
final
drive
oil
as
described
earlier
.
3
.
Remove
driveshaft
from
final
drive
inputshaft
flange
.
See
260
Driveshaft
.
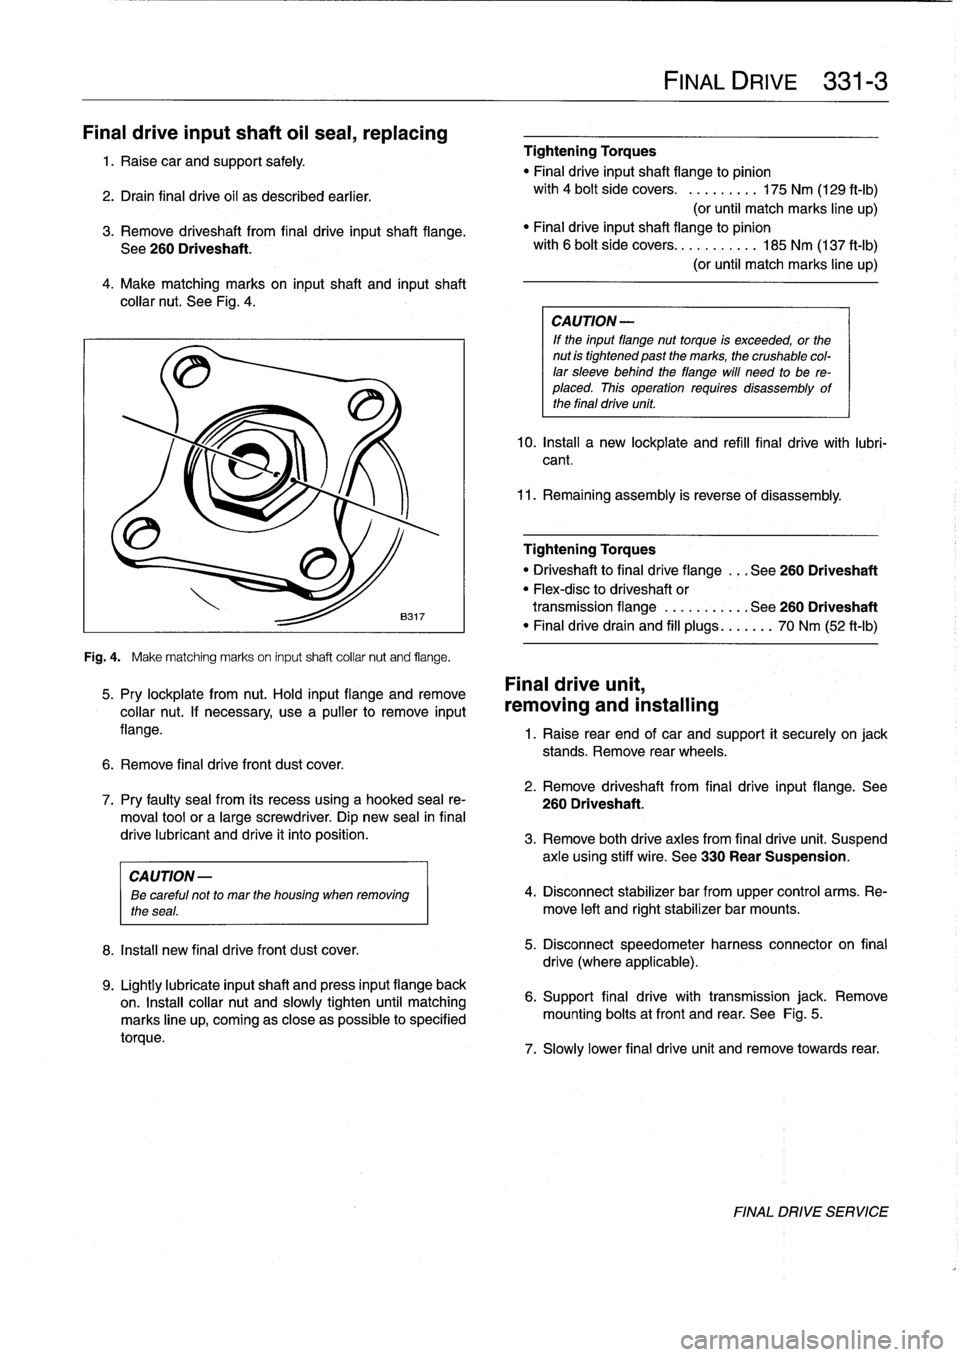
4
.
Make
matching
marks
on
input
shaft
and
inputshaft
collar
nut
.
See
Fig
.
4
.
Fig
.
4
.
Make
matching
marks
on
input
shaft
collar
nut
and
flange
.
5
.
Pry
lockplate
from
nut
.
Hold
input
flange
andremove
collar
nut
.
If
necessary,
usea
pullerto
remove
input
flange
.
6
.
Remove
final
drive
front
dust
cover
.
8
.
Install
new
final
drivefront
dust
cover
.
9
.
Lightly
lubricate
inputshaft
and
press
input
flange
back
on
.
Insta¡¡
collar
nut
and
slowly
tighten
until
matching
marks
line
up,
coming
as
close
aspossible
to
specified
torque
.
Tightening
Torques
"
Final
driveinputshaft
flange
to
pinion
with
4
bolt
side
covers
.
.........
175
Nm
(129
ft-Ib)
(or
until
match
marks
line
up)
"
Finaldriveinputshaft
flange
to
pinion
with
6
bolt
side
covers
...........
185
Nm
(137
ft-Ib)
(or
until
match
marks
line
up)
CA
UTION-
If
the
input
flange
nuttorque
is
exceeded,
or
the
nut
is
tightened
past
the
marks,
the
crushable
col-
lar
sleeve
behind
theflange
will
need
to
be
re-
placed
.
This
operation
requires
disassembly
of
the
final
drive
unit
.
10
.
Install
a
new
lockplate
and
refill
final
drive
with
lubri-
cant
.
11
.
Remaining
assembly
is
reverse
of
disassembly
.
Tightening
Torques
"
Driveshaftto
final
dríve
flange
...
See260
Driveshaft
"
Flex-disc
to
driveshaft
or
transmission
flange
...........
See260
Driveshaft
"
Finaldrivedrain
and
fill
plugs
...
.
..
.
70
Nm
(52
ft-Ib)
Final
drive
unit,
removing
and
installing
FINAL
DRIVE
331-
3
1
.
Raise
rear
end
of
car
and
support
it
securely
on
jack
stands
.
Remove
rear
wheels
.
2
.
Remove
driveshaft
from
final
drive
input
flange
.
See
7
.
Pry
faulty
sea¡
from
its
recess
using
a
hooked
sea¡
re-
260
Driveshaft
.
moval
toolor
a
large
screwdriver
.
Dip
new
sea¡
in
final
drive
lubricant
and
drive
it
into
position
.
3
.
Remove
both
drive
axles
from
final
drive
unit
.
Suspend
axle
using
stiff
wire
.
See
330
Rear
Suspension
.
CAUTION
-
ee
careful
not
to
mar
the
housing
when
removing
4
.
Disconnect
stabilizer
bar
from
upper
control
arms
.
Re-
the
seas
.
move
left
and
rightstabilizer
bar
mounts
.
5
.
Disconnect
speedometer
harness
connector
on
final
drive
(where
applicable)
.
6
.
Support
final
drive
with
transmission
jack
.
Remove
mounting
bolts
atfront
and
rear
.
See
Fig
.
5
.
7
.
Slowly
lower
final
drive
unit
and
remove
towards
rear
.
FINAL
DRIVE
SERVICE
Page 302 of 759
340-
1
2
BRAKES
ABS
is
self-tested
by
the
ABS
diagnostic
unit
each
time
the
car
is
started
.
Once
the
test
is
complete,
the
ABS
dashboard
light
tucos
off
.
If
the
light
remains
lit
or
comes
on
at
any
time
during
driving,
a
system
fault
has
occurred
and
ABS
is
elec-
tronically
disabled
.
The
conventional
braking
systemremains
fully
functioning
.
ABS
Inspection
A
visual
inspection
of
the
ABS
may
help
to
locate
system
faults
.
If
no
visual
faults
can
befound
and
the
ABS
light
re-
mains
on,
have
the
system
diagnosedbyan
authorized
BMW
dealer
.
Carefully
inspect
the
entire
ABS
wiring
harness,
particularly
the
pulse
sensorharnesses
and
connectors
near
each
wheel
.
Look
for
chafing
or
damage
due
to
incorrectly
routed
wires
.
Carefully
remove
the
wheelspeed
sensors
.
Clean
the
sen-
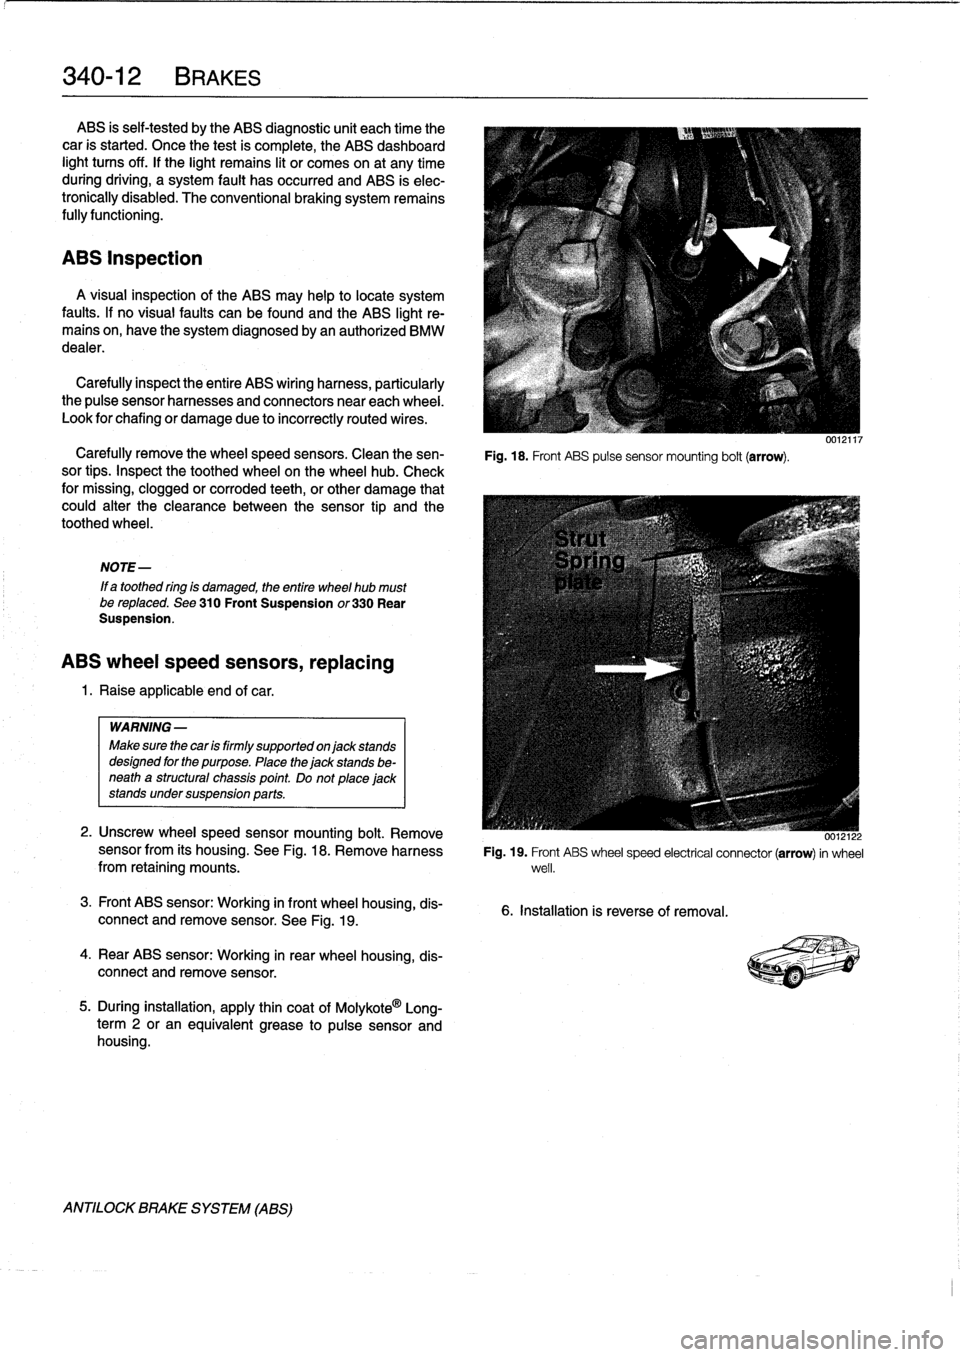
Fig
.
18
.
Front
ABS
pulse
sensor
mounting
bolt
(arrow)
.
sor
tips
.
Inspect
the
toothed
wheel
on
thewheel
hub
.
Check
for
missing,
clogged
or
corroded
teeth,
or
other
damage
that
could
alter
the
clearance
between
the
sensor
tip
and
the
toothed
wheel
.
NOTE-
If
a
toothed
ring
is
damaged,
the
entire
wheel
hub
mustbe
reptaced
.
See
310
Front
Suspension
or330
Rear
Suspension
.
ABS
wheel
speed
sensors,
replacing
1
.
Raise
applicable
end
of
car
.
WARNING
-
Make
sure
thecar
is
firmly
supportedon
jack
stands
designed
for
the
purpose
.
Place
the
jack
stands
be-
neath
a
structural
chassis
point
Do
not
place
jack
stands
under
suspension
parts
.
2
.
Unscrew
wheelspeed
sensor
mounting
bolt
.
Remove
sensor
from
its
housing
.
See
Fig
.
18
.
Remove
harnessfrom
retaining
mounts
.
3
.
Front
ABS
sensor
:
Working
in
front
wheel
housing,
dis-
connect
and
remove
sensor
.
See
Fig
.
19
.
4
.
Rear
ABS
sensor
:
Working
in
rear
wheel
housing,
dis-
connect
andremove
sensor
.
5
.
During
installation,
apply
thin
coat
of
Molykote
0
Long-
term
2
or
an
equivalent
grease
to
pulse
sensor
and
housing
.
ANTILOCK
BRAKE
SYSTEM
(ABS)
0012122
Fig
.
19
.
Front
ABS
wheel
speed
electrical
connector
(arrow)
in
wheel
well
.
6
.
Installation
is
reverse
of
removal
.
Page 311 of 759
ENGINE
HOOD
Hood,
raising
to
service
position
CA
UTION-
Do
not
switch
on
the
windshield
wipers
wlth
the
engine
hood
raised
.
As
a
precaution,
remove
the
wiper
motor
fuse
.
See
610
Electrical
Compo-
nent
Locations
.
1
.
4-door
models
:
Open
hood
fully
.
Remove
bolt
from
hood
hinge
behind
hood
supports
(left
and
right)
.
Raise
hood
to
service
position
.
See
Fig
.
5
.
2
.
2-door
models
:
Open
hood
fully
.
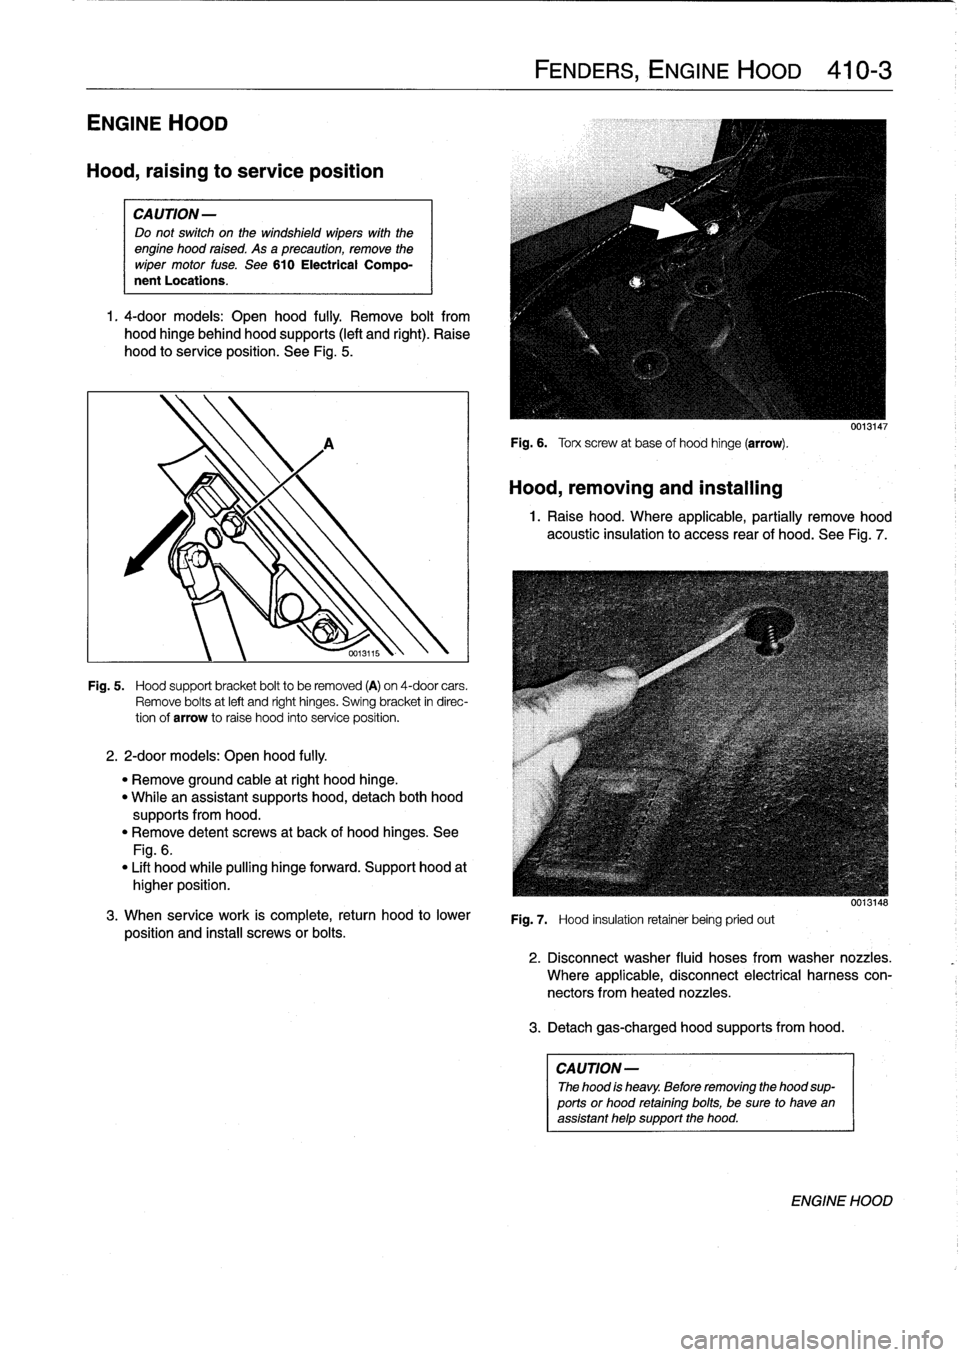
Fig
.
5
.
Hood
support
bracket
boltto
be
removed
(A)
on
4-door
cars
.
Remove
bolts
at
left
and
right
hinges
.
Swing
bracket
in
direc-
tion
of
arrow
to
raise
hood
into
service
position
.
"
Remove
ground
cable
atright
hood
hinge
.
"
Whilean
assistant
supports
hood,
detach
both
hood
supportsfrom
hood
.
"
Remove
detent
screws
at
back
of
hood
hinges
.
See
Fig
.
6
.
"
Lift
hood
while
pulling
hinge
forward
.
Support
hood
at
higher
position
.
3
.
When
service
work
is
complete,
return
hood
to
lower
position
and
instaf
screws
or
bolts
.
FENDERS,
ENGINE
HOOD
410-
3
Fig
.
6
.
Torx
screw
at
base
of
hood
hinge
(arrow)
.
Hood,
removing
and
installing
0013147
1
.
Raise
hood
.
Where
applicable,
partially
remove
hood
acoustic
insulation
to
access
rear
of
hood
.
See
Fig
.
7
.
Fig
.
7
.
Hood
insulation
retainer
being
pried
out
3
.
Detachgas-charged
hood
supportsfrom
hood
.
CAUTION
-
The
hood
is
heavy
.
Before
removing
the
hood
sup-
ports
or
hood
retainingbolts,
be
sure
to
have
an
assistant
help
support
the
hood
.
0013148
2
.
Disconnect
washer
fluid
hoses
from
washer
nozzles
.
Where
applicable,
disconnect
electrical
harness
con-
nectors
fromheated
nozzles
.
ENGINE
HOOD
Page 315 of 759
GENERAL
This
repair
group
covers
front
and
rear
door
repair
informa-
tion,
including
removal
and
installationof
the
interior
doorpan-
els
.
DOORS
WARNING
-
Late
M3
moddis
havealuminum
doors
.
Use
extra
care
in
handling
aluminum
parts
in
order
to
avoid
damage
from
gouging
or
corrosión
.
NOTE-
"
For
information
on
the
power
door
windows
and
door
glass
replacement,
sea512Door
Windows
.
"
Forinformation
on
the
power
door
locking
system,
see
515
Central
Locking
and
Anti-Theft
.
WARNING
-
Some
1997
and
all
1998
cars
are
fitted
with
side-im-
pact
airbags
in
the
front
doors
.
When
servicing
doors
on
cars
with
front
side-impact
airbags,
always
dis-
connect
the
negative
(-)
battery
terminal
.
See
721
Airbag
System
(SRS)
for
cautions
and
procedures
relating
to
the
airbag
system
.
Front
orrear
door,
removing
and
installing
1
.
If
workingon
front
door
with
side-impact
airbag,
discon-
nect
negative
(-)
battery
cable
.
CAUTION
-
Prior
to
disconnectiog
the
battery,
read
the
battery
disconnection
cautions
given
at
the
front
of
this
manual
on
page
vüi
.
2
.
Unbolt
main
harness
connector
at
door
pillar
and
sep-
arate
connector
.
See
Fig
.
1
.
411
Doors
GENERAL
.............
.
.
.
.
.
.
.
.
.
.
.
.
.
..
411-1
DOOR
PANELS
.
.
.
.
.
.
.
...
.
.
.
.
.
.
.
.
.
...
.
.
411-4
Front
door
trim
panel,
removing
and
installing
.411-4
DOORS
..
.
.
.
.
.
.
.
.
.
...
.
.......
.
....
.
.
.
411-1
Rear
door
trim
panel,
removing
and
installing
.411-5
Front
or
reardoor,
removing
and
installing
..
.
411-1
Rear
side
trim
panel,
removing
and
installing
Door
check,
replacing
.
.
.
.
.
.
.
.
.
.
.
.
.......
411-3
(coupemodel)
.
.
.
.
.
.
....
.
.............
411-6
Door
Adjustment
.......
.
.
.
.
.
.
.
.
.
.
.
.....
411-3
Rear
side
trim
panel,
removing
and
installing
(convertible
models)
.
...
.
.
.
.
.
.
.
.
.
.
.
...
.
411-6
DOORS
411-1
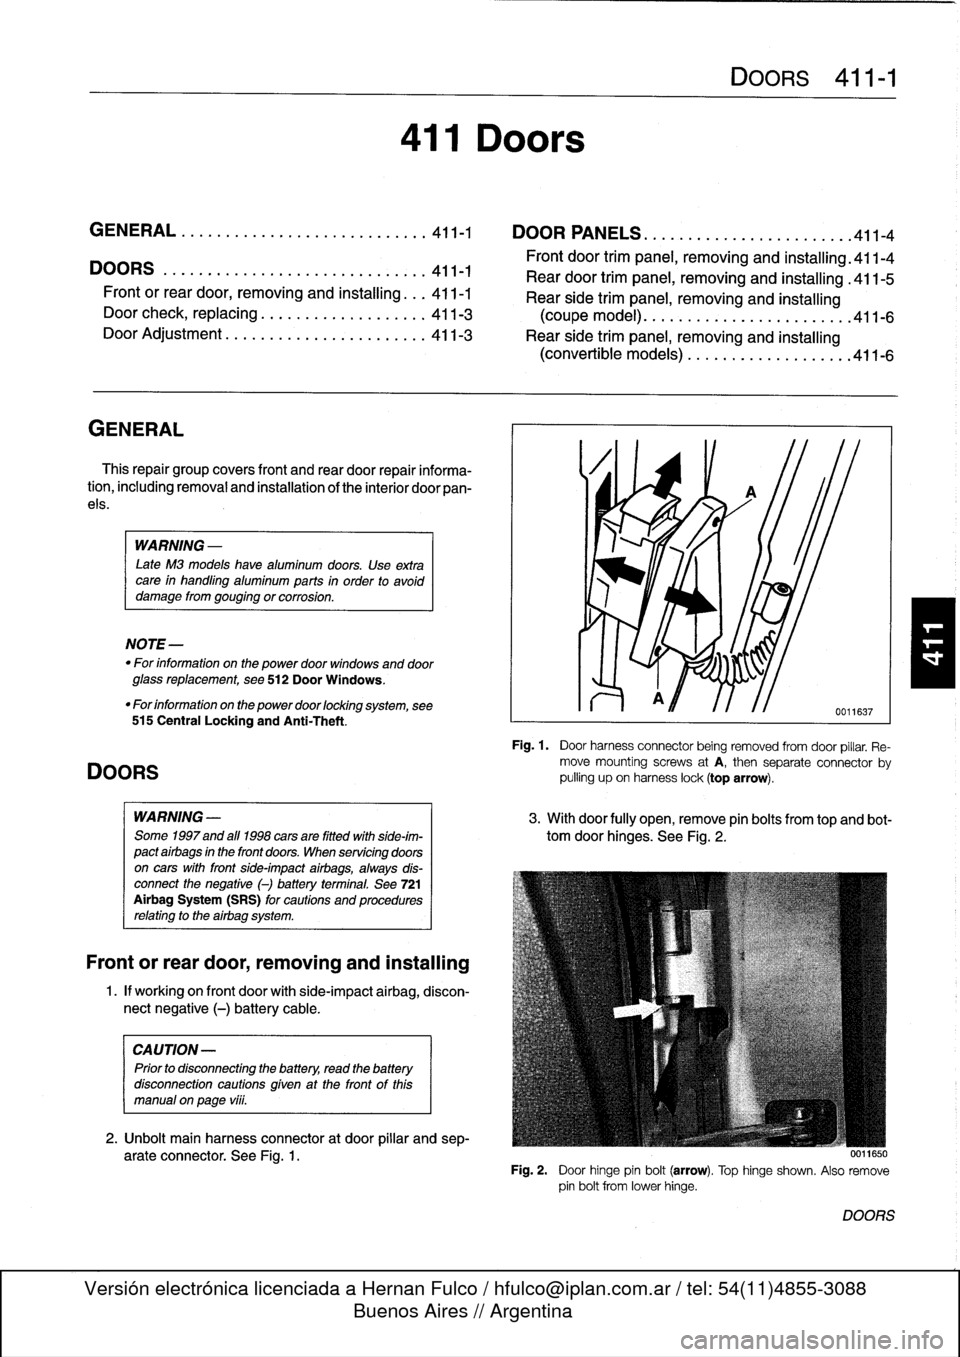
Fig
.
1
.
Door
harness
connector
being
removed
fromdoor
pillar
.
Re-
move
mountingscrews
atA,
then
separate
connector
by
pulling
upon
harness
lock(top
arrow)
.
3
.
Withdoor
fully
open,
remove
pin
bolts
from
top
and
bot-
tom
door
hinges
.
See
Fig
.
2
.
0011650
Fig
.
2
.
Door
hinge
pin
bolt
(arrow)
.
Top
hinge
shown
.
Also
remove
pin
bolt
from
lowerhinge
.
DOORS
Page 316 of 759
411-2
DOORS
4
.
Remove
retainer
clip
(early
models
only)
from
doorcheck
pin
onbody
pillar
.
Drive
out
door
check
pin
.
See
Fig
.
3
.
Door
Adjustment
"
Door
gap
to
fender/rear
door
.........
approx
.
5
mm
(0
.189
in)
"
Permíssible
deviation
from
parallel
.
.0
.5
mm
(0
.020
in)
0011651
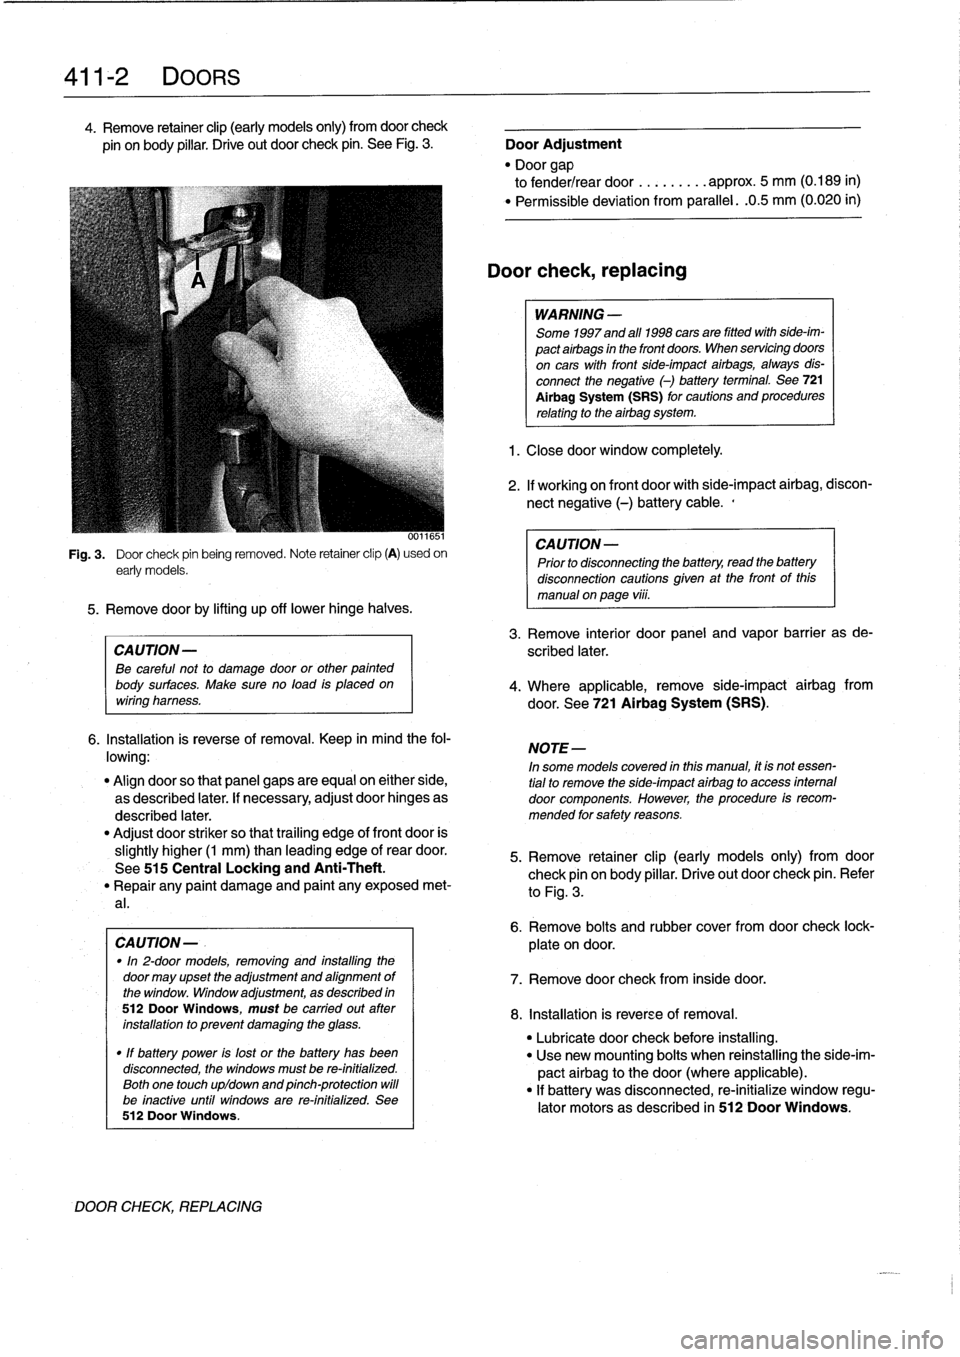
Fig
.
3
.
Door
check
pin
being
removed
.
Note
retainer
clip
(A)
usedon
early
models
.
5
.
Remove
doorby
lifting
up
off
lowerhinge
halves
.
CAUTION-
Be
careful
not
to
damage
door
or
other
painted
body
surfaces
.
Make
sure
no
load
is
placedon
wiring
harness
.
6
.
Installation
is
reverse
of
removal
.
Keep
in
mind
the
fol-
lowing
:
"
Align
doorso
that
panel
gaps
are
equal
on
either
side,
as
described
later
.
If
necessary,
adjust
door
hinges
as
described
later
.
"
Adjust
door
striker
so
that
trailing
edge
of
front
door
is
slightly
higher
(1
mm)
than
leading
edge
of
rear
door
.
See
515
Central
Locking
and
Anti-Theft
.
"
Repair
any
paint
damage
and
paínt
any
exposed
met-
al
.
CAUTION-
.
"In
2-door
models,
removing
and
installing
the
door
may
upset
the
adjustment
and
alignment
of
the
window
.
Window
adjustment,
as
described
in
512DoorWindows,
must
be
carried
out
ater
installation
to
prevent
damaging
the
glass
.
"
If
battery
power
is
lost
or
the
battery
has
been
disconnected,
the
windows
must
be
re-initialized
.
Both
one
touch
upldown
and
pinch-protection
will
be
inactive
until
windows
are
re-initialized
.
See
512
Door
Windows
.
DOOR
CHECK,
REPLACING
Door
check,replacing
WARNING
-
Some
1997
and
all
1998
cars
are
fitted
with
side-im-
pact
airbags
in
the
front
doors
.
When
servicing
doors
on
cars
with
front
side-impact
airbags,
always
dis-
connect
the
negative
(-)
battery
terminal
.
See
721
Al
rbag
System
(SRS)
for
cautions
and
procedures
relating
to
the
airbag
system
.
1
.
Closedoor
window
completely
.
2
.
If
working
on
front
door
with
side-impact
airbag,
discon-
nect
negative
(-)
battery
cable
.,
CAUTION-
Prior
to
disconnectiog
the
battery,
read
the
battery
disconnection
cautions
gíven
at
the
front
of
this
manual
on
page
viii
.
3
.
Remove
interior
door
panel
and
vapor
barrier
as
de-
scribed
later
.
4
.
Where
applicable,
remove
side-impact
airbag
from
door
.
See
721
Airbag
System
(SRS)
.
NOTE-
In
some
models
covered
inthis
manual,
ít
is
not
essen-
tial
to
remove
the
side-ímpact
airbag
to
access
internal
door
components
.
However,
the
procedure
is
recom-
mended
for
safety
reasons
.
5
.
Remove
retainer
clip
(early
models
only)
from
door
check
pin
on
body
pillar
.
Drive
out
door
check
pin
.
Refer
to
Fig
.
3
.
6
.
Remove
bolts
and
rubber
cover
fromdoor
check
lock-
plate
ondoor
.
7
.
Remove
door
check
from
inside
door
.
8
.
Installation
is
reverse
of
removal
.
"
Lubricate
door
check
before
installing
.
"
Use
new
mounting
bolts
when
reinstalling
the
side-im-
pact
airbag
to
thedoor(where
applicable)
.
"
If
battery
was
disconnected,
re-initialize
window
regu-
lator
motors
as
described
in
512
Door
Windows
.
Page 317 of 759
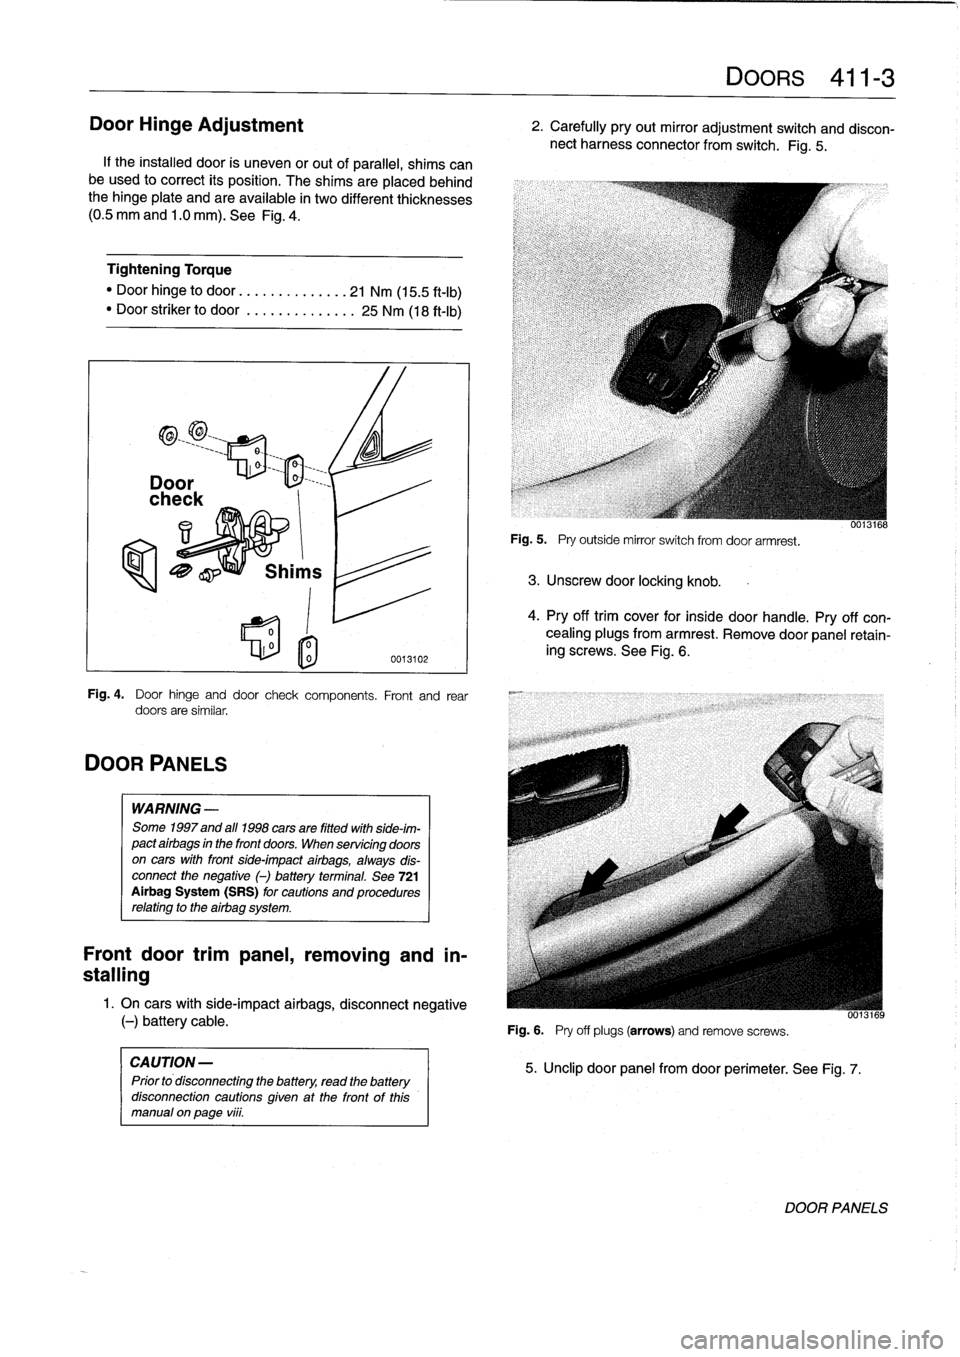
Door
Hinge
Adjustment
If
the
installed
door
is
uneven
or
out
of
parallel,
shims
can
be
used
to
correct
its
position
.
The
shims
are
placedbehind
the
hinge
plate
and
are
available
in
two
different
thicknesses
(0
.5
mm
and
1
.0
mm)
.
See
Fig
.
4
.
Tightening
Torque
"
Door
hinge
to
door
.............
..
21
Nm
(15
.5
ft-I
b)
"
Door
striker
to
door
...........
...
25
Nm
(18
ft-Ib)
DOOR
PANELS
0
l
o
0013102
Fig
.
4
.
Door
hinge
and
door
check
components
.
Front
and
rear
doors
are
similar
.
WARNING
-
Some
1997
and
all
1998
cars
are
fitted
with
side-im-
pact
airbags
in
the
front
doors
.
When
servicing
doors
on
cars
with
front
side-impact
airbags,
always
dis-
connect
the
negative
()
battery
terminal
.
See
721
Airbag
System
(SRS)
for
cautions
and
procedures
relating
to
the
airbag
system
.
Front
door
trimpanel,
removing
and
in-
stalling
1
.
On
cars
with
side-impact
airbags,
disconnect
negative
(-)
battery
cable
.
CAUTION
-
Prior
to
disconnecting
the
battery,
read
the
battery
disconnection
cautions
given
at
the
front
of
this
manual
on
page
viii
.
Fig
.
5
.
Pry
outside
mirror
switch
from
door
armrest
.
3
.
Unscrew
door
locking
knob
.
Fig
.
6
.
Pry
off
plugs
(arrows)
and
remove
screws
.
DOORS
411-
3
2
.
Carefully
pry
out
mirror
adjustment
switch
and
discon-
nect
harness
connector
from
switch
.
Fig
.
5
.
5
.
Unclip
door
panel
from
door
perimeter
.
See
Fig
.
7
.
0013168
4
.
Pry
off
trim
cover
for
insíde
door
handle
.
Pry
off
con-
cealing
plugs
from
armrest
.
Remove
door
panel
retain-
ing
screws
.
See
Fig
.
6
.
UU13169
DOOR
PANELS
Page 318 of 759
411-
4
DOORS
6
.
Disconnect
radio
speaker
harness
connector
.
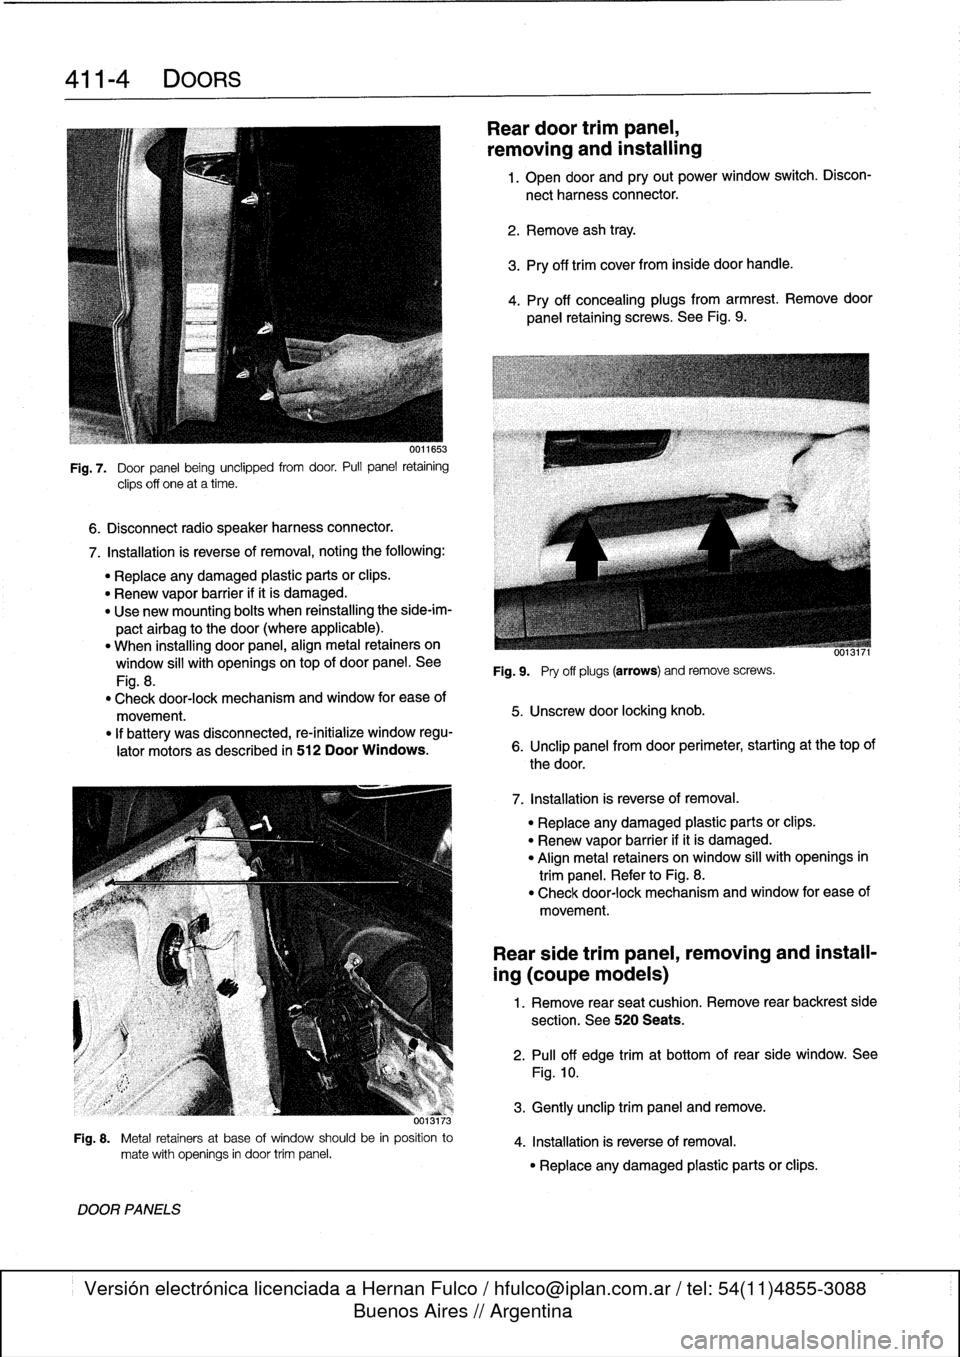
Fig
.
7
.
Door
panel
being
unclipped
from
door
.
Pull
panel
retaining
clips
off
one
at
a
time
.
7
.
Installation
is
reverse
of
removal,
noting
the
following
:
"
Replace
any
damaged
plastic
parts
orclips
.
"
Renew
vapor
barrier
ifit
is
damaged
.
"
Use
new
mounting
bolts
when
reinstalling
the
side-im-
pactairbag
to
the
door
(where
applicable)
.
"
When
installing
door
panel,
align
metal
retainers
on
window
sill
with
openingsontop
of
door
panel
.
See
Fig
.
8
.
"
Check
door-lock
mechanism
and
window
for
ease
of
movement
.
"
If
battery
was
disconnected,
re-initialize
window
regu-
lator
motors
as
described
in
512
Door
Windows
.
373
Fig
.
8
.
Metal
retainers
at
base
of
window
should
be
in
position
to
mate
with
openings
in
door
trim
panel
.
DOOR
PANELS
Reardoor
trimpanel,
removing
and
installing
1
.
Open
door
and
pry
out
power
window
switch
.
Discon-
nect
harness
connector
.
2
.
Remove
ash
tray
.
3
.
Pry
off
trim
cover
from
inside
door
handle
.
4
.
Pry
off
concealing
plugs
from
armrest
.
Remove
door
panel
retaining
screws
.
See
Fig
.
9
.
Fig
.
9
.
Pry
off
plugs
(arrows)
andremove
screws
.
5
.
Unscrew
door
locking
knob
.
6
.
Unclip
panel
from
door
perimeter,
starting
at
thetop
of
the
door
.
7
.
Installation
is
reverse
of
removal
.
"
Replace
any
damaged
plastic
parts
or
clips
.
"
Renew
vapor
barrier
ifit
is
damaged
.
"
Align
metal
retainers
on
window
sill
with
openings
in
trim
panel
.
Refer
to
Fig
.
8
.
"
Check
door-lock
mechanism
and
window
for
ease
of
movement
.
Rear
side
trim
panel,
removing
and
install-
ing
(coupe
models)
1
.
Remove
rear
seat
cushion
.
Remove
rear
backrest
side
section
.
See
520
Seats
.
2
.
Pull
off
edge
trimat
bottom
of
rear
side
window
.
See
Fig
.
10
.
3
.
Gently
unclip
trim
panel
andremove
.
4
.
Installation
is
reverse
of
removal
.
"
Replace
any
damaged
plastic
parts
or
clips
.