display BMW M4 2016 User Guide
[x] Cancel search | Manufacturer: BMW, Model Year: 2016, Model line: M4, Model: BMW M4 2016Pages: 228, PDF Size: 4.88 MB
Page 23 of 228
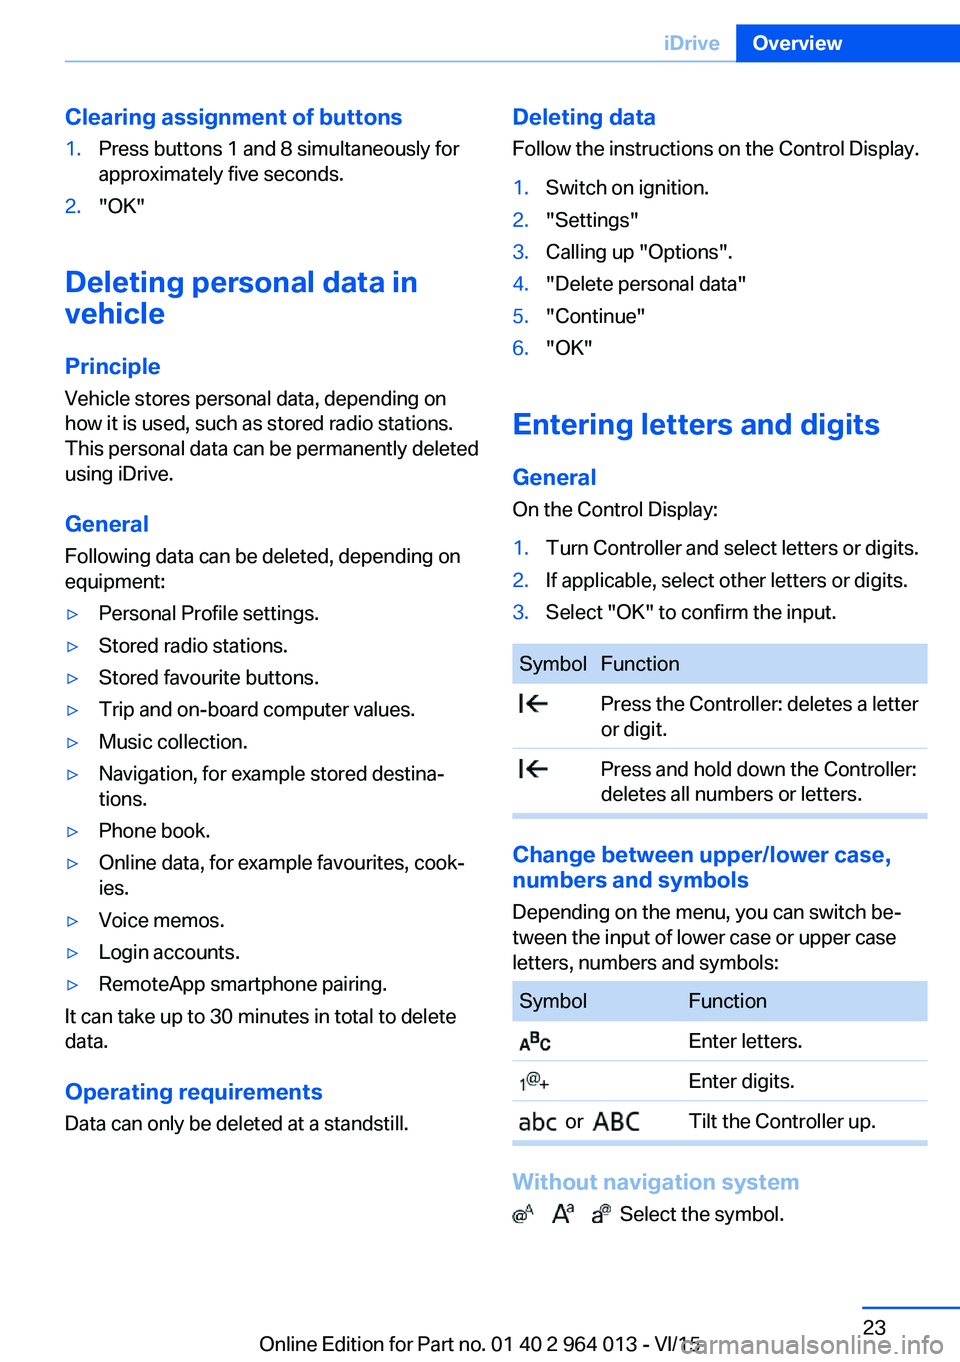
Clearing assignment of buttons1.Press buttons 1 and 8 simultaneously for
approximately five seconds.2."OK"
Deleting personal data in
vehicle
Principle
Vehicle stores personal data, depending on
how it is used, such as stored radio stations.
This personal data can be permanently deleted
using iDrive.
General
Following data can be deleted, depending on
equipment:
▷Personal Profile settings.▷Stored radio stations.▷Stored favourite buttons.▷Trip and on-board computer values.▷Music collection.▷Navigation, for example stored destina‐
tions.▷Phone book.▷Online data, for example favourites, cook‐
ies.▷Voice memos.▷Login accounts.▷RemoteApp smartphone pairing.
It can take up to 30 minutes in total to delete
data.
Operating requirements Data can only be deleted at a standstill.
Deleting data
Follow the instructions on the Control Display.1.Switch on ignition.2."Settings"3.Calling up "Options".4."Delete personal data"5."Continue"6."OK"
Entering letters and digits
General On the Control Display:
1.Turn Controller and select letters or digits.2.If applicable, select other letters or digits.3.Select "OK" to confirm the input.SymbolFunction Press the Controller: deletes a letter
or digit. Press and hold down the Controller:
deletes all numbers or letters.
Change between upper/lower case, numbers and symbols
Depending on the menu, you can switch be‐
tween the input of lower case or upper case
letters, numbers and symbols:
SymbolFunction Enter letters. Enter digits. or Tilt the Controller up.
Without navigation system
Select the symbol.
Seite 23iDriveOverview23
Online Edition for Part no. 01 40 2 964 013 - VI/15
Page 24 of 228
Entry comparison
Input of names and addresses: the selection is
gradually narrowed down and possibly supple‐
mented with every subsequent letter that you
enter.
Inputs are continuously compared with the
data saved in the vehicle.▷Only letters that are present in the data is
offered for entry.▷Destination search: place names can be
entered in the writing of any language
available on the Control Display.Seite 24OverviewiDrive24
Online Edition for Part no. 01 40 2 964 013 - VI/15
Page 25 of 228
Voice control systemVehicle equipment
This chapter describes all standard, national
and special equipment provided in the model
series. Equipment not available in the vehicle is
therefore also described, for example the se‐
lected special equipment or national version.
This also applies to safety-relevant functions
and systems. Comply with the relevant na‐
tional regulations when using the correspond‐
ing functions and systems.
Principle▷Through the voice control system most
functions shown in the Control Display can
be operated by spoken commands. The
system supports spoken input.▷Functions that can only be used when the
vehicle is stationary cannot be operated via
the voice control system.▷The system has a special microphone on
the driver's side.▷›...‹ Indicates commands for the voice con‐
trol system in the Owner's Handbook.
Requirements
On the control display set a language that is
also supported by the voice control system, so
that the vehicle can identify spoken com‐ mands.
Setting the language, see page 94.
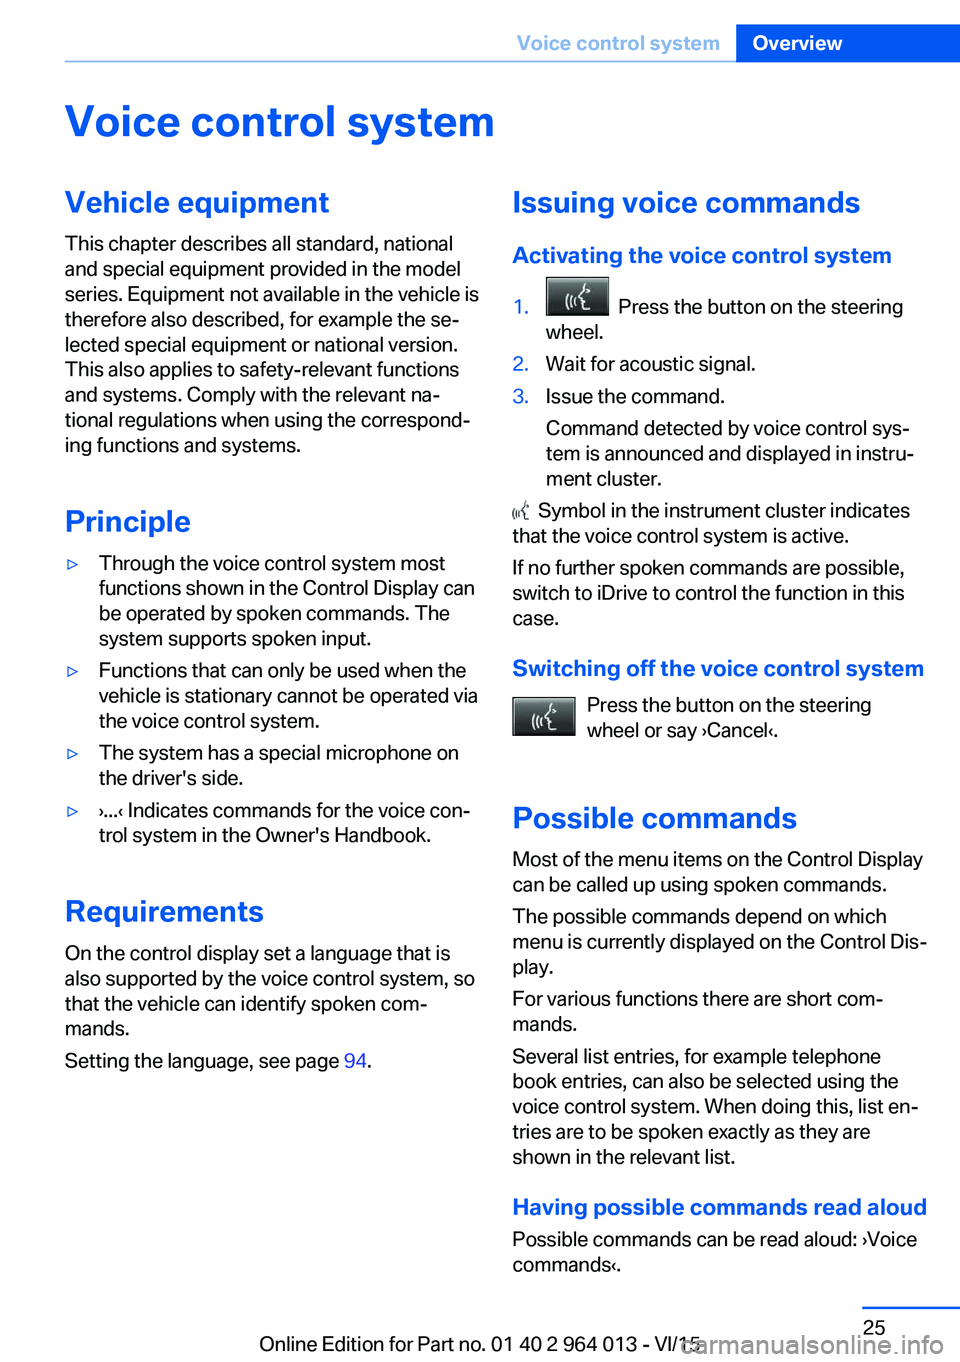
Issuing voice commands
Activating the voice control system1. Press the button on the steering
wheel.2.Wait for acoustic signal.3.Issue the command.
Command detected by voice control sys‐
tem is announced and displayed in instru‐
ment cluster.
Symbol in the instrument cluster indicates
that the voice control system is active.
If no further spoken commands are possible,
switch to iDrive to control the function in this
case.
Switching off the voice control system Press the button on the steering
wheel or say ›Cancel‹.
Possible commands
Most of the menu items on the Control Display
can be called up using spoken commands.
The possible commands depend on which
menu is currently displayed on the Control Dis‐
play.
For various functions there are short com‐
mands.
Several list entries, for example telephone
book entries, can also be selected using the
voice control system. When doing this, list en‐
tries are to be spoken exactly as they are
shown in the relevant list.
Having possible commands read aloud Possible commands can be read aloud: ›Voice
commands‹.
Seite 25Voice control systemOverview25
Online Edition for Part no. 01 40 2 964 013 - VI/15
Page 27 of 228
could unnecessarily delay the connection of
your call.
Instead, use the SOS button, see page 202, in
the area of the interior mirror.
Operating conditions▷Commands, digits and letters should be
pronounced fluently, with the usual em‐
phasis, and at a normal volume and speed.▷Always speak the commands in the lan‐
guage of the voice control system.▷When selecting the radio station, use the
customary pronunciation of the station
name as it is displayed on the Control Dis‐
play.
›Station ...‹, for example, Classic Radio sta‐
tion.▷Doors, windows and the Glass Roof should
be kept closed to avoid noise interference.▷Avoid background noises in the vehicle
while you are speaking.Seite 27Voice control systemOverview27
Online Edition for Part no. 01 40 2 964 013 - VI/15
Page 28 of 228
Integrated Owner’s Handbook in the
vehicleVehicle equipment
This chapter describes all standard, national
and special equipment provided in the model
series. Equipment not available in the vehicle is
therefore also described, for example the se‐
lected special equipment or national version.
This also applies to safety-relevant functions
and systems. Comply with the relevant na‐
tional regulations when using the correspond‐
ing functions and systems.
Integrated Owner’s
Handbook in the vehicle
The integrated Owner's Handbook can be
shown in the control display. It particularly de‐ scribes the equipment and functions present
in the vehicle.
Components of the integrated
Owner's Handbook
The integrated Owner's Handbook consists of
three parts, which provide various levels of in‐
formation or access possibilities.
Quick Reference Important information is found in the quick ref‐
erence for the operation of the vehicle, the op‐
eration of fundamental vehicle functions or in
case of breakdown. This information can also
be displayed when driving.
Search by pictures
Using the search by pictures, information and
descriptions can be searched using pictures.
For example, this is particularly helpful when
the description of a piece of equipment is nee‐
ded, which cannot be named.Owner's Handbook
Here, information and descriptions can be
searched via the index by directly entering a
search term.
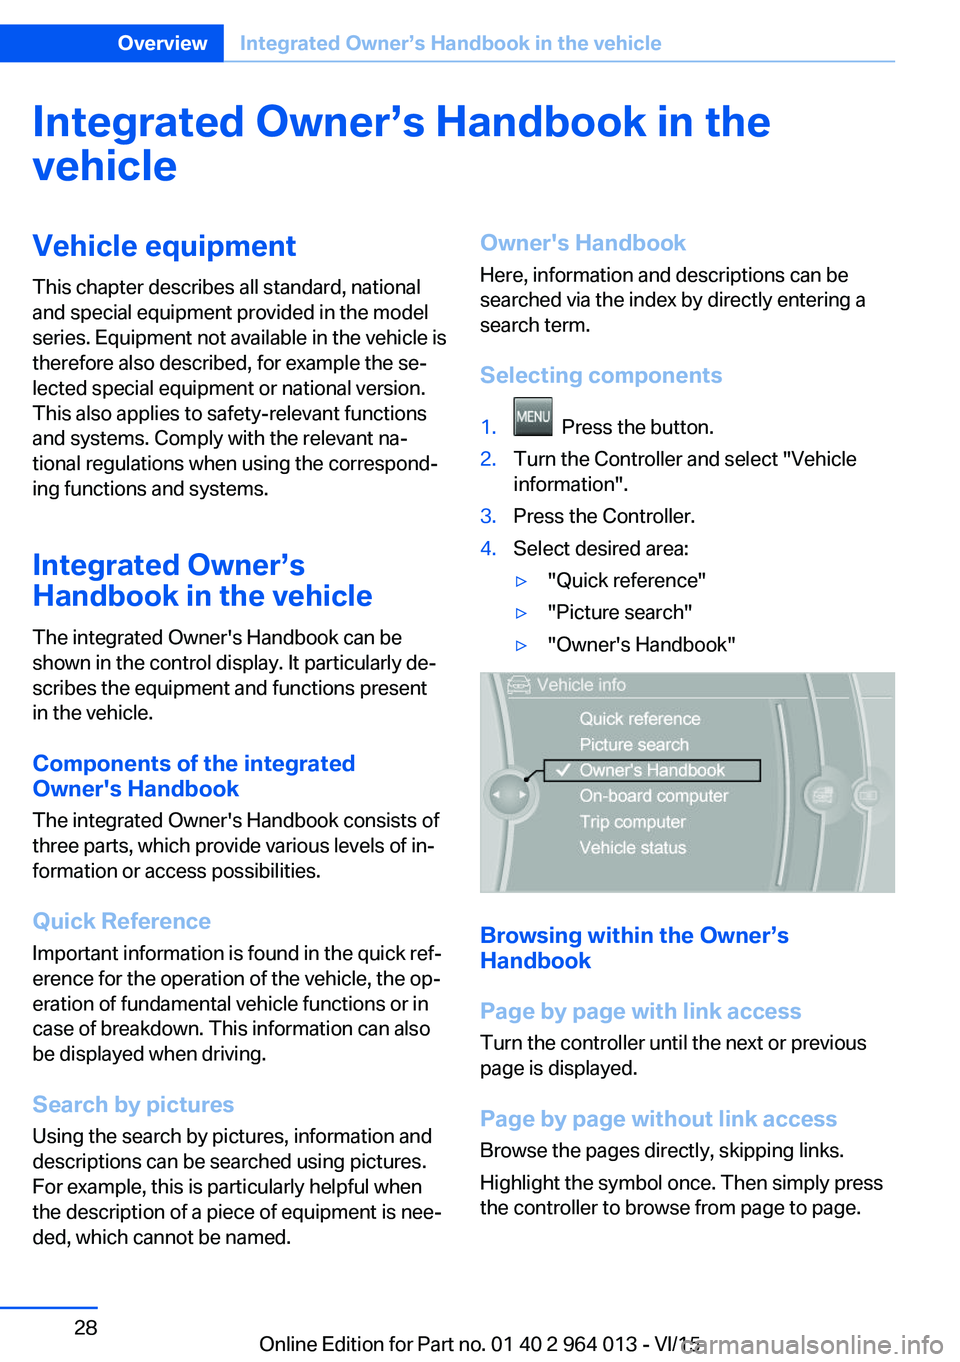
Selecting components1. Press the button.2.Turn the Controller and select "Vehicle
information".3.Press the Controller.4.Select desired area:▷"Quick reference"▷"Picture search"▷"Owner's Handbook"
Browsing within the Owner’s
Handbook
Page by page with link access
Turn the controller until the next or previous
page is displayed.
Page by page without link access
Browse the pages directly, skipping links.
Highlight the symbol once. Then simply press
the controller to browse from page to page.
Seite 28OverviewIntegrated Owner’s Handbook in the vehicle28
Online Edition for Part no. 01 40 2 964 013 - VI/15
Page 29 of 228
Browse back.
Browse forward.
Context-sensitive help - Owner's
Handbook for the currently selected
function
Suitable information can be displayed directly.
Calling up with iDrive operation
Switch to the Options menu directly from the
application on the Control Display:1. Press the button or tilt the Controller
repeatedly to the right until the "Options"
menu appears.2."Show Owner's Handbook"
Calling up with display of a check
control message
Directly from the check control message on
the Control Display:
"Show Owner's Handbook"
Switching between function and
Owner's Handbook
You can use the Control Display to switch from
a function, for example radio, to the Owner's
Handbook, and then back and forth between
the two displays:
1. Press the button or tilt the Controller
repeatedly to the right until the "Options"
menu appears.2."Show Owner's Handbook"3.Select the desired page in the Owner's
Handbook.4. Press the button again to switch back
to the last displayed function.5. Press the button again to switch back
to the last displayed page of the Owner's
Handbook.
To switch continuously between the last dis‐
played function and the last displayed page of
the Owner's Handbook, repeat steps 4 and 5.
As you do so, new screens are opened.
Favourites buttons
General
The Owner's Handbook can be stored in the
favourite buttons and called up directly.
Saving
1.Select "Owner's Handbook" using the
iDrive.2. Press the desired button for longer
than two seconds.
Use
Press the button.
The Owner's Handbook is displayed
immediately.
Seite 29Integrated Owner’s Handbook in the vehicleOverview29
Online Edition for Part no. 01 40 2 964 013 - VI/15
Page 33 of 228
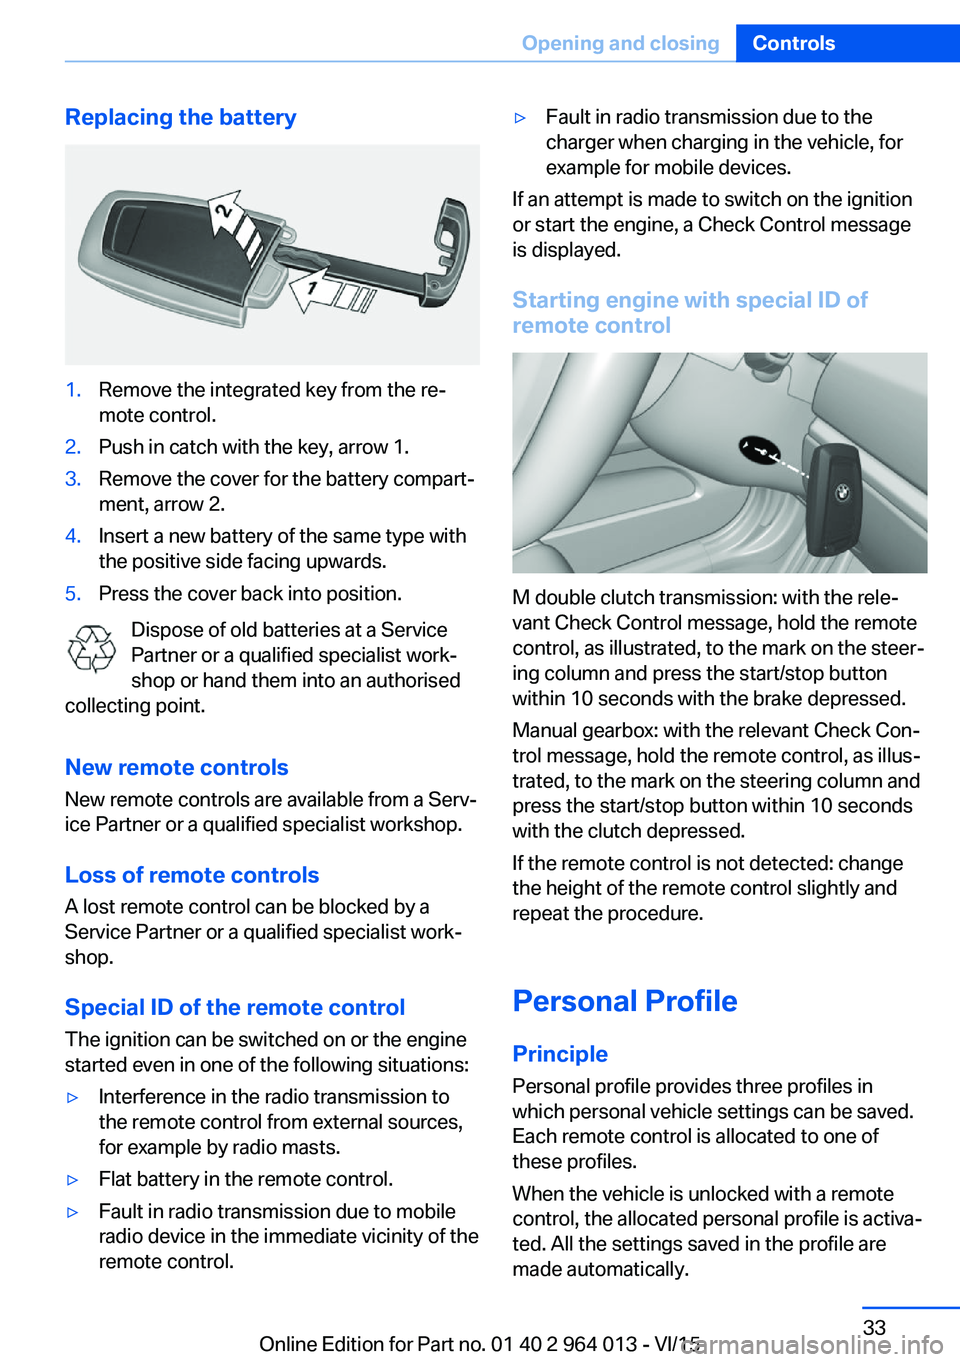
Replacing the battery1.Remove the integrated key from the re‐
mote control.2.Push in catch with the key, arrow 1.3.Remove the cover for the battery compart‐
ment, arrow 2.4.Insert a new battery of the same type with
the positive side facing upwards.5.Press the cover back into position.
Dispose of old batteries at a Service
Partner or a qualified specialist work‐
shop or hand them into an authorised
collecting point.
New remote controlsNew remote controls are available from a Serv‐
ice Partner or a qualified specialist workshop.
Loss of remote controls
A lost remote control can be blocked by a
Service Partner or a qualified specialist work‐
shop.
Special ID of the remote control The ignition can be switched on or the engine
started even in one of the following situations:
▷Interference in the radio transmission to
the remote control from external sources,
for example by radio masts.▷Flat battery in the remote control.▷Fault in radio transmission due to mobile
radio device in the immediate vicinity of the
remote control.▷Fault in radio transmission due to the
charger when charging in the vehicle, for
example for mobile devices.
If an attempt is made to switch on the ignition
or start the engine, a Check Control message
is displayed.
Starting engine with special ID ofremote control
M double clutch transmission: with the rele‐
vant Check Control message, hold the remote
control, as illustrated, to the mark on the steer‐
ing column and press the start/stop button
within 10 seconds with the brake depressed.
Manual gearbox: with the relevant Check Con‐
trol message, hold the remote control, as illus‐
trated, to the mark on the steering column and
press the start/stop button within 10 seconds
with the clutch depressed.
If the remote control is not detected: change
the height of the remote control slightly and
repeat the procedure.
Personal Profile
Principle Personal profile provides three profiles in
which personal vehicle settings can be saved.
Each remote control is allocated to one of
these profiles.
When the vehicle is unlocked with a remote
control, the allocated personal profile is activa‐
ted. All the settings saved in the profile are
made automatically.
Seite 33Opening and closingControls33
Online Edition for Part no. 01 40 2 964 013 - VI/15
Page 34 of 228
If several drivers each use their own remote
control, the vehicle will adapt to their personal
settings when it is unlocked. These settings
are also resaved if the vehicle is used in the in‐
tervening period by someone with a different
remote control.
Changes to settings are saved automatically in
the personal profile.
Three personal profiles and a guest profile can
be created.
Settings
Settings for the following systems and func‐
tions are saved in the active profile. The extent
of settings that can be saved depends on the
country and equipment.▷Unlocking and locking.▷Light.▷Air conditioning.▷Radio.▷Instrument cluster.▷Favourites buttons.▷Volumes, sound.▷Control Display.▷Navigation.▷TV.▷Park Distance Control PDC.▷Rear-view camera.▷Side view.▷Head-Up Display.▷M Drive: configurations.▷Driver's seat position, exterior mirror posi‐
tion, steering wheel position.▷Cruise Control.▷Intelligent Safety.▷Lane change warning.Profile management
Calling up profiles Independently of the remote control that is
used, another profile can be called up.
Via iDrive:1."Settings"2."Profiles"3.Select a profile.▷The settings saved in the called-up profile
are made automatically.▷The profile called up is assigned to the re‐
mote control currently used.▷If the profile has already been allocated to
another remote control, this profile applies
to both remote controls. It is no longer
possible to differentiate between the set‐
tings of both remote controls.
Renaming profiles
To avoid mixing up the profiles, each profile
can be given a personal name.
On the Control Display:
1."Settings"2."Profiles"3.Call up "Options".4."Rename current profile"
Resetting profiles Settings of the active profile are reset to fac‐
tory settings.
On the Control Display:
1."Settings"2."Profiles"3.Call up "Options".4."Reset current profile"
Exporting profiles Most of the settings of the active profile can be
exported.
Seite 34ControlsOpening and closing34
Online Edition for Part no. 01 40 2 964 013 - VI/15
Page 35 of 228
This may be useful for securing and calling up
personal settings, for example, before taking
the vehicle into a Service Centre. The saved
profiles can be taken to another vehicle with
the Personal Profile function.
The following options are available for export:▷Via BMW Online.▷Via USB interface to a USB medium.
Common file systems for USB media are
supported. FAT32 and exFAT formats are
recommended for exporting profiles, ex‐
port might not be possible with other for‐
mats.
On the Control Display:
1."Settings"2."Profiles"3."Export profile"4.BMW Online: "BMW Online"
USB interface: "USB device"
Importing profiles
Profiles exported via BMW Online can be im‐
ported via BMW Online.
Profiles saved on a USB medium can be im‐
ported using the USB interface.
Existing settings are overwritten with the im‐
ported profile.
On the Control Display:
1."Settings"2."Profiles"3."Import profile"4.BMW Online: "BMW Online"
USB interface: "USB device"
Using a guest profile With the guest profile, individual settings can
be made which are not saved in any of the
three personal profiles.
This can be beneficial if a driver without their
own profile uses the vehicle temporarily.
On the Control Display:1."Settings"2."Profiles"3."Guest"
Note: the guest profile cannot be renamed. It is
not allocated to the current remote control.
Showing profile list at start The profile list can be shown at the start to se‐
lect the desired profile.
On the Control Display:
1."Settings"2."Profiles"3.Call up "Options".4."Profile list at start"
With the remote control
Note WARNING
Persons remaining in the vehicle or pets
left inside can lock the doors from the inside
and lock themselves in. The vehicle cannot be
opened from the outside. Danger of injury.
Carry the remote control with you so that you
can open the vehicle from the outside.◀
Unlocking Press the button on the remote con‐
trol.
Depending on the settings, see page 41, the
following entrances are unlocked.
▷The driver door and the fuel filler flap.▷All doors, the boot lid and the fuel filler flap.
The following functions are also carried out:
▷The interior light is switched on. At dark,
the courtesy light is additionally switchedSeite 35Opening and closingControls35
Online Edition for Part no. 01 40 2 964 013 - VI/15
Page 53 of 228
▷Avoid bulky clothing.▷Regularly pull the seat belt in the upper-
body area taut.
Adjustment for automatic retracting
seat belts
▷Draw the buckle tongue attached to the
seat belt across the body and press it into
the buckle catch until a ‘click’ is heard.▷Adjustment of the belt length is very im‐
portant. To adjust the lap belt and check
whether the buckle has locked correctly,
pull upwards on the shoulder strap until the
lap belt fits tightly.▷The length of the diagonal shoulder strap
adjusts itself automatically to allow free‐
dom of movement.▷To release the seat belt, press the button
on the buckle catch unit.
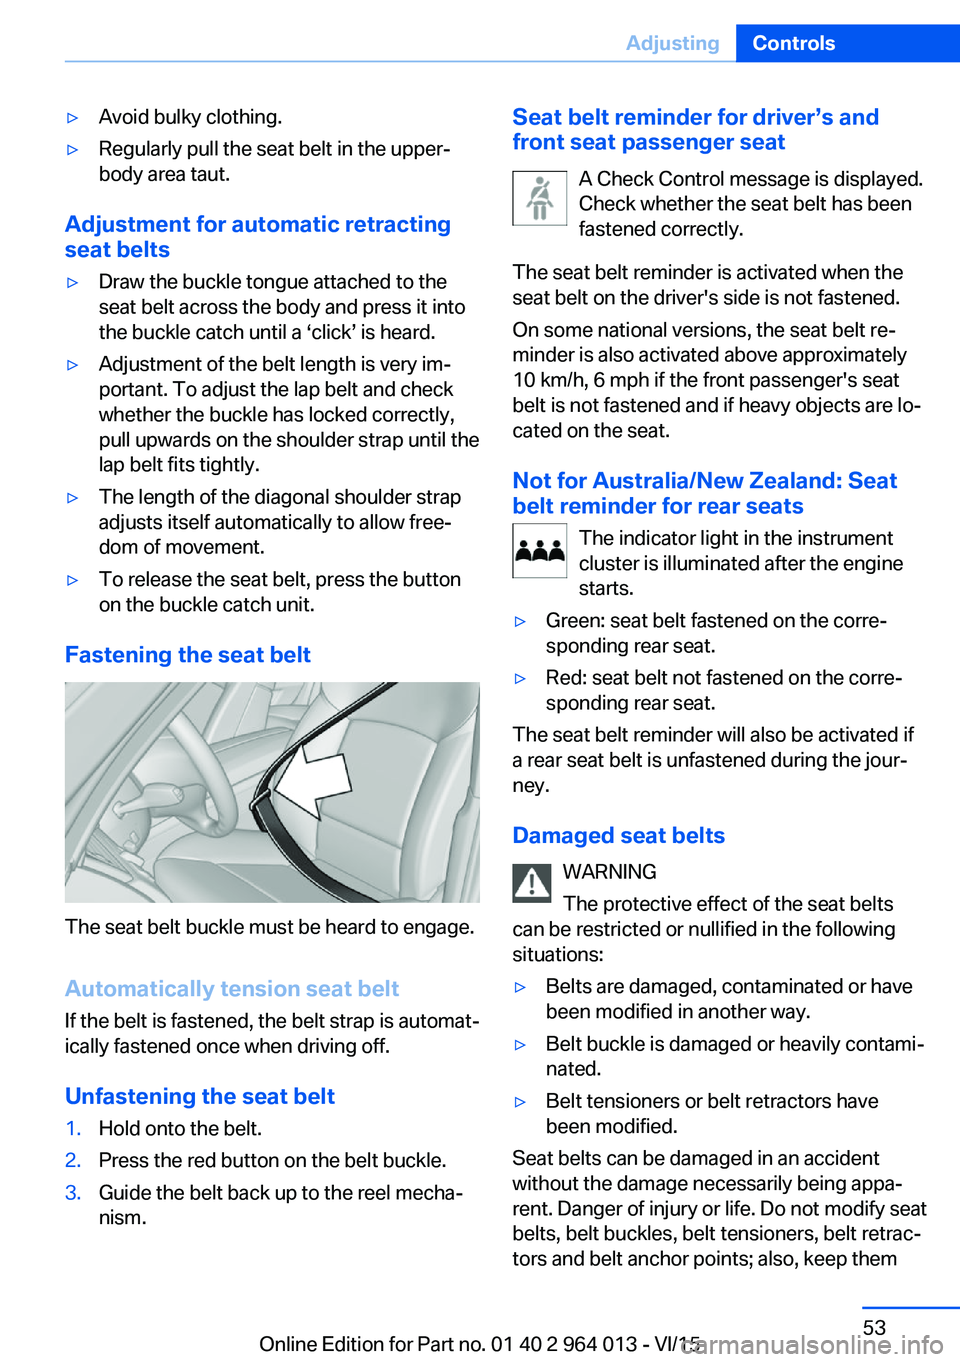
Fastening the seat belt
The seat belt buckle must be heard to engage.
Automatically tension seat belt
If the belt is fastened, the belt strap is automat‐
ically fastened once when driving off.
Unfastening the seat belt
1.Hold onto the belt.2.Press the red button on the belt buckle.3.Guide the belt back up to the reel mecha‐
nism.Seat belt reminder for driver’s and
front seat passenger seat
A Check Control message is displayed.
Check whether the seat belt has been
fastened correctly.
The seat belt reminder is activated when the
seat belt on the driver's side is not fastened.
On some national versions, the seat belt re‐
minder is also activated above approximately
10 km/h, 6 mph if the front passenger's seat
belt is not fastened and if heavy objects are lo‐
cated on the seat.
Not for Australia/New Zealand: Seat
belt reminder for rear seats
The indicator light in the instrument
cluster is illuminated after the engine
starts.▷Green: seat belt fastened on the corre‐
sponding rear seat.▷Red: seat belt not fastened on the corre‐
sponding rear seat.
The seat belt reminder will also be activated if
a rear seat belt is unfastened during the jour‐
ney.
Damaged seat belts WARNING
The protective effect of the seat belts
can be restricted or nullified in the following
situations:
▷Belts are damaged, contaminated or have
been modified in another way.▷Belt buckle is damaged or heavily contami‐
nated.▷Belt tensioners or belt retractors have
been modified.
Seat belts can be damaged in an accident
without the damage necessarily being appa‐
rent. Danger of injury or life. Do not modify seat
belts, belt buckles, belt tensioners, belt retrac‐
tors and belt anchor points; also, keep them
Seite 53AdjustingControls53
Online Edition for Part no. 01 40 2 964 013 - VI/15