display BMW M4 2016 Owners Manual
[x] Cancel search | Manufacturer: BMW, Model Year: 2016, Model line: M4, Model: BMW M4 2016Pages: 228, PDF Size: 4.88 MB
Page 5 of 228
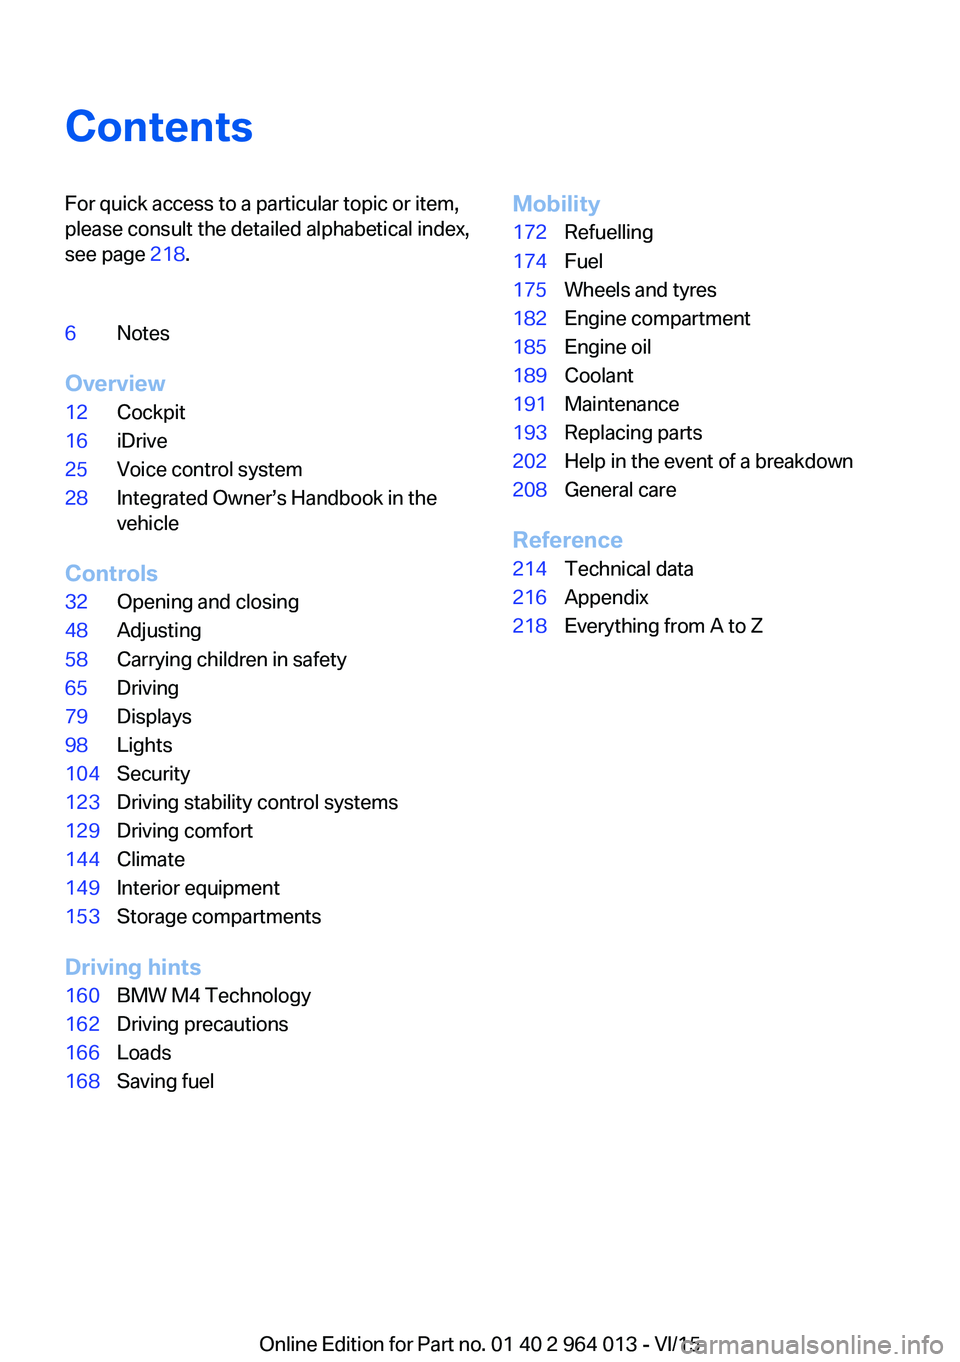
ContentsFor quick access to a particular topic or item,
please consult the detailed alphabetical index,
see page 218.6Notes
Overview
12Cockpit16iDrive25Voice control system28Integrated Owner’s Handbook in the
vehicle
Controls
32Opening and closing48Adjusting58Carrying children in safety65Driving79Displays98Lights104Security123Driving stability control systems129Driving comfort144Climate149Interior equipment153Storage compartments
Driving hints
160BMW M4 Technology162Driving precautions166Loads168Saving fuelMobility172Refuelling174Fuel175Wheels and tyres182Engine compartment185Engine oil189Coolant191Maintenance193Replacing parts202Help in the event of a breakdown208General care
Reference
214Technical data216Appendix218Everything from A to Z
Online Edition for Part no. 01 40 2 964 013 - VI/15
Page 6 of 228
NotesAbout this Owner's
Handbook
Orientation
The quickest access to a particular topic or
item is by consulting the alphabetical index.
The first chapter is recommended for an initial
overview of the vehicle.
Updates after going to press
If applicable, you will find updates after the edi‐
torial deadline in the appendix of the printed
Owner's Handbook for the vehicle.
Owner's Handbook for Navigation,
Entertainment, Communication
The topics of navigation, entertainment, com‐
munication and short commands of the voice
input system can be called up through the
integrated Owner's Handbook on the Control
Display.
Additional sources of
information
The Service Partner or a qualified specialist
workshop will be happy to answer any further
questions.
Information on BMW, for example on technol‐
ogy, on the Internet: www.bmw.com.
BMW Driver's Guide App The Owner's Handbook is available as an app
in many countries. You will find further infor‐
mation on the Internet at:
www.bmw.com/bmw_drivers_guideSymbols and displays
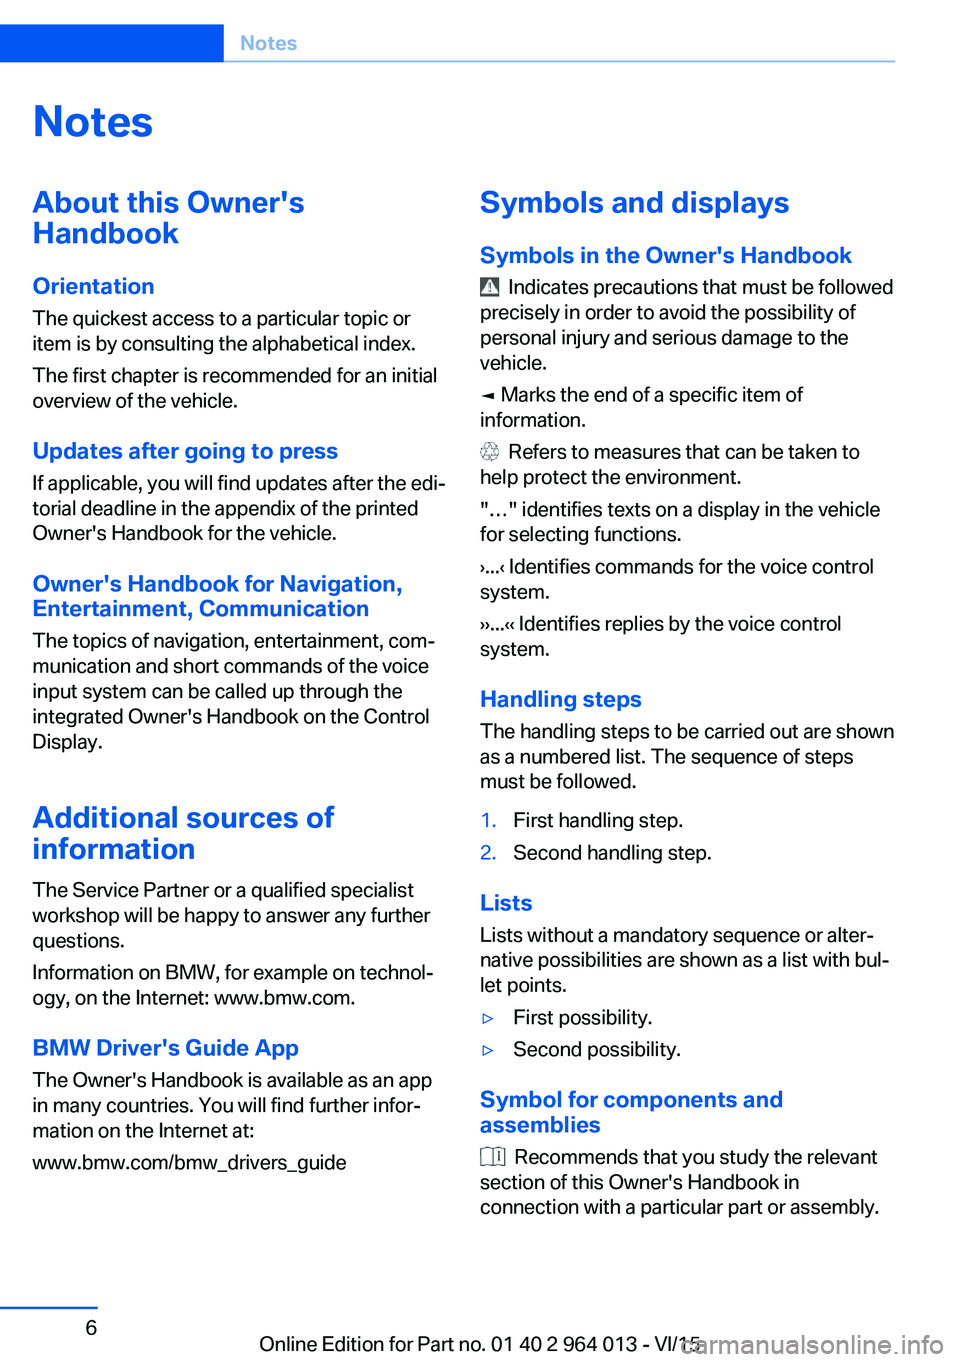
Symbols in the Owner's Handbook
Indicates precautions that must be followed
precisely in order to avoid the possibility of
personal injury and serious damage to the
vehicle.
◄ Marks the end of a specific item of
information.
Refers to measures that can be taken to
help protect the environment.
"…" identifies texts on a display in the vehicle
for selecting functions.
›...‹ Identifies commands for the voice control
system.
››...‹‹ Identifies replies by the voice control
system.
Handling steps
The handling steps to be carried out are shown
as a numbered list. The sequence of steps
must be followed.
1.First handling step.2.Second handling step.
Lists
Lists without a mandatory sequence or alter‐
native possibilities are shown as a list with bul‐
let points.
▷First possibility.▷Second possibility.
Symbol for components and
assemblies
Recommends that you study the relevant
section of this Owner's Handbook in
connection with a particular part or assembly.
Seite 6Notes6
Online Edition for Part no. 01 40 2 964 013 - VI/15
Page 11 of 228
Overview
This summary of buttons, switches and displays serves as an initial guide.
In addition, it gives you an insight into the
principles behind the various ways in which functions can be performed.Online Edition for Part no. 01 40 2 964 013 - VI/15
Page 14 of 228
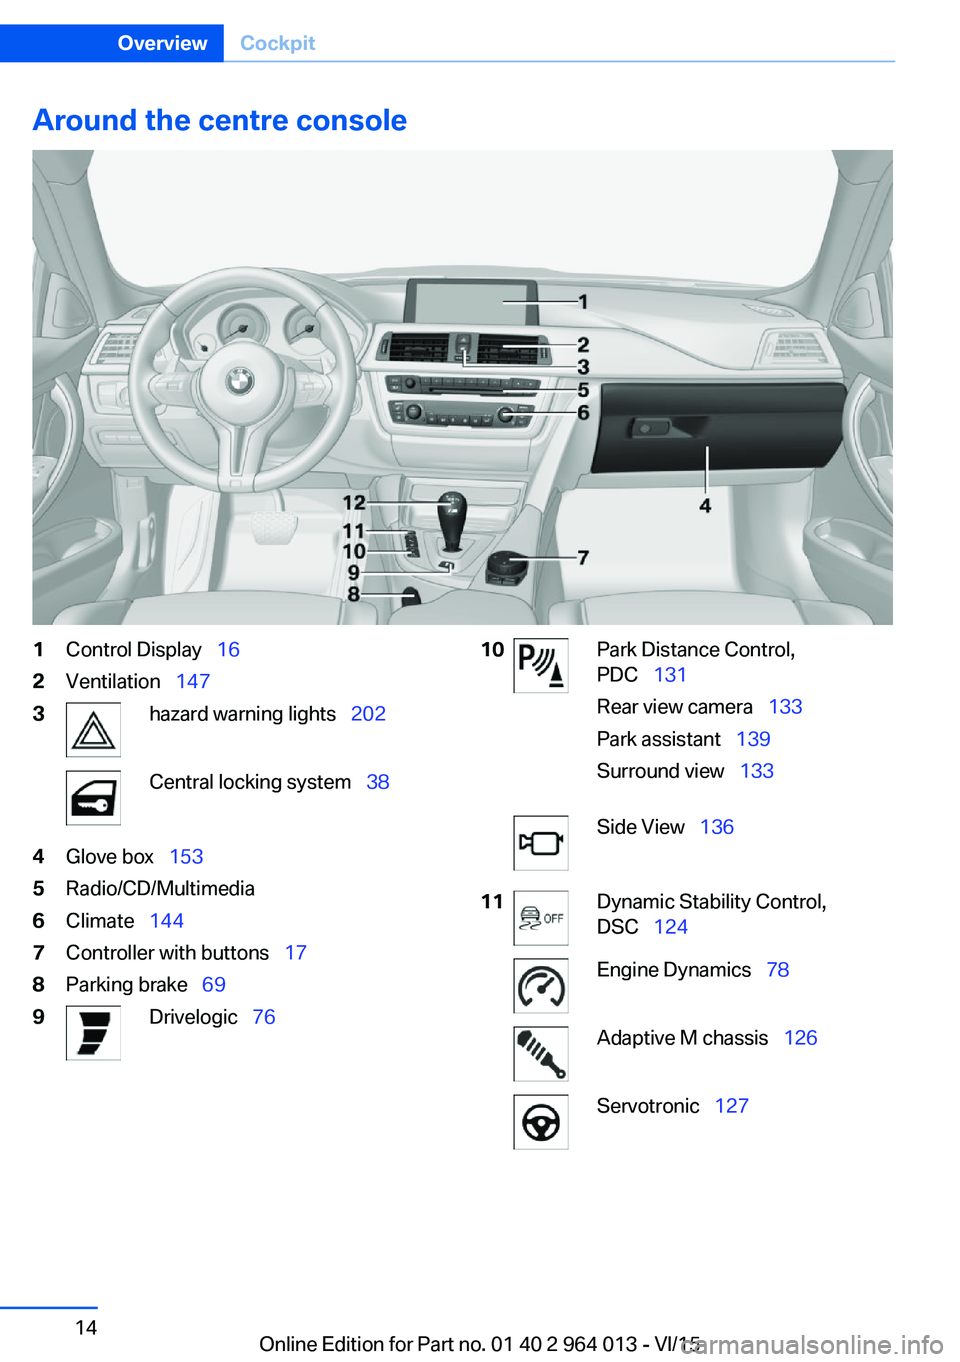
Around the centre console1Control Display 162Ventilation 1473hazard warning lights 202Central locking system 384Glove box 1535Radio/CD/Multimedia6Climate 1447Controller with buttons 178Parking brake 699Drivelogic 7610Park Distance Control,
PDC 131
Rear view camera 133
Park assistant 139
Surround view 133Side View 13611Dynamic Stability Control,
DSC 124Engine Dynamics 78Adaptive M chassis 126Servotronic 127Seite 14OverviewCockpit14
Online Edition for Part no. 01 40 2 964 013 - VI/15
Page 16 of 228
iDriveVehicle equipment
This chapter describes all standard, national
and special equipment provided in the model
series. Equipment not available in the vehicle is
therefore also described, for example the se‐
lected special equipment or national version.
This also applies to safety-relevant functions
and systems. Comply with the relevant na‐
tional regulations when using the correspond‐
ing functions and systems.
Principle
iDrive integrates the functions of a large num‐
ber of switches. These functions can therefore
be controlled from one central point.
WARNING
Operating integrated information sys‐
tems and communication devices during the
journey can distract from traffic. You could lose control of the vehicle. Danger of accidents.
Only operate the systems or devices if permis‐
sible in the traffic situation. Stop if necessary
and operate the systems or devices with the
vehicle at a standstill.◀Overview of controls
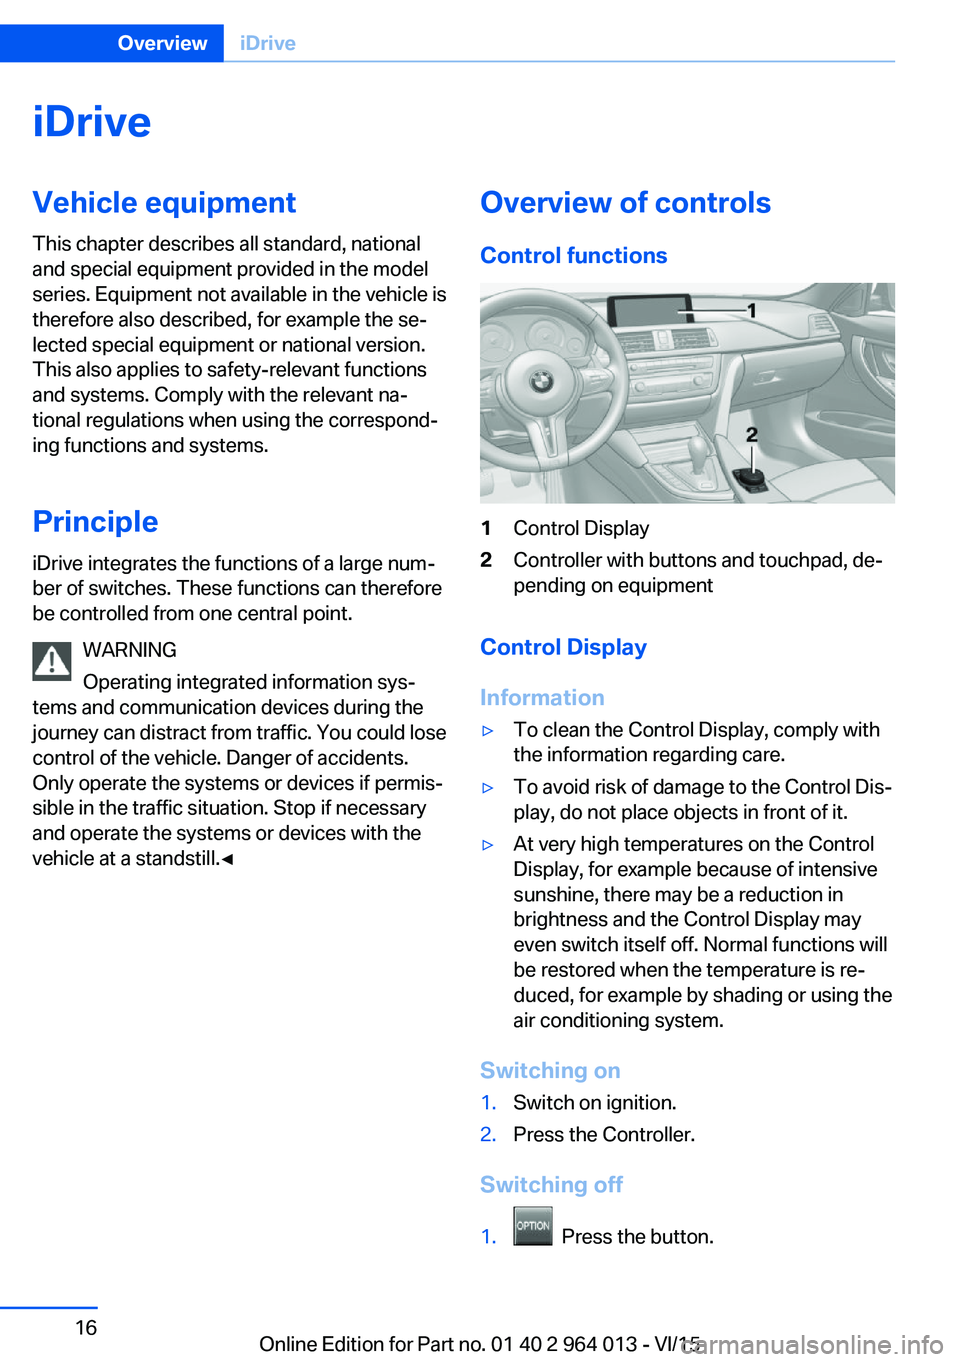
Control functions1Control Display2Controller with buttons and touchpad, de‐
pending on equipment
Control Display
Information
▷To clean the Control Display, comply with
the information regarding care.▷To avoid risk of damage to the Control Dis‐
play, do not place objects in front of it.▷At very high temperatures on the Control
Display, for example because of intensive
sunshine, there may be a reduction in
brightness and the Control Display may
even switch itself off. Normal functions will
be restored when the temperature is re‐
duced, for example by shading or using the
air conditioning system.
Switching on
1.Switch on ignition.2.Press the Controller.
Switching off
1. Press the button.
Seite 16OverviewiDrive16
Online Edition for Part no. 01 40 2 964 013 - VI/15
Page 17 of 228
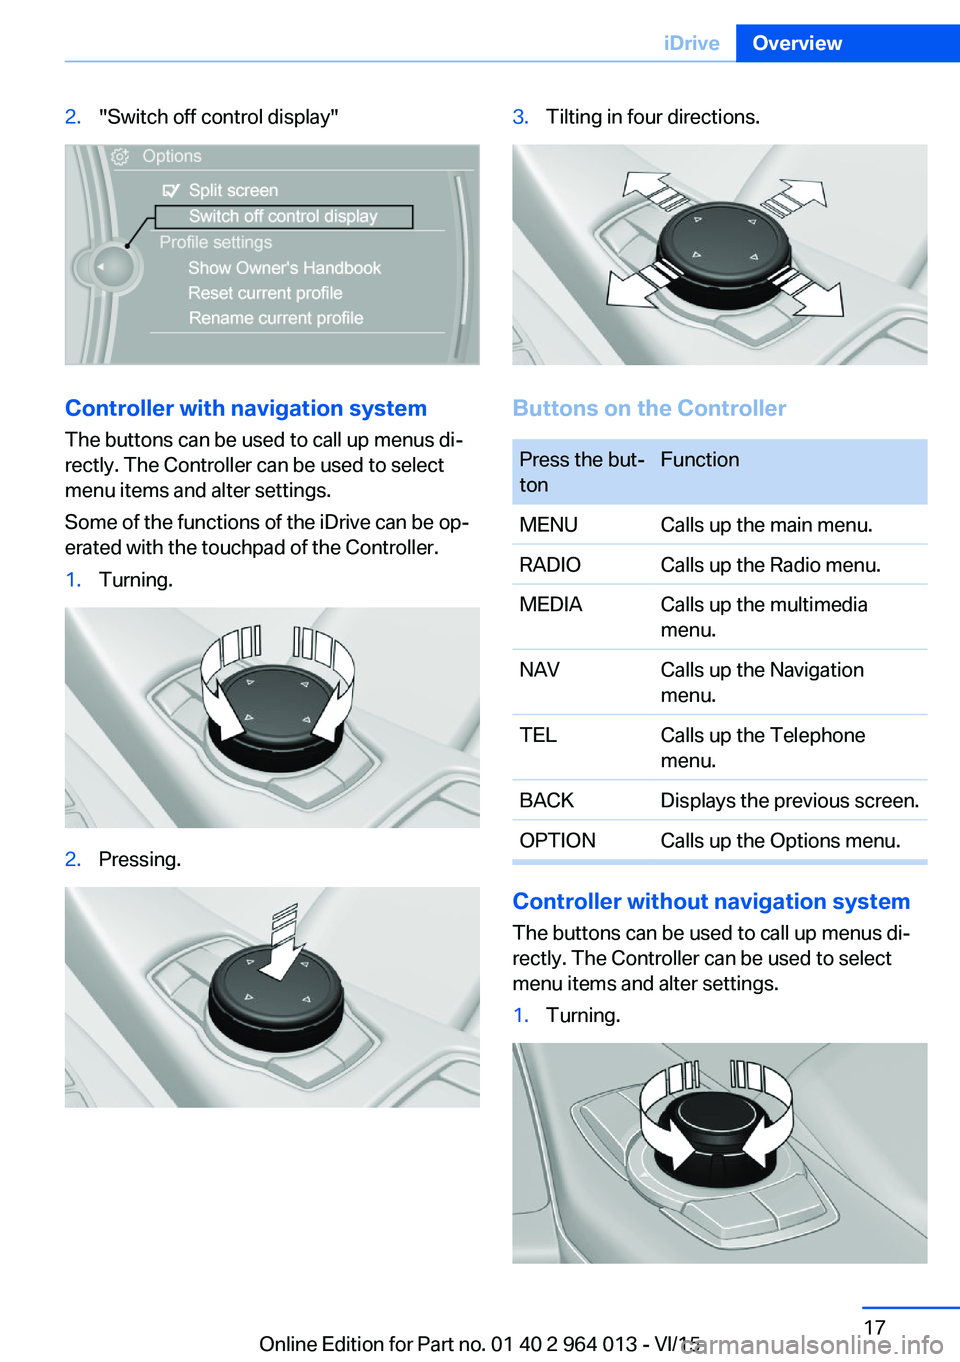
2."Switch off control display"
Controller with navigation systemThe buttons can be used to call up menus di‐
rectly. The Controller can be used to select
menu items and alter settings.
Some of the functions of the iDrive can be op‐
erated with the touchpad of the Controller.
1.Turning.2.Pressing.3.Tilting in four directions.
Buttons on the Controller
Press the but‐
tonFunctionMENUCalls up the main menu.RADIOCalls up the Radio menu.MEDIACalls up the multimedia
menu.NAVCalls up the Navigation
menu.TELCalls up the Telephone
menu.BACKDisplays the previous screen.OPTIONCalls up the Options menu.
Controller without navigation system
The buttons can be used to call up menus di‐
rectly. The Controller can be used to select
menu items and alter settings.
1.Turning.Seite 17iDriveOverview17
Online Edition for Part no. 01 40 2 964 013 - VI/15
Page 18 of 228
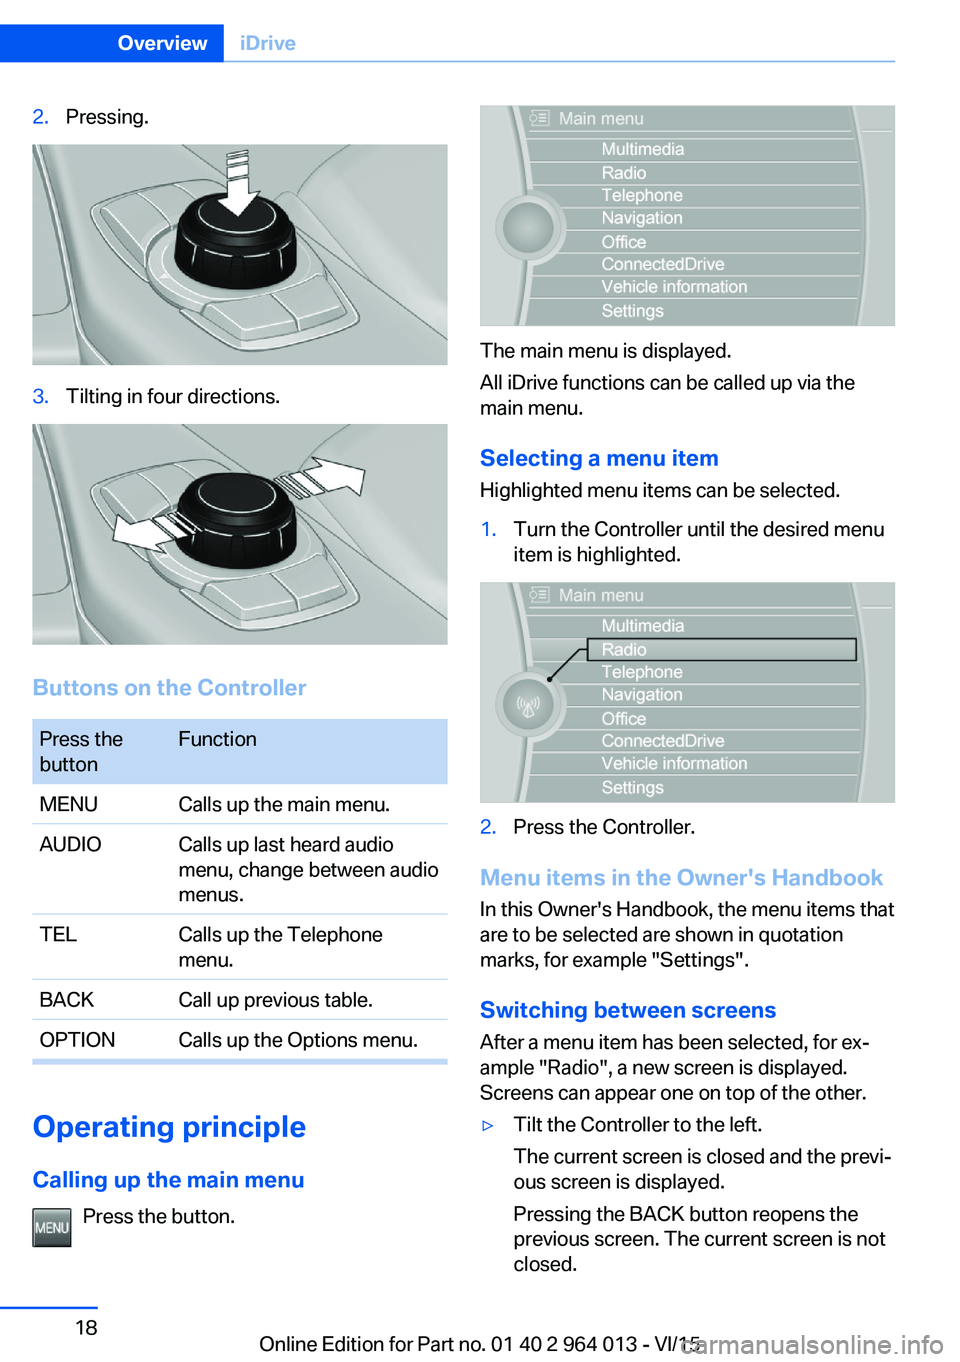
2.Pressing.3.Tilting in four directions.
Buttons on the Controller
Press the
buttonFunctionMENUCalls up the main menu.AUDIOCalls up last heard audio
menu, change between audio
menus.TELCalls up the Telephone
menu.BACKCall up previous table.OPTIONCalls up the Options menu.
Operating principle
Calling up the main menu Press the button.
The main menu is displayed.
All iDrive functions can be called up via the
main menu.
Selecting a menu item
Highlighted menu items can be selected.
1.Turn the Controller until the desired menu
item is highlighted.2.Press the Controller.
Menu items in the Owner's Handbook
In this Owner's Handbook, the menu items that
are to be selected are shown in quotation
marks, for example "Settings".
Switching between screens After a menu item has been selected, for ex‐
ample "Radio", a new screen is displayed.
Screens can appear one on top of the other.
▷Tilt the Controller to the left.
The current screen is closed and the previ‐
ous screen is displayed.
Pressing the BACK button reopens the
previous screen. The current screen is not
closed.Seite 18OverviewiDrive18
Online Edition for Part no. 01 40 2 964 013 - VI/15
Page 19 of 228
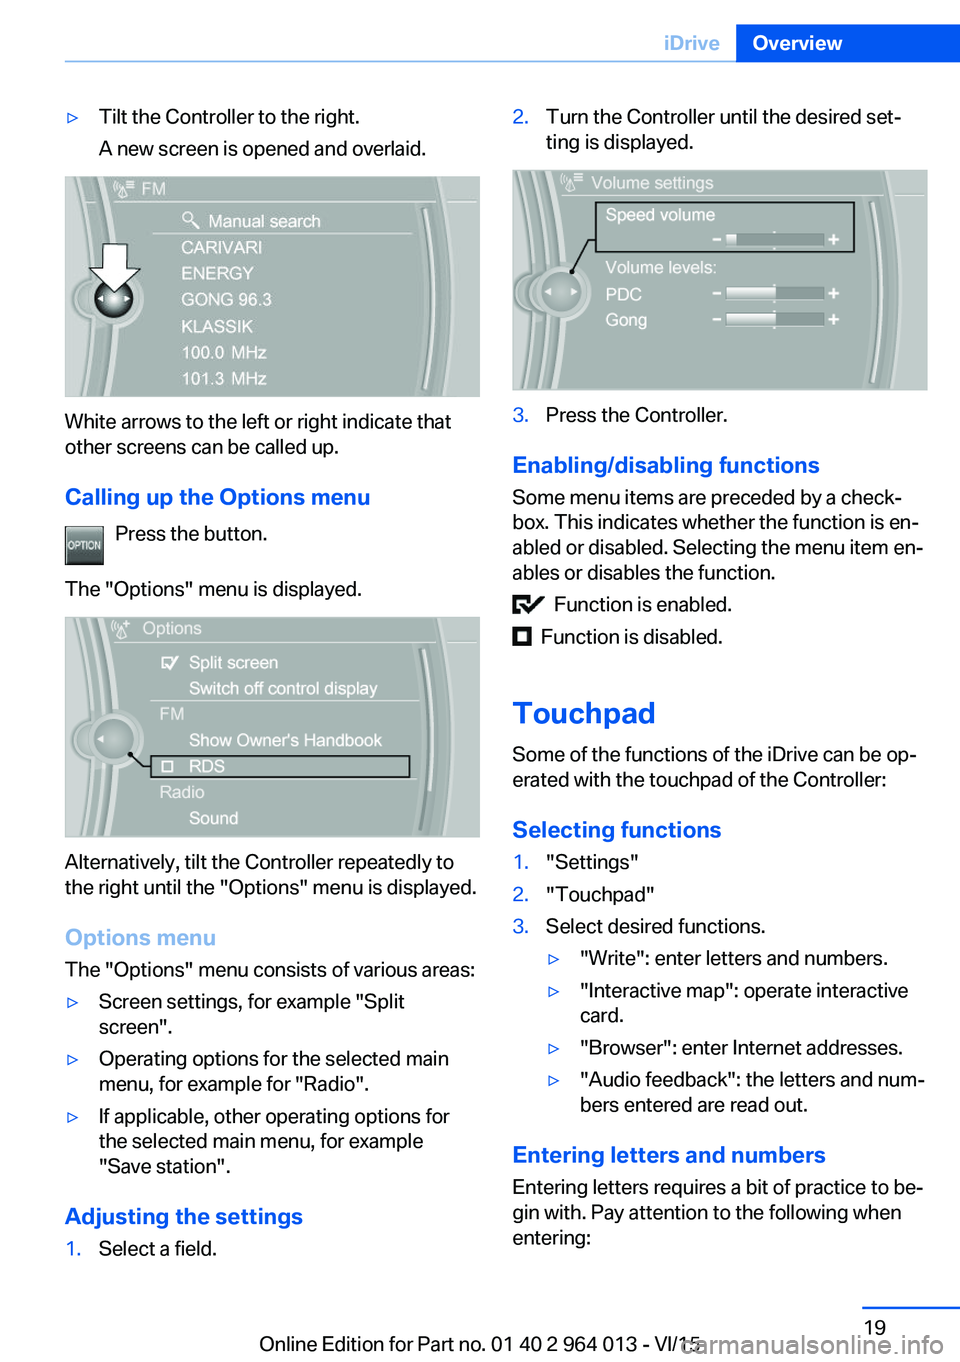
▷Tilt the Controller to the right.
A new screen is opened and overlaid.
White arrows to the left or right indicate that
other screens can be called up.
Calling up the Options menu Press the button.
The "Options" menu is displayed.
Alternatively, tilt the Controller repeatedly to
the right until the "Options" menu is displayed.
Options menu The "Options" menu consists of various areas:
▷Screen settings, for example "Split
screen".▷Operating options for the selected main
menu, for example for "Radio".▷If applicable, other operating options for
the selected main menu, for example
"Save station".
Adjusting the settings
1.Select a field.2.Turn the Controller until the desired set‐
ting is displayed.3.Press the Controller.
Enabling/disabling functions
Some menu items are preceded by a check‐
box. This indicates whether the function is en‐
abled or disabled. Selecting the menu item en‐
ables or disables the function.
Function is enabled.
Function is disabled.
Touchpad
Some of the functions of the iDrive can be op‐
erated with the touchpad of the Controller:
Selecting functions
1."Settings"2."Touchpad"3.Select desired functions.▷"Write": enter letters and numbers.▷"Interactive map": operate interactive
card.▷"Browser": enter Internet addresses.▷"Audio feedback": the letters and num‐
bers entered are read out.
Entering letters and numbers
Entering letters requires a bit of practice to be‐
gin with. Pay attention to the following when
entering:
Seite 19iDriveOverview19
Online Edition for Part no. 01 40 2 964 013 - VI/15
Page 20 of 228
▷The system recognises capital and small
letters. To enter small and capital letters
and numbers, it may be necessary to the
change input mode, for example, when
identically writing small and capital letters.
Change between upper/lower case, num‐
bers and symbols, see page 23.▷Enter symbols as they are displayed on the
Control Display.▷Relevant symbols, such as accents or full
stops are always known ambiguously with
the letter. The input option depends on the
language that has been set. You may need
to enter special characters using the Con‐
troller.▷To delete a character, swipe the touchpad
towards the left.▷To enter a space, swipe towards the right
in the middle of the touchpad.▷To enter a hyphen, swipe towards the right
in the upper area of the touchpad.▷To enter an underscore, swipe towards the
right in the lower area of the touchpad.
Operating interactive map and
Internet
The Interactive map of the navigation system
and websites can be moved using the touch‐
pad.
FunctionControlsMove interactive map or
web pages.Swipe in the ap‐
propriate direction.Enlarge/reduce interac‐
tive map or web pages.Pinch or open up
your fingers on the
touchpad.Show menu or open a
link on the Internet.Tap once.
Adjusting the settings
Settings on the Control Display, such as vol‐
ume, for example, can be made using the
touchpad. To do this swipe left or right as ap‐
propriate.
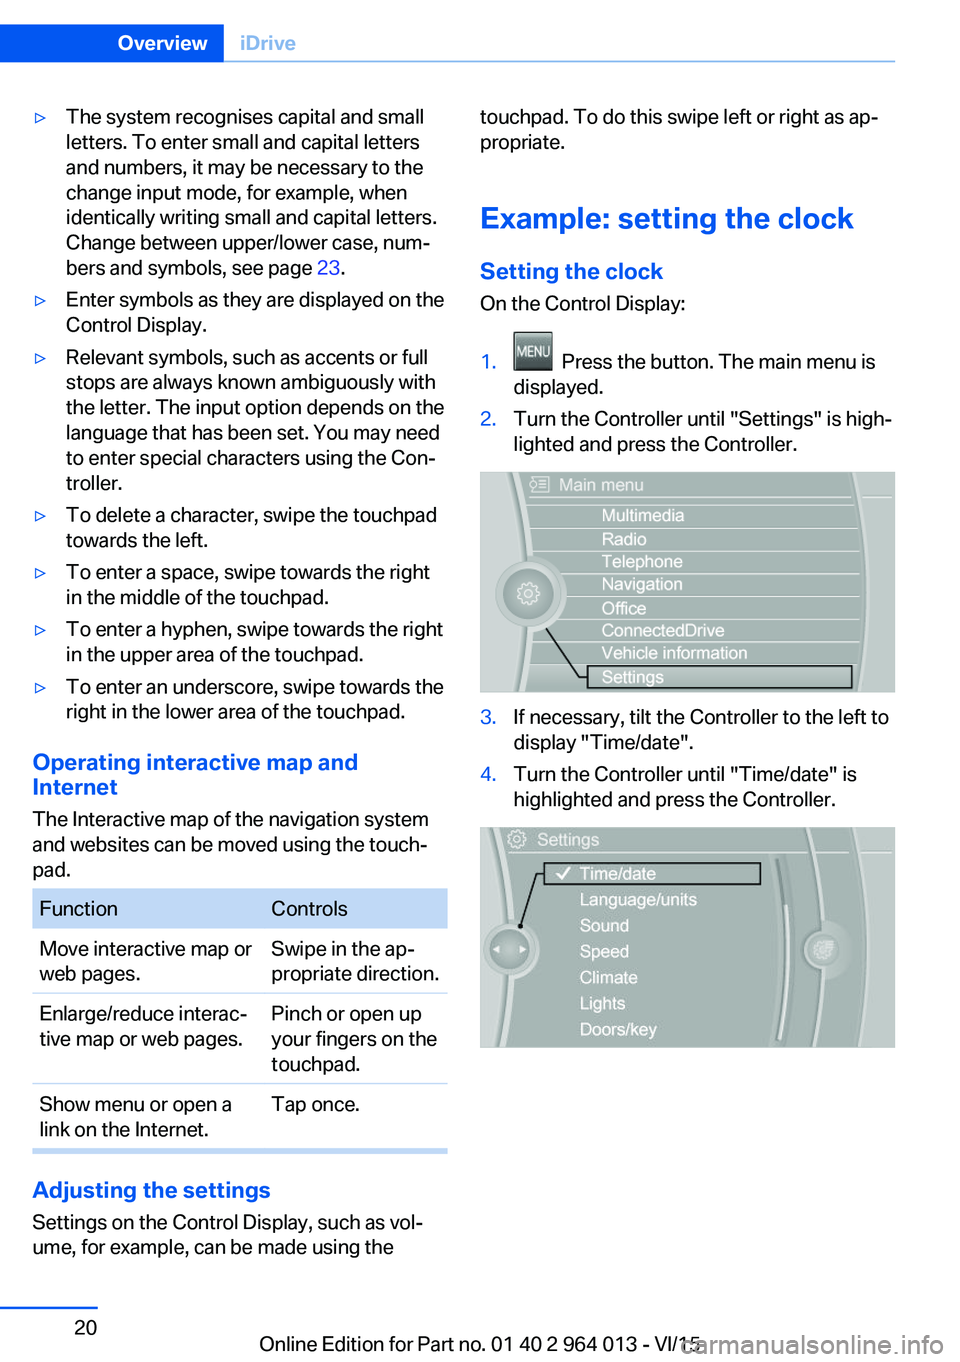
Example: setting the clock Setting the clock
On the Control Display:1. Press the button. The main menu is
displayed.2.Turn the Controller until "Settings" is high‐
lighted and press the Controller.3.If necessary, tilt the Controller to the left to
display "Time/date".4.Turn the Controller until "Time/date" is
highlighted and press the Controller.Seite 20OverviewiDrive20
Online Edition for Part no. 01 40 2 964 013 - VI/15
Page 22 of 228
Split-screen
General In the split-screen view, additional information
can be displayed on the right-hand side of the
screen, for example information from the on-
board computer.
This information remains visible in the split-
screen view even if a switch is made to another
menu.
Switching the split-screen view on
and off
On the Control Display:1. Press the button.2."Split screen"
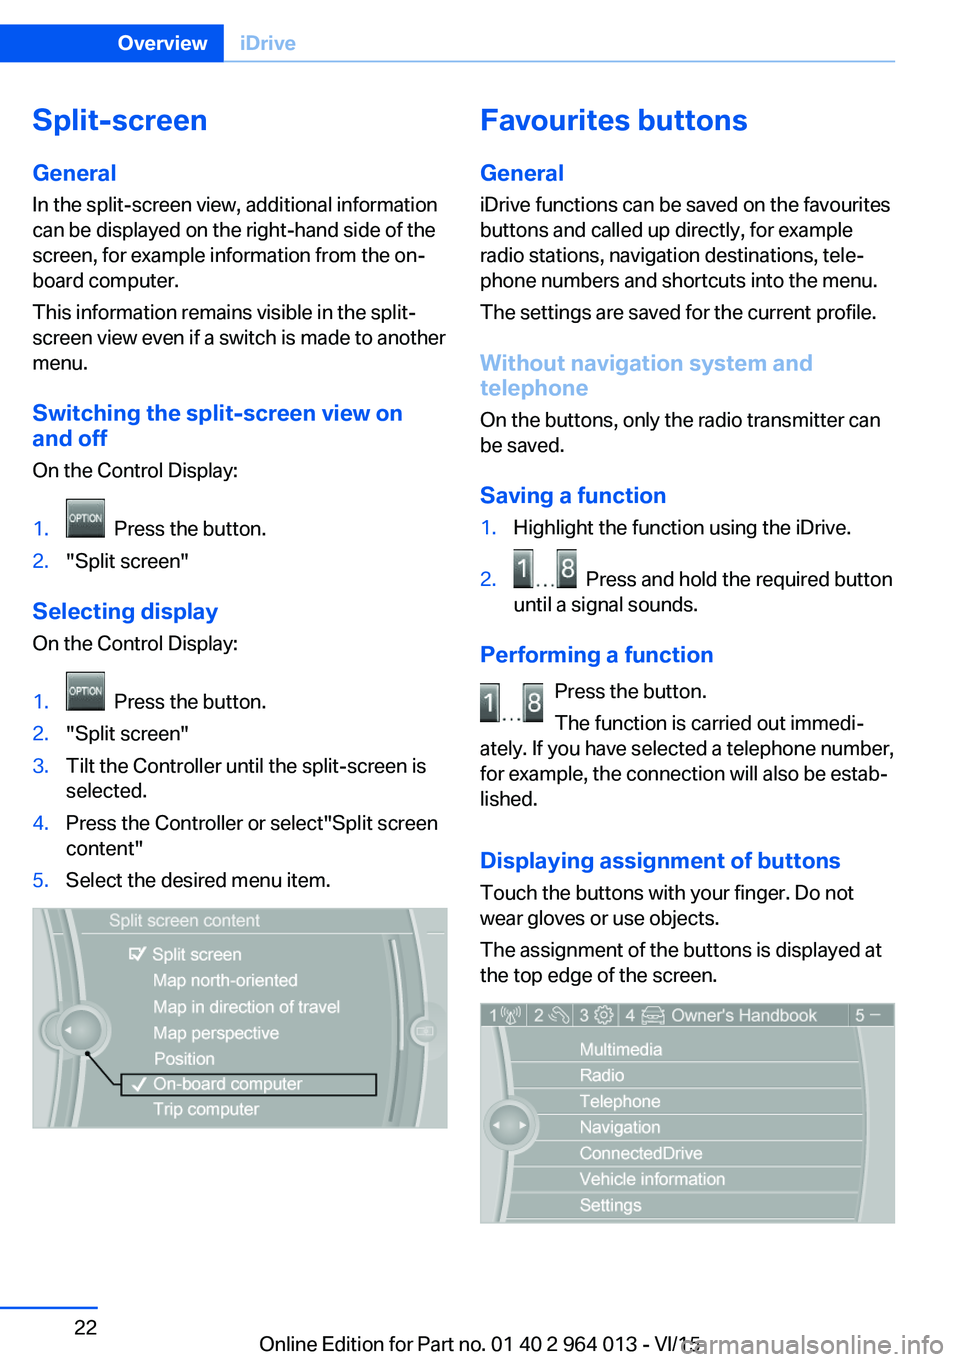
Selecting display On the Control Display:
1. Press the button.2."Split screen"3.Tilt the Controller until the split-screen is
selected.4.Press the Controller or select"Split screen
content"5.Select the desired menu item.Favourites buttons
General iDrive functions can be saved on the favourites
buttons and called up directly, for example
radio stations, navigation destinations, tele‐
phone numbers and shortcuts into the menu.
The settings are saved for the current profile.
Without navigation system and
telephone
On the buttons, only the radio transmitter can
be saved.
Saving a function1.Highlight the function using the iDrive.2. Press and hold the required button
until a signal sounds.
Performing a function
Press the button.
The function is carried out immedi‐
ately. If you have selected a telephone number,
for example, the connection will also be estab‐
lished.
Displaying assignment of buttons Touch the buttons with your finger. Do not
wear gloves or use objects.
The assignment of the buttons is displayed at
the top edge of the screen.
Seite 22OverviewiDrive22
Online Edition for Part no. 01 40 2 964 013 - VI/15