clutch BMW MOTORRAD K 1200 R 2004 Rider's Manual (in English)
[x] Cancel search | Manufacturer: BMW MOTORRAD, Model Year: 2004, Model line: K 1200 R, Model: BMW MOTORRAD K 1200 R 2004Pages: 168, PDF Size: 2.02 MB
Page 5 of 168

i3Introduction
6 Maintenance ............. 87
Toolkit .......................... 89
Engine oil ..................... 89
Coolant ........................ 92
Brakes .......................... 93
Clutch .......................... 96
Wheels ......................... 98
Front-wheel stand ...... 107
Rear wheel stand ....... 108
Bulbs .......................... 109
Jump starting ............. 115
Battery ....................... 116
Spray guard ................ 120
7 Care ......................... 121
Cleaning and care ...... 122
Laying up ................... 124
Restoring to use ......... 125
8 Technical data ........ 127
Threaded fasteners .... 128
Tyre pressures ........... 130
Engine ........................ 131
Power transmission .... 132
Frame and suspension 133
Wheels and tyres ........ 135Fuel and lubricants ..... 136
Electrical system ......... 138
Dimensions and
weights ....................... 140
Riding specifications .. 141
9 Service ..................... 143
BMW Motorrad
service ........................ 144
Confirmation of
maintenance work ...... 147
Confirmation of
service ........................ 151
i Index ......................... 155
Page 11 of 168

19Overview
General view, left side1Clutch-fluid reservoir
(
b
97)
2 Adjuster, spring preload,
rear (b
47)
3 Seat lock (b
44) beneath
rear light
4 Adjuster, rear shock
absorber (
b
48)
5 On-board socket (
b
80)
6 Filler neck, coolant (b
92)
Page 42 of 168
Operation340
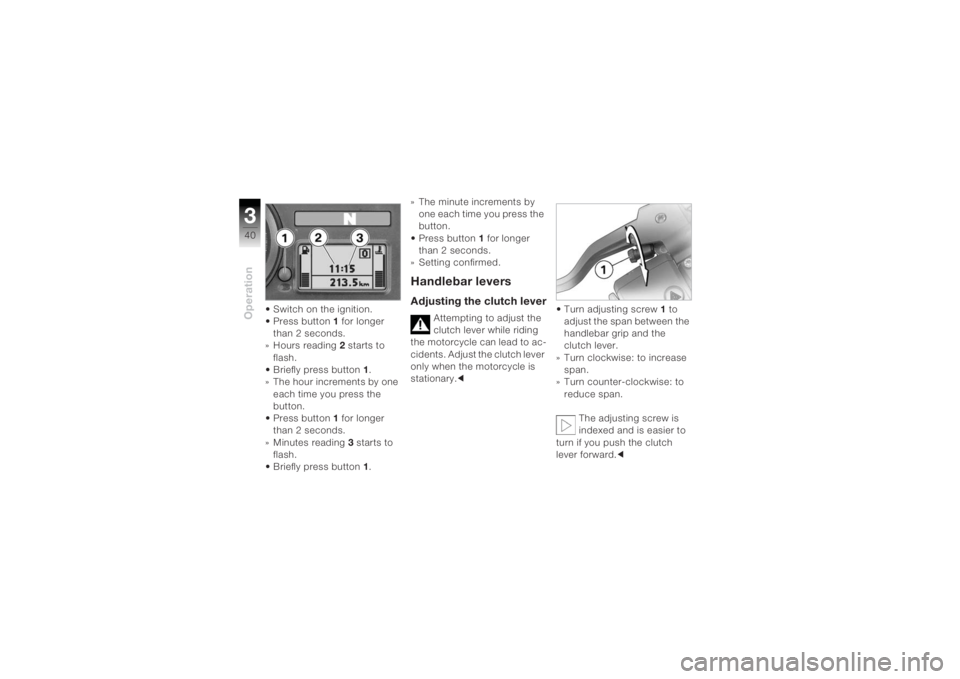
• Switch on the ignition.
• Press button1 for longer
than 2 seconds.
» Hours reading 2 starts to
flash.
• Briefly press button 1.
» The hour increments by one each time you press the
button.
• Press button 1 for longer
than 2 seconds.
» Minutes reading 3 starts to
flash.
• Briefly press button 1. » The minute increments by
one each time you press the
button.
• Press button 1 for longer
than 2 seconds.
» Setting confirmed.
Handlebar leversAdjusting the clutch lever
Attempting to adjust the
clutch lever while riding
the motorcycle can lead to ac-
cidents. Adjust the clutch lever
only when the motorcycle is
stationary. c • Turn adjusting screw
1 to
adjust the span between the
handlebar grip and the
clutch lever.
» Turn clockwise: to increase span.
» Turn counter-clockwise: to reduce span.
The adjusting screw is
indexed and is easier to
turn if you push the clutch
lever forward. c
Page 58 of 168
Riding456
Safety checkPrior to every journeyUse the following checklist to
check important functions,
settings and wear limits before
starting to ride.Checklist–Brakes (
b
93)
– Brake fluid level (
b
95)
–Clutch (
b
96)
– Clutch fluid level (
b
97)
– Warning and telltale lights (
b
20)
– Shock absorber setting (
b
48) and spring preload
(
b
47)
–Rims (
b
98), tread depth
(
b
98) and tyre pressure
(
b
51, 130)
– Load, gross weight (
b
140)
– Luggage system At regular intervals:
– Engine oil level (every time
you refuel) (
b
89)
– Brake pads (every second/ third time you refuel) (
b
93)
First time outSafe handling of your
motorcycleYou have to take the time to
familiarise yourself with your
motorcycle's unique
character:
– Acceleration
– Roadholding
– Cornering
–Braking
Bear in mind, too, that the
engine has to be run in over
the first 1,000 km (
b
63). The description of the BMW
Integral ABS
OE starts on page
(
b
75).
BMW Integral ABS
OE
incorporates a brake
booster, so braking efficiency
is significantly higher than with
conventional brake systems.
Inadvertently severe braking
can lead to dangerous situa-
tions, particularly when the
motorcycle is cornering.
Practice braking with BMW
Integral ABS
OE under safe
conditions.c
Page 62 of 168
Riding460
If you switch on the igni-
tion while the brakes are
applied, then start the engine
and ride off immediately, the
BMW Integral ABS remains in
its residual braking function
mode (b
77). Self-diagnosis is
performed as soon as the
brake levers are in their fully
released positions for the first
time. Until this completes the
ABS function is not available;
the same applies to power as-
sistance for the brakes.
Wait for ABS self-diagnosis to
complete before you start the
engine. c Starting on gradients:
Switch on the ignition
with gear engaged, clutch
lever released and both brake
levers released. When self-
diagnosis completes, apply
the brakes, disengage the
clutch, and start the engine. c
Side standYou cannot start the motorcy-
cle with the side stand
extended and a gear engaged.
The engine will switch itself off
if you start it with the gearbox
in neutral and then engage a
gear before retracting the side
stand.
GearboxYou can start the engine when
the gearbox is in neutral or if
you pull the clutch with a gear
engaged. Switch on the igni-
tion before you pull the clutch.
When the gearbox is in neutral,
the green neutral telltale light
is on and the gear indicator in
the multifunction display
shows 0.Starting
Do not turn the throttle
twistgrip when starting
the engine. At ambient tem-
peratures below 0 °C, disen-
gage the clutch after switching
on the ignition.c
Page 64 of 168
Riding462
Troubleshooting chartFault: Engine does not start or only starts with difficulty.
Possible causeRemedy see pageKill switch activatedKill switch in operating position (
b
57)
Side stand extended, gear
engaged Fully retract the side stand (
b
69)
Gear engaged, clutch not
disengaged Select neutral or pull clutch lever (
b
60)
Clutch pulled when ignition was
OFF Switch on the ignition, then pull the clutch
lever (
b
57)
No fuel in tank Refuel (
b
73)
Battery not adequately charged Recharge the battery (
b
116)
Page 67 of 168
465Riding
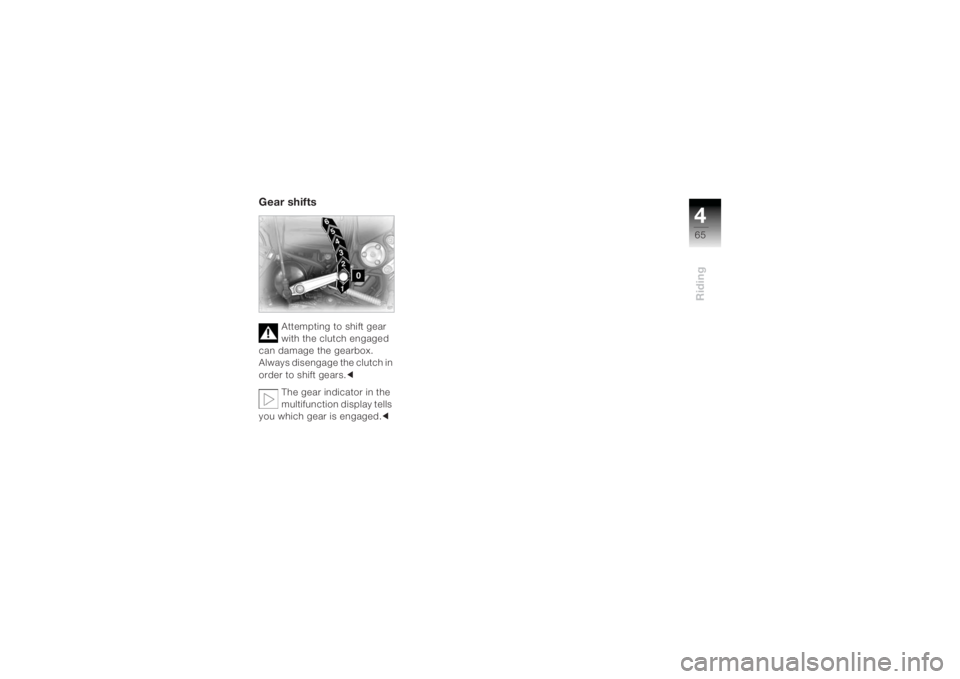
Gear shifts
Attempting to shift gear
with the clutch engaged
can damage the gearbox.
Always disengage the clutch in
order to shift gears. c
The gear indicator in the
multifunction display tells
you which gear is engaged. c
Page 89 of 168
687Maintenance
Toolkit ............................................ 89
Engine oil ...................................... 89
Coolant .......................................... 92
Brakes ........................................... 93
Clutch ............................................ 96
Wheels ........................................... 98
Front-wheel stand ...................... 107
Rear wheel stand ....................... 108
Bulbs ............................................ 109
Jump starting .............................. 115
Battery ......................................... 116
Spray guard ................................ 120Maintenance
Page 98 of 168
Maintenance696
If there is too little brake
fluid in the brake-fluid
reservoir, air can enter the
brake system. This causes a
serious reduction in braking
efficiency.
Think well ahead and brake
carefully; avoid severe
braking. c
Under normal operating condi-
tions the brake fluid level can-
not drop below the MIN mark.
• Check the brake pads.
• Check the brake system for
leaks.
• Have the fault rectified as
soon as possible by a spe-
cialist workshop, preferably
an authorised
BMW motorcycle dealer. Vehicles with ABS
OE
The brake fluid level re-
mains constant despite
wear of the brake pads. c
Any drop in brake-fluid level,
even if the level remains above
the MIN mark, is indicative of a
fault in the brake system.If the
brake fluid level falls:
• Have the fault rectified as soon as possible by a spe-
cialist workshop, preferably
an authorised
BMW motorcycle dealer.
ClutchChecking operation• Pull the clutch lever.
» The pressure point must be clearly perceptible.
Do not ride the motorcycle if
you have any doubts about the
dependability of the clutch. In
this case:
• Have the clutch checked by a specialist workshop, pref-
erably an authorised
BMW motorcycle dealer.
Page 99 of 168
697Maintenance
Checking clutch-fluid
level
Changing the position of
the clutch-fluid reservoir
can allow air to penetrate the
clutch system.
Do not turn either the handle-
bar fitting on the handlebars,
or the handlebars in their
mounts. c
• Make sure the ground is level and firm and either hole
the motorcycle upright or
place it on the centre
standOE.
• Make sure the handlebars are in the straight-ahead
position.
• Read off the clutch fluid level
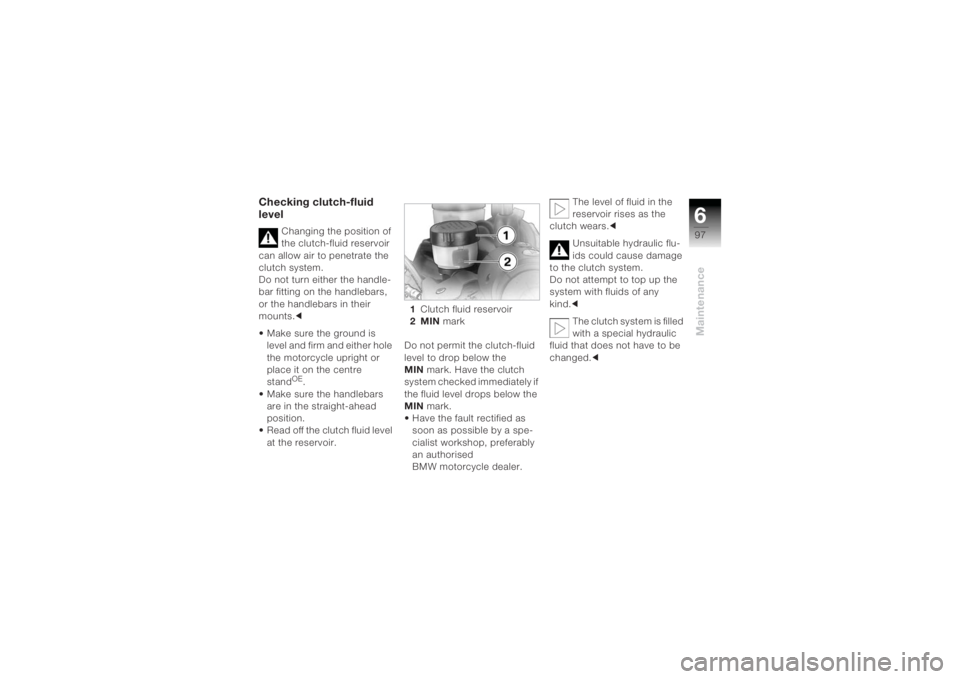
at the reservoir. 1
Clutch fluid reservoir
2MIN mark
Do not permit the clutch-fluid
level to drop below the
MIN mark. Have the clutch
system checked immediately if
the fluid level drops below the
MIN mark.
• Have the fault rectified as soon as possible by a spe-
cialist workshop, preferably
an authorised
BMW motorcycle dealer. The level of fluid in the
reservoir rises as the
clutch wears. c
Unsuitable hydraulic flu-
ids could cause damage
to the clutch system.
Do not attempt to top up the
system with fluids of any
kind. c
The clutch system is filled
with a special hydraulic
fluid that does not have to be
changed. c