BMW MOTORRAD K 1200 S 2004 Rider's Manual (in English)
Manufacturer: BMW MOTORRAD, Model Year: 2004, Model line: K 1200 S, Model: BMW MOTORRAD K 1200 S 2004Pages: 162, PDF Size: 2.99 MB
Page 41 of 162
339Operation
In the case of very high pay-
loads, adaptation of the spring
preload might not be ade-
quate. To avoid dazzling
oncoming traffic:
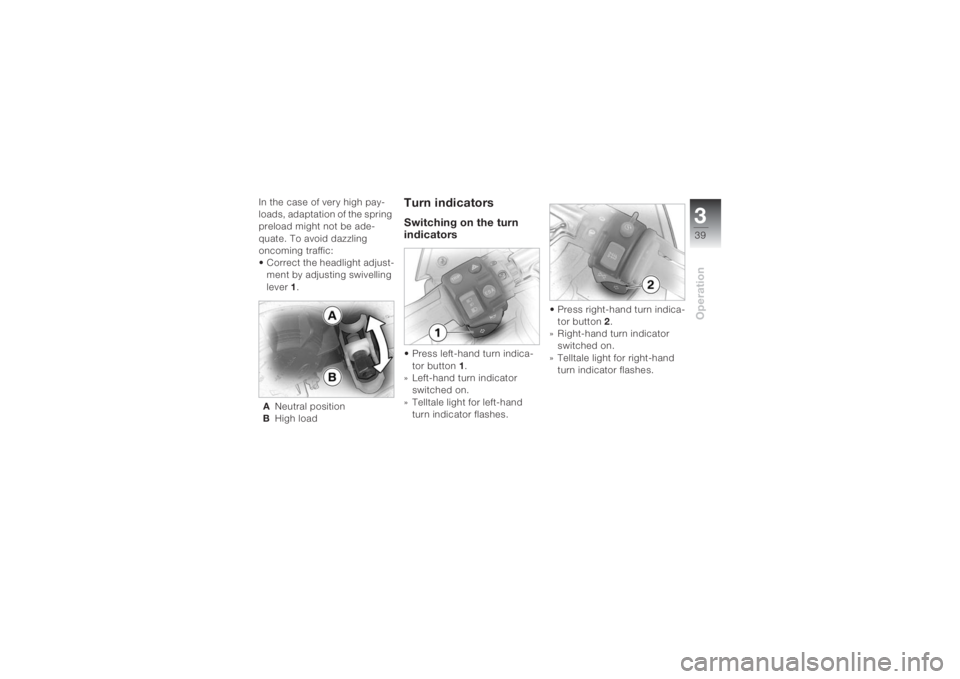
• Correct the headlight adjust-
ment by adjusting swivelling
lever1.
ANeutral position
BHigh load
Turn indicatorsSwitching on the turn
indicators• Press left-hand turn indica-
tor button 1.
» Left-hand turn indicator
switched on.
» Telltale light for left-hand
turn indicator flashes. • Press right-hand turn indica-
tor button 2.
» Right-hand turn indicator
switched on.
» Telltale light for right-hand
turn indicator flashes.
Page 42 of 162
Operation340
Switching off the turn
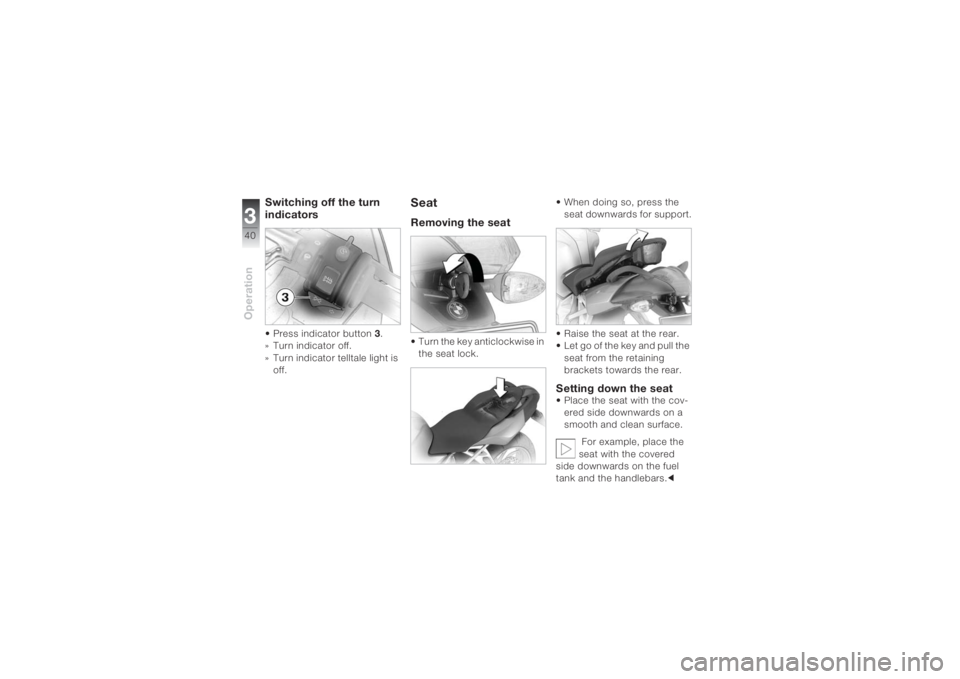
indicators• Press indicator button 3.
»Turn indicator off.
» Turn indicator telltale light is
off.
SeatRemoving the seat • Turn the key anticlockwise in
the seat lock. • When doing so, press the
seat downwards for support.
• Raise the seat at the rear.
• Let go of the key and pull the
seat from the retaining
brackets towards the rear.
Setting down the seat• Place the seat with the cov-
ered side downwards on a
smooth and clean surface.
For example, place the
seat with the covered
side downwards on the fuel
tank and the handlebars.c
Page 43 of 162
341Operation
Installing the seat
If too much pressure is
applied in a forward
direction, there is a danger
that the motorcycle will be
pushed off its stand.
Make sure that the motorcycle
is parked securely.c
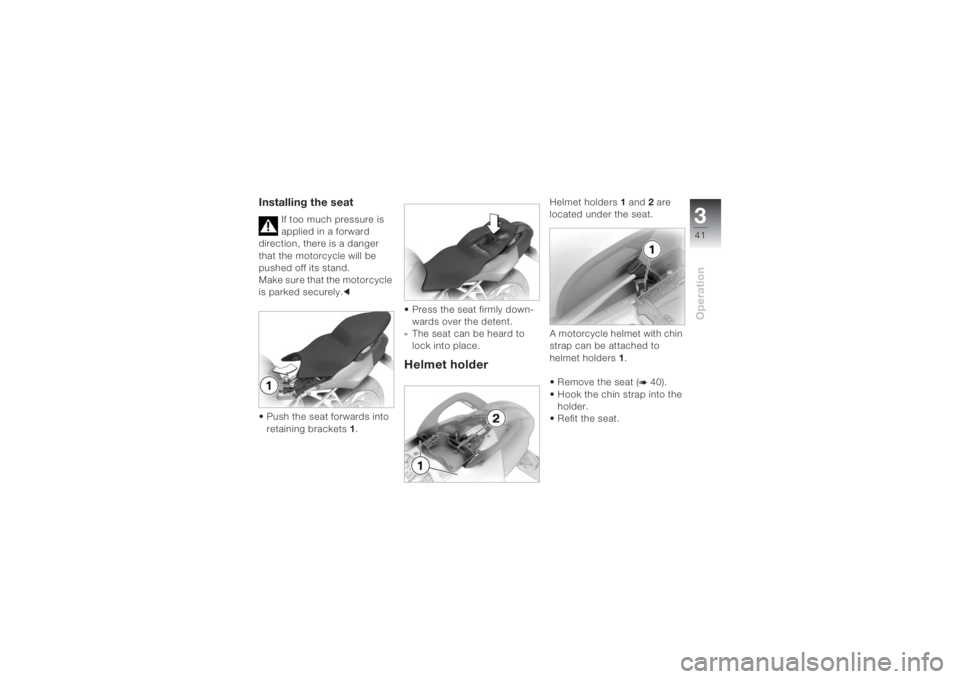
• Push the seat forwards into
retaining brackets 1.• Press the seat firmly down-
wards over the detent.
» The seat can be heard to
lock into place.
Helmet holder
Helmet holders 1 and 2 are
located under the seat.
A motorcycle helmet with chin
strap can be attached to
helmet holders1.
• Remove the seat (
b 40).
• Hook the chin strap into the
holder.
• Refit the seat.
Page 44 of 162
Operation342
The helmet catch can
scratch the panelling.
When hooking up the helmet,
pay attention to the position of
the helmet catch.c
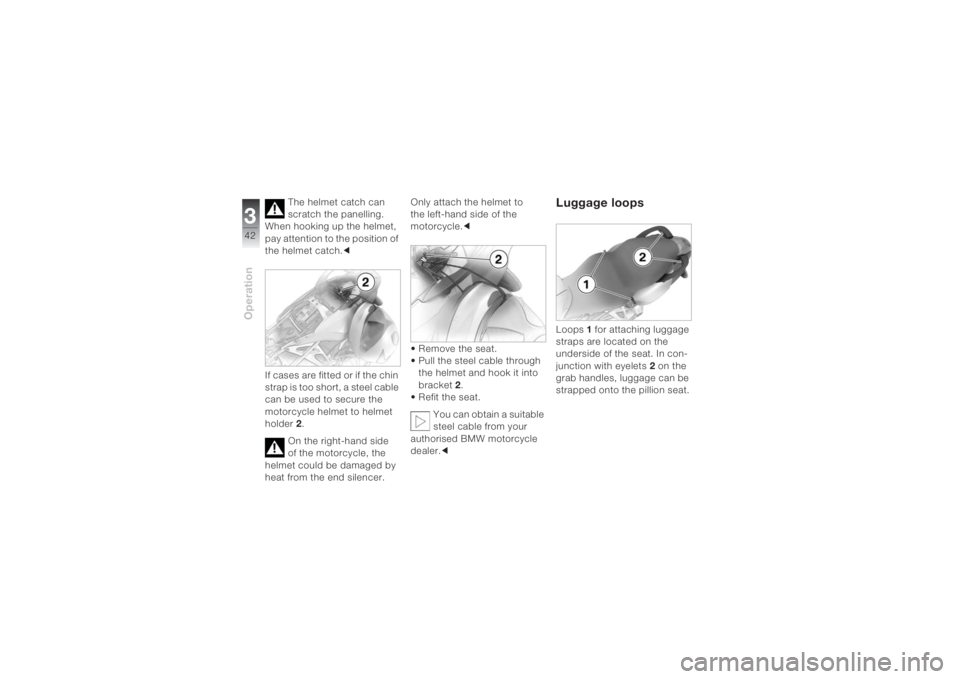
If cases are fitted or if the chin
strap is too short, a steel cable
can be used to secure the
motorcycle helmet to helmet
holder2.
On the right-hand side
of the motorcycle, the
helmet could be damaged by
heat from the end silencer.Only attach the helmet to
the left-hand side of the
motorcycle.c
• Remove the seat.
• Pull the steel cable through
the helmet and hook it into
bracket2.
• Refit the seat.
You can obtain a suitable
steel cable from your
authorised BMW motorcycle
dealer.c
Luggage loopsLoops 1 for attaching luggage
straps are located on the
underside of the seat. In con-
junction with eyelets2 on the
grab handles, luggage can be
strapped onto the pillion seat.
Page 45 of 162
343Operation
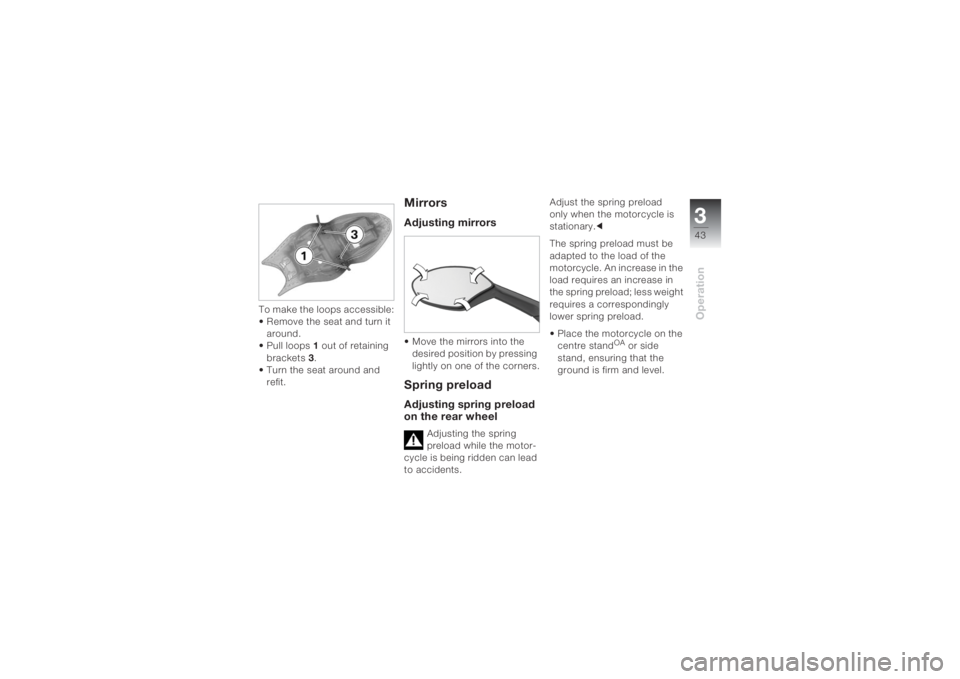
To make the loops accessible:
• Remove the seat and turn it
around.
• Pull loops1 out of retaining
brackets3.
• Turn the seat around and
refit.
MirrorsAdjusting mirrors• Move the mirrors into the
desired position by pressing
lightly on one of the corners.Spring preloadAdjusting spring preload
on the rear wheel
Adjusting the spring
preload while the motor-
cycle is being ridden can lead
to accidents.Adjust the spring preload
only when the motorcycle is
stationary.c
The spring preload must be
adapted to the load of the
motorcycle. An increase in the
load requires an increase in
the spring preload; less weight
requires a correspondingly
lower spring preload.
• Place the motorcycle on the
centre stand
OA or side
stand, ensuring that the
ground is firm and level.
Page 46 of 162
Operation344
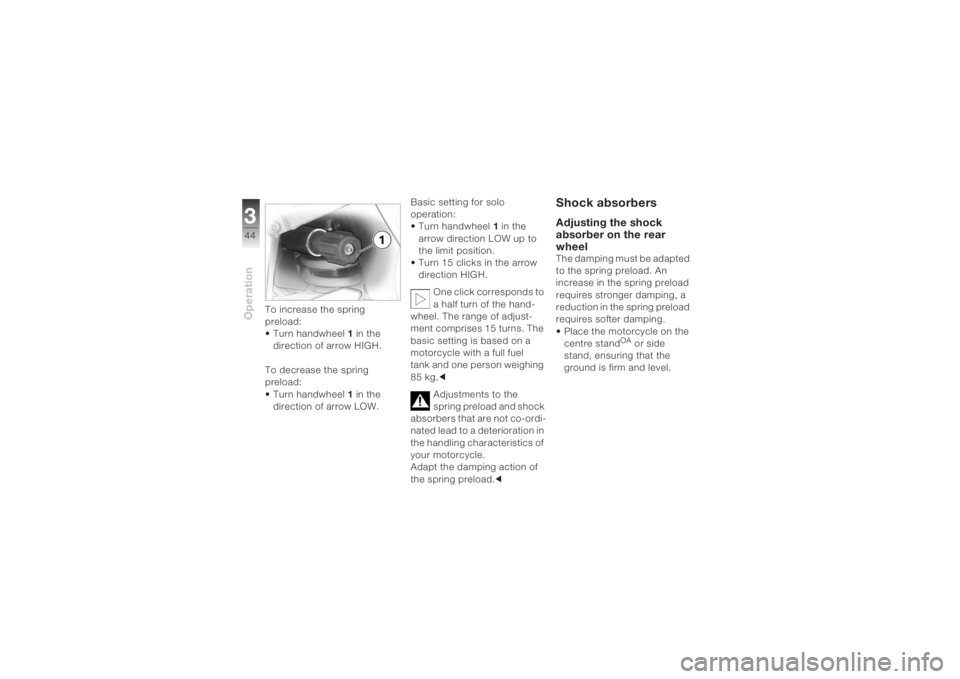
To increase the spring
preload:
• Turn handwheel 1 in the
direction of arrow HIGH.
To decrease the spring
preload:
• Turn handwheel 1 in the
direction of arrow LOW.Basic setting for solo
operation:
• Turn handwheel 1 in the
arrow direction LOW up to
the limit position.
• Turn 15 clicks in the arrow
direction HIGH.
One click corresponds to
a half turn of the hand-
wheel. The range of adjust-
ment comprises 15 turns. The
basic setting is based on a
motorcycle with a full fuel
tank and one person weighing
85 kg.c
Adjustments to the
spring preload and shock
absorbers that are not co-ordi-
nated lead to a deterioration in
the handling characteristics of
your motorcycle.
Adapt the damping action of
the spring preload.c
Shock absorbersAdjusting the shock
absorber on the rear
wheelThe damping must be adapted
to the spring preload. An
increase in the spring preload
requires stronger damping, a
reduction in the spring preload
requires softer damping.
• Place the motorcycle on the
centre stand
OA or side
stand, ensuring that the
ground is firm and level.
Page 47 of 162
345Operation
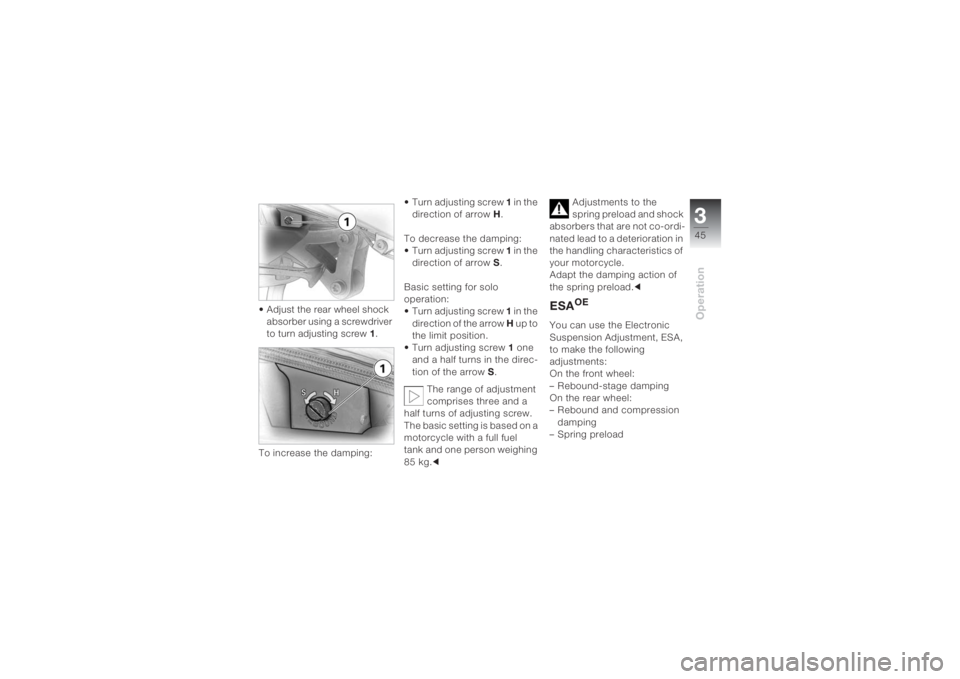
• Adjust the rear wheel shock
absorber using a screwdriver
to turn adjusting screw 1.
To increase the damping:• Turn adjusting screw 1 in the
direction of arrow H.
To decrease the damping:
• Turn adjusting screw 1 in the
direction of arrow S.
Basic setting for solo
operation:
• Turn adjusting screw 1 in the
direction of the arrow H up to
the limit position.
• Turn adjusting screw 1 one
and a half turns in the direc-
tion of the arrow S.
The range of adjustment
comprises three and a
half turns of adjusting screw.
The basic setting is based on a
motorcycle with a full fuel
tank and one person weighing
85 kg.cAdjustments to the
spring preload and shock
absorbers that are not co-ordi-
nated lead to a deterioration in
the handling characteristics of
your motorcycle.
Adapt the damping action of
the spring preload.c
ESA
OE
You can use the Electronic
Suspension Adjustment, ESA,
to make the following
adjustments:
On the front wheel:
– Rebound-stage damping
On the rear wheel:
– Rebound and compression
damping
– Spring preload
Page 48 of 162
Operation346
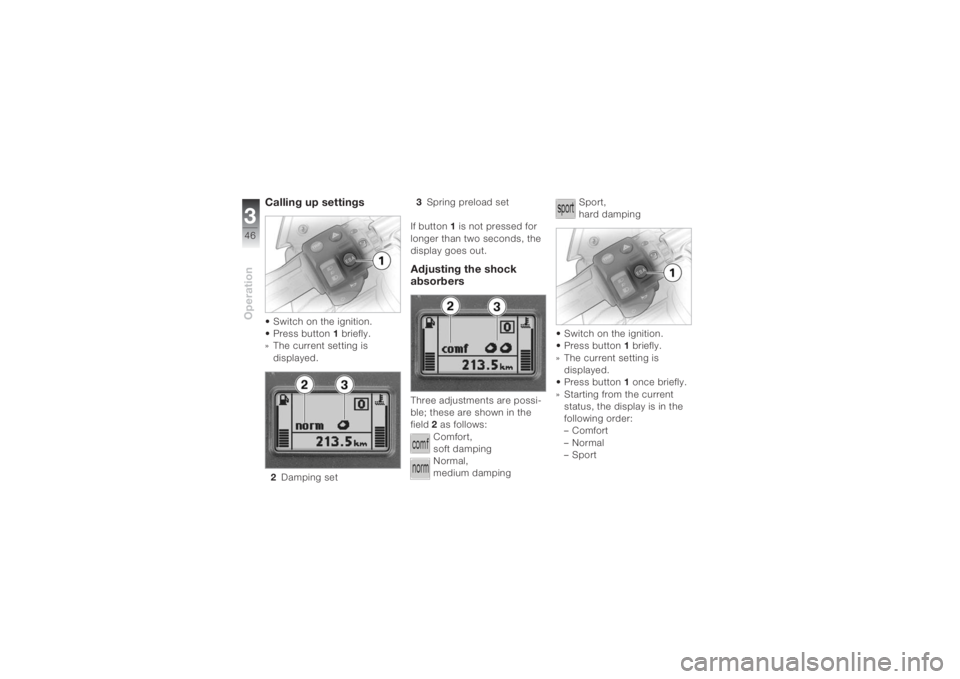
Calling up settings• Switch on the ignition.
• Press button1 briefly.
» The current setting is
displayed.
2Damping set3Spring preload set
If button 1 is not pressed for
longer than two seconds, the
display goes out.
Adjusting the shock
absorbersThree adjustments are possi-
ble; these are shown in the
field2 as follows:
Comfort,
soft damping
Normal,
medium dampingSport,
hard damping
• Switch on the ignition.
• Press button1 briefly.
» The current setting is
displayed.
• Press button1 once briefly.
» Starting from the current
status, the display is in the
following order:
–Comfort
–Normal
–Sport
Page 49 of 162
347Operation
If button1 is not pressed for
longer than one second, the
shock absorbers are set as
displayed.
During the setting procedure,
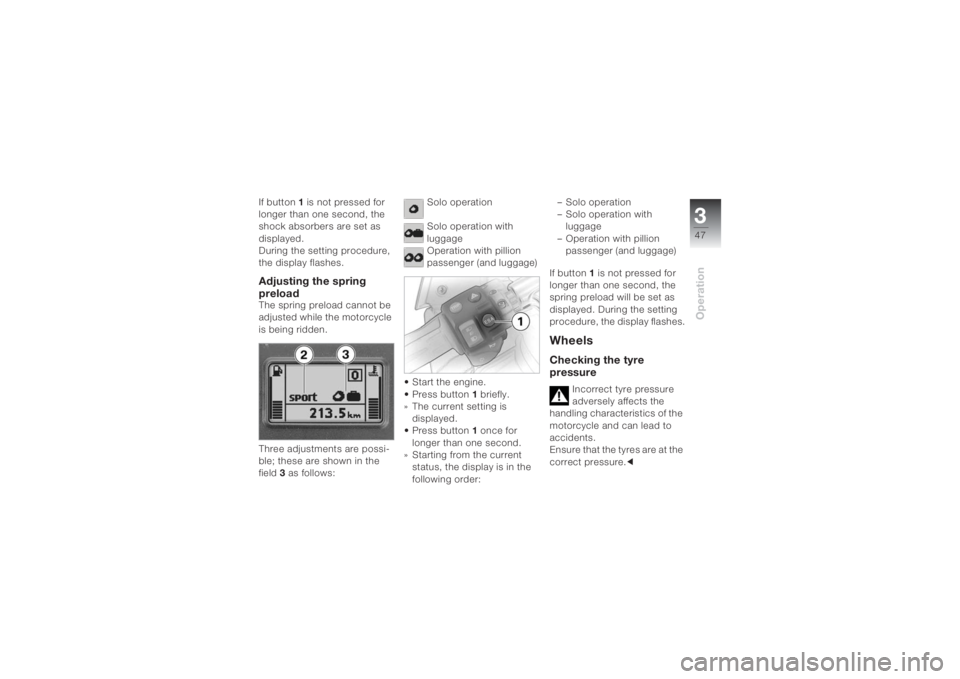
the display flashes.Adjusting the spring
preloadThe spring preload cannot be
adjusted while the motorcycle
is being ridden.
Three adjustments are possi-
ble; these are shown in the
field3 as follows:Solo operation
Solo operation with
luggage
Operation with pillion
passenger (and luggage)
•Start the engine.
• Press button1 briefly.
» The current setting is
displayed.
• Press button1 once for
longer than one second.
» Starting from the current
status, the display is in the
following order:– Solo operation
– Solo operation with
luggage
– Operation with pillion
passenger (and luggage)
If button1 is not pressed for
longer than one second, the
spring preload will be set as
displayed. During the setting
procedure, the display flashes.
WheelsChecking the tyre
pressure
Incorrect tyre pressure
adversely affects the
handling characteristics of the
motorcycle and can lead to
accidents.
Ensure that the tyres are at the
correct pressure.c
Page 50 of 162
Operation348
Incorrect tyre pressure
reduces the operating life
of the tyres.
Ensure that the tyres are at the
correct pressure.c
The tyre pressures required
can be found in the technical
data (b 126).
At high road speeds, tyre
valves have a tendency
to open as a result of centrifu-
gal force.
To avoid sudden loss of tyre
pressure, use a metal valve
cap with rubber sealing ring on
the rear wheel and tighten it
securely.c