BMW X5 4.8IS 2006 E53 Owner's Manual
Manufacturer: BMW, Model Year: 2006, Model line: X5 4.8IS, Model: BMW X5 4.8IS 2006 E53Pages: 202, PDF Size: 4.13 MB
Page 111 of 202
111n
OverviewControlsMaintenanceRepairsDataIndex
Automatic climate control
*
is adequately charged. The LED on the
button will light up when all conditions
have been met.
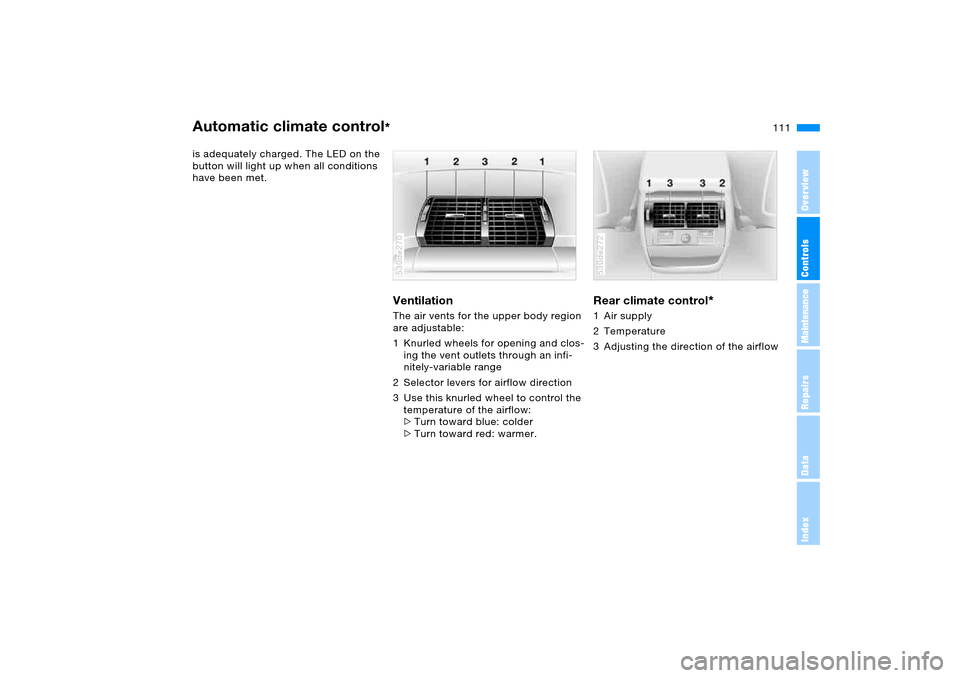
Ventilation The air vents for the upper body region
are adjustable:
1 Knurled wheels for opening and clos-
ing the vent outlets through an infi-
nitely-variable range
2 Selector levers for airflow direction
3 Use this knurled wheel to control the
temperature of the airflow:
>Turn toward blue: colder
>Turn toward red: warmer. 530de270
Rear climate control
*
1 Air supply
2 Temperature
3 Adjusting the direction of the airflow 530de272
Page 112 of 202
112n
Automatic climate control
*
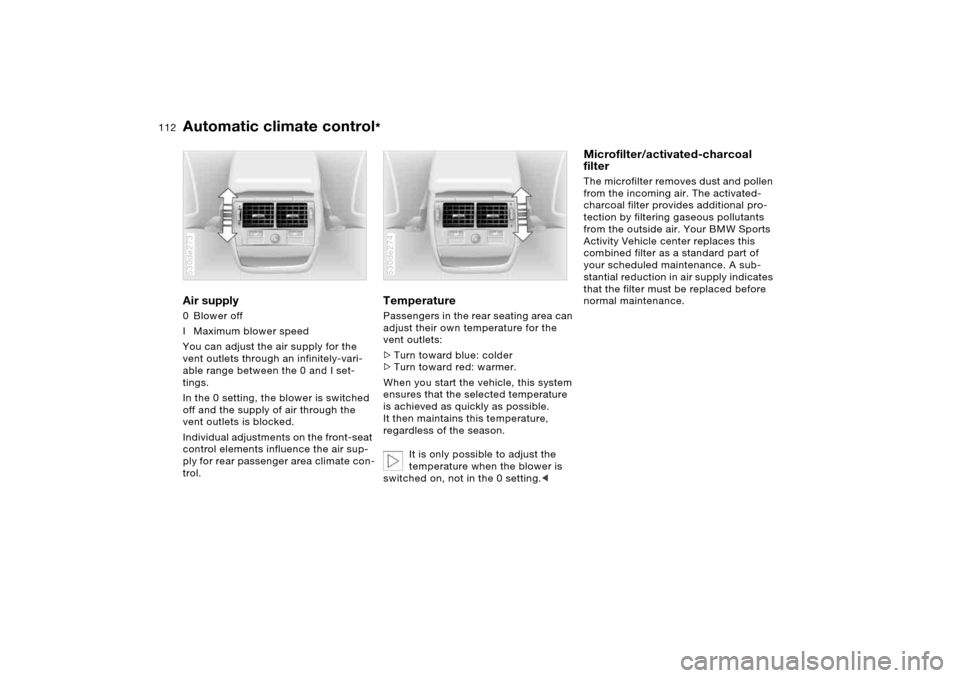
Air supply 0 Blower off
I Maximum blower speed
You can adjust the air supply for the
vent outlets through an infinitely-vari-
able range between the 0 and I set-
tings.
In the 0 setting, the blower is switched
off and the supply of air through the
vent outlets is blocked.
Individual adjustments on the front-seat
control elements influence the air sup-
ply for rear passenger area climate con-
trol. 530de273
Temperature Passengers in the rear seating area can
adjust their own temperature for the
vent outlets:
>Turn toward blue: colder
>Turn toward red: warmer.
When you start the vehicle, this system
ensures that the selected temperature
is achieved as quickly as possible.
It then maintains this temperature,
regardless of the season.
It is only possible to adjust the
temperature when the blower is
switched on, not in the 0 setting.< 530de274
Microfilter/activated-charcoal
filter The microfilter removes dust and pollen
from the incoming air. The activated-
charcoal filter provides additional pro-
tection by filtering gaseous pollutants
from the outside air. Your BMW Sports
Activity Vehicle center replaces this
combined filter as a standard part of
your scheduled maintenance. A sub-
stantial reduction in air supply indicates
that the filter must be replaced before
normal maintenance.
Page 113 of 202
113n
OverviewControlsMaintenanceRepairsDataIndex
Roller sun blinds
*
Parked car ventilation
*
Roller sun blinds for rear side
windows
*
Use the strap to pull out the blinds, then
hook them in the attachment provided.
With roller sun blinds attached,
do not open the windows during
travel. The blinds may otherwise be
damaged by the wind.<
You can use this system to ventilate the
interior and lower its temperature, using
the blower of the parked car ventilation
or of the automatic climate control.
The parked car ventilation is operated
via the MID Multi-Information Display,
refer to page84 or via the onboard
computer, refer to the separate
Owner's Manual.
You can set two different times for the
system to start; it will remain active for
30 minutes. You can also switch it on
and off directly. Since the system uses
a substantial amount of electrical cur-
rent, you should refrain from switching
it on twice in succession without allow-
ing the battery to be recharged in nor-
mal operation between uses.When a preselected activation time is
set, the parked car ventilation is opera-
tional at outside temperatures above
approx. 607/166, or by direct switch
activation.
The air enters the passenger compart-
ment through the vent outlets in the
instrument cluster, which can be
adjusted for both direction and airflow.
The vent outlets must therefore be open
for the system to operate.
Page 114 of 202
114n
The concept The integrated universal remote control
can replace as many as three hand-
held transmitters for various remote-
controlled accessories, such as door
openers and house alarm systems. The
integrated universal remote control rec-
ognizes and learns the transmitted sig-
nal of each of the original hand-held
transmitters.
The signal of an original hand-held
transmitter can be programmed on one
of the three memory buttons 1. Follow-
ing that, each of the devices can be
actuated with the appropriately-pro-
grammed memory button 1. The LED 2
flashes to confirm transmission of the
signal.
Should you sell your vehicle one day,
be sure to delete the stored programs
beforehand for your safety, refer to
page116. To prevent possible damage or
injury, before programming or
using the integrated universal remote
control, always inspect the immediate
area to make certain that no people,
animals or objects are within the travel
range of the device. Also, comply with
the safety precautions of the original
hand-held transmitter.<
To Canadian residents:
During programming, your hand-
held transmitter may automatically stop
transmitting after two seconds, which
may not be long enough to program the
integrated universal remote control. If
you are programming from one of these
hand-held transmitters, the Universal
Transmitter's light may begin to flash in
a series of double-blinks. If this occurs,
continue to hold the button of the inte-
grated universal remote control while
you reactivate your hand-held transmit-
ter. You may have to repeat this func-
tion several times while programming.<
Checking compatibility
If you see this symbol on the
packaging or in the manual sup-
plied with the original hand-held
transmitter, it is safe to assume that it is
compatible with the integrated universal
remote control.
A list of compatible hand transmitters
is available via fax polling by calling
+49 (0)6838 907283 3333. For details,
please call the toll-free HomeLink
Hotline at +49 (0)6838 907 277 or
0800 0466 35465 in Germany.
HomeLink is a registered trademark of
Johnson Controls.
Integrated universal remote control
*
Page 115 of 202
115n
OverviewControlsMaintenanceRepairsDataIndex
Integrated universal remote control
*
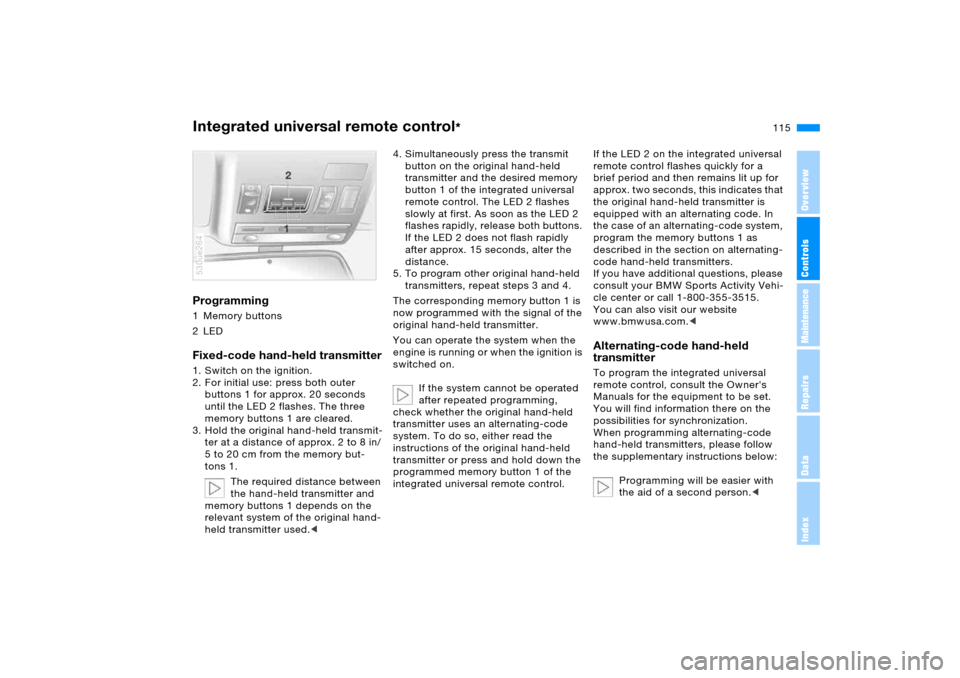
Programming 1Memory buttons
2LEDFixed-code hand-held transmitter1. Switch on the ignition.
2. For initial use: press both outer
buttons 1 for approx. 20 seconds
until the LED 2 flashes. The three
memory buttons 1 are cleared.
3. Hold the original hand-held transmit-
ter at a distance of approx. 2 to 8 in/
5 to 20 cm from the memory but-
tons 1.
The required distance between
the hand-held transmitter and
memory buttons 1 depends on the
relevant system of the original hand-
held transmitter used.<530ue264
4. Simultaneously press the transmit
button on the original hand-held
transmitter and the desired memory
button 1 of the integrated universal
remote control. The LED 2 flashes
slowly at first. As soon as the LED 2
flashes rapidly, release both buttons.
If the LED 2 does not flash rapidly
after approx. 15 seconds, alter the
distance.
5. To program other original hand-held
transmitters, repeat steps 3 and 4.
The corresponding memory button 1 is
now programmed with the signal of the
original hand-held transmitter.
You can operate the system when the
engine is running or when the ignition is
switched on.
If the system cannot be operated
after repeated programming,
check whether the original hand-held
transmitter uses an alternating-code
system. To do so, either read the
instructions of the original hand-held
transmitter or press and hold down the
programmed memory button 1 of the
integrated universal remote control.
If the LED 2 on the integrated universal
remote control flashes quickly for a
brief period and then remains lit up for
approx. two seconds, this indicates that
the original hand-held transmitter is
equipped with an alternating code. In
the case of an alternating-code system,
program the memory buttons 1 as
described in the section on alternating-
code hand-held transmitters.
If you have additional questions, please
consult your BMW Sports Activity Vehi-
cle center or call 1-800-355-3515.
You can also visit our website
www.bmwusa.com.
remote control, consult the Owner's
Manuals for the equipment to be set.
You will find information there on the
possibilities for synchronization.
When programming alternating-code
hand-held transmitters, please follow
the supplementary instructions below:
Programming will be easier with
the aid of a second person.<
Page 116 of 202
116n
Integrated universal remote control
*
Car phone
*
1. Park your vehicle within the range of
the remote-controlled device
2. Program the integrated universal
remote control as described at the
section on fixed-code hand-held
transmitters
3. Locate the button on the receiver of
the device you want to set up, e.g. on
the upper section of the motor
4. Press the button on the receiver of
the device you want to set up. After
step 4, you have approx. 30 seconds
for step 5
5. Press the programmed memory
button 1 on the integrated universal
remote control three times.
The corresponding memory button 1 is
now programmed with the signal of the
original hand-held transmitter.
If you have any additional ques-
tions, please contact your BMW
Sports Activity Vehicle center.<
Clearing memory buttonsIt is not possible to clear memory but-
tons 1 individually. To clear all three
memory buttons 1, proceed as follows:
Press both outer buttons 1 of the inte-
grated universal remote control for
approx. 20 seconds, maintaining pres-
sure until the LED 2 starts to flash.
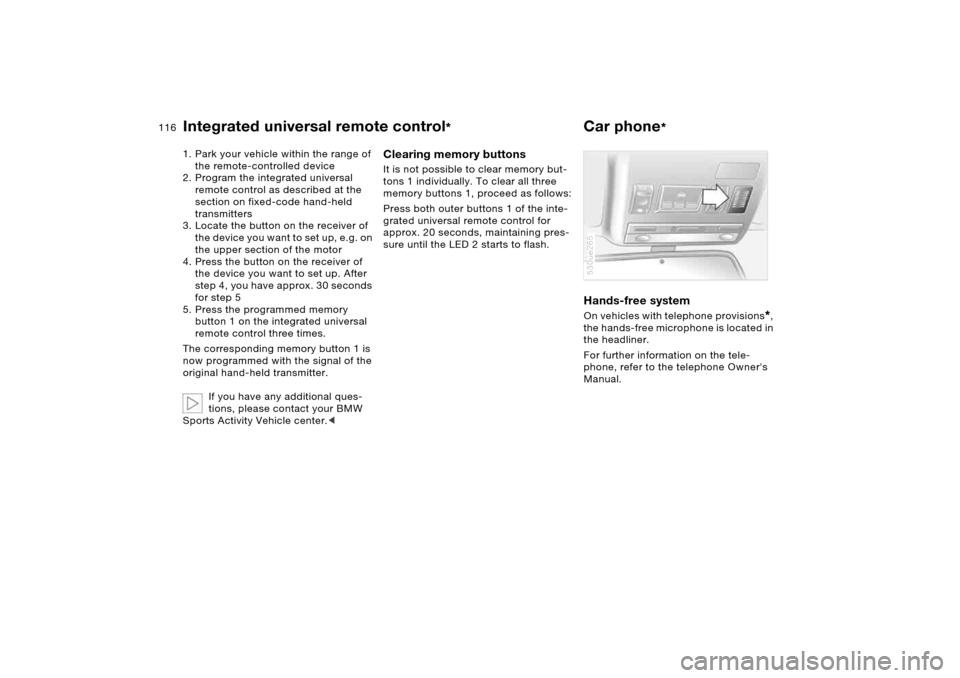
Hands-free system On vehicles with telephone provisions
*,
the hands-free microphone is located in
the headliner.
For further information on the tele-
phone, refer to the telephone Owner's
Manual.
530ue265
Page 117 of 202
117n
OverviewControlsMaintenanceRepairsDataIndex
Interior rearview mirror with digital compass
*
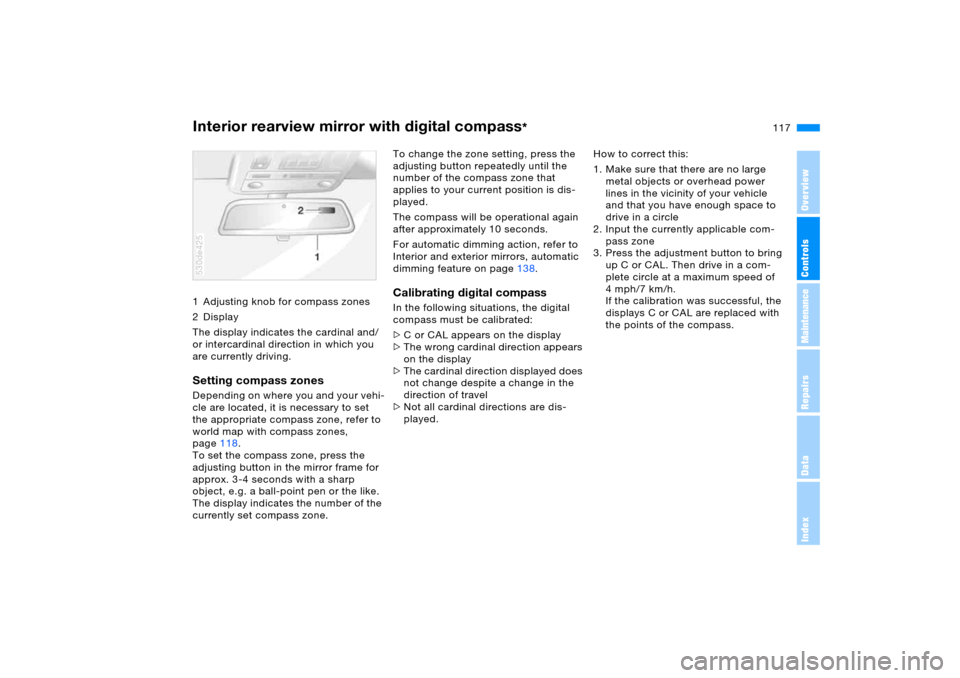
1 Adjusting knob for compass zones
2Display
The display indicates the cardinal and/
or intercardinal direction in which you
are currently driving.Setting compass zonesDepending on where you and your vehi-
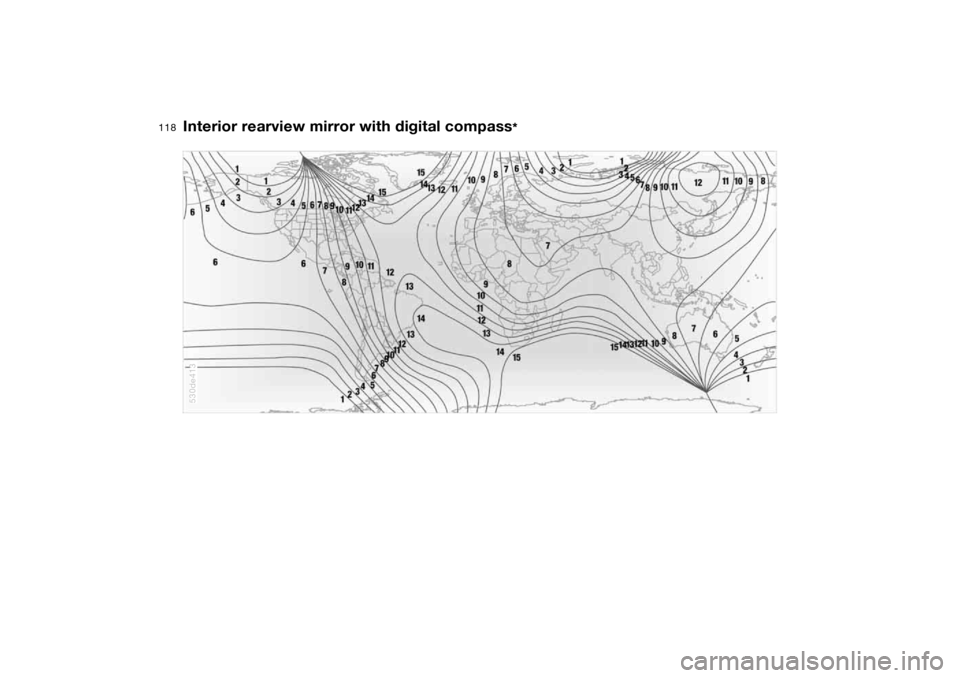
cle are located, it is necessary to set
the appropriate compass zone, refer to
world map with compass zones,
page118.
To set the compass zone, press the
adjusting button in the mirror frame for
approx. 3-4 seconds with a sharp
object, e.g. a ball-point pen or the like.
The display indicates the number of the
currently set compass zone.530de425
To change the zone setting, press the
adjusting button repeatedly until the
number of the compass zone that
applies to your current position is dis-
played.
The compass will be operational again
after approximately 10 seconds.
For automatic dimming action, refer to
Interior and exterior mirrors, automatic
dimming feature on page138.Calibrating digital compassIn the following situations, the digital
compass must be calibrated:
>C or CAL appears on the display
>The wrong cardinal direction appears
on the display
>The cardinal direction displayed does
not change despite a change in the
direction of travel
>Not all cardinal directions are dis-
played.How to correct this:
1. Make sure that there are no large
metal objects or overhead power
lines in the vicinity of your vehicle
and that you have enough space to
drive in a circle
2. Input the currently applicable com-
pass zone
3. Press the adjustment button to bring
up C or CAL. Then drive in a com-
plete circle at a maximum speed of
4mph/7km/h.
If the calibration was successful, the
displays C or CAL are replaced with
the points of the compass.
Page 118 of 202
118n
Interior rearview mirror with digital compass
*
530de413
Page 119 of 202
119n
OverviewControlsMaintenanceRepairsDataIndex
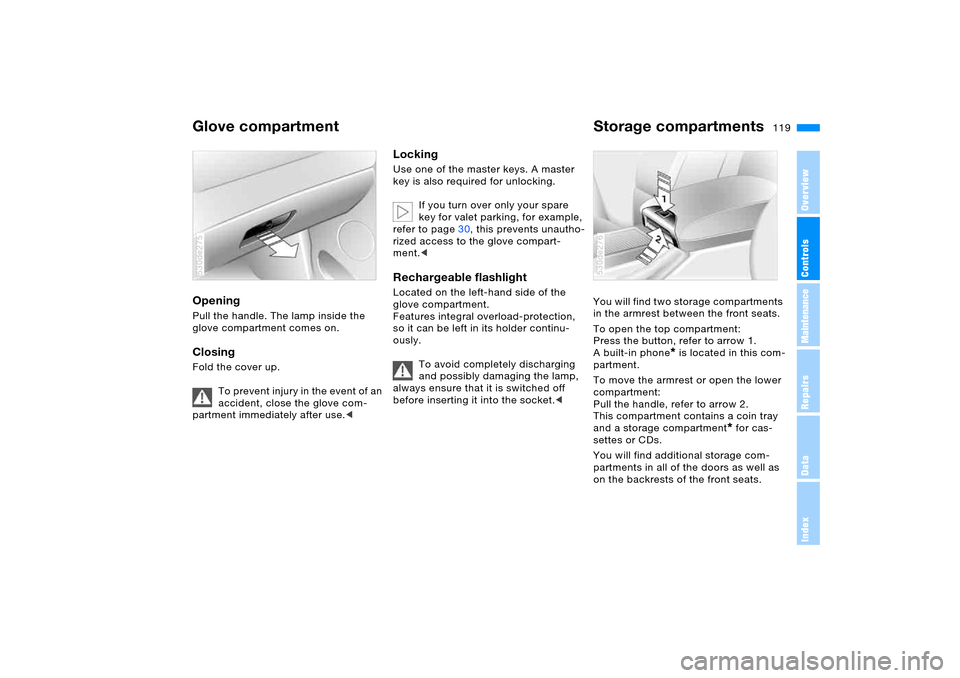
Glove compartment Storage compartments Opening Pull the handle. The lamp inside the
glove compartment comes on.Closing Fold the cover up.
To prevent injury in the event of an
accident, close the glove com-
partment immediately after use.< 530de275
Locking Use one of the master keys. A master
key is also required for unlocking.
If you turn over only your spare
key for valet parking, for example,
refer to page30, this prevents unautho-
rized access to the glove compart-
ment.< Rechargeable flashlight Located on the left-hand side of the
glove compartment.
Features integral overload-protection,
so it can be left in its holder continu-
ously.
To avoid completely discharging
and possibly damaging the lamp,
always ensure that it is switched off
before inserting it into the socket.<
You will find two storage compartments
in the armrest between the front seats.
To open the top compartment:
Press the button, refer to arrow 1.
A built-in phone
* is located in this com-
partment.
To move the armrest or open the lower
compartment:
Pull the handle, refer to arrow 2.
This compartment contains a coin tray
and a storage compartment
* for cas-
settes or CDs.
You will find additional storage com-
partments in all of the doors as well as
on the backrests of the front seats.
530de276
Page 120 of 202
120n
Storage compartments Cup holders Clothes hooks
When suspending clothing from
the hooks, ensure that it will not
obstruct the driver's vision. Do not hang
heavy objects on the hooks. If you do
so, they could cause endanger passen-
gers during braking or evasive maneu-
vers.<
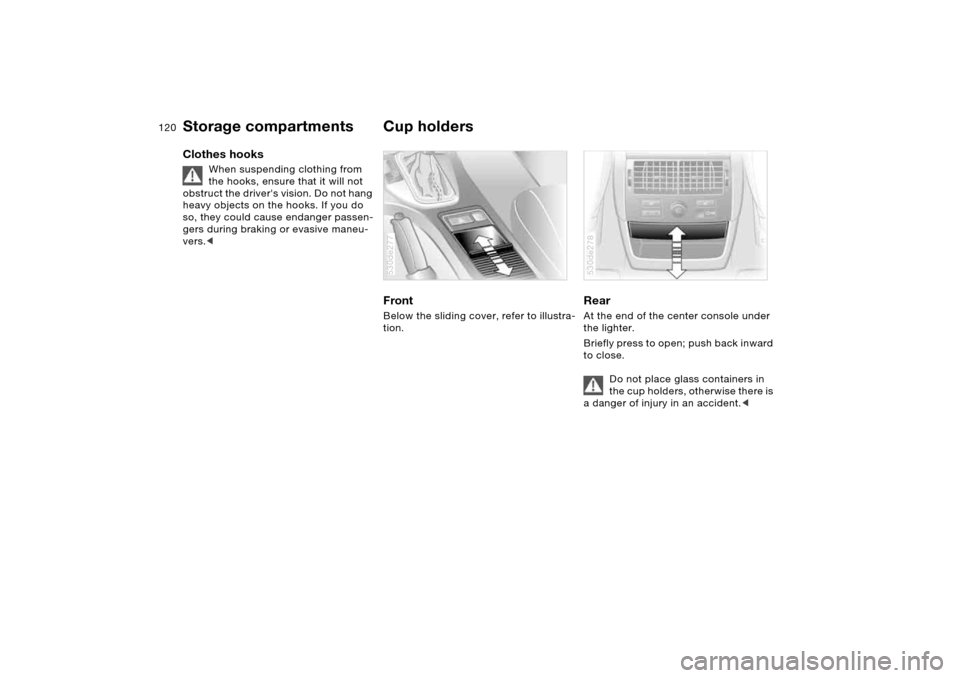
Front Below the sliding cover, refer to illustra-
tion.530de277
RearAt the end of the center console under
the lighter.
Briefly press to open; push back inward
to close.
Do not place glass containers in
the cup holders, otherwise there is
a danger of injury in an accident.< 530de278