BMW Z8 CONVERTIBLE 2002 Service Manual
Manufacturer: BMW, Model Year: 2002, Model line: Z8 CONVERTIBLE, Model: BMW Z8 CONVERTIBLE 2002Pages: 174, PDF Size: 2.37 MB
Page 41 of 174
41n
IndexDataTechnologyRepairsCar careControlsOverview
The automatic convertible topWeather protectionThe fabric convertible top combines
reliable protection from the elements
with simple, convenient operation. Here
are a few tips to ensure that you enjoy
your BMW Z8 roadster.
It is advisable to close the convertible
top when the vehicle is parked. The
closed convertible top not only protects
the passenger compartment from
unforeseeable damage from the
weather, it also provides a certain
degree of theft protection. Even if the
convertible top is closed, store your
valuables only in the locked luggage
compartment.
To prevent damage to its rear window,
avoid opening or closing the fabric top
unless the temperature is well above
freezing. Operate the convertible top only
when the vehicle is stationary,
otherwise the procedure will be inter-
rupted. Driving before the opening or
closing procedure has been properly
concluded can lead to damage or
injury.
Do not lay objects on the convertible
top, since they would fall off when the
convertible top is operated and cause
damage or injuries.
Make sure that no objects or people get
in the way while the convertible top is
opening or closing, so that no damage
or injuries occur.
The automatic operating procedure is
interrupted immediately if the switch
for actuating the top is released. The
procedure can be continued in the
desired direction by pressing this
switch.<
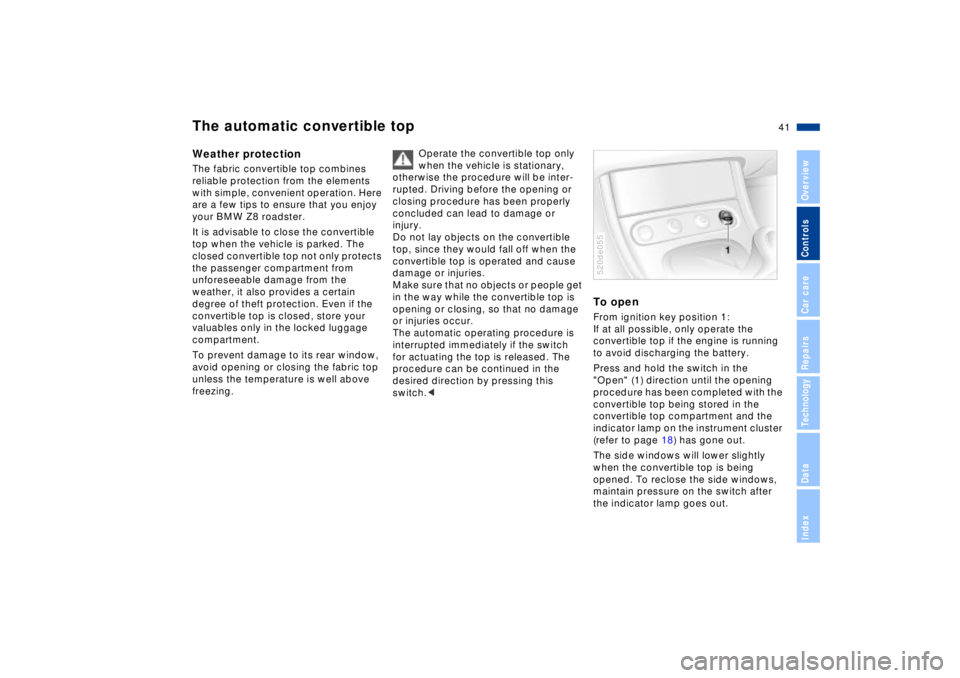
To openFrom ignition key position 1:
If at all possible, only operate the
convertible top if the engine is running
to avoid discharging the battery.
Press and hold the switch in the
"Open" (1) direction until the opening
procedure has been completed with the
convertible top being stored in the
convertible top compartment and the
indicator lamp on the instrument cluster
(refer to page 18) has gone out.
The side windows will lower slightly
when the convertible top is being
opened. To reclose the side windows,
maintain pressure on the switch after
the indicator lamp goes out. 520de055
Page 42 of 174
42n
The automatic convertible topThe indicator lamp stays on while the
convertible top is in motion. If the
opening procedure has not been
completed, the indicator lamp will blink
after you release the switch.
In order to avoid subsequent
moisture damage, do not leave
the convertible top retracted when it is
wet (refer also to the chapter on vehicle
care beginning on page 118).<
To mount the cover
In order to avoid damage or
getting dirt on the inside of the
convertible top, always drive with the
convertible top cover installed.<
Remove the folded cover from the
luggage compartment and extract it
from its protective slip case.
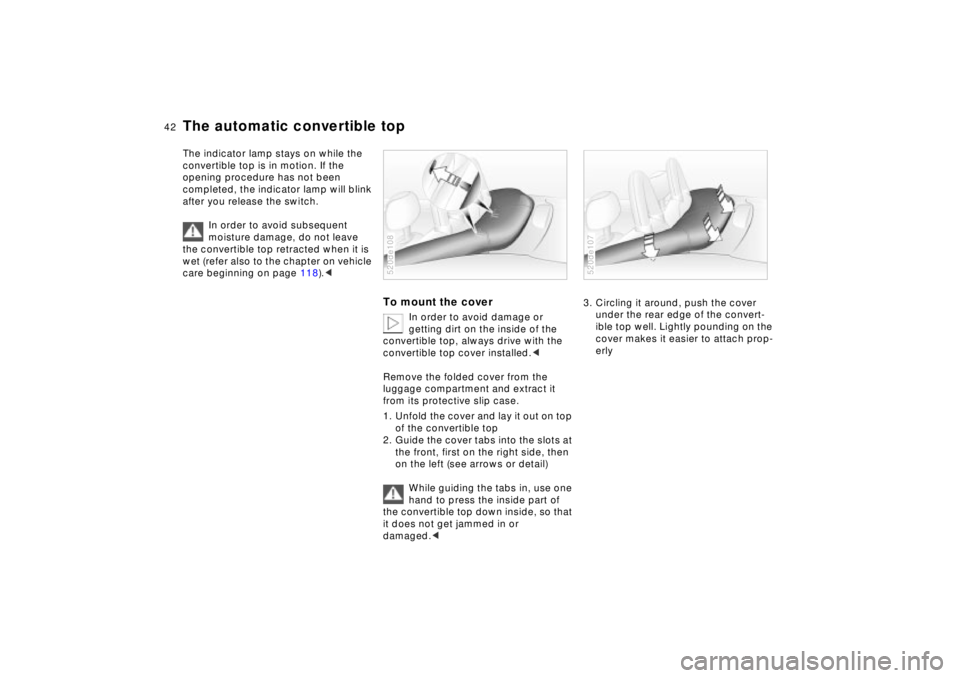
1. Unfold the cover and lay it out on top
of the convertible top
2. Guide the cover tabs into the slots at
the front, first on the right side, then
on the left (see arrows or detail)
While guiding the tabs in, use one
hand to press the inside part of
the convertible top down inside, so that
it does not get jammed in or
damaged.<
520de108
3. Circling it around, push the cover
under the rear edge of the convert-
ible top well. Lightly pounding on the
cover makes it easier to attach prop-
erly520de107
Page 43 of 174
43n
IndexDataTechnologyRepairsCar careControlsOverview
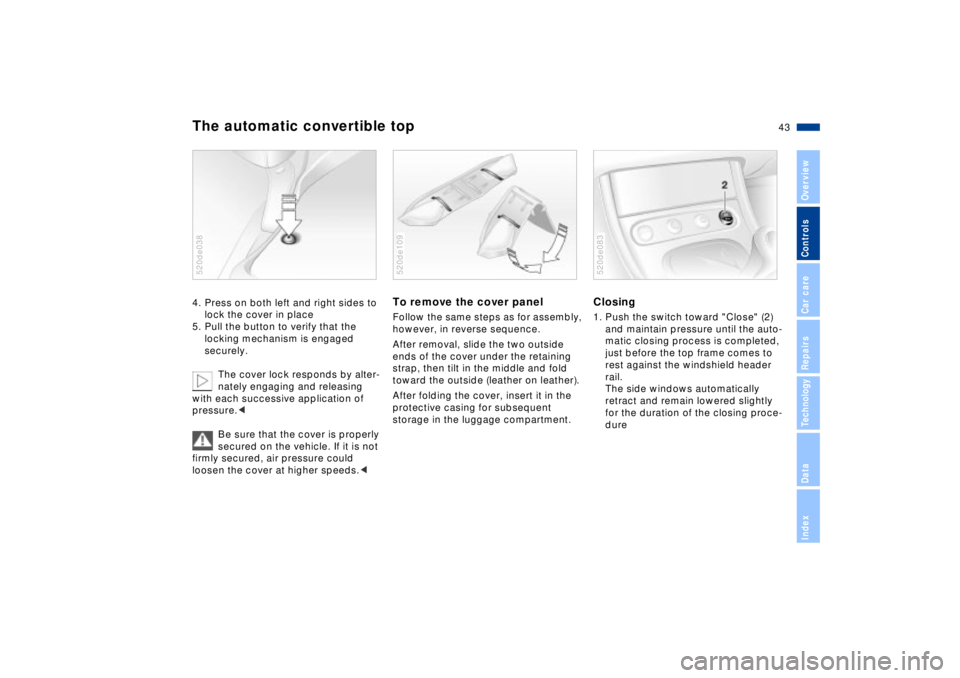
The automatic convertible top4. Press on both left and right sides to
lock the cover in place
5. Pull the button to verify that the
locking mechanism is engaged
securely.
The cover lock responds by alter-
nately engaging and releasing
with each successive application of
pressure.<
Be sure that the cover is properly
secured on the vehicle. If it is not
firmly secured, air pressure could
loosen the cover at higher speeds.<520de038
To remove the cover panelFollow the same steps as for assembly,
however, in reverse sequence.
After removal, slide the two outside
ends of the cover under the retaining
strap, then tilt in the middle and fold
toward the outside (leather on leather).
After folding the cover, insert it in the
protective casing for subsequent
storage in the luggage compartment.520de109
Closing1. Push the switch toward "Close" (2)
and maintain pressure until the auto-
matic closing process is completed,
just before the top frame comes to
rest against the windshield header
rail.
The side windows automatically
retract and remain lowered slightly
for the duration of the closing proce-
dure520de083
Page 44 of 174
44n
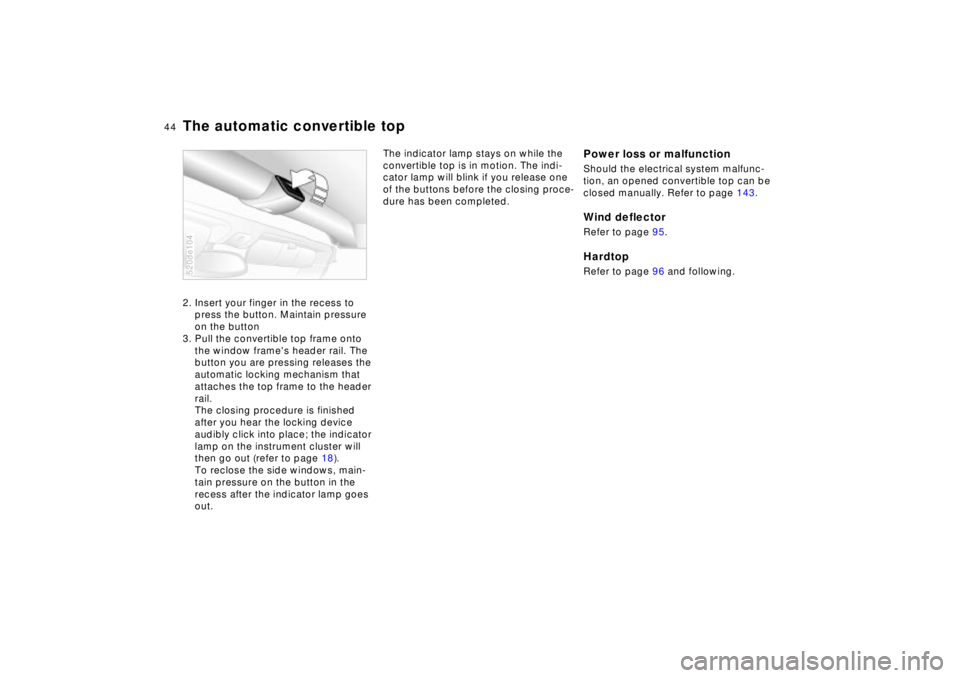
The automatic convertible top2. Insert your finger in the recess to
press the button. Maintain pressure
on the button
3. Pull the convertible top frame onto
the window frame's header rail. The
button you are pressing releases the
automatic locking mechanism that
attaches the top frame to the header
rail.
The closing procedure is finished
after you hear the locking device
audibly click into place; the indicator
lamp on the instrument cluster will
then go out (refer to page 18).
To reclose the side windows, main-
tain pressure on the button in the
recess after the indicator lamp goes
out. 520de104
The indicator lamp stays on while the
convertible top is in motion. The indi-
cator lamp will blink if you release one
of the buttons before the closing proce-
dure has been completed.
Power loss or malfunctionShould the electrical system malfunc-
tion, an opened convertible top can be
closed manually. Refer to page 143.Wind deflectorRefer to page 95.HardtopRefer to page 96 and following.
Page 45 of 174
45n
IndexDataTechnologyRepairsCar careControlsOverview
For maximum safety when adjusting the
seating position, please observe the
following:
Never try to adjust your seat while
driving the vehicle. The seat could
respond with un unexpected move-
ment, and the ensuing loss of vehicle
control could lead to an accident.
Be sure that the safety belt remains
firmly against your body at all times. In
the event of a frontal impact, a loose lap
belt could slide over the hips, leading to
abdominal injury. In addition, the safety
belt's restraint effectiveness is reduced
if the belt is worn loosely.
Never ride with the backrest reclined to
an extreme angle (especially important
for the passenger to remember). If you
do so, there is a risk that you will slide
under the safety belt in an accident,
thus reducing the protection provided
by the safety belt.<
Correct sitting postureTo reduce strain on the spinal column,
sit all the way back in the seat and rest
your back fully against the backrest.
The ideal sitting posture is achieved
with your head extending from your
spine in a straight line.
For long-distance driving, you may wish
to increase the backrest tilt-angle
slightly to reduce muscular tension.
You should be able to grasp the
steering wheel at its highest point with
your arms slightly bent.
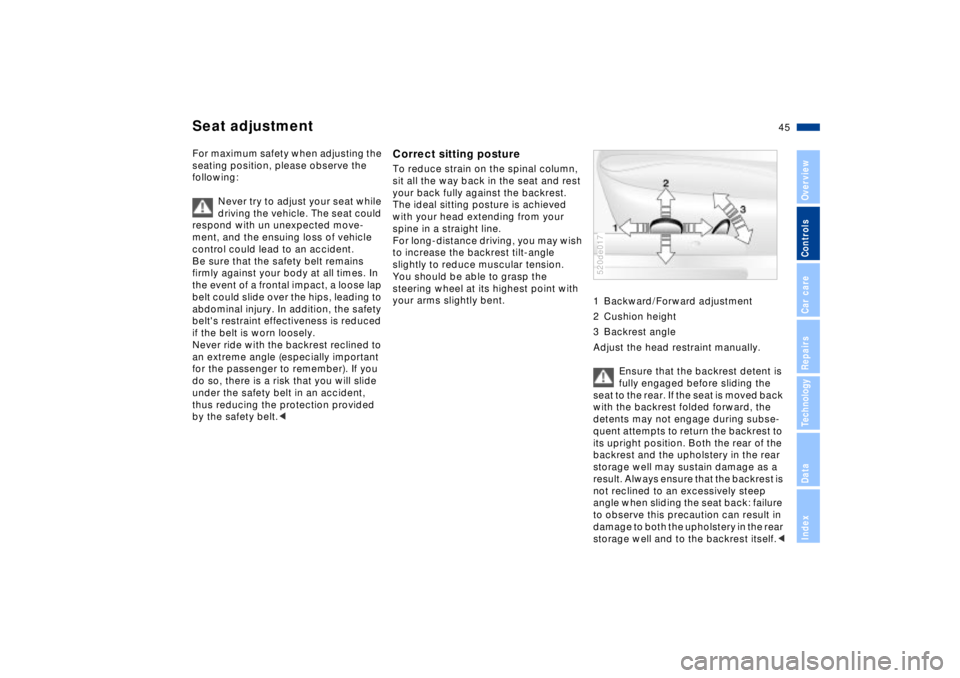
1 Backward/Forward adjustment
2 Cushion height
3 Backrest angle
Adjust the head restraint manually.
Ensure that the backrest detent is
fully engaged before sliding the
seat to the rear. If the seat is moved back
with the backrest folded forward, the
detents may not engage during subse-
quent attempts to return the backrest to
its upright position. Both the rear of the
backrest and the upholstery in the rear
storage well may sustain damage as a
result. Always ensure that the backrest is
not reclined to an excessively steep
angle when sliding the seat back: failure
to observe this precaution can result in
damage to both the upholstery in the rear
storage well and to the backrest itself.<
520de017
Seat adjustment
Page 46 of 174
46n
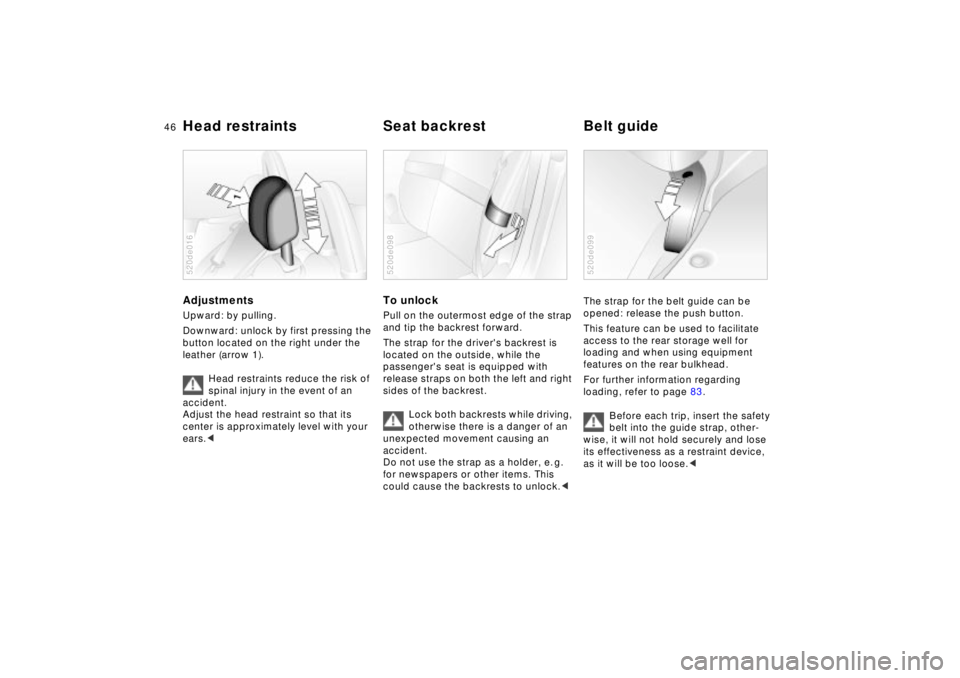
Head restraints Seat backrest Belt guideAdjustments Upward: by pulling.
Downward: unlock by first pressing the
button located on the right under the
leather (arrow 1).
Head restraints reduce the risk of
spinal injury in the event of an
accident.
Adjust the head restraint so that its
center is approximately level with your
ears.<520de016
To unlockPull on the outermost edge of the strap
and tip the backrest forward.
The strap for the driver's backrest is
located on the outside, while the
passenger's seat is equipped with
release straps on both the left and right
sides of the backrest.
Lock both backrests while driving,
otherwise there is a danger of an
unexpected movement causing an
accident.
Do not use the strap as a holder, e. g.
for newspapers or other items. This
could cause the backrests to unlock.<520de098
The strap for the belt guide can be
opened: release the push button.
This feature can be used to facilitate
access to the rear storage well for
loading and when using equipment
features on the rear bulkhead.
For further information regarding
loading, refer to page 83.
Before each trip, insert the safety
belt into the guide strap, other-
wise, it will not hold securely and lose
its effectiveness as a restraint device,
as it will be too loose.<520de099
Page 47 of 174
47n
IndexDataTechnologyRepairsCar careControlsOverview
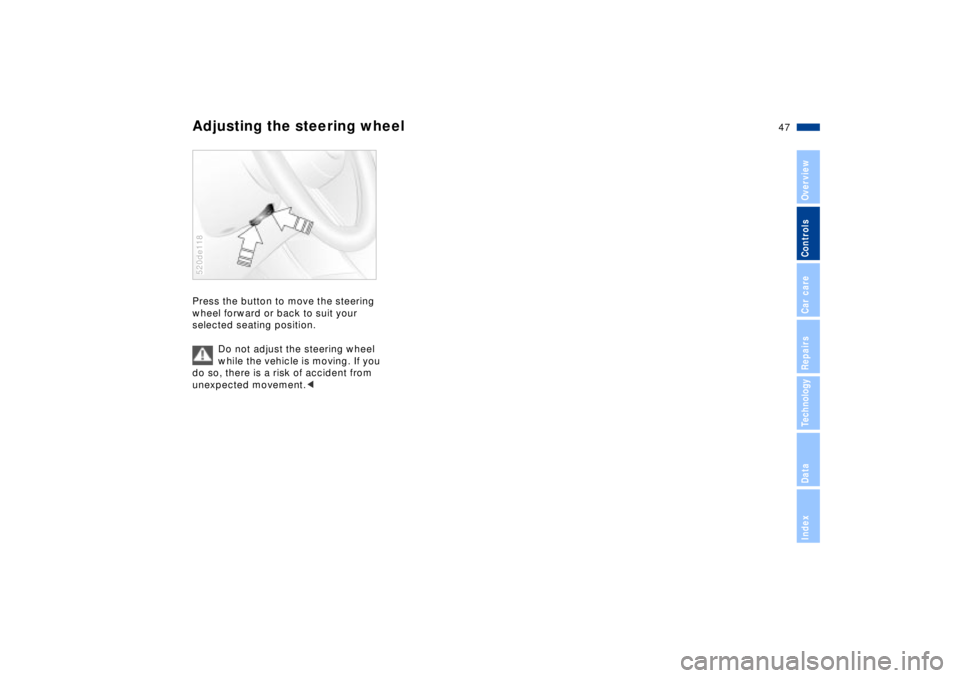
Adjusting the steering wheelPress the button to move the steering
wheel forward or back to suit your
selected seating position.
Do not adjust the steering wheel
while the vehicle is moving. If you
do so, there is a risk of accident from
unexpected movement.<520de118
Page 48 of 174
48n
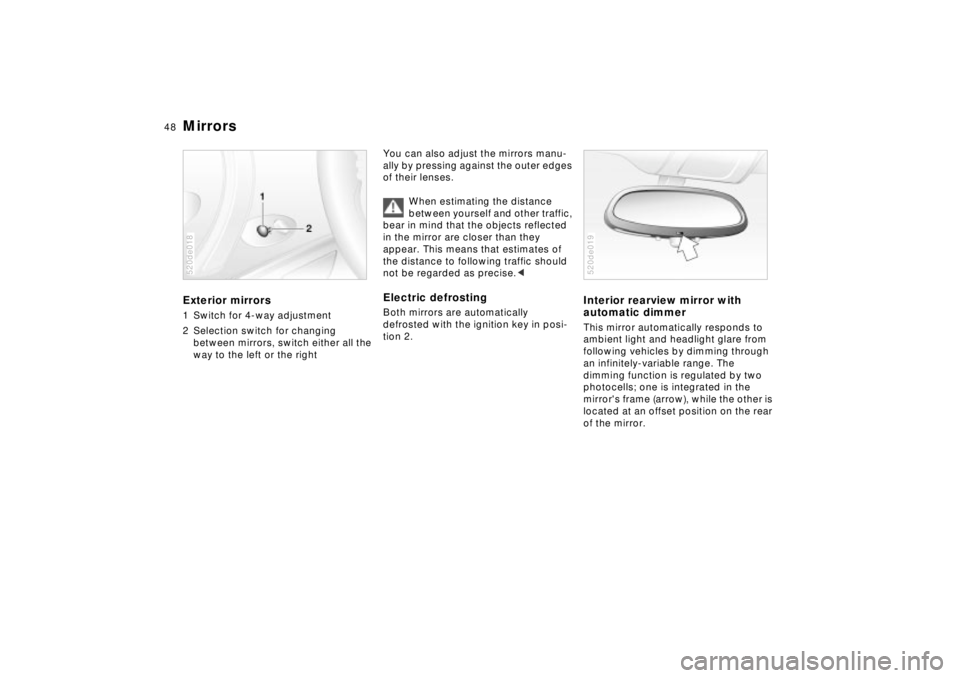
Mirrors Exterior mirrors1 Switch for 4-way adjustment
2 Selection switch for changing
between mirrors, switch either all the
way to the left or the right520de018
You can also adjust the mirrors manu-
ally by pressing against the outer edges
of their lenses.
When estimating the distance
between yourself and other traffic,
bear in mind that the objects reflected
in the mirror are closer than they
appear. This means that estimates of
the distance to following traffic should
not be regarded as precise.
tion 2.
Interior rearview mirror with
automatic dimmer This mirror automatically responds to
ambient light and headlight glare from
following vehicles by dimming through
an infinitely-variable range. The
dimming function is regulated by two
photocells; one is integrated in the
mirror's frame (arrow), while the other is
located at an offset position on the rear
of the mirror. 520de019
Page 49 of 174

49n
IndexDataTechnologyRepairsCar careControlsOverview
Mirrors Vehicle Memory, Key MemoryThe mirror switches to its clear,
undimmed mode whenever you shift
into reverse.
For trouble-free operation, keep the
photocells clean and do not cover the
area between the interior rearview
mirror and the windshield. Do not
attach any kind of stickers on the wind-
shield in front of the mirror, either.
For a more detailed explanation of the
electrochromatic technology used in
this mirror, please refer to page 153.
The conceptNo doubt you have reflected at one
time or another on how great it would
be if you could permanently configure
your vehicle's various features and
adjustments to mirror your own indi-
vidual preferences. In developing the
Z8, BMW has incorporated a number of
options for personal adjustment that
can be programmed into your vehicle
by your BMW center.
The available configuration data fall into
two categories, according to whether
their primary orientation is the vehicle
("Vehicle Memory") or the individual
("Key Memory"). Provided that each
person has a separate remote-control
key, you can have your BMW center
enter adjustment data for as many as
four different individuals into the
system.
The system then relies on a bilateral
data exchange to identify the individual
user and dial in the selected settings
whenever the remote-control unit is
used to disengage the door locks.
What the system can doYour BMW center can provide you with
details on the capabilities of the Vehicle
Memory and Key Memory systems.
Below a few examples:
A Vehicle Memory sampler:
>Various signals to confirm release
and engagement of the vehicle's
locks.
>Activate/deactivate the "Follow me
home" lamps.
A Key Memory sampler:
>Engage vehicle locks as soon as the
vehicle is underway.
At various points throughout this
Owner's Manual you will find this
symbol, indicating that the equipment
or system described in the adjacent
section can be preset for automatic
adjustment using the Vehicle or Key
Memory.<
Page 50 of 174
50n
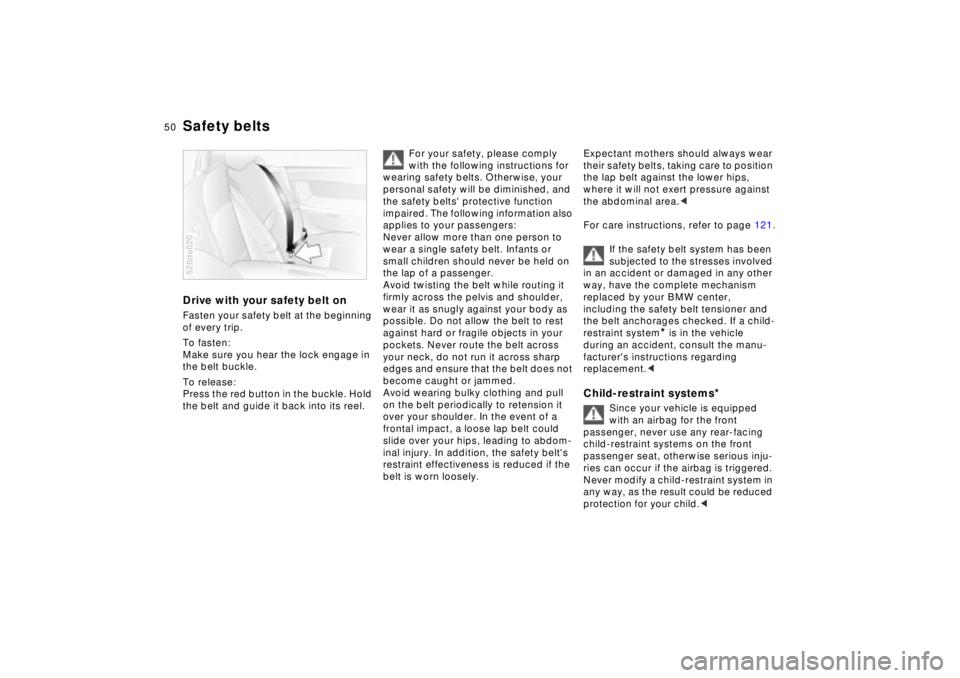
Drive with your safety belt onFasten your safety belt at the beginning
of every trip.
To fasten:
Make sure you hear the lock engage in
the belt buckle.
To release:
Press the red button in the buckle. Hold
the belt and guide it back into its reel. 520de020
For your safety, please comply
with the following instructions for
wearing safety belts. Otherwise, your
personal safety will be diminished, and
the safety belts' protective function
impaired. The following information also
applies to your passengers:
Never allow more than one person to
wear a single safety belt. Infants or
small children should never be held on
the lap of a passenger.
Avoid twisting the belt while routing it
firmly across the pelvis and shoulder,
wear it as snugly against your body as
possible. Do not allow the belt to rest
against hard or fragile objects in your
pockets. Never route the belt across
your neck, do not run it across sharp
edges and ensure that the belt does not
become caught or jammed.
Avoid wearing bulky clothing and pull
on the belt periodically to retension it
over your shoulder. In the event of a
frontal impact, a loose lap belt could
slide over your hips, leading to abdom-
inal injury. In addition, the safety belt's
restraint effectiveness is reduced if the
belt is worn loosely.
Expectant mothers should always wear
their safety belts, taking care to position
the lap belt against the lower hips,
where it will not exert pressure against
the abdominal area.<
For care instructions, refer to page 121.
If the safety belt system has been
subjected to the stresses involved
in an accident or damaged in any other
way, have the complete mechanism
replaced by your BMW center,
including the safety belt tensioner and
the belt anchorages checked. If a child-
restraint system
* is in the vehicle
during an accident, consult the manu-
facturer's instructions regarding
replacement.<
Child-restraint systems
*
Since your vehicle is equipped
with an airbag for the front
passenger, never use any rear-facing
child-restraint systems on the front
passenger seat, otherwise serious inju-
ries can occur if the airbag is triggered.
Never modify a child-restraint system in
any way, as the result could be reduced
protection for your child.<
Safety belts