BUICK PARK AVENUE 1997 Owners Manual
Manufacturer: BUICK, Model Year: 1997, Model line: PARK AVENUE, Model: BUICK PARK AVENUE 1997Pages: 420, PDF Size: 21.93 MB
Page 111 of 420
Press the button at the base of the mirror to turn on the
automatic feature. The button has an indicator light to
show it
is on. Press the button again to turn the
automatic feature
off.
Time Delay
The automatic mirror has a time delay feature which
prevents unnecessary switching from the night back to
the day position. This delay prevents rapid changing
of
the mirror as you drive under lights and through traffic.
Reverse Gear Day Mode
The reverse day mode is another important feature of the
electrochromic mirror. When the shift lever
is placed in
REVERSE (R), the mirror changes to the day mode.
This gives you a bright image in the mirror as you
back up.
Cleaning the Photocells
Use a cotton swab and glass cleaner to clean the
photocells when necessary.
Electrochromic Daymight Rearview Mirror
with Compass
(If Equipped)
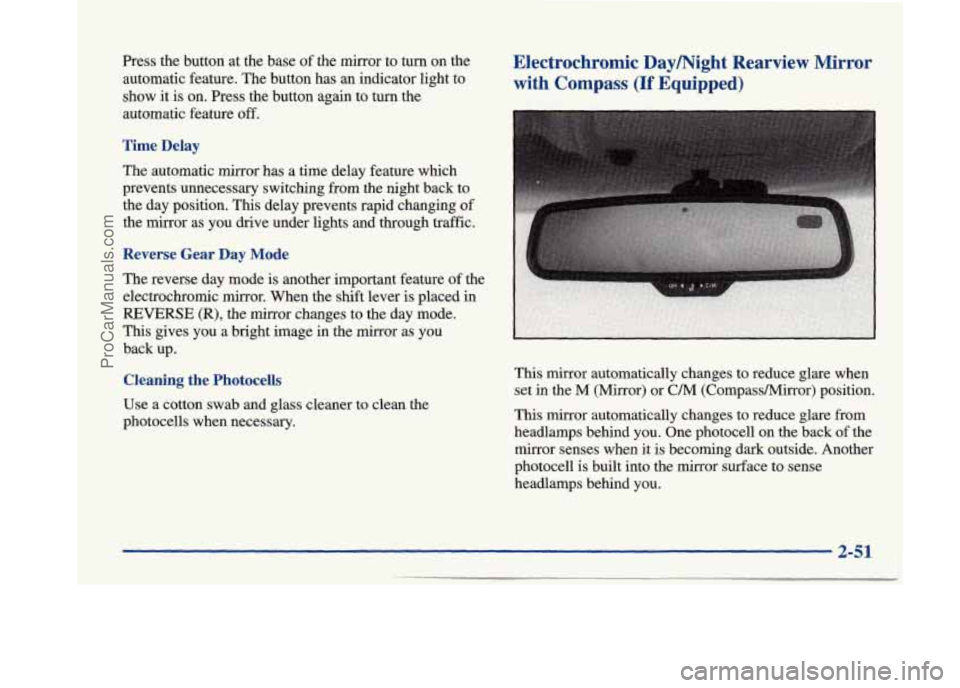
This mirror automatically changes to reduce glare when
set in the
M (Mirror) or C/M (CornpassMirror) position.
This mirror automatically changes to reduce glare from
headlamps behind you. One photocell
on the back of the
mirror senses when it is becoming dark outside. Another
photocell is built into the mirror surface to sense
headlamps behind you.
2-51
ProCarManuals.com
Page 112 of 420
At night, when the glare is too high, the mirror will
gradually darken to reduce glare (this change may
take a
few seconds). The mirror will return to its clear daytime
state when the glare is reduced.
Setting the Mirror
OFF: This setting turns off the dayhight function and
compass. The mirror will stay in the day mode.
M: This turns on the dayhight portion of the mirror to
automatically reduce glare.
C/M: This setting turns on the compass in addition to
the dayhight function. The letter
or letters displayed in
the top right corner of the mirror indicate the direction
in which you are traveling.
Time Delay
This feature prevents rapid changing of the mirror from
the night mode to the day mode as you drive under
lights and through traffic.
Reverse Gear Day Mode
The reverse mode is another important feature of the
electrochromic mirror. When the
shift lever is placed in
REVERSE (R), the mirror changes to the day mode. This
gives you a bright image in the mirror as you back up.
Cleaning the Photocells
Use a cotton swab and glass cleaner to clean the
photocells when necessary.
Compass Calibration
Once the compass is calibrated, it does not need to be
recalibrated as long as the mirror is left in your vehicle
and the vehicle remains in the same geographical zone.
To calibrate the compass:
1. Set the switch on the mirror control to C/M.
2. Turn the vehicle ignition switch on. If the letter C
is not displayed in the mirror compass window, hold
the
CAL switch for more than 10 seconds. To hold
in the
CAL switch, insert a paper clip into the small
hole on the bottom
of the mirror housing. The
display will show a number first, but keep holding
until the letter
C appears.
360-degree circle at less than
5 mph (8 km/h) until
the display reads a compass direction.
3. For
quick calibration, drive the vehicle in a
For normal calibration, drive the vehicle on
your everyday routine, and the compass will
eventually calibrate.
2-52
ProCarManuals.com
Page 113 of 420
Compass Variance
I fa
Variance is the difference between magnetic north and
geographic north. In some areas, the difference between
the two can be great enough to cause false compass
readings.
If this happens, follow these instructions to set
the variance for your particular location:
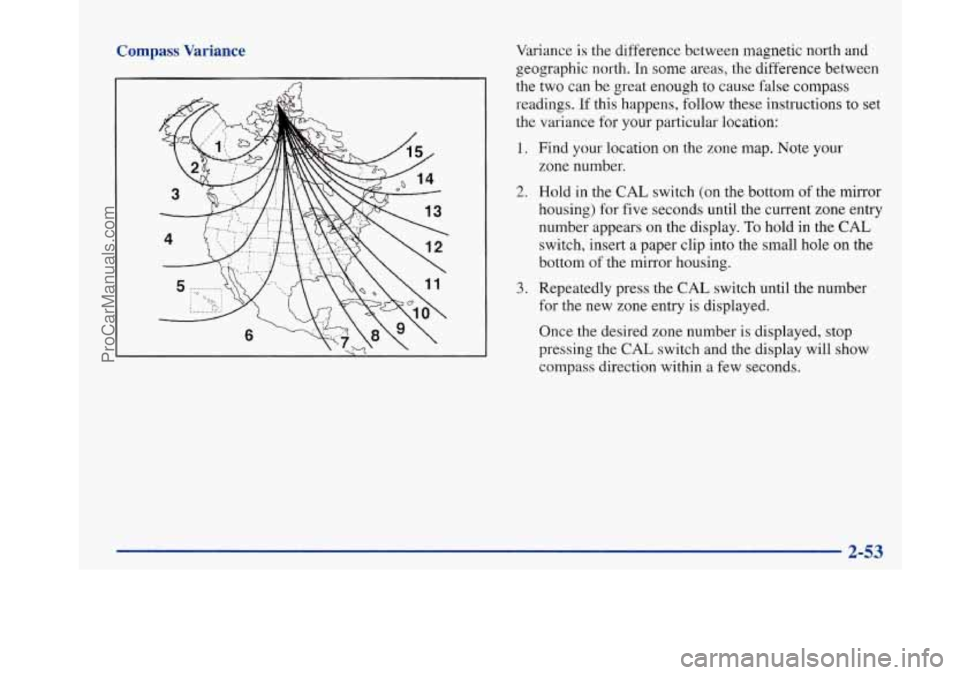
1. Find your location on the zone map. Note your
zone number.
2. Hold in the CAL switch (on the bottom of the mirror
housing) for five seconds until the current zone entry
number appears on the display.
To hold in the CAL
switch, insert a paper clip into the small hole on the
bottom
of the mirror housing.
3. Repeatedly press the CAL switch until the number
for the new zone entry is displayed.
Once the desired zone number is displayed, stop
pressing the
CAL switch and the display will show
compass direction within a few seconds.
2-53
ProCarManuals.com
Page 114 of 420
Outside Power Remote Control Mirror
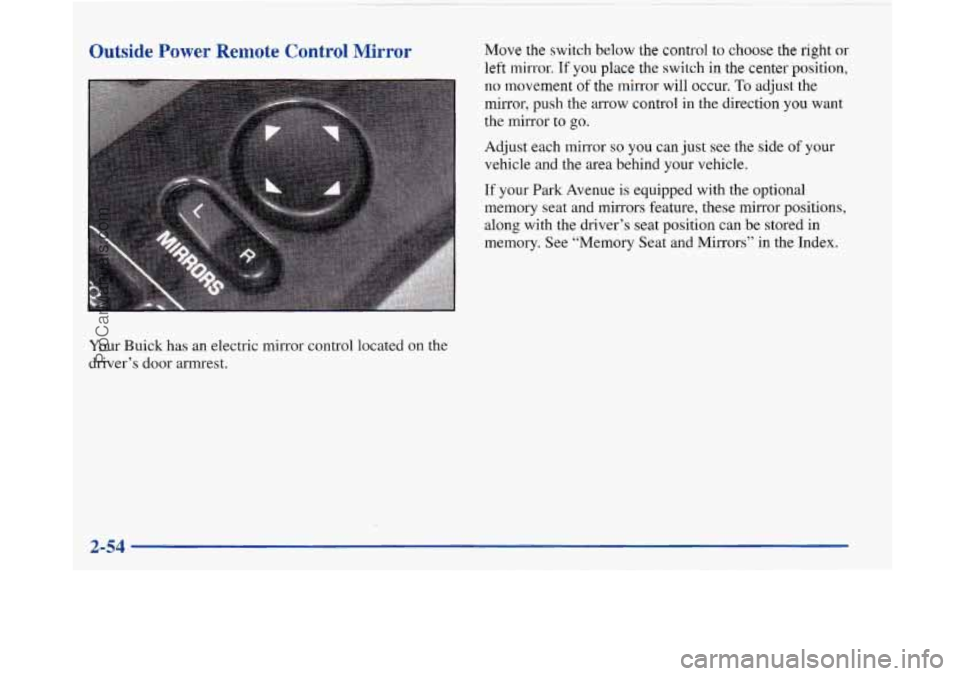
Your Buick has an electric mirror control located on the
driver’s door armrest.
Move the switch below the control to choose the right or
left mirror. If you place the switch in the center position,
no movement of the mirror will occur. To adjust the
mirror, push the arrow control in the direction you want
the mirror to go.
Adjust each mirror
so you can just see the side of your
vehicle and the area behind your vehicle.
If your Park Avenue is equipped with the optional
memory seat and mirrors feature, these mirror positions,
along with the driver’s seat position can be stored in
memory. See “Memory Seat and Mirrors” in the Index.
ProCarManuals.com
Page 115 of 420
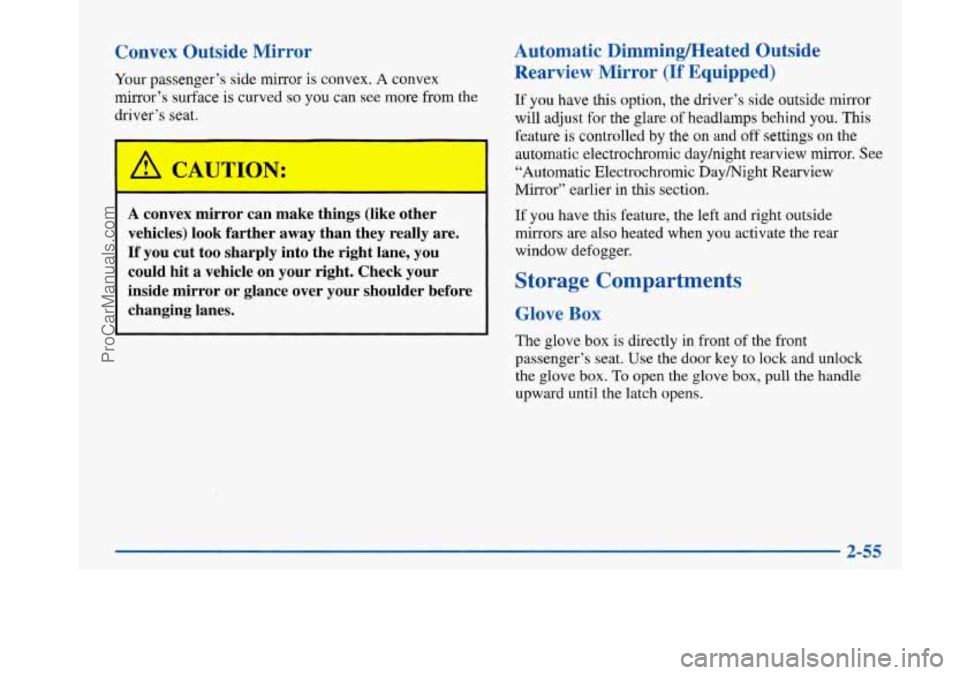
Convex Outside Mirror
Your passenger’s side mirror is convex. A convex
mirror’s surface is curved
so you can see more from the
driver’s seat.
1
A convex mirror can make things (like other
vehicles) look farther away than they really are.
1 If you cut too sharply into the right lane, you
could hit a vehicle on your right. Check your
inside mirror or glance over your shoulder before
changing lanes.
Automatic DimmingMeated Outside Rearview Mirror
(If Equipped)
If you have this option, the driver’s side outside mirror
will adjust for the glare of headlamps behind you.
This
feature is controlled by the on and off settings on the
automatic electrochromic dayhight rearview mirror. See
“Automatic Electrochromic Daymight Rearview
Mirror” earlier in this section.
If you have this feature, the left and right outside
mirrors are also heated when you activate the rear
window defogger.
Storage Compartments
Glove Box
The glove box is directly in front of the front
passenger’s seat. Use the door key to lock and unlock
the glove
box. To open the glove box, pull the handle
upward until the latch opens.
ProCarManuals.com
Page 116 of 420
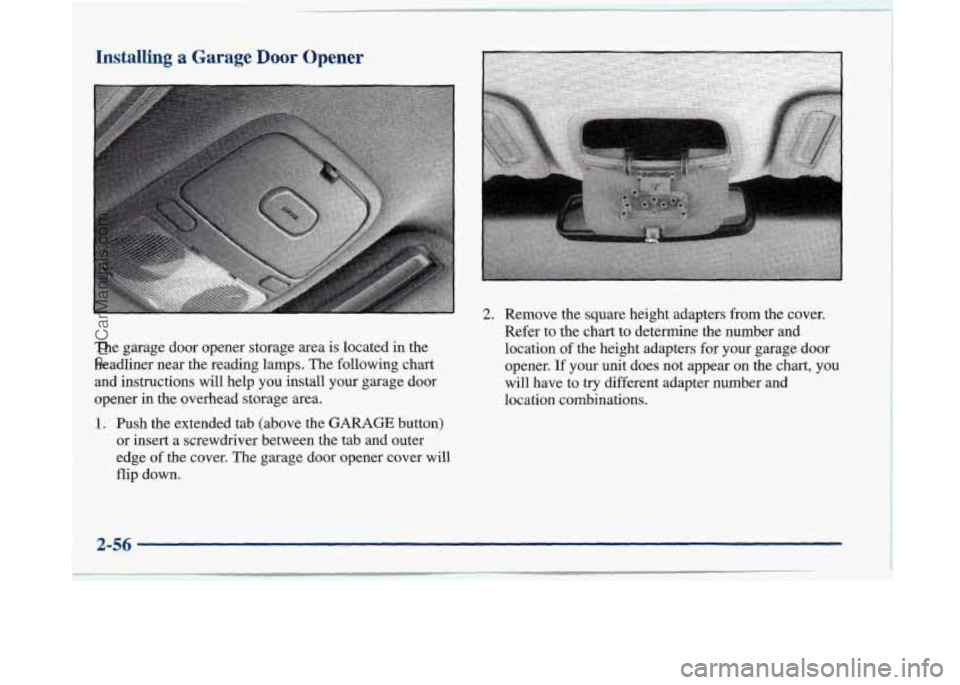
Installing a Garage Door Opener
The garage door opener storage area is located in the
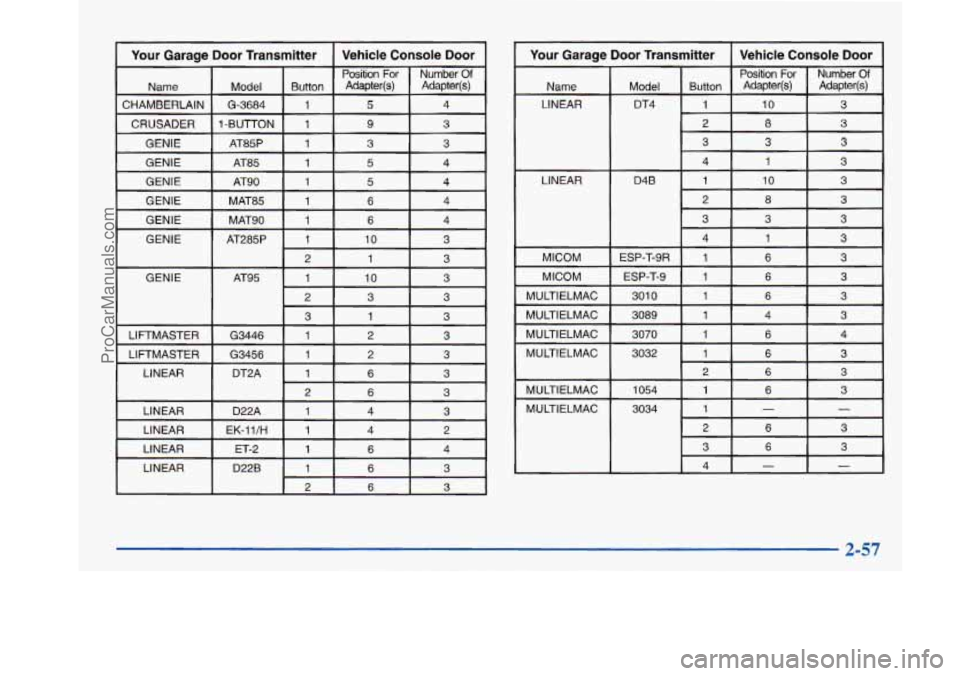
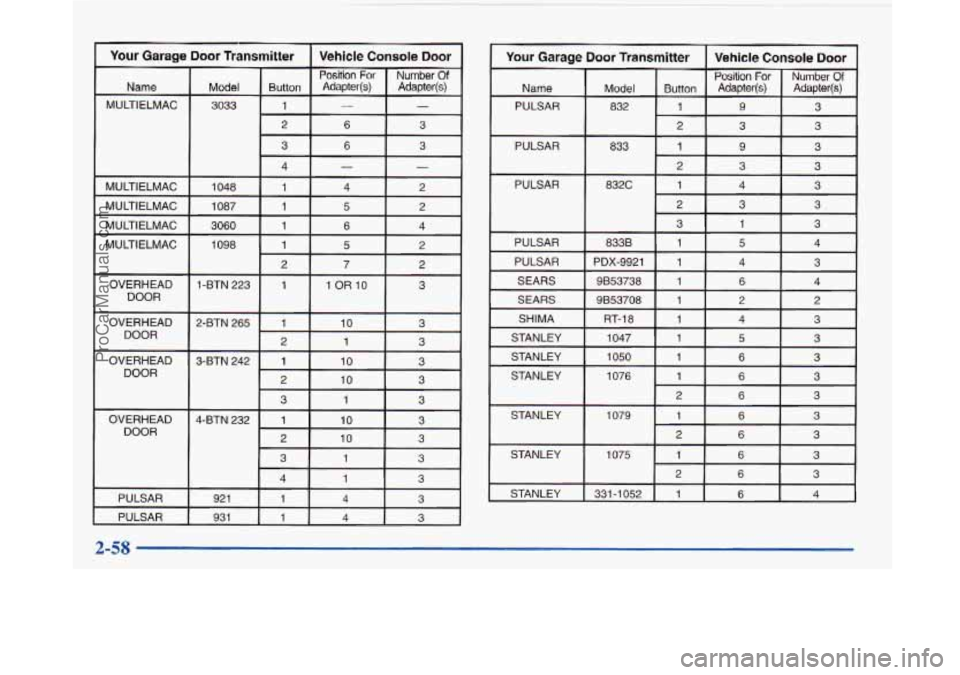
headliner near the reading lamps. The following chart
and instructions will help you install your garage door
opener
in the overhead storage area.
1. Push the extended tab (above the GARAGE button)
or insert a screwdriver between the tab and outer
edge
of the cover. The garage door opener cover will
flip down.
2. Remove the square height adapters from the cover.
Refer to the
chart to determine the number and
location of the height adapters for your garage door
opener. If
your unit does not appear on the chart, you
will have to
try different adapter number and
location combinations.
2-56
ProCarManuals.com
Page 117 of 420
Your Garage Door Transmitter I Vehicle Console Door
Name
CHAMBERLAIN
CRUSADER
GENIE
GENIE
GENIE
I
GENIE
LINEAR
Position For Number Of
Model Button Adapter(s) Adapter@) I G-3684 1 5 4
1 -BUTTON 1 9 3
AT85
3
10
1
AT285P 4
6
1 MAT90
4 6 1 MAT85 4
5 1
AT90 4
5 1
2 1
3
.
AT95
5
G3456
6 3
EK-ll/H
D22B 6 3
I 6 I 3 I
I Your Garage Door Transmitter I Vehicle Console Door I
F LINEAR
MICOM MICOM
MULTIELMAC
MULTIELMAC
MULTIELMAC
~
MULTIELMAC
MULTIELMAC
MULTIELMAC
2 8 3
3
3 3
cl
3 3 I I
4 I 1 3 I I
ESP-T-9R I 1 6 ! ! 3
ESP-T-9
3 6
1
301
0
3 6
1 3032 4
6
1 3070 3 4
1
3089 3
6 1
2 6 3
1054
3034 3 6 1
1
- -
3
4
3 6
- -
ProCarManuals.com
Page 118 of 420
DOOR I I I I I
OVERHEAD
DOOR
OVERHEAD
DOOR
OVERHEAD
DOOR
PULSAR 921 1 4 3
PULSAR 931 1
4 3
Your Garage Door Transmitter Vehicle Console Door
Position For Number Of
Name Model Button Adapter(s) Adapter@)
PULSAR 832 1 9
3 I I
I 12 I 3 I 3
I PULSAR I 833 I 1 I 9 13
2 I 3. I 3
PULSAR
I 832c
I I I 1 I 3
PULSAR 833B
1 5 4
PULSAR
PDX-9921 1 4 3
SEARS 9B53738 1
6 4
SEARS
3
6
2
3 6 1 1076
STANLEY 3
6 1 1050
STANLEY 3
5 1 1047
STANLEY 3
4 1
RT-18
SHIMA 2
2
1
9853708
STANLEY
I 1079
1 6
3
6
2
3
~~ ~
STANLEY 3 6 1 1075
4 6 1 331-1052
STANLEY 3
6 2
2-58
ProCarManuals.com
Page 119 of 420
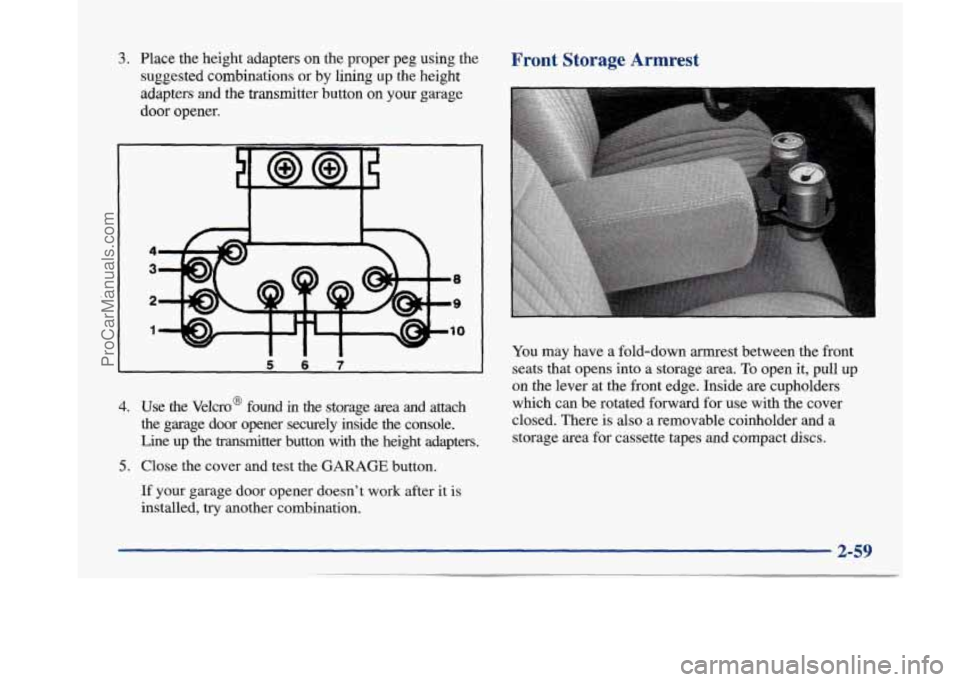
3. Place the height adapters on the proper peg using the
suggested combinations
or by lining up the height
adapters
and the transmitter button on your garage
door opener.
4
3
2
1
W Ill
4. Use the Velcro@ found in the storage area and attach
the garage door opener securely inside the console.
Line up the transmitter button with the height adapters.
5. Close the cover and test the GARAGE button.
If your garage door opener doesn’t work after it is
installed, try another combination.
Front Storage Armrest
You may have a fold-down armrest between the front
seats that opens into a storage area. To open it, pull up
on the lever at the front edge. Inside are cupholders
which can be rotated forward for use with the cover
closed. There is
also a removable coinholder and a
storage area for cassette tapes and compact discs.
2-59
ProCarManuals.com
Page 120 of 420
Front Center Console (If Equipped)
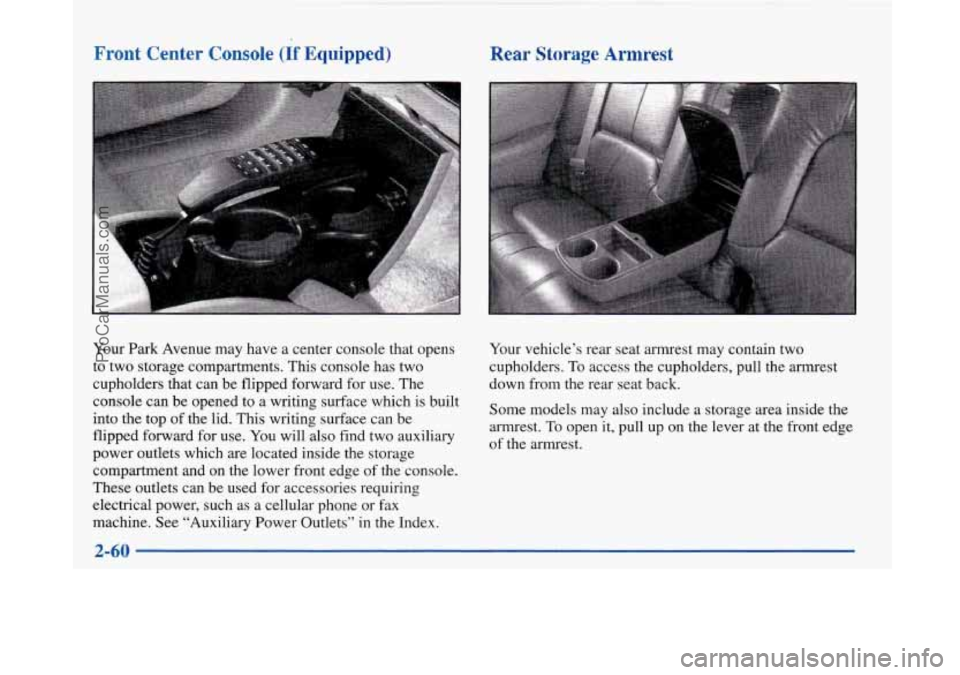
Your Park Avenue may have a center console that opens
to two storage compartments. This console has two
cupholders that can be flipped forward for use. The
console can be opened to a writing surface which is built
into the top of the lid. This writing surface can be
flipped forward for use. You will also find two auxiliary
power outlets which are located inside the storage
compartment and on the lower front edge of the console.
These outlets can be used
for accessories requiring
electrical power, such as a cellular phone or fax
machine. See “Auxiliary Power Outlets” in the Index.
Rear Storage Armrest
Your vehicle’s rear seat armrest may contain two
cupholders.
To access the cupholders, pull the armrest
down from the rear seat back.
Some models may also include a storage area inside the
armrest. To open it, pull up on the lever at the front edge
of the armrest.
ProCarManuals.com