key CADILLAC ESCALADE 2010 3.G Workshop Manual
[x] Cancel search | Manufacturer: CADILLAC, Model Year: 2010, Model line: ESCALADE, Model: CADILLAC ESCALADE 2010 3.GPages: 616, PDF Size: 39.41 MB
Page 257 of 616
MEMORY SEAT RECALL
This feature allows you to select your preference for theremote memory seat recall feature. SeeMemoryFeatureso n p a g e 2!6for more information.
Press the customization button until MEMORYSEAT RECALL appears on the DIC display. Pressthe set/reset button once to access the settings forthis feature. Then press the customization button toscroll through the following settings:
OFF (default) :No remote memory seat recall willoccur.
ON :The driver's seat, and on some vehicles, theoutside mirrors will automatically move to the storeddriving position when the unlock button on the RemoteKeyless Entry (RKE) transmitter is pressed. On somevehicles with the adjustable throttle and brake pedalfeature, the pedals will also automatically move. See“Relearn Remote Key”underDIC Operation andDisplayson page 4!41for more information onmatching transmitters to driver ID numbers.
NO CHANGE :No change will be made to this feature.The current setting will remain.
To select a setting, press the set/reset button while thedesired setting is displayed on the DIC.
REMOTE START
If your vehicle has this feature, it allows you to turn theremote start off or on. The remote start feature allowsyou to start the engine from outside of the vehicle usingthe Remote Keyless Entry (RKE) transmitter. SeeRemote Vehicle Starto n p a g e 3!7for moreinformation.
Press the customization button until REMOTE STARTappears on the DIC display. Press the set/reset buttononce to access the settings for this feature. Then pressthe customization button to scroll through the followingsettings:
OFF :The remote start feature will be disabled.
ON (default) :The remote start feature will be enabled.
NO CHANGE :No change will be made to this feature.The current setting will remain.
To select a setting, press the set/reset button while thedesired setting is displayed on the DIC.
4-65
Page 259 of 616

Audio System(s)
Determine which radio the vehicle has and read thefollowing pages to become familiar with its features.
{WARNING:
Taking your eyes off the road for extended periods
could cause a crash resulting in injury or death to
you or others. Do not give extended attention to
entertainment tasks while driving.
This system provides access to many audio and nonaudio listings.
To minimize taking your eyes off the road while driving,do the following while the vehicle is parked:
.Become familiar with the operation and controls ofthe audio system.
.Set up the tone, speaker adjustments, and presetradio stations.
For more information, seeDefensive Drivingonp a g e 6!2.
This vehicle's infotainment system may be equippedwith a noise reduction system which can workimproperly if the audio amplifier, engine calibrations,
exhaust system, microphones, radio, or speakers aremodified or replaced. This could result in morenoticeable engine noise at certain speeds.
Notice:Contact your dealer/retailer before addingany equipment.
Adding audio or communication equipment couldinterfere with the operation of the vehicle's engine,radio, or other systems, and could damage them.Follow federal rules covering mobile radio andtelephone equipment.
The vehicle has Retained Accessory Power (RAP).With RAP, the audio system can be played even afterthe ignition is turned off. SeeRetained AccessoryPower (RAP)on page 3!28for more information.
Bluetooth®
Vehicles with a Bluetooth system can use a Bluetoothcapable cell phone with a Hands Free Profile to makeand receive phone calls. The system can be used whilethe key is in ON/RUN or ACC/ACCESSORY position.The range of the Bluetooth system can be up to 9.1 m(30 ft). Not all phones support all functions, and not allphones are guaranteed to work with the in-vehicleBluetooth system. See www.gm.com/bluetooth for moreinformation on compatible phones.
4-67
Page 268 of 616
To Transfer Audio to the In-Vehicle
Bluetooth System
The cellular phone must be paired and connected withthe Bluetooth system before a call can be transferred.The connection process can take up to two minutesafter the key is turned to the ON/RUN or ACC/ACCESSORY position.
During a call with the audio on the cell phone,
pressbgfor more than two seconds. The audio
switches from the cell phone to the vehicle.
Voice Pass-Thru
Voice Pass!Thru allows access to the voice recognitioncommands on the cell phone. See the cell phonemanufacturers user guide to see if the cell phonesupports this feature. This feature can be used toverbally access contacts stored in the cell phone.
1. Press and holdbgfor two seconds. The system
responds with“Ready”followed by a tone.
2. Say“Bluetooth”. The system responds with“Bluetooth ready”followed by a tone.
3. Say“Voice”. The system responds with“OK,accessing
.The cell phone's normal prompt messages willgo through its cycle according to the phone'soperating instructions.
Dual Tone Multi-Frequency (DTMF)
Tones
The in!vehicle Bluetooth system can send numbers andnumbers stored as name tags during a call. This is usedwhen calling a menu driven phone system. Accountnumbers can be programmed into the phonebook forretrieval during menu driven calls.
Sending a Number During a Call
1. Pressbg. The system responds with“Ready”
followed by a tone.
2. Say“Dial”. The system responds with“Say anumber to send tones”followed by a tone.
3. Say the number to send.
.If the system clearly recognizes the number itresponds with“OK, Sending Number”and thedial tones are sent and the call continues.
.If the system is not sure it recognized thenumber properly, it responds“Dial Number,Please say yes or no?”followed by a tone.If the number is correct, say“Yes”. The systemresponds with“OK, Sending Number”and thedial tones are sent and the call continues.
4-76
Page 276 of 616
AUX (Auxiliary) :Press to switch the system betweenthe DVD player and an auxiliary source.
If the vehicle has a third row video screen, theAUX button controls the source display on thesecond row video screen, and the third row videoscreen as described in the table below:
Aux ButtonPressSecond RowScreenThird RowScreen
Default State(No Press)DVD MediaDVD Media
First PressAux VideoSourceAux VideoSource
Second Press DVD MediaAux VideoSource
Third PressAux VideoSourceDVD Media
Fourth PressReturn to DefaultStateReturn to DefaultState
d(Camera):Press to change camera angles on DVDsthat have this feature when a DVD is playing. Theformat and content of this function varies for each disc.
1 through 0 (Numeric Keypad) :The numeric keypadprovides the capability of direct chapter or track numberselection.
\(Clear):Press within three seconds after entering anumeric selection, to clear all numeric inputs.
}10 (Double Digit Entries):Press to select chapter ortrack numbers greater than 9. Press this button beforeentering the number.
Battery Replacement
To change the remote control batteries:
1. Slide the rear cover back on the remote control.
2. Replace the two batteries in the compartment.Make sure that they are installed correctly, usingthe diagram on the inside of the batterycompartment.
3. Replace the battery cover.
If the remote control is to be stored for a long period oftime, remove the batteries and keep them in a cool, dryplace.
Tips and Troubleshooting Chart
ProblemRecommended Action
No power.The ignition might notbe turned ON/RUN or inACC/ACCESSORY.
The picture does not fill thescreen. There are blackborders on the top andbottom or on both sides orit looks stretched out.
Check the display modesettings in the setup menuby pressing the displaymenu button on the remotecontrol.
4-84
Page 290 of 616
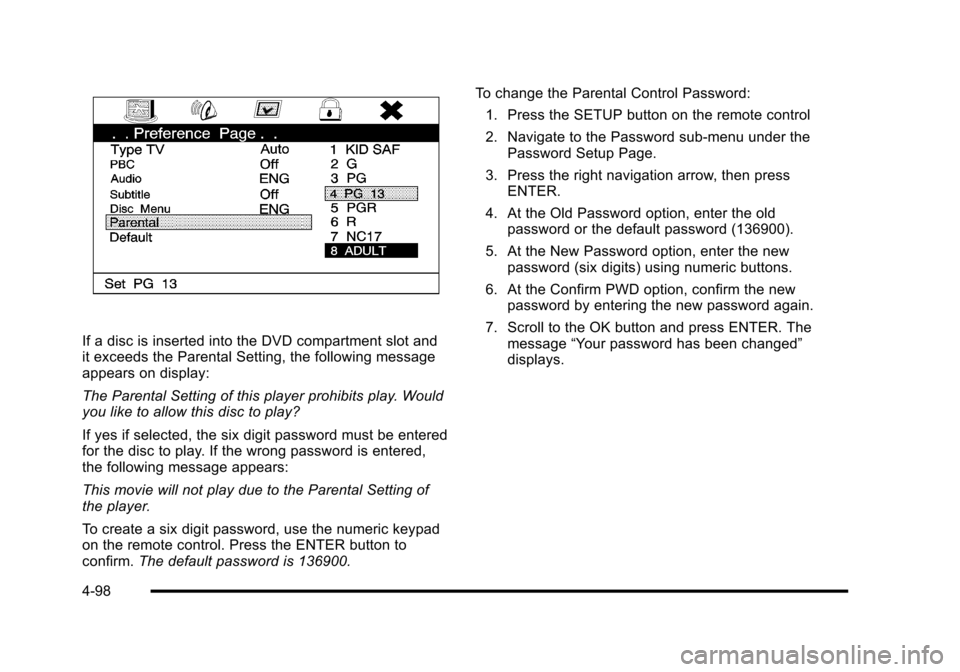
If a disc is inserted into the DVD compartment slot andit exceeds the Parental Setting, the following messageappears on display:
The Parental Setting of this player prohibits play. Wouldyou like to allow this disc to play?
If yes if selected, the six digit password must be enteredfor the disc to play. If the wrong password is entered,the following message appears:
This movie will not play due to the Parental Setting ofthe player.
To create a six digit password, use the numeric keypadon the remote control. Press the ENTER button toconfirm.The default password is 136900.
To change the Parental Control Password:
1. Press the SETUP button on the remote control
2. Navigate to the Password sub-menu under thePassword Setup Page.
3. Press the right navigation arrow, then pressENTER.
4. At the Old Password option, enter the oldpassword or the default password (136900).
5. At the New Password option, enter the newpassword (six digits) using numeric buttons.
6. At the Confirm PWD option, confirm the newpassword by entering the new password again.
7. Scroll to the OK button and press ENTER. Themessage“Your password has been changed”displays.
4-98
Page 303 of 616

A. FULL MAP Touch Screen Button. See“NAV”under“Hard Keys”underUsing the Navigation Systemon page 5!12for more information.
B. No GPS Symbol. SeeSymbolson page 5!17formore information.
C. North Up/Heading Up Symbol. SeeSymbolsonpage 5!17for more information.
D. Map Scale. See“Map Scales”underMapsonpage 5!14for more information.
E.0(Zoom In) Touch Screen Button. See“Map
Scales”underMapson page 5!14for moreinformation.
F. Mark Touch Screen Button. See“AddingDestinations to the Address Book”underDestinationon page 5!24for more information.
G.Z(DVD Map Disc Eject) Key. SeeMapson
page 5!14for more information.
H. Map DVD Slot. See“Installing the Map DVD”underMapson page 5!14for information on how toinstall and eject a map DVD.
I.M(Load) Key. SeeCD Playeron page 5!68or
DVD Playeron page 5!75for more information.
J.Z(CD/DVD Video/Audio Eject) Key. SeeCD
Playeron page 5!68orDVD Playeron page 5!75for more information.
K. CD/DVD Video/Audio Slot. SeeCD Playeronpage 5!68orDVD Playeron page 5!75formore information.
L.O/n(Power/Volume) Knob. SeeNavigation
Audio Systemon page 5!60for more information.
M.M(Disc Up/Down) Key. See“Hard Keys”under
Using the Navigation Systemon page 5!12formore information.
N. AUDIO Key. SeeNavigation Audio Systemonpage 5!60for more information.
O. FAV (Favorite) Key. See“Storing Radio StationPresets”underNavigation Audio Systemonpage 5!60for more information.
P.5(Phone) Key. See the OnStar®owner guide and
Bluetooth®on page 4!67for more information.
Q.e(Sound) Key. See“Sound Menu”under
Navigation Audio Systemon page 5!60formore information.
R. Source (AM, FM, XM, CD, etc.) Touch ScreenButton. SeeNavigation Audio Systemonpage 5!60for more information.
S. Clock Touch Screen Button. See“Setting theClock”underConfigure Menuon page 5!42formore information.
5-3
Page 304 of 616
T. POI (Point of Interest) Touch Screen Button. See“Displaying Points of Interest (POI) on the MapScreen”underSymbolson page 5!17for moreinformation.
U.1(Zoom Out) Touch Screen Button. See“Map
Scales”underMapson page 5!14for moreinformation.
V.y © ¨ z(Seek) Key (Previous/Next). See
Navigation Audio Systemon page 5!60for moreinformation.
W.w(Tune) Knob. SeeNavigation Audio System
on page 5!60for more information.
X. NAV (Navigation) Key. See“Hard Keys”underUsing the Navigation Systemon page 5!12formore information.
Y. RPT (Repeat) Key. See“Hard Keys”underUsingthe Navigation Systemon page 5!12for moreinformation.
Z. DEST (Destination) Key. SeeDestinationonpage 5!24for more information.
AA. CONFIG (Configure) Key. SeeConfigure Menuonpage 5!42for more information.
Getting Started
Read this manual thoroughly to become familiarwith how the navigation system operates.
The navigation system includes navigation andaudio functions.
While entering the vehicle or when turning the vehicleoff, some DVD Map Disc noise is normal.
Keeping your eyes on the road and your mind onthe drive is important for safe driving. The navigationsystem has built-in features intended to help keep youreyes on the road and mind on the drive. Some featuresmay be disabled while driving. Note that these functionswill be grayed-out. A grayed-out function indicates it isnot available when the vehicle is moving.
All functions are available when the vehicle is parked.Do the following before driving:
.Become familiar with the navigation systemoperation, hard keys on the faceplate, andtouch-sensitive screen buttons of thenavigation system.
.Set up the audio by presetting favorite stations,setting the tone, and adjusting the speakers.
5-4
Page 306 of 616
{WARNING:
Taking your eyes off the road for extended periods
could cause a crash resulting in injury or death to
you or others.
To help avoid a crash in which you or others couldbe killed:
.Always concentrate on your driving first by keepingyour eyes and mind on the road, and your handson the wheel.
.Follow system directions only if permitted by trafficlaws, controls, and conditions.
.Before using this system, read the owner manualand learn how it operates.
.Some system controls cannot be used the whenvehicle is moving.
After you acknowledge the start up information you willbe able to access the NAV (navigation) and DEST(destination) functions. Once accessed, you can enteror delete information in the navigation system or accessother functions. See instructions later in this section.
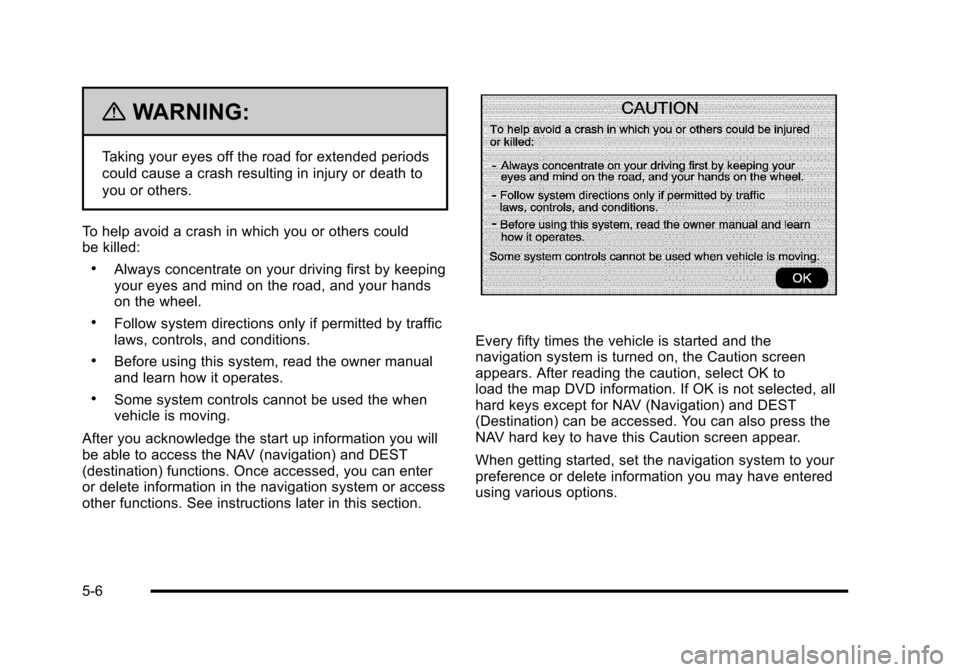
Every fifty times the vehicle is started and thenavigation system is turned on, the Caution screenappears. After reading the caution, select OK toload the map DVD information. If OK is not selected, allhard keys except for NAV (Navigation) and DEST(Destination) can be accessed. You can also press theNAV hard key to have this Caution screen appear.
When getting started, set the navigation system to yourpreference or delete information you may have enteredusing various options.
5-6
Page 307 of 616
Language—English/Metric
To change the language of the navigation screens, seeDriver Information Center (DIC)on page 4!41for moreinformation.
To change the navigation screens from English ormetric, seeDIC Operation and Displayson page 4!41for more information.
Deleting Personal Information
This navigation system can record and store personalinformation such as names and addresses. Delete thisinformation when selling your vehicle or returning aleased vehicle. See“Edit Address Book—Edit/View”underConfigure Menuon page 5!42for deletinginformation from the address book.
Limit Features While Driving
The navigation system may have this feature.
Touch the Limit Features While Driving screen button toturn the ability to limit functions on and off while driving.When this screen button is highlighted, the followingfunctions are limited while driving:
.Music Navigator Scrolling
.Radio Category Scrolling
.Navigation Menu Scrolling and some functions
See“Category”underNavigation Audio Systemonpage 5!60for more information. See“From Map”underDestinationon page 5!24for more information.
Some functions will remain limited regardless of thesetting.
Storing Radio Station Presets
To set preset radio stations, do the following:
1. PressOto turn the system on.
2. Press the AUDIO hard key and select the desiredband (AM, FM, or XM (if equipped)).
3. Use thew(tuning) knob or the SEEK arrows to
tune to the desired station.
4. Press and hold one of the five preset screenbuttons, at the bottom of the screen, until a beep isheard or if the station displays on the selectedpreset button.
5. Repeat the steps for each preset.
See“Storing Radio Station Presets”underNavigationAudio Systemon page 5!60for more information.
5-7
Page 308 of 616

Setting the Clock
The navigation system time and the analog clockoperate independently. Changing the time through thenavigation system does not change the time on theanalog clock. SeeAnalog Clockon page 4!20tochange the analog clock time.
To set the time for the navigation system:
1. Press the CONFIG key to enter the configuremenu options, then press the CONFIG keyrepeatedly until the time is selected or touch thetime screen button.
2. Press the Hours and Minutes!(minus) and+ (plus) signs to decrease or to increase the time.
See“Setting the Clock”underConfigure Menuonpage 5!42for more information.
Entering an Address and Point of
Interest, and Storing Preset
Destinations
Entering an Address
Enter a destination by inputting the city name first:
1. If the radio is already on with a map disc inserted,skip to Step 5.
2. PressOto turn the system on.
3. Insert the DVD map disc. See“Installing theMap DVD”underMapson page 5!14for moreinformation.
4. A caution may appear. Touch the OK screen buttonto proceed.
5. Press the DEST hard key.
6. Press the2Address Entry screen button.
5-8