Mode CADILLAC ESCALADE 2020 User Guide
[x] Cancel search | Manufacturer: CADILLAC, Model Year: 2020, Model line: ESCALADE, Model: CADILLAC ESCALADE 2020Pages: 392, PDF Size: 6.39 MB
Page 72 of 392
Cadillac Escalade Owner Manual (GMNA-Localizing-U.S./Canada/Mexico-
13566588) - 2020 - CRC - 4/24/19
SEATS AND RESTRAINTS 71
Frontal airbags are not intended to
inflate during vehicle rollovers, rear
impacts, or many side impacts.
In addition, the vehicle has advanced
technology frontal airbags. Advanced
technology frontal airbags adjust the
restraint according to crash severity.
The vehicle also has a seat position
sensor that enables the sensing
system to monitor the position of the
driver seat. The seat position sensor
provides information that is used to
adjust the deployment of the driver
frontal airbag.
The front center airbag is designed to
inflate in moderate to severe side
crashes depending upon the location
of the impact, when either side of the
vehicle is struck. In addition, the front
center airbag is designed to inflate
when the sensing system predicts that
the vehicle is about to roll over on its
side. The front center airbag is not
designed to inflate in frontal impacts,
near frontal impacts, or rear impacts.
Seat-mounted side impact airbags are
designed to inflate in moderate to
severe side crashes depending on thelocation of the impact. Seat-mounted
side impact airbags are not designed
to inflate in frontal impacts, near
frontal impacts, rollovers, or rear
impacts. A seat-mounted side impact
airbag is designed to inflate on the
side of the vehicle that is struck.
Roof-rail airbags are designed to
inflate in moderate to severe side
crashes depending on the location of
the impact. In addition, these roof-rail
airbags are designed to inflate during
a rollover or in a severe frontal
impact. Roof-rail airbags are not
designed to inflate in rear impacts.
Both roof-rail airbags will inflate when
either side of the vehicle is struck,
if the sensing system predicts that the
vehicle is about to roll over on its
side, or in a severe frontal impact.
In any particular crash, no one can
say whether an airbag should have
inflated simply because of the vehicle
damage or the repair costs.What Makes an Airbag
Inflate?
In a deployment event, the sensing
system sends an electrical signal
triggering a release of gas from the
inflator. Gas from the inflator fills the
airbag causing the bag to break out of
the cover. The inflator, the airbag, and
related hardware are all part of the
airbag module.
For airbag locations, see
Where Are the
Airbags? 069.
How Does an Airbag
Restrain?
In moderate to severe frontal or near
frontal collisions, even belted
occupants can contact the steering
wheel or the instrument panel. In
moderate to severe side collisions,
even belted occupants can contact the
inside of the vehicle.
Airbags supplement the protection
provided by seat belts by distributing
the force of the impact more evenly
over the occupant's body.
Page 74 of 392
Cadillac Escalade Owner Manual (GMNA-Localizing-U.S./Canada/Mexico-
13566588) - 2020 - CRC - 4/24/19
SEATS AND RESTRAINTS 73
{Warning
A crash severe enough to inflate the
airbags may have also damaged
important functions in the vehicle,
such as the fuel system, brake and
steering systems, etc. Even if the
vehicle appears to be drivable after
a moderate crash, there may be
concealed damage that could make
it difficult to safely operate the
vehicle.
Use caution if you should attempt
to restart the engine after a crash
has occurred.
In many crashes severe enough to
inflate the airbag, windshields are
broken by vehicle deformation.
Additional windshield breakage may
also occur from the front outboard
passenger airbag.
. Airbags are designed to inflate
only once. After an airbag inflates,
you will need some new parts for
the airbag system. If you do not
get them, the airbag system will not be there to help protect you in
another crash. A new system will
include airbag modules and
possibly other parts. The service
manual for the vehicle covers the
need to replace other parts.
. The vehicle has a crash sensing
and diagnostic module which
records information after a crash.
See Vehicle Data Recording and
Privacy 0367 and
Event Data Recorders 0368.
. Let only qualified technicians
work on the airbag systems.
Improper service can mean that
an airbag system will not work
properly. See your dealer for
service.
Passenger Sensing System
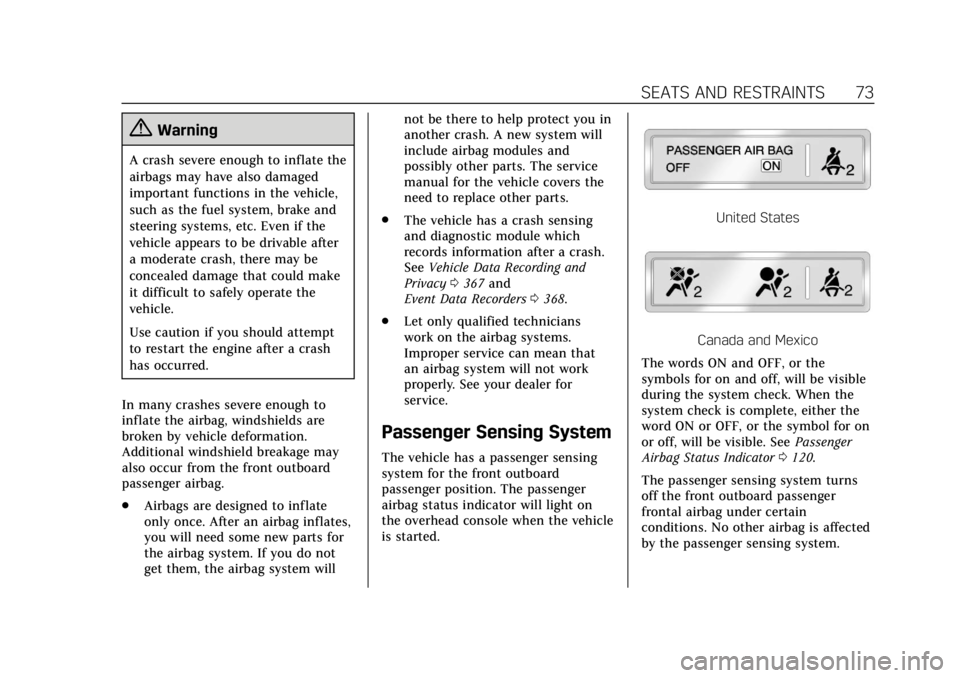
The vehicle has a passenger sensing
system for the front outboard
passenger position. The passenger
airbag status indicator will light on
the overhead console when the vehicle
is started.
United States
Canada and Mexico
The words ON and OFF, or the
symbols for on and off, will be visible
during the system check. When the
system check is complete, either the
word ON or OFF, or the symbol for on
or off, will be visible. See Passenger
Airbag Status Indicator 0120.
The passenger sensing system turns
off the front outboard passenger
frontal airbag under certain
conditions. No other airbag is affected
by the passenger sensing system.
Page 83 of 392
Cadillac Escalade Owner Manual (GMNA-Localizing-U.S./Canada/Mexico-
13566588) - 2020 - CRC - 4/24/19
82 SEATS AND RESTRAINTS
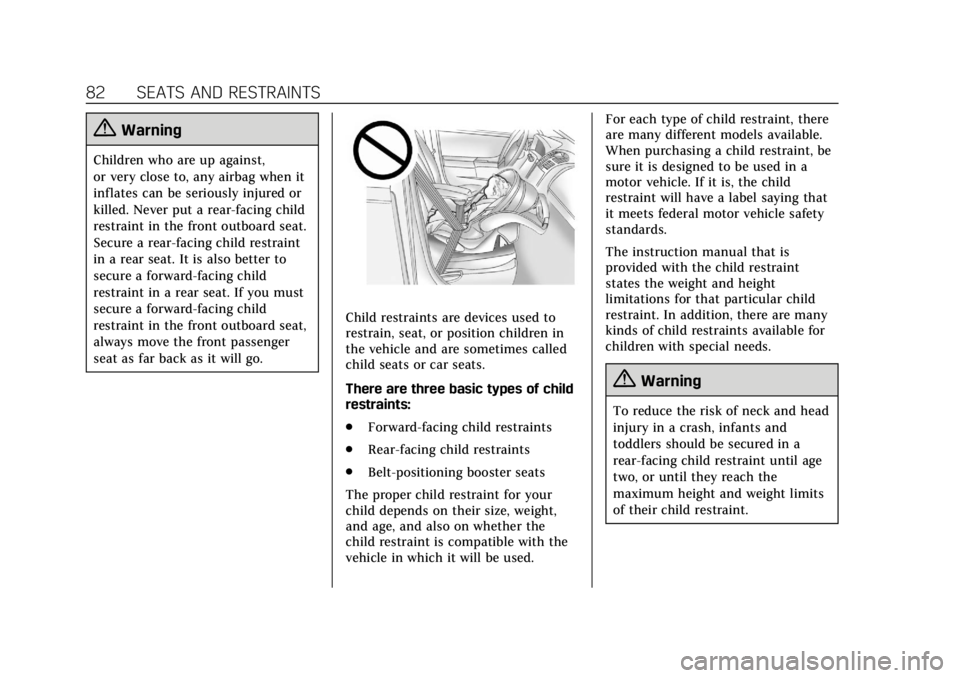
{Warning
Children who are up against,
or very close to, any airbag when it
inflates can be seriously injured or
killed. Never put a rear-facing child
restraint in the front outboard seat.
Secure a rear-facing child restraint
in a rear seat. It is also better to
secure a forward-facing child
restraint in a rear seat. If you must
secure a forward-facing child
restraint in the front outboard seat,
always move the front passenger
seat as far back as it will go.
Child restraints are devices used to
restrain, seat, or position children in
the vehicle and are sometimes called
child seats or car seats.
There are three basic types of child
restraints:
.Forward-facing child restraints
. Rear-facing child restraints
. Belt-positioning booster seats
The proper child restraint for your
child depends on their size, weight,
and age, and also on whether the
child restraint is compatible with the
vehicle in which it will be used. For each type of child restraint, there
are many different models available.
When purchasing a child restraint, be
sure it is designed to be used in a
motor vehicle. If it is, the child
restraint will have a label saying that
it meets federal motor vehicle safety
standards.
The instruction manual that is
provided with the child restraint
states the weight and height
limitations for that particular child
restraint. In addition, there are many
kinds of child restraints available for
children with special needs.
{Warning
To reduce the risk of neck and head
injury in a crash, infants and
toddlers should be secured in a
rear-facing child restraint until age
two, or until they reach the
maximum height and weight limits
of their child restraint.
Page 90 of 392
Cadillac Escalade Owner Manual (GMNA-Localizing-U.S./Canada/Mexico-
13566588) - 2020 - CRC - 4/24/19
SEATS AND RESTRAINTS 89
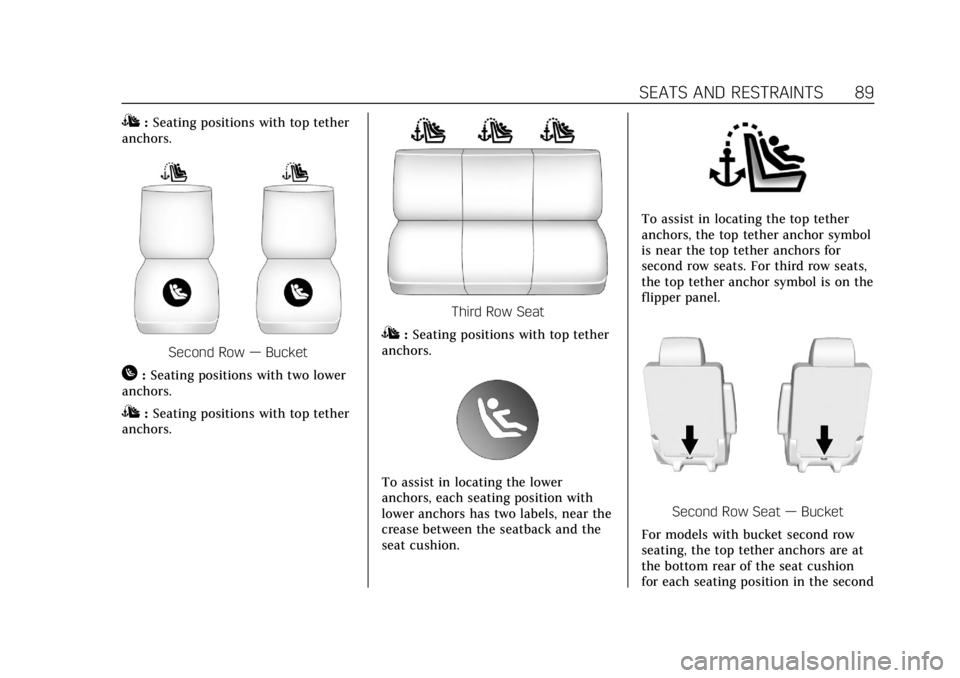
I:Seating positions with top tether
anchors.
Second Row —Bucket
H:Seating positions with two lower
anchors.
I: Seating positions with top tether
anchors.
Third Row Seat
I: Seating positions with top tether
anchors.
To assist in locating the lower
anchors, each seating position with
lower anchors has two labels, near the
crease between the seatback and the
seat cushion.
To assist in locating the top tether
anchors, the top tether anchor symbol
is near the top tether anchors for
second row seats. For third row seats,
the top tether anchor symbol is on the
flipper panel.
Second Row Seat —Bucket
For models with bucket second row
seating, the top tether anchors are at
the bottom rear of the seat cushion
for each seating position in the second
Page 91 of 392
Cadillac Escalade Owner Manual (GMNA-Localizing-U.S./Canada/Mexico-
13566588) - 2020 - CRC - 4/24/19
90 SEATS AND RESTRAINTS
row. Be sure to use an anchor located
directly behind the seating position
where the child restraint will be
placed.
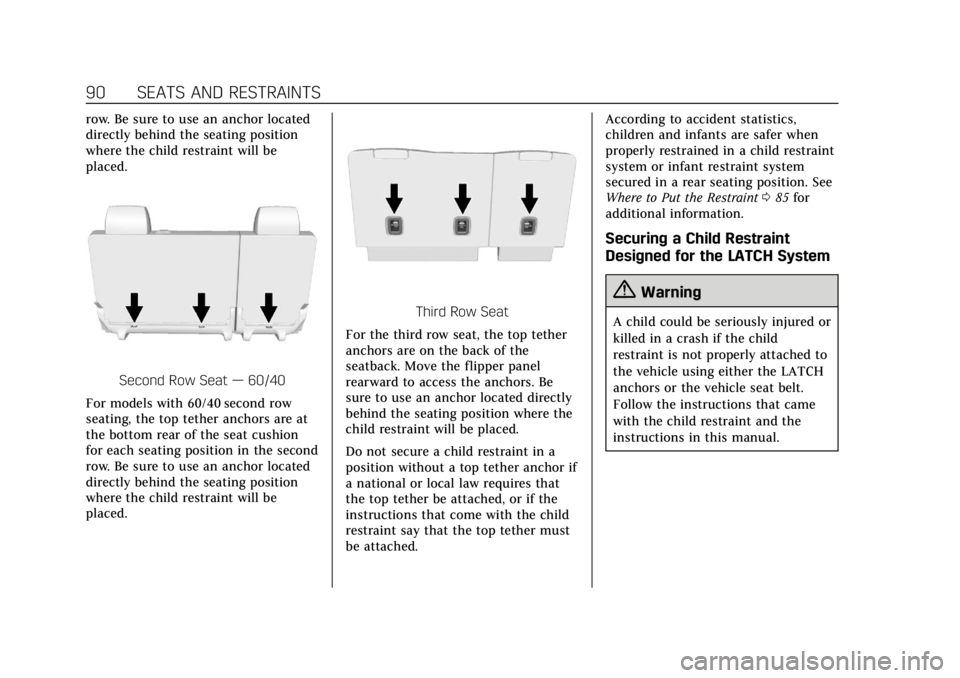
Second Row Seat—60/40
For models with 60/40 second row
seating, the top tether anchors are at
the bottom rear of the seat cushion
for each seating position in the second
row. Be sure to use an anchor located
directly behind the seating position
where the child restraint will be
placed.
Third Row Seat
For the third row seat, the top tether
anchors are on the back of the
seatback. Move the flipper panel
rearward to access the anchors. Be
sure to use an anchor located directly
behind the seating position where the
child restraint will be placed.
Do not secure a child restraint in a
position without a top tether anchor if
a national or local law requires that
the top tether be attached, or if the
instructions that come with the child
restraint say that the top tether must
be attached. According to accident statistics,
children and infants are safer when
properly restrained in a child restraint
system or infant restraint system
secured in a rear seating position. See
Where to Put the Restraint
085 for
additional information.
Securing a Child Restraint
Designed for the LATCH System
{Warning
A child could be seriously injured or
killed in a crash if the child
restraint is not properly attached to
the vehicle using either the LATCH
anchors or the vehicle seat belt.
Follow the instructions that came
with the child restraint and the
instructions in this manual.
Page 105 of 392
Cadillac Escalade Owner Manual (GMNA-Localizing-U.S./Canada/Mexico-
13566588) - 2020 - CRC - 4/24/19
104 INSTRUMENTS AND CONTROLS
Instruments and
Controls
Controls
Steering Wheel Adjustment . . . . . 105
Steering Wheel Controls . . . . . . . . . 105
Heated Steering Wheel . . . . . . . . . . 105
Horn . . . . . . . . . . . . . . . . . . . . . . . . . . . . . . . 105
Windshield Wiper/Washer . . . . . . . 105
Rear Window Wiper/Washer . . . . 107
Compass . . . . . . . . . . . . . . . . . . . . . . . . . . 108
Clock . . . . . . . . . . . . . . . . . . . . . . . . . . . . . . 109
Power Outlets . . . . . . . . . . . . . . . . . . . . . 109
Wireless Charging . . . . . . . . . . . . . . . . 111
Cigarette Lighter . . . . . . . . . . . . . . . . . . 113
Ashtrays . . . . . . . . . . . . . . . . . . . . . . . . . . 114
Warning Lights, Gauges, and
Indicators
Warning Lights, Gauges, andIndicators . . . . . . . . . . . . . . . . . . . . . . . 114
Instrument Cluster . . . . . . . . . . . . . . . 115
Speedometer . . . . . . . . . . . . . . . . . . . . . . 117
Odometer . . . . . . . . . . . . . . . . . . . . . . . . . 117
Trip Odometer . . . . . . . . . . . . . . . . . . . . 117
Tachometer . . . . . . . . . . . . . . . . . . . . . . . 118
Fuel Gauge . . . . . . . . . . . . . . . . . . . . . . . . 118 Engine Coolant Temperature
Gauge . . . . . . . . . . . . . . . . . . . . . . . . . . . . 118
Seat Belt Reminders . . . . . . . . . . . . . . 119
Airbag Readiness Light . . . . . . . . . . 120
Passenger Airbag Status Indicator . . . . . . . . . . . . . . . . . . . . . . . . . 120
Charging System Light . . . . . . . . . . . 121
Malfunction Indicator Lamp (Check Engine Light) . . . . . . . . . . . 121
Brake System Warning Light . . . . 123
Electric Parking Brake Light . . . . . 124
Service Electric Parking Brake Light . . . . . . . . . . . . . . . . . . . . . . . . . . . . . 124
Antilock Brake System (ABS) Warning Light . . . . . . . . . . . . . . . . . . 124
Sport Mode Light . . . . . . . . . . . . . . . . . 125
Tow/Haul Mode Light . . . . . . . . . . . . 125
Winter Driving Mode Light . . . . . . 125
Lane Keep Assist (LKA) Light . . . 125
Vehicle Ahead Indicator . . . . . . . . . 126
Traction Off Light . . . . . . . . . . . . . . . . 126
StabiliTrak OFF Light . . . . . . . . . . . . 126
Traction Control System (TCS)/ StabiliTrak Light . . . . . . . . . . . . . . . . 126
Engine Coolant Temperature Warning Light . . . . . . . . . . . . . . . . . . 127
Tire Pressure Light . . . . . . . . . . . . . . . 127
Engine Oil Pressure Light . . . . . . . . 128
Low Fuel Warning Light . . . . . . . . . 128
Security Light . . . . . . . . . . . . . . . . . . . . . 128 High-Beam On Light . . . . . . . . . . . . . 128
Lamps On Reminder . . . . . . . . . . . . . 129
Cruise Control Light . . . . . . . . . . . . . . 129
Door Ajar Light . . . . . . . . . . . . . . . . . . . 129
Information Displays
Driver Information
Center (DIC) . . . . . . . . . . . . . . . . . . . . . 130
Head-Up Display (HUD) . . . . . . . . . 132
Vehicle Messages
Vehicle Messages . . . . . . . . . . . . . . . . . 135
Engine Power Messages . . . . . . . . . . 136
Vehicle Speed Messages . . . . . . . . . 136
Vehicle Personalization
Vehicle Personalization . . . . . . . . . . 136
Universal Remote System
Universal Remote System . . . . . . . . 145
Universal Remote System Programming . . . . . . . . . . . . . . . . . . . 145
Universal Remote System Operation . . . . . . . . . . . . . . . . . . . . . . . . 147
Page 111 of 392
Cadillac Escalade Owner Manual (GMNA-Localizing-U.S./Canada/Mexico-
13566588) - 2020 - CRC - 4/24/19
110 INSTRUMENTS AND CONTROLS
The vehicle has five accessory power
outlets:
.One near the cupholders on the
center console
. One inside the center console
. One on the rear of the center
console
. One in the third row seat on the
driver side
. One in the rear cargo area on the
passenger side
Lift the cover to access and replace
when not in use.
The accessory power outlets are
powered as follows:
. The power outlet near the
cupholders on the center console
is powered in Retained Accessory
Power (RAP) mode. This outlet can
be configured to operate using
RAP or battery power. If the power
outlet is used while in the battery
power mode, this could cause
interference between the RKE
transmitter and the vehicle, and
the vehicle may not start. See
Ignition Positions 0184. .
The power outlets inside the
center console and on the rear of
the center console are powered
when the vehicle is started or the
ignition is in ACC/ACCESSORY,
or until the driver door is opened
within 10 minutes of turning off
the vehicle. See Retained Accessory
Power (RAP) 0188.
. The power outlets in the third row
seat and in the rear cargo area are
powered at all times.
{Warning
Power is always supplied to the
outlets. Do not leave electrical
equipment plugged in when the
vehicle is not in use because the
vehicle could catch fire and cause
injury or death.
Caution
Leaving electrical equipment
plugged in for an extended period
of time while the vehicle is off will
drain the battery. Always unplug
electrical equipment when not in
use and do not plug in equipment
that exceeds the maximum 15 amp
rating.
Certain power accessory plugs may
not be compatible with the accessory
power outlet and could overload
vehicle or adapter fuses. If a problem
is experienced, see your dealer.
When adding electrical equipment, be
sure to follow the proper installation
instructions included with the
equipment. See Add-On Electrical
Equipment 0253.
Page 118 of 392
Cadillac Escalade Owner Manual (GMNA-Localizing-U.S./Canada/Mexico-
13566588) - 2020 - CRC - 4/24/19
INSTRUMENTS AND CONTROLS 117
Cluster Options Menu
To enter the cluster Options menu:1. Use the five-way control on the right side of the steering wheel
to find the Options page in one
of the interactive display zones
on the cluster.
2. Press SEL on the center of the five-way control to enter the
Options menu.
Units : Press SEL while Units is
highlighted to enter the Unit menu.
Choose US or metric units by pressing
SEL while the desired item is
highlighted. A checkmark will be
displayed next to the selected item.
Info Pages : Press SEL while Info
Pages is highlighted to select the
items to be displayed in the DIC info
displays. See Driver Information Center
(DIC) 0130.
Fav Button Options : Press SEL while
Fav Button Options is highlighted to
select between FAV Primary and SEEK
Primary. This selection allows for
configuration of the
CandB
steering wheel controls. When FAV Primary is selected, pressing
Cand
Bwill go to the next or previous
favorite and pressing and holding
C
andBwill seek. When SEEK Primary
is selected, pressing
CandBwill
seek and pressing and holding
Cand
Bwill go to the next or previous
favorite.
Display Layout : Press SEL while
Display Layout is highlighted to
change the configuration of the
cluster. See “Reconfigurable
Instrument Cluster” earlier in this
section.
Head-up Display (HUD) Rotation :
This feature allows for adjusting the
angle of the HUD image. The vehicle
must be in P (Park). Press SEL on the
steering wheel controls while Head-up
Display Rotation is highlighted to
enter Adjust Mode. Press
yorzto
adjust the angle of the HUD display.
Press
SorTto highlight OK, then press SEL to save the setting. Cancel
can also be selected to cancel the
setting.
Open Source Software :
Press SEL
while Open Source Software is
highlighted to display open source
software information.
Speedometer
The speedometer shows the vehicle's
speed in either kilometers per hour
(km/h) or miles per hour (mph).
Odometer
The odometer shows how far the
vehicle has been driven, in either
kilometers or miles.
Trip Odometer
The trip odometer shows how far the
vehicle has been driven since the trip
odometer was last reset.
The trip odometer is accessed and
reset through the Driver Information
Center (DIC). See Driver Information
Center (DIC) 0130.
Page 122 of 392
Cadillac Escalade Owner Manual (GMNA-Localizing-U.S./Canada/Mexico-
13566588) - 2020 - CRC - 4/24/19
INSTRUMENTS AND CONTROLS 121
If the word ON or the on symbol is lit
on the passenger airbag status
indicator, it means that the front
outboard passenger frontal airbag is
allowed to inflate.
If the word OFF or the off symbol is lit
on the airbag status indicator, it
means that the passenger sensing
system has turned off the front
outboard passenger frontal airbag.
If, after several seconds, both status
indicator lights remain on, or if there
are no lights at all, there may be a
problem with the lights or the
passenger sensing system. See your
dealer for service.
{Warning
If the airbag readiness light ever
comes on and stays on, it means
that something may be wrong with
the airbag system. To help avoid
injury to yourself or others, have
the vehicle serviced right away. See
Airbag Readiness Light0120 for
more information, including
important safety information.
Charging System Light
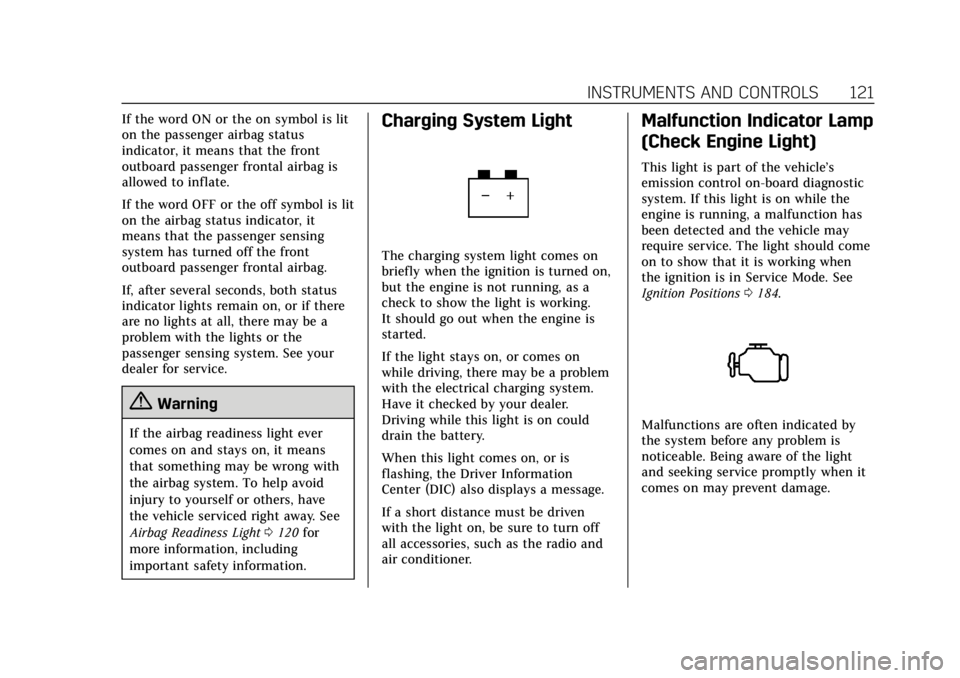
The charging system light comes on
briefly when the ignition is turned on,
but the engine is not running, as a
check to show the light is working.
It should go out when the engine is
started.
If the light stays on, or comes on
while driving, there may be a problem
with the electrical charging system.
Have it checked by your dealer.
Driving while this light is on could
drain the battery.
When this light comes on, or is
flashing, the Driver Information
Center (DIC) also displays a message.
If a short distance must be driven
with the light on, be sure to turn off
all accessories, such as the radio and
air conditioner.
Malfunction Indicator Lamp
(Check Engine Light)
This light is part of the vehicle’s
emission control on-board diagnostic
system. If this light is on while the
engine is running, a malfunction has
been detected and the vehicle may
require service. The light should come
on to show that it is working when
the ignition is in Service Mode. See
Ignition Positions 0184.
Malfunctions are often indicated by
the system before any problem is
noticeable. Being aware of the light
and seeking service promptly when it
comes on may prevent damage.
Page 124 of 392
Cadillac Escalade Owner Manual (GMNA-Localizing-U.S./Canada/Mexico-
13566588) - 2020 - CRC - 4/24/19
INSTRUMENTS AND CONTROLS 123
The DLC is under the instrument
panel to the left of the steering wheel.
Connecting devices that are not used
to perform an Emissions Inspection/
Maintenance test or to service the
vehicle may affect vehicle operation.
SeeAdd-On Electrical Equipment 0253.
See your dealer if assistance is needed.
The vehicle may not pass
inspection if:
. The light is on when the engine is
running.
. The light does not come on when
the ignition is in Service Mode.
. Critical emission control systems
have not been completely
diagnosed. If this happens, the
vehicle would not be ready for
inspection and might require
several days of routine driving
before the system is ready for
inspection. This can happen if the 12-volt battery has recently been
replaced or run down, or if the
vehicle has been recently serviced.
See your dealer if the vehicle will not
pass or cannot be made ready for
the test.Brake System Warning
Light
MetricEnglish
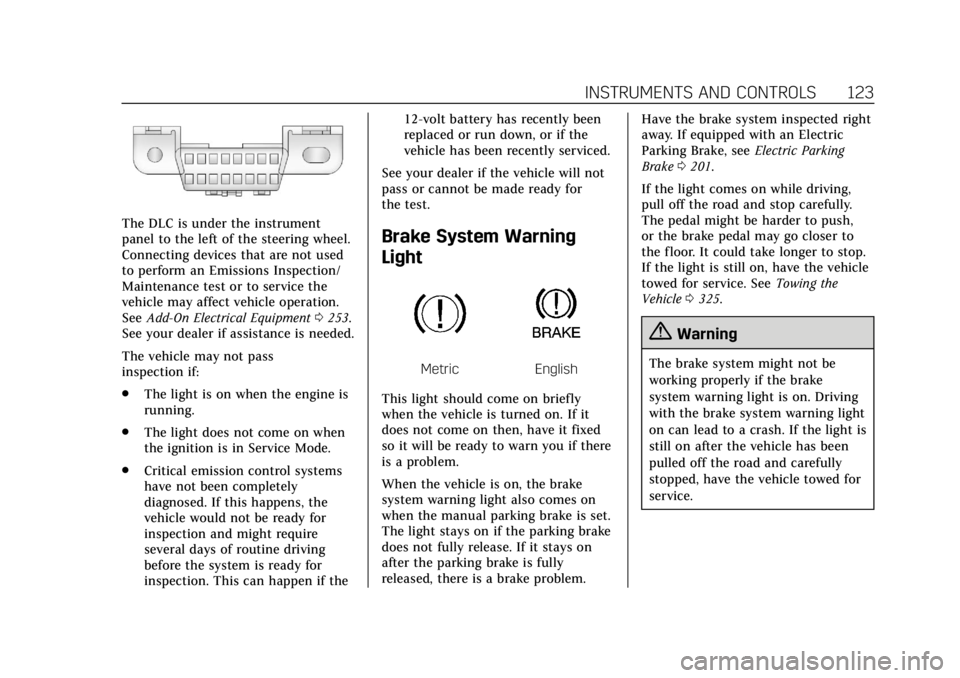
This light should come on briefly
when the vehicle is turned on. If it
does not come on then, have it fixed
so it will be ready to warn you if there
is a problem.
When the vehicle is on, the brake
system warning light also comes on
when the manual parking brake is set.
The light stays on if the parking brake
does not fully release. If it stays on
after the parking brake is fully
released, there is a brake problem. Have the brake system inspected right
away. If equipped with an Electric
Parking Brake, see
Electric Parking
Brake 0201.
If the light comes on while driving,
pull off the road and stop carefully.
The pedal might be harder to push,
or the brake pedal may go closer to
the floor. It could take longer to stop.
If the light is still on, have the vehicle
towed for service. See Towing the
Vehicle 0325.
{Warning
The brake system might not be
working properly if the brake
system warning light is on. Driving
with the brake system warning light
on can lead to a crash. If the light is
still on after the vehicle has been
pulled off the road and carefully
stopped, have the vehicle towed for
service.