Mode CADILLAC ESCALADE 2020 Owner's Guide
[x] Cancel search | Manufacturer: CADILLAC, Model Year: 2020, Model line: ESCALADE, Model: CADILLAC ESCALADE 2020Pages: 392, PDF Size: 6.39 MB
Page 126 of 392
Cadillac Escalade Owner Manual (GMNA-Localizing-U.S./Canada/Mexico-
13566588) - 2020 - CRC - 4/24/19
INSTRUMENTS AND CONTROLS 125
If both the ABS warning light and the
brake system warning light are on,
ABS is not functioning and there is a
problem with the regular brakes. See
your dealer for service.
SeeBrake System Warning Light 0123.
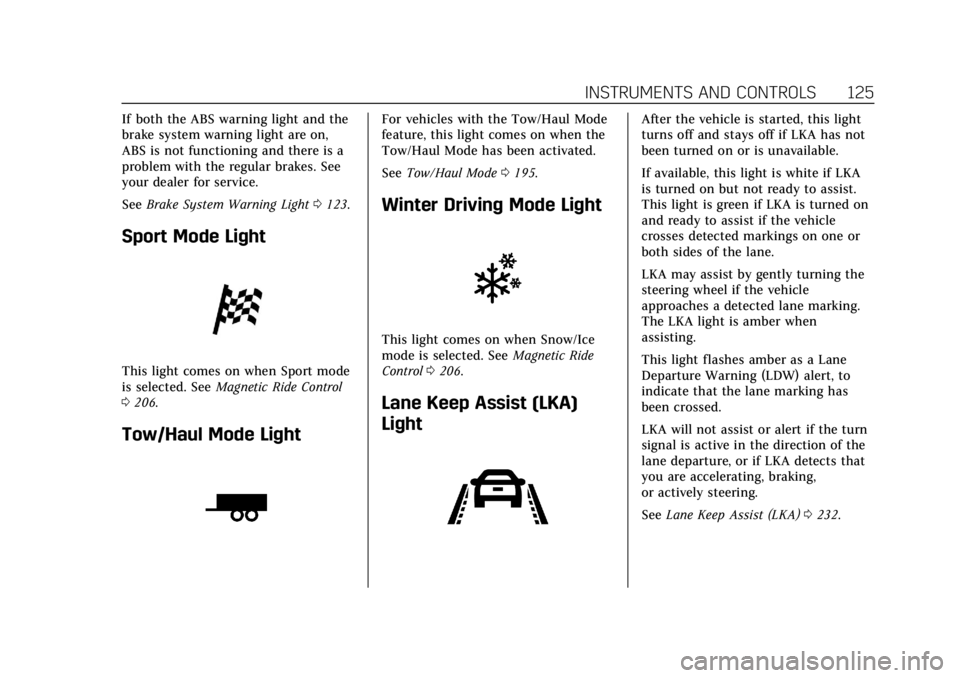
Sport Mode Light
This light comes on when Sport mode
is selected. See Magnetic Ride Control
0 206.
Tow/Haul Mode Light
For vehicles with the Tow/Haul Mode
feature, this light comes on when the
Tow/Haul Mode has been activated.
See Tow/Haul Mode 0195.
Winter Driving Mode Light
This light comes on when Snow/Ice
mode is selected. See Magnetic Ride
Control 0206.
Lane Keep Assist (LKA)
Light
After the vehicle is started, this light
turns off and stays off if LKA has not
been turned on or is unavailable.
If available, this light is white if LKA
is turned on but not ready to assist.
This light is green if LKA is turned on
and ready to assist if the vehicle
crosses detected markings on one or
both sides of the lane.
LKA may assist by gently turning the
steering wheel if the vehicle
approaches a detected lane marking.
The LKA light is amber when
assisting.
This light flashes amber as a Lane
Departure Warning (LDW) alert, to
indicate that the lane marking has
been crossed.
LKA will not assist or alert if the turn
signal is active in the direction of the
lane departure, or if LKA detects that
you are accelerating, braking,
or actively steering.
See Lane Keep Assist (LKA) 0232.
Page 131 of 392
Cadillac Escalade Owner Manual (GMNA-Localizing-U.S./Canada/Mexico-
13566588) - 2020 - CRC - 4/24/19
130 INSTRUMENTS AND CONTROLS
Information Displays
Driver Information
Center (DIC)
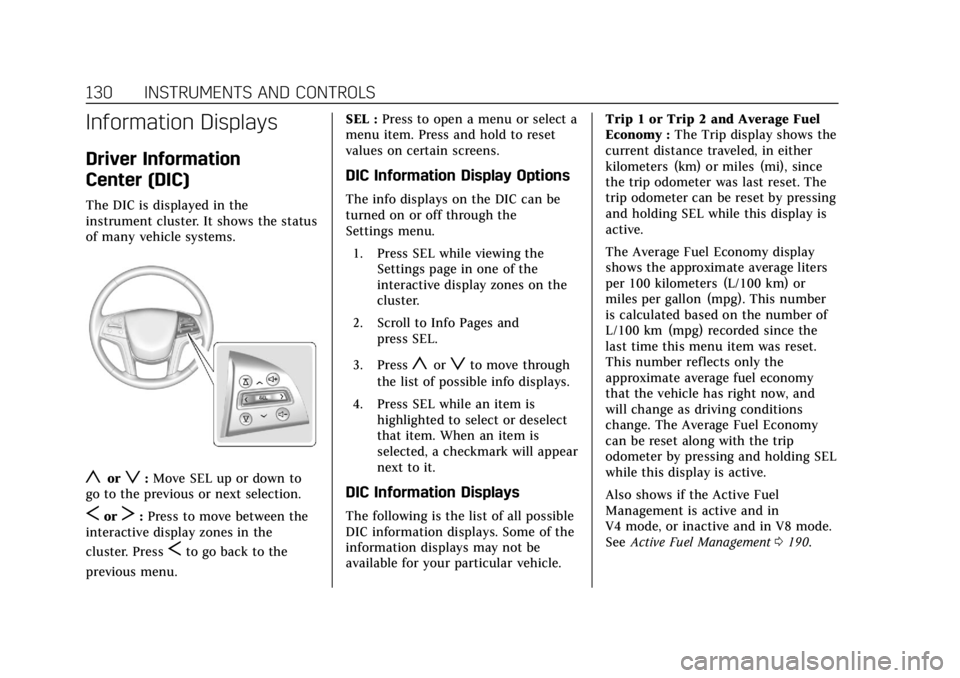
The DIC is displayed in the
instrument cluster. It shows the status
of many vehicle systems.
yorz:Move SEL up or down to
go to the previous or next selection.
SorT: Press to move between the
interactive display zones in the
cluster. Press
Sto go back to the
previous menu. SEL :
Press to open a menu or select a
menu item. Press and hold to reset
values on certain screens.
DIC Information Display Options
The info displays on the DIC can be
turned on or off through the
Settings menu.
1. Press SEL while viewing the Settings page in one of the
interactive display zones on the
cluster.
2. Scroll to Info Pages and press SEL.
3. Press
yorzto move through
the list of possible info displays.
4. Press SEL while an item is highlighted to select or deselect
that item. When an item is
selected, a checkmark will appear
next to it.
DIC Information Displays
The following is the list of all possible
DIC information displays. Some of the
information displays may not be
available for your particular vehicle. Trip 1 or Trip 2 and Average Fuel
Economy :
The Trip display shows the
current distance traveled, in either
kilometers (km) or miles (mi), since
the trip odometer was last reset. The
trip odometer can be reset by pressing
and holding SEL while this display is
active.
The Average Fuel Economy display
shows the approximate average liters
per 100 kilometers (L/100 km) or
miles per gallon (mpg). This number
is calculated based on the number of
L/100 km (mpg) recorded since the
last time this menu item was reset.
This number reflects only the
approximate average fuel economy
that the vehicle has right now, and
will change as driving conditions
change. The Average Fuel Economy
can be reset along with the trip
odometer by pressing and holding SEL
while this display is active.
Also shows if the Active Fuel
Management is active and in
V4 mode, or inactive and in V8 mode.
See Active Fuel Management 0190.
Page 134 of 392
Cadillac Escalade Owner Manual (GMNA-Localizing-U.S./Canada/Mexico-
13566588) - 2020 - CRC - 4/24/19
INSTRUMENTS AND CONTROLS 133
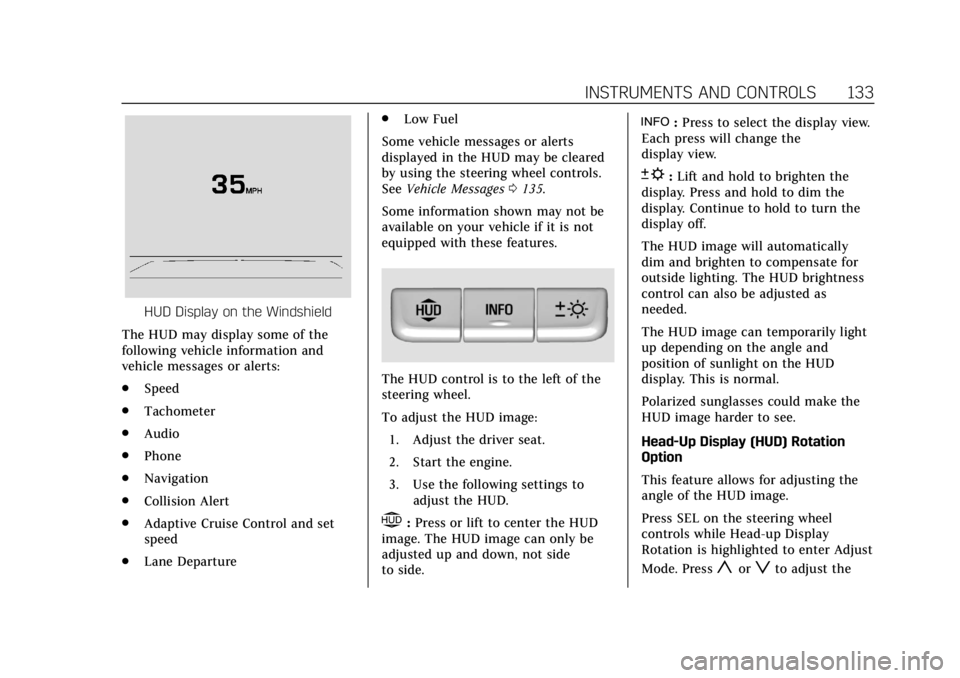
HUD Display on the Windshield
The HUD may display some of the
following vehicle information and
vehicle messages or alerts:
. Speed
. Tachometer
. Audio
. Phone
. Navigation
. Collision Alert
. Adaptive Cruise Control and set
speed
. Lane Departure .
Low Fuel
Some vehicle messages or alerts
displayed in the HUD may be cleared
by using the steering wheel controls.
See Vehicle Messages 0135.
Some information shown may not be
available on your vehicle if it is not
equipped with these features.
The HUD control is to the left of the
steering wheel.
To adjust the HUD image: 1. Adjust the driver seat.
2. Start the engine.
3. Use the following settings to adjust the HUD.
$:Press or lift to center the HUD
image. The HUD image can only be
adjusted up and down, not side
to side.
!: Press to select the display view.
Each press will change the
display view.
D: Lift and hold to brighten the
display. Press and hold to dim the
display. Continue to hold to turn the
display off.
The HUD image will automatically
dim and brighten to compensate for
outside lighting. The HUD brightness
control can also be adjusted as
needed.
The HUD image can temporarily light
up depending on the angle and
position of sunlight on the HUD
display. This is normal.
Polarized sunglasses could make the
HUD image harder to see.
Head-Up Display (HUD) Rotation
Option
This feature allows for adjusting the
angle of the HUD image.
Press SEL on the steering wheel
controls while Head-up Display
Rotation is highlighted to enter Adjust
Mode. Press
yorzto adjust the
Page 138 of 392
Cadillac Escalade Owner Manual (GMNA-Localizing-U.S./Canada/Mexico-
13566588) - 2020 - CRC - 4/24/19
INSTRUMENTS AND CONTROLS 137
.Video Voice-Over
. Valet Mode
. Teen Driver
. Radio
. Vehicle
. Bluetooth
. Apple CarPlay
. Android Auto
. Voice
. Display
. Rear Camera
. Return to Factory Settings
. Software Information
. Wi-Fi
Detailed information for each menu
follows.
Time and Date
Manually set the time and date. See
Clock 0109.
Rear Seat Reminder
This allows for a chime and a message
when the rear door has been opened
before or during operation of the
vehicle.
Select Off or On.
Language
Select Language, then select from the
available language(s).
The selected language will display on
the system, and voice recognition will
reflect the selected language.
Video Voice-Over
When activated, the Rear Seat
Infotainment (RSI) system will read
aloud menu titles, menu listings,
pop-ups, alerts, and file titles from
audio and video media.
Select Off or On.
Valet Mode
This will lock the infotainment system
and steering wheel controls. It may
also limit access to vehicle storage
locations, if equipped. To enable valet mode:
1. Enter a four-digit code on the keypad.
2. Select Enter to go to the confirmation screen.
3. Re-enter the four-digit code.
Touch Lock or Unlock to lock or
unlock the system. Touch Back to go
back to the previous menu.
Teen Driver
See “Teen Driver” under“Settings ”in
the infotainment manual.
Radio
Select to display the Radio menu and
the following may display:
. Manage Favorites
. Number of Favorites Shown
. Audible Touch Feedback
. Bose AudioPilot
. Auto Volume
. Maximum Startup Volume
Page 144 of 392
Cadillac Escalade Owner Manual (GMNA-Localizing-U.S./Canada/Mexico-
13566588) - 2020 - CRC - 4/24/19
INSTRUMENTS AND CONTROLS 143
Apple CarPlay
This feature allows Apple devices to
be connected to the infotainment
system through a USB port.
Select Off or On.
Manage Apple CarPlay Devices
Select to manage Apple devices. Apple
CarPlay must be on for this feature to
be accessed.
Android Auto
Select and the following may display:
.Android Auto
. Manage Android Auto Devices
Android Auto
This feature allows Android devices to
be connected to the infotainment
system through a USB port.
Select Off or On.
Manage Android Auto Devices
Select to manage Android devices.
Android Auto must be on for this
feature to be accessed.
Voice
Select and the following may display:
. Confidence Threshold
. Prompt Length
. Audio Feedback Speed
. Display “What Can I Say?” Tips
Confidence Threshold
This feature allows the adjustment of
the sensitivity of the speech
recognition system.
Select Confirm More or Confirm Less.
Prompt Length
This feature adjusts the voice prompt
length.
Select Short or Long.
Audio Feedback Speed
This feature adjusts the audio
feedback speed.
Select Slow, Medium, or Fast.
Display “What Can I Say?” Tips
This feature gives voice
command tips. Select Off or On.Display
Select and the following may display:
.
Mode
. Proximity Sensing
. Calibrate Touchscreen
. Turn Display Off
Mode
Select to change the display of the
infotainment system.
Select Auto, Day, or Night.
Proximity Sensing
This allows the feature to be turned
on or off.
Select Off, On, or On-Map Only.
Calibrate Touchscreen
Select to calibrate the touchscreen,
then follow the prompts.
Page 146 of 392
Cadillac Escalade Owner Manual (GMNA-Localizing-U.S./Canada/Mexico-
13566588) - 2020 - CRC - 4/24/19
INSTRUMENTS AND CONTROLS 145
Universal Remote
System
SeeRadio Frequency Statement 0366.
Universal Remote System
Programming
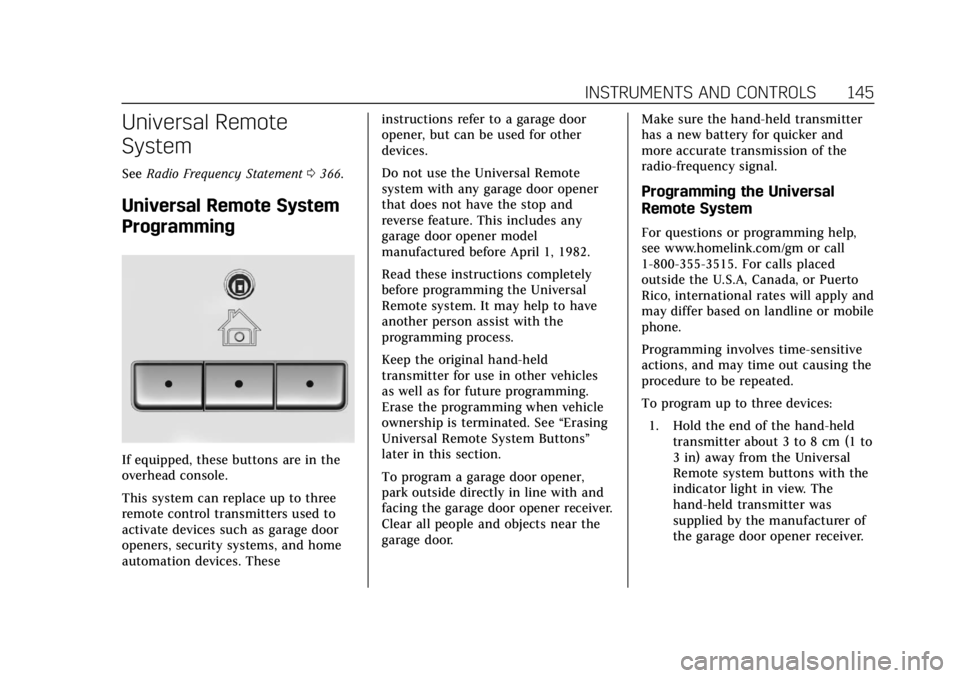
If equipped, these buttons are in the
overhead console.
This system can replace up to three
remote control transmitters used to
activate devices such as garage door
openers, security systems, and home
automation devices. These instructions refer to a garage door
opener, but can be used for other
devices.
Do not use the Universal Remote
system with any garage door opener
that does not have the stop and
reverse feature. This includes any
garage door opener model
manufactured before April 1, 1982.
Read these instructions completely
before programming the Universal
Remote system. It may help to have
another person assist with the
programming process.
Keep the original hand-held
transmitter for use in other vehicles
as well as for future programming.
Erase the programming when vehicle
ownership is terminated. See
“Erasing
Universal Remote System Buttons”
later in this section.
To program a garage door opener,
park outside directly in line with and
facing the garage door opener receiver.
Clear all people and objects near the
garage door. Make sure the hand-held transmitter
has a new battery for quicker and
more accurate transmission of the
radio-frequency signal.
Programming the Universal
Remote System
For questions or programming help,
see www.homelink.com/gm or call
1-800-355-3515. For calls placed
outside the U.S.A, Canada, or Puerto
Rico, international rates will apply and
may differ based on landline or mobile
phone.
Programming involves time-sensitive
actions, and may time out causing the
procedure to be repeated.
To program up to three devices:
1. Hold the end of the hand-held transmitter about 3 to 8 cm (1 to
3 in) away from the Universal
Remote system buttons with the
indicator light in view. The
hand-held transmitter was
supplied by the manufacturer of
the garage door opener receiver.
Page 151 of 392

Cadillac Escalade Owner Manual (GMNA-Localizing-U.S./Canada/Mexico-
13566588) - 2020 - CRC - 4/24/19
150 LIGHTING
.The vehicle is being driven on
winding or hilly roads.
The automatic high-beam headlamps
may need to be disabled if any of the
above conditions exist.
Exterior Lamps Off
Reminder
If a door is open, a reminder chime
sounds when the headlamps or
parking lamps are manually turned on
and the ignition is off. To turn off the
chime, turn the exterior lamp control
to off or AUTO and then back on,
or close and re-open the door. In the
AUTO mode, the headlamps turn off
once the ignition is off or remain on
until the headlamp delay ends (if
enabled in the DIC). See “Exit
Lighting” underVehicle Personalization
0 136.
Headlamp High/Low-Beam
Changer
Push the turn signal lever toward the
instrument panel to change the
headlamps from low to high beam. Pull the turn signal lever toward you
and release it to return to low-beam
headlamps.
When the high-beam headlamps are
on, this indicator light on the
instrument cluster will also be on.
Flash-to-Pass
This feature lets you use the
high-beam headlamps to signal a
driver in front of you that you want to
pass. It works even if the headlamps
are in the automatic position.
To use it, pull the turn signal lever
toward you, then release it.
If the headlamps are in the automatic
position or on low beam, the
high-beam headlamps will turn on.
They will stay on as long as you hold
the lever toward you. The high-beam
indicator on the instrument cluster
will come on. Release the lever to
return to normal operation.
Daytime Running
Lamps (DRL)
DRL can make it easier for others to
see the front of the vehicle during the
day. Fully functional DRL are required
on all vehicles first sold in Canada.
The DRL system comes on when the
following conditions are met:
.
The ignition is on.
. The exterior lamp control is
in AUTO.
. The transmission is not in
P (Park).
. The light sensor determines it is
daytime.
When the DRL system is on, only the
DRL are on. The taillamps, sidemarker
lamps, instrument panel lights, and
other lamps will not be on.
When it begins to get dark, the
automatic headlamp system switches
from DRL to the headlamps.
Page 153 of 392
Cadillac Escalade Owner Manual (GMNA-Localizing-U.S./Canada/Mexico-
13566588) - 2020 - CRC - 4/24/19
152 LIGHTING
the headlamps, parking lamps, and
other exterior lamps come on. The
transition time for the lamps coming
on varies based on wiper speed. When
the wipers are not operating, these
lamps turn off. Move the exterior
lamp control to
Por;to disable
this feature.
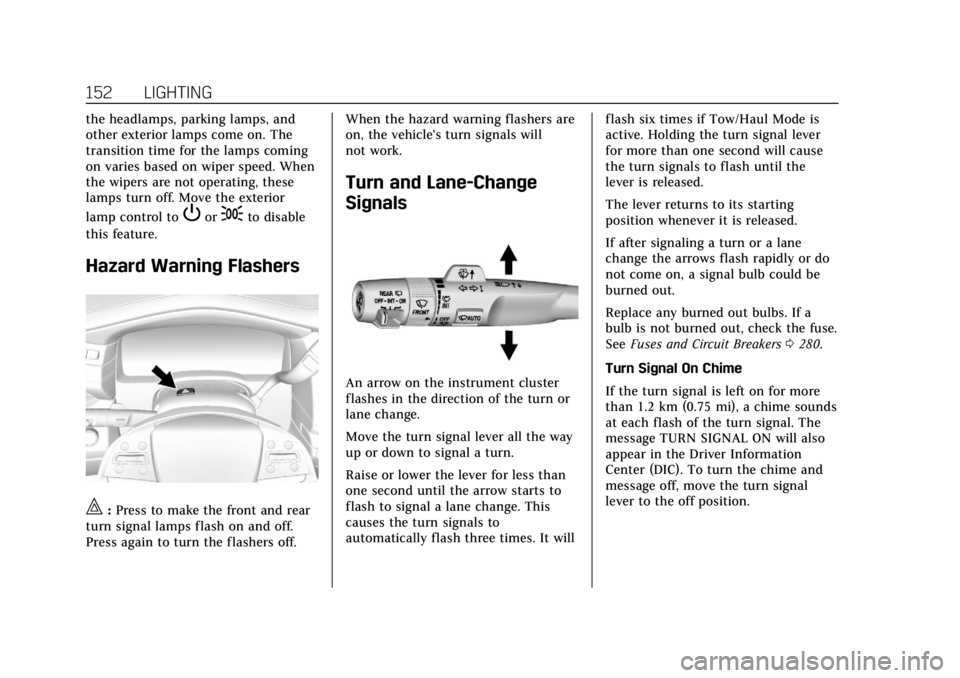
Hazard Warning Flashers
|: Press to make the front and rear
turn signal lamps flash on and off.
Press again to turn the flashers off. When the hazard warning flashers are
on, the vehicle's turn signals will
not work.
Turn and Lane-Change
Signals
An arrow on the instrument cluster
flashes in the direction of the turn or
lane change.
Move the turn signal lever all the way
up or down to signal a turn.
Raise or lower the lever for less than
one second until the arrow starts to
flash to signal a lane change. This
causes the turn signals to
automatically flash three times. It will
flash six times if Tow/Haul Mode is
active. Holding the turn signal lever
for more than one second will cause
the turn signals to flash until the
lever is released.
The lever returns to its starting
position whenever it is released.
If after signaling a turn or a lane
change the arrows flash rapidly or do
not come on, a signal bulb could be
burned out.
Replace any burned out bulbs. If a
bulb is not burned out, check the fuse.
See
Fuses and Circuit Breakers 0280.
Turn Signal On Chime
If the turn signal is left on for more
than 1.2 km (0.75 mi), a chime sounds
at each flash of the turn signal. The
message TURN SIGNAL ON will also
appear in the Driver Information
Center (DIC). To turn the chime and
message off, move the turn signal
lever to the off position.
Page 159 of 392
Cadillac Escalade Owner Manual (GMNA-Localizing-U.S./Canada/Mexico-
13566588) - 2020 - CRC - 4/24/19
158 CLIMATE CONTROLS
5. A/C Mode (Air Conditioning)
6. Climate Control Selection(Application Tray Button)
7. Rear (Rear Climate Control Touch Screen)
8. Air Delivery Mode Control
The fan, air delivery mode, air
conditioning, driver and passenger
temperatures, and SYNC settings can
be controlled by pressing CLIMATE on
the infotainment home screen or the
climate button on the infotainment
display application tray. A selection
can then be made on the front climate
control page displayed. See the
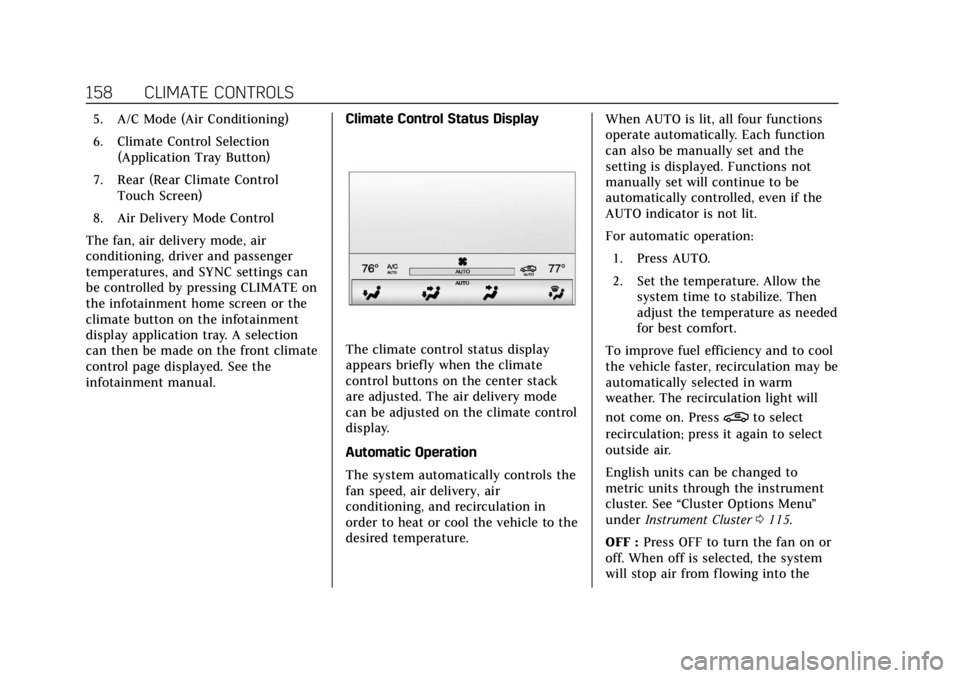
infotainment manual. Climate Control Status Display
The climate control status display
appears briefly when the climate
control buttons on the center stack
are adjusted. The air delivery mode
can be adjusted on the climate control
display.
Automatic Operation
The system automatically controls the
fan speed, air delivery, air
conditioning, and recirculation in
order to heat or cool the vehicle to the
desired temperature.When AUTO is lit, all four functions
operate automatically. Each function
can also be manually set and the
setting is displayed. Functions not
manually set will continue to be
automatically controlled, even if the
AUTO indicator is not lit.
For automatic operation:
1. Press AUTO.
2. Set the temperature. Allow the system time to stabilize. Then
adjust the temperature as needed
for best comfort.
To improve fuel efficiency and to cool
the vehicle faster, recirculation may be
automatically selected in warm
weather. The recirculation light will
not come on. Press
@to select
recirculation; press it again to select
outside air.
English units can be changed to
metric units through the instrument
cluster. See “Cluster Options Menu ”
under Instrument Cluster 0115.
OFF : Press OFF to turn the fan on or
off. When off is selected, the system
will stop air from flowing into the
Page 160 of 392

Cadillac Escalade Owner Manual (GMNA-Localizing-U.S./Canada/Mexico-
13566588) - 2020 - CRC - 4/24/19
CLIMATE CONTROLS 159
cabin. If on is selected, any other
buttons are pressed, or any knobs are
turned, the climate control system will
turn on and operate at the current
setting.
w/x:The temperature can be
adjusted separately for the driver and
the passenger. Press to increase or
decrease the temperature. Press and
hold to rapidly increase or decrease
the temperature.
The driver and passenger
temperatures can also be adjusted by
touching the controls on the climate
control display.
SYNC : Touch SYNC on the climate
control display to link all climate zone
settings to the driver settings. Adjust
the driver side temperature control to
change the linked temperature. When
the passenger settings are adjusted,
the SYNC button is displayed when
the temperatures are unlinked.
Rear : If equipped, touch Rear on the
front climate control display to open
the rear climate control screen. The rear climate control settings can now
be adjusted from the front
passenger area.
Manual Operationz 9 y:
Touch the fan controls on
the climate control display or press
the fan control buttons, to increase or
decrease the fan speed. Touch or press
and hold the fan controls to adjust
speed more quickly. The fan speed
setting displays. Any adjustment of
the fan speed cancels automatic fan
control and the fan can be controlled
manually. Press AUTO to return to
automatic operation.
To turn off the fan and climate
control system, press OFF on the
center stack climate controls. The
airf low will be blocked from entering
in all air delivery modes, except
defrost.
The maximum automatic fan speed
can be set to low, medium, or high. To
adjust Auto Fan Speed, see “Climate
and Air Quality” underVehicle
Personalization 0136. Air Delivery Mode Control :
When
the climate information is displayed,
press the desired air delivery mode on
the climate control display to change
the direction of the airf low. The
selected air delivery mode button is
lit. Pressing any of the air delivery
buttons cancels automatic air delivery
control and the direction of the
airf low can be controlled manually.
Press AUTO to return to automatic
operation.
To change the current mode, select
one of the following:
Y: Air is directed to the instrument
panel outlets.
\: Air is divided between the
instrument panel outlets and the floor
outlets.
[: Air is directed to the floor
outlets.
-: Clears the windows of fog or
moisture. Air is directed to the
windshield and floor outlets.