service CADILLAC ESCALADE ESV 2010 Manual Online
[x] Cancel search | Manufacturer: CADILLAC, Model Year: 2010, Model line: ESCALADE ESV, Model: CADILLAC ESCALADE ESV 2010Pages: 620, PDF Size: 7.4 MB
Page 490 of 620

Black plate (42,1)Cadillac Escalade/Escalade ESV Owner Manual - 2010
Brake Wear This vehicle has disc brakes. Disc brake pads have
built-in wear indicators that make a high-pitched
warning sound when the brake pads are worn and new
pads are needed. The sound can come and go or be
heard all the time the vehicle is moving, except when
applying the brake pedal firmly.
{ WARNING: The brake wear warning sound means that soon
the brakes will not work well. That could lead to a
crash. When the brake wear warning sound is
heard, have the vehicle serviced.
Notice: Continuing to drive with worn-out brake
pads could result in costly brake repair.
Some driving conditions or climates can cause a brake
squeal when the brakes are first applied or lightly
applied. This does not mean something is wrong with
the brakes. Properly torqued wheel nuts are necessary to help
prevent brake pulsation. When tires are rotated, inspect
brake pads for wear and evenly tighten wheel nuts in
the proper sequence to torque specifications in
Capacities and Specifications on page 7 ‑ 117 .
Brake linings should always be replaced as complete
axle sets.
Brake Pedal Travel See your dealer if the brake pedal does not return to
normal height, or if there is a rapid increase in pedal
travel. This could be a sign that brake service might be
required.
Brake Adjustment Every brake stop, the disc brakes adjust for wear.
7-42
Page 496 of 620

Black plate (48,1)Cadillac Escalade/Escalade ESV Owner Manual - 2010
9. Connect the other end of the negative ( − ) cable to
the remote negative ( − ) terminal, on the vehicle
with the dead battery.
10. Now start the vehicle with the good battery and run
the engine for a while.
11. Try to start the vehicle that had the dead battery.
If it will not start after a few tries, it probably needs
service.
Notice: If the jumper cables are connected or
removed in the wrong order, electrical shorting may
occur and damage the vehicle. The repairs would
not be covered by the vehicle warranty. Always
connect and remove the jumper cables in the
correct order, making sure that the cables do not
touch each other or other metal.
Jumper Cable Removal
A. Heavy, Unpainted Metal Engine Part or Remote
Negative ( − ) Terminal
B. Good Battery or Remote Positive (+) and Remote
Negative ( − ) Terminals
C. Dead Battery or Remote Positive (+) Terminal
To disconnect the jumper cables from both vehicles do
the following:
1. Disconnect the black negative ( − ) cable from the
vehicle that had the bad battery.
2. Disconnect the black negative ( − ) cable from the
vehicle with the good battery.
7-48
Page 500 of 620

Black plate (52,1)Cadillac Escalade/Escalade ESV Owner Manual - 2010
Headlamp Aiming The vehicle has a visual optical headlamp aiming
system. The aim of the headlamps have been preset at
the factory and should need no further adjustment.
However, if the vehicle is damaged in a crash, the aim
of the headlamps may be affected and adjustment may
be necessary.
If oncoming vehicles flash their high beams at you, this
may mean the vertical aim of your headlamps needs to
be adjusted.
It is recommended that the vehicle is taken to your
dealer for service if the headlamps need to be adjusted.
It is possible however, to re-aim the headlamps as
described.
The vehicle should: .
Be placed so the headlamps are 25 ft. (7.6 m) from
a light colored wall or other flat surface. .
Have all four tires on a level surface which is level
all the way to the wall or other flat surface. .
Be placed so it is perpendicular to the wall or other
flat surface. .
Not have any snow, ice, or mud on it. .
Be fully assembled and all other work stopped
while headlamp aiming is being performed. .
Be normally loaded with a full tank of fuel and one
person or 160 lbs (75 kg) sitting on the driver seat. .
Have the tires properly inflated. .
Have the spare tire is in its proper location in the
vehicle.
Headlamp aiming is done with the vehicle's low-beam
headlamps. The high-beam headlamps will be correctly
aimed if the low-beam headlamps are aimed properly.
To adjust the vertical aim:
1. Open the hood. See Hood Release
on page 7 ‑ 15
for more information.
2. Locate the center of
the projector lens of
the low ‐ beam
headlamp.
3. Record the distance from the ground to the center
of the projector lens of the low ‐ beam headlamp.
7-52
Page 502 of 620

Black plate (54,1)Cadillac Escalade/Escalade ESV Owner Manual - 2010
9. Make sure that the light from the headlamp is
positioned at the bottom edge of the horizontal
tape line. The lamp on the left (A) shows the
correct headlamp aim. The lamp on the right (B)
shows the incorrect headlamp aim.
10. Repeat Steps 7 through 9 for the opposite
headlamp. Bulb Replacement For the proper type of replacement bulbs, see
Replacement Bulbs on page 7 ‑ 56 .
For any bulb changing procedure not listed in this
section, contact your dealer.
High Intensity Discharge (HID)
Lighting
{ WARNING: The low beam high intensity discharge lighting
system operates at a very high voltage. If you try
to service any of the system components, you
could be seriously injured. Have your dealer or a
qualified technician service them.
The vehicle may have HID headlamps. After an HID
headlamp bulb has been replaced, you may notice that
the beam is a slightly different shade than it was
originally. This is normal.
7-54
Page 504 of 620

Black plate (56,1)Cadillac Escalade/Escalade ESV Owner Manual - 2010
7. Reinstall the taillamp assembly. When reinstalling,
make sure to line up the pins on the taillamp
assembly with the vehicle. If you do not line up the
pins correctly, you will not be able install the
taillamp assembly properly.
If you need to replace the taillamp, stoplamp, or turn
signal, you will need to see your dealer for service.
License Plate Lamp
1. Remove the two screws holding each of the
license plate lamps to the molding that is part of
the liftgate. 2. Twist and pull the license plate lamp forward
through the molding opening.
3. Turn the bulb socket counterclockwise and pull the
bulb straight out of the socket.
4. Install the new bulb.
5. Reverse Steps 1 through 3 to reinstall the license
plate lamp.
Replacement Bulbs Exterior Lamp Bulb Number
Back-up Lamp 7440
License Plate Lamp W5W
For replacement bulbs not listed here, contact your
dealer.
7-56
Page 506 of 620
Black plate (58,1)Cadillac Escalade/Escalade ESV Owner Manual - 2010
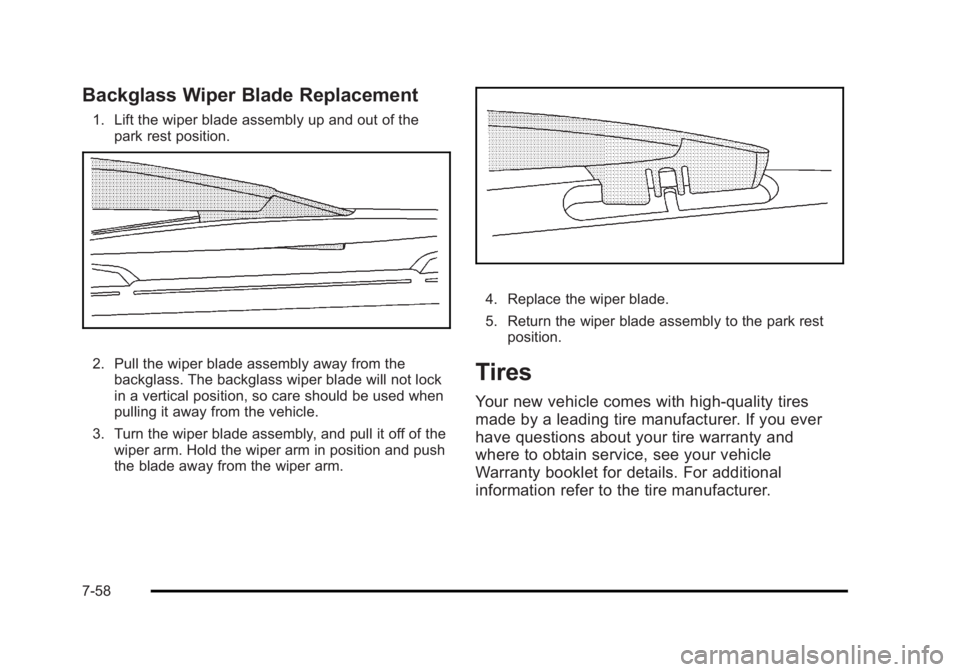
Backglass Wiper Blade Replacement 1. Lift the wiper blade assembly up and out of the
park rest position.
2. Pull the wiper blade assembly away from the
backglass. The backglass wiper blade will not lock
in a vertical position, so care should be used when
pulling it away from the vehicle.
3. Turn the wiper blade assembly, and pull it off of the
wiper arm. Hold the wiper arm in position and push
the blade away from the wiper arm. 4. Replace the wiper blade.
5. Return the wiper blade assembly to the park rest
position.
Tires Your new vehicle comes with high-quality tires
made by a leading tire manufacturer. If you ever
have questions about your tire warranty and
where to obtain service, see your vehicle
Warranty booklet for details. For additional
information refer to the tire manufacturer.
7-58
Page 508 of 620

Black plate (60,1)Cadillac Escalade/Escalade ESV Owner Manual - 2010
Tire Sidewall Labeling Useful information about a tire is molded into the
sidewall. The following illustration is an example
of a typical P ‐ Metric tire sidewall.
Passenger (P ‐ Metric) Tire
(A) Tire Size :
The tire size code is a combination
of letters and numbers used to define a particular
tire's width, height, aspect ratio, construction type,
and service description. See the “ Tire Size ”
illustration later in this section for more detail. (B) TPC Spec (Tire Performance Criteria
Specification) :
Original equipment tires designed
to GM's specific tire performance criteria have a
TPC specification code molded onto the sidewall.
GM's TPC specifications meet or exceed all
federal safety guidelines.
(C) DOT (Department of Transportation) :
The
Department of Transportation (DOT) code
indicates that the tire is in compliance with the
U.S. Department of Transportation Motor Vehicle
Safety Standards.
(D) Tire Identification Number (TIN) :
The letters
and numbers following DOT code are the Tire
Identification Number (TIN). The TIN shows the
manufacturer and plant code, tire size, and date
the tire was manufactured. The TIN is molded
onto both sides of the tire, although only one side
may have the date of manufacture.
(E) Tire Ply Material :
The type of cord and
number of plies in the sidewall and under the
tread.
(F) Uniform Tire Quality Grading (UTQG) :
Tire
manufacturers are required to grade tires based
on three performance factors: treadwear, traction,
and temperature resistance. For more information,
see Uniform Tire Quality Grading
on page 7 ‑ 76 .
7-60
Page 509 of 620

Black plate (61,1)Cadillac Escalade/Escalade ESV Owner Manual - 2010
(G) Maximum Cold Inflation Load Limit :
Maximum load that can be carried and the
maximum pressure needed to support that load.
For information on recommended tire pressure
see Inflation - Tire Pressure
on page 7 ‑ 65 and
Loading the Vehicle
on page 6 ‑ 32 .
Tire Size The following examples show the different parts of
a tire size.
Passenger (P ‐ Metric) Tire
(A) Passenger (P ‐ Metric) Tire :
The United States
version of a metric tire sizing system. The letter P
as the first character in the tire size means a
passenger vehicle tire engineered to standards
set by the U.S. Tire and Rim Association. (B) Tire Width :
The three ‐ digit number indicates
the tire section width in millimeters from sidewall
to sidewall.
(C) Aspect Ratio :
A two ‐ digit number that
indicates the tire height ‐ to ‐ width measurements.
For example, if the tire size aspect ratio is 75, as
shown in item C of the light truck (LT ‐ Metric) tire
illustration, it would mean that the tire's sidewall is
75% as high as it is wide.
(D) Construction Code :
A letter code is used to
indicate the type of ply construction in the tire.
The letter R means radial ply construction; the
letter D means diagonal or bias ply construction;
and the letter B means belted ‐ bias ply
construction.
(E) Rim Diameter :
Diameter of the wheel in
inches.
(F) Service Description :
These characters
represent the load index and speed rating of the
tire. The load index represents the load carry
capacity a tire is certified to carry. The speed
rating is the maximum speed a tire is certified to
carry a load.
7-61
Page 517 of 620

Black plate (69,1)Cadillac Escalade/Escalade ESV Owner Manual - 2010
Notice: Liquid tire sealants could damage the Tire
Pressure Monitor System (TPMS) sensors. Sensor
damage caused by using a tire sealant is not
covered by your warranty. Do not use liquid tire
sealants.
TPMS Malfunction Light and Message The TPMS will not function properly if one or more of
the TPMS sensors are missing or inoperable. When the
system detects a malfunction, the low tire warning light
flashes for about one minute and then stays on for the
remainder of the ignition cycle. A DIC warning message
is also displayed. The low tire warning light and DIC
warning message come on at each ignition cycle until
the problem is corrected. Some of the conditions that
can cause the malfunction light and DIC message to
come on are: .
One of the road tires has been replaced with the
spare tire. The spare tire does not have a TPMS
sensor. The TPMS malfunction light and DIC
message should go off once you re ‐ install the road
tire containing the TPMS sensor. .
The TPMS sensor matching process was started
but not completed or not completed successfully
after rotating the vehicle's tires. The DIC message
and TPMS malfunction light should go off once the
TPMS sensor matching process is performed
successfully. See “ TPMS Sensor Matching
Process ” later in this section. .
One or more TPMS sensors are missing or
damaged. The DIC message and the TPMS
malfunction light should go off when the TPMS
sensors are installed and the sensor matching
process is performed successfully. See your dealer
for service. .
Replacement tires or wheels do not match your
vehicle's original equipment tires or wheels. Tires
and wheels other than those recommended for
your vehicle could prevent the TPMS from
functioning properly. See Buying New Tires
on
page 7 ‑ 73
. .
Operating electronic devices or being near facilities
using radio wave frequencies similar to the TPMS
could cause the TPMS sensors to malfunction.
If the TPMS is not functioning it cannot detect or signal
a low tire condition. See your dealer for service if the
TPMS malfunction light and DIC message comes on
and stays on.
7-69
Page 518 of 620

Black plate (70,1)Cadillac Escalade/Escalade ESV Owner Manual - 2010
TPMS Sensor Matching Process Each TPMS sensor has a unique identification code.
Any time you rotate your vehicle's tires or replace one
or more of the TPMS sensors, the identification codes
will need to be matched to the new tire/wheel position.
The sensors are matched to the tire/wheel positions in
the following order: driver side front tire, passenger side
front tire, passenger side rear tire, and driver side rear
tire using a TPMS diagnostic tool. See your dealer for
service.
The TPMS sensors can also be matched to each tire/
wheel position by increasing or decreasing the tire's air
pressure. If increasing the tire's air pressure, do not
exceed the maximum inflation pressure indicated on the
tire's sidewall.
To decrease air-pressure out of a tire you can use the
pointed end of the valve cap, a pencil-style air pressure
gauge, or a key. You have two minutes to match the first tire/wheel
position, and five minutes overall to match all four tire/
wheel positions. If it takes longer than two minutes, to
match the first tire and wheel, or more than five minutes
to match all four tire and wheel positions the matching
process stops and you need to start over.
The TPMS sensor matching process is outlined below:
1. Set the parking brake.
2. Turn the ignition switch to ON/RUN with the
engine off.
3. Press
Q and
K on the Remote Keyless
Entry (RKE) transmitter at the same time for
approximately five seconds. The horn sounds
twice to signal the receiver is in relearn mode and
TIRE LEARNING ACTIVE message displays on
the DIC screen.
4. Start with the driver side front tire.
7-70