power CADILLAC SRX 2011 2.G Owner's Guide
[x] Cancel search | Manufacturer: CADILLAC, Model Year: 2011, Model line: SRX, Model: CADILLAC SRX 2011 2.GPages: 498, PDF Size: 7.62 MB
Page 60 of 498
Black plate (26,1)Cadillac SRX Owner Manual - 2011
2-26 Keys, Doors and Windows
Express‐Down/Up Windows
Windows that have the
express‐down/up feature
allow the windows to be lowered
and raised fully without holding
the window switch. Press the
window switch fully and release it to
activate the express‐down feature.
Pull the window switch fully up and
release it to activate the express‐up
feature. The express mode can be
canceled at any time by briefly
pressing, or pulling the switch.
Programming the Power
Windows
Programming the power windows
may be necessary if the vehicle's
battery has been disconnected or
discharged.
If the window will not express up
after power has been restored and
a message is displayed in the Driver
Information Center:
1. Close all doors
2. Place the ignition inACC/ACCESSORY or
ON/RUN/START.
3. From any partial open position, close the window and continue
to pull the switch briefly after the
window has fully closed.
Obstacle Detection Feature
The Obstacle Detection Feature is
part of the express-up feature and is
active:
1. In the middle and upper portionsof the window opening.
2. During window up movements.
3. In ignition OFF during all window up movements and during
express-up window movements
in ignition ON/RUN/START.
If there is something blocking the
window during automatic closing,
the window will reverse direction
for a short distance. Weather
conditions such as extreme cold
and/or ice may cause the window to
auto-reverse. The window will return
to normal operation once the object
or condition is removed.
Page 62 of 498
Black plate (28,1)Cadillac SRX Owner Manual - 2011
2-28 Keys, Doors and Windows
Roof
Sunroof
On vehicles with a sunroof, the
switches are on the overhead
console.
The sunroof only operates when
the ignition is in ON/RUN/START
or ACC/ACCESSORY, or in
Retained Accessory Power (RAP).
SeeIgnition Positions on page 9‑18
and Retained Accessory Power
(RAP) on page 9‑22.
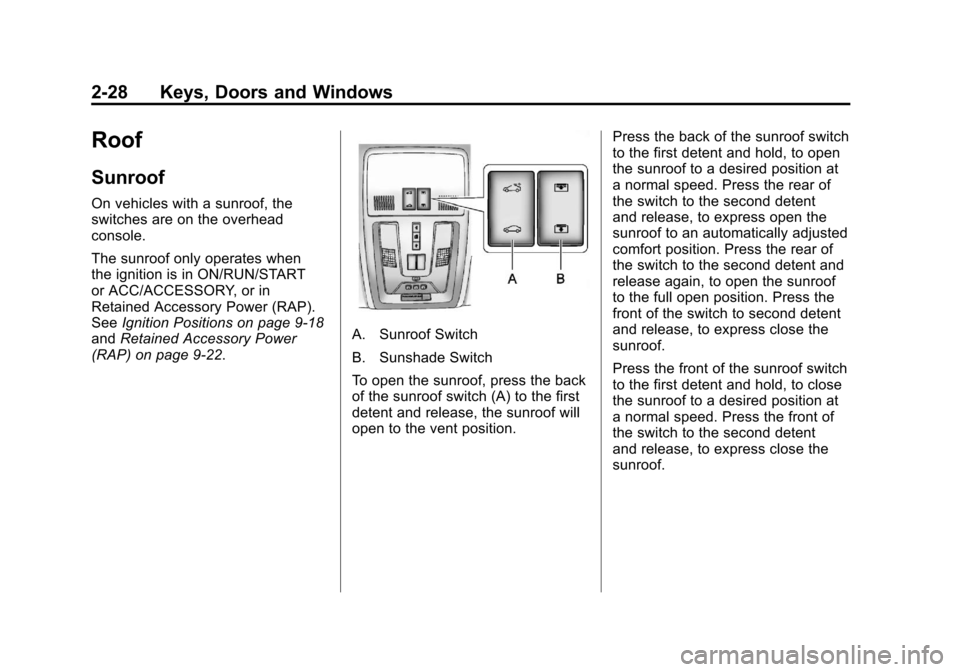
A. Sunroof Switch
B. Sunshade Switch
To open the sunroof, press the back
of the sunroof switch (A) to the first
detent and release, the sunroof will
open to the vent position. Press the back of the sunroof switch
to the first detent and hold, to open
the sunroof to a desired position at
a normal speed. Press the rear of
the switch to the second detent
and release, to express open the
sunroof to an automatically adjusted
comfort position. Press the rear of
the switch to the second detent and
release again, to open the sunroof
to the full open position. Press the
front of the switch to second detent
and release, to express close the
sunroof.
Press the front of the sunroof switch
to the first detent and hold, to close
the sunroof to a desired position at
a normal speed. Press the front of
the switch to the second detent
and release, to express close the
sunroof.
Page 65 of 498
Black plate (1,1)Cadillac SRX Owner Manual - 2011
Seats and Restraints 3-1
Seats and
Restraints
Head Restraints
Head Restraints . . . . . . . . . . . . . . . 3-2
Front Seats
Seat Adjustment . . . . . . . . . . . . . . 3-4
Power Seat Adjustment . . . . . . . 3-4
Lumbar Adjustment . . . . . . . . . . . 3-7
Thigh Support Adjustment . . . . 3-8
Reclining Seatbacks . . . . . . . . . . 3-8
Heated Front Seats . . . . . . . . . . 3-10
Heated and Ventilated FrontSeats . . . . . . . . . . . . . . . . . . . . . . . 3-11
Rear Seats
Rear Seats . . . . . . . . . . . . . . . . . . 3-12
Heated Rear Seats . . . . . . . . . . 3-13
Rear SeatPass-Through Door . . . . . . . . 3-14
Safety Belts
Safety Belts . . . . . . . . . . . . . . . . . . 3-14
How to Wear Safety BeltsProperly . . . . . . . . . . . . . . . . . . . . 3-18
Lap-Shoulder Belt . . . . . . . . . . . 3-24
Safety Belt Use During Pregnancy . . . . . . . . . . . . . . . . . . 3-28
Safety Belt Extender . . . . . . . . . 3-28
Safety System Check . . . . . . . . 3-29
Safety Belt Care . . . . . . . . . . . . . 3-29
Replacing Safety Belt System Parts After a Crash . . . . . . . . . 3-29
Airbag System
Airbag System . . . . . . . . . . . . . . . 3-30
Where Are the Airbags? . . . . . 3-33
When Should an Airbag
Inflate? . . . . . . . . . . . . . . . . . . . . . 3-34
What Makes an Airbag
Inflate? . . . . . . . . . . . . . . . . . . . . . 3-36
How Does an Airbag Restrain? . . . . . . . . . . . . . . . . . . . 3-36
What Will You See After an Airbag Inflates? . . . . . . . . . . . . 3-37
Passenger Sensing System . . . . . . . . . . . . . . . . . . . . . 3-39
Servicing the Airbag-Equipped Vehicle . . . . . . . . . . . . . . . . . . . . . 3-44
Adding Equipment to the Airbag-Equipped Vehicle . . . 3-44
Airbag System Check . . . . . . . . 3-46
Replacing Airbag System Parts After a Crash . . . . . . . . . 3-46
Page 68 of 498
Black plate (4,1)Cadillac SRX Owner Manual - 2011
3-4 Seats and Restraints
Front Seats
Seat Adjustment
{WARNING
You can lose control of the
vehicle if you try to adjust a
manual driver seat while the
vehicle is moving. The sudden(Continued)
WARNING (Continued)
movement could startle and
confuse you, or make you push
a pedal when you do not want to.
Adjust the driver seat only when
the vehicle is not moving.
To adjust a manual seat:
1. Pull the handle at the front of the seat cushion.
2. Move the seat forward or rearward to adjust the seat
position.
3. Release the handle to stop the seat from moving.
4. Try to move the seat back and forth to be sure it is locked in
place.
Power Seat Adjustment
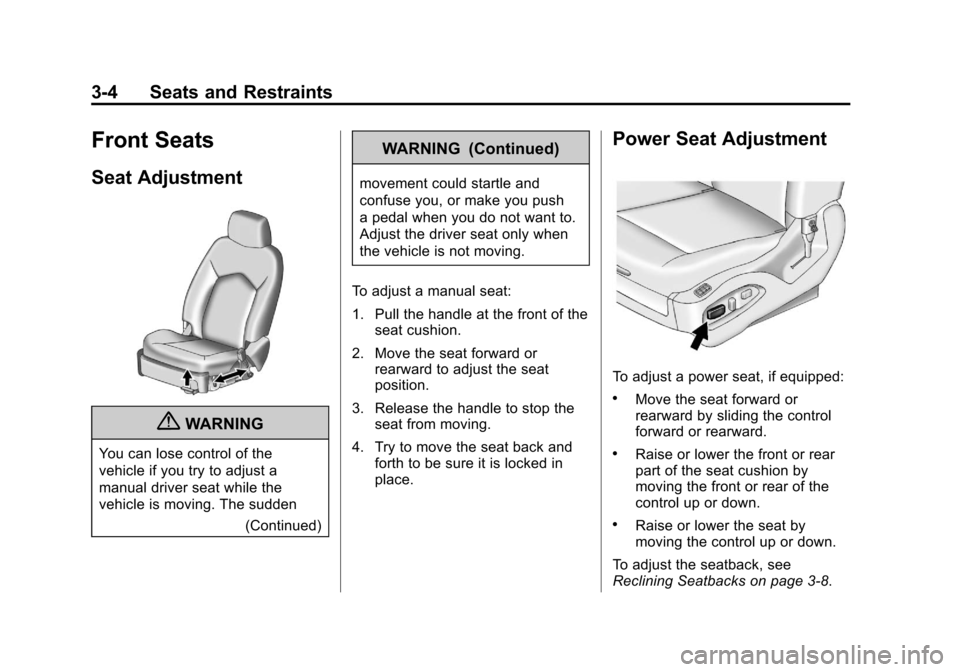
To adjust a power seat, if equipped:
.Move the seat forward or
rearward by sliding the control
forward or rearward.
.Raise or lower the front or rear
part of the seat cushion by
moving the front or rear of the
control up or down.
.Raise or lower the seat by
moving the control up or down.
To adjust the seatback, see
Reclining Seatbacks on page 3‑8.
Page 70 of 498
Black plate (6,1)Cadillac SRX Owner Manual - 2011
3-6 Seats and Restraints
Recalling RKE Memory Positions
(Memory Remote Recall)
The Memory Remote Recall feature
can recall the driver seat, outside
mirrors, and adjustable pedals,
if available, to previously stored
RKE Memory positions when
entering the vehicle.
Every time the ignition is
placed in OFF, the positions
of the driver seat, outside mirrors,
and adjustable pedals, if available,
are automatically stored to the RKE
transmitter that was used to start
the vehicle. These positions are
called RKE Memory positions and
may be different than the previously
mentioned Button Memory positions
saved to the“1”or“2” buttons. To automatically recall RKE
Memory positions, unlock the driver
door with the RKE transmitter, and
open the driver door. On vehicles
with Keyless Access, opening the
driver door when an RKE transmitter
is present will activate the RKE
Memory recall. If the driver door
is already open, pressing the
RKE transmitter
Kbutton will also
activate the RKE Memory recall.
The driver seat, outside mirrors,
and pedals, if available, will move to
the previously saved RKE Memory
positions.
This feature is turned on or off using
the vehicle personalization menu.
See “Memory Remote Recall”
under Vehicle Personalization on
page 5‑40 for more information. To stop recall movement, press
one of the memory, power mirror,
or power seat controls, or the
adjustable pedal switch, if available.
If something has blocked the
driver seat and/or the adjustable
pedals, if available, while recalling
a memory position, the recall
may stop. Remove the obstruction;
then press and hold the appropriate
manual control for the memory item
that is not recalling for two seconds.
Try recalling the memory position
again by opening the driver door
and pressing the RKE transmitter
K
button. If the memory position is
still not recalling, see your dealer
for service.
Page 71 of 498
Black plate (7,1)Cadillac SRX Owner Manual - 2011
Seats and Restraints 3-7
Easy Exit Driver Seat
This feature moves the seat
rearward allowing the driver more
room to exit the vehicle.
To activate, place the ignition in
OFF and open the driver door. If the
driver door is already open, placing
the ignition in OFF will activate the
easy exit driver seat.
This feature is turned on or off
using the vehicle personalization
menu. See“Easy Exit Driver Seat”
under Vehicle Personalization on
page 5‑40 for more information. To stop recall movement, press one
of the memory, power seat controls,
or the adjustable pedal switch,
if available.
If something has blocked the driver
seat while recalling the exit position,
the recall may stop. Remove the
obstruction; then press and hold
the power seat control rearward for
two seconds. Try recalling the exit
position again. If the exit position is
still not recalling, see your dealer for
service.Lumbar Adjustment
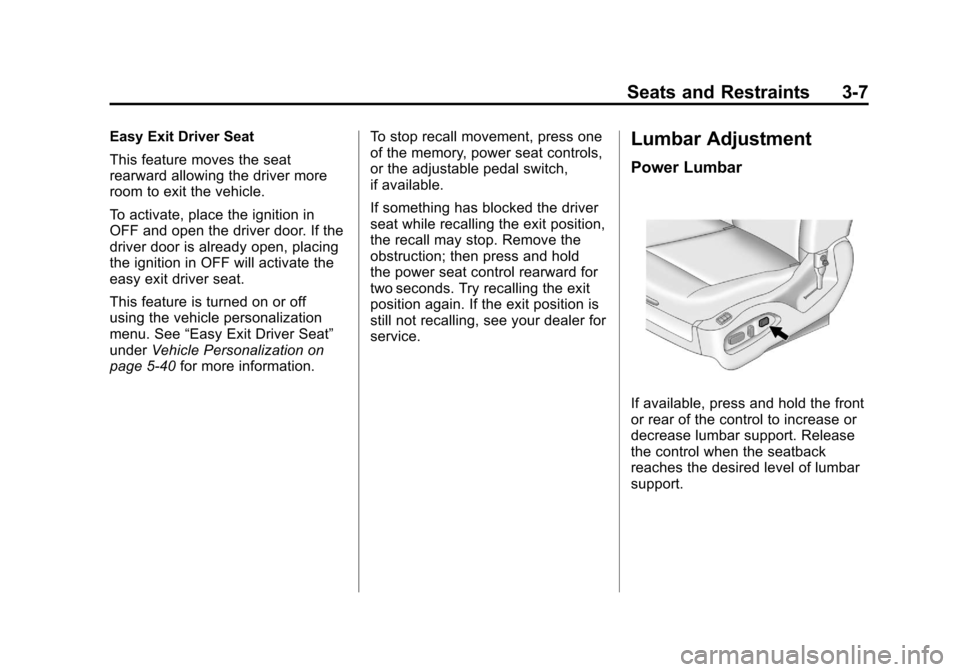
Power Lumbar
If available, press and hold the front
or rear of the control to increase or
decrease lumbar support. Release
the control when the seatback
reaches the desired level of lumbar
support.
Page 73 of 498
Black plate (9,1)Cadillac SRX Owner Manual - 2011
Seats and Restraints 3-9
Manual Reclining Seatbacks
{WARNING
You can lose control of the
vehicle if you try to adjust a
manual driver seat while the
vehicle is moving. The sudden
movement could startle and
confuse you, or make you push
a pedal when you do not want to.
Adjust the driver seat only when
the vehicle is not moving.
{WARNING
If either seatback is not locked, it
could move forward in a sudden
stop or crash. That could cause
injury to the person sitting there.
Always push and pull on the
seatbacks to be sure they are
locked.
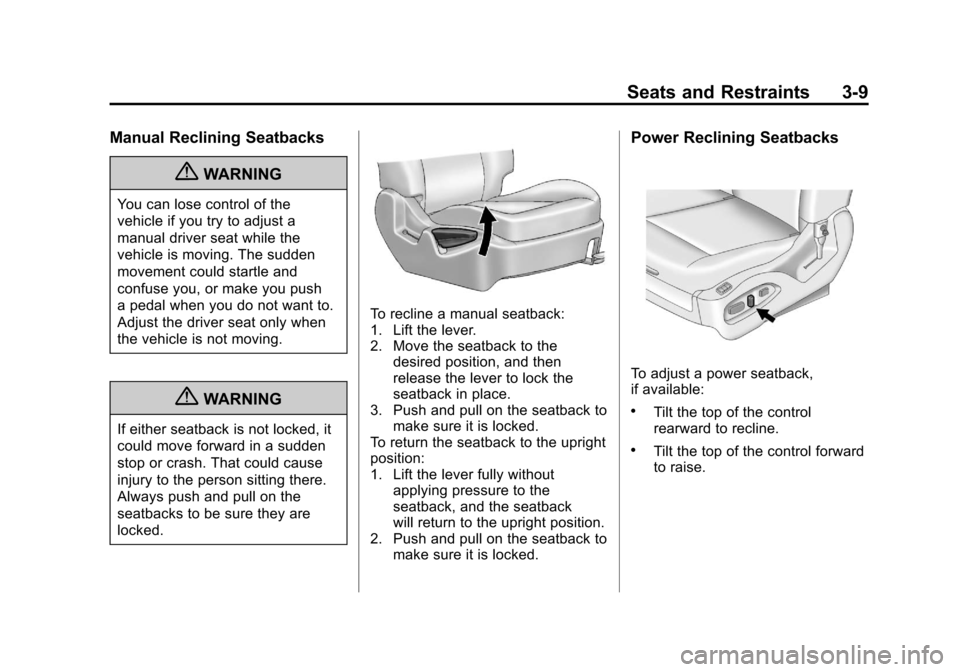
To recline a manual seatback:
1. Lift the lever.
2. Move the seatback to thedesired position, and then
release the lever to lock the
seatback in place.
3. Push and pull on the seatback to make sure it is locked.
To return the seatback to the upright
position:
1. Lift the lever fully without applying pressure to the
seatback, and the seatback
will return to the upright position.
2. Push and pull on the seatback to
make sure it is locked.
Power Reclining Seatbacks
To adjust a power seatback,
if available:
.Tilt the top of the control
rearward to recline.
.Tilt the top of the control forward
to raise.
Page 136 of 498
Black plate (2,1)Cadillac SRX Owner Manual - 2011
4-2 Storage
Cupholders
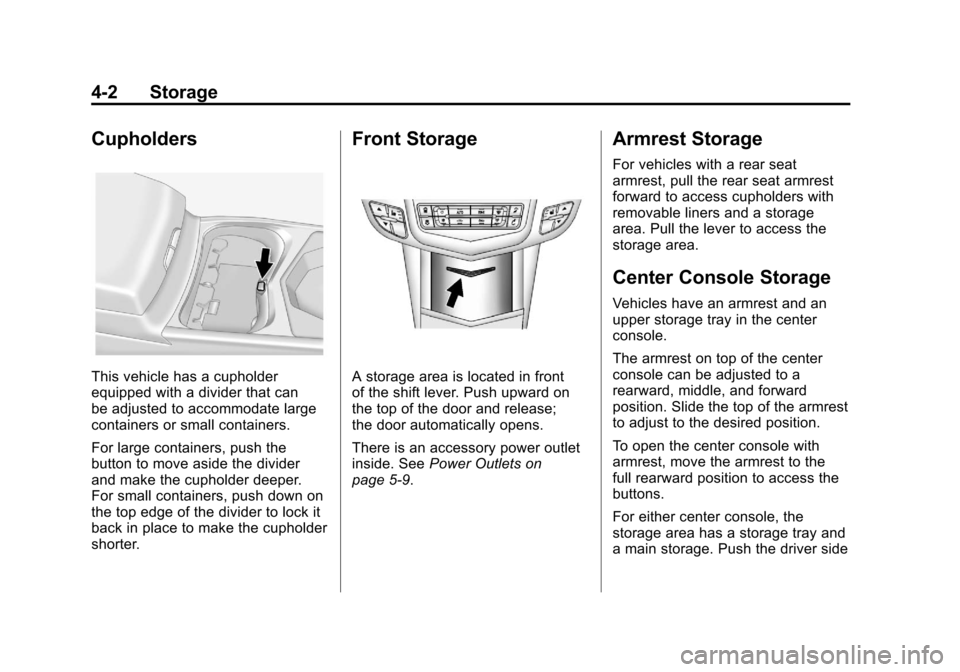
This vehicle has a cupholder
equipped with a divider that can
be adjusted to accommodate large
containers or small containers.
For large containers, push the
button to move aside the divider
and make the cupholder deeper.
For small containers, push down on
the top edge of the divider to lock it
back in place to make the cupholder
shorter.
Front Storage
A storage area is located in front
of the shift lever. Push upward on
the top of the door and release;
the door automatically opens.
There is an accessory power outlet
inside. SeePower Outlets on
page 5‑9.
Armrest Storage
For vehicles with a rear seat
armrest, pull the rear seat armrest
forward to access cupholders with
removable liners and a storage
area. Pull the lever to access the
storage area.
Center Console Storage
Vehicles have an armrest and an
upper storage tray in the center
console.
The armrest on top of the center
console can be adjusted to a
rearward, middle, and forward
position. Slide the top of the armrest
to adjust to the desired position.
To open the center console with
armrest, move the armrest to the
full rearward position to access the
buttons.
For either center console, the
storage area has a storage tray and
a main storage. Push the driver side
Page 137 of 498
Black plate (3,1)Cadillac SRX Owner Manual - 2011
Storage 4-3
button to access the storage tray.
Push the passenger side button to
access the main storage.
There is an accessory power outlet
and input jacks for auxiliary audio
devices. SeePower Outlets on
page 5‑9 andAuxiliary Devices
(Radio with CD ) on page 7‑30
or Auxiliary Devices (Radio with
CD/DVD and MEM) on page 7‑36.
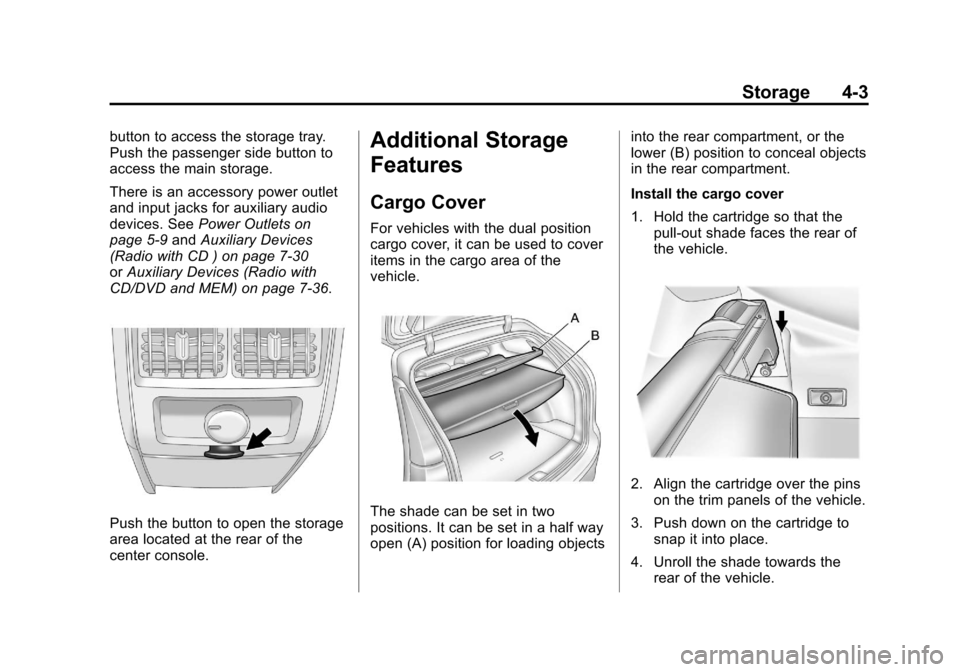
Push the button to open the storage
area located at the rear of the
center console.
Additional Storage
Features
Cargo Cover
For vehicles with the dual position
cargo cover, it can be used to cover
items in the cargo area of the
vehicle.
The shade can be set in two
positions. It can be set in a half way
open (A) position for loading objects into the rear compartment, or the
lower (B) position to conceal objects
in the rear compartment.
Install the cargo cover
1. Hold the cartridge so that the
pull‐out shade faces the rear of
the vehicle.
2. Align the cartridge over the pinson the trim panels of the vehicle.
3. Push down on the cartridge to snap it into place.
4. Unroll the shade towards the rear of the vehicle.
Page 147 of 498
Black plate (1,1)Cadillac SRX Owner Manual - 2011
Instruments and Controls 5-1
Instruments and
Controls
Controls
Steering Wheel Adjustment . . . 5-2
Steering Wheel Controls . . . . . . 5-2
Horn . . . . . . . . . . . . . . . . . . . . . . . . . . 5-3
Windshield Wiper/Washer . . . . . 5-3
Rear Window Wiper/Washer . . . . . . . . . . . . . . . . . . . . . . 5-5
Headlamp Washer . . . . . . . . . . . . 5-6
Compass . . . . . . . . . . . . . . . . . . . . . 5-7
Clock (Analog Clock) . . . . . . . . . . 5-7
Clock (Digital Clock) . . . . . . . . . . 5-8
Power Outlets . . . . . . . . . . . . . . . . . 5-9
Cigarette Lighter . . . . . . . . . . . . . . 5-9
Ashtrays . . . . . . . . . . . . . . . . . . . . . 5-10
Warning Lights, Gauges, and
Indicators
Warning Lights, Gauges, and Indicators . . . . . . . . . . . . . . . . . . 5-10
Instrument Cluster . . . . . . . . . . . 5-11
Speedometer . . . . . . . . . . . . . . . . 5-12
Odometer . . . . . . . . . . . . . . . . . . . . 5-12
Tachometer . . . . . . . . . . . . . . . . . . 5-12
Fuel Gauge . . . . . . . . . . . . . . . . . . 5-12 Fuel Economy Gauge
(3.0L Only) . . . . . . . . . . . . . . . . . 5-13
Turbo Gauge (2.8L Only) . . . . 5-14
Engine Coolant Temperature Gauge . . . . . . . . . . . . . . . . . . . . . . 5-15
Safety Belt Reminders . . . . . . . 5-15
Airbag Readiness Light . . . . . . 5-17
Passenger Airbag Status Indicator . . . . . . . . . . . . . . . . . . . . 5-18
Charging System Light . . . . . . 5-19
Malfunction Indicator Lamp . . . . . . . . . . . . . 5-19
Brake System Warning Light . . . . . . . . . . . . . . . . . . . . . . . 5-22
Electric Parking Brake Light . . . . . . . . . . . . . . . . . . . . . . . 5-23
Antilock Brake System (ABS) Warning Light . . . . . . . . . . . . . . 5-23
Traction Off Light . . . . . . . . . . . . 5-24
StabiliTrak
®OFF Light . . . . . . . 5-24
Traction Control System (TCS)/StabiliTrak
®Light . . . . 5-25
Tire Pressure Light . . . . . . . . . . 5-25
Engine Oil Pressure Light . . . . 5-26
Fuel Economy Light . . . . . . . . . 5-26
Low Fuel Warning Light . . . . . . 5-27
Security Light . . . . . . . . . . . . . . . . 5-27
High-Beam On Light . . . . . . . . . 5-27 Adaptive Forward Lighting
(AFL) Light . . . . . . . . . . . . . . . . . 5-27
Front Fog Lamp Light . . . . . . . . 5-28
Lamps On Reminder . . . . . . . . . 5-28
Cruise Control Light . . . . . . . . . 5-28
Information Displays
Driver Information Center (DIC) . . . . . . . . . . . . . . . 5-28
Vehicle Messages
Vehicle Messages . . . . . . . . . . . 5-32
Battery Voltage and ChargingMessages . . . . . . . . . . . . . . . . . . 5-33
Brake System Messages . . . . 5-33
Compass Messages . . . . . . . . . 5-34
Cruise Control Messages . . . . 5-34
Door Ajar Messages . . . . . . . . . 5-34
Engine Cooling System Messages . . . . . . . . . . . . . . . . . . 5-34
Engine Oil Messages . . . . . . . . 5-35
Engine Power Messages . . . . 5-36
Fuel System Messages . . . . . . 5-36
Key and Lock Messages . . . . . 5-36
Lamp Messages . . . . . . . . . . . . . 5-37
Object Detection System Messages . . . . . . . . . . . . . . . . . . 5-37
Ride Control System Messages . . . . . . . . . . . . . . . . . . 5-37