display CADILLAC XLR 2009 1.G Owners Manual
[x] Cancel search | Manufacturer: CADILLAC, Model Year: 2009, Model line: XLR, Model: CADILLAC XLR 2009 1.GPages: 462, PDF Size: 3.72 MB
Page 290 of 462

Seek Up:Causes the selected audio source to seek up
to the next strongest signal.
Seek Down:Causes the selected audio source to seek
down to the next strongest signal.
Stop Scan:Causes the audio source to stop scanning
for the next strongest signal.
CD Changer Commands
Track Up:Causes the CD changer to skip up to the
next track.
Previous Track, Track Down:Causes the CD changer
to go to the previous track.
Screen Commands
Screen Day Mode, Day Mode On:Adjusts the
system’s screen setting to the day mode.
Screen Night Mode, Night Mode On:Adjusts the
system’s screen setting to the night mode.
Screen Auto Mode, Auto Mode On:Adjusts the
system’s screen setting to auto mode.
Screen Off:Turns the system’s screen display off.
Position Commands
Current Position, Current Location, Show Current
Position, Show Current Location:Displays the
vehicle’s current location on the map screen.
Map:Displays the map screen.
Map Commands
Zoom In:Zooms in when on the map screen.
Zoom Out:Zooms out when on the map screen.
Maximum Scale:Zooms out to the maximum available
map scale when on the map screen.
Minimum Scale:Zooms in to the minimum available
map scale when on the map screen.
Heading Up, Change to Heading Up:Displays the
Vehicle Up heading when on the map screen. The map
scale should be set for under 2 miles (4 km).
North Up, Change to North Up:Displays the North Up
heading when on the map screen if the map scale is
set to 2 miles (4 km) or less.
4-76
Page 291 of 462

Map Direction, Change Map Direction:Changes the
vehicle’s direction from North Up to Heading Up or
Heading Up to North Up on the map screen if the map
scale is set to 2 miles (4 km) or less.
Mark, Mark This Point:Marks the location as a
memory point while on the map screen.
Destination Commands
Home, Go Home:Enters the Home destination, if one
is set.
Go To Starting Point, Previous Starting Point:Enters
the last available starting point as a destination.
Guidance Commands
Repeat Guidance, Repeat Voice:Repeats the last
available voice prompt guidance command if a
destination has been set.
Louder:Increases the volume of the navigation voice
prompts if a destination has been set.
Softer:Decreases the volume of the navigation voice
prompts if a destination has been set.
Voice Guidance Off:Turns off the navigation voice
prompts if a destination has been set.Voice Guidance On:Turns on the navigation voice
prompts if a destination has been set.
Open Guidance, Open Guidance Screen, Open
Guide, Open Guide Screen:Opens the Guidance
Appearance menu if a destination has been set.
Close Guidance, Close Guidance Screen, Close
Guide, Close Guide Screen:Closes the Guidance
Appearance menu if a destination has been set.
Arrow Guidance, Arrow Guide, Change To Arrow
Guidance, Change To Arrow Guide:Changes to
Arrow Guidance screen view in the Guidance Menu if a
destination has been set.
Turn List Guidance, Turn List Guide, Change to
Turn List Guidance, Change to Turn List Guide:
Changes to Turn List Guidance screen view in the
Guidance Menu if a destination has been set.
Entire Route, Entire Route Map, Route Overview:
Displays the entire route if a destination has been set.
Reroute:Generates an alternate route to a set
destination while on a planned route.
Detour, Detour Entire Route:Activates the detour
feature when driving a planned route.
4-77
Page 292 of 462

Delete Destination, Cancel Destination:Cancels a
destination if one has been set.
Next Waypoint Map:Displays the map view of the
next waypoint location if one has been set.
First Waypoint Map:Displays the map view of the �rst
waypoint location if one has been set.
Second Waypoint Map:Displays the map view of the
second waypoint location if more than one waypoint
has been set.
Third Waypoint Map:Displays the map view of the
third waypoint location if more than two waypoints have
been set.
Fourth Waypoint Map:Displays the map view of the
fourth waypoint location if more than three waypoints
have been set.
Fifth Waypoint Map:Displays the map view of the
�fth waypoint location if more than four waypoints have
been set.
Destination Map:Displays the map view of the �nal
destination location if one has been set.Point of Interest (POI) Commands
The following commands cause the system to display
icons if they are available on the map screen when the
map scale is set to a half mile (eight-tenths km) or less.
Restaurant, I’m Hungry:Displays restaurant POI icons.
American Restaurant, American Food:Displays
American restaurant POI icons.
Chinese Restaurant, Chinese Food:Displays Chinese
restaurant POI icons.
Continental Restaurant, Continental Food:Displays
Continental restaurant POI icons.
French Restaurant, French Food:Displays French
restaurant POI icons.
Italian Restaurant, Italian Food:Displays Italian
restaurant POI icons.
Japanese Restaurant, Japanese Food:Displays
Japanese restaurant POI icons.
4-78
Page 293 of 462

Mexican Restaurant, Mexican Food:Displays
Mexican restaurant POI icons.
Seafood Restaurant, Seafood:Displays Seafood
restaurant POI icons.
Other Restaurant, Other Food:Displays other types
of restaurant POI icons.
Shopping, Shopping Mall:Displays mall POI icons.
Grocery Store:Displays grocery store POI icons.
Gas Station, Gas:Displays gas station POI icons.
Parking Garage:Displays parking garage POI icons.
Parking Lot:Displays parking lot POI icons.
Rental Car Agency:Displays rental car POI icons.
Automobile Club, Triple A:Displays auto club
POI icons.
Auto Service And Maintenance, Auto Service,
Maintenance:Displays auto service POI icons.
Hotel:Displays hotel POI icons.
Golf Course:Displays golf course POI icons.Ski Resort, Skiing:Displays ski resort POI icons.
Amusement Park:Displays amusement park
POI icons.
Sport Complex, Stadium:Displays sports complex
POI icons.
Casino:Displays casino POI icons.
Marina:Displays marina POI icons.
Tourist Attraction:Displays tourist attraction POI icons.
Winery:Displays winery POI icons.
City Hall:Displays city hall POI icons.
Police Station:Displays police station POI icons.
Library:Displays library POI icons.
Hospital:Displays hospital POI icons.
Park & Recreation, Parks & Recreation:Displays
parks and recreation POI icons.
Civic Center, Community Center:Displays community
center POI icons.
4-79
Page 294 of 462

Convention Center, Exhibition Center:Displays
convention center POI icons.
Court House:Displays court house POI icons.
Train Station:Displays train station POI icons.
Airport:Displays airport POI icons.
Bus Station:Displays bus station POI icons.
Commuter Rail Station:Displays commuter rail station
POI icons.
Ferry Terminal:Displays ferry terminal POI icons.
Park & Ride:Displays park & ride POI icons.
Rest Area, Rest Stop:Displays rest area POI icons.
Tourist Information:Displays tourist information
POI icons.Historical Monument:Displays historical monument
POI icons.
Performing Arts:Displays performing arts POI icons.
Museum:Displays museum POI icons.
Bank:Displays bank POI icons.
School:Displays school POI icons.
ATM:Displays ATM POI icons.
Higher Education, University, College:Displays
higher education POI icons.
Business Facility:Displays business facility POI icons.
City Center:Displays city center POI icons.
POI Off:Turns off POIs so they do not appear on the
map screen.
4-80
Page 302 of 462
Performance Mode — XLR-V Only
Notice:When traction control is turned off, or
Performance Mode is active, it is possible to lose
traction. If a shift is attempted with the rear wheels
spinning with a loss of traction, it is possible to
cause damage to the transmission. Do not attempt to
shift when the rear wheels do not have traction.
Damage caused by misuse of the vehicle is not
covered. See the warranty book for additional
information.
For vehicles with this feature, the Performance Mode
can be selected by pressing the TCS/StabiliTrak button
on the console two times quickly. PERFORMANCE
MODE comes on the DIC. Performance Mode allows the
driver to have full control of the rear wheels while the
StabiliTrak System helps maintain directional control of
the vehicle by applying the brakes as necessary.
The TCS/StabiliTrak light will not be on. The TCS will
not be operating. Adjust your driving accordingly.
When the TCS/StabiliTrak button is pressed again, the
StabiliTrak and Traction Control Systems will be on.
The TRAC/STABILITRAK ON message will be displayed
brie�y in the DIC and a chime will be heard.
Traction Control System (TCS)
The vehicle has a traction control system that limits
wheel spin. This is especially useful in slippery
road conditions. The system operates only if it senses
that one or both of the rear wheels are spinning or
beginning to lose traction. When this happens,
the system works the rear brakes and reduces engine
power to limit wheel spin.
The TRAC SYSTEM ACTIVE message will display on
the Driver Information Center (DIC) when the traction
control system is limiting wheel spin. SeeDIC Warnings
and Messages on page 3-60. The system may be
heard or felt while it is working, but this is normal.
If cruise control is being used when the traction control
system begins to limit wheel spin, the cruise control
will automatically disengage. Cruise control may be
reengaged when road conditions allow. SeeAdaptive
Cruise Control on page 3-14orCruise Control on
page 3-11for more information.
5-8
Page 303 of 462
This warning light comes
on if there is a problem
with the traction control
system.
SeeStabiliTrak
®/Traction Control System (TCS) Warning
Light on page 3-48. When this warning light is on, the
system will not limit wheel spin. Adjust your driving
accordingly.
The traction control system automatically comes on
whenever the vehicle is started. To limit wheel spin,
especially in slippery road conditions, the system should
always be left on but can be turned off if needed. It may
be necessary to turn the system off if the vehicle is stuck
in sand, mud or snow and rocking the vehicle is required.
SeeRocking Your Vehicle to Get It Out on page 5-20and
If Your Vehicle is Stuck in Sand, Mud, Ice, or Snow on
page 5-20for more information.To turn the system off,
press the traction control
button located on the
center console.
The TRACTION SYSTEM OFF message will display on
the DIC and the traction control system warning light will
come on. If the system is limiting wheel spin when the
button is pressed, the TRACTION SYSTEM OFF
message will display – but the system will not turn off right
away. It will wait until there is no longer a current need to
limit wheel spin.
The system can be turned back on at any time by
pressing the button again. The TRACTION SYSTEM ON
message should display brie�y on the Driver Information
Center. SeeDIC Warnings and Messages on page 3-60
for more information.
Adding non-GM accessories can affect the vehicle’s
performance. SeeAccessories and Modifications
on page 6-3for more information.
5-9
Page 304 of 462
Magnetic Ride Control™
With this feature, Magnetic Ride Control automatically
adjusts the ride of the vehicle based on driving
conditions. The controller receives input from the system
to determine the proper ride. If the controller detects
a problem within the system, the DIC will display a
SERVICE RIDE CONTROL message. SeeDIC
Warnings and Messages on page 3-60for more
information. See your dealer/retailer for service.
Limited-Slip Rear Axle
Vehicles with a limited-slip rear axle can give more
traction on snow, mud, ice, sand or gravel. It works like
a standard axle most of the time, but when traction
is low, this feature allows the drive wheel with the most
traction to move the vehicle.
Steering
Power Steering
If you lose power steering assist because the engine
stops or the system is not functioning, you can steer but
it will take much more effort.
Magnetic Speed Variable Assist
Steering System
This system continuously adjusts the effort you feel
when steering at all vehicle speeds. It provides ease
when parking, yet a �rm, solid feel at highway speeds.
Steering Tips
It is important to take curves at a reasonable speed.
Traction in a curve depends on the condition of the tires
and the road surface, the angle at which the curve is
banked, and your speed. While in a curve, speed is the
one factor you can control.
If you need to reduce speed, do it before you enter the
curve, while the front wheels are straight ahead.
Try to adjust the speed so you can drive through the
curve. Maintain a reasonable, steady speed. Wait
to accelerate until you are out of the curve, and then
accelerate gently into the straightaway.
5-10
Page 329 of 462
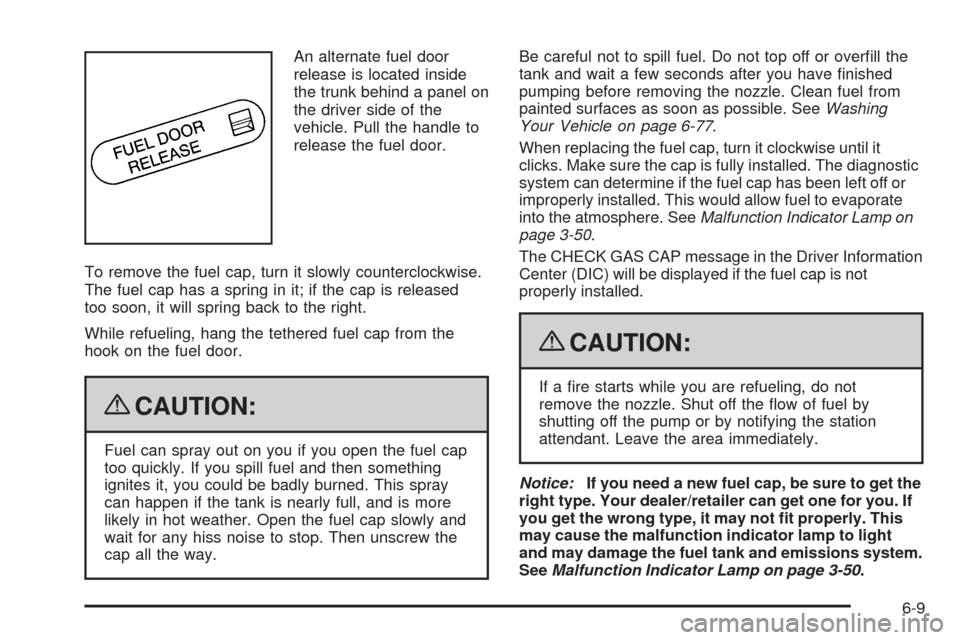
An alternate fuel door
release is located inside
the trunk behind a panel on
the driver side of the
vehicle. Pull the handle to
release the fuel door.
To remove the fuel cap, turn it slowly counterclockwise.
The fuel cap has a spring in it; if the cap is released
too soon, it will spring back to the right.
While refueling, hang the tethered fuel cap from the
hook on the fuel door.
{CAUTION:
Fuel can spray out on you if you open the fuel cap
too quickly. If you spill fuel and then something
ignites it, you could be badly burned. This spray
can happen if the tank is nearly full, and is more
likely in hot weather. Open the fuel cap slowly and
wait for any hiss noise to stop. Then unscrew the
cap all the way.Be careful not to spill fuel. Do not top off or over�ll the
tank and wait a few seconds after you have �nished
pumping before removing the nozzle. Clean fuel from
painted surfaces as soon as possible. SeeWashing
Your Vehicle on page 6-77.
When replacing the fuel cap, turn it clockwise until it
clicks. Make sure the cap is fully installed. The diagnostic
system can determine if the fuel cap has been left off or
improperly installed. This would allow fuel to evaporate
into the atmosphere. SeeMalfunction Indicator Lamp on
page 3-50.
The CHECK GAS CAP message in the Driver Information
Center (DIC) will be displayed if the fuel cap is not
properly installed.
{CAUTION:
If a �re starts while you are refueling, do not
remove the nozzle. Shut off the �ow of fuel by
shutting off the pump or by notifying the station
attendant. Leave the area immediately.
Notice:If you need a new fuel cap, be sure to get the
right type. Your dealer/retailer can get one for you. If
you get the wrong type, it may not �t properly. This
may cause the malfunction indicator lamp to light
and may damage the fuel tank and emissions system.
SeeMalfunction Indicator Lamp on page 3-50.
6-9
Page 347 of 462
If the LOW COOLANT message does not appear on the
Driver Information Center (DIC) after two minutes, the
coolant is at the proper �ll level. If a LOW COOLANT
message does appear, repeat Steps 1 through 3 then
reinstall the pressure cap, or see your dealer/retailer.
If coolant is needed, add the proper DEX-COOL
®
coolant mixture at the coolant surge tank.
Notice:If the pressure cap is not tightly installed,
coolant loss and possible engine damage may occur.
Be sure the cap is properly and tightly secured.
The coolant surge tank pressure cap must be fully
installed on the coolant surge tank. SeeEngine
Compartment Overview on page 6-12for more
information on location.
Engine Overheating
The vehicle has several indicators to warn of engine
overheating.
There is a COOLANT OVER TEMP message or an
ENGINE HOT, STOP ENGINE message displayed in the
Driver Information Center (DIC). SeeDIC Warnings
and Messages on page 3-60. You will also hear a chime.There is also an engine coolant temperature gage on
the instrument panel cluster. SeeEngine Coolant
Temperature Gage on page 3-49.
You may decide not to lift the hood when this warning
appears, but instead get service help right away.
SeeRoadside Service on page 8-7.
If you do decide to lift the hood, make sure the vehicle
is parked on a level surface.
Then check to see if the engine cooling fans are
running. If the engine is overheating, both fans should
be running. If they are not, do not continue to run
the engine and have the vehicle serviced.
Notice:Engine damage from running the engine
without coolant is not covered by the warranty.
Notice:If the engine catches �re while driving
with no coolant, the vehicle can be badly damaged.
The costly repairs would not be covered by the
vehicle warranty. SeeOverheated Engine Protection
Operating Mode on page 6-29for information on
driving to a safe place in an emergency.
6-27