key CADILLAC XLR V 2006 1.G Owner's Manual
[x] Cancel search | Manufacturer: CADILLAC, Model Year: 2006, Model line: XLR V, Model: CADILLAC XLR V 2006 1.GPages: 456, PDF Size: 3.74 MB
Page 90 of 456
OnStar®System
OnStar®uses global positioning system (GPS) satellite
technology, wireless communications, and live advisors
to provide you with a wide range of safety, security,
information, and convenience services. If your airbags
deploy, the system is designed to make an automatic call
to OnStar
®Emergency where we can request emergency
services be sent to your location. If you lock your keys in
the car, call OnStar
®at 1-888-4-ONSTAR and they can
send a signal to unlock your doors. If you need roadside
assistance, press the OnStar
®button and they will get
you the help you need.
A complete OnStar
®User’s Guide and the Terms and
Conditions of the OnStar®Subscription Service
Agreement are included in the vehicle’s glove box
literature. For more information, visit www.onstar.com or
www.onstar.ca. Contact OnStar
®at 1-888-4-ONSTAR
(1-888-466-7827), or press the OnStar®button to speak
to an OnStar®advisor 24 hours a day, 7 days a week.Terms and conditions of the Subscription Service
Agreement can be found at www.onstar.com or
www.onstar.ca.
OnStar®Services
The OnStar®Directions and Connections Plan is
included on new vehicles for the �rst year from the date
of purchase. You can extend this plan beyond the
�rst year to meet your needs. For more information,
press the OnStar
®button to speak with an advisor.
Directions and Connections Plan
Automatic Noti�cation of Airbag Deployment
Emergency Services
Roadside Assistance
Stolen Vehicle Tracking
Accident Assist
Remote Door Unlock/Vehicle Alert
Remote Diagnostics
Driving Directions
Ride Assist
Information and Convenience Services
2-38
Page 97 of 456
Storage Areas
Glove Box
To open the glove box, lift up on the lever. The glove
box has a light inside. Use the key to lock and unlock.
Cupholder(s)
The cupholders are located under a lid in the front
console to the right of the shift lever. Press the left side
of the lid and it will open automatically.
Center Console Storage Area
There is a center console storage area located between
the seats. To open this storage area, push the latch
button and lift the lid.
There is also an upright center console storage area
between the seatbacks. To open the storage area, press
and release the button near the top so it extends out.
Then, turn the button in either direction to unlatch the lid
and pull the console lid down. After you close the lid,
press the release button back in.
Map Pocket
The map/storage pockets are located on each door
behind a cover.
Floor Mats
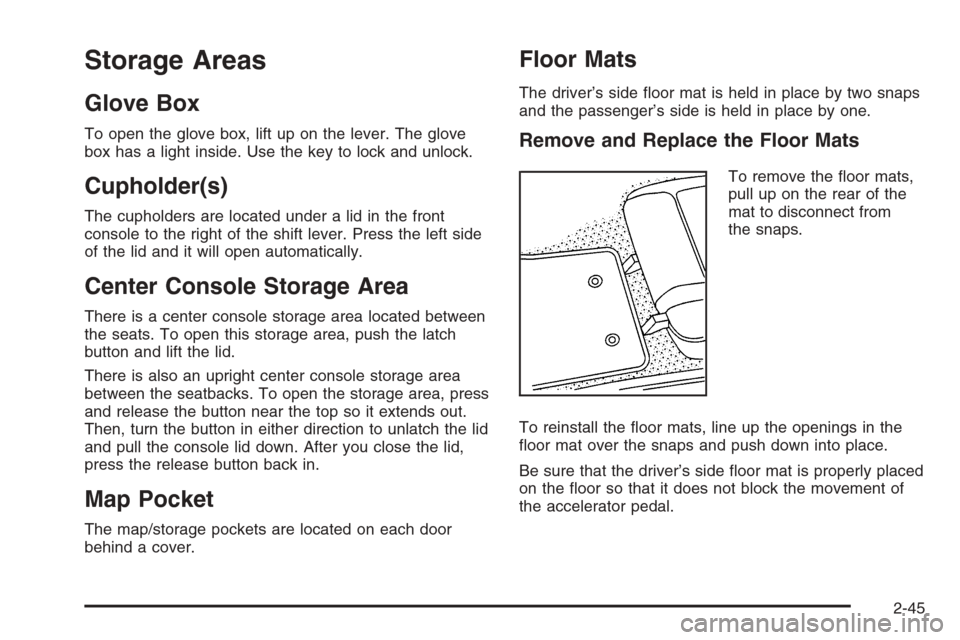
The driver’s side �oor mat is held in place by two snaps
and the passenger’s side is held in place by one.
Remove and Replace the Floor Mats
To remove the �oor mats,
pull up on the rear of the
mat to disconnect from
the snaps.
To reinstall the �oor mats, line up the openings in the
�oor mat over the snaps and push down into place.
Be sure that the driver’s side �oor mat is properly placed
on the �oor so that it does not block the movement of
the accelerator pedal.
2-45
Page 101 of 456
5. Push and hold the
top of the retractable
hardtop button located
behind the shift lever.
The windows will
automatically lower
and the top will raise.
A chime will sound
when the top has raised
completely.
After the top is fully raised, release the retractable
hardtop button. If you press the button again within
�ve seconds, the windows will automatically close.
If your radio is on, you may notice a brief mute in
sound. This is normal and due to a new audio system
equalization being loaded for the vehicle with the
top raised.
Under certain conditions, the Driver Information
Center (DIC) may display a message regarding the
retractable hardtop. If this happens, seeDIC Warnings
and Messages on page 3-67for more information.Manually Raising the Retractable Hardtop
If your vehicle has a power loss, such as a dead battery,
you can still raise the top manually by doing the following:
1. Lower both sun visors and open both doors.
2. Use the key to open the trunk. SeeKeys on
page 2-2andTrunk on page 2-12for more
information.
3. Raise the trunk by hand.
4. Remove the wrench located inside the passenger’s
side storage compartment.
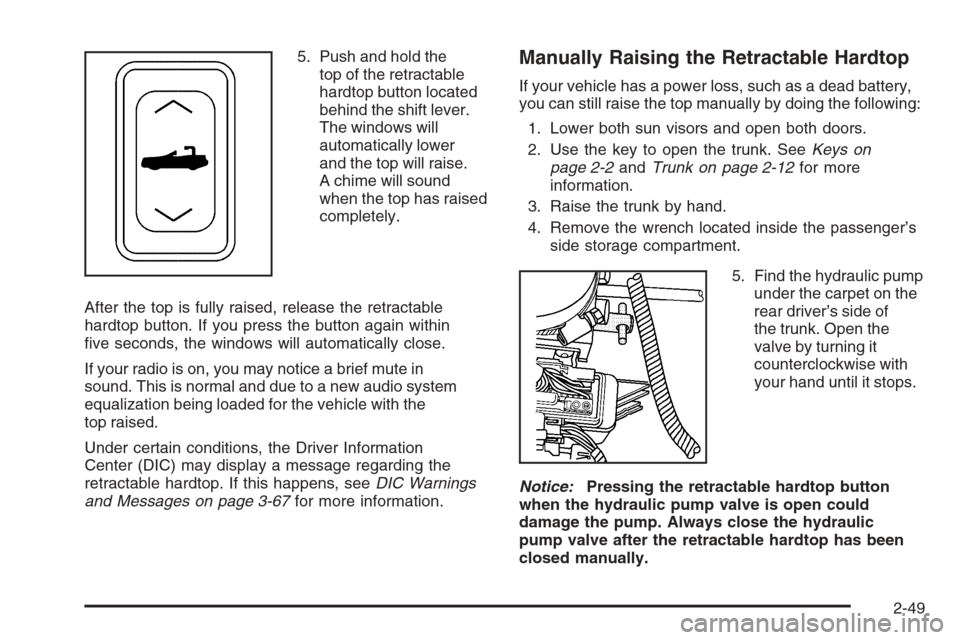
5. Find the hydraulic pump
under the carpet on the
rear driver’s side of
the trunk. Open the
valve by turning it
counterclockwise with
your hand until it stops.
Notice:Pressing the retractable hardtop button
when the hydraulic pump valve is open could
damage the pump. Always close the hydraulic
pump valve after the retractable hardtop has been
closed manually.
2-49
Page 109 of 456
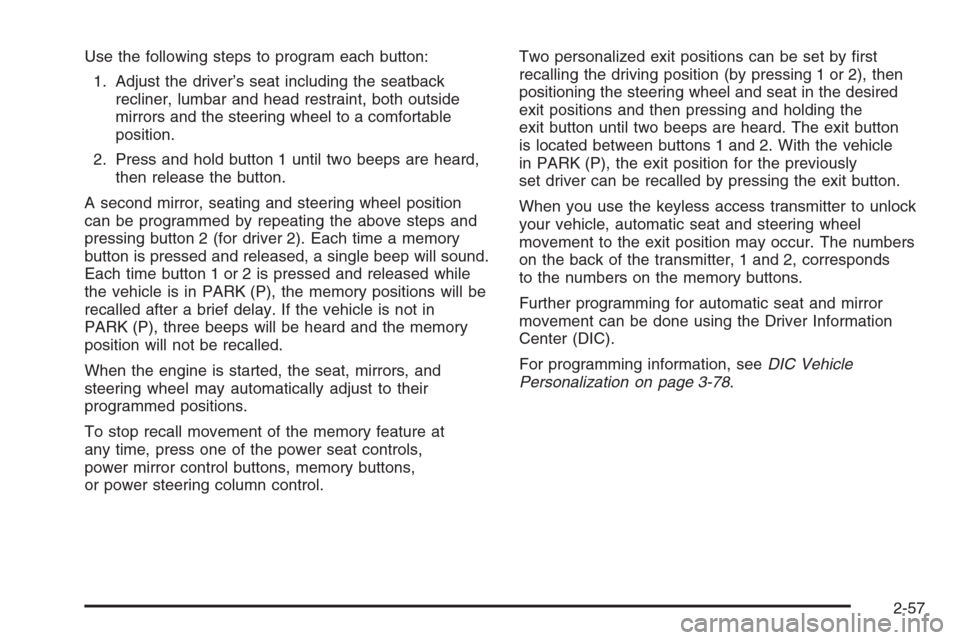
Use the following steps to program each button:
1. Adjust the driver’s seat including the seatback
recliner, lumbar and head restraint, both outside
mirrors and the steering wheel to a comfortable
position.
2. Press and hold button 1 until two beeps are heard,
then release the button.
A second mirror, seating and steering wheel position
can be programmed by repeating the above steps and
pressing button 2 (for driver 2). Each time a memory
button is pressed and released, a single beep will sound.
Each time button 1 or 2 is pressed and released while
the vehicle is in PARK (P), the memory positions will be
recalled after a brief delay. If the vehicle is not in
PARK (P), three beeps will be heard and the memory
position will not be recalled.
When the engine is started, the seat, mirrors, and
steering wheel may automatically adjust to their
programmed positions.
To stop recall movement of the memory feature at
any time, press one of the power seat controls,
power mirror control buttons, memory buttons,
or power steering column control.Two personalized exit positions can be set by �rst
recalling the driving position (by pressing 1 or 2), then
positioning the steering wheel and seat in the desired
exit positions and then pressing and holding the
exit button until two beeps are heard. The exit button
is located between buttons 1 and 2. With the vehicle
in PARK (P), the exit position for the previously
set driver can be recalled by pressing the exit button.
When you use the keyless access transmitter to unlock
your vehicle, automatic seat and steering wheel
movement to the exit position may occur. The numbers
on the back of the transmitter, 1 and 2, corresponds
to the numbers on the memory buttons.
Further programming for automatic seat and mirror
movement can be done using the Driver Information
Center (DIC).
For programming information, seeDIC Vehicle
Personalization on page 3-78.
2-57
Page 144 of 456
Battery Run-Down Protection
Your vehicle has a feature to help prevent you from
draining the battery in case the underhood lamp, vanity
mirror lamps, cargo lamps, reading lamps, console
or glove box lamps are accidentally left on or in case
something is plugged into the accessory power outlet or
cigarette lighter. If you leave any of these lamps on,
they will automatically time-out after about 20 minutes.
To reset it, all of the above lamps must be turned
off or the ignition key must be in ON.
Head-Up Display (HUD)
{CAUTION:
If the HUD image is too bright, or too high in
your �eld of view, it may take you more time to
see things you need to see when it is dark
outside. Be sure to keep the HUD image dim
and placed low in your �eld of view.The Head-Up Display (HUD) allows you to see some of
the driver information that appears on your instrument
panel cluster.
The information may be displayed in English or metric
units and appears as an image focused out toward
the front of your vehicle. To change from English
to metric units, seeDriver Information Center (DIC)
on page 3-64.
The HUD consists of the following information:
Speedometer
Turn Signal Indicators
High-Beam Indicator Symbol
Tap-Up/Tap-Down Transmission Feature
Check Gages Icon
Adaptive Cruise Control Features and Indicators
Radio Features
3-34
Page 170 of 456
Emissions Inspection and
Maintenance Programs
Some state/provincial and local governments have or
may begin programs to inspect the emission control
equipment on your vehicle. Failure to pass this
inspection could prevent you from getting a vehicle
registration.
Here are some things you need to know to help
your vehicle pass an inspection:
Your vehicle will not pass this inspection if the
Check Engine light is on or not working properly.
To perform a Check Engine light bulb check with the
keyless ignition, make sure the transmitter fob is in
the passenger compartment. SeeIgnition Positions
on page 2-21. Press the bottom of the ACC button
on the instrument panel and hold the button down
for �ve seconds. The instrument panel, including
the Check Engine light, will light up and the ignitionwill be on, but the engine will not start — if you press
the bottom of the ACC button only brie�y, less than
�ve seconds, the accessory power mode will be turned
on, but not the ignition. After the bulb check, be sure
to press and release the ACC button again to turn
the ignition off and avoid draining the vehicle’s battery.
Your vehicle will not pass this inspection if the
OBD (on-board diagnostic) system determines that
critical emission control systems have not been
completely diagnosed by the system. The vehicle
would be considered not ready for inspection. This can
happen if you have recently replaced your battery or
if your battery has run down. The diagnostic system is
designed to evaluate critical emission control systems
during normal driving. This may take several days
of routine driving. If you have done this and your vehicle
still does not pass the inspection for lack of OBD
system readiness, your GM dealer can prepare the
vehicle for inspection.
3-60
Page 182 of 456
NO FOB DETECTED:This message is displayed if
the vehicle does not detect the presence of a keyless
access transmitter when you have attempted to start the
vehicle or a vehicle door has just closed. The following
conditions may cause this message to appear:
Driver-added equipment plugged into the accessory
power outlet on the center console is causing
interference. Examples of these devices are cell
phones and cell phone chargers, two-way radios,
power inverters, or similar items. Try moving
the keyless access transmitter away from these
devices when starting the vehicle. In addition,
PDA devices and remote garage and gate openers
may also generate Electromagnetic Interference
(EMI) that may interfere with the keyless access
transmitter. Do not carry the keyless access
transmitter in the same pocket or bag as these
devices.
The vehicle is experiencing Electromagnetic
Interference (EMI). Some locations, such as
airports, automatic toll booths, and some gas
stations, have EMI �elds which may interfere with
your keyless access transmitter.
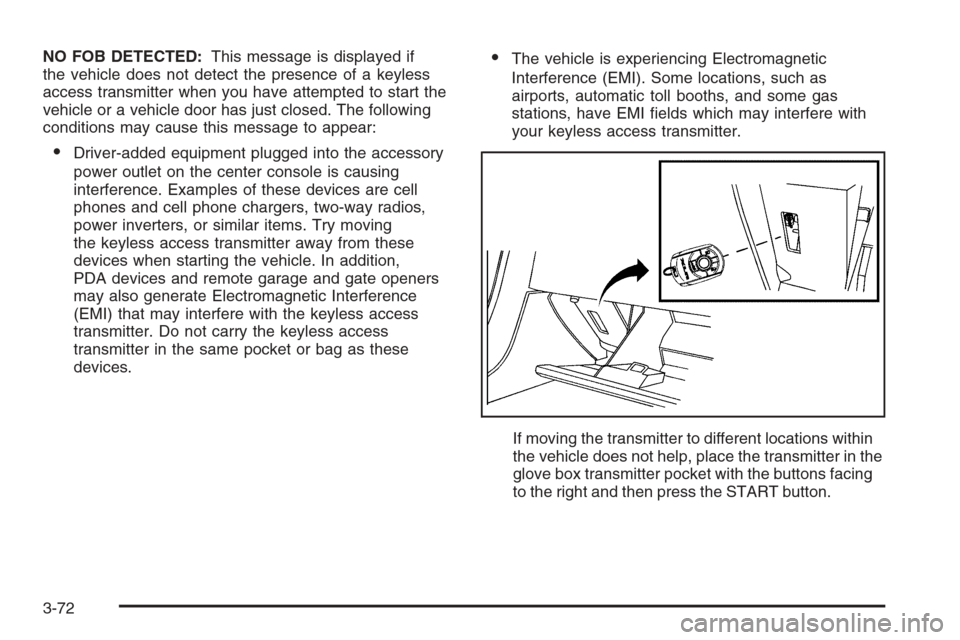
If moving the transmitter to different locations within
the vehicle does not help, place the transmitter in the
glove box transmitter pocket with the buttons facing
to the right and then press the START button.
3-72
Page 183 of 456
NO FOB, OFF OR RUN?:When this message displays,
it means that the keyless access transmitter is not
detected inside the vehicle while you are trying to turn
the ignition off. Your vehicle may be near a strong
radio antenna signal causing the keyless access system
to be jammed. The vehicle will remain in ACC until off
or START has been pressed or �ve minutes has
expired. If you turn the ignition off and you cannot �nd
the keyless access transmitter, you will not be able
to restart the vehicle. The keyless access transmitter
needs to be inside of the vehicle in order for the vehicle
to start. SeeStarting the Engine on page 2-22for
more information.
OVER SPEED WARNING:This message is displayed
when the vehicle speed exceeds a certain limit as
required by some export countries. A chime will sound
when this message is displayed.
PRESS BRAKE TO START:The brake pedal must
be applied to start the vehicle. Make sure you are
pressing the brake pedal all the way down.
REDUCED ENGINE POWER:This message informs
you that the vehicle is reducing engine power because
the transmission is being placed in gear under conditions
that may cause damage to the vehicle’s engine,
transmission, or ability to accelerate. Reduced engine
power can affect the vehicle’s ability to accelerate. If this
message is on, but there is no reduction in performance,
proceed to your destination.The performance may be reduced the next time the
vehicle is driven. The vehicle may be driven at a reduced
speed while this message is on, but acceleration and
speed may be reduced. Anytime this message stays on,
the vehicle should be taken to your GM dealer for service
as soon as possible.
RIGHT DOOR AJAR:The passenger’s door is open or
ajar when this message appears. The vehicle must
be running and the transmission not in PARK (P) for this
message to display. A chime will sound if the vehicle’s
speed is greater than 3 mph (5 km/h).
SERVICE A/C:This message appears when the
electronic sensors that control the air conditioning and
heating systems are no longer working. Have the climate
control system serviced by your GM dealer if you
notice a drop in heating and air conditioning efficiency.
SERVICE ABS (Anti-Lock Brake System):If the
SERVICE ABS message is displayed when you
are driving, stop as soon as possible and turn the
ignition off. Then start the engine again to reset the
system. If the message stays on, or comes back
on again while you are driving, your vehicle is in need
of service. See your GM dealer.
If the SERVICE ABS message is being displayed, your
Traction Control System and StabiliTrak
®System
will also be disabled.
3-73
Page 188 of 456
DIC Vehicle Personalization
Your vehicle is equipped with personalization capabilities
that allows you to program certain features to a
preferred setting for up to two drivers. The back of the
keyless access transmitters are labelled 1 or 2.
The current driver’s preferences are recalled when one
of the following occurs:
The lock or unlock button on the keyless access
transmitter, programmed as 1 or 2, is pressed.
The appropriate memory button, 1 or 2, located on
the driver’s seat is pressed. SeeMemory Seat,
Mirrors and Steering Wheel on page 2-56for more
information.
A valid keyless access transmitter is detected upon
opening the driver’s door.
If more than one valid keyless access transmitter is
detected upon opening the driver’s door, the driver
preferences for the lowest driver number will be recalled.
If a keyless access transmitter is programmed
as #3 or #4, the personalization system will not
recognize the transmitter. The Driver Information
Center (DIC) will not display a current driver number
and the features that are normally programmed
through the DIC will be set to the default states.Also, if the OPTIONS button is pressed, the DIC does
not display the menus used to set personalizations,
but instead displays OPTIONS UNAVAILABLE for a
few seconds.
Feature Programming
To change feature preferences, make sure the vehicle
is running and in PARK (P). Press the OPTIONS
button and the Driver Information Center (DIC) will
display the current driver for a few seconds, then display
the �rst personalization menu item. You can now use
the OPTIONS button to change the setting of the
displayed feature. Press the top or bottom of the
information button to scroll up or down the list of
features. When you get to a feature you want to change,
press the OPTIONS button again. When you are
�nished, press the RESET button to exit the
personalization menu. If no button is pressed within
45 seconds, the DIC will exit the personalization menu.
The following are DIC options that will be available
in the personalization menu.
Auto Recall
This feature allows the steering column, outside mirrors
and the driver’s seat to automatically move to the current
driver’s set position when the engine starts. The DIC will
display AUTO RECALL OFF or AUTO RECALL ON.
Press the OPTIONS button to change the setting.
3-78
Page 189 of 456
Auto Exit Recall
This feature allows the steering column and driver’s
seat to automatically move to the current driver’s
exit position when one of the following occurs:
The vehicle is turned off or in RAP or accessory
mode and the driver’s door is opened.
The vehicle is turned off or in RAP and the unlock
button on the keyless access transmitter is
pressed.
The DIC will display AUTO EXIT RECALL OFF or
AUTO EXIT RECALL ON. Press the OPTIONS button
to change the setting.
Approach Lights
This feature activates the parking lamps, front fog lamps
and back-up lamps during low light periods when the
unlock button on the keyless access transmitter is
pressed, both doors are closed and the vehicle is off or
in RAP. The lamps remain on for 20 seconds or until
a door is opened, the lock button on the keyless access
transmitter is pressed or the vehicle is no longer off
or in RAP.
The DIC will display APPROACH LIGHTS OFF or
APPROACH LIGHTS ON. Press the OPTIONS button
to change the setting.
Exit Lights
This feature activates the parking lamps and front fog
lamps for 15, 30 or 90 seconds. This will occur when the
vehicle is off or in RAP and the headlamps are on
due to the automatic headlamp system. The parking
lamps and front fog lamps will remain on until the driver
selected time period expires, the exterior lamp control
is activated or the vehicle is no longer off or in RAP.
The DIC will display EXIT LIGHTS OFF, EXIT
LIGHTS - 15 SEC, EXIT LIGHTS - 30 SEC or
EXIT LIGHTS - 90 SEC. Press the OPTIONS button
to change the setting.
Flash at Unlock
This feature activates the front and rear turn signals for
two short �ashes when the unlock or trunk button on
the keyless access transmitter is pressed. This will only
occur when the vehicle is off.
The DIC will display NO FLASH AT UNLOCK or FLASH
AT UNLOCK. Press the OPTIONS button to change
the setting.
3-79