service CHEVROLET CAMARO SS 2010 Owners Manual
[x] Cancel search | Manufacturer: CHEVROLET, Model Year: 2010, Model line: CAMARO SS, Model: CHEVROLET CAMARO SS 2010Pages: 372, PDF Size: 1.91 MB
Page 2 of 372
Bulb Replacement
.........9-37
Electrical System
...........9-41
Wheels and Tires
..........9-48
Jump Starting
...............9-84
Towing
........................9-87
Appearance Care
..........9-88
Service and
Maintenance.....................10-1
General Information
.......10-1
Scheduled
Maintenance
..............10-2
Recommended Fluids,
Lubricants, and
Parts
........................10-7
Maintenance Records
. . . 10-10
Technical Data.................11-1
Vehicle Identification
......11-1
Vehicle Data
.................11-2
Customer Information......12-1
Customer Information
.....12-1
Reporting Safety
Defects
...................12-13
Vehicle Data Recording
and Privacy
.............12-14
Index................................... i-1
Page 4 of 372
Using this Manual
To quickly locate information about
the vehicle use the Index in the
back of the manual. It is an
alphabetical list of what is in the
manual and the page number where
it can be found.
Danger, Warnings, and
Cautions
Warning messages found on vehicle
labels and in this manual describe
hazards and what to do to avoid
or reduce them.
Dangerindicates a hazard with a
high level of risk which will result in
serious injury or death.
WarningorCautionindicates a
hazard that could result in injury
or death.
{WARNING
These mean there is something
that could hurt you or other people.
Notice:This means there is
something that could result in
property or vehicle damage.
This would not be covered by
the vehicle’s warranty.
A circle with a slash through it is
a safety symbol which means
“Do Not,” “Do not do this” or
“Do not let this happen.”
Symbols
The vehicle has components and
labels that use symbols instead
of text. Symbols are shown along
with the text describing the operation
or information relating to a specific
component, control, message, gage,
or indicator.
M:This symbol is shown when
you need to see your owner manual
for additional instructions or
information.
*:This symbol is shown when
you need to see a service manual
for additional instructions or
information.
iv Introduction
Page 9 of 372
Remote Keyless Entry
(RKE) System
SeeRadio Frequency Statement
(US, Can) on page 12-15for
information regarding Part 15 of
the Federal Communications
Commission (FCC) Rules and
RSS-210/211 of Industry and
Science Canada.
Changes or modifications to this
system by other than an authorized
service facility could void
authorization to use this equipment.
If there is a decrease in the RKE
operating range, try this:
•Check the distance. The
transmitter may be too far from
the vehicle. Stand closer
during rainy or snowy weather.
•Check the location. Other
vehicles or objects may be
blocking the signal. Take a
few steps to the left or right,
hold the transmitter higher, and
try again.
•Check the transmitter’s battery.
See “Battery Replacement”
later in this section.
•If the transmitter is still not
working correctly, see your
dealer/retailer or a qualified
technician for service.
Remote Keyless Entry
(RKE) System Operation
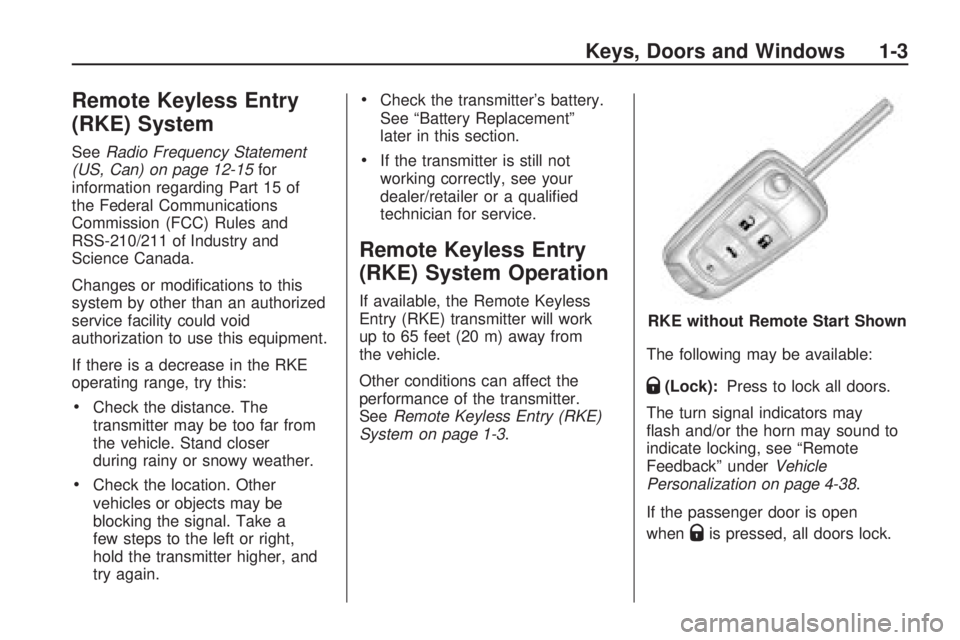
If available, the Remote Keyless
Entry (RKE) transmitter will work
up to 65 feet (20 m) away from
the vehicle.
Other conditions can affect the
performance of the transmitter.
SeeRemote Keyless Entry (RKE)
System on page 1-3.The following may be available:
Q(Lock):Press to lock all doors.
The turn signal indicators may
flash and/or the horn may sound to
indicate locking, see “Remote
Feedback” underVehicle
Personalization on page 4-38.
If the passenger door is open
when
Qis pressed, all doors lock. RKE without Remote Start Shown
Keys, Doors and Windows 1-3
Page 17 of 372
How to Detect a Tamper
Condition
If the horn sounds and the turn
signal lamps flash three times
when
Kis pressed, an attempted
break-in has occurred while the
system was armed. The vehicle may
also display a message on the
DIC. SeeAnti-Theft Alarm System
Messages on page 4-35for
more information.
Immobilizer
SeeRadio Frequency Statement
(US, Can) on page 12-15for
information regarding Part 15
of the Federal Communications
Commission (FCC) Rules and
RSS-210/211 of Industry and
Science Canada.
Immobilizer Operation
This vehicle has a passive
theft-deterrent system.
The system does not have to be
manually armed or disarmed.The vehicle is automatically
immobilized when the key is
removed from the ignition.
The system is automatically
disarmed when the vehicle is started
with the correct key. The key uses
a transponder that matches an
immobilizer control unit in the
vehicle and automatically disarms
the system. Only the correct key
starts the vehicle. The vehicle may
not start if the key is damaged.
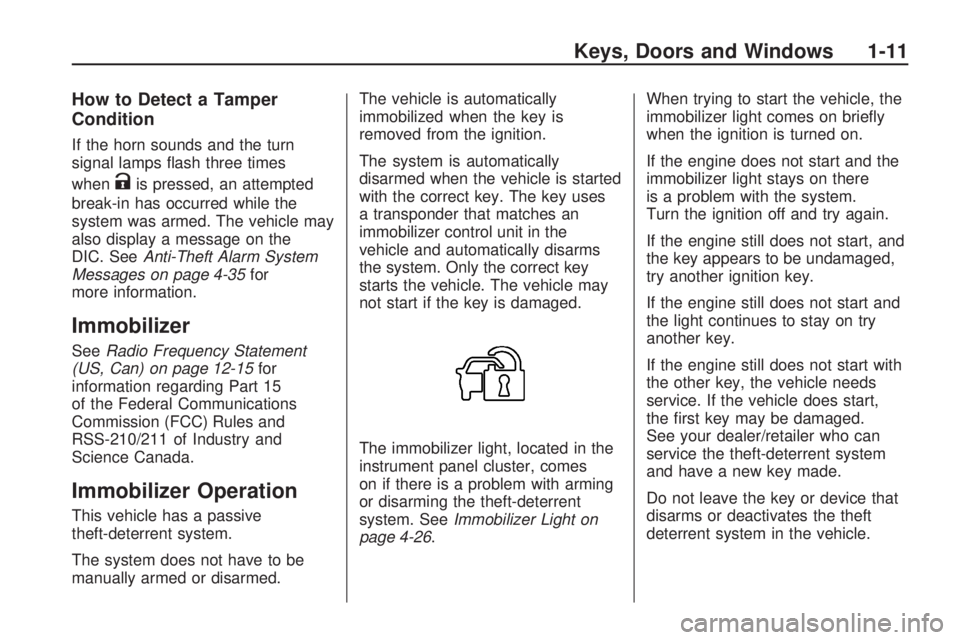
The immobilizer light, located in the
instrument panel cluster, comes
on if there is a problem with arming
or disarming the theft-deterrent
system. SeeImmobilizer Light on
page 4-26.When trying to start the vehicle, the
immobilizer light comes on briefly
when the ignition is turned on.
If the engine does not start and the
immobilizer light stays on there
is a problem with the system.
Turn the ignition off and try again.
If the engine still does not start, and
the key appears to be undamaged,
try another ignition key.
If the engine still does not start and
the light continues to stay on try
another key.
If the engine still does not start with
the other key, the vehicle needs
service. If the vehicle does start,
the first key may be damaged.
See your dealer/retailer who can
service the theft-deterrent system
and have a new key made.
Do not leave the key or device that
disarms or deactivates the theft
deterrent system in the vehicle.
Keys, Doors and Windows 1-11
Page 19 of 372

Interior Mirrors
Manual Rearview Mirror
Adjust the inside rearview mirror for
a clear view of the area behind
your vehicle. To avoid glare of the
headlamps from behind, push
the tab forward for daytime and pull
it for nighttime use.
Vehicles with OnStar have additional
control buttons located at the
bottom of the mirror. See your
dealer/retailer for more information
on the system and how to
subscribe to OnStar. SeeOnStar
®
System on page 4-42for more
information about the services
OnStar provides.
Automatic Dimming
Rearview Mirror
Vehicles with an automatic dimming
inside rearview mirror reduces
the glare from the headlamps of the
vehicle behind you. The dimming
feature comes on and the indicator
light illuminates each time the
vehicle is started.
Vehicles with OnStar have three
additional control buttons located
at the bottom of the mirror. See your
dealer/retailer for more information
on the system and how to
subscribe to OnStar. SeeOnStar
®
System on page 4-42for more
information about the services
OnStar provides.
O(On/Off):Press to turn the
dimming feature and/or compass
display on or off.
Cleaning the Mirror
Do not spray glass cleaner directly
on the mirror. Use a soft towel
dampened with water.
Keys, Doors and Windows 1-13
Page 52 of 372

In many crashes severe enough
to inflate the airbag, windshields
are broken by vehicle deformation.
Additional windshield breakage
may also occur from the right
front passenger airbag.
•Airbags are designed to inflate
only once. After an airbag inflates,
you will need some new parts for
the airbag system. If you do not
get them, the airbag system will
not be there to help protect you
in another crash. A new system
will include airbag modules and
possibly other parts. The service
manual for your vehicle covers
the need to replace other parts.
•The vehicle has a crash sensing
and diagnostic module which
records information after a crash.
SeeVehicle Data Recording and
Privacy on page 12-14andEvent
Data Recorders on page 12-14.
•Let only qualified technicians work
on the airbag systems. Improper
service can mean that an airbag
system will not work properly.
See your dealer/retailer for
service.
Passenger Sensing
System
The vehicle has a passenger
sensing system for the right front
passenger position. The passenger
airbag status indicator will be
visible on the overhead console
when the vehicle is started.
The words ON and OFF, or the
symbol for on and off, will be
visible during the system check.If you are using remote start to
start the vehicle from a distance,
if equipped, you may not see the
system check. When the system
check is complete, either the word
ON or OFF, or the symbol for on or
off, will be visible. SeePassenger
Airbag Status Indicator on
page 4-18.
The passenger sensing system
will turn off the right front passenger
frontal airbag under certain
conditions. The driver airbags and
roof-rail airbags (if equipped) are not
affected by the passenger sensing
system.
The passenger sensing system
works with sensors that are part
of the right front passenger seat.
The sensors are designed to detect
the presence of a properly-seated
occupant and determine if the right
front passenger frontal airbag should
be enabled (may inflate) or not. United States
Canada
2-28 Seats and Restraints
Page 54 of 372

•A right front passenger takes
his/her weight off of the seat
for a period of time.
•The right front passenger seat
is occupied by a smaller person,
such as a child who has outgrown
child restraints.
•Or, if there is a critical problem
with the airbag system or the
passenger sensing system.
When the passenger sensing
system has turned off the right front
passenger frontal airbag, the off
indicator will light and stay lit to
remind you that the airbag is off.
SeePassenger Airbag Status
Indicator on page 4-18.The passenger sensing system is
designed to turn on (may inflate) the
right front passenger frontal airbag
anytime the system senses that a
person of adult size is sitting properly
in the right front passenger seat.
When the passenger sensing
system has allowed the airbag
to be enabled, the on indicator
will light and stay lit to remind you
that the airbag is active.
For some children who have
outgrown child restraints and for very
small adults, the passenger sensing
system may or may not turn off the
right front passenger frontal airbag,
depending upon the person’s seating
posture and body build. Everyone in
the vehicle who has outgrown child
restraints should wear a safety belt
properly — whether or not there is
an airbag for that person.
{WARNING
If the airbag readiness light ever
comes on and stays on, it means
that something may be wrong with
the airbag system. To help avoid
injury to yourself or others, have
the vehicle serviced right away.
SeeAirbag Readiness Light on
page 4-17for more information,
including important safety
information.
If the On Indicator is Lit for a
Child Restraint
If a child restraint has been installed
and the on indicator is lit:
1. Turn the vehicle off.
2. Remove the child restraint from
the vehicle.
3. Remove any additional items
from the seat such as blankets,
cushions, seat covers, seat
heaters, or seat massagers.
2-30 Seats and Restraints
Page 56 of 372

Additional Factors Affecting
System Operation
Safety belts help keep the
passenger in position on the
seat during vehicle maneuvers
and braking, which helps the
passenger sensing system
maintain the passenger airbag
status. See “Safety Belts” and
“Child Restraints” in the Index for
additional information about the
importance of proper restraint use.
A thick layer of additional material,
such as a blanket or cushion, or
aftermarket equipment such as
seat covers, seat heaters, and seat
massagers can affect how well the
passenger sensing system operates.
We recommend that you not use
seat covers or other aftermarket
equipment except when approved
by GM for your specific vehicle.
SeeAdding Equipment to the
Airbag-Equipped Vehicle onpage 2-33for more information
about modifications that can affect
how the system operates.
The passenger sensing system may
turn on the passenger airbag when
liquid soaks into the seat. If this
happens, the on indicator will be lit.
If the passenger seat gets wet, dry
the seat immediately. If the airbag
readiness light is lit, do not install a
child restraint or allow anyone to
occupy the seat. SeeAirbag
Readiness Light on page 4-17for
important safety information.
{WARNING
Stowing of articles under the
passenger seat or between the
passenger seat cushion and
seatback may interfere with the
proper operation of the passenger
sensing system.
Servicing the
Airbag-Equipped Vehicle
Airbags affect how the vehicle
should be serviced. There are parts
of the airbag system in several
places around the vehicle. Your
dealer/retailer and the service
manual have information about
servicing the vehicle and the airbag
system. To purchase a service
manual, seeService Publications
Ordering Information on page 12-12.
{WARNING
For up to 10 seconds after the
ignition is turned off and the
battery is disconnected, an airbag
can still inflate during improper
service. You can be injured if you
are close to an airbag when it
inflates. Avoid yellow connectors.
They are probably part of the
airbag system. Be sure to follow
proper service procedures, and
make sure the person performing
work for you is qualified to do so.
2-32 Seats and Restraints
Page 58 of 372

In addition, your dealer/retailer and
the service manual have information
about the location of the airbag
sensors, sensing and diagnostic
module and airbag wiring.
Airbag System Check
The airbag system does not need
regularly scheduled maintenance
or replacement. Make sure the
airbag readiness light is working.
SeeAirbag Readiness Light on
page 4-17for more information.
Notice:If an airbag covering is
damaged, opened, or broken, the
airbag may not work properly.
Do not open or break the airbag
coverings. If there are any opened
or broken airbag covers, have the
airbag covering and/or airbag
module replaced. For the location
of the airbag modules, seeWhat
Makes an Airbag Inflate? on
page 2-26. See your dealer/retailer
for service.
Replacing Airbag System
Parts After a Crash
{WARNING
A crash can damage the
airbag systems in your vehicle.
A damaged airbag system may not
work properly and may not protect
you and your passenger(s) in a
crash, resulting in serious injury or
even death. To help make sure
your airbag systems are working
properly after a crash, have them
inspected and any necessary
replacements made as soon as
possible.If an airbag inflates, you will need
to replace airbag system parts.
See your dealer/retailer for service.
If the airbag readiness light stays
on after the vehicle is started
or comes on when you are driving,
the airbag system may not work
properly. Have the vehicle serviced
right away. SeeAirbag Readiness
Light on page 4-17for more
information.
2-34 Seats and Restraints
Page 81 of 372
Instruments and
Controls
Instrument Panel OverviewInstrument Panel Overview......4-4
ControlsSteering Wheel Adjustment.....4-6
Steering Wheel Controls.........4-6
Horn....................................4-7
Windshield Wiper/Washer.......4-7
Compass.............................4-8
Clock...................................4-8
Power Outlets.......................4-9
Warning Lights, Gages,
and Indicators
Warning Lights, Gages,
and Indicators.....................4-9
Instrument Cluster...............4-10
Speedometer......................4-11
Odometer...........................4-11
Trip Odometer.....................4-11
Tachometer........................4-11
Fuel Gage..........................4-11
Engine Oil Pressure Gage......4-12Engine Oil
Temperature Gage.............4-13
Engine Coolant
Temperature Gage.............4-14
Transmission
Temperature Gage.............4-14
Voltmeter Gage...................4-15
Safety Belt Reminders..........4-16
Airbag Readiness Light.........4-17
Passenger Airbag Status
Indicator...........................4-18
Charging System Light.........4-19
Malfunction
Indicator Lamp..................4-19
Brake System Warning
Light................................4-22
Antilock Brake System
(ABS) Warning Light...........4-23
Traction Off Light.................4-23
Traction Control System
(TCS)/StabiliTrak
®Light.......4-24
Traction Control System
(TCS) OFF/StabiliTrak
®OFF
Light................................4-24
Tire Pressure Light..............4-24
Engine Oil Pressure Light.....4-25
Immobilizer Light.................4-26
Fog Lamp Light...................4-26
Taillamp Indicator Light.........4-26
Cruise Control Light.............4-26
Information DisplaysDriver Information
Center (DIC).....................4-27
Vehicle MessagesBattery Voltage and
Charging Messages............4-30
Brake System Messages......4-31
Compass Messages.............4-31
Cruise Control Messages......4-31
Door Ajar Messages............4-31
Engine Cooling System
Messages.........................4-32
Engine Oil Messages...........4-32
Engine Power Messages......4-33
Fuel System Messages........4-33
Key and Lock Messages......4-33
Lamp Messages..................4-33
Object Detection System
Messages.........................4-34
Ride Control System
Messages.........................4-34
Airbag System Messages......4-35
Safety Belt Messages...........4-35
Anti-Theft Alarm System
Messages.........................4-35
Service Vehicle Messages.....4-35
Tire Messages....................4-36
Transmission Messages........4-36
Vehicle Reminder
Messages.........................4-37
Instruments and Controls 4-1