CHEVROLET CORVETTE 1996 4.G Owners Manual
Manufacturer: CHEVROLET, Model Year: 1996, Model line: CORVETTE, Model: CHEVROLET CORVETTE 1996 4.GPages: 386, PDF Size: 20.12 MB
Page 101 of 386
Downloaded from www.Manualslib.com manuals search engine 3. Lower the roof panel onto the vehicle, rear edge first,
and place the rear guide pins into the holes in the
roof opening.
4. Lower the front of the roof panel, and align the front
guide pins.
5. Tighten the rear bolts part way.
NOTICE:
If you tighten bolts that are improperly started,
the threads can become stripped. Be sure all bolts
are properly started before you tighten them.
6. Use the ratchet to start the front bolts. If the bolts are
hard to start, tighten the rear bolts some more.
Holding down the panel on the outside will also
help.
7. Fully tighten the rear bolts, then the front bolts.
If you hear a popping noise when you drive, the
bolts may not be tight enough. Be sure to tighten
them securely.
Convertible Top (Option)
The following procedures explain the proper operation
of your convertible top.
Lowering Your Convertible Top
NOTICE:
Don’t leave your convertible out with the top
down for any long periods of time. The sun and
the rain can damage your seat material and other
things inside your vehicle.
1. Park on a level surface, set the parking brake firmly
and shift an automatic transmission into
PARK (P).
Shift a manual transmission into REVERSE (R).
Lower both windows and sunshades and turn the
ignition
key to LOCK.
Page 102 of 386
Downloaded from www.Manualslib.com manuals search engine I I
NOTICE:
Before lowering the convertible top into the storage area, be sure there are
no objects in the
way of the folded, stored top. The weight of a
~ stored top on items in the storage area may cause
the convertible top back glass to break.
.
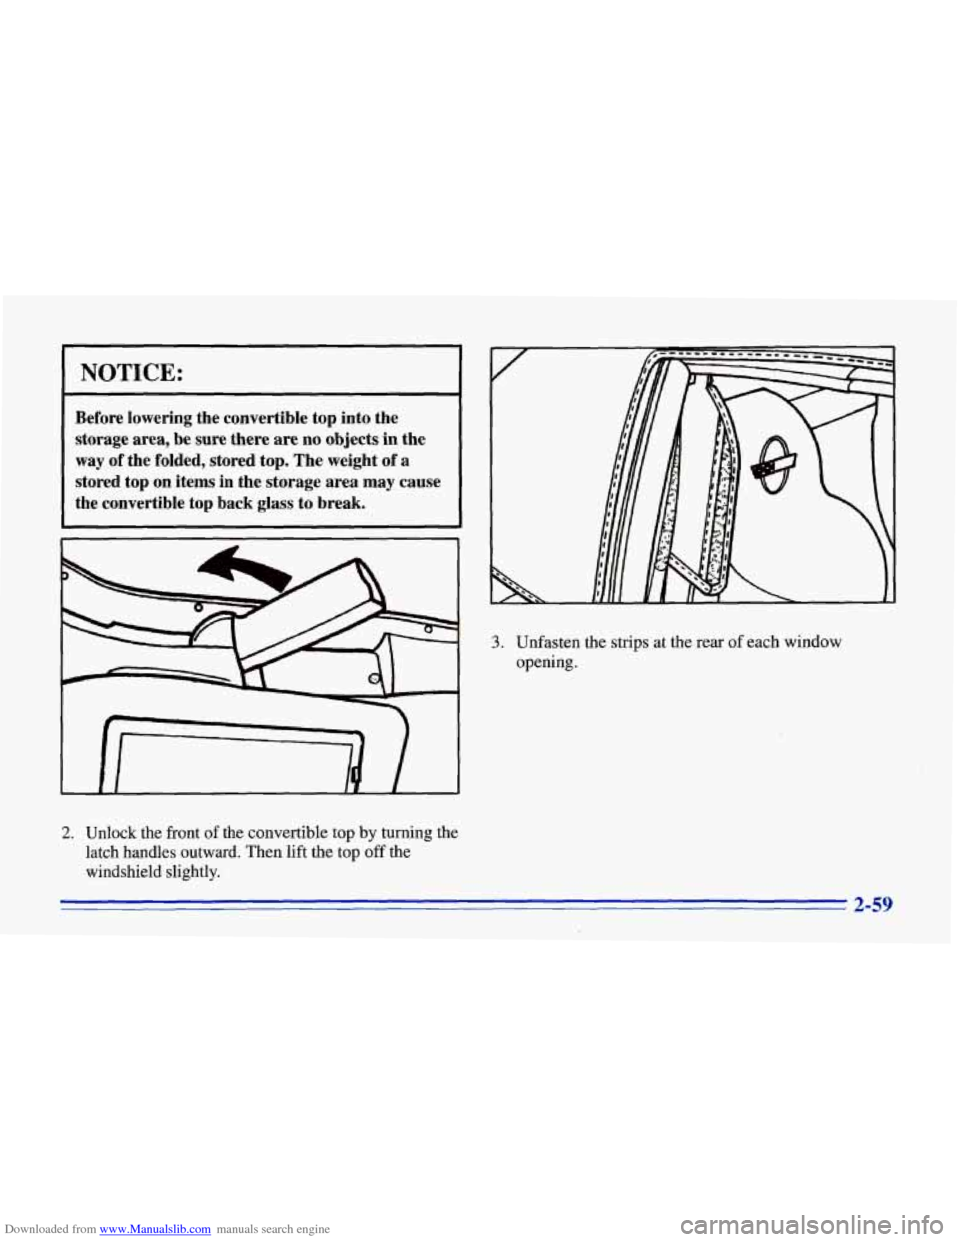
2. Unlock the front of the convertible top by turning the
latch handles outward. Then lift the top
off the
windshield slightly.
3. Unfasten the strips at the rear of each window
opening.
2-59
Page 103 of 386
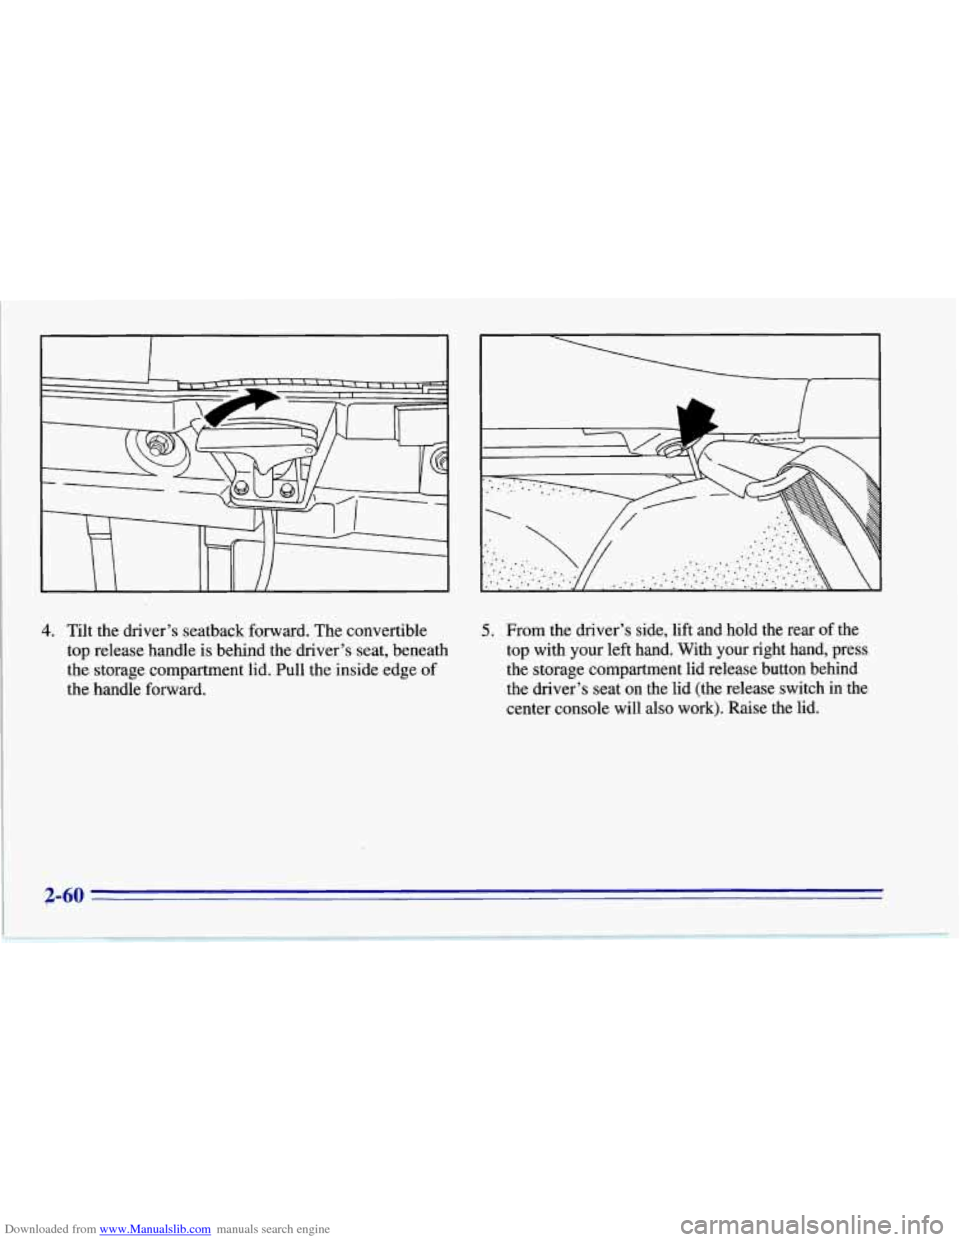
Downloaded from www.Manualslib.com manuals search engine 4. Tilt the driver’s seatback forward. The convertible
top release handle is behind the driver’s seat, beneath
the storage compartment lid. Pull the inside edge
of
the handle forward.
5. From the driver’s side, lift and hold the rear of the
top with your left hand. With your right hand, press
the storage compartment lid release button behind
the driver’s seat
on the lid (the release switch in the
center console will also work). Raise the lid.
Page 104 of 386
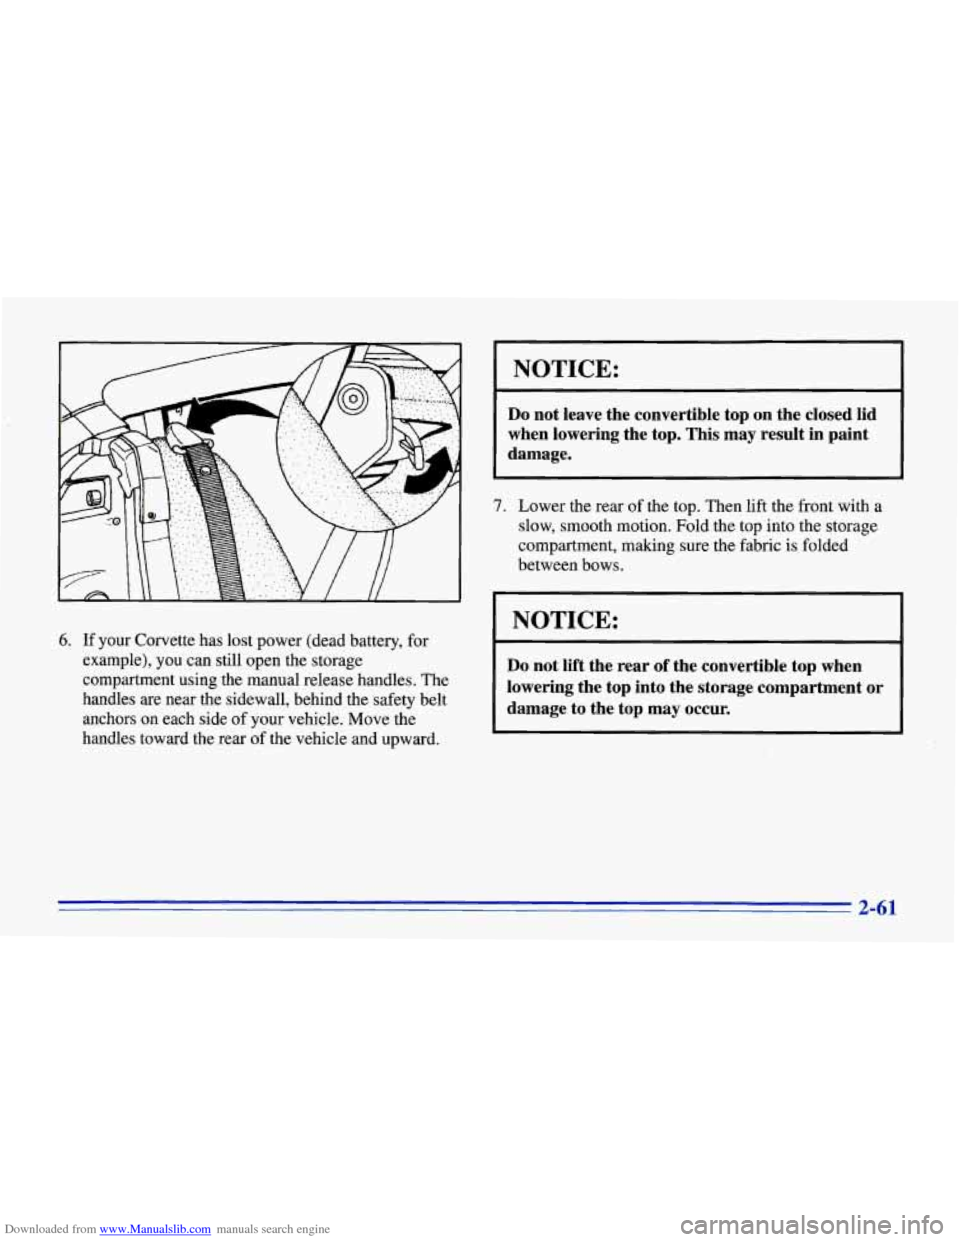
Downloaded from www.Manualslib.com manuals search engine 6. If your Corvette has lost power (dead battery, for
example), you can still open the storage
compartment using the manual release handles. The
handles are near the sidewall, behind the safety belt
anchors on each side of your vehicle. Move the
handles toward the rear of the vehicle and upward.
1
NOTICE:
Do not leave the convertible top on the closed lid
when lowering the top. This may result in paint
damage.
7. Lower the rear of the top. Then lift the front with a
slow, smooth motion. Fold the top into the storage
compartment, making sure the fabric is folded
between bows.
NOTICE:
r
Do not lift the rear of the convertible top when
lowering the top into the storage compartment
or
damage to the top may occur.
2-61
Page 105 of 386
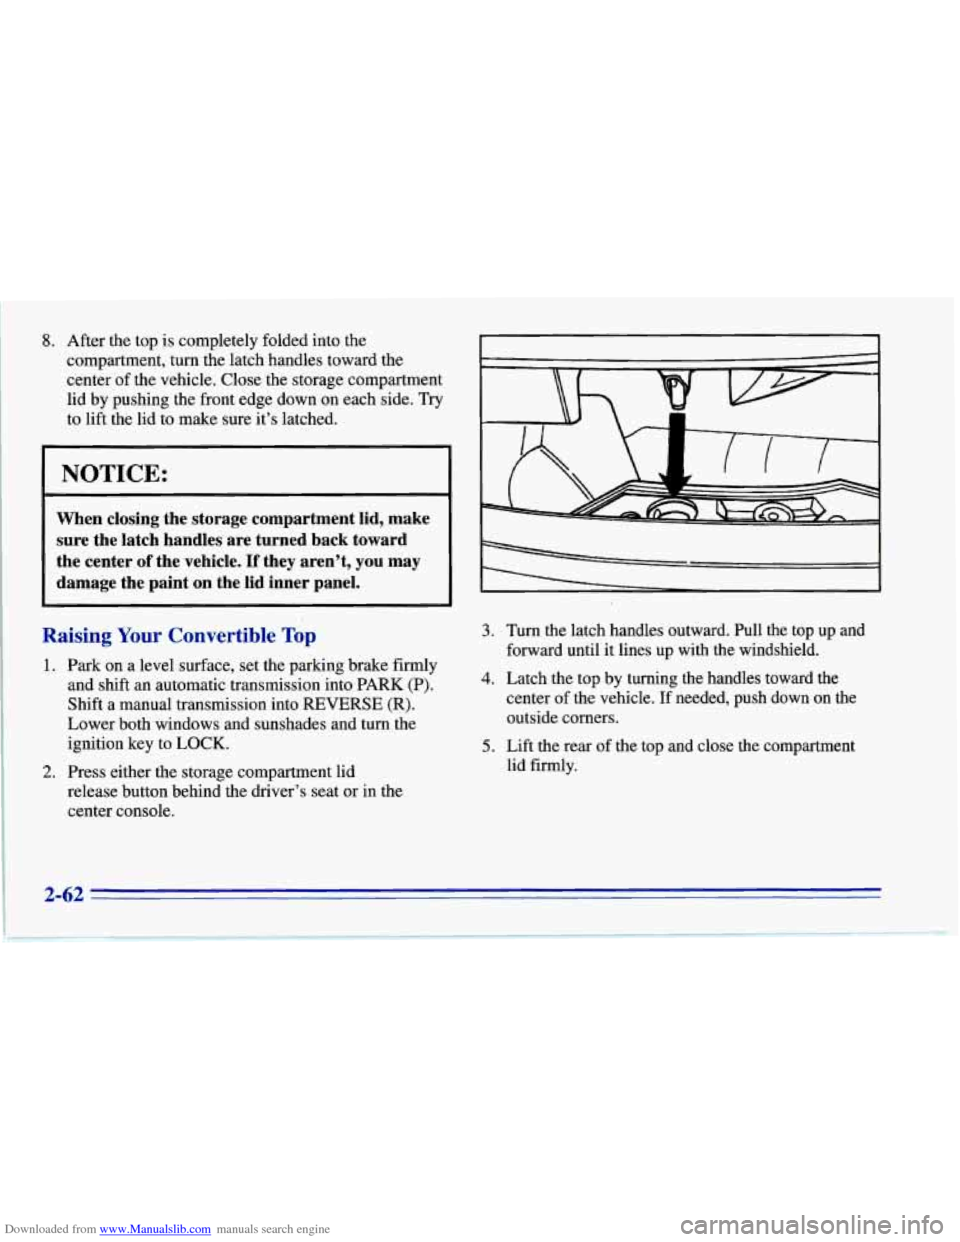
Downloaded from www.Manualslib.com manuals search engine 8. After the top is completely folded into the
compartment, turn the latch handles toward the
center of the vehicle. Close the storage compartment
lid by pushing the front edge down on each side. Try
to lift the lid to make sure it’s latched.
NOTICE:
When closing the storage compartment lid, make
sure the latch handles are turned back toward
the center
of the vehicle. If they aren’t, you may
damage the paint on the lid inner panel.
I
Raising Your Convertible Top
1.
2.
Park on a level surface, set the parking brake firmly
and shift an automatic transmission into PARK (P).
Shift a manual transmission into REVERSE
(R).
Lower both windows and sunshades and turn the
ignition key to LOCK.
Press either the storage compartment lid
release button behind the driver’s seat
or in the
center console.
3.
4.
5.
Turn the latch handles outward. Pull the top up and
forward until it lines up with the windshield.
Latch the top by turning the handles toward the
center of the vehicle. If needed, push down on the
outside corners.
Lift the rear
of the top and close the compartment
lid firmly.
2-62
Page 106 of 386
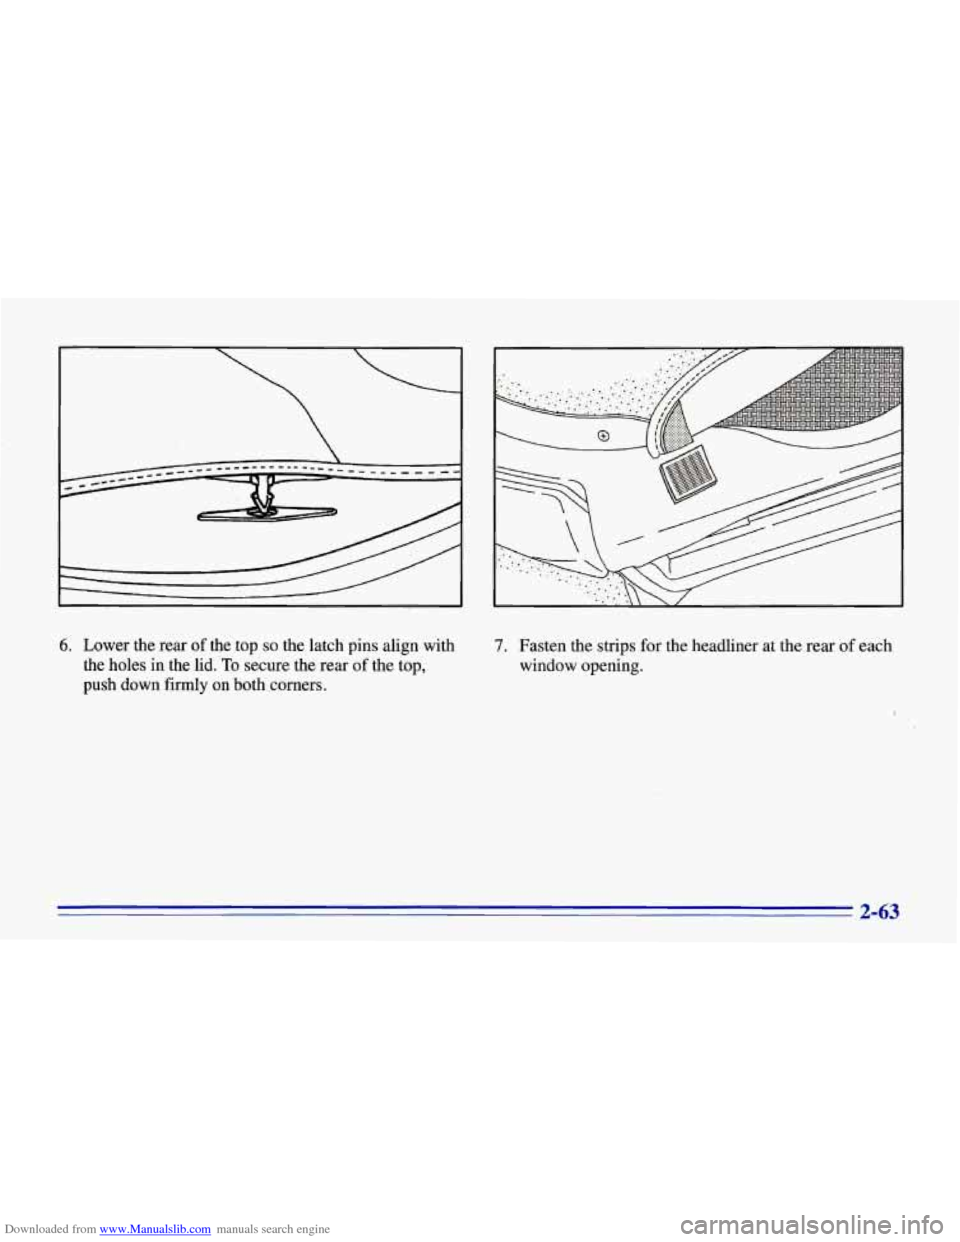
Downloaded from www.Manualslib.com manuals search engine 6. Lower the rear of the top so the latch pins align with
the
holes in the lid. To secure the rear of the top,
push down firmly on
both corners.
7. Fasten the strips for the headliner at the rear of each
window opening.
2-63
Page 107 of 386
Downloaded from www.Manualslib.com manuals search engine NOTICE:
~~ ~~
Certain automatic car washes may cause damage
to your vehicle.
The top fabric can be damaged
by top cleaning brushes.
Please be aware that when you raise the convertible top,
the bottom edge rests on a clear, protective tape strip.
This protective strip protects your Corvette from paint
damage
so it should not be removed.
For care and cleaning of your convertible top, see
“Cleaning Your Convertible Top” in the Index.
Convertible Hardtop (Option)
The convertible hardtop is designed for extended use in
both warm and cold weather. The installation and
removal of this top requires two people and takes about
30 minutes. You will need the wrench and ratchet stored
in your center console.
For information on cleaning your
convertible hardtop, see “Cleaning” in the Index.
Removing Your Convertible Hardtop
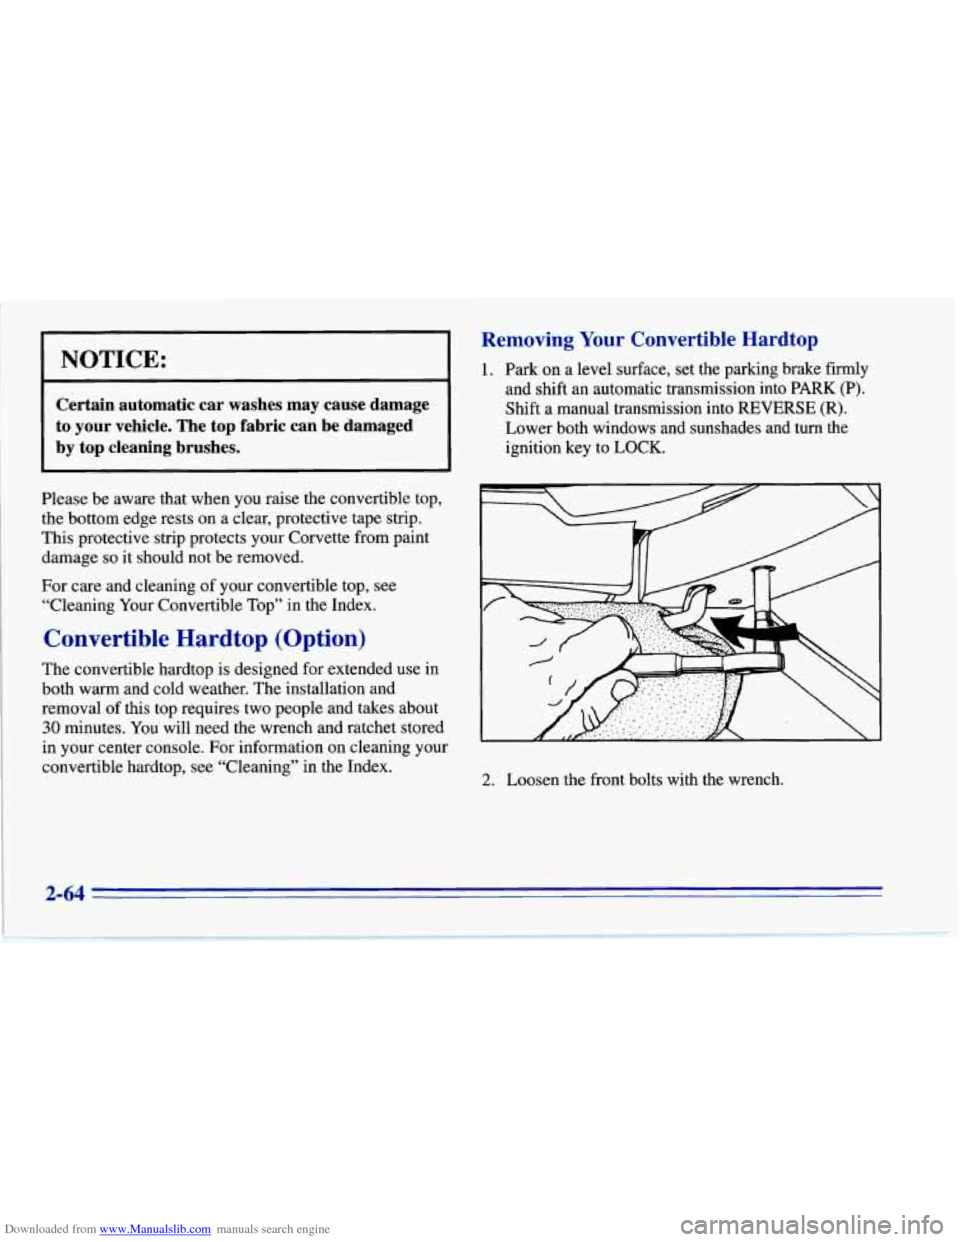
1. Park on a level surface, set the parking brake firmly
and shift an automatic transmission into
PARK (P).
Shift a manual transmission into REVERSE (R).
Lower both windows and sunshades and turn the
ignition key to LOCK.
2. Loosen the front bolts with the wrench.
2-64
Page 108 of 386
Downloaded from www.Manualslib.com manuals search engine Y
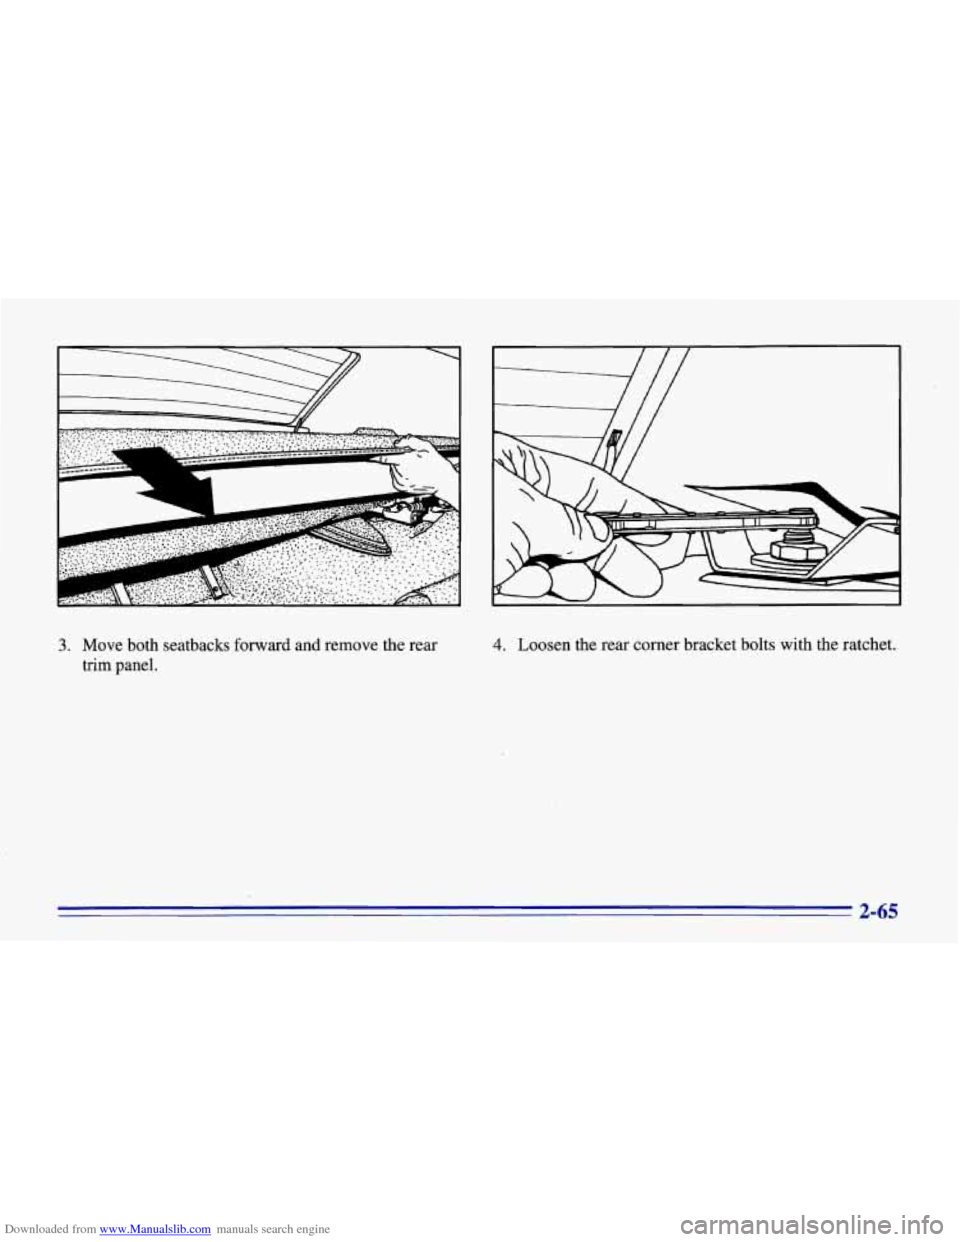
3. Move both seatbacks forward and remove the rear
trim panel. 4. Loosen the rear corner bracket bolts with the ratchet.
2-65
Page 109 of 386
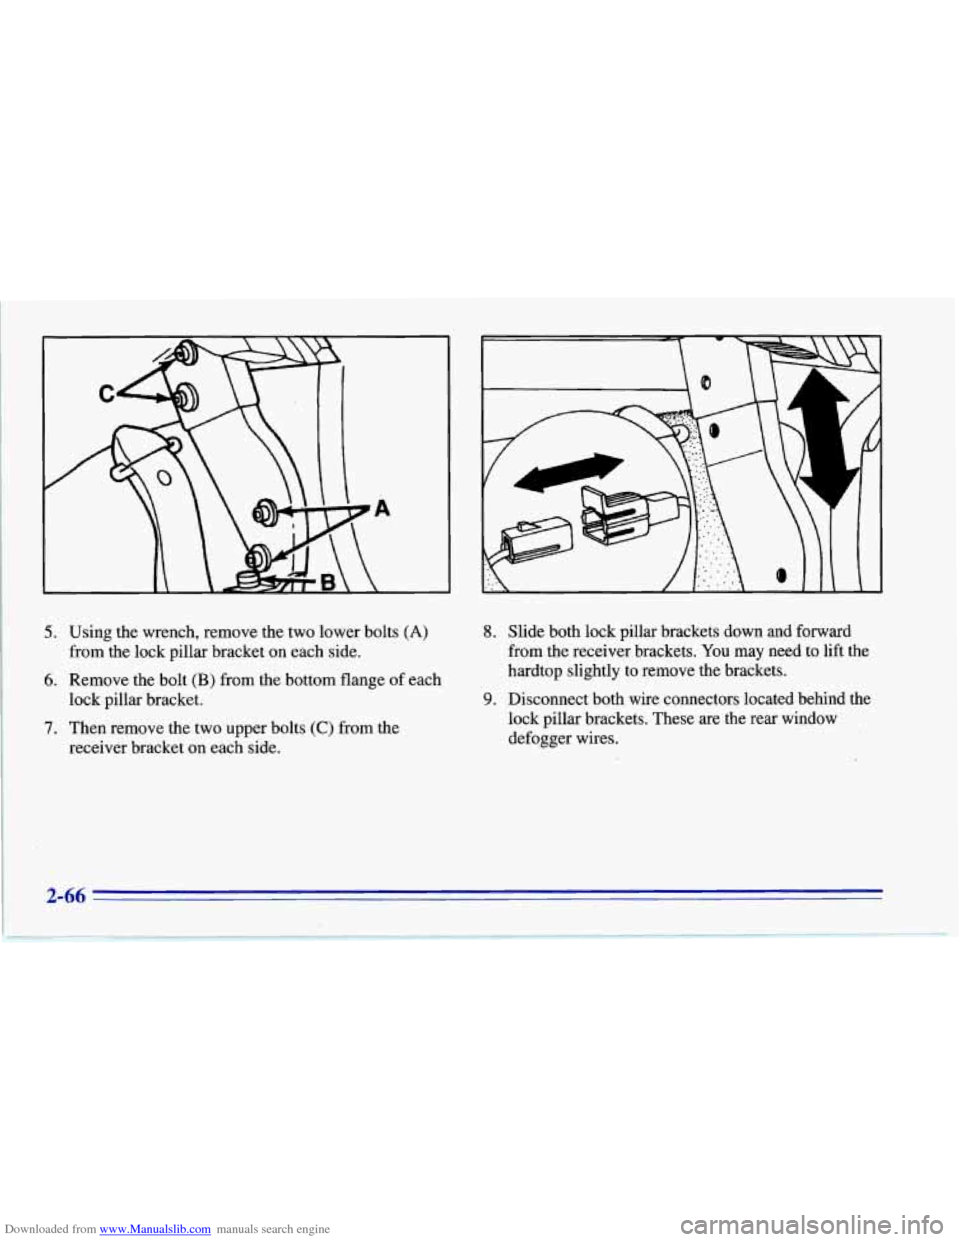
Downloaded from www.Manualslib.com manuals search engine 5. Using the wrench, remove the two lower bolts (A)
from the lock pillar bracket on each side.
6. Remove the bolt (B) from the bottom flange of each
lock pillar bracket.
7. Then remove the two upper bolts (C) from the
receiver bracket on each side.
8. Slide both lock pillar brackets down and forward
from the receiver brackets.
You may need to lift the
hardtop slightly to remove the brackets.
9. Disconnect both wire connectors located behind the
lock pillar brackets. These
are the rear window
defogger wires.
2-66
Page 110 of 386
Downloaded from www.Manualslib.com manuals search engine NOTICE:
To help avoid damaging the hardtop when not in
use:
Store the hardtop in its normal position,
resting on
its mounting brackets.
0 Store hardware and trim panel with
the hardtop.
12. Connect the rear window defogger electrical
connectors.
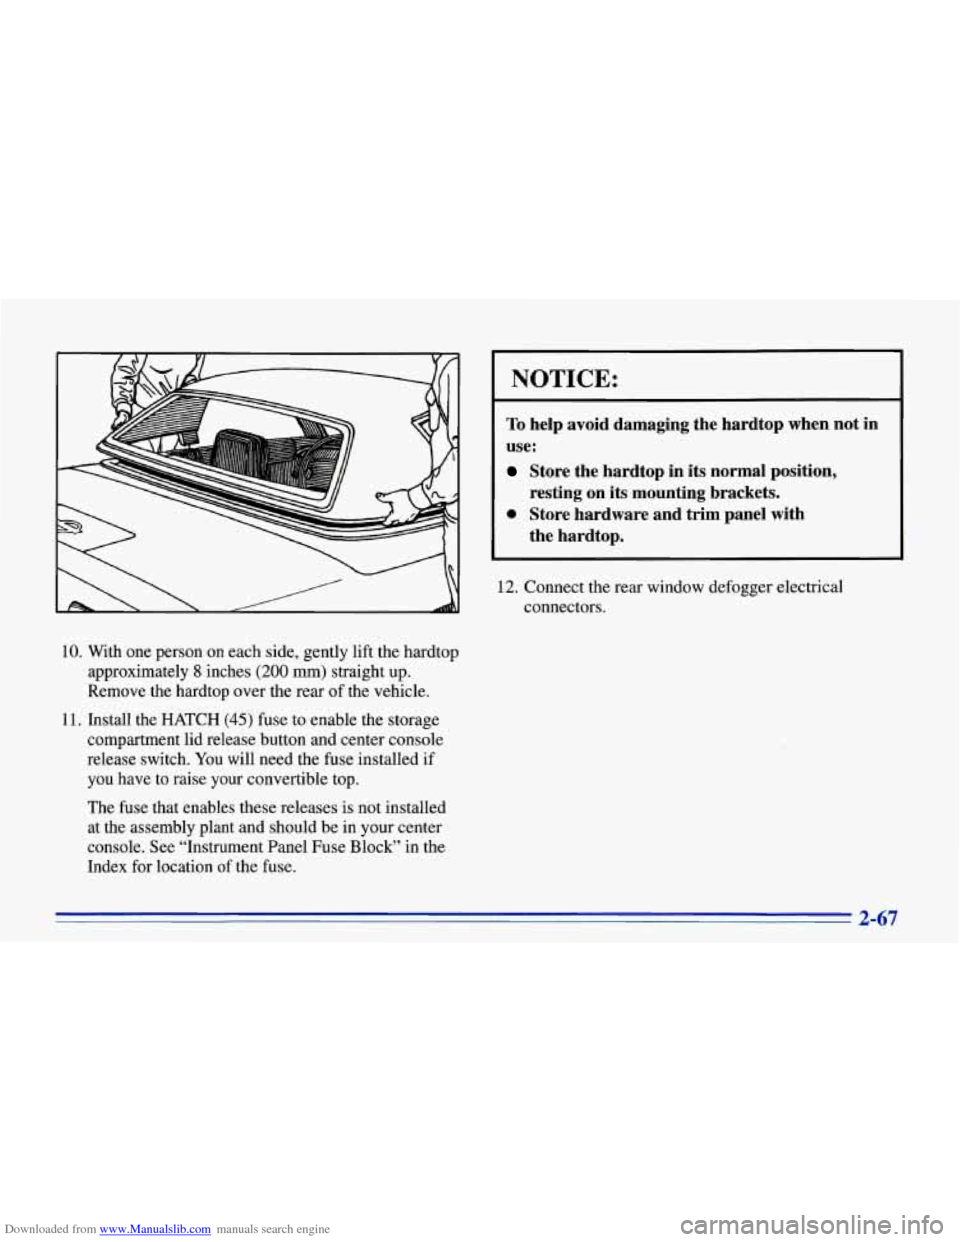
10. With one person on each side, gently lift the hardtop
approximately
8 inches (200 mm) straight up.
Remove the hardtop over the rear of the vehicle.
11. Install the HATCH
(45) fuse to enable the storage
compartment lid release button and center console
release switch. You will need the fuse installed if
you have to raise your convertible top.
The fuse that enables these releases is not installed
at the assembly plant and should be in your center
console. See “Instrument Panel Fuse Block” in the
Index for location of the fuse.
2-67