CHEVROLET CORVETTE 1998 5.G Owners Manual
Manufacturer: CHEVROLET, Model Year: 1998, Model line: CORVETTE, Model: CHEVROLET CORVETTE 1998 5.GPages: 378, PDF Size: 19.91 MB
Page 121 of 378
Downloaded from www.Manualslib.com manuals search engine Convertible Top (Option)
The following procedures explain the proper operation
of your convertible top.
1 NOTICE:
I
Certain automatic car washes may cause damage
to your vehicle. The top fabric can be damaged
by top cleaning brushes.
For care and cleaning of your convertible top, see
“Cleaning
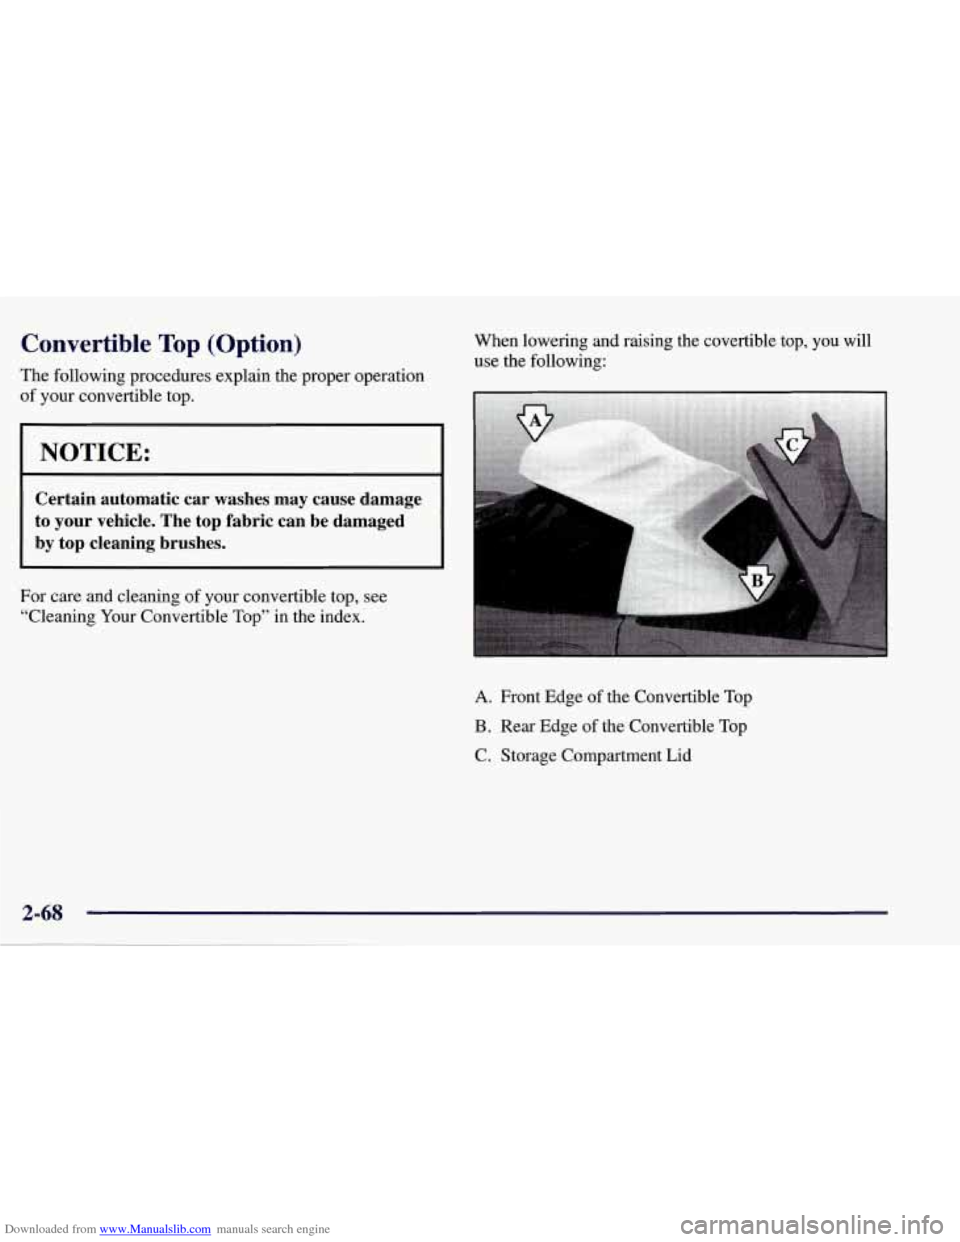
Your Convertible Top” in the index. When lowering and raising the covertible top, you will
use the following:
A. Front Edge of the
Convertible Top
B. Rear Edge of the Convertible Top
C. Storage Compartment Lid
Page 122 of 378
Downloaded from www.Manualslib.com manuals search engine Lowering Your Convertible Top
I NOTICE:
Don’t leave your convertible out with the top
down for any long periods of time. The sun and
rain can damage your seat material and other
things inside your vehicle.
1. Set the parking brake firmly. Shift an automatic
transmission into PARK (P). Shift a manual
transmission into REVERSE
(R). Turn the ignition
key
to OFF. Lower both sunshades and rotate them
toward the door glass.
NOTICE:
Before lowering the convertible top into the
storage area, be sure there are no objects in the
way of the folded, stored top. The weight of a
stored top on items in the storage area may cause
the convertible top back glass to break.
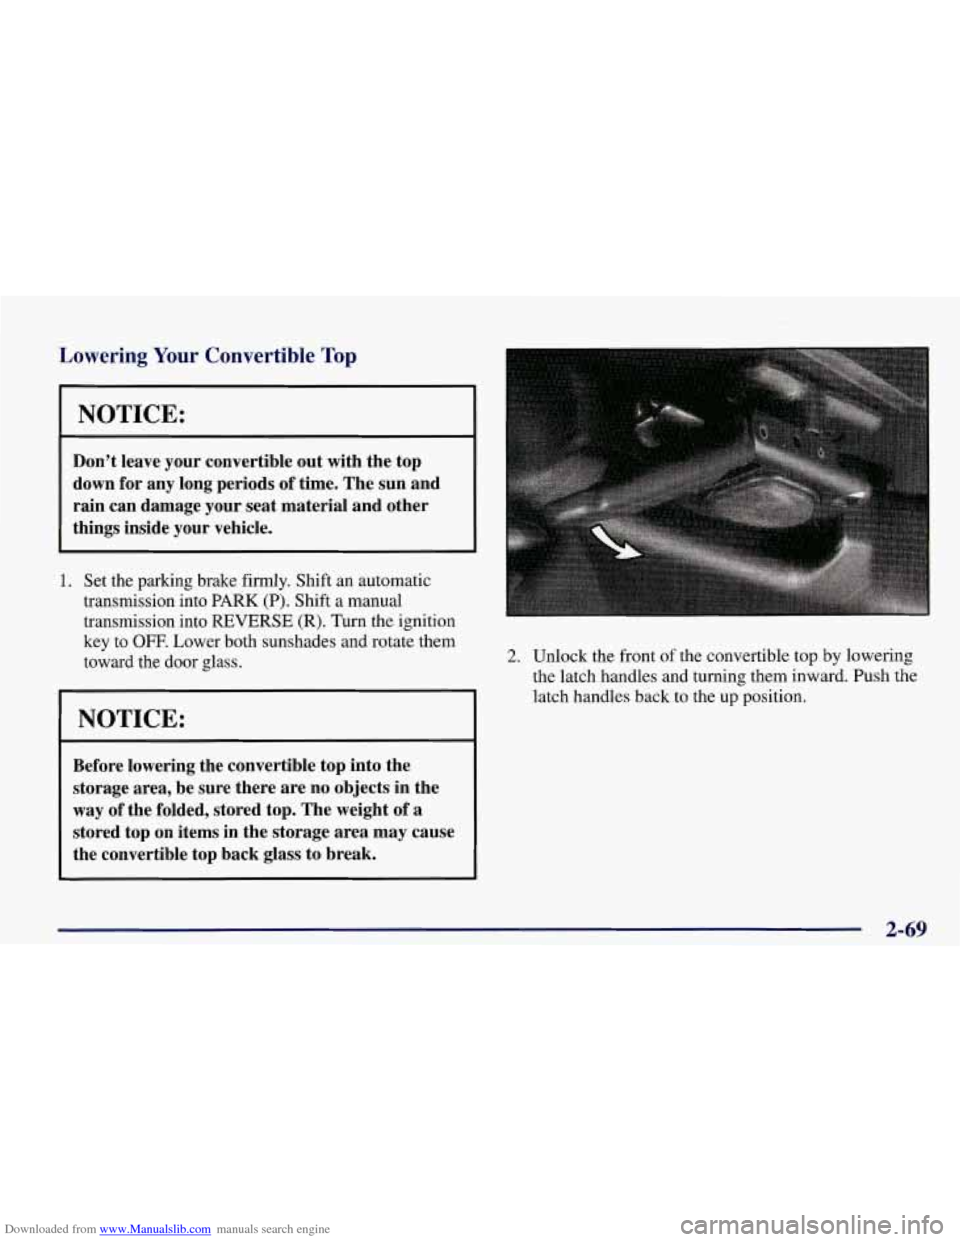
2. Unlock the front of the convertible top by lowering
the latch handles and turning them inward. Push the
latch handles back to the up position.
2-69
Page 123 of 378
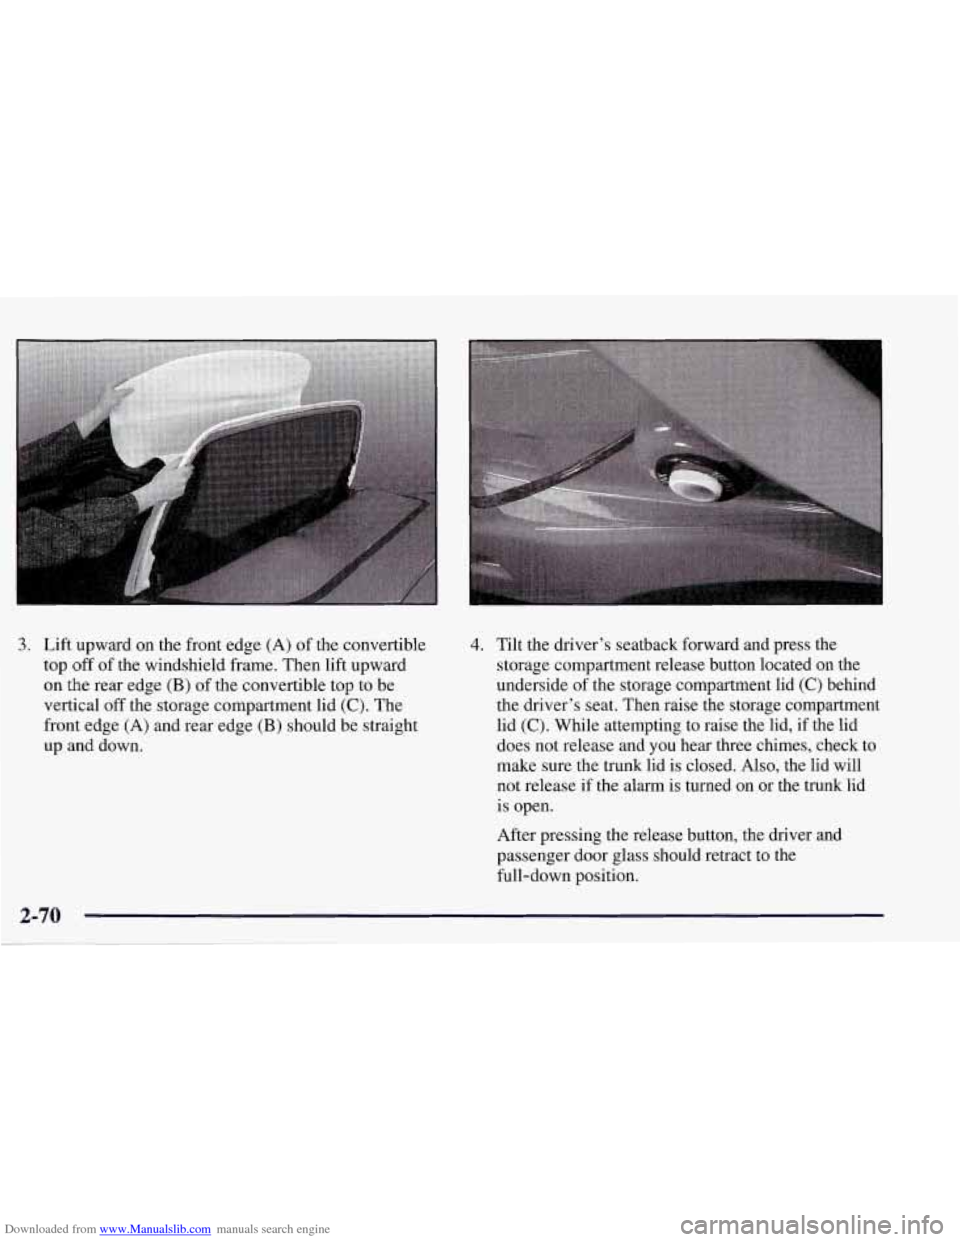
Downloaded from www.Manualslib.com manuals search engine 3. Lift upward on the front edge (A) of the convertible
top
off of the windshield frame. Then lift upward
on the rear edge (B) of the convertible top to be
vertical
off the storage compartment lid (C). The
front edge
(A) and rear edge (B) should be straight
up and down.
4. Tilt the driver’s seatback forward and press the
storage compartment release button located on the
underside
of the storage compartment lid (C) behind
the driver’s seat. Then raise the storage compartment
lid
(C). While attempting to raise the lid, if the lid
does not release and
you hear three chimes, check to
make sure the trunk lid is closed. Also, the lid will
not release if the alarm is turned on or the trunk lid
is open.
After pressing the release button, the driver and
passenger door glass should retract to the
full-down position.
Page 124 of 378
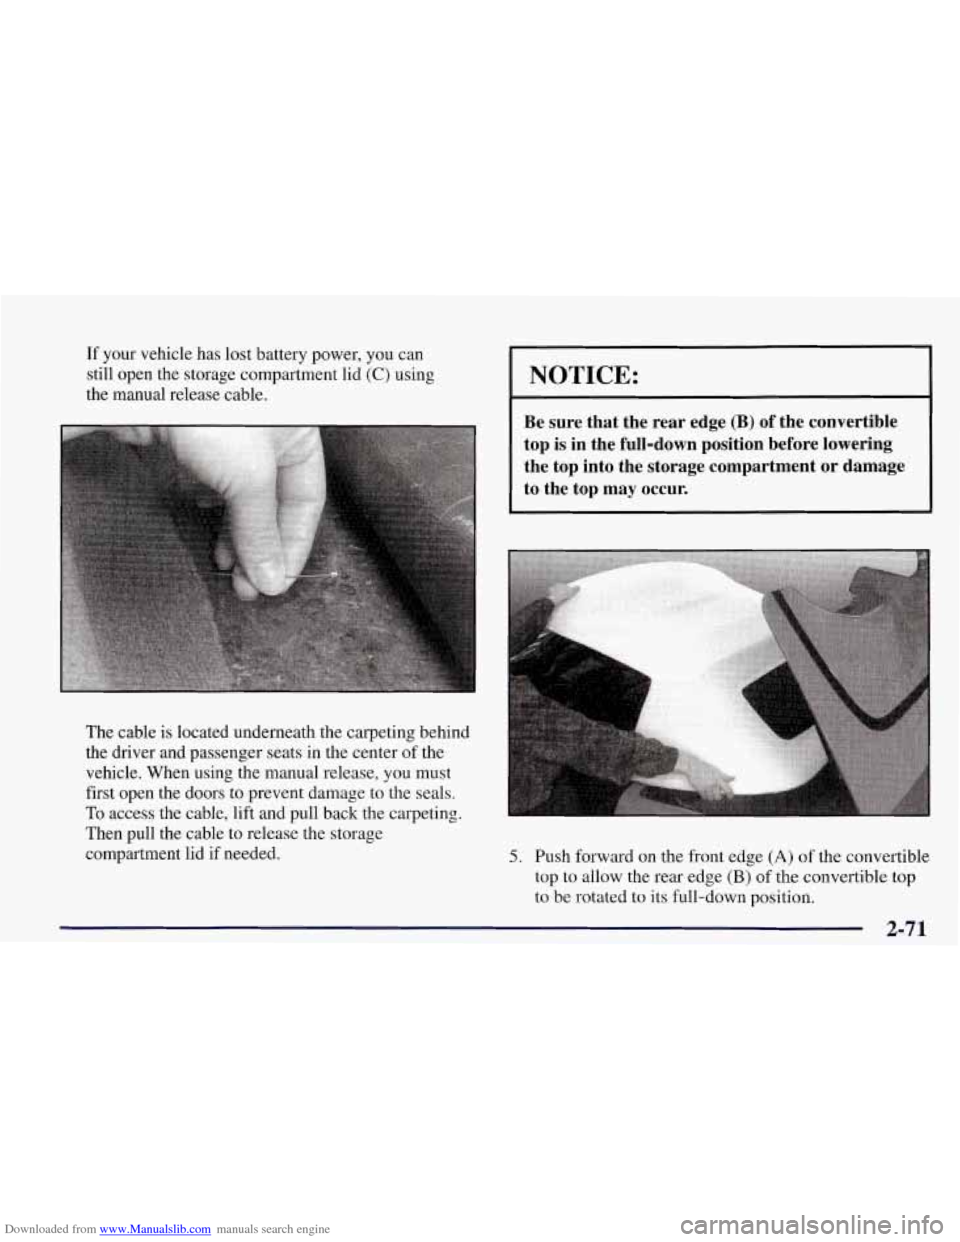
Downloaded from www.Manualslib.com manuals search engine If your vehicle has lost battery power, you can
still open the storage compartment lid
(C) using
the manual release cable.
The cable
is located underneath the carpeting behind
the driver and passenger seats in the center of the
vehicle. When using the manual release, you must
first open the doors to prevent damage to the seals.
To access the cable, lift and pull back the carpeting.
Then pull the cable to release the storage
compartment lid if needed.
NOTICE:
Be sure that the rear edge (B) of the convertible
top is in the full-down position before lowering
the top into the storage compartment or damage
to the top may occur.
5. Push forward on the front edge (A) of the convertible
top to allow the rear edge
(B) of the convertible top
to be rotated to its full-down position.
2-71
Page 125 of 378
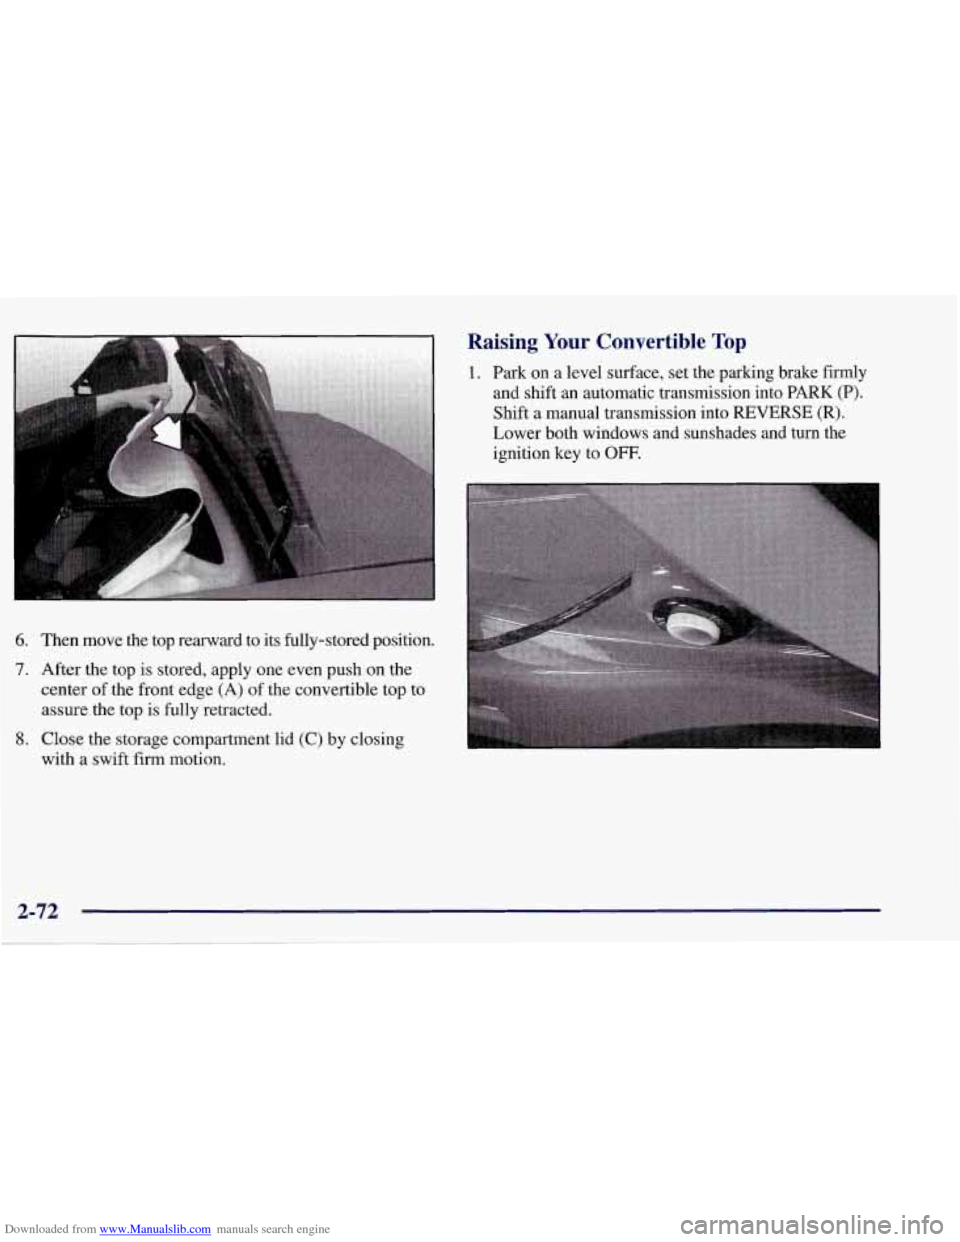
Downloaded from www.Manualslib.com manuals search engine 6. Then move the top rearward to its fully-stored position.
7. After the top is stored, apply one even push on the
center of the front edge (A) of the convertible top to
assure the top is fully retracted.
8. Close the storage compartment lid (C) by closing
with a swift firm motion.
Raising Your Convertible Top
1. Park on a level surface, set the parking brake firmly
and shift an automatic transmission into PARK
(P).
Shift a manual transmission into REVERSE (R).
Lower both windows and sunshades and turn the
ignition key to
OFF.
Page 126 of 378
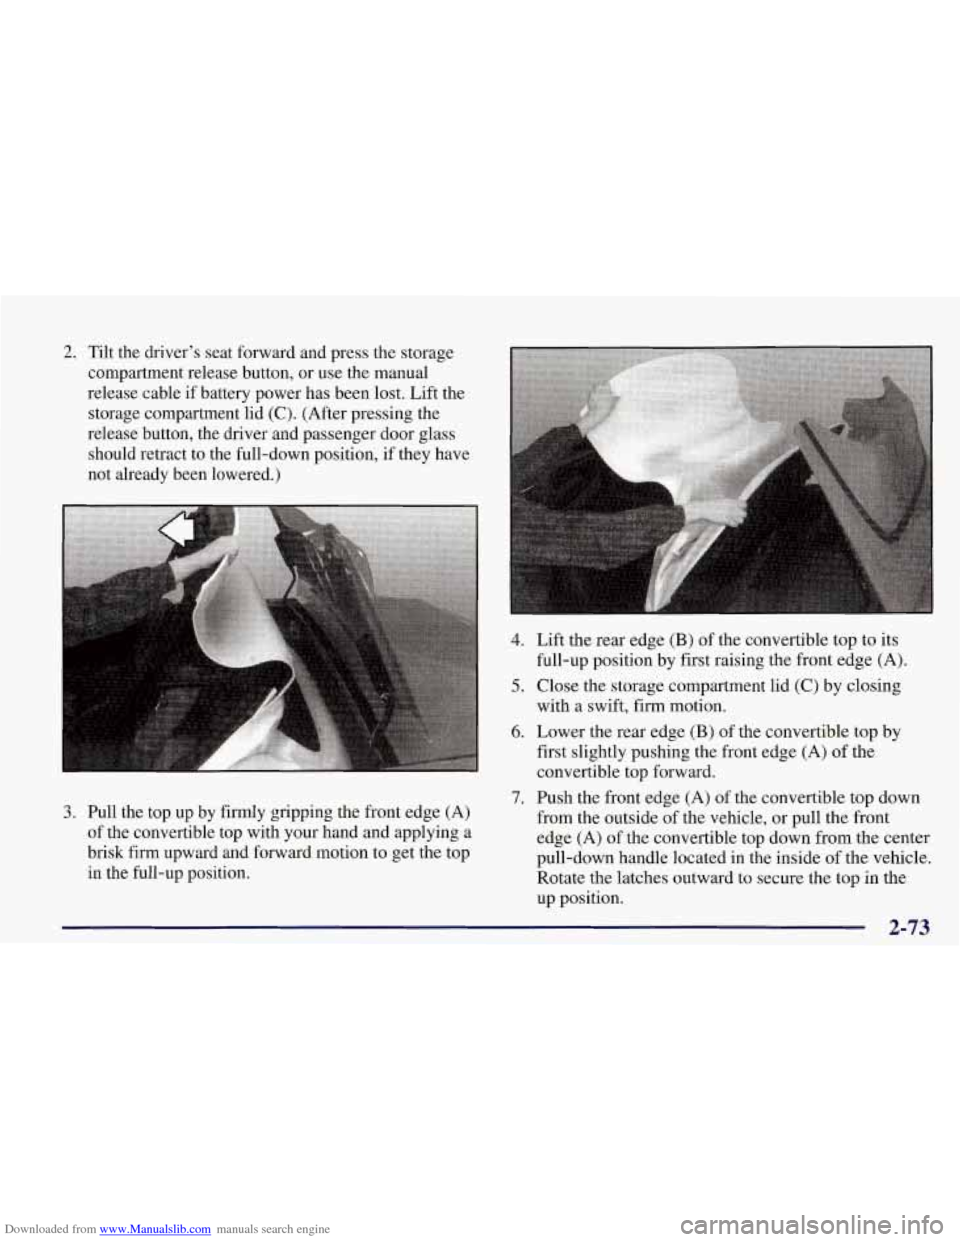
Downloaded from www.Manualslib.com manuals search engine 2. Tilt the driver’s seat forward and press the storage
compartment release button, or use the manual
release cable if battery power has been lost. Lift the
storage compartment lid
(C). (After pressing the
release button, the driver and passenger door glass
should retract to the full-down position, if they have
not already been lowered.)
4.
5.
6.
7.
3. Pull the top up by firmly gripping the front edge (A)
of the convertible top with your hand and applying a
brisk firm upward and forward motion to get the top
in the full-up position. Lift the
re
ar edge
(B) of the convertible top to its
full-up position by first raising the front edge
(A).
Close the storage compartment lid (C) by closing
with a swift, firm motion.
Lower the rear edge
(B) of the convertible top by
first slightly pushing the front edge (A) of the
convertible top forward.
Push the front edge
(A) of the convertible top down
from the outside
of the vehicle, or pull the front
edge
(A) of the convertible top down from the center
pull-down handle located
in the inside of the vehicle.
Rotate the latches outward to secure the top in the
up position.
2-73
Page 127 of 378
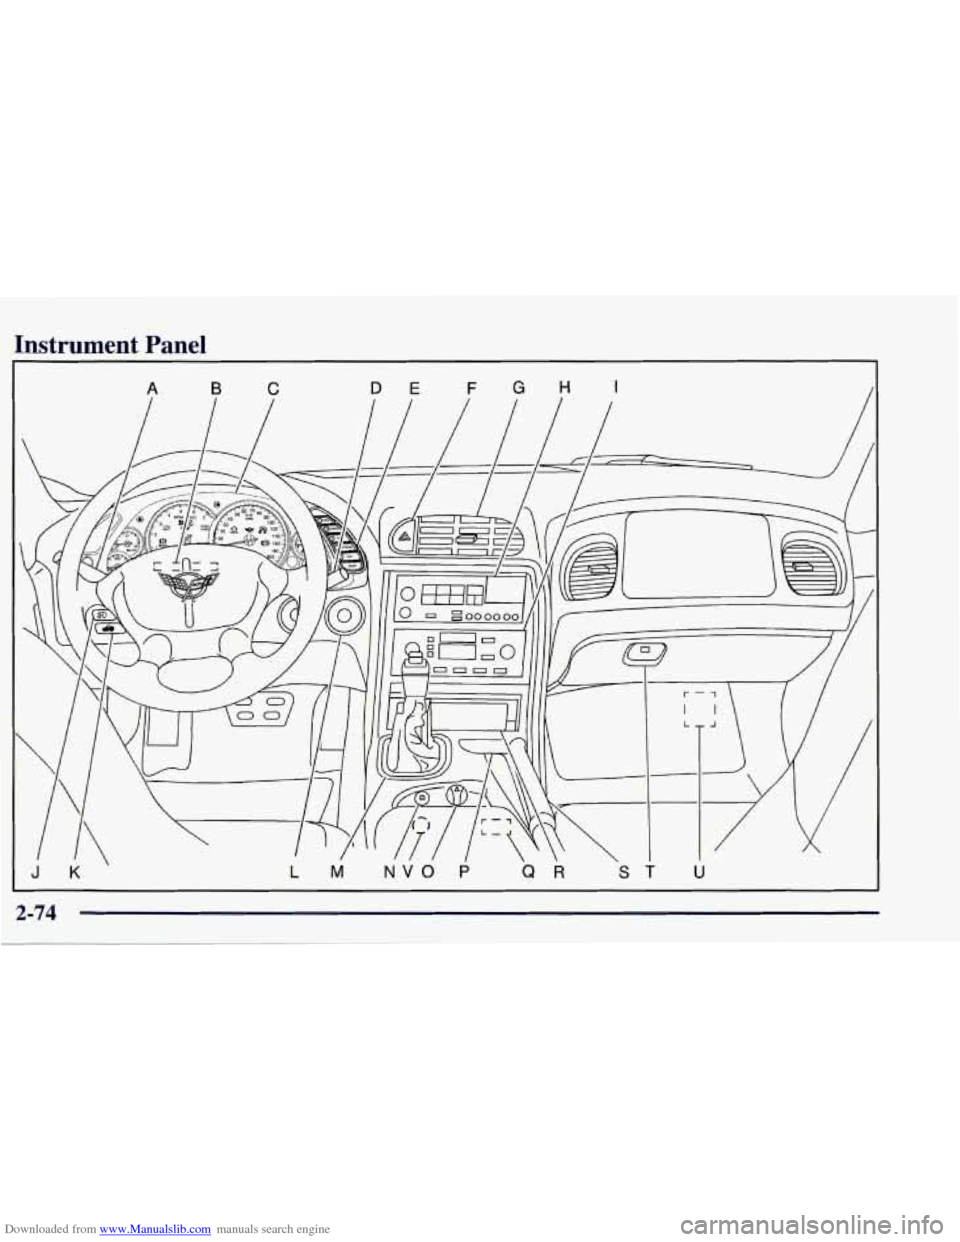
Downloaded from www.Manualslib.com manuals search engine Instrument Panel
JK LM NVO P QR ST U
2-74
Page 128 of 378
Downloaded from www.Manualslib.com manuals search engine A. Turn Signal/Multifunction Lever
B. Driver Information Center (DIC)
C. Instrument Panel Cluster
D. Windshield Wipermasher Lever
E. DIC Buttons
E Hazard Warning Flasher Button
G. Center Air Vent
H. Audio System
I. Comfort Controls
J. Fog Lamp Button (Option)
K. Remote Hatch Release Button (Coupe) or Remote
Trunk Release Button (Convertible)
L. Ignition Switch
M. Shift Lever (Automatic Shown)
N. Traction Control System (TCS) Switch
0. Selective Real Time Damping (Option)
P. Instrument Panel Cupholder
Q. Remote Fuel Door Release Button
R. Ashtray
& Cigarette Lighter
S. Parking Brake
T. Glove Box
U. Instrument Panel Fuse Block
V. Power Accessory Outlet
2-75
Page 129 of 378
Downloaded from www.Manualslib.com manuals search engine Instrument Panel Cluster
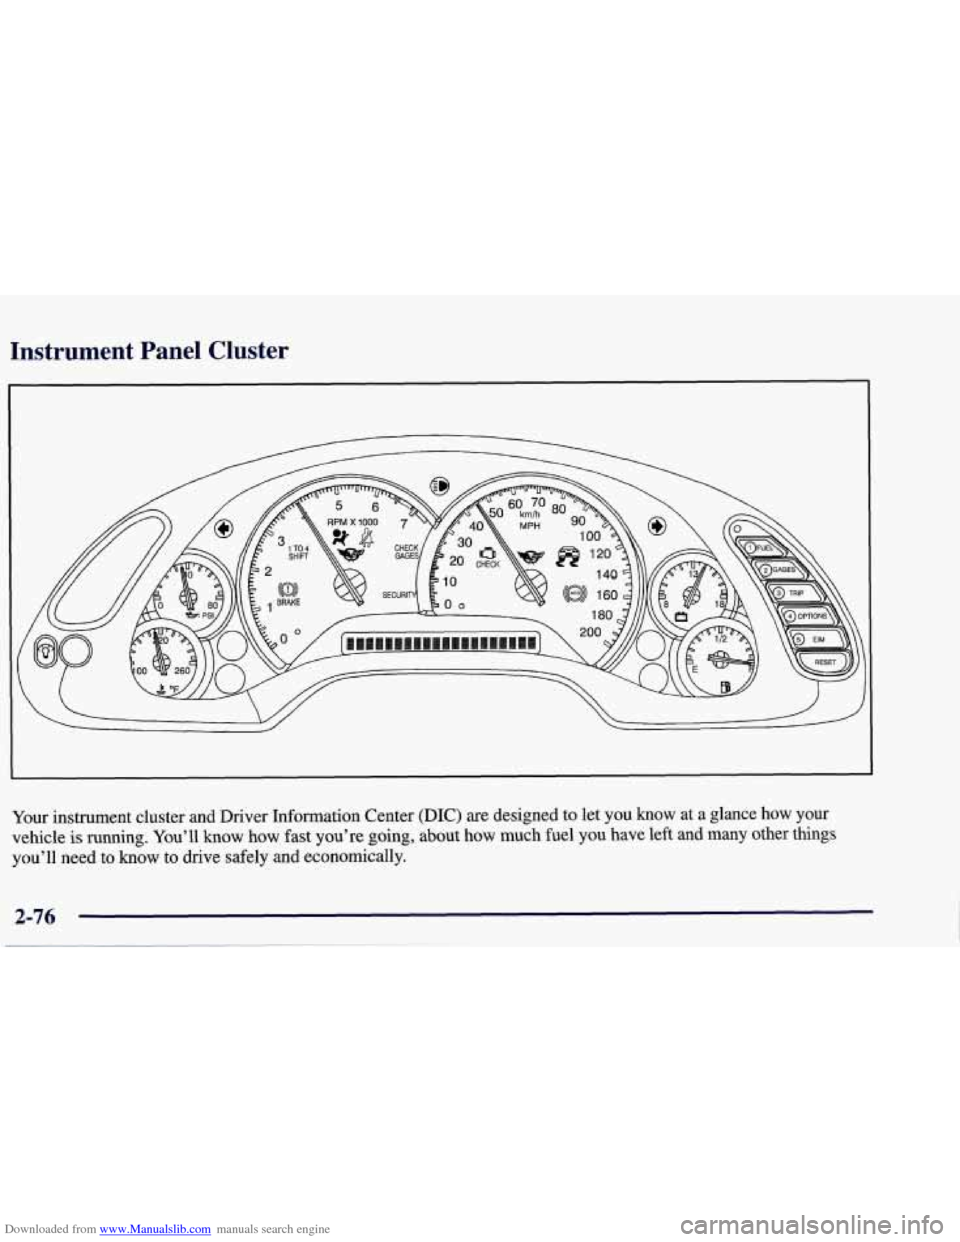
Your instrument cluster and Driver Information Center (DIC) are designed to let you know at a glance how your
vehicle
is running. You’ll know how fast you’re going, about how much fuel you have left and many other things
you’ll need to
know to drive safely and economically.
2-76
Page 130 of 378
Downloaded from www.Manualslib.com manuals search engine Speedometer
Your speedometer lets you see your speed in either miles
per hour (mph)
or kilometers per hour (km/h).
You may note that there are not two separate scales for
mph and
km/h. When you press the EM
(EnglishNetric) button on the Driver Information
Center (DIC), the cluster will calculate the proper speed
and move the needle to the correct position. Either the
MPH or the km/h telltale will illuminate, depending on
which measurement you choose.
Tachometer
The tachometer displays the engine speed in thousands
of revolutions per minute (rpm).
Fuel will shut
off at about 6200 rpm.
If you continue to drive your vehicle at the fuel shut off
rpm, you could damage your engine. Be sure to operate
your vehicle below the fuel shut off rpm or reduce your
rpm quickly when the fuel shuts off.
Warning Lights, Gages and Messages
This part describes the warning lights and gages that
may be on your vehicle. The pictures will help you
locate them.
Warning lights and gages can signal that something is wrong before it becomes serious enough to cause an
expensive repair or replacement. Paying attention to
your warning lights and gages could also save you or
others from injury.
Warning lights come on when there may be
or is a
problem with one of your vehicle’s functions.
As you
will see in the details on the next few pages, some
warning lights come on briefly when you start the
engine just to let you know they’re working.
If you are
familiar with this section, you should not be alarmed
when this happens.
Gages can indicate when there may be or is a problem
with one
of your vehicle’s functions. Often gages and
warning lights work together to let you
know when
there’s a problem with your vehicle.
2-77