CHEVROLET EXPRESS CARGO VAN 2017 1.G Owners Manual
Manufacturer: CHEVROLET, Model Year: 2017, Model line: EXPRESS CARGO VAN, Model: CHEVROLET EXPRESS CARGO VAN 2017 1.GPages: 346, PDF Size: 6.54 MB
Page 91 of 346
Chevrolet Express Owner Manual (GMNA-Localizing-U.S./Canada/Mexico-9967827) - 2017 - crc - 5/2/16
90 Instruments and Controls
6:Use to adjust the delay timebetween wipes. Turn the band upfor more frequent wipes or down forless frequent wipes.
d:Slow wipes.
a:Fast wipes.
9:Use to turn the wipers off.
When driving during the day and thewipers are activated, the headlamps automatically turn on aftercompleting eight wipe cycles.
Clear ice and snow from the wiperblades before using them. If frozento the windshield, carefully loosen orthaw them. Damaged blades shouldbe replaced.
Windshield Washer
The windshield wiper paddle is ontop of the turn signal lever.
L:Push the paddle to spraywasher fluid on the windshield. Thewipers will clear the window andthen either stop or return to thepreset speed.
{Warning
In freezing weather, do not use
the washer until the windshield is
warmed. Otherwise the washer
fluid can form ice on the
windshield, blocking your vision.
Compass
This vehicle may have a compass inthe Driver Information Center (DIC).
Compass Zone
Yo u r d e a l e r w i l l s e t t h e c o r r e c t z o n efor your location.
Under certain circumstances, suchas during a long distancecross-country trip or moving to anew state or province, it will benecessary to compensate forcompass variance by resetting thezone through the DIC if the zone isnot set correctly.
Compass variance is the differencebetween the earth's magnetic northand true geographic north. If thecompass is not set to the zonewhere you live, the compass may
give false readings. The compassmust be set to the variance zone inwhich the vehicle is traveling.
To a d j u s t f o r c o m p a s s v a r i a n c e , u s ethe following procedure:
Compass Variance (Zone)Procedure
1. Do not set the compass zonewhen the vehicle is moving.Only set it when the vehicle isin P (Park).
PressTuntil PRESSVTO
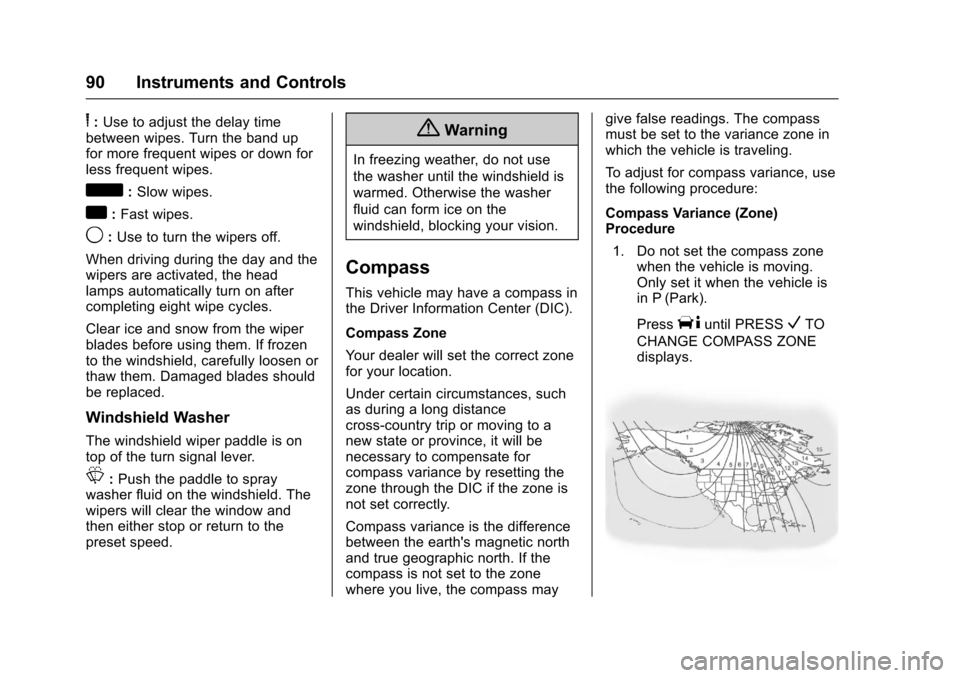
CHANGE COMPASS ZONEdisplays.
Page 92 of 346
Chevrolet Express Owner Manual (GMNA-Localizing-U.S./Canada/Mexico-9967827) - 2017 - crc - 5/2/16
Instruments and Controls 91
2. Find the vehicle's currentlocation and variance zonenumber on the map.
Zones 1 through 15 areavailable.
3. PressVto scroll through and
select the appropriatevariance zone.
4. Press3until the vehicle
heading, for example, N forNorth, is displayed in the DIC.
5. If calibration is necessary,calibrate the compass. See“Compass CalibrationProcedure”following.
Compass Calibration
The compass can be manuallycalibrated. Only calibrate thecompass in a magnetically cleanand safe location, such as an openparking lot, where driving thevehicle in circles is not a danger.It is suggested to calibrate awayfrom tall buildings, utility wires,manhole covers, or other industrialstructures, if possible.
If CAL should ever appear in theDIC display, the compass should becalibrated.
If the DIC display does not show aheading, for example, N for North,or the heading does not changeafter making turns, there may be astrong magnetic field interfering withthe compass. Such interferencemay be caused by a magnetic CB orcell phone antenna mount, amagnetic emergency light, magneticnote pad holder, or any othermagnetic item. Turn off the vehicle,move the magnetic item, then turnon the vehicle and calibrate thecompass.
To c a l i b r a t e t h e c o m p a s s , u s e t h efollowing procedure:
Compass Calibration Procedure
1. Before calibrating the compass,make sure the compass zoneis set to the variance zone inwhich the vehicle is located.See“Compass Variance (Zone)Procedure”earlier in thissection.
Do not operate any switchessuch as window, climatecontrols, seats, etc. during thecalibration procedure.
2. PressTuntil PRESSVTO
CALIBRATE COMPASSdisplays.
3. PressVto start the compass
calibration.
4. The DIC will displayCALIBRATING: DRIVE INCIRCLES. Drive the vehicle intight circles at less than 8 km/h(5 mph) to complete thecalibration. The DIC will displayCALIBRATION COMPLETE forafewsecondswhenthecalibration is complete. TheDIC display will then return to
PRESSVTO CALIBRATE
COMPASS.
Page 93 of 346
Chevrolet Express Owner Manual (GMNA-Localizing-U.S./Canada/Mexico-9967827) - 2017 - crc - 5/2/16
92 Instruments and Controls
Clock
The clock can be set with either theradio turned on or off.
AM-FM Radio
To s e t t h e t i m e :
1. PressHuntil the hour begins
flashing on the display. Pressthis button a second time andthe minutes begin flashing ondisplay.
PressHathirdtimeandthe
12HR or 24HR time formatbegins flashing.
2. While either the hour or the
minutes are flashing, turn thef
knob, on the upper right side ofthe radio, clockwise orcounterclockwise to increase ordecrease the time. While the12HR or 24HR time format is
flashing, turn thefknob
clockwise or counterclockwiseto select the default timesettings.
3. PressHagain until the clock
display stops flashing to set thecurrently displayed time;otherwise, the flashing stopsafter five seconds and thecurrent time displayed isautomatically set.
Radio with CD/MP3
To s e t t h e t i m e a n d d a t e :
1. PressHand the HR, MIN, MM,
DD, and YYYY (hour, minute,month, day, and year) display.
2. Press the softkey under anyone of the tabs to be changed.Every time the softkey ispressed again, the time or thedate if selected, increasesby one.
Another way to increase the
time or date is to press¨
SEEK or\FWD (forward).
3. To decrease, press©SEEK or
sREV. Turn thefknob, onthe upper right side of theradio, to adjust the selectedsetting.
Changing the Time and DateDefault Settings
To c h a n g e t h e t i m e o r d a t e d e f a u l tsettings:
1. PressHand then the softkey
under the forward arrow that iscurrently displayed on the radioscreen until the time 12H(hour) and 24H (hour), and thedate MM/DD (month and day)and DD/MM (day and month)are displayed.
2. Press the softkey under thedesired option.
3. PressHagain to apply the
selected default, or let thescreen time out.
Page 94 of 346
Chevrolet Express Owner Manual (GMNA-Localizing-U.S./Canada/Mexico-9967827) - 2017 - crc - 5/2/16
Instruments and Controls 93
Power Outlets
Power Outlets 12 Volt DirectCurrent
The accessory power outlets can beused to plug in electrical equipment,such as a cell phone or an MP3player.
The vehicle may have twoaccessory power outlets on theinstrument panel.
Remove the cover to access andreplace when not in use.
Certain power accessory plugs maynot be compatible to the accessorypower outlet and could overloadvehicle or adapter fuses. If aproblem is experienced, see yourdealer.
{Warning
Power is always supplied to the
outlets. Do not leave electrical
equipment plugged in when the
vehicle is not in use because the
vehicle could catch fire and cause
injury or death.
Caution
Leaving electrical equipment
plugged in for an extended period
of time while the vehicle is off will
drain the battery. Always unplug
electrical equipment when not in
use and do not plug in equipment
that exceeds the maximum
20 amp rating.
When adding electrical equipment,be sure to follow the properinstallation instructions included withthe equipment. SeeAdd-OnElectrical Equipment0212.
Caution
Hanging heavy equipment from
the power outlet can cause
damage not covered by the
vehicle warranty. The power
outlets are designed for
accessory power plugs only, such
as cell phone charge cords.
Power Outlet 110/120 Volt
Alternating Current
This power outlet can be used toplug in electrical equipment thatuses a maximum limit of 150 watts.
The 110/120 volt power outlet is onthe instrument panel.
An indicator light on the outlet turnson to show it is in use. The lightcomes on when the ignition is inON/RUN, equipment requiring lessthan 150 watts is plugged into theoutlet, and no system fault isdetected.
The indicator light does not come onwhen the ignition is in LOCK/OFF orif the equipment is not fully seatedinto the outlet.
If equipment is connected usingmore than 150 watts or a systemfault is detected, a protection circuitshuts off the power supply and theindicator light turns off. To reset thecircuit, unplug the item and plug itback in or turn the RetainedAccessory Power (RAP) off andthen back on. SeeRetainedAccessory Power (RAP)0180.
Page 95 of 346
Chevrolet Express Owner Manual (GMNA-Localizing-U.S./Canada/Mexico-9967827) - 2017 - crc - 5/2/16
94 Instruments and Controls
The power outlet is not designed forthe following, and may not workproperly if they are plugged in:
.Equipment with high initial peakwattage, such ascompressor-driven refrigeratorsand electric power tools.
.Other equipment requiring anextremely stable power supply,such asmicrocomputer-controlledelectric blankets and touchsensor lamps.
.Medical equipment.
Cigarette Lighter
If equipped with a cigarette lighter,to heat push it in all the way and letgo. When it is ready for use, it willpop back out by itself.
Do not use the lighter to plug inaccessory devices. Use the poweroutlets provided.
Caution
Holding a cigarette lighter in while
it is heating does not let the
lighter back away from the
heating element when it is hot.
Damage from overheating can
occur to the lighter or heating
element, or a fuse could be
blown. Do not hold a cigarette
lighter in while it is heating.
Ashtrays
If equipped with a removableashtray, it can be placed into thefront floor console cupholder. Openthe cover to use.
Caution
If papers, pins, or other
flammable items are put in the
ashtray, hot cigarettes or other
smoking materials could ignite
them and possibly damage the
vehicle. Never put flammable
items in the ashtray.
Warning Lights,
Gauges, and
Indicators
Warning lights and gauges cansignal that something is wrongbefore it becomes serious enoughto cause an expensive repair orreplacement. Paying attention to thewarning lights and gauges couldprevent injury.
Some warning lights come on brieflywhen the engine is started toindicate they are working. Whenone of the warning lights comes onand stays on while driving, or whenone of the gauges shows there maybe a problem, check the section thatexplains what to do. Waiting to dorepairs can be costly and evendangerous.
Page 96 of 346
Chevrolet Express Owner Manual (GMNA-Localizing-U.S./Canada/Mexico-9967827) - 2017 - crc - 5/2/16
Instruments and Controls 95
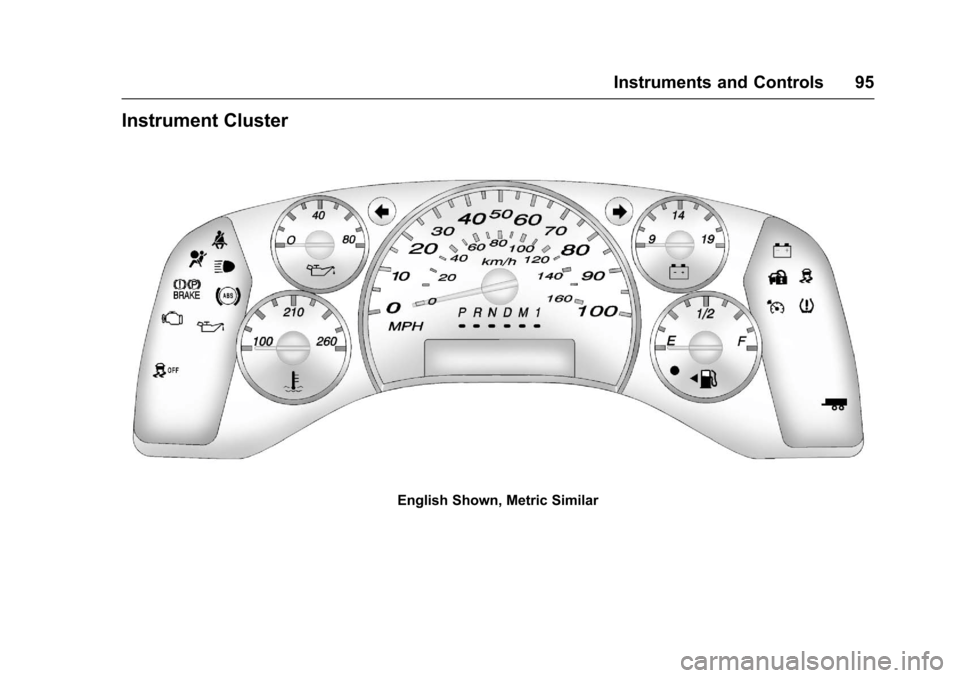
Instrument Cluster
English Shown, Metric Similar
Page 97 of 346
Chevrolet Express Owner Manual (GMNA-Localizing-U.S./Canada/Mexico-9967827) - 2017 - crc - 5/2/16
96 Instruments and Controls
If the vehicle has a diesel engine,see the Duramax diesel supplementfor more information.
Speedometer
The speedometer shows the vehiclespeed in kilometers per hour (km/h)and miles per hour (mph).
Odometer
The odometer shows how far thevehicle has been driven, in eitherkilometers or miles.
Trip Odometer
The trip odometer shows how farthe vehicle has been driven sincethe trip odometer was last reset.
The trip odometer is accessed andreset through the Driver InformationCenter (DIC). SeeDriverInformation Center (DIC)0108.
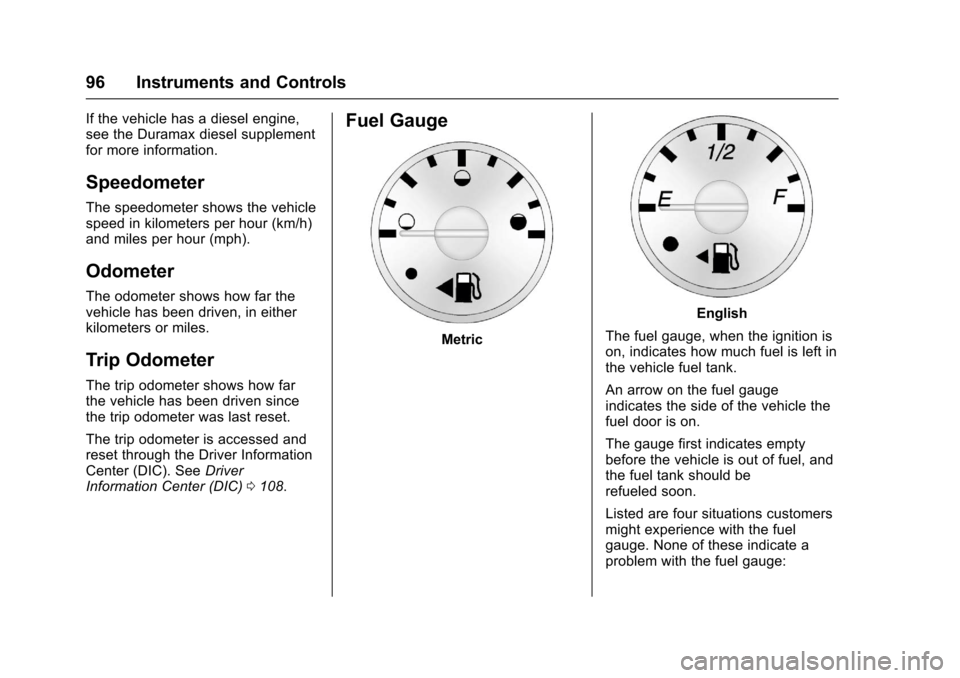
Fuel Gauge
Metric
English
The fuel gauge, when the ignition ison, indicates how much fuel is left inthe vehicle fuel tank.
An arrow on the fuel gaugeindicates the side of the vehicle thefuel door is on.
The gauge first indicates emptybefore the vehicle is out of fuel, andthe fuel tank should berefueled soon.
Listed are four situations customersmight experience with the fuelgauge. None of these indicate aproblem with the fuel gauge:
Page 98 of 346
Chevrolet Express Owner Manual (GMNA-Localizing-U.S./Canada/Mexico-9967827) - 2017 - crc - 5/2/16
Instruments and Controls 97
.At the gas station, the fuel pumpshuts off before the gaugereads full.
.It takes a little more or less fuelto fill up than the fuel gaugeindicated. For example, thegauge may have indicated thetank was half full, but it actuallytook a little more or less thanhalf the tank's capacity to fillthe tank.
.The gauge moves a little whileturning a corner or speeding up.
.The gauge does not go back toempty when the ignition isturned off.
If the vehicle has a diesel engine,see the Duramax dieselsupplement.
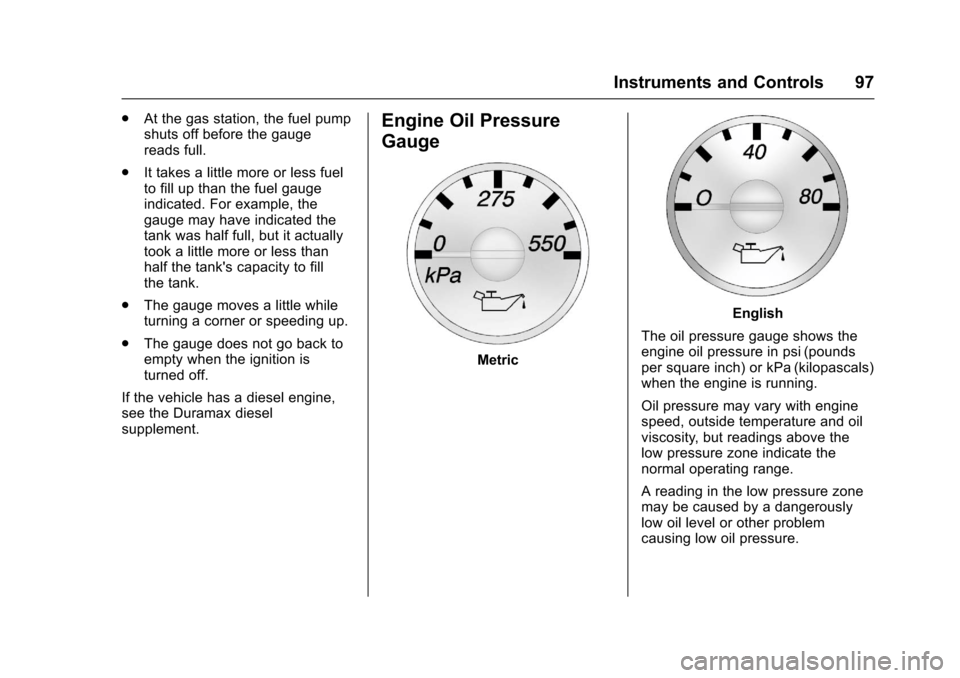
Engine Oil Pressure
Gauge
Metric
English
The oil pressure gauge shows theengine oil pressure in psi (poundsper square inch) or kPa (kilopascals)when the engine is running.
Oil pressure may vary with enginespeed, outside temperature and oilviscosity, but readings above thelow pressure zone indicate thenormal operating range.
Areadinginthelowpressurezonemay be caused by a dangerouslylow oil level or other problemcausing low oil pressure.
Page 99 of 346
Chevrolet Express Owner Manual (GMNA-Localizing-U.S./Canada/Mexico-9967827) - 2017 - crc - 5/2/16
98 Instruments and Controls
Caution
Lack of proper engine oil
maintenance can damage the
engine. Driving with the engine oil
low can also damage the engine.
The repairs would not be covered
by the vehicle warranty. Check
the oil level as soon as possible.
Add oil if required, but if the oil
level is within the operating range
and the oil pressure is still low,
have the vehicle serviced. Always
follow the maintenance schedule
for changing engine oil.
Engine Coolant
Temperature Gauge
Metric
English
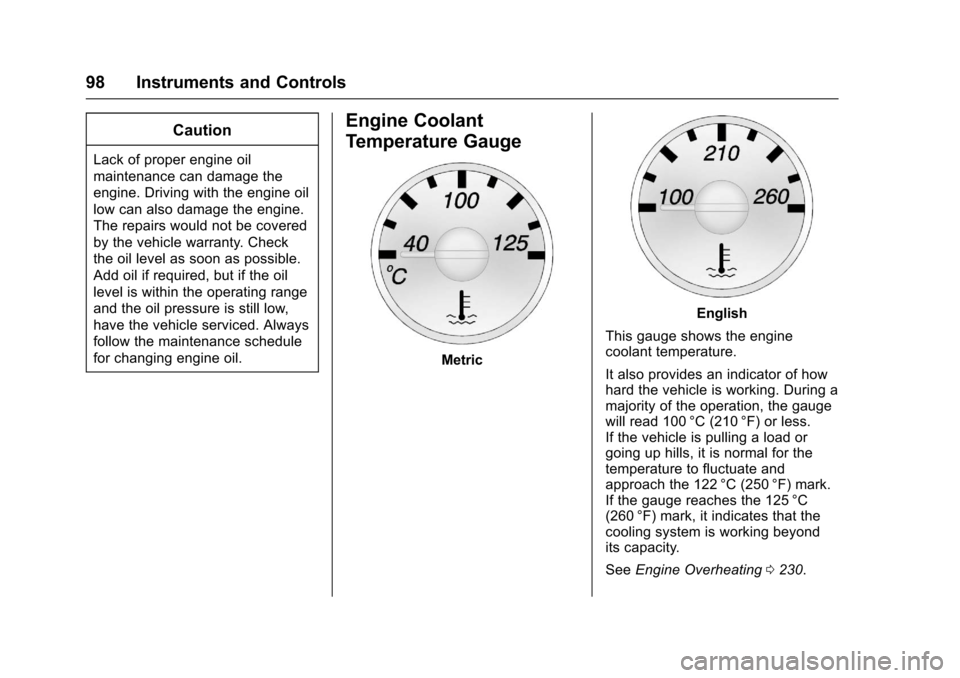
This gauge shows the enginecoolant temperature.
It also provides an indicator of howhard the vehicle is working. During amajority of the operation, the gaugewill read 100 °C (210 °F) or less.If the vehicle is pulling a load orgoing up hills, it is normal for thetemperature to fluctuate andapproach the 122 °C (250 °F) mark.If the gauge reaches the 125 °C(260 °F) mark, it indicates that thecooling system is working beyondits capacity.
SeeEngine Overheating0230.
Page 100 of 346
Chevrolet Express Owner Manual (GMNA-Localizing-U.S./Canada/Mexico-9967827) - 2017 - crc - 5/2/16
Instruments and Controls 99
Voltmeter Gauge
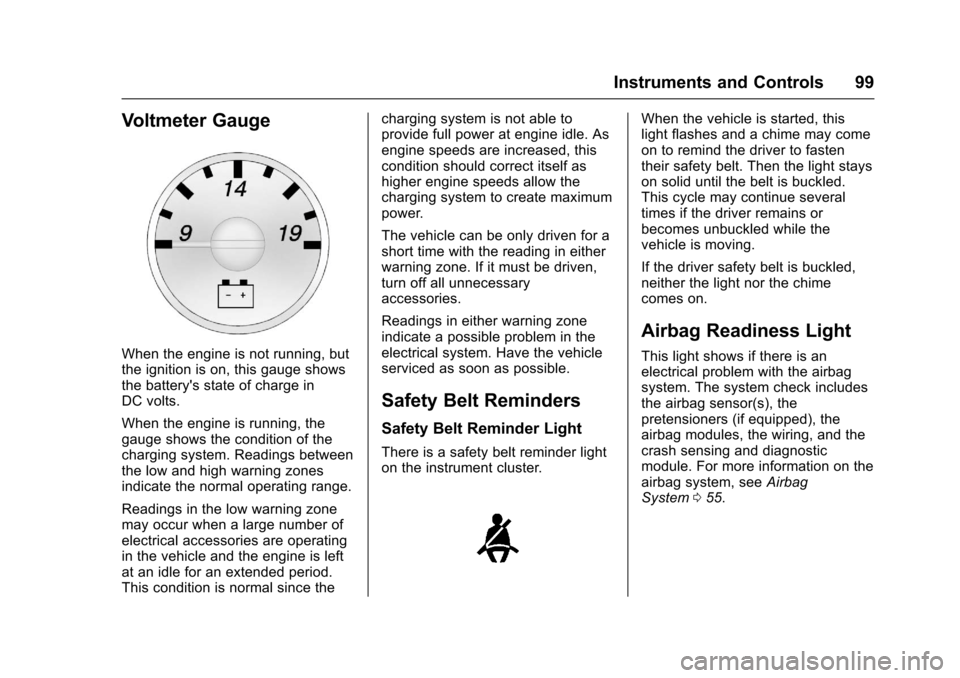
When the engine is not running, butthe ignition is on, this gauge showsthe battery's state of charge inDC volts.
When the engine is running, thegauge shows the condition of thecharging system. Readings betweenthe low and high warning zonesindicate the normal operating range.
Readings in the low warning zonemay occur when a large number ofelectrical accessories are operatingin the vehicle and the engine is leftat an idle for an extended period.This condition is normal since the
charging system is not able toprovide full power at engine idle. Asengine speeds are increased, thiscondition should correct itself ashigher engine speeds allow thecharging system to create maximumpower.
The vehicle can be only driven for ashort time with the reading in eitherwarning zone. If it must be driven,turn off all unnecessaryaccessories.
Readings in either warning zoneindicate a possible problem in theelectrical system. Have the vehicleserviced as soon as possible.
Safety Belt Reminders
Safety Belt Reminder Light
There is a safety belt reminder lighton the instrument cluster.
When the vehicle is started, thislight flashes and a chime may comeon to remind the driver to fastentheir safety belt. Then the light stayson solid until the belt is buckled.This cycle may continue severaltimes if the driver remains orbecomes unbuckled while thevehicle is moving.
If the driver safety belt is buckled,neither the light nor the chimecomes on.
Airbag Readiness Light
This light shows if there is anelectrical problem with the airbagsystem. The system check includesthe airbag sensor(s), thepretensioners (if equipped), theairbag modules, the wiring, and thecrash sensing and diagnosticmodule. For more information on theairbag system, seeAirbagSystem055.