ECO CHEVROLET KODIAK 2005 Owner's Manual
[x] Cancel search | Manufacturer: CHEVROLET, Model Year: 2005, Model line: KODIAK, Model: CHEVROLET KODIAK 2005Pages: 374, PDF Size: 5.46 MB
Page 96 of 374
Eaton®Fuller®Five and Six-Speed
Transmissions and TTC Spicer
Seven-Speed Transmissions
These transmissions have gears that automatically
synchronize when you shift up or down (except
FIRST (1) gear on the five-speed and seven-speed
transmission which is unsynchronized). Choose the
gear that will maintain the road speed you want while
keeping the engine above two-thirds of the governed
speed. When the engine speed drops below two-thirds
of the governed speed, shift into the next lower gear
before your engine begins to lug. When you shift down,
be sure to double-clutch if required.
ZF Six-Speed Transmission
Here is how to operate your transmission.
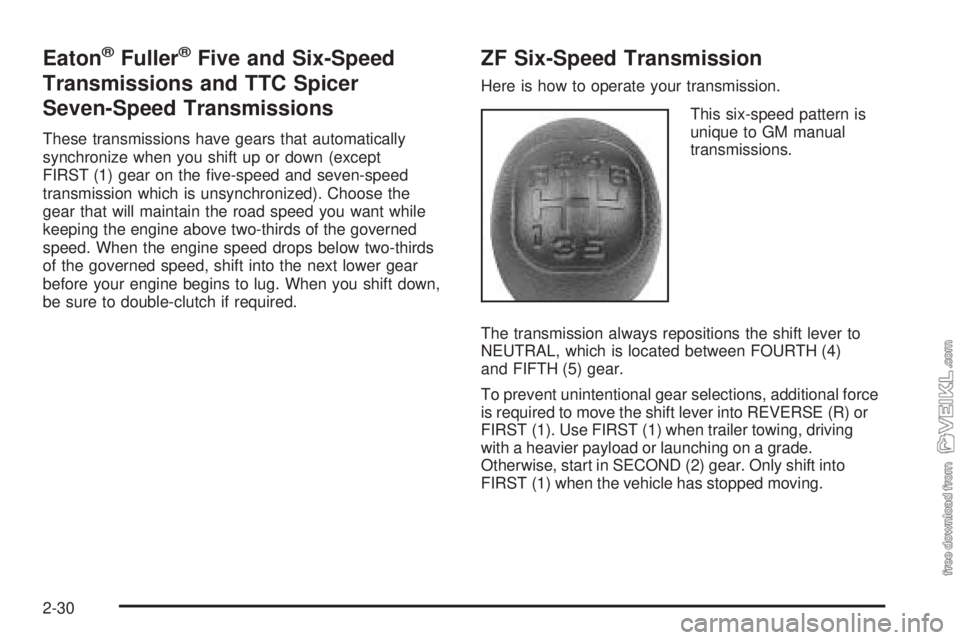
This six-speed pattern is
unique to GM manual
transmissions.
The transmission always repositions the shift lever to
NEUTRAL, which is located between FOURTH (4)
and FIFTH (5) gear.
To prevent unintentional gear selections, additional force
is required to move the shift lever into REVERSE (R) or
FIRST (1). Use FIRST (1) when trailer towing, driving
with a heavier payload or launching on a grade.
Otherwise, start in SECOND (2) gear. Only shift into
FIRST (1) when the vehicle has stopped moving.
2-30
Page 97 of 374
During the first 500 miles (805 km) of vehicle use, start
the vehicle moving in FIRST (1) gear. This allows
the clutch components to wear-in properly.
FIRST (1):With the vehicle at a stop, release the
brake, press the clutch pedal and shift into FIRST (1).
Then, slowly let up on the clutch pedal as you press the
accelerator pedal. Only downshift into FIRST (1)
when the vehicle has come to a complete stop. If the
shift lever will not go into FIRST (1), put the lever
in NEUTRAL and let up on the clutch pedal to fully
engage the clutch. Press the clutch pedal again.
Then, shift into FIRST (1).
SECOND (2):With the vehicle at a stop, release the
brake, press the clutch pedal and shift into SECOND (2).
Then, slowly let up on the clutch pedal as you press
the accelerator pedal. With the vehicle moving, press the
clutch pedal and upshift into SECOND (2) from
FIRST (1) while applying light pressure to the right on
the shifter. Then, slowly let up on the clutch pedal
as you press the accelerator pedal. If you come to a
complete stop and the shift lever will not go into
SECOND (2), put the lever in NEUTRAL and let up on
the clutch pedal to fully engage the clutch. Press
the clutch pedal again. Then, shift into SECOND (2).THIRD (3):Press the clutch pedal and upshift into
THIRD (3). Then, slowly let up on the clutch pedal as
you press the accelerator pedal.
FOURTH (4), FIFTH (5) and SIXTH (6):Upshift into
the higher forward gears the same way as you do
THIRD (3). Slowly let up on the clutch pedal as you
press the accelerator pedal.
NEUTRAL:Use this position when you start or idle
your engine.
REVERSE (R):To back up, press the clutch pedal.
Wait for the vehicle to stop moving and then, shift
to REVERSE (R). Let up on the clutch slowly while
pressing the accelerator pedal. Also, use REVERSE (R),
along with the parking brake, when turning off your
engine and parking your vehicle.
2-31
Page 100 of 374
Electronic Transfer Case
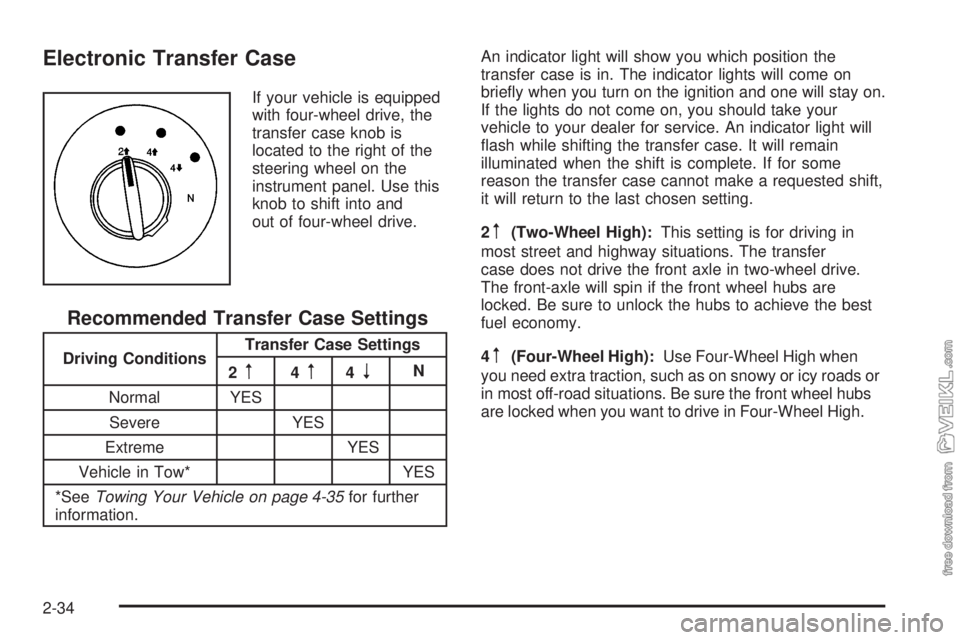
If your vehicle is equipped
with four-wheel drive, the
transfer case knob is
located to the right of the
steering wheel on the
instrument panel. Use this
knob to shift into and
out of four-wheel drive.
Recommended Transfer Case Settings
Driving ConditionsTransfer Case Settings
2m4m4nN
Normal YES
Severe YES
Extreme YES
Vehicle in Tow* YES
*SeeTowing Your Vehicle on page 4-35for further
information.An indicator light will show you which position the
transfer case is in. The indicator lights will come on
briefly when you turn on the ignition and one will stay on.
If the lights do not come on, you should take your
vehicle to your dealer for service. An indicator light will
flash while shifting the transfer case. It will remain
illuminated when the shift is complete. If for some
reason the transfer case cannot make a requested shift,
it will return to the last chosen setting.
2
m(Two-Wheel High):This setting is for driving in
most street and highway situations. The transfer
case does not drive the front axle in two-wheel drive.
The front-axle will spin if the front wheel hubs are
locked. Be sure to unlock the hubs to achieve the best
fuel economy.
4
m(Four-Wheel High):Use Four-Wheel High when
you need extra traction, such as on snowy or icy roads or
in most off-road situations. Be sure the front wheel hubs
are locked when you want to drive in Four-Wheel High.
2-34
Page 102 of 374
Shifting Into Four-Wheel Low
To shift to Four-Wheel Low, the vehicle’s engine must
be running and the vehicle must be stopped or
moving less than 3 mph (5 km/h) with the transmission
in NEUTRAL (N). The preferred method for shifting
into Four-Wheel Low is to have your vehicle moving
1 or 2 mph (1.6 to 3.2 km/h). Turn the knob to
Four-Wheel Low. You must wait for the Four-Wheel Low
indicator light to stop flashing and remain illuminated
before shifting your transmission into gear.
Notice:Shifting the transmission into gear before
the Four-Wheel Low indicator light has stopped
ashing could damage the transfer case. To help
avoid damaging your vehicle, always wait for
the Four-Wheel Low indicator light to stop ashing
before shifting the transmission into gear.
If you turn the knob to Four-Wheel Low when your
vehicle is in gear and/or moving, the Four-Wheel Low
indicator light will flash for 30 seconds and not
complete the shift unless your vehicle is moving
less than 3 mph (4.8 km/h) and the transmission is in
NEUTRAL (N). After 30 seconds, the transfer case
will return to the setting last chosen. If your vehicle is in
gear and moving less than 3 mph (4.8 km/h), the
transfer case will shift to Four-Wheel High.
Shifting Out of Four-Wheel Low
To shift from four-wheel low to Four-Wheel High or
Two-Wheel High, your vehicle must be stopped
or moving less than 3 mph (5 km/h) with the
transmission in NEUTRAL (N) and the engine running.
The preferred method for shifting out of Four-Wheel
Low is to have your vehicle moving 1 or 2 mph
(1.6 to 3.2 km/h). Turn the knob to Four-Wheel High or
Two-Wheel High. You must wait for the Four-Wheel
High or Two-Wheel High indicator light to stop flashing
and remain illuminated before shifting your transmission
into gear.
Notice:Shifting the transmission into gear before
the Four-Wheel High or Two-Wheel High indicator
light has stopped ashing could damage the transfer
case. To help avoid damaging your vehicle, always
wait for the Four-Wheel High or Two-Wheel High
indicator light to stop ashing before shifting
the transmission into gear.
If the knob is turned to Four-Wheel High or two-wheel
high when your vehicle is in gear and/or moving,
the Four-Wheel High or Two-Wheel high indicator light
will flash for 30 seconds. It will not complete the
shift unless your vehicle is moving less than 3 mph
(5 km/h) with the transmission in NEUTRAL (N).
2-36
Page 103 of 374
Shifting Into NEUTRAL
Before shifting the transfer case to NEUTRAL, first
make sure the vehicle is parked so that it will not roll.
1. Set the parking brake.
2. Start the vehicle.
3. Put the transmission in NEUTRAL (N).
4. Shift the transfer case to Two-Wheel High.
5. Turn the transfer case knob all of the way past
Four-Wheel Low and hold it there for a minimum
of 10 seconds. The neutral indicator light will
come on.
6. Shift the transmission to REVERSE (R) for
one second, then shift the transmission to
DRIVE (D) for one second.
7. Turn the ignition to OFF.
8. Place the transmission shift lever in PARK. (P).
9. Turn the ignition to LOCK.
Shifting Out of NEUTRAL
To shift the transfer case out of NEUTRAL, do the
following:
1. Set the parking brake and apply the regular
brake pedal.
2. Turn the ignition to RUN with the engine off.
3. Put the transmission in NEUTRAL (N).
4. Turn the transfer case knob to the desired shift
position (Two-Wheel High, Four-Wheel High,
Four-Wheel Low).
5. After the transfer case has shifted out of NEUTRAL,
the indicator light will go out.
6. Release the parking brake.
7. Start the engine and shift the transmission lever to
the desired position.
Excessively shifting the transfer case into or out of the
different modes may cause the transfer case to enter the
shift protection mode. This will protect the transfer case
from possible damage and will only allow the transfer
case to respond to one shift per 10 seconds. The transfer
case may stay in this mode for up to three minutes.
2-37
Page 105 of 374
To set the hand lever parking brake, hold the regular
brake pedal down with your right foot. Pull up on
the handle with your right hand, until it stops.
If the ignition is on when the parking brake is set,
the brake system warning light will come on.
To release the foot pedal parking brake, hold the
regular brake pedal down. Pull the brake release handle,
located just above the parking brake pedal, to release
the parking brake.
To release the hand lever parking brake, hold the
regular brake pedal down and push down on the handle
until it stops.
If the ignition is on when the parking brake is released,
the brake system warning light will go off.
Propshaft Brake Burnish Procedure
It is recommended that the propshaft-mounted parking
brake be burnished as part of the new vehicle break-in.
The parking brake will work best after it has been
burnished following these instructions:
Make 10 stops, using the parking brake hand lever or
foot pedal, from 20 mph (32 km/h) about 2 1/2 miles
(4 km) apart. Between stops, drive the vehicle at
20 mph (32 km/h) to allow the brake to cool.Notice:Driving with the parking brake on can
damage the transmission and brake system parts.
Verify that the parking brake is fully released and the
brake warning light is off before driving.
Rear Wheel Park Brake Burnish
Procedure
It is recommended that the rear wheel mounted
parking brake be burnished as part of the new vehicle
break-in. The parking brake will work best after it
has been burnished following these instructions:
Make one or two stops using the parking brake hand
lever or foot pedal from 55 mph (92 km/h) to a stop
with moderate apply. Each stop should occur within
1/4 of a mile.
Notice:Driving with the parking brake on can
overheat the brake system and cause premature
wear or damage to brake system parts. Verify that
the parking brake is fully released and the brake
warning light is off before driving.
2-39
Page 123 of 374
Windshield Wipers
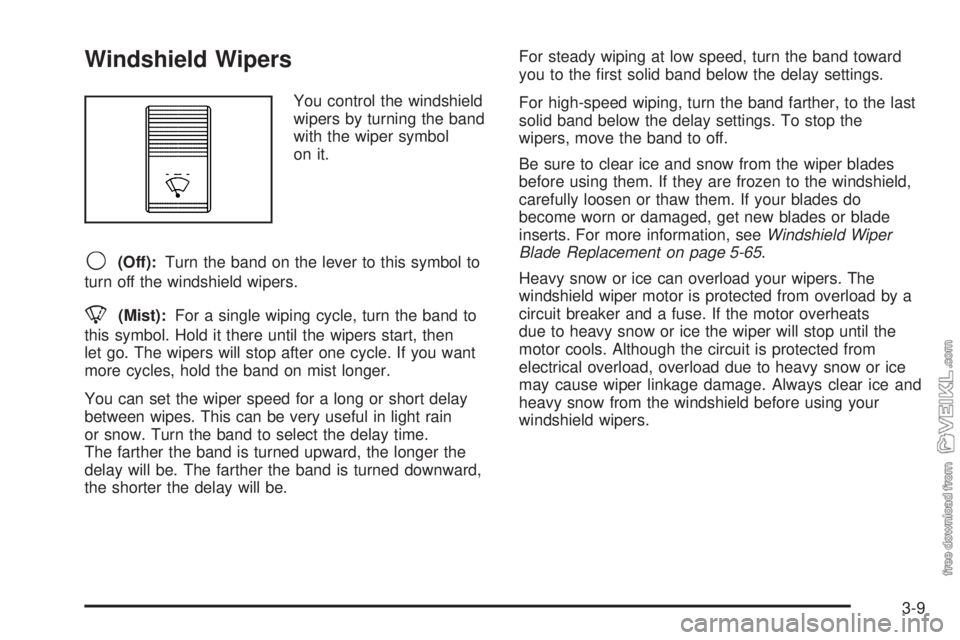
You control the windshield
wipers by turning the band
with the wiper symbol
on it.
9(Off):Turn the band on the lever to this symbol to
turn off the windshield wipers.
8(Mist):For a single wiping cycle, turn the band to
this symbol. Hold it there until the wipers start, then
let go. The wipers will stop after one cycle. If you want
more cycles, hold the band on mist longer.
You can set the wiper speed for a long or short delay
between wipes. This can be very useful in light rain
or snow. Turn the band to select the delay time.
The farther the band is turned upward, the longer the
delay will be. The farther the band is turned downward,
the shorter the delay will be.For steady wiping at low speed, turn the band toward
you to the first solid band below the delay settings.
For high-speed wiping, turn the band farther, to the last
solid band below the delay settings. To stop the
wipers, move the band to off.
Be sure to clear ice and snow from the wiper blades
before using them. If they are frozen to the windshield,
carefully loosen or thaw them. If your blades do
become worn or damaged, get new blades or blade
inserts. For more information, seeWindshield Wiper
Blade Replacement on page 5-65.
Heavy snow or ice can overload your wipers. The
windshield wiper motor is protected from overload by a
circuit breaker and a fuse. If the motor overheats
due to heavy snow or ice the wiper will stop until the
motor cools. Although the circuit is protected from
electrical overload, overload due to heavy snow or ice
may cause wiper linkage damage. Always clear ice and
heavy snow from the windshield before using your
windshield wipers.
3-9
Page 130 of 374
Marker Lamps
If your vehicle has this feature, you can manually blink
the marker and clearance lamps.
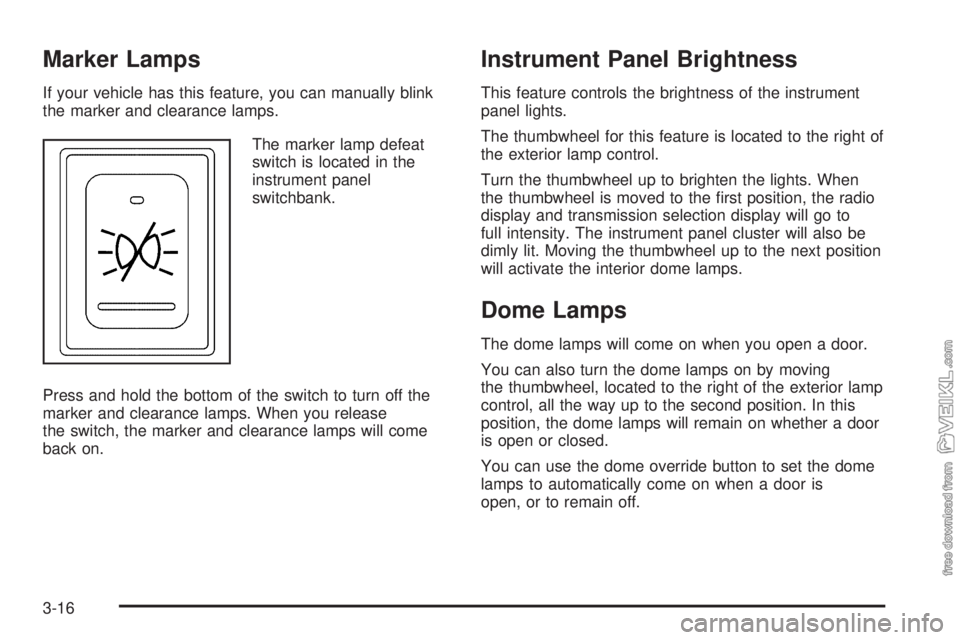
The marker lamp defeat
switch is located in the
instrument panel
switchbank.
Press and hold the bottom of the switch to turn off the
marker and clearance lamps. When you release
the switch, the marker and clearance lamps will come
back on.
Instrument Panel Brightness
This feature controls the brightness of the instrument
panel lights.
The thumbwheel for this feature is located to the right of
the exterior lamp control.
Turn the thumbwheel up to brighten the lights. When
the thumbwheel is moved to the first position, the radio
display and transmission selection display will go to
full intensity. The instrument panel cluster will also be
dimly lit. Moving the thumbwheel up to the next position
will activate the interior dome lamps.
Dome Lamps
The dome lamps will come on when you open a door.
You can also turn the dome lamps on by moving
the thumbwheel, located to the right of the exterior lamp
control, all the way up to the second position. In this
position, the dome lamps will remain on whether a door
is open or closed.
You can use the dome override button to set the dome
lamps to automatically come on when a door is
open, or to remain off.
3-16
Page 131 of 374
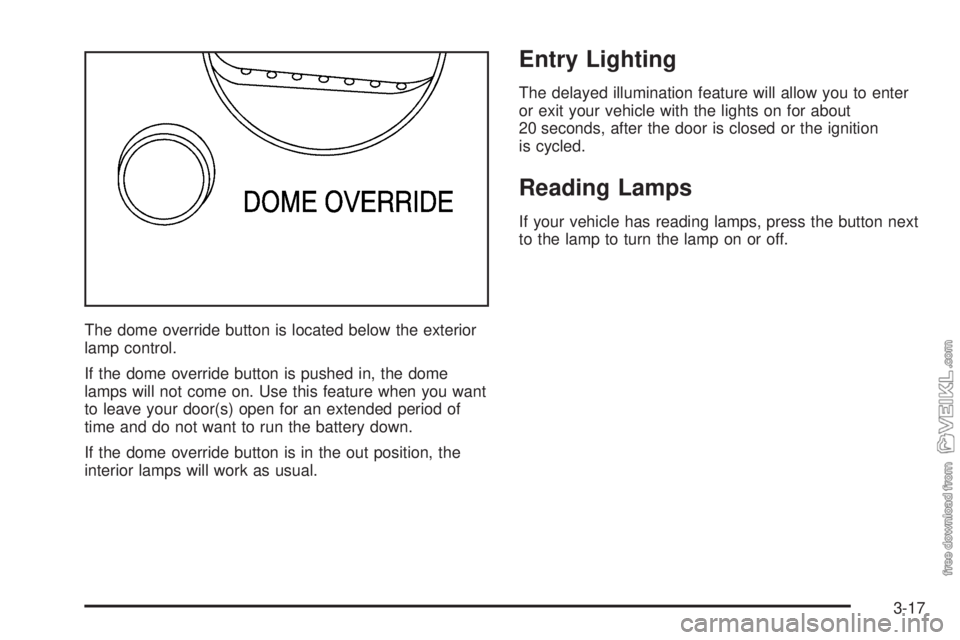
The dome override button is located below the exterior
lamp control.
If the dome override button is pushed in, the dome
lamps will not come on. Use this feature when you want
to leave your door(s) open for an extended period of
time and do not want to run the battery down.
If the dome override button is in the out position, the
interior lamps will work as usual.
Entry Lighting
The delayed illumination feature will allow you to enter
or exit your vehicle with the lights on for about
20 seconds, after the door is closed or the ignition
is cycled.
Reading Lamps
If your vehicle has reading lamps, press the button next
to the lamp to turn the lamp on or off.
3-17
Page 135 of 374
)(Bi-Level):This mode directs half of the air to the
instrument panel vents, then directs the remaining
air to the floor vents. Cooler air is directed to the upper
vents and warmer air to the floor vents.
6(Floor):This mode directs most of the air to the
floor vents. Use this mode to send air to the rear of the
vehicle. Keep the area under the front seats free of
objects that could obstruct airflow to the rear of
the vehicle.
The mode knob can also be used to select the defrost
mode. For more information, see “Defogging and
Defrosting” later in this section.
9(Fan):Turn the left knob clockwise or
counterclockwise to increase or decrease the fan speed.
To increase airflow, turn the knob clockwise. To
decrease airflow, turn it counterclockwise. To turn the
fan off, turn the mode knob on the far right
counterclockwise to the off position.
Temperature Knob:Turn the middle knob located
clockwise or counterclockwise to increase or decrease
the temperature inside of your vehicle. Turn the
knob toward the red area for warmer air. Turn the knob
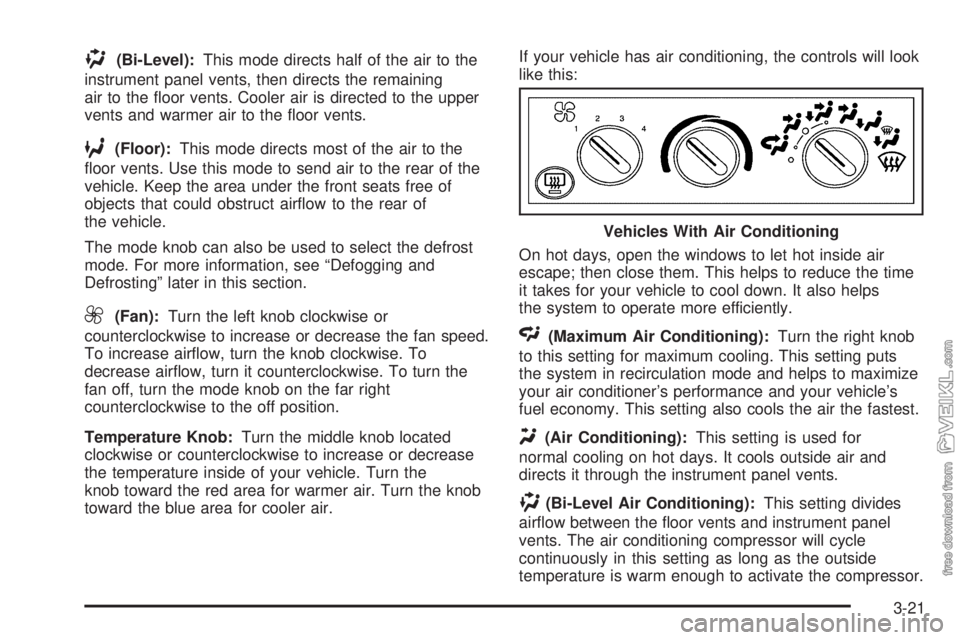
toward the blue area for cooler air.If your vehicle has air conditioning, the controls will look
like this:
On hot days, open the windows to let hot inside air
escape; then close them. This helps to reduce the time
it takes for your vehicle to cool down. It also helps
the system to operate more efficiently.
<(Maximum Air Conditioning):Turn the right knob
to this setting for maximum cooling. This setting puts
the system in recirculation mode and helps to maximize
your air conditioner’s performance and your vehicle’s
fuel economy. This setting also cools the air the fastest.
Y(Air Conditioning):This setting is used for
normal cooling on hot days. It cools outside air and
directs it through the instrument panel vents.
)(Bi-Level Air Conditioning):This setting divides
airflow between the floor vents and instrument panel
vents. The air conditioning compressor will cycle
continuously in this setting as long as the outside
temperature is warm enough to activate the compressor.Vehicles With Air Conditioning
3-21