CHEVROLET KODIAK 2005 Manual PDF
Manufacturer: CHEVROLET, Model Year: 2005, Model line: KODIAK, Model: CHEVROLET KODIAK 2005Pages: 374, PDF Size: 5.46 MB
Page 71 of 374
Matching Transmitter(s) to Your Vehicle
Each remote keyless entry transmitter is coded to
prevent another transmitter from unlocking your vehicle.
If a transmitter is lost or stolen, a replacement can
be purchased through your dealer. Remember to bring
any remaining transmitters with you when you go to
your dealer. When the dealer matches the replacement
transmitter to your vehicle, any remaining transmitters
must also be matched. Once your dealer has coded the
new transmitter, the lost transmitter will not unlock
your vehicle. Each vehicle can have a maximum of
four transmitters matched to it.
Battery Replacement
Under normal use, the battery in your remote keyless
entry transmitter should last about two years.
You can tell the battery is weak if the transmitter won’t
work at the normal range in any location. If you have
to get close to your vehicle before the transmitter works,
it’s probably time to change the battery.Notice:When replacing the battery, use care not to
touch any of the circuitry. Static from your body
transferred to these surfaces may damage the
transmitter.
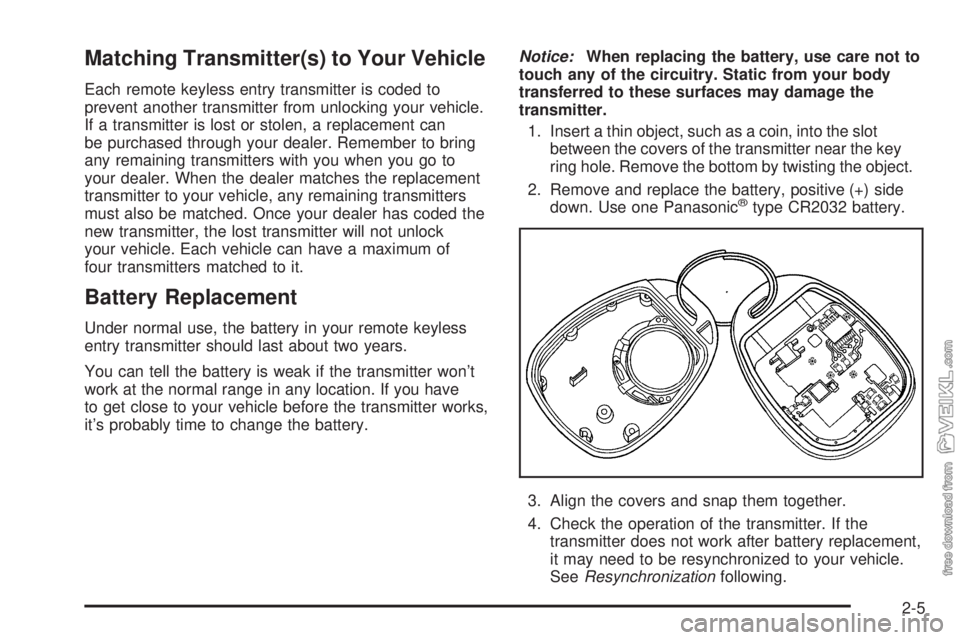
1. Insert a thin object, such as a coin, into the slot
between the covers of the transmitter near the key
ring hole. Remove the bottom by twisting the object.
2. Remove and replace the battery, positive (+) side
down. Use one Panasonic
®type CR2032 battery.
3. Align the covers and snap them together.
4. Check the operation of the transmitter. If the
transmitter does not work after battery replacement,
it may need to be resynchronized to your vehicle.
SeeResynchronizationfollowing.
2-5
Page 72 of 374
Resynchronization
Resynchronization may be necessary due to the
security method used by this system. The transmitter
does not send the same signal twice to the receiver.
The receiver will not respond to a signal it has been sent
previously. This prevents anyone from recording and
playing back the signal from the transmitter.
To resynchronize your transmitter, stand close to your
vehicle and simultaneously press and hold the LOCK
and UNLOCK buttons on the transmitter for at least
five seconds. The door locks should cycle to confirm
resynchronization. If the locks do not cycle, see
your dealer for service.
Doors and Locks
Door Locks
{CAUTION:
Unlocked doors can be dangerous.
Passengers — especially children — can
easily open the doors and fall out of a
moving vehicle. When a door is locked,
the handle will not open it. You increase
the chance of being thrown out of the
vehicle in a crash if the doors are not
locked. So, wear safety belts properly and
lock the doors whenever you drive.
Young children who get into unlocked
vehicles may be unable to get out. A child
can be overcome by extreme heat and can
suffer permanent injuries or even death
from heat stroke. Always lock your vehicle
whenever you leave it.
Outsiders can easily enter through an
unlocked door when you slow down or
stop your vehicle. Locking your doors can
help prevent this from happening.
2-6
Page 73 of 374
There are several ways to lock and unlock your vehicle.
If your vehicle is equipped with keyless entry, you
can use your transmitter to lock or unlock your vehicle.
SeeRemote Keyless Entry System Operation on
page 2-4.
To lock or unlock your door from the outside,
use your key.
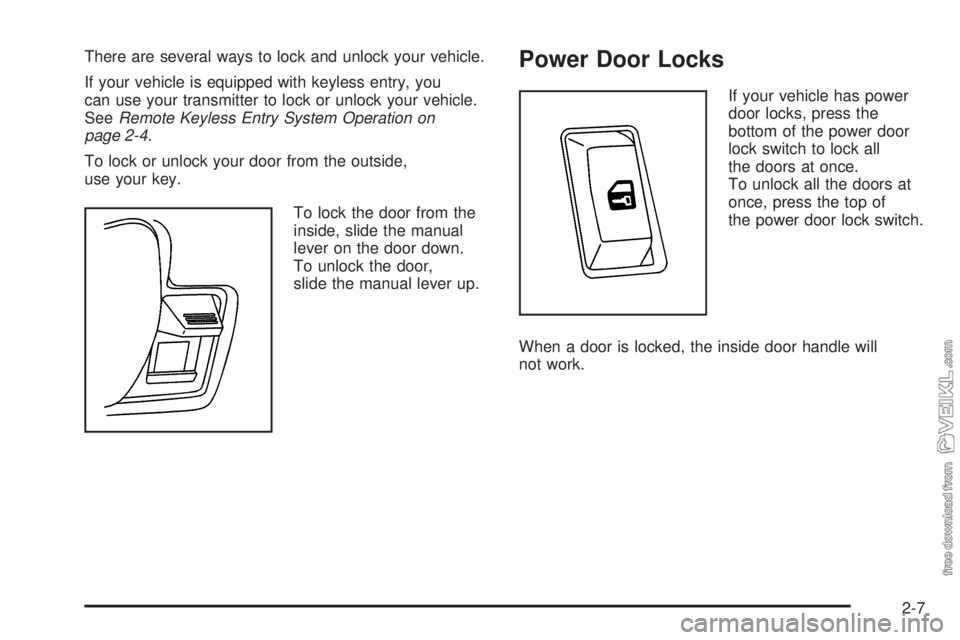
To lock the door from the
inside, slide the manual
lever on the door down.
To unlock the door,
slide the manual lever up.Power Door Locks
If your vehicle has power
door locks, press the
bottom of the power door
lock switch to lock all
the doors at once.
To unlock all the doors at
once, press the top of
the power door lock switch.
When a door is locked, the inside door handle will
not work.
2-7
Page 74 of 374
Windows
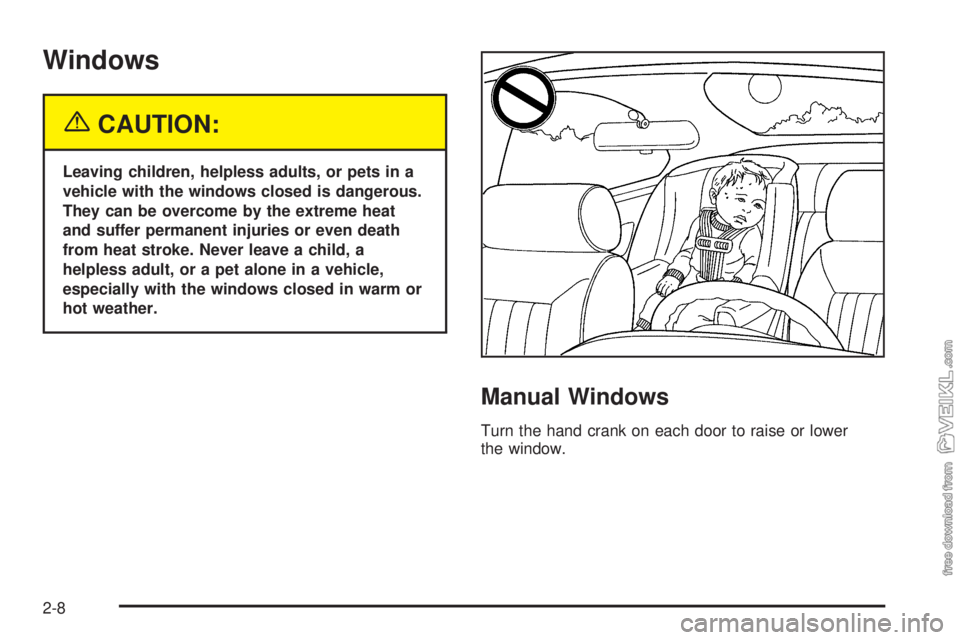
{CAUTION:
Leaving children, helpless adults, or pets in a
vehicle with the windows closed is dangerous.
They can be overcome by the extreme heat
and suffer permanent injuries or even death
from heat stroke. Never leave a child, a
helpless adult, or a pet alone in a vehicle,
especially with the windows closed in warm or
hot weather.
Manual Windows
Turn the hand crank on each door to raise or lower
the window.
2-8
Page 75 of 374
Power Windows
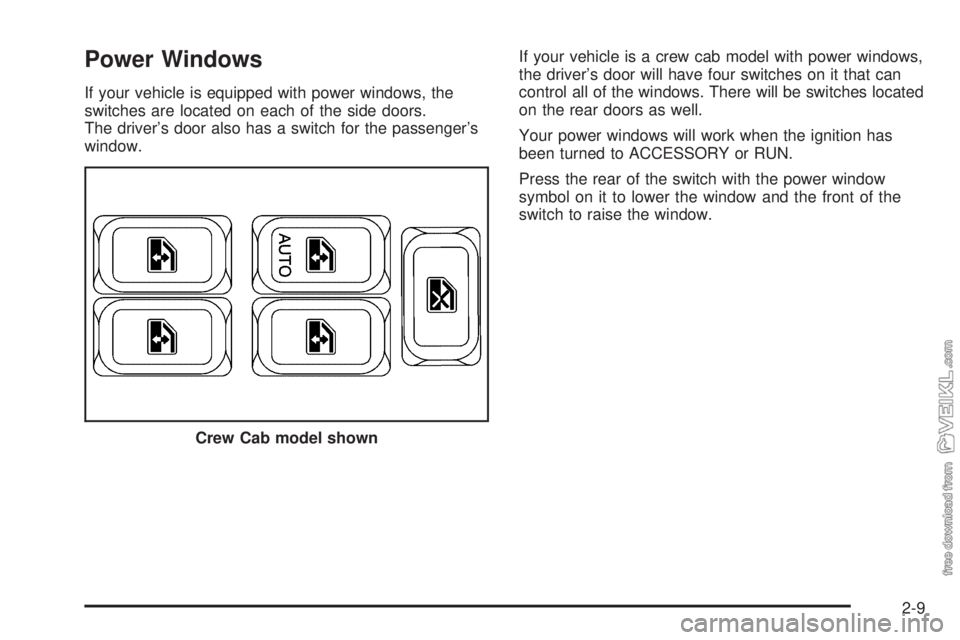
If your vehicle is equipped with power windows, the
switches are located on each of the side doors.
The driver’s door also has a switch for the passenger’s
window.If your vehicle is a crew cab model with power windows,
the driver’s door will have four switches on it that can
control all of the windows. There will be switches located
on the rear doors as well.
Your power windows will work when the ignition has
been turned to ACCESSORY or RUN.
Press the rear of the switch with the power window
symbol on it to lower the window and the front of the
switch to raise the window.
Crew Cab model shown
2-9
Page 76 of 374
Express-Down Feature
The driver’s window also has an express-down feature
that allows the window to be lowered without holding
down the switch. Press and hold the rear of the window
switch labeled AUTO for one second to activate the
express-down mode.
The express-down mode can be cancelled at any time
by pressing the front of the switch. To open the
window part way, lightly tap the switch until the window
is at the desired position.
Lockout Feature
o
(Lockout):If you have a crew cab model with
power windows, the driver’s door will have a window
lockout feature. When engaged, this feature will prevent
all window switches, except the driver’s window
switches, from operating. This switch is located above
the four window switches on the driver’s door. When the
switch is not engaged, all windows will return to
normal operation.
Sliding Rear Window
To open the sliding rear window, pull the latch toward
the driver’s side of the vehicle.
To close the window, slide the window toward the
passenger’s side of the vehicle. The latch will
automatically lock into place. Try to open the window
without releasing the latch to be sure the window is in the
locked position.
Sun Visors
To block out glare, you can swing down the visors.
You can also swing them out to block glare from the side.
2-10
Page 77 of 374
Starting and Operating
Your Vehicle
New Vehicle Break-In
Notice:Your vehicle does not need an elaborate
break-in. But it will perform better in the long run if
you follow these guidelines:
Let your engine warm up before you operate
your vehicle under load.
Keep your speed at 55 mph (88 km/h) or less for
the �rst 500 miles (805 km).
Do not drive at any one speed, fast or slow,
for the �rst 500 miles (805 km). Do not make
full-throttle starts.
Avoid making hard stops for the �rst 200 miles
(322 km) or so. During this time your new brake
linings are not yet broken in. Hard stops with new
linings can mean premature wear and earlier
replacement. Follow this breaking-in guideline
every time you get new brake linings.
Use the lowest gear you can when you start a
loaded vehicle in motion and when going up hills
to avoid overloading the engine.
Check and adjust engine and transmission �uid
levels often and be sure tires are properly
in�ated for the load you are carrying.
If you have a Caterpillar®diesel engine, see the
Caterpillar®Diesel Engine Operation and
Maintenance Manual.
2-11
Page 78 of 374
Ignition Positions
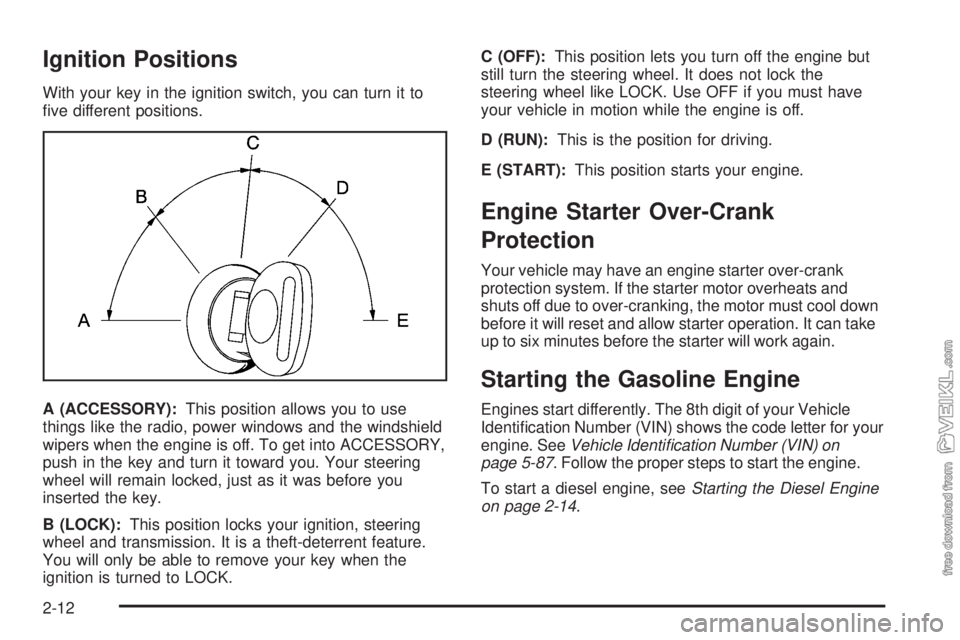
With your key in the ignition switch, you can turn it to
five different positions.
A (ACCESSORY):This position allows you to use
things like the radio, power windows and the windshield
wipers when the engine is off. To get into ACCESSORY,
push in the key and turn it toward you. Your steering
wheel will remain locked, just as it was before you
inserted the key.
B (LOCK):This position locks your ignition, steering
wheel and transmission. It is a theft-deterrent feature.
You will only be able to remove your key when the
ignition is turned to LOCK.C (OFF):This position lets you turn off the engine but
still turn the steering wheel. It does not lock the
steering wheel like LOCK. Use OFF if you must have
your vehicle in motion while the engine is off.
D (RUN):This is the position for driving.
E (START):This position starts your engine.
Engine Starter Over-Crank
Protection
Your vehicle may have an engine starter over-crank
protection system. If the starter motor overheats and
shuts off due to over-cranking, the motor must cool down
before it will reset and allow starter operation. It can take
up to six minutes before the starter will work again.
Starting the Gasoline Engine
Engines start differently. The 8th digit of your Vehicle
Identification Number (VIN) shows the code letter for your
engine. SeeVehicle Identi�cation Number (VIN) on
page 5-87. Follow the proper steps to start the engine.
To start a diesel engine, seeStarting the Diesel Engine
on page 2-14.
2-12
Page 79 of 374
Automatic Transmission
Set the parking brake and move your shift lever to
NEUTRAL (N) or PARK (P), if so equipped. Your engine
will not start in any other position — that is a safety
feature.
Manual Transmission
Set the parking brake, shift to neutral NEUTRAL (N)
and hold the clutch pedal to the floor while starting
the engine.
Starter Motor Operation
•The starter motor will disengage if you release
the key or the engine reaches a predetermined
engine speed.
•To prevent overheating, the starter motor will
disengage after continuously operating for
15 seconds. You must release the key from the
start position to re-engage the starter.
•The starter motor will not engage if the engine
is already running.
•The starter motor will disengage if, after
two seconds, the starter pinion gear does not
engage the flywheel or there is no engine
rpm signal from the engine speed sensor.
Starting Your Engine
1. Without pushing the accelerator pedal, turn your
ignition key to START. When the engine starts,
let go of the key. The idle speed will go down as
your engine gets warm.
2. If the engine does not start in 10 seconds, push the
accelerator pedal all the way down and crank the
engine for five more seconds, unless it starts sooner.
3. If your engine still will not start, or starts but then
stops, it could be flooded with too much gasoline.
Wait 15 seconds to let the starter motor cool down.
Do Steps 1 through 3 again.
When the engine starts, let go of the key and the
accelerator pedal.
Notice:Your engine is designed to work with the
electronics in your vehicle. If you add electrical
parts or accessories, you could change the way the
engine operates. Before adding electrical equipment,
check with your dealer. If you do not, your engine
might not perform properly. Any resulting damage
would not be covered by your vehicle’s warranty.
If you ever need to have your vehicle towed,
seeTowing Your Vehicle on page 4-35.
2-13
Page 80 of 374
Gasoline Engine Warm-Up
When you have started your engine, let it run for
20 or 30 seconds to warm up before you put a load
on the engine.
Drive at moderate speeds for the first 2 to 3 miles
(3.2 to 4.8 km), especially in cold weather. SeeHigh
Idle System (Caterpillar
®Diesel/Gasoline Engine)
on page 2-19.
Restarting the Gasoline Engine While
Moving (Automatic Transmission)
If you have to restart the engine while the vehicle is
moving, you will first have to shift to NEUTRAL (N).
This safety feature prevents starting the engine when
the transmission is in a drive gear.
Stopping the Gasoline Engine
Let your engine idle for a few seconds before turning it
off after you have finished driving your vehicle.
If you shift to NEUTRAL (N) or PARK (P), set the
parking brake.
If your vehicle has a two-speed axle, put the range
selector in LOW. To be sure the axle has shifted into
LOW, engage the clutch and transmission; the vehicle
may move slightly when you do this.While your engine is idling and before you turn it off,
you can make a list of any operational or handling
concerns to give to responsible maintenance personnel
so they can handle them right away.
Moisture will condense in a fuel tank that is almost
empty if the engine has not run for a while, even just
overnight under some conditions. So, it is always best
to refuel your vehicle at the end of each run.
Starting the Diesel Engine
Your vehicle’s diesel engine starts differently than a
gasoline engine. Read the following pages to learn how
to start, restart, warm-up, and stop your diesel engine.
The information applies to both Caterpillar
®diesel
engine and DURAMAX®diesel engine unless
otherwise noted.
If you have a Caterpillar
®diesel engine, also refer to
your Caterpillar®diesel engine Operation & Maintenance
Manual for the starting procedure.
2-14