lock CHEVROLET S10 1994 2.G Owner's Guide
[x] Cancel search | Manufacturer: CHEVROLET, Model Year: 1994, Model line: S10, Model: CHEVROLET S10 1994 2.GPages: 340, PDF Size: 18.45 MB
Page 114 of 340
Downloaded from www.Manualslib.com manuals search engine Trailer Wiring Harness
Your vehicle may have either a 5-wire or 7-wire harness.
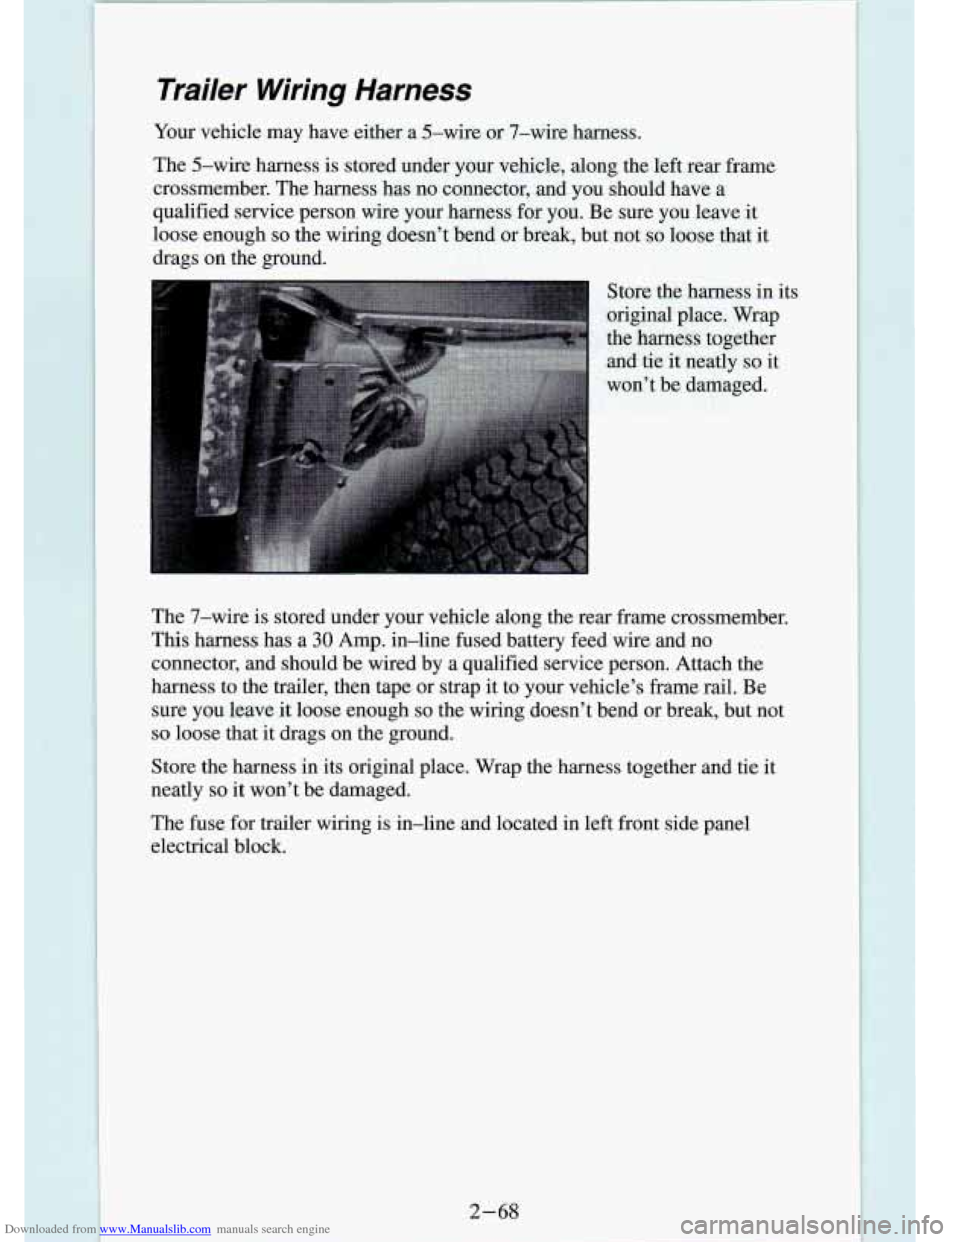
The 5-wire harness is stored under your vehicle, along the left rear frame
crossmember. The harness has no connector, and you should have \
a
qualified service person wire your harness for you. Be sure you leave
it
loose enough so the wiring doesn’t bend or break, but not so loose that it
drags
on the ground.
Store the harness in its
original place. Wrap
the h>arness together
and tie it neatly so it
wm’t be damaged.
The 7-wire is stored under your vehicle along the rear frame erossmember.
This harness has a
30 Amp. in-line fused battery feed wire and no
connector, and should be wired by
a qualified service person. Attach the
harness to the trailer, then tape or strap it to your vehicle’s frame rail. Be
sure you leave it loose enough
so the wiring doesn’t bend or break, but not
so loose that it drags on the ground.
Store the harness in its original place. Wrap the harness together a\
nd tie it
neatly
so it won’t be damaged.
The fuse for trailer wiring is in-line and located in left front side panel
electrical block.
2-68
Page 115 of 340
Downloaded from www.Manualslib.com manuals search engine Comfort Controls & Audio Systems
Section
I .
In this part you’ll find out how to operate the comfort co\
ntrol systems and audio systems offered with your vehicle
. Be sure to read about the particular
system supplied with your vehicle
.
For explanation of vehicle symbols. refer to “Vehicle Symbols” in the
Introduction
.
Comfort Controls
Flow-Through Ventilation System
........................... 3-2
Heater Controls
.......................................... 3-3
Heater/Air Conditioning Controls
........................... 3-4
Engine Coolant Heater (Engine Block Heater)
.................... 3-5
Audiosystems
............................................. 3-5
FMStereo
.............................................. 3-6
AM
................................................... 3-6
AM Stereo
.................. ... -* ........ I ............ 3-6
How to Operate Your
E I R@ AM Radio ....................... 3-7
How to Operate Your ETR@ AM-FM Stereo Audio System
...... 3-8
How to Operate Your ETR@ AM-FM Stereo Audio Cassette
System
............................................. 3-10
How to Operate Your ETR@ AM-FM Stereo Audio Cassette System
With Equalizer
....................................... 3-13
Care
of Your Cassette Tape Player .......................... 3-16
How to Operate Your
ETR@ AM-FM Stereo Audio Compact Disc
(CD)Systern
........................................ 3-17
Care of Compact Disc
.................................... 3-22
Fixed Mast Antenna
..................................... 3-22
3-1
Page 117 of 340
Downloaded from www.Manualslib.com manuals search engine Air Vents
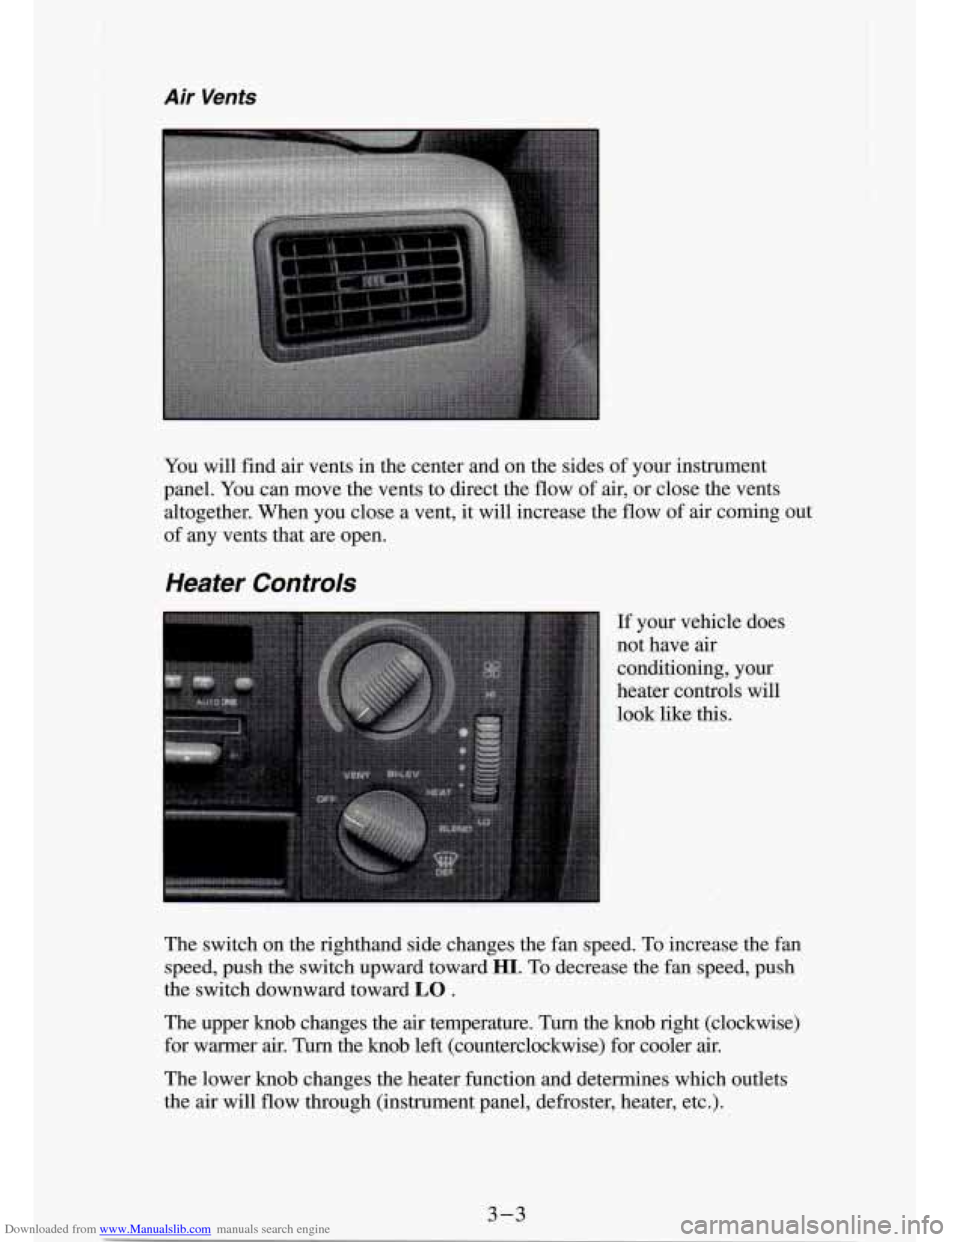
You will find air vents in the center and on the sides of your instrument
panel. You can move the vents to direct the flow
of air, or close the vents
altogether. When you close a vent,
it will increase the flow of air coming out
of any vents that are open.
Heater Controls
If your vehicle does
not have
air
conditioning, your
heater controls will
look like this.
The switch on the righthand side changes the fan speed. To increase the
fan
speed, push the switch upward toward HI. To decrease the fan speed, push
the switch downward toward
LO .
The upper knob changes the air temperature. Turn the knob right (clockwise)
for warmer
air. Turn the knob left (counterclockwise) for cooler air.
The lower knob changes the heater function and determines which\
outlets
the
air will flow through (instrument panel, defroster, heater, etc.).
3-3
Page 118 of 340
Downloaded from www.Manualslib.com manuals search engine OFF: This setting turns off all heating functions. Some outside air will still
come out of the heater outlet whenever the vehicle is moving forward.
VENT Airflow is through the instrument panel vents. Set the upper knob to
the temperature desired. This setting is useful for mild outside temperatures,
when little heating
or cooling is desired.
BI-LEV: Outside air comes in through the heater floor vents and the
instrument panel vents. This setting is useful in cool weather \
with bright sunlight.
HEAT Heated air comes out through the heater floor vents and windsh\
ield
defroster vents. This setting is useful for cold weather.
BLEND: Airflow is divided equally between the heater floor vent and t\
he
windshield defroster vents. This setting is useful in cool weather when you
have fog or ice on the windshield or side windows.
DEF: This setting directs most air through the windshield defroster \
vents
and some through the heater vents. This setting is useful when\
you have fog
or ice on the windshield.
Heater/Air Conditioning Controls
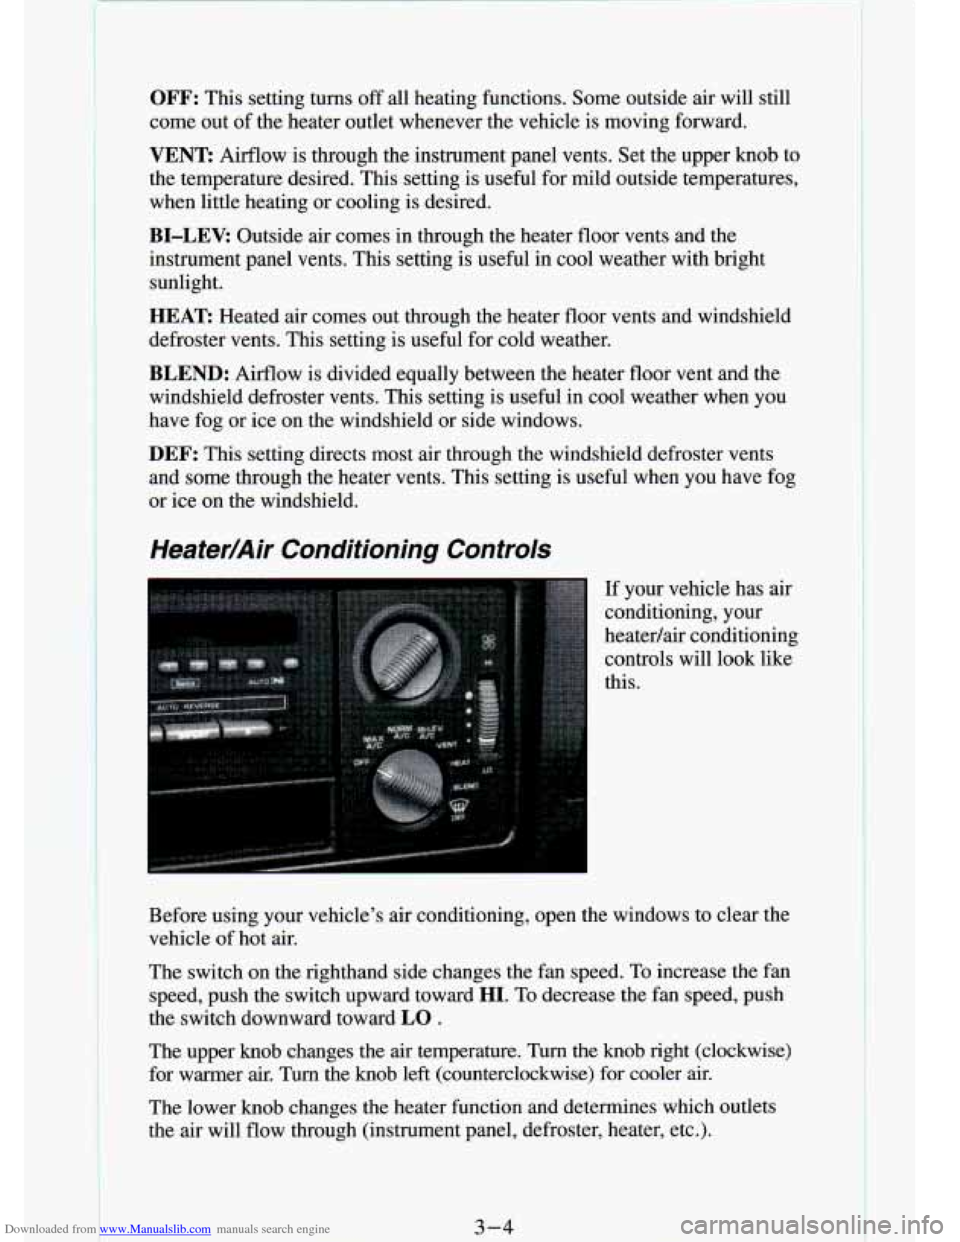
If your vehicle has air
conditioning, your
heatedair conditioning
controls will look like
this.
Before using your vehicle's air conditioning, open the windows \
to clear the vehicle
of hot air.
The switch on the righthand side changes the fan speed. To increase the fan
speed, push the switch upward toward
HI. To decrease the fan speed, push
the switch downward toward
LO .
The upper knob changes the air temperature. Turn the knob righ\
t (clockwise)
for warmer air. Turn the knob left (counterclockwise) for coo\
ler air.
The lower knob changes the heater function and determines which out\
lets
the air will flow through (instrument panel, defroster, heater, etc\
.).
3-4
Page 119 of 340
Downloaded from www.Manualslib.com manuals search engine Engine Coolant Heater (Engine Block Heater)
If you use the optional engine coolant heater before starting your engine,
your heating system will produce warmer air faster, to heat th\
e passenger
compartment in cold weather. See “Engine Coolant Heater” in the Index.
Audio Systems
Your Delco@ audio system has been designed to operate easily and give
years of listening pleasure. But you will get the most enjoyment out of it if
you acquaint yourself with
it first. Find out what your Delco’ system can
do and how to operate
all its controls, to be sure you’re getting the most out
of the advanced engineering that went into it.
Be aware that hearing damage from loud noise is almost undetectable until
it is too late. Your hearing can adapt to higher volumes of sound. Sound that
seems normal can be loud and harmful to your hearing. Take precautions by
adjusting the volume control on your radio to a safe sound le\
vel before your
hearing adapts to it.
3-5
Page 121 of 340
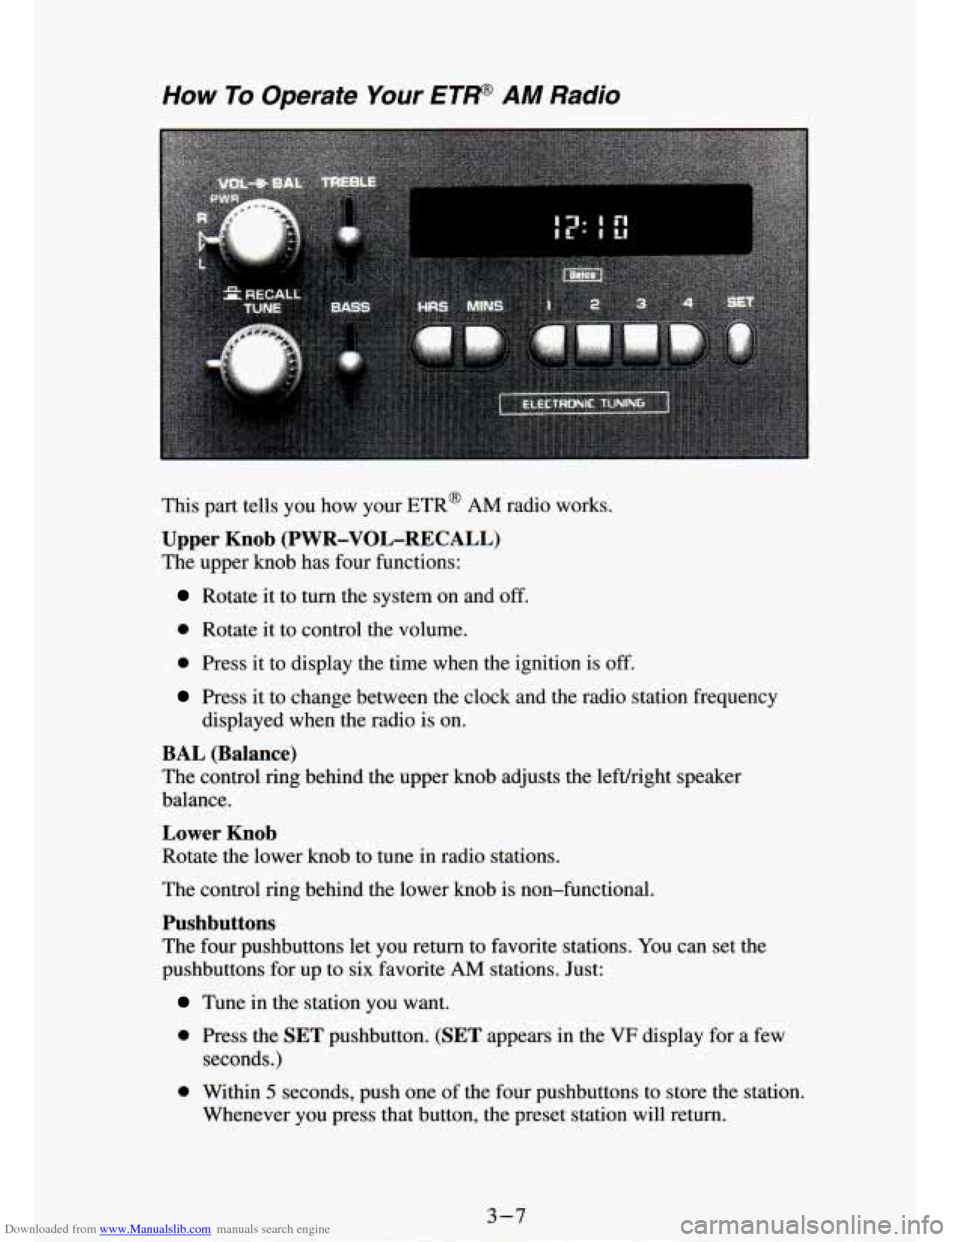
Downloaded from www.Manualslib.com manuals search engine How To Operate Your ETP AM Radio
This part tells you how your ETR@ AM radio works.
Upper Knob (PWR-VOL-RECALL)
The upper knob has four functions:
Rotate it to turn the system on and off.
0 Rotate it to control the volume.
0 Press it to display the time when the ignition is off.
Press it to change between the clock and the radio station frequency
displayed when the radio is on.
BAL (Balance)
The contrQl rimz behind the upper knob adjusts the lefvright speaker
balance.
Lower Knob
Rotate the lower knob to tune in radio srauons.
The control ring behind the lower knob is non-functional.
Pushbuttons
The four pushbuttons let you return to favorite stations. You can set the
pushbuttons for up to six favorite
AM stations. Just:
Tune in the station you want.
0 Press the SET pushbutton. (SET appears in the VF display for a few
seconds.)
0 Within 5 seconds, push one of the four pushbuttons to store the station,
Whenever you press that button, the preset station will return.\
3-7
Page 122 of 340
Downloaded from www.Manualslib.com manuals search engine 1 I
NOTE:
Up to two additional stations may be preset by pressing two adjoining
buttons at the same time.
0 Tune in the desired station.
Press the SET pushbutton.
0 Within 5 seconds, press any two adjoining pushbuttons at the same
time. (The station will return when the same two buttons are \
pressed
again.)
Clock
To set the clock, just:
Press the SET pushbutton.
Within 5 seconds, press and hold MINS until the correct minute
Press and hold HRS until the correct hour appears on the display.
appears
on the display.
TREBLE
Slide
the TREBLE lever up to increase the treble response. If the station is
weak or noisy, slide the TREBLE lever down to reduce the noise.
BASS
Slide the BASS lever up to increase the bass response. Adjust the BASS
lever to give a pleasing sound to your ear.
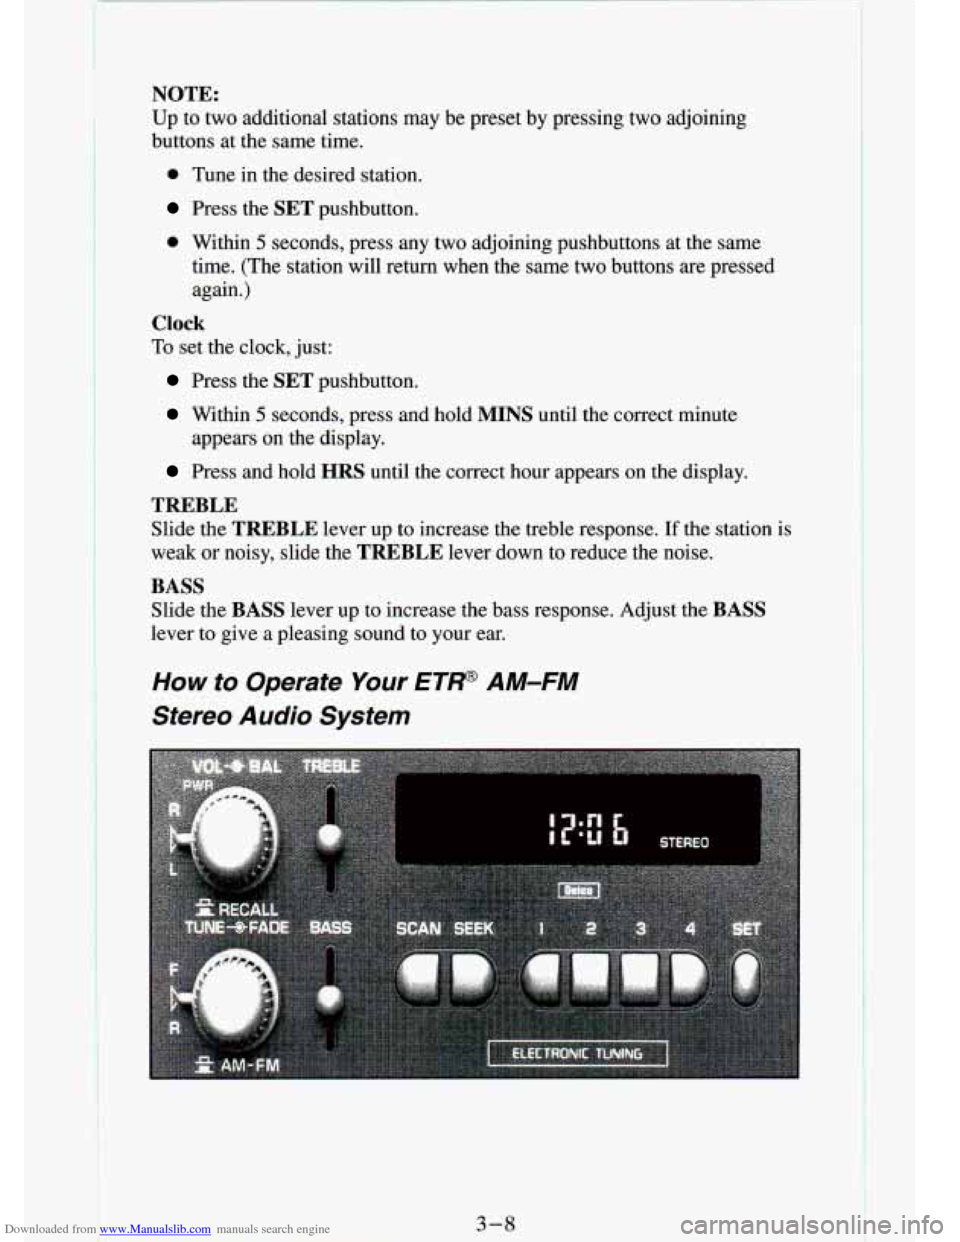
How to Operate Your ETW AM-FM
Stereo Audio System
3-8 1
Page 123 of 340
Downloaded from www.Manualslib.com manuals search engine This part tells you how your ETR@ AM-FM stereo audio system works:
Upper Knob (PWR-VOL-RECALL)
The upper knob has these four functions:
Rotate it to turn the system on and off.
Rotate it to control the volume.
Press it to display the time when the ignition is off.
0 Press it to change between the clock and the radio station fr\
equency
displayed when~the radio is on.
BAL (Balance)
The control ring behind the upper knob adjusts the leftlright me: :r
balance.
Lower Knob
The lower knob has two functions:
*
Rotate it to tune in radio stations.
0 Press it to change between the AM and FM bands.
FADE
The control ring behind the lower knob adjusts the frontlrear speaker
balance.
SEEK
Press the SEEK button to cause the receiver to SEEK the next higher
station and stop.
SCAN
When you press SCAN, the radio will go to the next station and pause and
will keep scanning until you press
SCAN again. SCAN appears in the VF
display.
Pushbuttons
The four pushbuttons let you return to favorite stations.
YOU can set the pushbuttons for up to eight favorite stations
(4 AM and
4 FM). Just:
Tune in the desired station.
Press the SET pushbutton. (SET appears in the VF display for a few
seconds.)
0 Within 5 seconds, push one of the four pushbuttons to store the station.
Whenever you press that button, the preset station will return.\
NOTE:
Up to two additional stations may be preset on each band by pressing two
adjoining buttons at
the same time. (The station will return when the same
two buttons are pressed again.)
Page 124 of 340
Downloaded from www.Manualslib.com manuals search engine 1
3
Clock
To set the clock, just:
Press the SET pushbutton.
Within 5 seconds, press and hold SEEK until the correct minute
appears
on the display.
0 Press and hold SCAN until the correct hour appears on the display.
TREBLE
Slide the TREBLE lever up to increase the treble response. If a station is
weak or noisy, slide the
TREBLE lever down to reduce the noise.
BASS
Slide the BASS lever up to increase the bass response. Adjust the BASS
lever to give a pleasing sound to your ear.
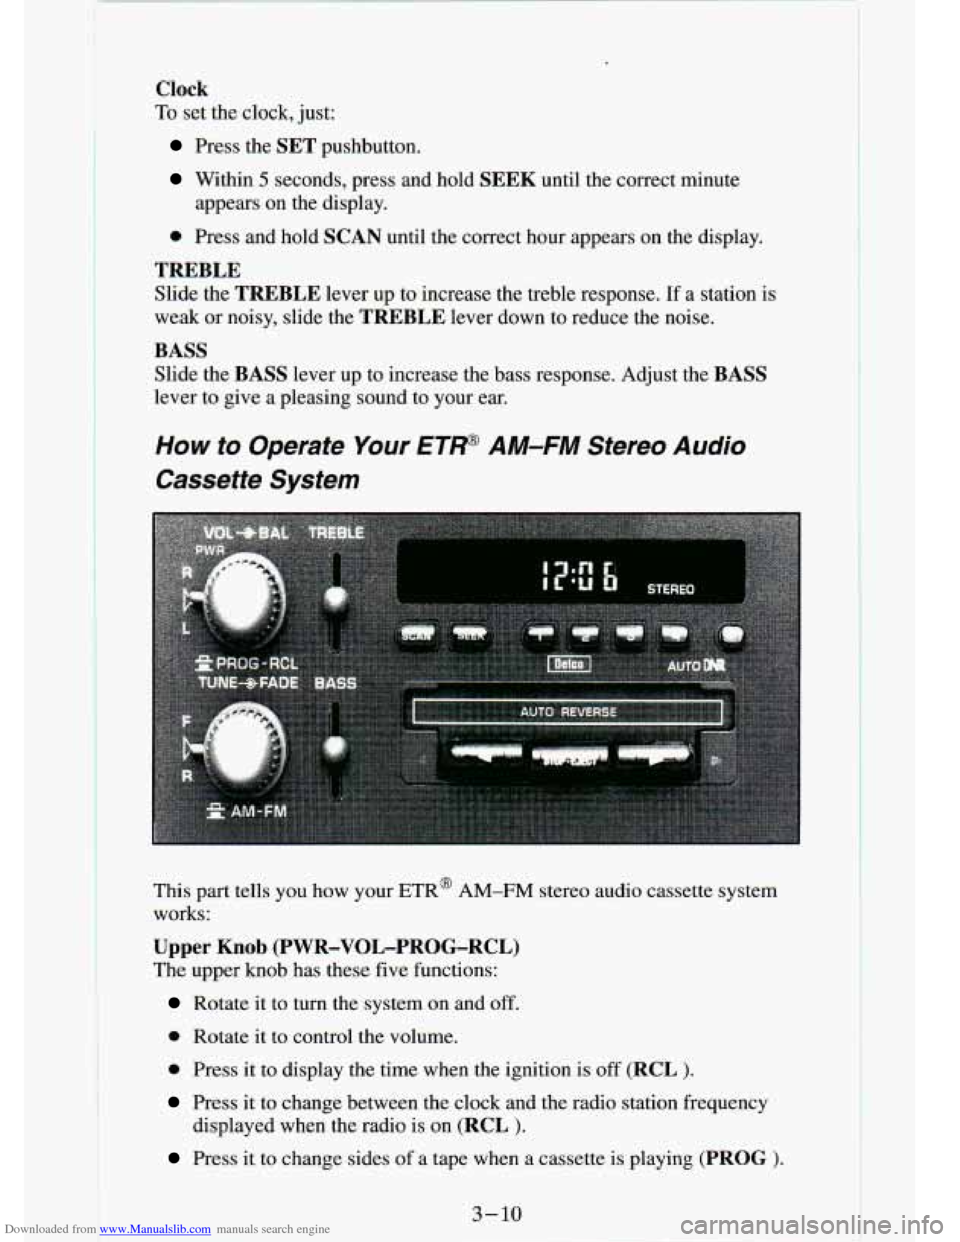
How to Operate Your ET' AM-FM Stereo Audio
Cassette System
This part tells you how your ETR@ AM-FM stereo audio cassette system
works:
Upper Knob (PWR-VOL-PROG-RCL)
The upper knob has these five functions:
Rotate it to turn the system on and off.
0 Rotate it to control the volume.
0 Press it to display the time when the ignition is off (RCL $.
Press it to change between the clock and the radio station fr\
equency
displayed when the radio is on
(RCL ).
Press it to change sides of a tape when a cassette is playing (PROG >.
3-16
Page 126 of 340
Downloaded from www.Manualslib.com manuals search engine t
Clock
To set the clock, just:
Press the SET pushbutton.
Within 5 seconds, press and hold SEEK until the correct minute
Press and hold SCAN until the correct hour appears on the display.
appears on the display.
TREBLE
Slide
the TREBLE lever up to increase the treble response. If the station is
weak or noisy, slide the
TREBLE lever down to reduce the noise.
BASS
Slide the BASS lever up to increase the bass response. Adjust the BASS
lever to give a pleasing sound to your ear.
AUTO DNR @
This unit is equipped with an automatic Dynamic Noise Reduction system.
DNR@reduces background hiss on
AM and FM radio broadcasts, as well as
on cassette tapes.
DNR@
is a registered trademark of National Semiconductor Corporation.
To Play A Cassette
Your tape player is built to work best with tapes that are 30 to 45 minutes
long on each side. Tapes longer than that are
so thin they may not work well
in this player.
Once
the tape is playing, use the upper and lower knobs for volume,
balance, and fade just as you do for the radio. The arrows indicate which
side
of the tape is being played.
Fast Forward
Press the button with the arrow pointing in the same direction that the tape
is playing. The
arrow light next to the arrow button will be lit. To stop fast
forward, press the
STOP-E JECT button.
Reverse
Press the button with the arrow pointing in the opposite direction that the
tape is playing. The arrow light next to the arrow button will be lit\
. To stop
reverse, press the
STOP-E JECT button.
PROGRAM
To change sides of the tape, press the PWR-VOL-PROG-RCL knob.
STOP- EJECT
To stop playing a tape, fully press this button (the cassette will be partially \
ejected, and the radio will begin playing).
3-12