front end CHEVROLET SONIC 2020 Owner's Guide
[x] Cancel search | Manufacturer: CHEVROLET, Model Year: 2020, Model line: SONIC, Model: CHEVROLET SONIC 2020Pages: 329, PDF Size: 5.56 MB
Page 223 of 329
Chevrolet Sonic Owner Manual (GMNA-Localizing-U.S./Canada-13566834) -
2020 - CRC - 10/4/19
222 Vehicle Care
Park Brake and P (Park)
Mechanism Check
{Warning
When you are doing this check,
the vehicle could begin to move.
You or others could be injured
and property could be damaged.
Make sure there is room in front
of the vehicle in case it begins to
roll. Be ready to apply the regular
brake at once should the vehicle
begin to move.
Park on a fairly steep hill, with the
vehicle facing downhill. Keeping
your foot on the regular brake, set
the parking brake.
. To check the parking brake's
holding ability: With the engine
running and the transmission in
N (Neutral), slowly remove foot
pressure from the regular brake
pedal. Do this until the vehicle is
held by the parking brake only. .
To check the P (Park)
mechanism's holding ability:
With the engine running, shift to
P (Park). Then release the
parking brake followed by the
regular brake.
Contact your dealer if service is
required.
Wiper Blade Replacement
Front Wiper Blade
Replacement
Windshield wiper blades should be
inspected for wear or cracking. See
the Maintenance Schedule 0278 for
more information.
Replacement blades come in
different types and are removed in
different ways. For proper
windshield wiper blade length and
type, see Maintenance
Replacement Parts 0288.
Caution
Allowing the wiper arm to touch
the windshield when no wiper
blade is installed could damage
the windshield. Any damage that
occurs would not be covered by
the vehicle warranty. Do not allow
the wiper arm to touch the
windshield.
To replace the windshield wiper
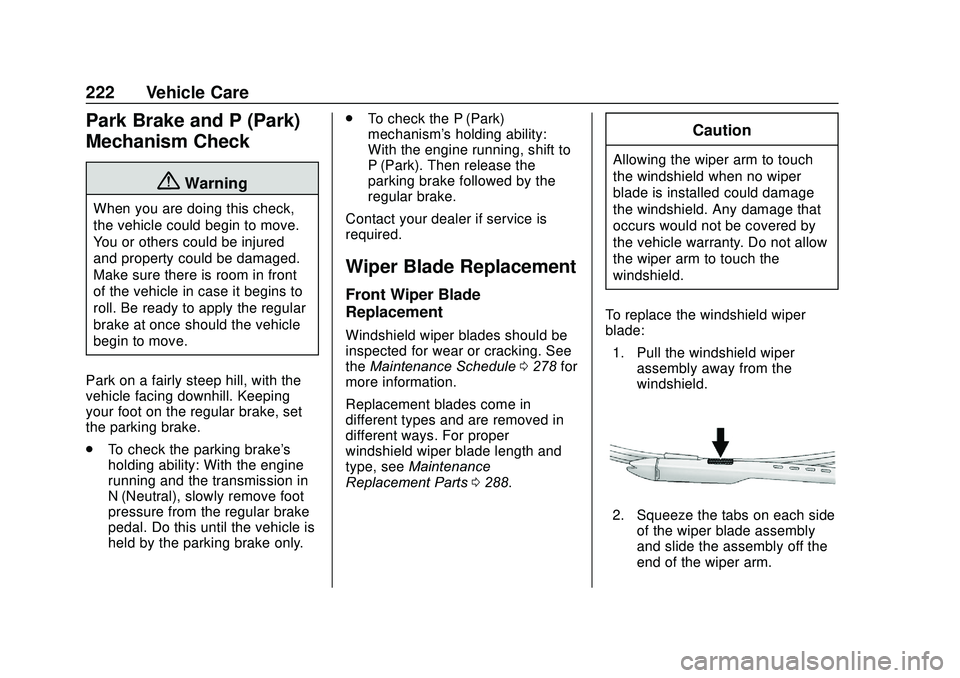
blade: 1. Pull the windshield wiper assembly away from the
windshield.
2. Squeeze the tabs on each sideof the wiper blade assembly
and slide the assembly off the
end of the wiper arm.
Page 224 of 329

Chevrolet Sonic Owner Manual (GMNA-Localizing-U.S./Canada-13566834) -
2020 - CRC - 10/4/19
Vehicle Care 223
3. Install the new blade onto thearm and make sure the tabs
are fully set in the locked
position.
4. Repeat the steps for the other wiper.
Rear Wiper Blade Replacement
1. Pull the wiper arm a shortdistance away from the
glass (1).
2. Pull the blade out from the arm (2).
It may require extra effort to
remove the old blade.
3. Once the blade pin disengages
from the wiper arm, remove the
wiper blade by sliding the pin
out of the guide hole.
4. Reverse the steps to install the new blade.
Windshield Replacement
Driver Assistance Systems
If the windshield needs to be
replaced and the vehicle is
equipped with a front camera sensor
for the Driver Assistance Systems, a
GM replacement windshield is
recommended. The replacement
windshield must be installed
according to GM specifications for
proper alignment. If it is not, these
systems may not work properly, they
may display messages, or they may
not work at all. See your dealer for
proper windshield replacement.
Gas Strut(s)
This vehicle is equipped with gas
strut(s) to provide assistance in
lifting and holding open the hood/
trunk/liftgate system in full open
position.
Page 240 of 329
Chevrolet Sonic Owner Manual (GMNA-Localizing-U.S./Canada-13566834) -
2020 - CRC - 10/4/19
Vehicle Care 239
GVWR:Gross Vehicle Weight
Rating. See Vehicle Load Limits
0 166.
GAWR FRT
:Gross Axle Weight
Rating for the front axle. See
Vehicle Load Limits 0166.
GAWR RR
:Gross Axle Weight
Rating for the rear axle. See
Vehicle Load Limits 0166.
Intended Outboard Sidewall
:
The side of an asymmetrical tire
that must always face outward
when mounted on a vehicle.
Kilopascal (kPa)
:The metric
unit for air pressure.
Light Truck (LT-Metric) Tire
:A
tire used on light duty trucks and
some multipurpose passenger
vehicles.
Load Index
:An assigned
number ranging from 1 to 279
that corresponds to the load
carrying capacity of a tire. Maximum Inflation Pressure
:
The maximum air pressure to
which a cold tire can be inflated.
The maximum air pressure is
molded onto the sidewall.
Maximum Load Rating
:The
load rating for a tire at the
maximum permissible inflation
pressure for that tire.
Maximum Loaded Vehicle
Weight
:The sum of curb
weight, accessory weight,
vehicle capacity weight, and
production options weight.
Normal Occupant Weight
:The
number of occupants a vehicle
is designed to seat multiplied by
68 kg (150 lb). See Vehicle Load
Limits 0166.
Occupant Distribution
:
Designated seating positions.
Outward Facing Sidewall
:The
side of an asymmetrical tire that
has a particular side that faces
outward when mounted on a vehicle. The side of the tire that
contains a whitewall, bears
white lettering, or bears
manufacturer, brand, and/or
model name molding that is
higher or deeper than the same
moldings on the other sidewall
of the tire.
Passenger (P-Metric) Tire
:A
tire used on passenger cars and
some light duty trucks and
multipurpose vehicles.
Recommended Inflation
Pressure
:Vehicle
manufacturer's recommended
tire inflation pressure as shown
on the tire placard. See Tire
Pressure 0240 and
Vehicle Load Limits 0166.
Radial Ply Tire
:A pneumatic
tire in which the ply cords that
extend to the beads are laid at
90 degrees to the centerline of
the tread.
Page 245 of 329
Chevrolet Sonic Owner Manual (GMNA-Localizing-U.S./Canada-13566834) -
2020 - CRC - 10/4/19
244 Vehicle Care
TPMS Malfunction Light
The TPMS will not function properly
if one or more of the TPMS sensors
are missing or inoperable. When the
system detects a malfunction, the
low tire pressure warning light
flashes for about one minute and
then stays on for the remainder of
the ignition cycle. The malfunction
light comes on at each ignition cycle
until the problem is corrected. Some
of the conditions that can cause this
to come on are:
.One of the road tires has been
replaced with the spare tire. The
spare tire does not have a
TPMS sensor. The malfunction
light should go off after the road
tire is replaced and the sensor
matching process is performed
successfully. See "TPMS Sensor
Matching Process" later in this
section.
. The TPMS sensor matching
process was not done or not
completed successfully after
rotating the tires. The
malfunction light should go off
after successfully completing the sensor matching process. See
"TPMS Sensor Matching
Process" later in this section.
. One or more TPMS sensors are
missing or damaged. The
malfunction light should go off
when the TPMS sensors are
installed and the sensor
matching process is performed
successfully. See your dealer for
service.
. Replacement tires or wheels do
not match the original equipment
tires or wheels. Tires and wheels
other than those recommended
could prevent the TPMS from
functioning properly. See Buying
New Tires 0248.
. Operating electronic devices or
being near facilities using radio
wave frequencies similar to the
TPMS could cause the TPMS
sensors to malfunction.
If the TPMS is not functioning
properly, it cannot detect or signal a
low tire pressure condition. See
your dealer for service if the TPMS
malfunction light comes on and
stays on.
TPMS Sensor Matching
Process
Each TPMS sensor has a unique
identification code. The identification
code needs to be matched to a new
tire/wheel position after rotating the
tires or replacing one or more of the
TPMS sensors. The TPMS sensor
matching process should also be
performed after replacing a spare
tire with a road tire containing the
TPMS sensor. The malfunction light
should go off at the next ignition
cycle. The sensors are matched to
the tire/wheel positions, using a
TPMS relearn tool, in the following
order: driver side front tire,
passenger side front tire, passenger
side rear tire, and driver side rear.
See your dealer for service or to
purchase a relearn tool. A TPMS
relearn tool can also be purchased.
See Tire Pressure Monitor
Sensor Activation Tool at
www.gmtoolsandequipment.com or
call 1-800-GM TOOLS
(1-800-468-6657).
Page 246 of 329
Chevrolet Sonic Owner Manual (GMNA-Localizing-U.S./Canada-13566834) -
2020 - CRC - 10/4/19
Vehicle Care 245
There are two minutes to match the
first tire/wheel position, and
five minutes overall to match all four
tire/wheel positions. If it takes
longer, the matching process stops
and must be restarted.
The TPMS sensor matching
process is:1. Set the parking brake.
2. Turn the ignition on without starting the vehicle or place the
vehicle in Service Mode. See
Ignition Positions (Keyless
Access) 0170 or
Ignition Positions (Key Access)
0 172.
3. Press the MENU button to display the menu items in the
Driver Information
Center (DIC).
4. If the vehicle has a base level DIC, use the thumbwheel to
scroll to the Tire Learn menu
item screen.
If the vehicle has an uplevel
DIC, use the thumbwheel to
scroll to the Tire Pressure
menu item screen. 5. Press and hold the SET/CLR
button to begin the sensor
matching process.
A message requesting
acceptance of the process may
display.
6. The horn sounds twice to signal the receiver is in relearn
mode and the TIRE LEARN
message may display on the
DIC screen.
7. Start with the driver side front tire.
8. Place the relearn tool against the tire sidewall, near the valve
stem. Then press the button to
activate the TPMS sensor.
A horn chirp confirms that the
sensor identification code has
been matched to this tire and
wheel position.
9. Proceed to the passenger side front tire, and repeat the
procedure in Step 8.
10. Proceed to the passenger side rear tire, and repeat the
procedure in Step 8. 11. Proceed to the driver side rear
tire, and repeat the procedure
in Step 8. The horn sounds two
times to indicate the sensor
identification code has been
matched to the driver side rear
tire, and the TPMS sensor
matching process is no longer
active. The TIRE LEARN
message on the DIC display
screen goes off.
12. Turn the vehicle off.
13. Set all four tires to the recommended air pressure
level as indicated on the Tire
and Loading Information label.
Tire Inspection
We recommend that the tires,
including the spare tire, if the
vehicle has one, be inspected
for signs of wear or damage at
least once a month.
Replace the tire if:
.The indicators at three or
more places around the tire
can be seen.
Page 247 of 329
Chevrolet Sonic Owner Manual (GMNA-Localizing-U.S./Canada-13566834) -
2020 - CRC - 10/4/19
246 Vehicle Care
.There is cord or fabric
showing through the tire's
rubber.
.The tread or sidewall is
cracked, cut, or snagged
deep enough to show cord or
fabric.
.The tire has a bump, bulge,
or split.
.The tire has a puncture, cut,
or other damage that cannot
be repaired well because of
the size or location of the
damage.
Tire Rotation
Tires should be rotated every
12 000 km (7,500 mi). See
Maintenance Schedule0278.
Tires are rotated to achieve a
more uniform wear for all tires.
The first rotation is the most
important. Anytime unusual wear is
noticed, rotate the tires as soon
as possible, check for proper tire
inflation pressure, and check for
damaged tires or wheels. If the
unusual wear continues after the
rotation, check the wheel
alignment. See
When It Is Time
for New Tires 0247 and
Wheel Replacement 0251.
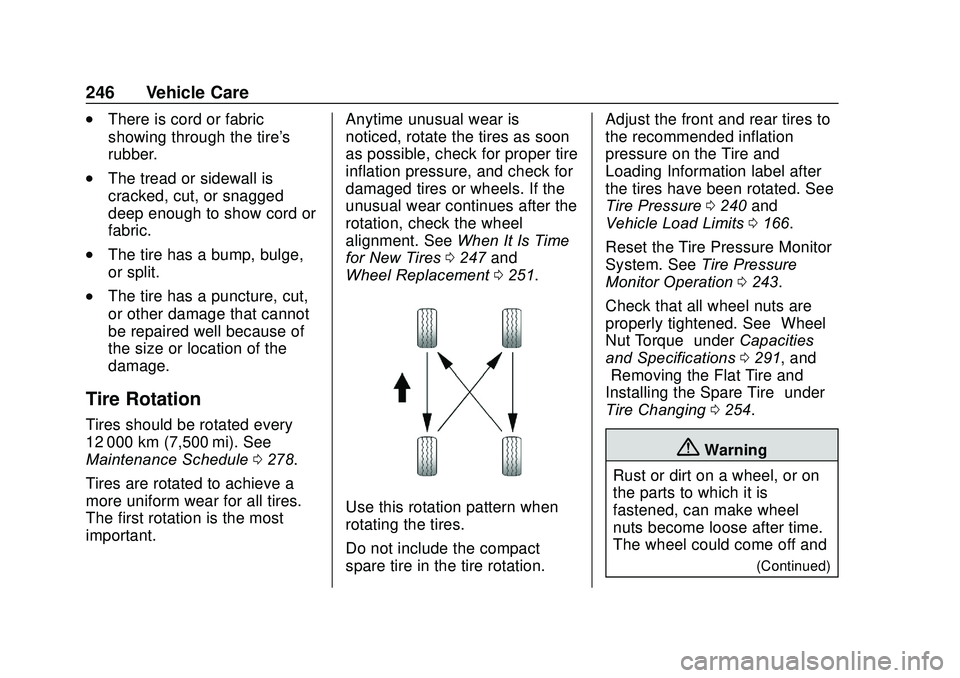
Use this rotation pattern when
rotating the tires.
Do not include the compact
spare tire in the tire rotation. Adjust the front and rear tires to
the recommended inflation
pressure on the Tire and
Loading Information label after
the tires have been rotated. See
Tire Pressure
0240 and
Vehicle Load Limits 0166.
Reset the Tire Pressure Monitor
System. See Tire Pressure
Monitor Operation 0243.
Check that all wheel nuts are
properly tightened. See “Wheel
Nut Torque” underCapacities
and Specifications 0291, and
“Removing the Flat Tire and
Installing the Spare Tire” under
Tire Changing 0254.
{Warning
Rust or dirt on a wheel, or on
the parts to which it is
fastened, can make wheel
nuts become loose after time.
The wheel could come off and
(Continued)
Page 253 of 329
Chevrolet Sonic Owner Manual (GMNA-Localizing-U.S./Canada-13566834) -
2020 - CRC - 10/4/19
252 Vehicle Care
{Warning
Using the wrong replacement
wheels, wheel bolts, or wheel
nuts can be dangerous. It could
affect the braking and handling of
the vehicle. Tires can lose air,
and cause loss of control, causing
a crash. Always use the correct
wheel, wheel bolts, and wheel
nuts for replacement.
Caution
The wrong wheel can also cause
problems with bearing life, brake
cooling, speedometer or
odometer calibration, headlamp
aim, bumper height, vehicle
ground clearance, and tire or tire
chain clearance to the body and
chassis.
Used Replacement Wheels
{Warning
Replacing a wheel with a used
one is dangerous. How it has
been used or how far it has been
driven may be unknown. It could
fail suddenly and cause a crash.
When replacing wheels, use a
new GM original equipment
wheel.
Tire Chains
{Warning
If the vehicle has a tire size other
than 195/65R15 or 205/55R16, do
not use tire chains. There is not
enough clearance. Tire chains
used on a vehicle without the
proper amount of clearance can
cause damage to the brakes,
suspension, or other vehicle
parts. The area damaged by the(Continued)
Warning (Continued)
tire chains could cause loss of
control and a crash. Use another
type of traction device only if its
manufacturer recommends it for
the vehicle's tire size combination
and road conditions. Follow that
manufacturer's instructions. To
avoid vehicle damage, drive slow
and readjust or remove the
traction device if it contacts the
vehicle. Do not spin the wheels. If
traction devices are used, install
them on the front tires.
Caution
If the vehicle is equipped with
195/65R15 or 205/55R16 size
tires, use tire chains only where
legal and only when necessary.
Use low profile chains that add no
more than 10 mm thickness to the
tire tread and inner sidewall. Use
(Continued)
Page 254 of 329
Chevrolet Sonic Owner Manual (GMNA-Localizing-U.S./Canada-13566834) -
2020 - CRC - 10/4/19
Vehicle Care 253
Caution (Continued)
chains that are the proper size for
the tires. Install them on the tires
of the front axle. Do not use
chains on the tires of the rear
axle. Tighten them as tightly as
possible with the ends securely
fastened. Drive slowly and follow
the chain manufacturer's
instructions. If the chains contact
the vehicle, stop and retighten
them. If the contact continues,
slow down until it stops. Driving
too fast or spinning the wheels
with chains on will damage the
vehicle.
If a Tire Goes Flat
It is unusual for a tire to blow out
while driving, especially if the tires
are maintained properly. SeeTires
0 233. If air goes out of a tire, it is
much more likely to leak out slowly.
But if there ever is a blowout, here
are a few tips about what to expect
and what to do: If a front tire fails, the flat tire
creates a drag that pulls the vehicle
toward that side. Take your foot off
the accelerator pedal and grip the
steering wheel firmly. Steer to
maintain lane position, and then
gently brake to a stop, well off the
road, if possible.
A rear blowout, particularly on a
curve, acts much like a skid and
may require the same correction as
used in a skid. Stop pressing the
accelerator pedal and steer to
straighten the vehicle. It may be
very bumpy and noisy. Gently brake
to a stop, well off the road,
if possible.
{Warning
Driving on a flat tire will cause
permanent damage to the tire.
Re-inflating a tire after it has been
driven on while severely
underinflated or flat may cause a
blowout and a serious crash.
Never attempt to re-inflate a tire
that has been driven on while
(Continued)
Warning (Continued)
severely underinflated or flat.
Have your dealer or an authorized
tire service center repair or
replace the flat tire as soon as
possible.
{Warning
Lifting a vehicle and getting under
it to do maintenance or repairs is
dangerous without the
appropriate safety equipment and
training. If a jack is provided with
the vehicle, it is designed only for
changing a flat tire. If it is used for
anything else, you or others could
be badly injured or killed if the
vehicle slips off the jack. If a jack
is provided with the vehicle, only
use it for changing a flat tire.
If a tire goes flat, avoid further tire
and wheel damage by driving slowly
to a level place, well off the road,
Page 265 of 329
Chevrolet Sonic Owner Manual (GMNA-Localizing-U.S./Canada-13566834) -
2020 - CRC - 10/4/19
264 Vehicle Care
recreational vehicle towing are
known as dinghy towing and dolly
towing. Dinghy towing is towing the
vehicle with all four wheels on the
ground. Dolly towing is towing the
vehicle with two wheels on the
ground and two wheels up on a
device known as a dolly.
Here are some important things to
consider before recreational vehicle
towing:
.Before towing the vehicle,
become familiar with the local
laws that apply to recreational
vehicle towing. These laws may
vary by region.
. What is the towing capacity of
the towing vehicle? Be sure to
read the tow vehicle
manufacturer's
recommendations.
. What is the distance that will be
traveled? Some vehicles have
restrictions on how far and how
long they can tow. .
Is the proper towing equipment
going to be used? See your
dealer or trailering professional
for additional advice and
equipment recommendations.
. Is the vehicle ready to be
towed? Just as preparing the
vehicle for a long trip, make sure
the vehicle is prepared to be
towed.
Caution
Use of a shield mounted in front
of the vehicle grille could restrict
airflow and cause damage to the
transmission. The repairs would
not be covered by the vehicle
warranty. If using a shield, only
use one that attaches to the
towing vehicle.
Dinghy Towing
When dinghy towing a vehicle with
an automatic transmission, the
vehicle should be run at the
beginning of each day and at each RV fuel stop for about five minutes.
This will ensure proper lubrication of
transmission components.
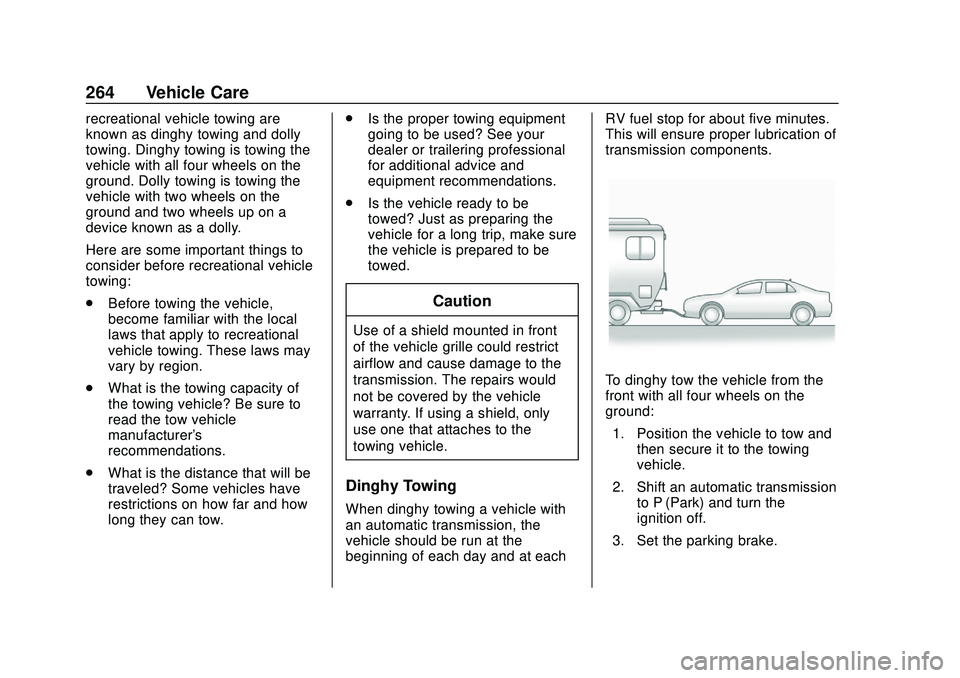
To dinghy tow the vehicle from the
front with all four wheels on the
ground:
1. Position the vehicle to tow and then secure it to the towing
vehicle.
2. Shift an automatic transmission to P (Park) and turn the
ignition off.
3. Set the parking brake.
Page 267 of 329
Chevrolet Sonic Owner Manual (GMNA-Localizing-U.S./Canada-13566834) -
2020 - CRC - 10/4/19
266 Vehicle Care
2. Drive the front wheels onto thedolly.
3. Put an automatic transmission in P (Park).
4. Set the parking brake and turn the vehicle off.
5. Clamp the steering wheel in a straight-ahead position with a
clamping device designed for
towing.
6. Secure the vehicle to the dolly.
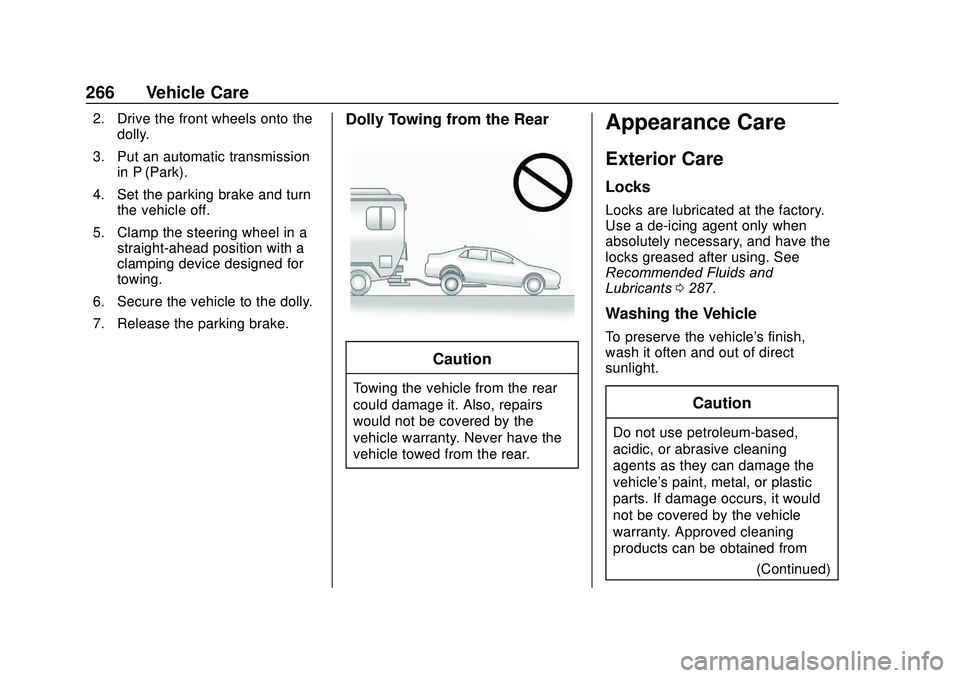
7. Release the parking brake.Dolly Towing from the Rear
Caution
Towing the vehicle from the rear
could damage it. Also, repairs
would not be covered by the
vehicle warranty. Never have the
vehicle towed from the rear.
Appearance Care
Exterior Care
Locks
Locks are lubricated at the factory.
Use a de-icing agent only when
absolutely necessary, and have the
locks greased after using. See
Recommended Fluids and
Lubricants 0287.
Washing the Vehicle
To preserve the vehicle's finish,
wash it often and out of direct
sunlight.
Caution
Do not use petroleum-based,
acidic, or abrasive cleaning
agents as they can damage the
vehicle's paint, metal, or plastic
parts. If damage occurs, it would
not be covered by the vehicle
warranty. Approved cleaning
products can be obtained from
(Continued)