lock CHEVROLET TAHOE 1995 1.G Service Manual
[x] Cancel search | Manufacturer: CHEVROLET, Model Year: 1995, Model line: TAHOE, Model: CHEVROLET TAHOE 1995 1.GPages: 486, PDF Size: 27.22 MB
Page 139 of 486
Downloaded from www.Manualslib.com manuals search engine The brake system warning light will also come on when you set your
parking brake, and it will stay on if your parking brake doesn’t release fully.
If it stays on after your parking brake is fully released, it means you have a
brake problem.
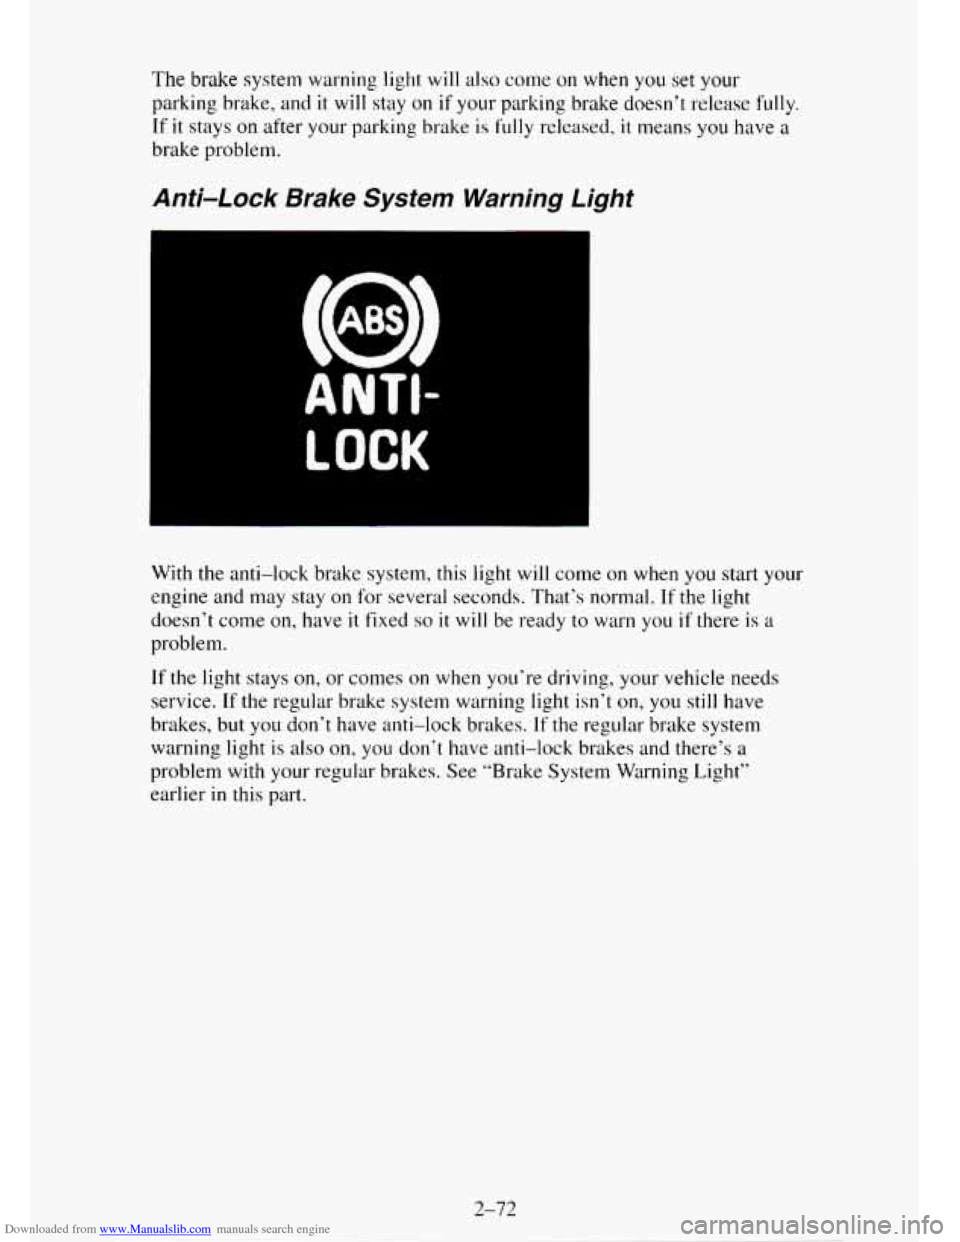
Anti4 ock Brake System Warning Light
ANTI-
LOCK
With the anti-lock brake system, this light will come on when you start your
engine and may stay on for several seconds. That’s normal.
If the light
doesn’t come on, have
it fixed so it will be ready to warn you if there is a
problem.
If the light stays on, or comes on when you’re driving, your vehicle needs
service.
If the regular brake system warning light isn’t on, you still have
brakes, but
you don’t have anti-lock brakes. If the regular brake system
warning light
is also on, you don’t have anti-lock brakes and there’s a
problem with your regular brakes. See “Brake System Warning Light”
earlier
in this part.
2-72
.~
Page 149 of 486
Downloaded from www.Manualslib.com manuals search engine Center High Mount Stop Lamp (CHMSL)
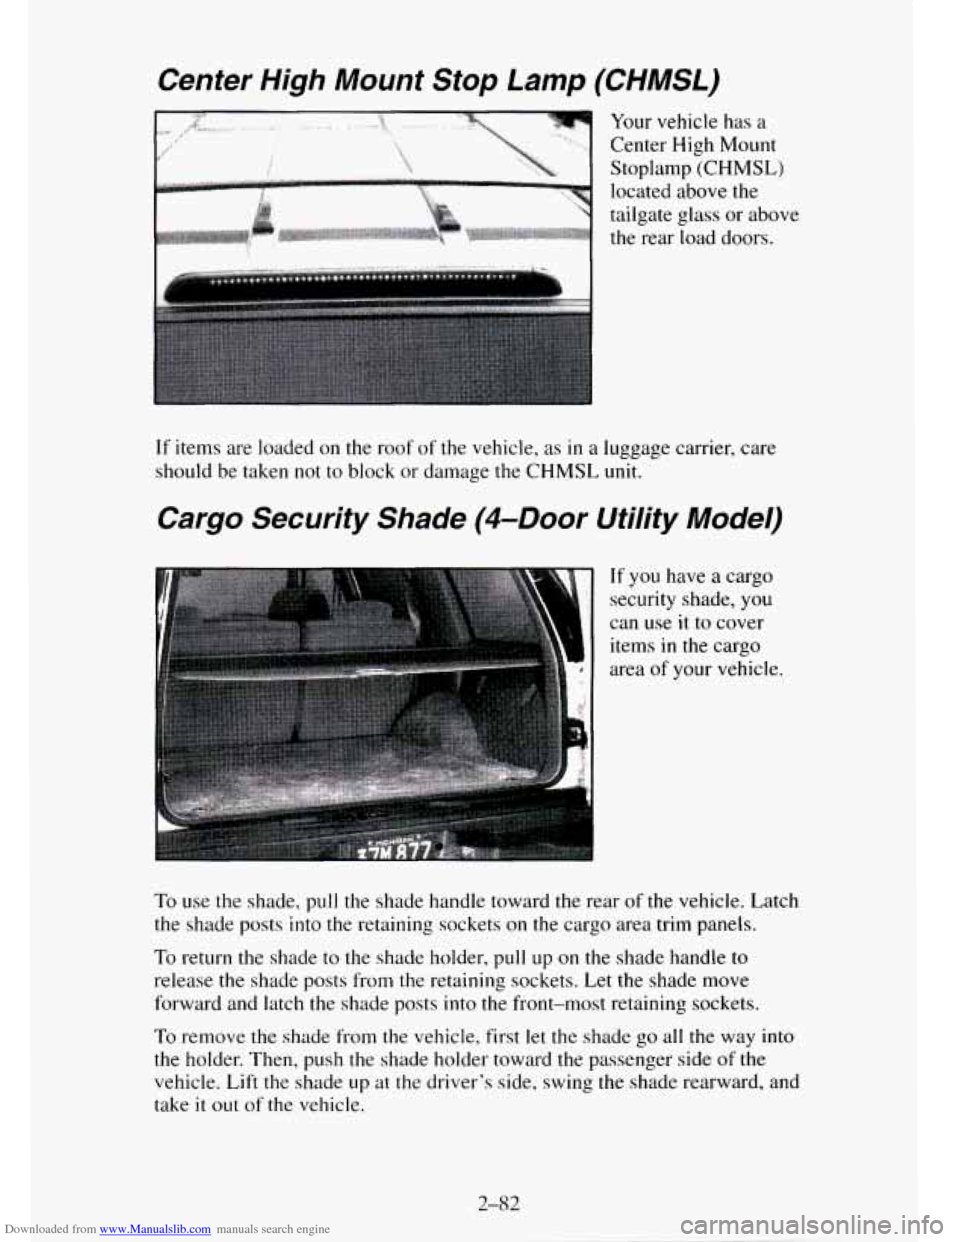
Your vehicle has a
Center High Mount
Stoplamp
(CHMSL)
located above the
tailgate glass
or above
the rear load doors.
I I
If items are loaded on the roof of the vehicle, as in a luggage carrier, care
should be taken not
to block or damage the CHMSL unit.
Cargo Security Shade (4-Door Utility Model)
If you have a cargo
security shade,
you
can use it to cover
items
in the cargo
area
of your vehicle.
To use the shade,
pull the shade handle toward the rear of the vehicle. Latch
the shade posts into the retaining sockets
on the cargo area trim panels.
To return the shade to the shade holder, pull up on the shade handle to
release the shade posts from the retaining sockets. Let the shade move
forward and latch the shade posts into the front-most retaining sockets.
To remove
the shade from the vehicle, first let the shade go all the way into
the holder. Then, push the shade holder toward the passenger side of the
vehicle. Lift the shade up at the driver's side, swing the shade rearward, and
take
it out of the vehicle.
Page 158 of 486
Downloaded from www.Manualslib.com manuals search engine Before using your vehicle’s air conditioning, open the windows to clear the
vehicle of
hot air.
Using the recirculation function can also help. See “Recirculation Button”
in this section for more information.
The knob on the left side of the heating system control panel controls the
fan speed. The knob has four speed positions. To increase the air flow, move
the knob toward HI.
To decrease the air flow, move it toward LO. To turn
the fan off, move the knob to
OFF. If you have the air conditioner on,
moving the fan knob to OFF also turns off the A/C compressor.
The middle knob
on the control panel lets you select the relative
temperature
of the air flowing into the passenger area of your vehicle. This
knob will allow
you to adjust the relative air temperature independently of
the function knob setting. Move the knob right toward the red area for
warmer air. Move the knob left toward the blue area for cooler air.
With
A/C on, move the knob to MAX for maximum cooling. This setting
puts the system in the recirculation mode and helps to maximize your air
conditioner’s performance and your vehicle’s fuel economy. This setting
also cools the air
the fastest. After the vehicle’s interior reaches a
comfortable temperature, move
the knob clockwise to place the air
conditioning system
in the normal mode.
The right knob on the control panel changes the heatedair conditioning
setting.
VENT
- This setting, with the arrow pointing at the figure’s head, directs
air through the instrument panel vents.
VENT/HEAT
- Use this setting, with the arrows pointing at the figure’s
feet and head, to divide airflow between the heater floor vents and
instrument panel vents.
HEAT
- This setting, with the arrow pointing at the figure’s feet, directs air
through the heater floor vents. This setting
is useful for cold weather.
HEAT/DEFROST
- Use this setting, with the arrow pointing at the figure’s
feet and the defroster symbol near
the figure’s head, to divide airflow
between the heater floor
vents and windshield.
DEFROST
- This setting with the defrost symbol directs air through the
windshield defroster vents. This setting is useful when
you have fog or ice
on the windshield.
The control knob can be placed in any position between two heatedair
conditioning settings to blend the flow of air. The closer the knob
is to a
setting symbol, the more
the air flow will represent that symbol’s air flow
arrows.
RECIRCULATION BUTTON
- This button, between the left and middle
knobs, allows the air inside your vehicle to be recirculated. This setting
helps to maximize your air conditioner’s performance and your vehicle’s
3-3
Page 161 of 486
Downloaded from www.Manualslib.com manuals search engine To increase and decrease the flow of heated air to the rear floor vents, move
the switch marked REAR HEAT to the blower speed you want.
The knob has three speed positions.
To increase the flow of heated air, move
the switch toward HIGH.
To decrease the flow of heated air, move it toward
LOW. To turn the fan off, move the switch to OFF.
Rear Air Conditioning and Rear Heater
If your vehicle has a rear air conditioning and rear heater system
combination, controls are provided
to regulate the temperature, location and
speed of the air flow.
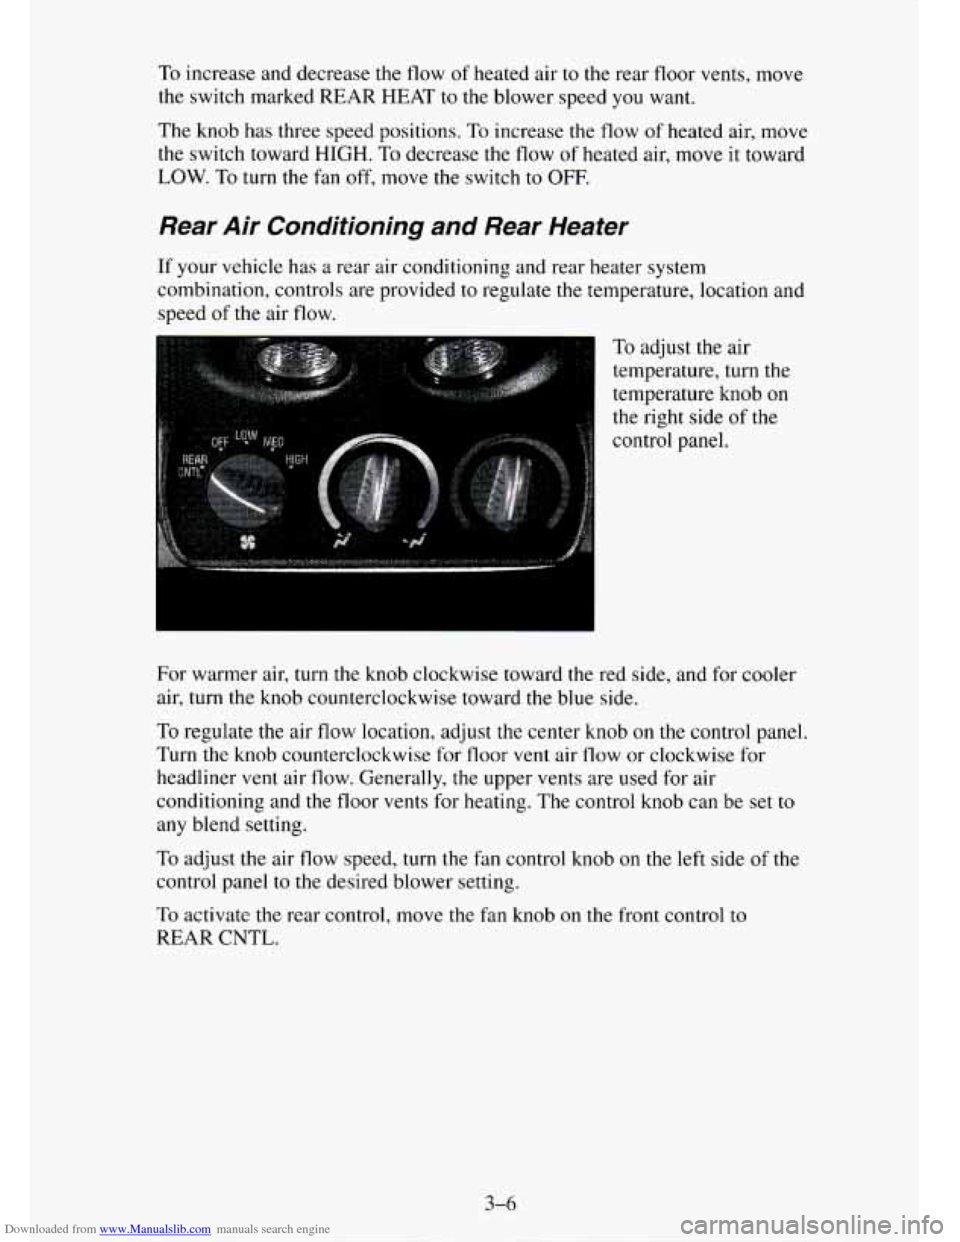
To adjust the air
temperature, turn the
temperature knob
on
the right side of the
control panel.
For warmer air, turn the knob clockwise toward the red side, and for cooler
air, turn the knob counterclockwise toward the blue side.
To regulate the air flow location, adjust the center knob on the control panel
Turn the knob counterclockwise for floor vent air flow or clockwise for
headliner vent air flow. Generally, the upper vents are used for air
conditioning and the floor vents for heating. The control knob can be set
to
any blend setting.
To adjust the air flow speed, turn the fan control knob on the left side of the
control panel
to the desired blower setting.
To activate
the rear control, move the fan knob on the front control to
REAR
CNTL.
3-6
Page 164 of 486
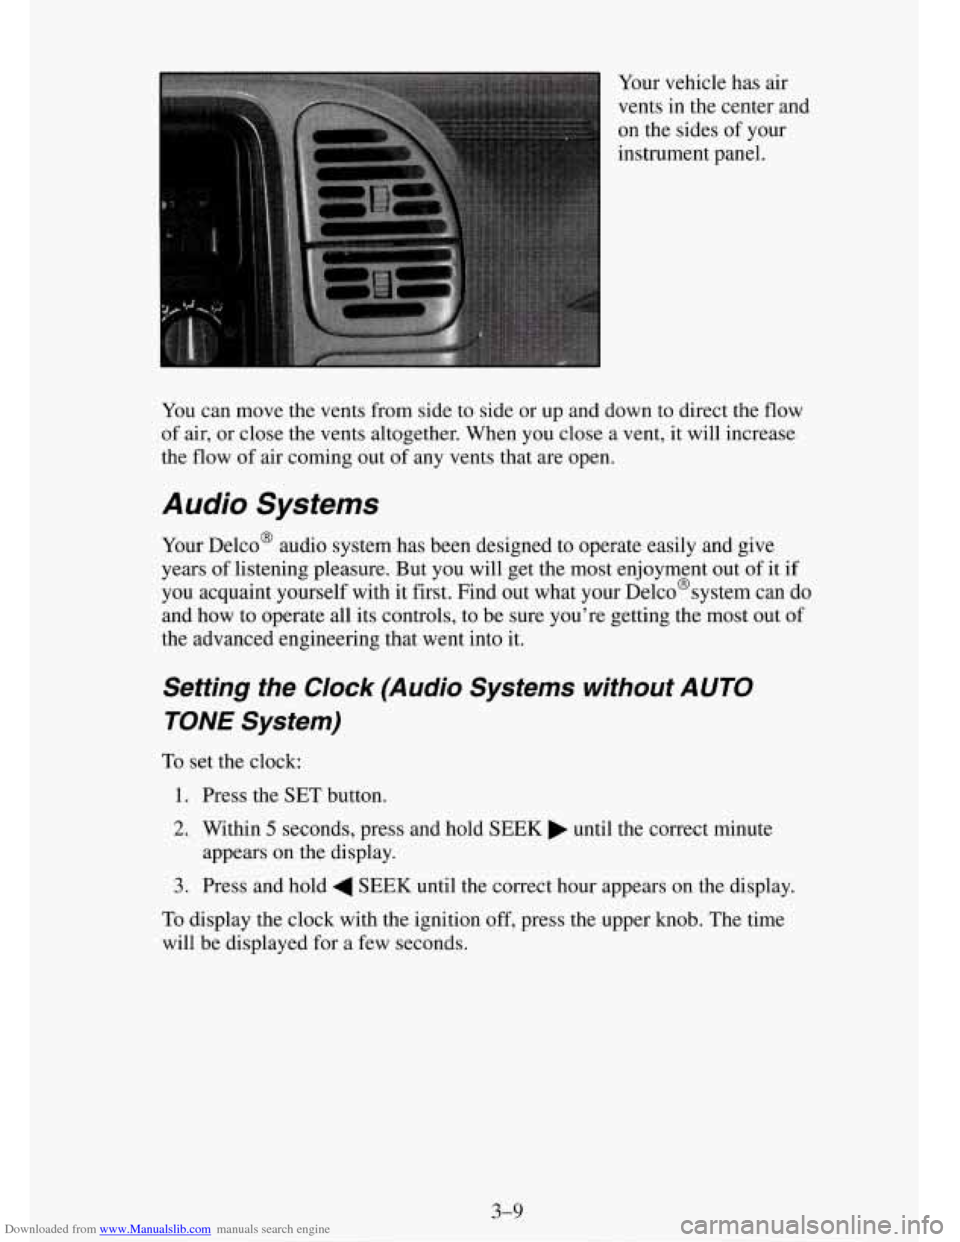
Downloaded from www.Manualslib.com manuals search engine Your vehicle has air
vents in the center and
on the sides of your
instrument panel.
You can move the vents from side to side or up and down to direct the
flow
of air, or close the vents altogether. When you close a vent, it will increase
the flow of air coming out of any vents that are open.
Audio Systems
Your Delco@ audio system has been designed to operate easily and give
years of listening pleasure. But
you will get the most enjoyment out of it if
you acquaint yourself with it first. Find out what your Delco@systern can
do
and how to operate all its controls, to be sure you’re getting the most out of
the advanced engineering that went into it.
Setting the Clock (Audio Systems without AUTO
TONE System)
To set the clock:
1. Press the SET button.
2. Within 5 seconds, press and hold SEEK until the correct minute
3. Press and hold 4 SEEK until the correct hour appears on the display.
appears
on the display.
To display the clock with the ignition off, press the upper knob. The time
will be displayed for a few seconds.
3-9
Page 165 of 486
Downloaded from www.Manualslib.com manuals search engine Setting the Clock (Audio Systems with AUTO TONE
System)
The buttons used to set the clock are located below the AUTO TONE button
in the bottom right corner of your audio system.
To set the clock:
1. Press and hold HR until the correct hour appears on the display.
2. Press and hold MIN until the correct minute appears on the display.
To display the clock with the ignition off, press the recall button. The time
will be displayed for a few seconds.
There is an initial two-second delay before the clock goes into the time-set
mode.
How to Operate Your ETW AM-FM Stereo Audio
System
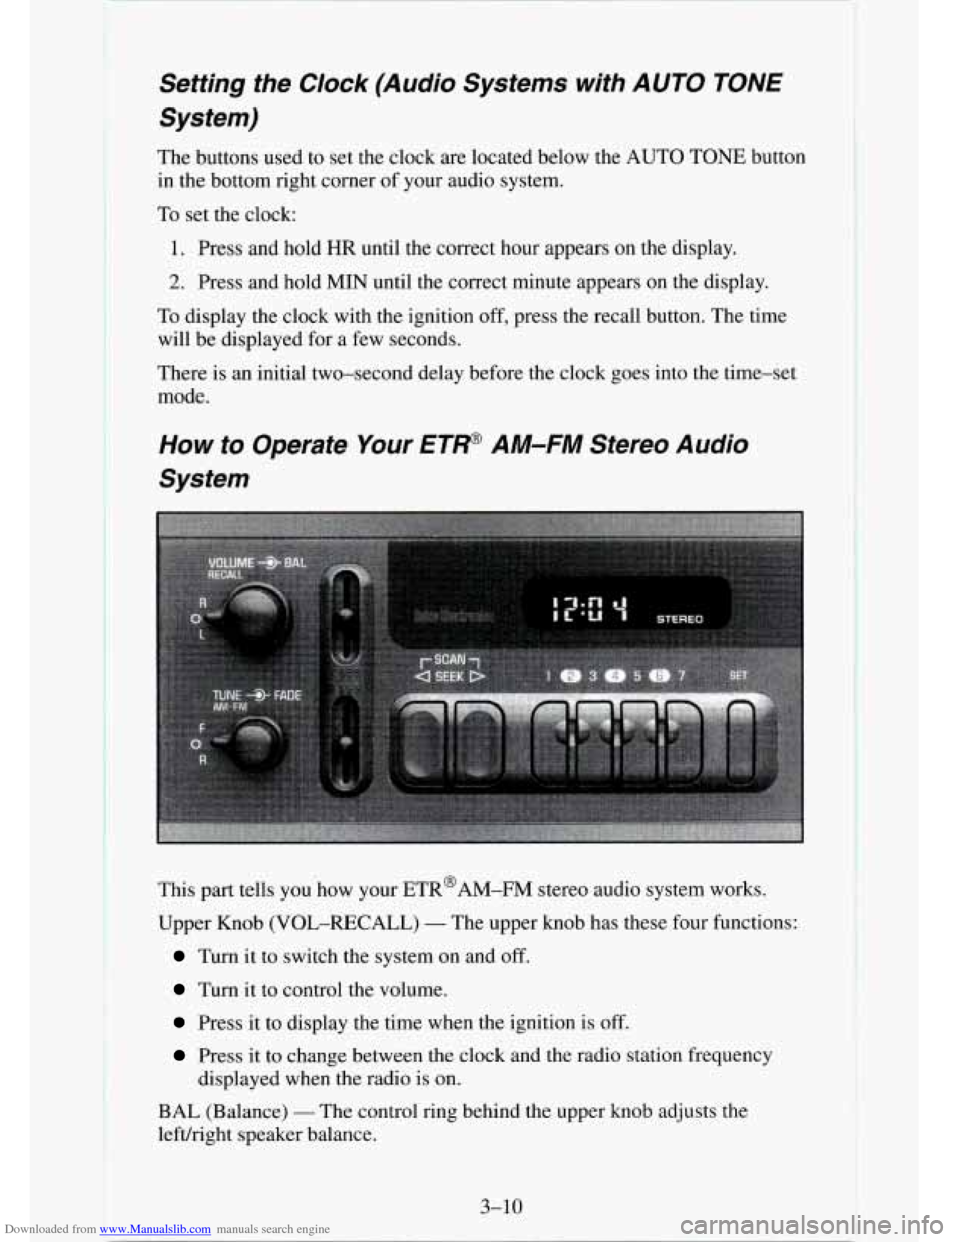
This part tells you.how your ETR@AM-FM stereo audio system works.
Upper Knob (VOL-RECALL)
- The upper knob has these four functions:
Turn it to switch the system on and off.
Turn it to control the volume.
Press it to display the time when the ignition is off.
Press it to change between the clock and the radio station frequency
displayed when the radio is
on.
BAL (Balance) - The control ring behind the upper knob adjusts the
left/right speaker balance.
3-10
Page 167 of 486
Downloaded from www.Manualslib.com manuals search engine How to Operate Your ETP AM-FM Stereo Audio
Cassette System
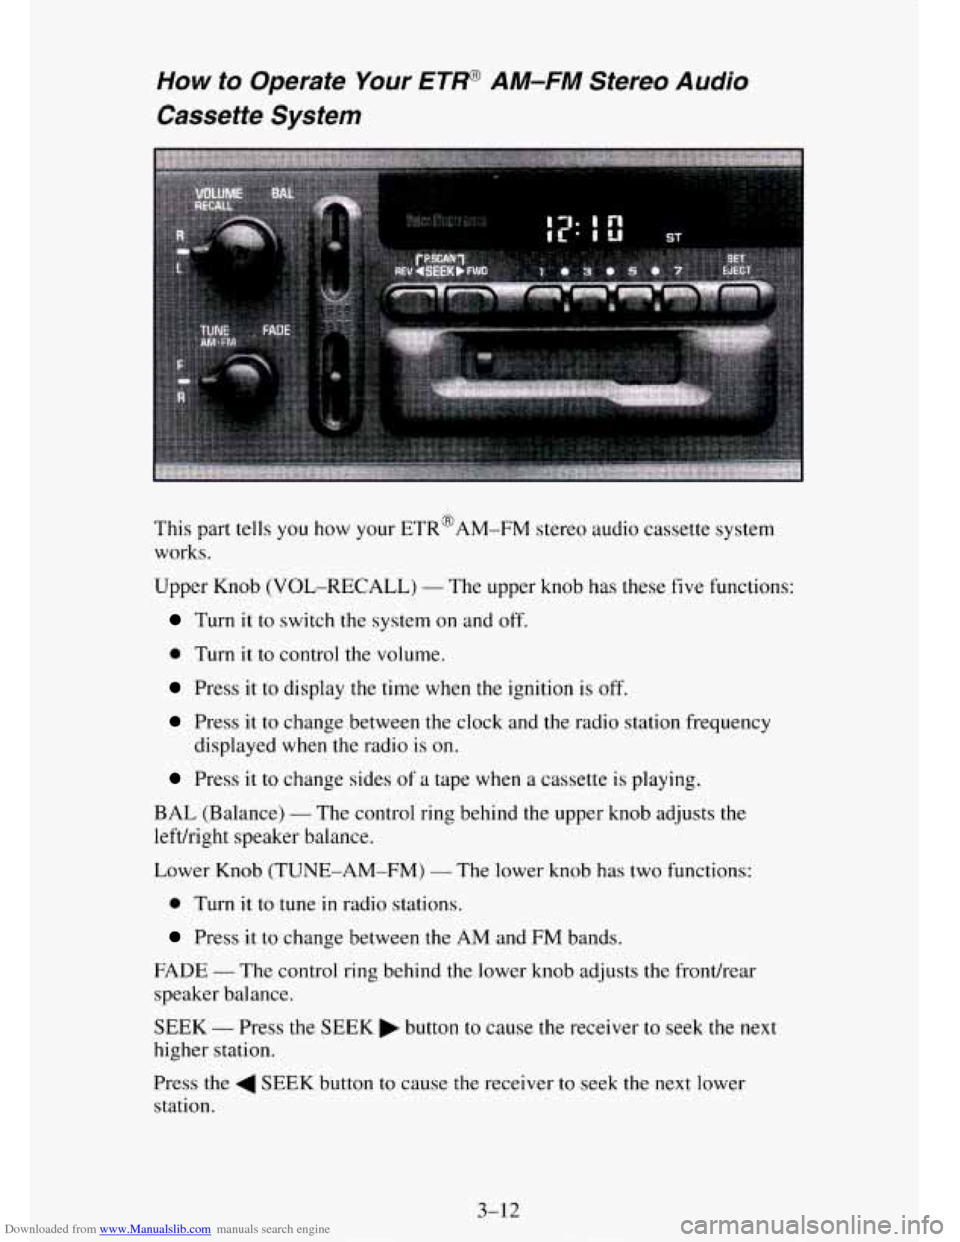
This part tells you how your ETR@AM-FM stereo audio cassette system
works.
Upper Knob (VOL-RECALL)
- The upper knob has these five functions:
Turn it to switch the system on and off.
0 Turn it to control the volume.
Press it to display the time when the ignition is off.
Press it to change between the clock and the radio station frequency
displayed when the radio
is on.
Press it to change sides of a tape when a cassette is playing.
BAL (Balance)
- The control ring behind the upper knob adjusts the
lefthight speaker balance.
Lower Knob (TUNE-AM-FM)
- The lower knob has two functions:
0 Turn it to tune in radio stations.
Press it to change between the AM and FM bands.
FADE
- The control ring behind the lower knob adjusts the fronthear
speaker balance.
SEEK
- Press the SEEK button to cause the receiver to seek the next
higher station.
Press the
4 SEEK button to cause the receiver to seek the next lower
station.
3-12
Page 169 of 486
Downloaded from www.Manualslib.com manuals search engine PROGRAM - To go from one side of the tape to the other, press the
VOL-RCL knob.
EJECT - To remove the tape or stop the tape and switch to radio, press the
EJECT button.
If
a tape is inserted with side “I” (or “A”) up, then the right arrow means
that that side is being played. Likewise, a left arrow would indicate that side
“2” (or “B”) had been selected. The player will automatically switch to the
other side of
the tape when the first side ends.
How to Operate Your ET, AM-FM Stereo Audio
Cassette ATC System
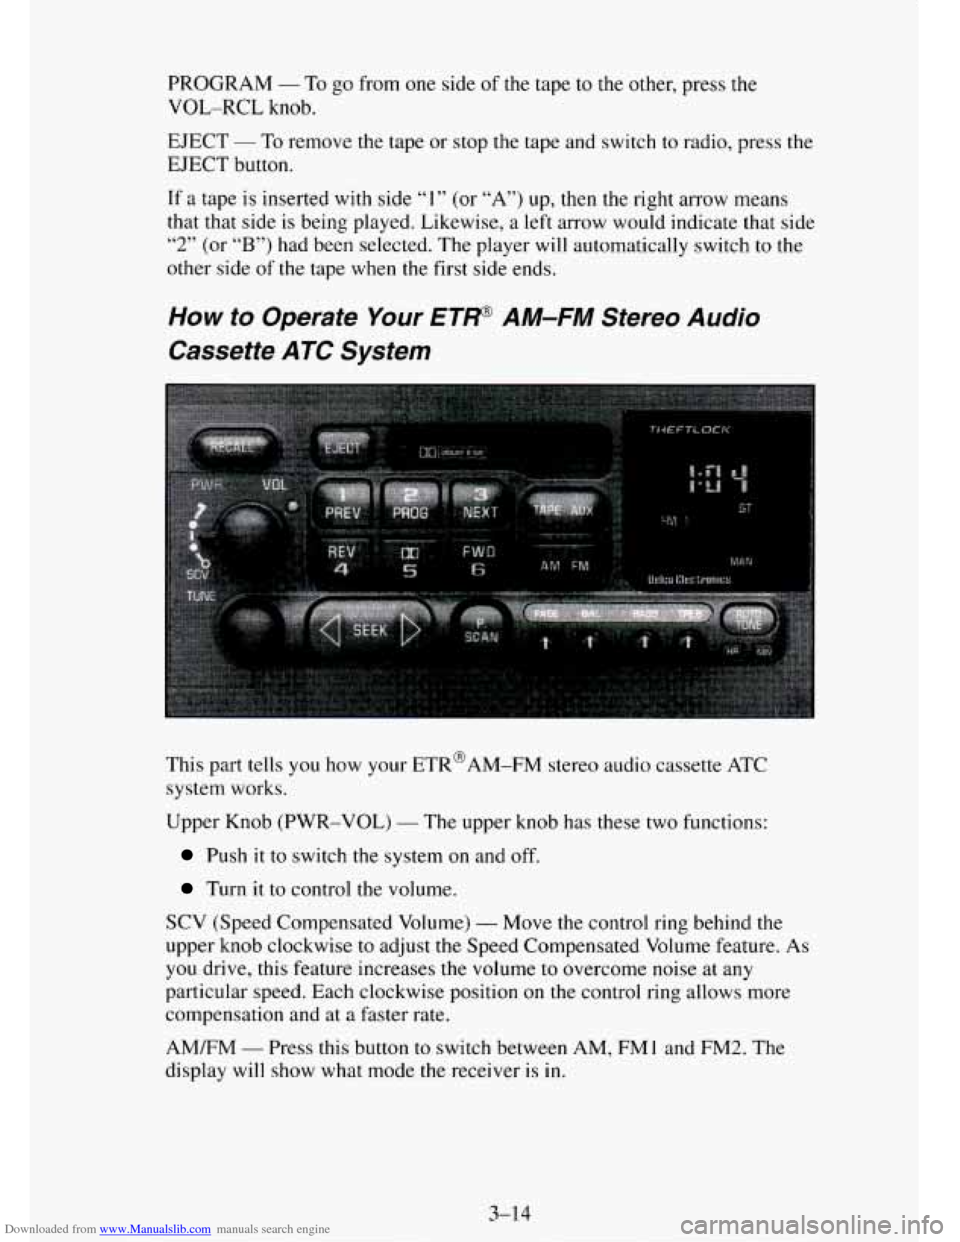
This part tells you how your ETR@AM-FM stereo audio cassette ATC
system works.
Upper Knob (PWR-VOL)
- The upper knob has these two functions:
Push it to switch the system on and off.
Turn it to control the volume.
SCV (Speed Compensated Volume)
- Move the control ring behind the
upper knob clockwise
to adjust the Speed Compensated Volume feature. As
you drive, this feature increases the volume to overcome noise at any
particular speed. Each clockwise position on the control ring allows more
compensation and at
a faster rate.
AM/FM
- Press this button to switch between AM, FMl and FM2. The
display will show what mode
the receiver is in.
3-14
Page 170 of 486
Downloaded from www.Manualslib.com manuals search engine RCL (Recall) - Press this button to change between the clock and the radio
station frequency displayed when the radio is on. Also, press this button to
display the time when the ignition is off.
TUNE - Press lightly on the TUNE button to release it from its stored
position. Rotate
the knob clockwise to increase frequency and
counterclockwise to decrease radio frequency. When done, press
the knob
again to return
it to its stored position.
Pushbuttons
- The six pushbuttons let you return to favorite stations. To
set the pushbuttons for up to
18 favorite stations (6 AM, 6 FM1 and 6 FM2):
1. Tune in the desired station.
2. Press AUTO TONE to select the best setting for the type of station
chosen.
3. Press and hold one of the pushbuttons until sound returns
(approximately two seconds). Whenever you press
that button, me
preset station will return.
Repeat these steps for each pushbutton.
SEEK
- Press SEEK to cause the receiver to seek the next higher
station.
Press
4 SEEK to cause the receiver to seek the next lower station.
SCAN
- Press and hold the center of the SEEK button to momentarily hear
each available station. Release the button when SCAN appears
in the
display. The receiver will continue to scan and momentarily stop at each
station
until you press the center of the SEEK button again.
P. SCAN (Preset Scan)
- Press this button to scan each preset pushbutton
station. The receiver will continue to scan and momentarily stop at each
station
until you press either P. SCAN again or one of the six pushbuttons.
The AUTO SCAN setting for
that preset button will also return. The
pushbutton number (PI-P6)
will appear momentarily just before frequency
is displayed.
AUTO TONE
- Press this button to select between five preset equalization
settings and tailor the sound to
the music or voice being heard. Each time
you press the button, the selection
will switch to one of the preset settings of
CLASSIC, NEWS, ROCK, POP, or
JAZZ. The display will show which
mode the receiver is in. To return to the manual mode, press and release
AUTO TONE until
MAN (manual) appears in the display. This will return
the tone adjustment to the TREB and BASS controls. Also, any time a
TREB or BASS control is rotated, tone is automatically set back to MAN
(manual).
3-15
Page 171 of 486
Downloaded from www.Manualslib.com manuals search engine FADE - Press lightly on the FADE knob to release it from its stored
position and
pull it out to the fully extended position. Rotate the knob
clockwise to adjust sound
to the front speakers and counterclockwise to
adjust sound to the rear speakers. Push the knob back
in to the stored
position when done.
BAL
- Press lightly on the BAL knob to release it from its stored position
and pull it
out to the fully extended position. Rotate the knob clockwise to
adjust sound to the right speakers and counterclockwise to adjust sound
to
the left speakers. Push the knob back in to the stored position when done.
BASS
- Press lightly on the BASS knob to release it from its stored
position and pull
it out to the fully extended position. Rotate the knob
clockwise
to increase the bass response and counterclockwise to decrease
bass response. Any time the BASS control is rotated,
tone is automatically
set back to
MAN (manual). Push the knob back in to the stored position
when done.
TREBLE
- Press lightly on the TREB knob to release it from its stored
position and pull
it out to the fully extended position. Rotate the knob
clockwise to increase the treble response and counterclockwise
to decrease
treble response. Any time the TREB control is rotated,
tone is automatically
set back
to MAN (manual). Push the knob back in to the stored position
when done.
To Play a Cassette
Your tape player is built to work best with tapes that are 30 to 45 minutes
long
on each side. Tapes longer than that are so thin they may not work well
in this player.
To load a cassette tape with the ignition off, first press EJECT or RCL.
Then, insert the cassette tape.
Once the tape is playing, use the control knobs for volume, balance, fade,
treble and bass just
as you do for the radio. A lighted tape symbol shows
when a cassette tape is in the player. A lighted arrow
will also appear and
show the direction of play when a tape
is active.
The player automatically senses if the cassette tape
is metal or CR02 and
adjusts for best playback sound. For metal tapes,
00 (Dolby' Noise
Reduction) will appear
in the display.
Any time
a cassette tape is inserted, the top side is selected for play first.
PREV (1)
- Press PREV or 4 SEEK (in the direction that the lighted tape
direction
arrow points) to search for the previous selection. A minimum
three-second blank gap is needed for the player to stop at the beginning
of
the selection. The tape direction arrow will blink during the SEEK
operation.
3-16
..