ESP CHEVROLET TRACKER 1994 User Guide
[x] Cancel search | Manufacturer: CHEVROLET, Model Year: 1994, Model line: TRACKER, Model: CHEVROLET TRACKER 1994Pages: 258, PDF Size: 14.43 MB
Page 118 of 258

Slow down, especially on higher
speed roads. Your headlights can light
up
only so much road ahead.
0 In remote areas. watch for animals.
0 If you're tired, pull off the road in a
safe place md rest.
Night Vision
No one can see 11s well at night as in the
daytime.
But as we get older these
differences increase. A SO-year-old driver
may require at least twice as much
light to
see the same thing
a( night :is a
20-year-old.
What you do
in the daytime can also
affect your night vision. For example.
if
you spend the day in bright sunshine you
are wise
to wear sunglasses. Your eyes
will have less trouble adjusting
to night.
But
if you're driving, don't wear
sunglasses at night. They may cut down
on glare from headlights. but they also
make
a lot of things invisible.
You can be temporarily blinded by
approaching lights. It c;tn take a second or
two,
or even several seconds, for your
eyes
to readjust to the dark. When you are
ked with severe glare
(as from a driver
who doesn't lower the high beams. or a vehicle with Inisaimed headlights), slow.
down
a little. Avoid staring directly into
the approaching lights.
Keep your windshield and
all the glass on
your vehicle clean - inside and out.
Glare
at night is nladc much worse by dirt
on the glass. Even the inside of the glass
can build up a film caused by dust. Dirty
glass makes lights dazzle and flash more
than clean
glass would. making the pupils
of
your eyes contract repeatedly.
Remember that your hcacilights light
up
far less of' LI roadway when you are in a
turn or curve.
Kecp your eycs moving: that way,
it's
casier to pick out dimly lighted objects.
Just
as your headlights should be checked
regularly for proper aim.
so should your
eyes be examined regulurly.
Some drivers
suffer from night blindness
- the
inability to see
in dim light - and aren't
even aware
of it.
Driving in the Rain
Rain and wet roads can mean driving
trouble. On
a wet road you can't stop,
accelerate
or turn as well because your
tire-to-road traction isn't as good as on
dry roads. And,
if your tires don't have
much tread left, you'll get even less
traction.
It's always wise to go slower and
be cautious if
rain starts to fall while you
are driving. The surface may get wet
suddenly when your reflexes are tuned for
driving
on dry pavement.
The heavier the rain. the harder
it is to
see. Even if your windshield wiper blades
are
in good shape. a heavy rain can make
it harder to see road signs and traffic
signals, pavement markings,
the edge of
the road, and even people walking.
117 ...
ProCarManuals.com
Page 119 of 258
Your Driving and the Road
It’s wise to keep your wiping equipment
in good shape and keep your windshield
washer tank filled. Replace your
windshield wiper inserts when they show
signs of streaking or missing areas on the
windshield, or when strips of rubber start
to separate from the inserts.
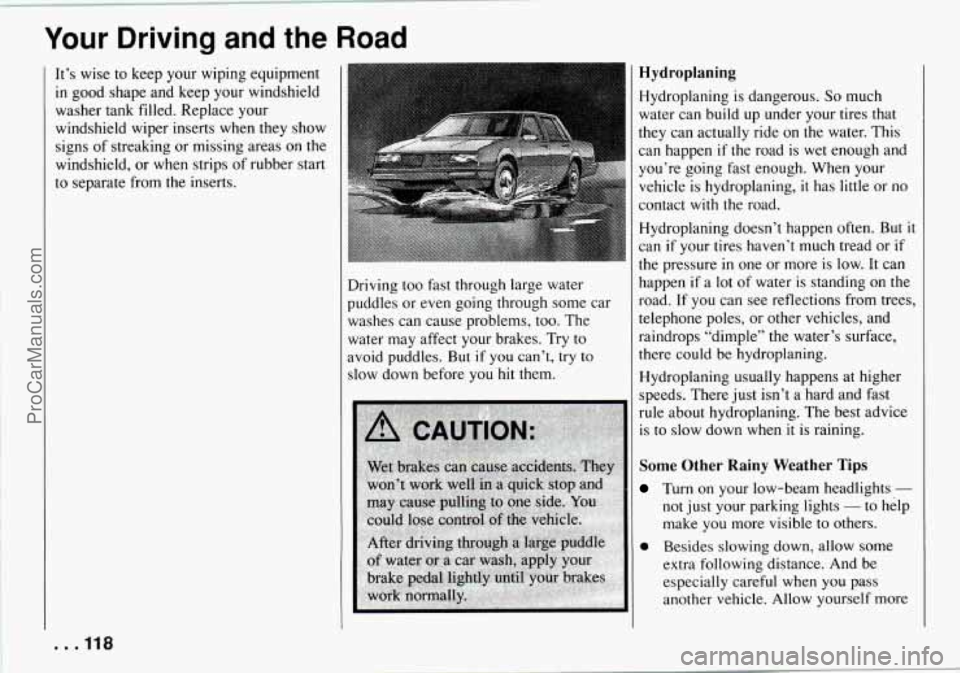
Driving too fast through large water
puddles or even going through some car
washes can cause problems, too. The
water may affect your brakes. Try to
avoid puddles. But
if you can’t, try to
slow down before you hit them.
Hydroplaning
Hydroplaning is dangerous. So much
water can build
up under your tires that
they can actually ride on the water. This
can happen if the road is
wet enough and
you’re going fast enough. When your
vehicle is hydroplaning,
it has little or no
contact
with the road.
Hydroplaning doesn’t happen often.
But it
can if your tires haven’t much tread or
if
the pressure in one or more is low. It can
happen
if a lot of water is standing on the
road.
If you can see reflections from trees,
telephone poles, or other vehicles, and
raindrops “dimple” the water’s surface,
there could be hydroplaning.
Hydroplaning usually happens at higher speeds. There just isn’t a hard and fast
rule about hydroplaning. The best advice
is to slow down when it is raining.
Some Other Rainy Weather Tips
Turn on your low-beam headlights -
not just your parking lights - to help
make you more visible to others.
0 Besides slowing down, allow some
extra following distance. And be
especially careful when you pass
another vehicle. Allow yourself more
. . .I18
ProCarManuals.com
Page 128 of 258

0
distance is less than 12 inches, take
the foot off the trailer tongue.
Will you have to make any holes
in
the body of your vehicle when you
install a trailer hitch?
If you do, then
be sure
to seal the holes later when
you remove the hitch. If you don't
seal them, deadly carbon monoxide
(CO) from your exhaust can get into
your vehicle (see "Carbon Monoxide"
in the Index). Dirt and water can, too.
Safety Chains
You should always attach chains between
your vehicle and your trailer. Cross the
safety chains under the tongue of the
trailer
so that the tongue will not drop to
the road if
it becomes separated from the
hitch. Instructions about safety chains
may be provided by the hitch
manufacturer
or by the trailer
manufacturer. Follow the manufacturer's
recommendation
for attaching safety
chains. Always leave just enough slack
so
you can turn with pour rig. And, never
allow safety chains
to drag on the ground.
Trailer Brakes
If your trailer weighs more than 1,000
pounds (450 kg) loaded, then it needs its
own brakes -and they must be adequate.
Be sure
to read and follow the instructions
for the trailer brakes so you'll be able to
install, ad-just and maintain them properly.
Don't tap into your vehicle's brake
system
if the trailer's brake system
will use more than 0.02 cubic inch
(0.3 cc) of fluid from your vehicle's
master cylinder.
If it does. both
systems won't work well. You could
even lose your brakes.
Will the trailer brake parts take
3,000
psi (20 650 kPa) of pressure? If not,
the trailer brake system must not be
used
with your vehicle.
If everything checks out this far. then
make the brake fluid tap at the port on
the master cylinder that sends fluid
to
the rear brakes. But don't use copper
tubing for
this. If you do, it will bend
and finally break off. Use steel brake
tubing.
Driving with a Trailer
Towing a trailer requires a certain amount
of experience. Before setting out for the
open road, you'll want
to get to know
your rig. Acquaint yourself
with the feel
of handling and braking with the added
weight
of the trailer. And always keep in
mind that the vehicle you are driving is
now a good deal longer and not nearly so
responsive as your vehicle is by itself.
Before you start, check the trailer hitch
and platform. safety chains, electrical
contwxtor. lights, tires and mirror
adjustment. If the trailer has electric
brakes, start your vehicle and trailer
moving and then apply the trailer brake
controller by hand to be sure the brakes
are working. This lets you check your
electrical connection
at the same time.
During your trip, check occasionally to be
sure that the load is secure. and that the
lights and any trailer brakes are
still
working.
Following Distance
Stay at least twice as far behind the
vehicle ahead as
you would when driving
your vehicle without
a trailer. This can
help you avoid situations that require
heavy braking and sudden turns.
Passing
You'll need more passing distance up
ahead when you're towing a tnliler. And.
because you're
B good deal longer, you'll
need to go much farther beyond the
127 ...
ProCarManuals.com
Page 130 of 258
When You Are Ready to Leave after
Parking
on a Hill
1. Apply your regular brakes and hold
the pedal down while you:
Start your engine;
Shift into a gear; and
0 Release the parking brake.
2. Let up on the brake pedal.
3. Drive slowly until the trailer is clear
4. Stop and have someone pick up and
of the chocks.
store the chocks.
Maintenance When Trailer Towing
Your vehicle will need service more often
when you're pulling
a trailer. See the
Maintenance Schedule for more
on this.
rhings that are especially important in
:railer operation are automatic
.ransmission lluid (don't overfill), engine
oil? axle lubricant, belts, cooling system,
and brake adjustment. Each of these
is
covered in this manual, and the Index will
help you find them quickly. If you're
trailering, it's a good idea to review these
sections before you start
your trip.
Check periodically
to see that all hitch
nuts and bolts are tight.
I
I
Recreational Vehicle
To wing
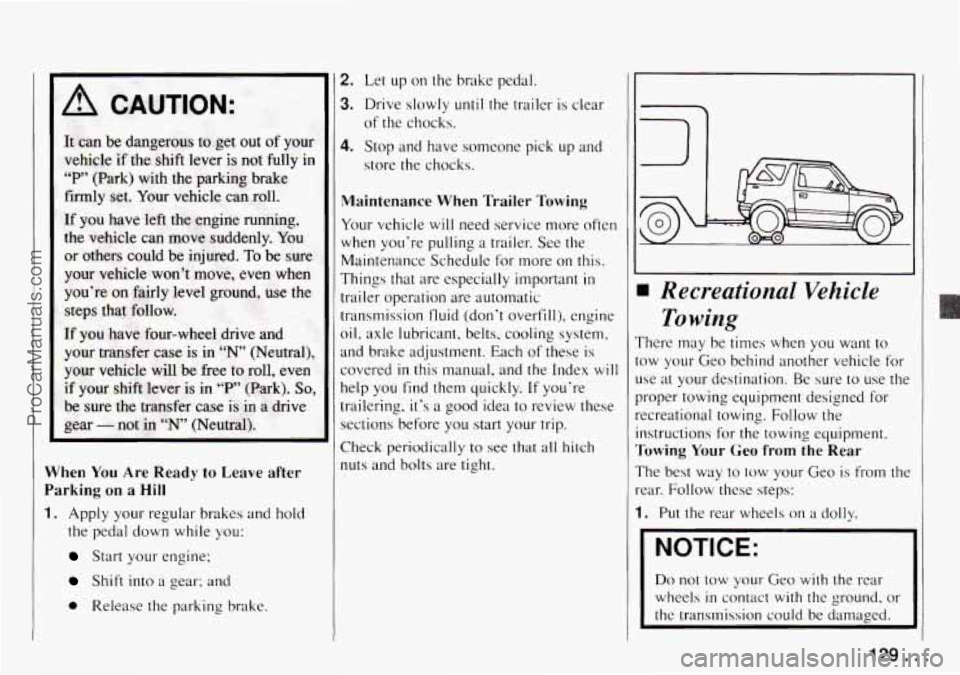
There may be times when you want to
:ow your Geo behind another vehicle for
Jse at your destination. Be sure to use the
proper towing equipment designed for
-ecreational towing. Follow the Instructions for the towing equipment.
rowing Your Geo from the Rear
rhe best way to tow your Geo is from the
-ear. Follow these steps:
1. Put the rear wheels on a dolly.
I NOTICE:
I
Do not tow your Geo with the rear
wheels
in contact with the ground. or
the transmission could be damaged. 1
.. 129. ProCarManuals.com
Page 147 of 258
Problems on the Road
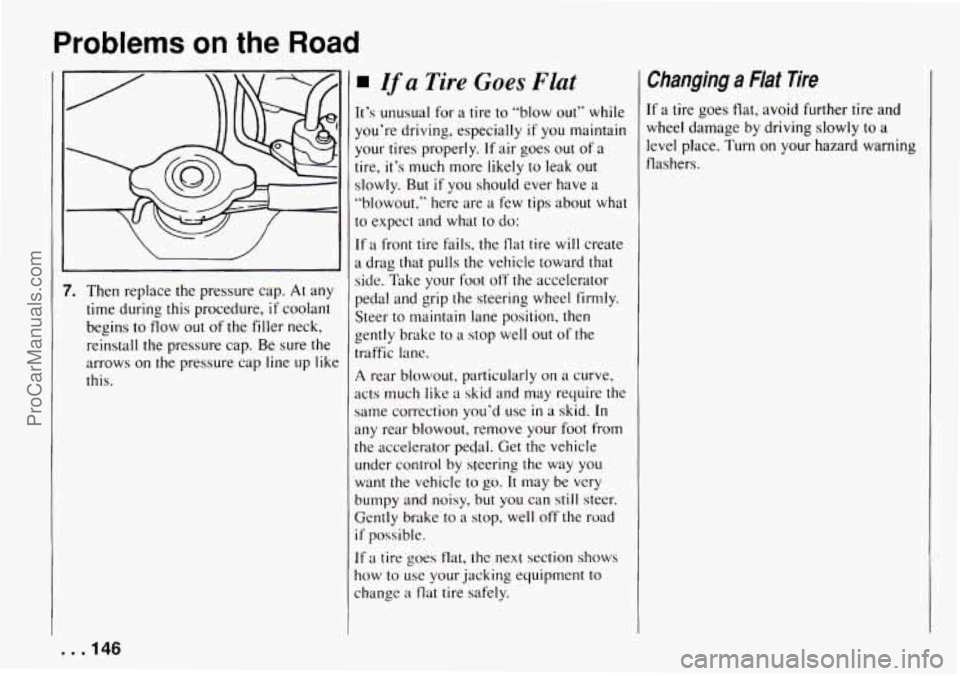
7, Then replace the pressure cap. At any
time during this procedure,
if coolant
begins
to flow out of the filler neck,
reinstall
the pressure cap. Be sure the
arrows on
the pressure cap line up like
this.
. .I46
If a Tire Goes Flat
It’s unusual for a tire to “blow out” while
you’re driving, especially
if you maintain
your tires properly.
If air goes out of a
tire, it’s much more likely to leak out
slowly.
But if you should ever have a
“blowout.” here are a few tips about what
to expect and what to do:
If a front tire Fails, the flat tire will create
a drag that pulls the vehicle toward that
side. Tdke your foot off
the accelerator
pedal and grip the steering wheel firmly.
Steer
to maintain lane position, then
gently brake to a stop well out
of the
traffic lane.
A rear blowout, particularly on a curve,
acts much like
a skid and may require the
same correction you’d use
in a skid. In
any rear blowout, remove your foot from
the accelerator pedal. Get the vehicle under control by steering
the way you
want the vehicle to go. It rnay be very
bumpy and noisy, but
you can still steer.
fently brake to a stop, well off the road
if possible.
If a tire goes tlat, the next section shows
how to use your jacking equipment
to
:hange a tlat tire safely.
Changing a Flat Tire
If a tire goes tlat, avoid further tire and
wheel damage by driving slowly
to a
level place.
Turn on your hazard warning
flashers.
ProCarManuals.com
Page 158 of 258
worry if you hear a little pinging noise
when you’re accelerating or driving up a
hill. That’s normal and you don’t have to
buy a higher octane fuel to get rid of
pinging. It’s the heavy, constant knock
that means you have a problem.
What about gasoline
with blending
materials that contain oxygen
(oxygenates), such as MTBE or alcohol?
MTBE
is “methyl tertiary-butyl ether.”
Fuel that is no more than
15% MTBE is
fine for your vehicle.
Ethanol
is ethyl or grain alcohol.
Properly-blended fuel that
is no more
than
10% ethanol is fine for your vehicle.
Methanol is methyl or wood alcohol.
NOTICE:
Fuel that is more than S% methanol
is bad for your vehicle. Don’t use it.
It can corrode metal parts
in your fuel
system and also damage plastic and
rubber parts. That damage wouldn’t
be covered under your warranty. And
even
at 5% or less, there must be
“cosolvents” and corrosion prevent-
ers
in this fuel to help avoid these
problems.
Gasolines for Cleaner Air
Your use of gasoline with deposit control
additives
will help prevent deposits from
forming
in your engine and fuel system.
That helps keep your engine
in tune and
your emission control system working
properly. It’s good for your vehicle, and
you’ll be doing your part
for cleaner air.
Many gasolines are now blended with
oxygenates. General Motors recommends
that you use gasolines
with these blending
materials, such as MTBE and ethanol. By
doing
so, you can help clean the air,
especially
in those parts of the country
that have high carbon monoxide levels.
In addition, some gasoline suppliers are
now producing reformulated gasolines.
These gasolines are specially designed to
reduce vehicle emissions. General Motors
recommends that you use reformulated
gasoline.
By doing so, you can help clean
the air, especially
in those parts of the
country that have high ozone levels.
You should ask your service station
operators
if their gasolines contain deposit
control additives and oxygenates, and
if
they have been reformulated to reduce
vehicle emissions.
Fuels in Foreign Countries
If you plan on driving in another country
outside the
U.S. or Canada, unleaded fuel
may be hard to find.
Do not use leaded
gasoline. If you use even one tankful,
your emission controls won’t work well
or at all. With continuous use, spark plugs
can get fouled, the exhaust system can
corrode, and your engine oil can
deteriorate quickly. Your vehicle’s oxygen
sensor
will be damaged. All of that means
costly repairs that wouldn’t be covered by
your warranty.
To check on fuel availability, ask an auto
club, or contact a major oil company
that
does business in the country where you’ll
be driving.
You can also write us
at the following
address for advice. Just tell us where
you’re going and give your Vehicle
Identification Number
(VIN).
General Motors Overseas Distribution
North American Export Sales (NAES)
1908 Colonel Sam Drive
Oshawa, Ontario
LlH 8P7
Corporation
157.. ProCarManuals.com
Page 168 of 258
I A utomatic Transmission FIuid
When to Check and Change
A good time to check your automatic
transmission fluid level
is when the
engine
oil is changed. Refer to the
Maintenance Schedule to determine when
to change your fluid. See “Scheduled
Maintenance Services”
in the Index.
How to Check
Because this operation can be a little
difficult, you may choose to have
this
done at your Geo dealership Service
Department.
If you do
it yourself, be sure to follow all
the instructions here, or you could get a
false reading on the dipstick.
NOTICE:
Too much or too little tluid can
damage your transmission.
Too much
can mean that some of the fluid could
come out and fall on hot engine parts
or exhaust system parts, starting
a fire.
Be sure to get an accurate reading
if
you check your transmission tluid. Wait
at least 30 minutes before checking
the transmission fluid level
if you have
been driving:
0 When outside temperatures are above
0 At high speed for quite a while.
0 In heavy traffic - especially in hot
While pulling a trailer.
To get the right reading, the fluid should
be at normal operating temperature,
which is 180°F to 200°F
(82°C to 93°C).
To check transmission fluid hot: Get the
vehicle warmed
up by driving about IS
miles (24 km) when outside temperatures
are above 50°F
( 10°C). If it’s colder than
50°F (IOOC), drive the vehicle in “D”
(Third Gear) until the engine temperature
gage moves
and then remains steady for
ten minutes. Then follow the hot check
procedures.
To check transmission fluid cold: A cold
check is made after the vehicle has been
sitting for eight hours or more
with the
engine off
and is used only as a reference.
Let
the engine run at idle for five minutes
if outside temperatures are 50°F (10°C)
or more. If it’s colder than 50°F (IO’C),
you
may have to idle the engine longer.
90°F (32°C).
weather. Should
the
fluid level be low during a
cold check, you must perform a hot check
before adding fluid. This will give you a
more accurate reading
of the fluid level.
To check the fluid hot or cold
0 Park your vehicle on a level place.
0 With the parking brake applied, place
0 With your foot on the brake pedal,
Keep the
engine running.
the shift lever
in “P’ (Park).
move the shift lever through each gear
range, pausing for about three seconds
in each range. Then, position the shift
lever
in “P” (Park).
minutes or more.
0 Let the engine run at idle for three
167.,
ProCarManuals.com
Page 169 of 258
Service and Appearance Care
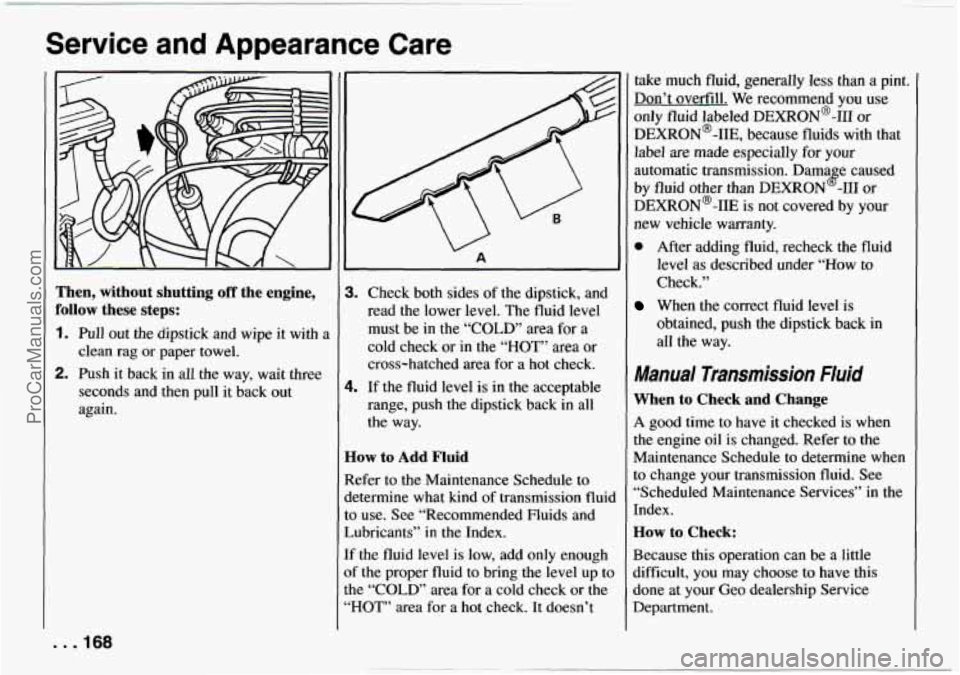
Then, without shutting off the engine,
follow these steps:
1. Pull out the dipstick and wipe it with a
clean rag or paper towel.
2. Push it back in all the way, wait three
seconds and then pull it back out
again.
. . .I68
~
3. Check both sides of the dipstick, and
read the lower level. The fluid level
must be in the “COLD’ area for a
cold check or
in the “HOT” area or
cross-hatched area for a hot check.
4. If the fluid level is in the acceptable
range, push the dipstick back
in all
the way.
How to Add Fluid
Refer to the Maintenance Schedule to
determine what kind of transmission fluid
to use. See “Recommended Fluids and
Lubricants”
in the Index.
[f the fluid level is low, add only enough
of the proper fluid to bring the level up to
the “COLD” area for a cold check or the
“HOT” area for a hot check. It doesn’t take
much fluid, generally less than a
pint.
Don’t overfill. We recommend you use
only fluid labeled DEXRON@-III
or
DEXRON@-IIE, because fluids with that
label are made especially for
your
automatic transmission. Dama e caused
by fluid other than DEXRON
8 -m or
DEXRON@-IIE is not covered by your
new vehicle warranty.
0 After adding fluid, recheck the fluid
level as described under “How to
Check.”
obtained, push
the dipstick back in
all the way.
When the correct fluid level is
Manual Transmission Fluid
When to Check and Change
A good time to have it checked is when
the engine oil is changed. Refer to the
Maintenance Schedule to determine when
to change your transmission fluid. See
“Scheduled Maintenance Services”
in the
Index.
How to Check:
Because this operation can be a little
difficult, you may choose to have this
done at your Geo dealership Service
Department.
ProCarManuals.com
Page 188 of 258

upon the actual conditions of their use,
however, and may depart significantly
from the norm due to variations in driving
habits, service practices and differences in
road characteristics and climate.
Traction - A, B, C
The traction grades, from highest to
lowest are: A,
B, and C. They represent
the tire’s ability to stop on wet pavement
as measured under controlled conditions
on specified government test surfaces of
asphalt and concrete. A tire marked
C
may have poor traction performance.
Warning: The traction grade assigned to
this tire is based on braking
(straight-ahead) traction tests and does
not include cornering (turning) traction.
Temperature - A, B, C
The temperature grades are A (the
highest),
B, and C, representing the tire’s
resistance to the generation of heat and its
ability to dissipate heat when tested under
controlled conditions on a specified
indoor laboratory test wheel. Sustained
high temperature can cause the material
of the tire to degenerate and reduce tire
life, and excessive temperature can lead to
sudden tire failure. The grade
C
corresponds to a level of performance
which all passenger car tires must meet
under the Federal Motor Vehicle Safety
Standard
No. 109. Grades B and A
represent higher levels of performance on
the laboratory test wheel than the
minimum required by law.
Warning: The temperature grade for this
tire is established for a tire that is properly
inflated and not overloaded. Excessive
speed, underinflation, or excessive
loading, either separately or
in
combination, can cause heat buildup and
possible tire failure.
These grades are molded on the sidewalls
of passenger car tires.
While the tires available as standard or
optional equipment on General Motors
vehicles may vary with respect to these
grades, all such tires meet General Motors
performance standards and have been
approved for use on General Motors
vehicles. All passenger type
(P Metric)
tires must conform to Federal safety
requirements in addition to these grades.
Wheel Alignment and Tire Balance
The wheels on your vehicle were aligned
and balanced carefully at the factory to give
you the longest tire life and best
overall performance.
In most cases, you will not need to have
your wheels aligned again. However, if
you notice unusual tire wear or your
vehicle pulling one way or the other, the
alignment may need to be reset. If you
notice your vehicle vibrating when
driving on a smooth road, your wheels
may need to be rebalanced.
Wheel Replacement
Replace any wheel that is bent, cracked or
badly rusted. If wheel nuts keep coming
loose, the wheel, wheel bolts, and wheel
nuts should be replaced. If the wheel
leaks air, replace it (except some
aluminum wheels, which can sometimes
be repaired). See your Geo dealer if any
of these conditions exist.
Your dealer will know the kind of wheel
you need.
Each new wheel should have the same
load carrying capacity, diameter, width,
offset, and be mounted the same way as
the one it replaces.
187 ...
ProCarManuals.com
Page 217 of 258

Maintenance Schedule
sc 1 ection A: Scheduled Maintenance Services (Cont.) 1 ITEM
NO.
12
13
14
15
SERVICE
Positive Crankcase Ventilation
{PCV) Valve Replacement*
-
Inspect valve for proper
function. Replace
the valve
every
50,000 miles (83 000 km)
as well as any worn, plugged or
collapsed hases.
Exhaust
Gas Recirculation
{EGR) System Inspection* -
lpspect at 50,pOO mile
(83 000 km) intervals.
Replace every
30,000 miles
(50 ODD km) or more often under
dusty conditions.
Ask your dealer
for the proper replacement
intervals
for your driving
qonflitions.
Fuel Tank. Cap and Lines
wection*t
- Inspect fuel tank,
cap, lines and hoses
for damage
or-leaks. Inspect fuel cap gasket
for an even filler neck imprint or
any damage at
30,000 miles
(50 000 h). Replace parts as
Cleaner
Filter Replacement*-
ITEM
NO.
16
17
18
19
20
21
SERVICE
needed. Replace the cap and
gasket at
60,000 mile
(100 000 km) intervals.
Fuel Filter Re&uxmmt*
-
Replace the fuel filter every
30,000 miles (50 000 km), or
sooner if clogged.
Fuel Injector Inspectim*
-
Inspect at 100,000 mile
( 166 000 km) intervals,
Heated
Own Sensor
dacemea*
- Replace at
80,000 miles (133 000 km).
Etive va E-ns Canister
Redacernent"
- Replace at
100,000 mile
(166 000 km)
intervals.
me Control Module (ECM)
and Associated Sensors
Jnspectipn*
- Inspect at 100,000
mile (1.66 000 km) intervals.
lsslon Svstem
Hoses
Inspection" - Inspect at 60,000
mile (100 OD0 km) intervals.
0.
..
ITEM
NO.
22
23
SERVICE
Three-way CUytlc Convertex
Jnspection"
- Inspect at 100,000
mile (166 000 km) intervals.
At each si1 change, inspect the
entire exhaust system for leaks
and loose fittings, especially
if
the vehicle is used off-road.
E-e Timing and Dlstnbu tor
Check*
- Adjust the timing to the
underhood label specifications.
Inspect the inside and outside
of
the distributor cap and rotor for
cracks, carbon tracking and
corrosion. Clean or replace
as
needed.
..
* An Emission Control Service.
t The US. Environmental Protection Agency
or
the California 4ir Resources Eoard has
determined that the failure to perjorm this
maintenance item
will not nullifjt the emission
warranty or
limit recall liabiliw prior to the
completion
of vehicle useful life. General
Motors, however, urges that all recommended
maintenance services be petfiimed at the
indicated intervals and the maintenance
be
recorded in "Section E: Maintenance
Record."
... 21 6
ProCarManuals.com